


Best Wood for Laser Engraving and Cutting A STEAM Educator's Guide
 24-08-03
WHAT ARE YOU LOOKING FOR?
Search Across Products, Blog Posts, Support Content, And Resources.

Best Wood for Laser Engraving and Cutting A STEAM Educator's Guide
24-08-03

Wood is one of the most accessible materials for school laser engraving and cutting projects. It can be used to create models, signs, puzzles, personalized gifts, prototypes, medals, decorative products, and engineering structures.
However, different wood species and engineered boards can produce very different results. Grain, resin, density, natural color, thickness, glue, coatings, and surface condition can all affect engraving contrast, cutting quality, smoke, residue, and processing time.
In a STEAM classroom, choosing wood is more than a material-purchasing decision. It gives students an opportunity to observe material properties, compare variables, test ideas, evaluate failures, improve designs, and explain why one material is more suitable than another.
This guide helps teachers and students choose wood for classroom laser projects, understand how common materials behave, apply test results to a STEAM design challenge, and prepare wood safely for engraving and cutting.
Quick Answer: Birch plywood is a versatile starting material for classroom models, signs, puzzles, and repeated cutting projects. Basswood is lightweight and easy to cut, making it useful for beginner activities and engineering models.
Maple and birch are strong choices for detailed engraving because their relatively light color and fine grain can produce visible contrast. Laser-safe MDF is useful for prototypes and repeated shapes, but its adhesive composition and ventilation requirements must be verified.
Pine is affordable and widely available, but resin, knots, and grain variation may produce smoke, sticky residue, or inconsistent engraving. The best material depends on the project, required detail, structural strength, available machine, and classroom learning goal.
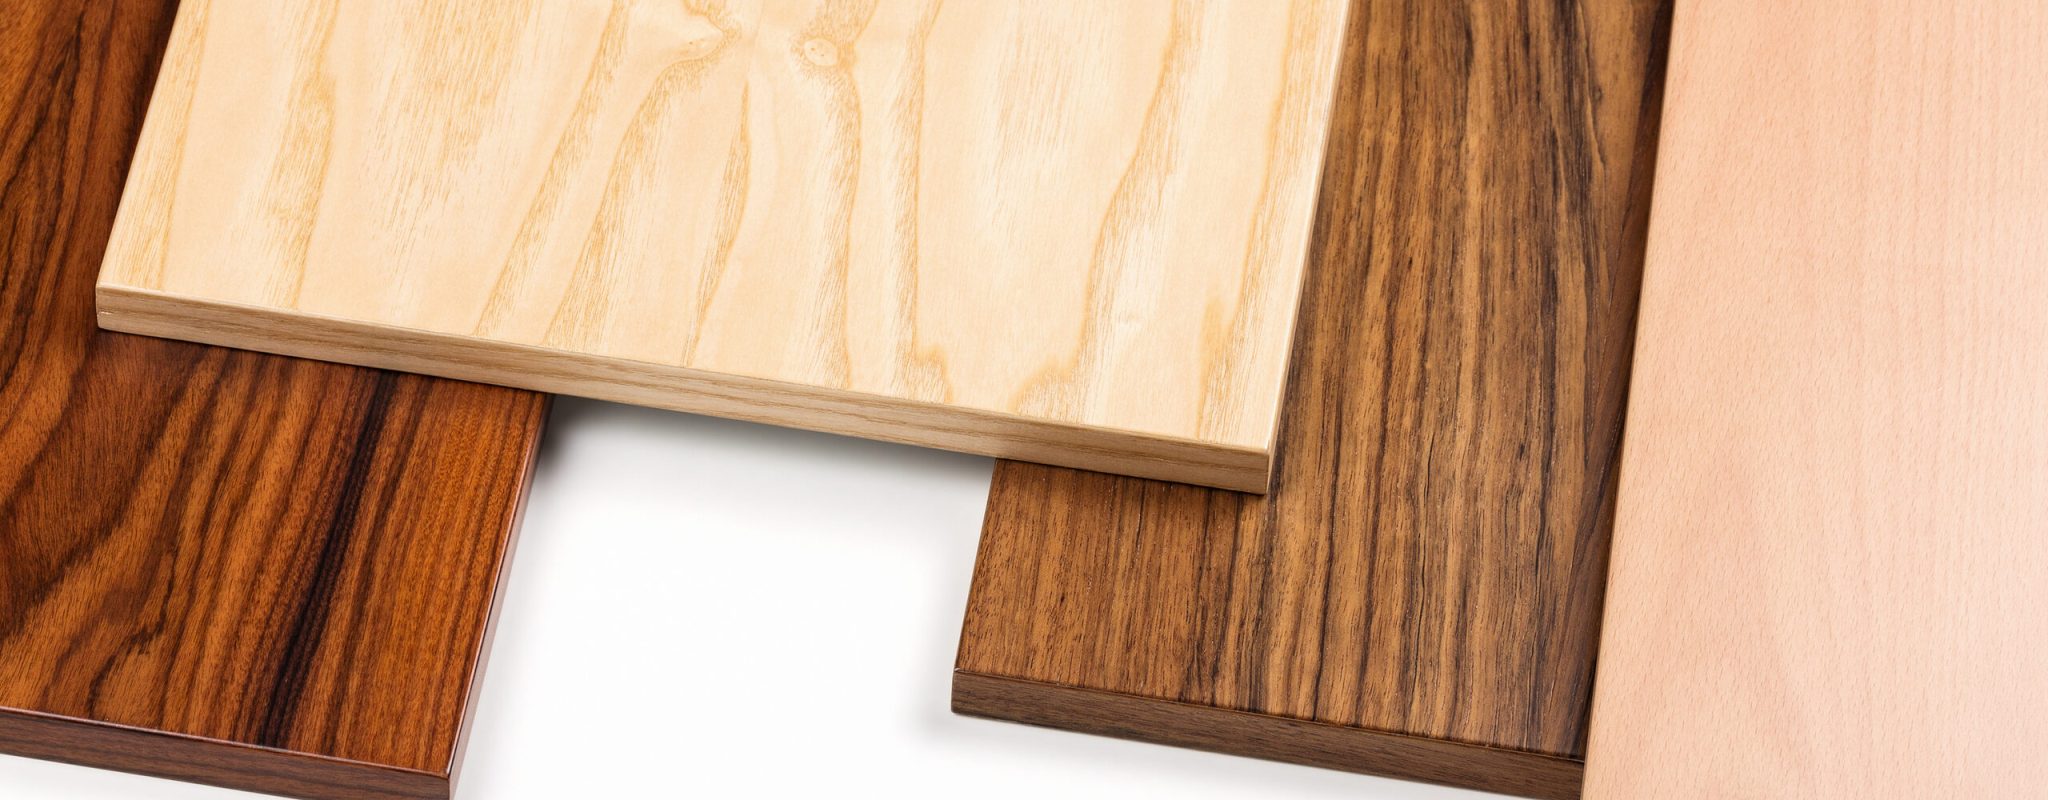
Different woods respond differently to laser engraving and cutting, so material selection should be part of the STEAM design process.
This lesson introduces students to material selection through laser engraving and cutting. Students compare common woods, observe how each material responds to laser energy, and use their findings to choose a material for a final design project.
Students will learn how to evaluate wood before laser processing and select a material that matches the project goal.
By the end of the lesson, students should be able to:
The same laser settings can produce different results on different wood materials. Students should understand the main variables before selecting wood for a classroom project.
Wood grain describes the direction, size, and arrangement of wood fibers.
Fine-grain woods such as maple and birch often provide a more consistent surface for small text, logos, line art, and photo-style engraving. Their relatively uniform surfaces allow the laser to create clearer details.
Open-grain woods such as oak and ash may produce a more textured result. Variations in fiber density can cause lines to appear darker or deeper in some areas.
Grain direction also matters. A design engraved with the grain may appear different from the same design engraved across the grain.
Teacher activity: Ask students to place the same small design in two directions on one wood sample. Compare detail, texture, and contrast after engraving.
Resin can increase smoke, surface staining, sticky residue, and dark burn areas.
Pine and cedar often contain more resin than maple, birch, cherry, or alder. Resin content may also vary within the same board, especially around knots.
A resinous wood can still be useful for supervised classroom testing, but students should understand that it may require:
If unexpected smoke, odor, or sticky residue appears, stop processing and verify the material.
Denser woods often require more laser energy or a slower cutting speed than lightweight woods.
Hard maple, walnut, and some dense tropical woods may hold fine detail well, but cutting can take longer.
Basswood and balsa cut more easily and are useful for:
Soft wood can also burn through or char quickly, so lower density does not remove the need for testing.
Light-colored woods usually create stronger visible contrast when the laser produces a dark mark.
Maple, birch, basswood, and pale plywood are often useful for text, logos, diagrams, and photo engraving.
Dark woods such as walnut can produce a more subtle result. Students may need to use:
The best visual result depends on the relationship between the natural wood color and the engraved mark.
Material thickness directly affects cutting settings and processing time.
A warped sheet can move outside the correct focus range, causing:
Moisture can also affect smoke, cutting consistency, and warping. Students should compare materials only after confirming that samples are flat and stored under similar conditions.
Plywood, MDF, laminated wood, and bamboo boards may contain adhesives or surface treatments.
These materials can vary by manufacturer and production batch. Glue layers may affect:
Painted, stained, sealed, pressure-treated, reclaimed, or coated wood should not be processed until the complete material composition has been verified. Students can use the material compatibility guide as part of the approval process before a new classroom material reaches the laser machine.
Students should never assume that a material is safe only because it looks like wood.
There is no single best wood for every classroom project. The most suitable material depends on whether students need fine engraving, easy cutting, low weight, structural strength, visual quality, or repeatable dimensions.
| Project Type | Recommended Materials | Why They Work |
|---|---|---|
| Beginner engraving practice | Birch, maple, and basswood | Their light surfaces can make engraving easier to see and evaluate. |
| Architectural models | Birch plywood and basswood | They are available as flat sheets and can be cut into repeated structural parts. |
| Mechanical models and prototypes | Birch plywood and laser-safe MDF | They provide stable dimensions and are suitable for repeated components. |
| Detailed text and logos | Maple, birch, and cherry | Their relatively fine or consistent grain helps preserve smaller details. |
| Photo engraving | Maple, birch, and basswood | Their light color reduces visual interference from the background. |
| Lightweight engineering structures | Basswood and balsa | They are light and easy to cut, although students must consider structural strength. |
| Classroom signs | Birch plywood, maple, and laser-safe MDF | They provide relatively flat surfaces for readable text and graphics. |
| Premium student gifts | Cherry, walnut, and maple | Their natural color and grain can create a more finished appearance. |
| Low-cost testing | Pine and poplar | They are widely available, but grain, resin, and knots require additional testing. |
| Sustainable product design discussion | Bamboo and responsibly sourced local wood | They can support discussions about sourcing, manufacturing, product life, transportation, and material waste. |
A classroom material comparison table that connects common wood options with different STEAM laser project goals.
Students do not need to memorize every wood species. They should understand the strengths and limitations of the materials most likely to appear in school workshops and makerspaces.
Birch plywood is one of the most versatile materials for classroom laser cutting and engraving.
It is commonly used for:
Its main advantages include:
However, plywood quality varies. Internal glue, knots, gaps, and overlapping layers can cause incomplete cutting or inconsistent edge quality.
Students should test the exact plywood sheet and record its supplier, thickness, surface finish, and result.
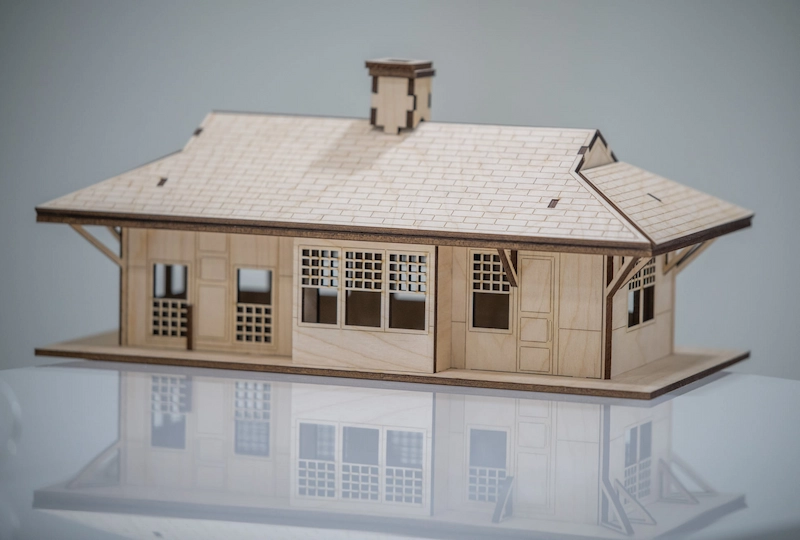
Birch plywood is suitable for models, structural parts, signs, and repeated classroom cutting projects.
Basswood is lightweight, pale, and relatively easy to cut.
It works well for:
Its pale surface can also produce visible engraving contrast.
Because basswood is soft, thin sheets may warp, overburn, or break more easily. Students should use suitable support and avoid applying excessive heat.
Maple is a hard, fine-grain wood that can produce detailed engraving and clean visual contrast.
It is useful for:
Maple may require more energy than soft wood. Students should test engraving and cutting separately rather than assuming one setting will work for both.
Pine is affordable, widely available, and easy to obtain for classroom exercises.
It can be used for:
Pine also contains resin, knots, and strong grain variation. These characteristics may create:
Pine is useful for teaching material variation, but it is not always the best material for precise or repeatable engraving.
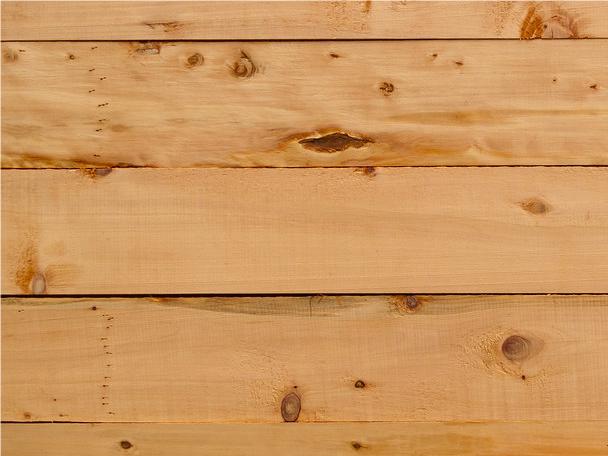
Pine is affordable for supervised practice, but resin, knots, and grain variation can affect engraving consistency.
Medium-density fiberboard has a smooth surface and relatively uniform density.
It is commonly used for:
MDF does not contain a natural grain pattern, so it can support consistent cutting and small details.
However, MDF may contain different adhesives and can produce significant smoke, dust, and dark edges.
Only use MDF that has been verified as suitable for laser processing. Strong exhaust and proper supervision are essential, and classrooms that process MDF regularly should evaluate the available extraction setup or a fume extractor such as Thunder Air.
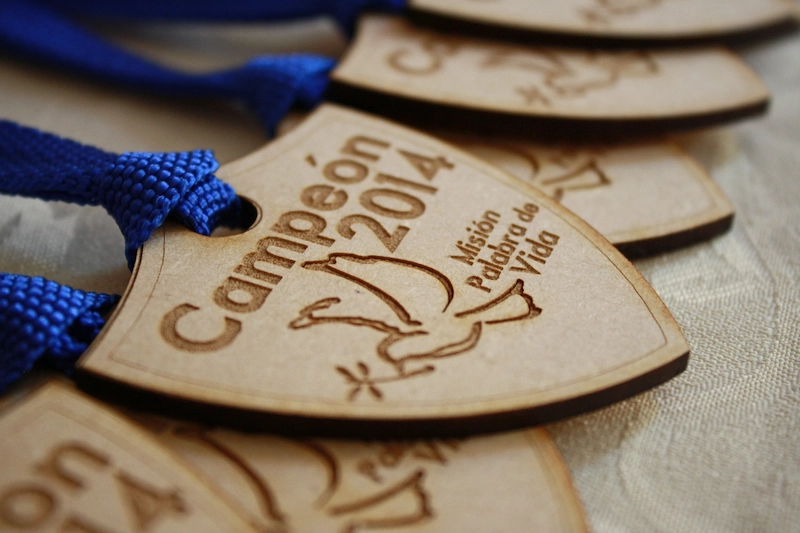
Laser-safe MDF can support prototypes, medals, repeated shapes, and detailed classroom projects.
Cherry and walnut are useful for advanced projects where appearance is an important part of the design.
Cherry offers a warm reddish-brown tone and may darken naturally over time.
Walnut has a deep brown color and a distinctive premium appearance.
They are suitable for:
Because these materials may cost more than pine, plywood, or MDF, students should complete their design and settings tests on lower-cost samples first.
Bamboo is often used for:
Bamboo products are frequently laminated from multiple strips. Individual strips and glue lines can produce different engraving colors.
Bamboo is useful for classroom discussions about:
Balsa is very lightweight and easy to cut.
It is useful for:
Its low density means it can burn or break easily. Students should consider both laser settings and structural requirements before choosing balsa for a final project.

Solid wood is useful when natural grain, color, and material variation are part of the final product design.
A material test becomes more meaningful when students apply their observations to a finished design.
The purpose of the final project is not simply to create an attractive object. Students should demonstrate that their material decision is supported by evidence.
Students identify:
Students choose a material based on:
Students create or modify a design containing:
They should check whether fine details are suitable for the selected wood grain.
Students measure:
Measurements should be recorded before production.
Students should test the exact material before processing the final piece.
The test should confirm:
Students position the material, focus on the surface, frame the job, and complete the project under supervision.
Students compare the finished product with the original goal.
They should consider:
Each student identifies one change for a future version, such as:
By the end of the activity, students should be able to:
Good results begin with material verification and a controlled classroom workflow.
Students should not bring unknown wood products directly to the laser machine. Every material should be approved by the teacher, lab supervisor, or makerspace manager.
Confirm the wood species or engineered-board type whenever possible.
Pay special attention to:
Check for:
Use suitable supports, fixtures, clamps, or a vacuum table.
Fixtures should not enter the laser path.
Fine sanding can remove rough fibers and help create a more consistent engraving surface.
Remove sanding dust before placing the material in the machine.
Low-tack laser masking can reduce smoke staining on selected wood surfaces.
Students should test masking first because adhesive may affect coated, oily, rough, or delicate wood.
Secure the wood before focusing.
Do not focus on the machine bed or a lower point beside the material.
Use the framing function to confirm:
Students can compare their classroom test results with the CO₂ laser settings table, then adjust power, speed, line interval, airflow, number of passes, and cutting depth according to the exact wood sample.
Effective exhaust removes smoke from the processing area.
Air assist can improve cutting quality, reduce debris, and help protect the lens. The required airflow depends on whether the process is engraving or cutting.
Wood is combustible and should not be left unattended during laser engraving or cutting.
| Problem | Possible Causes | Adjustment |
|---|---|---|
| Engraving is too light | Low power, high speed, incorrect focus, large line interval, dark or coated surface. | Change one setting at a time, refocus, and test again. |
| Small text is unclear | Coarse grain, text is too small, stroke width is too thin, incorrect focus. | Increase the font size, use thicker lines, or choose a finer-grain material. |
| Results vary across the board | Grain variation, knots, glue, density differences, warping. | Move the design, test another area, flatten the material, or use a more consistent sheet. |
| Wood does not cut through | Incorrect focus, insufficient energy, material is too thick, glue layers or internal voids, weak air assist. | Verify the material, focus, lens, air assist, speed, and cutting settings. |
| Cut edges are heavily charred | Excessive heat, cutting speed is too slow, poor focus, insufficient air assist, multiple unnecessary passes. | Improve cutting efficiency, refocus, increase suitable airflow, and reduce accumulated heat. |
| Sticky residue appears | Resin, coating, oil, adhesive, unknown surface treatment. | Stop the process and verify the material before continuing. |
| Plywood separates | Weak adhesive, internal voids, excessive heat, poor material quality. | Test another sheet, another supplier, or a different material. |
| Material warps | Thin sheet, moisture, large filled engraving, repeated heat input, poor support. | Flatten the sheet, reduce accumulated heat, divide large engraving areas, and allow cooling. |
| Student results are inconsistent | Students changed several variables at once, different samples were used, focus or positioning changed, results were not recorded. | Return to a controlled test. Change one variable at a time and use samples from the same material batch. |
A troubleshooting table for common wood laser engraving and cutting issues in STEAM classrooms.
Responsible making should be part of every STEAM laser project.
Students should consider:
Students should keep failed samples when possible. A failed result can provide useful evidence for future design improvements.
The best laser setup for a STEAM classroom is not simply the machine with the highest power or fastest speed.
Schools should choose equipment that is easy for teachers to prepare, straightforward for students to understand, convenient to supervise, and suitable for repeated use in a shared learning environment.
A classroom laser setup should support:
The machine should also match the size and complexity of the projects students are expected to complete. A compact classroom may prioritize simple setup and a smaller footprint, while a larger makerspace may require more working area for architectural models, class batches, signs, and multi-part engineering projects.
An enclosed laser system helps keep the laser-processing area separated from students and other classroom activities.
Schools should prioritize machines with suitable enclosure design, access protection, safety interlocks, and emergency controls.
Automatic or assisted focusing reduces manual adjustment and helps teachers and students prepare projects more consistently.
This is especially useful in classrooms where different students may process materials with different thicknesses during the same lesson.
A camera and clear framing workflow help students see where the design will be placed before the laser starts.
Visual positioning is useful for:
It can also reduce positioning errors and unnecessary material waste.
The software should be understandable for beginners while still supporting more advanced student projects.
Students should be able to learn how to:
Air assist helps move smoke and debris away from the laser path.
A system that supports different airflow requirements for engraving and cutting can help teachers produce cleaner results while reducing unnecessary manual adjustment.
Schools should consider more than the machine itself.
Useful education support may include:
These resources help teachers establish repeatable procedures before students begin using the machine.
The Thunder Laser Bolt Series is suitable for schools, training centers, libraries, and makerspaces that need a compact RF CO₂ laser for wood engraving and small-to-medium cutting projects.
The series can support classroom projects such as:
The Bolt Series combines an enclosed Class 1 laser design with features that simplify classroom preparation and supervision.
Useful classroom features include:
These features make the Bolt Series easy for teachers and students to learn, convenient to use, and well suited to supervised operation in shared classrooms and makerspaces.
Automatic focusing reduces setup steps, while the camera allows students to position designs more visually. Dual air assist supports both engraving and cutting workflows without requiring students to manually rebuild the airflow system for each project.
The integrated and air-cooled design can also simplify installation compared with laser systems that require additional external cooling equipment.
Within the Bolt Series, schools can select a compact configuration for individual projects or a larger working area for bigger models and multiple student designs. The choice should be based on available classroom space, typical material dimensions, class size, and expected project volume.
Students should still operate the machine only under trained teacher or lab-supervisor guidance.

The Bolt Series provides an enclosed, easy-to-learn RF CO₂ laser platform for supervised wood engraving and cutting projects in STEAM classrooms.
The Thunder Laser Nova Plus Series is suitable for schools, universities, vocational programs, fabrication labs, and makerspaces that need more working area for larger or repeated wood projects.
It can support:
The Nova Plus Series uses an RF CO₂ laser source and provides a larger platform for classrooms that need both engraving detail and wood-cutting capability.
Education-focused features include:
The automatic focusing system and overhead camera help teachers prepare projects more efficiently and make material positioning easier to explain to students.
The larger work area allows several student designs to be arranged in one job. This can be useful when a teacher needs to process one complete class set of badges, model parts, medals, or prototype components.
Safety protections such as cover monitoring, airflow protection, temperature alarms, and visible operating-status indicators also help teachers establish a clearer supervised workflow.
These features support easier daily use, more predictable classroom preparation, and safer operation when the machine is installed correctly and used according to school procedures.
Because the Nova Plus Series requires more physical space than a compact desktop system, schools should plan:
A Nova Plus configuration is most suitable when larger projects, multiple student jobs, or frequent makerspace use justify the additional working area.

The Nova Plus Series provides more working area for architectural models, larger wood projects, and repeated student production in school makerspaces.
A laser machine should not be considered separately from smoke and fume management.
Wood engraving and cutting can produce:
In a school or shared makerspace, an effective extraction system helps capture airborne contaminants close to the source and supports a cleaner learning environment.
Thunder Air 700 is designed as a fume-extraction and air-filtration system for laser workspaces.
Its main features include:
For STEAM education spaces, Thunder Air can support:
A fume extractor can make the laser workflow easier to manage in classrooms because teachers do not need to wait as long for visible smoke to clear before inspecting a completed project.
It also helps reduce the amount of smoke and dust that can settle on lenses, mirrors, machine components, classroom surfaces, and student projects.
However, Thunder Air does not make an unknown or unsuitable material safe to process.
Teachers must still verify:
Filter condition should also be checked regularly. A blocked or saturated filter may reduce airflow and should be replaced according to actual usage and the maintenance instructions.

Thunder Air supports smoke and particle control for laser engraving and cutting in shared classrooms, school labs, and makerspaces.
Recommended direction: Bolt Series combined with a suitable Thunder Air setup or an approved outdoor exhaust system.
Suitable for:
Main advantages:
Recommended direction: A larger Bolt Series configuration or Nova Plus Series combined with Thunder Air or a properly designed exhaust system.
Suitable for:
Main advantages:
Recommended direction: Nova Plus Series with dedicated extraction, filtration, material storage, teacher training, and scheduled machine maintenance.
Suitable for:
Main advantages:
Before choosing or installing a school laser system, confirm the following.
For STEAM education, the most suitable laser setup should combine an enclosed machine, simple focusing, clear visual positioning, teacher-friendly controls, effective air assist, reliable smoke extraction, and accessible training support.
The Bolt Series is well suited to compact classrooms and beginner-to-intermediate wood projects. The Nova Plus Series provides more space for larger models, repeated student work, and active school makerspaces. Thunder Air adds dedicated smoke and particle filtration to support a cleaner and more manageable shared workspace.
Together, the laser machine, air-management system, teacher training, approved materials, and supervised operating procedure form a complete classroom laser setup.
Build Better STEAM Wood Projects with the Right Laser Setup
Tell Thunder Laser about your classroom space, student project types, wood materials, material thickness, ventilation conditions, and expected class volume. Our team can help evaluate suitable machines, testing workflows, and fume extraction options for your school or makerspace.
Contact Thunder LaserTalk To Our Experts Now!
Please leave your contact information so that we can serve you better.
TAKE THE NEXT STEP WITH THUNDER LASER


 Stable & Consistent MachinesUnlimited ApplicationsRobust After-sales SupportFactory Direct Supply


