Achieving high-quality 3D laser engravings requires attention to detail at every step, from selecting the image to fine-tuning the engraving settings. Each stage of the process, from material preparation to post-engraving, contributes to the overall precision and clarity of the final product.
Tom Murray, a customer with hands-on experience in 3D laser engraving, shares his approach and insights, highlighting how minor adjustments can lead to significant improvements. By carefully managing settings and understanding the process, anyone can produce stunning 3D engravings with ease.
Let’s get started!
1. What is 3D Laser Engraving
3D laser engraving is an advanced technique that uses a laser beam to carve highly detailed, three-dimensional images or designs into various materials. Unlike traditional engraving methods, which usually create shallow marks on the surface, 3D laser engraving adds depth, texture, and a lifelike effect to the material, producing stunning and realistic results. This technology allows for the creation of intricate, multi-layered designs that appear sculpted, giving a unique depth to the engraving, as if the design was physically carved into the material.
2. Steps for 3D Laser Engraving Work
To achieve a flawless results, you’ll need to follow a series of precise steps. Each stage, from selecting the image to post-engraving cleaning, plays a crucial role in ensuring the final result meets your expectations.
2.1. Step 1: Choose a 3D Image
Start by searching for a 3D image you want to engrave. You can find images through Google or other image resources. Ensure the image format is compatible with your laser engraving machine.
2.2. Step 2: Set the Parameters
Once you’ve selected the image, import it into LightBurn software and configure the engraving parameters for your Thunder Laser machine. Pay particular attention to setting the engraving times. For shallow engraving depths, 3 passes are usually sufficient. After adjusting, send the design data to the laser engraver.
2.3. Step 3: Prepare the Material
Place the material into the laser engraving machine, ensuring it’s properly aligned. Adjust the height and focus of the honeycomb plate for optimal precision. Then, close the machine cover, select the design file from the control panel, and start the engraving process. The laser head will emit a beam of light, moving in the X, Y, and Z directions to burn and evaporate the material with high accuracy.
2.4. Step 4: Post-Engraving Cleaning
If you’re engraving wood, cleaning may be necessary after the engraving process to remove any residue or debris. Once cleaned, you’ll have a beautiful and highly detailed 3D artwork, made with precision and accuracy using the Thunder Laser engraving system
3. 3D Laser Engraving Images: A Customer Case Study by Tom Murray
This case is shared by our customer, Tom Murray, for those interested in 3D laser engraving images. The following content is his process to achieve the 3D laser engraving image he likes. While this method may not be the most efficient, it works well for him.
3.1. Parameter Settings
| Parameter | Setting |
| Model | Nova 24 60W |
| Power | Max 37.5%, Min 15% |
| Speed | 195mm/sec |
| DPI | 318 |
| Scan Angle | 0 degrees |
Laser Head Size | 1.5″ |
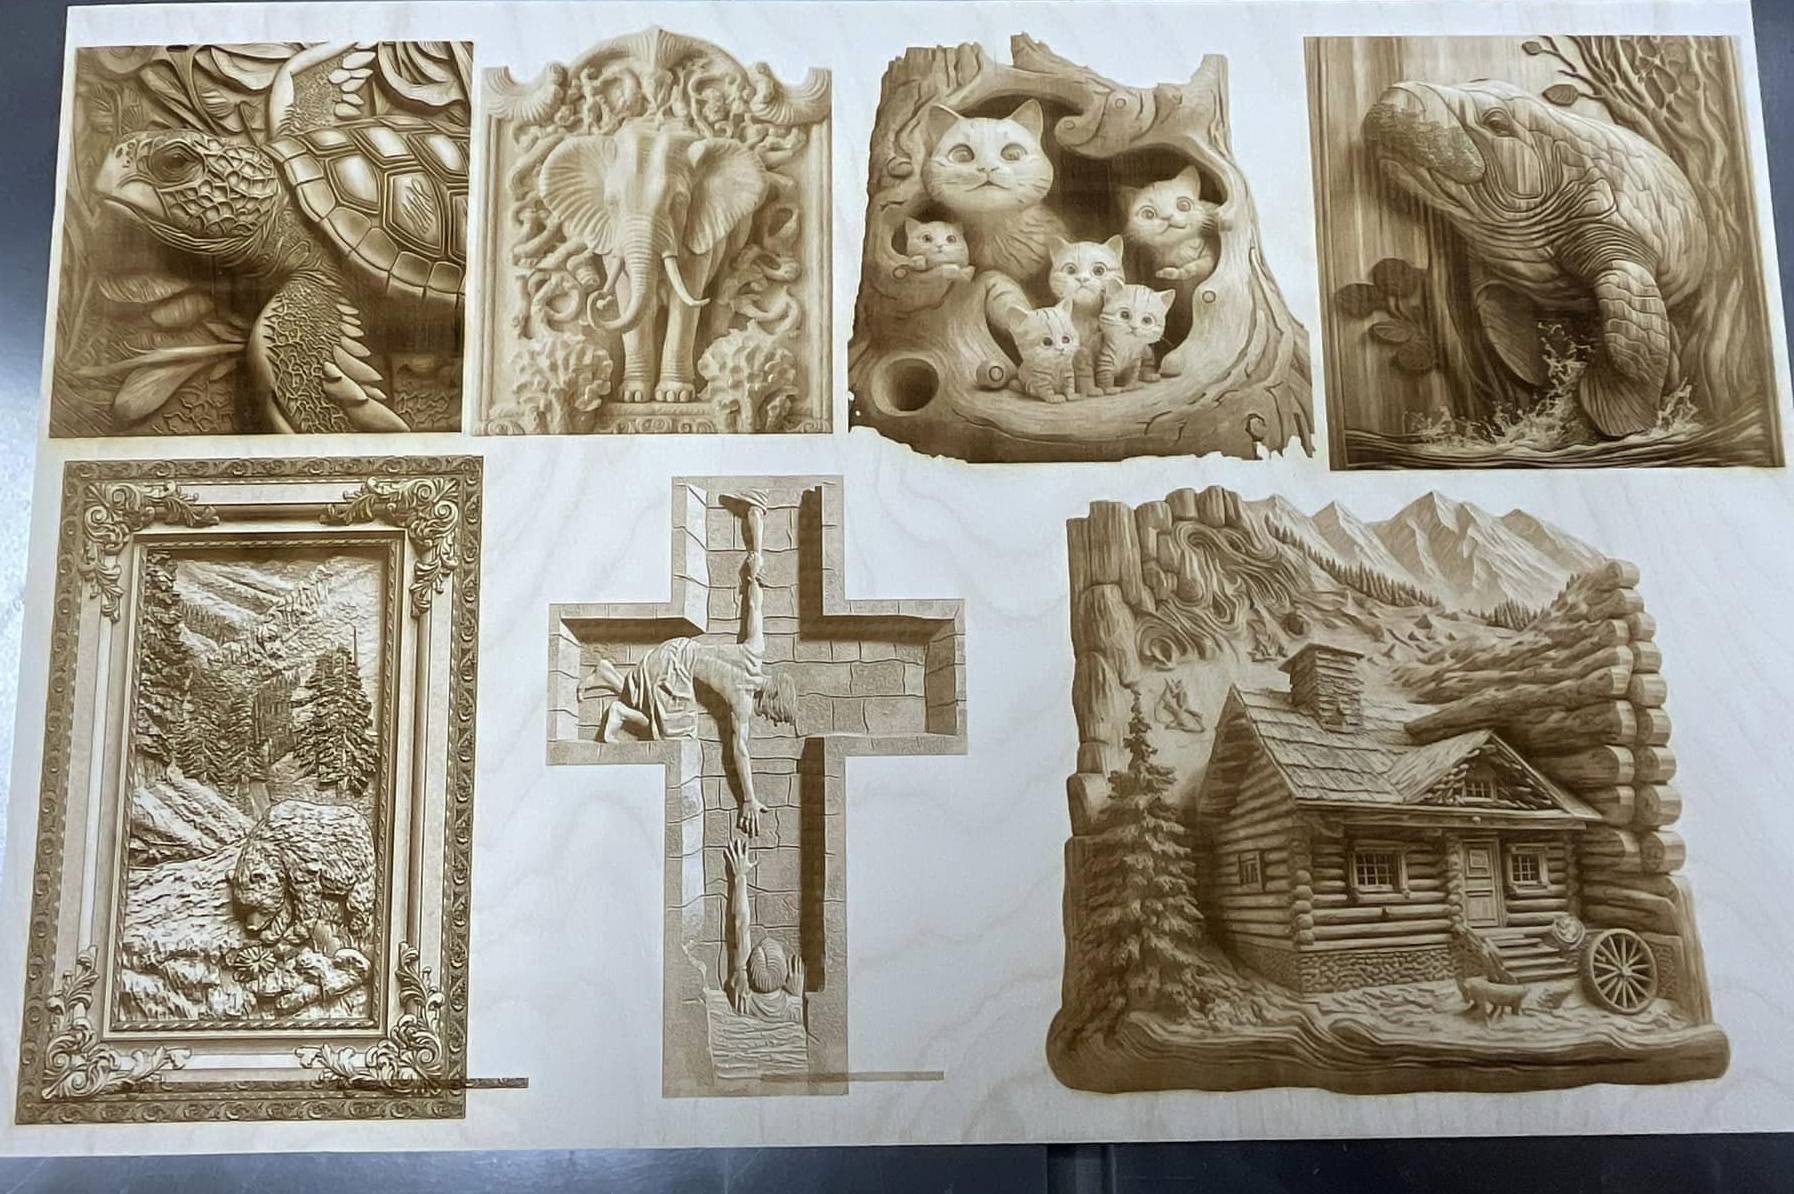
This table shows the settings used for the 3D engraving finished product image.
3.2. Dithering and Image Settings
For dithering, all images use the Jarvis algorithm, except for the bear, which uses the threshold setting. Remember to double-check the settings
3.3. Fine-Tuning and Adjustments
Tom adjusted the power and speed settings on all 7 images. There were three images that he would tweak, especially the lighter ones. The second image shows his trial and error process to get the result he wanted. He fine-tuned the settings by adjusting the power first, then the speed.
3.4. Final Thoughts
Tom hopes this process will help others get in the ballpark for 3D laser engraving. Let’s start the journey of engraving 3D pictures together!
Conclusion
In conclusion, 3D laser engraving opens up countless creative possibilities for custom designs, from intricate patterns to personalized gifts. By following the precise steps outlined in this guide and learning from real-world examples, you can achieve professional-quality results that are both unique and visually striking.
Whether you’re engraving on wood, acrylic, or any other material, the process of 3D laser engraving offers unmatched precision and the ability to bring your designs to life in a way that traditional methods simply can’t match.
Ready to start your own 3D engraving journey? Let’s explore this fascinating technique together and see the incredible results you can achieve with Thunder Laser machine!
.png "laser cutter Globle") International
International
 United States
 Brasil
 Canada
 Costa Rica
 Mexico
 Česká
Česká
 Romania
 Polska
 Ireland
 Italia
 Lietuva
 Россия
 Deutschland
 Britain
 Україна
 France
 Sverige
 Norway
 Denmark
 Ελλάδα
 Portugal
 한국
한국
 中国
中国
 中国香港
中国香港
 Israel
 中國臺灣
中國臺灣
 ジャパン
ジャパン India
India
 پاکستان
 پශ්රී ලංකා
 ประเทศไทย
 Australia
 New Zealand
 South Africa