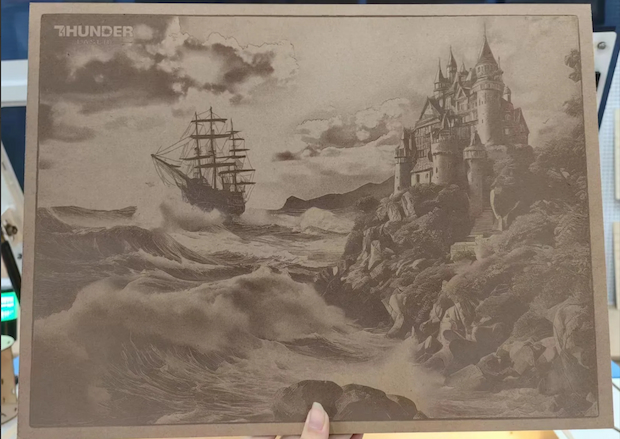
In a world flooded with digital snapshots, there’s something timeless about holding a memory carved into natural wood. Laser engraved wood photos offer a unique blend of warmth, texture, and permanence that traditional prints simply can’t match.
This case study explores how Thunder Laser technology brings photographs to life on wood, transforming everyday images into lasting works of art.
1. Recommended Settings
| Processing | Speed (mm/s) | Max power(%) | Min power(%) | DPI | Hatch type | Blow type |
|---|---|---|---|---|---|---|
| Engraving | 1500 | 30 | 20 | 300 | one-way fill | weak |
| Cutting | 20 | 80 | 10 | 300 | one-way fill | strong |
2. Processing Steps
Before starting the actual engraving process, it’s essential to go through a series of preparation and setup steps to ensure the best possible outcome. From configuring the correct file settings to positioning the laser precisely and monitoring the operation, each step plays a critical role in achieving a high-quality laser engraved wood photo. The following steps walks you through the complete process from file setup to final finishing.
2.1 File Setup
Step #1: Choose the Appropriate Parameters
Confirm the correct speed and power settings based on the specific material and thickness.
Decide between unidirectional or bidirectional fill; unidirectional often yields better results but takes longer. Here, unidirectional fill is selected.
Generally, set the DPI to 300. The higher the DPI, the more lines and the deeper the engraving.
Since this is an image engraving, select the appropriate image mode. Here, Jarvis mode is chosen.
In the advanced options, ensure the slope value is set to “0.”
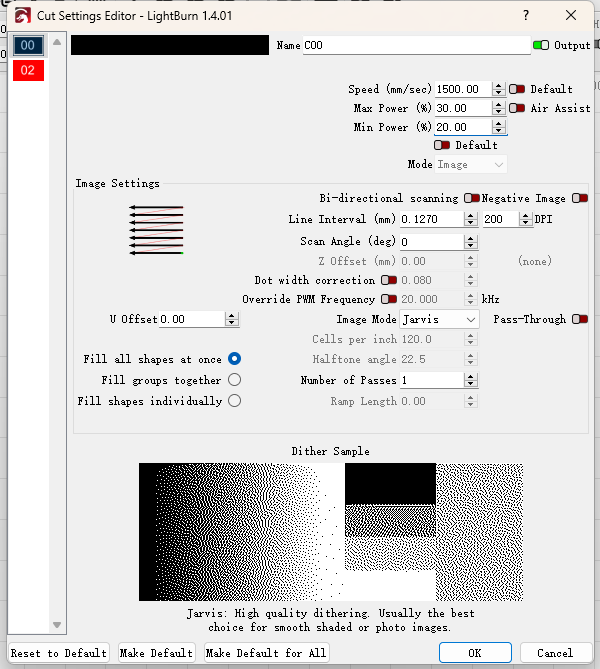
Engraving Settings
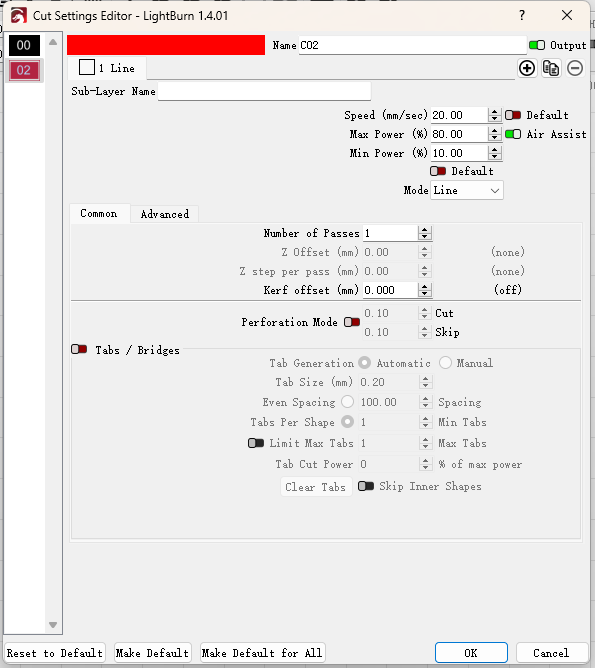
Cutting Settings
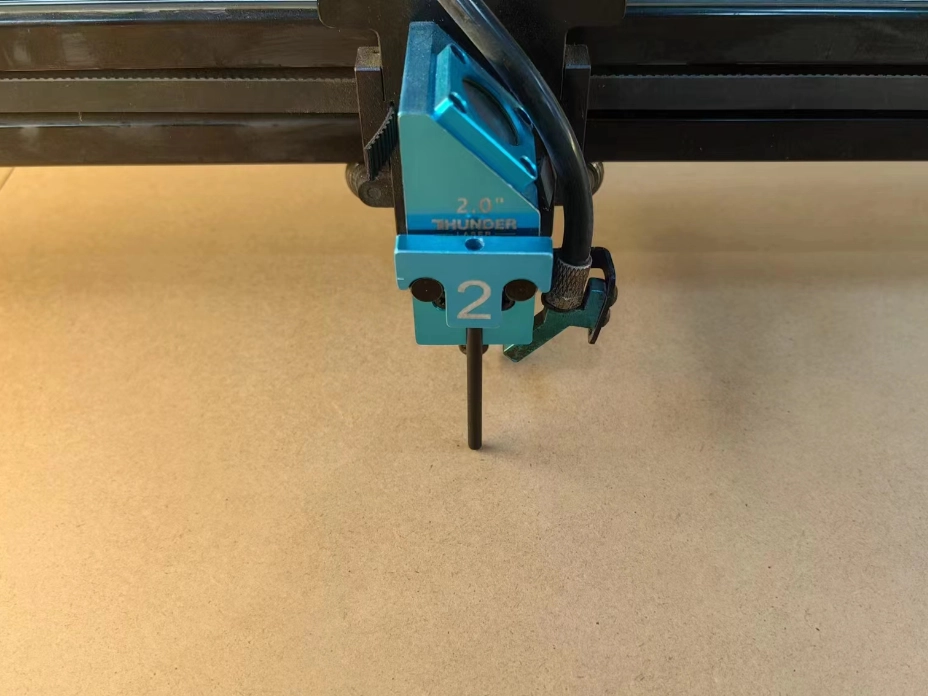
Step #2: Focus
Focus on Positioning To improve positioning, set the starting position to the center.
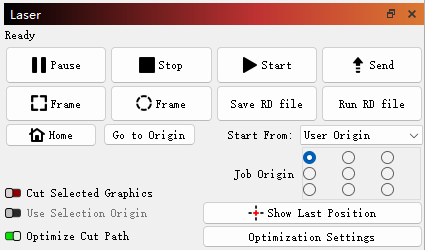
Step #3: Send the File
Send the File to the Machine Name the file simply and easy to locate. Click the send button to transfer the file to the machine, then confirm.
2.2 Machine Operation
Step #1: Focus the Laser Head
Focus Preferably focus at the center (automatic focusing is available, but manual focusing is recommended).
Step #2: Select the File and Confirm
Click the file to enter the file selection page.
Select the named file and carefully check if any part of the file pattern is missing to avoid missing details in the engraving.
Confirm the file, and the file preview will enlarge on the left side of the display.
Step #3: Sample Positioning Confirmation
Move the laser head to the center position and check the distance from the top, bottom, left, and right of the pattern, ensuring it is centered as much as possible.
After determining the correct position, click the positioning button to confirm the starting point.
Run the frame to see if the engraving range fits entirely on the sample surface.
Once the position is set and all settings like focus are correct, click the start button.
Step #4: Monitor the Process
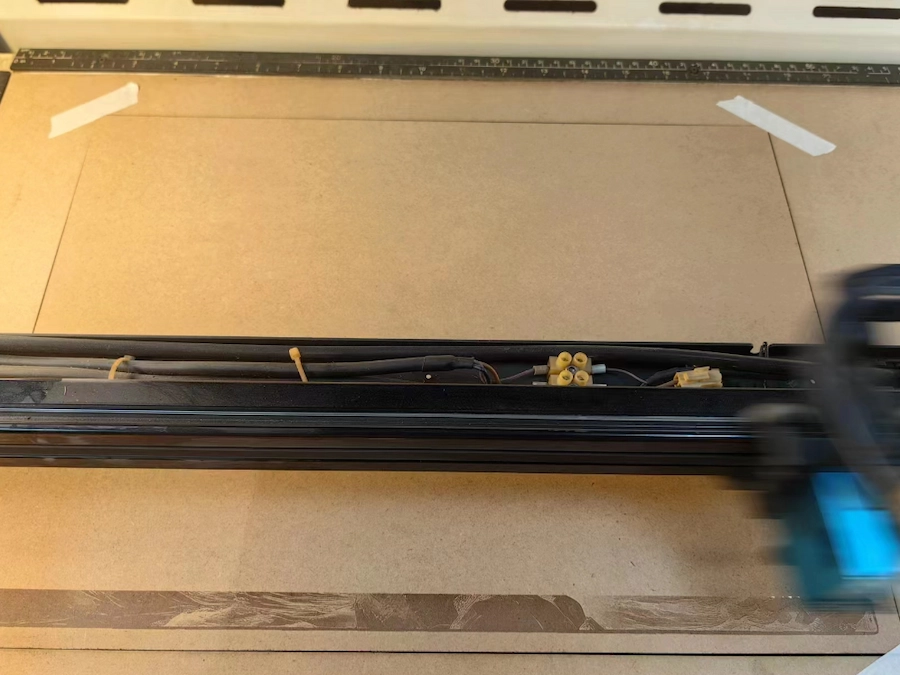
You can cut the board beforehand and tape around it to prevent the wood from warping.
Monitor the engraving process to prevent any unexpected incidents. Do not leave the machine unattended while it is running.
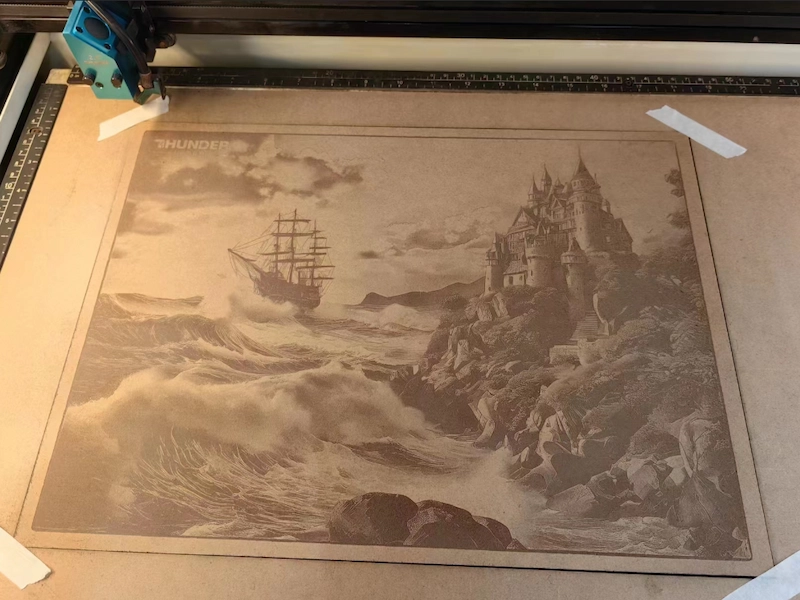
Step #5: Engraving Finished
The engraving is finished. Remove the tape and clean the surface.
Conclusion
Whether it’s a cherished family portrait or a meaningful moment captured in time, laser engraved wood photos offer a beautiful and durable way to display your memories. With Thunder Laser’s precision and reliability, turning photos into wooden art has never been easier—or more inspiring. Discover how you can create your own custom photo engravings and make every memory last.
.png "laser cutter Globle") International
International
 United States
 Brasil
 Canada
 Costa Rica
 Mexico
 Česká
Česká
 Romania
 Polska
 Ireland
 Italia
 Lietuva
 Россия
 Deutschland
 Britain
 Україна
 France
 Sverige
 Norway
 Denmark
 Ελλάδα
 Portugal
 한국
한국
 中国
中国
 中国香港
中国香港
 Israel
 中國臺灣
中國臺灣
 ジャパン
ジャパン India
India
 پاکستان
 پශ්රී ලංකා
 ประเทศไทย
 Australia
 New Zealand
 South Africa