


Laser Engraving on Acrylic: Types, Settings & Tips
 2024-08-16
WHAT ARE YOU LOOKING FOR?
Search Across Products, Blog Posts, Support Content, And Resources.

Laser Engraving on Acrylic: Types, Settings & Tips
2024-08-16

Laser engraving on acrylic is used to create frosted text, logos, photographs, patterns, awards, signs, ornaments, nameplates and illuminated panels. Whether you want to etch acrylic with a shallow matte finish or create a deeper engraved effect, the result depends on the acrylic type, color, surface finish, laser source and acrylic engraving settings.
Acrylic is also known as PMMA and is commonly sold under names such as Plexiglass. CO₂ laser engraving acrylic is generally the most versatile approach for clear and colored sheets. Cast acrylic usually produces stronger frosted contrast, while extruded acrylic often creates a lighter and more transparent finish. Diode laser engraving acrylic and UV laser engraving acrylic are also possible in selected cases, but both depend more heavily on wavelength absorption, color, additives, coatings and the required result.
This guide explains how to laser engrave acrylic, how to choose between cast and extruded sheets, how laser engraving clear acrylic differs from engraving colored acrylic, and how to adjust speed, power, DPI, focus and airflow. It also answers common questions about Plexiglass engraving, acrylic sheet engraving, reverse acrylic engraving and clear acrylic engraving with diode and UV lasers.
Yes. Laser engraving on acrylic can create permanent text, images, logos, patterns and decorative surface effects. The laser modifies or removes a controlled amount of surface material, producing a matte, frosted, white or translucent result that contrasts with the surrounding sheet.
Can you laser engrave Plexiglass? Yes, provided that the sheet is PMMA acrylic. Plexiglass engraving follows the same basic process as other acrylic laser engraving applications. Before processing, confirm that the material is PMMA rather than PVC, polycarbonate or another unknown plastic because visually similar plastics may react differently under a laser.
A detailed frosted pattern created by laser engraving on acrylic.
Users often use acrylic engraving, acrylic etching and acrylic marking interchangeably. In practical projects, all three terms may describe a visible design created on the material surface.
The boundary between these terms is not always strict. The final result depends on material formulation, wavelength, power, speed, line spacing, focus and passes. For a broader overview of cutting, engraving and marking, read the Acrylic Laser Cutting and Engraving Guide.
Cast acrylic is generally preferred for acrylic laser engraving when strong frosted contrast, photographs and fine decorative details are the priority. Extruded acrylic can also be engraved, but the result is often clearer, lighter and less visibly frosted.
| Feature | Cast Acrylic | Extruded Acrylic |
|---|---|---|
| Typical engraving result | Frosted white with stronger contrast | Lighter, clearer or more transparent |
| Fine details | Usually suitable for detailed designs and photographs | More dependent on the exact material and acrylic engraving settings |
| Common applications | Awards, photographs, plaques, ornaments and premium displays | Signs, displays and projects combining cutting with lighter engraving |
| Sheet consistency | Thickness may vary slightly between sheets | Usually has more uniform sheet thickness |
| Testing requirement | Test color, surface finish and supplier batch | Test engraving visibility and heat response |
Cast and extruded acrylic often produce different engraving appearances.
Cast acrylic generally produces a bright frosted-white engraving that contrasts well with clear or colored backgrounds. This makes it a common choice for awards, photo engraving, decorative panels, edge-lit signs and personalized gifts. For laser engraving clear acrylic, cast sheet is usually the first material to test when visible contrast is important.
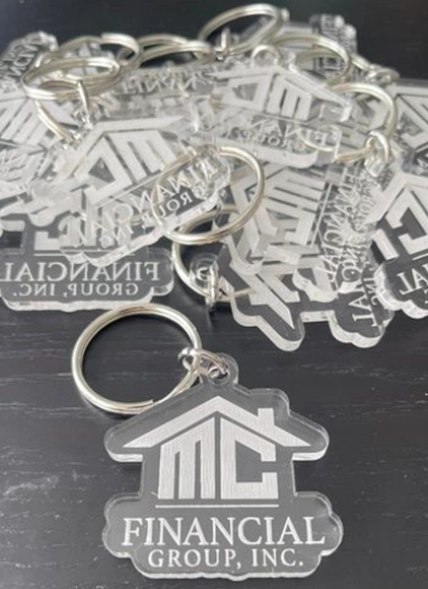
Cast acrylic commonly produces a visible frosted-white engraving.
Yes. Extruded acrylic can be laser engraved, but the design often appears lighter and more transparent than the frosted result commonly produced on cast acrylic. Fine details and photographs may therefore have lower visible contrast.
Extruded acrylic is frequently selected for cutting-heavy projects because its consistent thickness can support repeatable sheet processing. When a project combines cutting and acrylic sheet engraving, test the actual sheet to confirm that the engraving contrast meets the final product requirement.
Laser engraving clear acrylic is most straightforward with a CO₂ laser because PMMA absorbs the infrared wavelength. Depending on the material and acrylic engraving settings, clear acrylic engraving may appear white, frosted or translucent.
Clear sheets can be engraved from the front or the back. Reverse acrylic engraving is often selected for awards, plaques and LED panels because the design is viewed through a smooth front surface. For the cleanest result, test cast versus extruded acrylic, front versus reverse engraving, and several combinations of speed, power and line interval.
Colored acrylic engraving can produce high or low contrast depending on the base color, pigment, opacity and material formulation. Dark acrylic may produce a lighter mark, while pale, transparent or fluorescent colors may show a subtler result.
Test each color and supplier batch separately. Two sheets with a similar appearance may react differently under identical acrylic engraving settings.
Mirrored acrylic is commonly processed from the coated back side so the reflective front surface remains intact. The artwork usually needs to be mirrored when it will be viewed through the front.
Because mirrored acrylic includes a reflective coating and protective layers, confirm which side should face the laser and test the exact material before production. For more detailed setup guidance, read the Mirror Acrylic Laser Engraving and Cutting Guide.
Frosted acrylic already has a textured surface, so additional engraving may produce less contrast than engraving clear or colored cast acrylic. Test a small design to confirm whether the laser engraved acrylic result remains visible against the existing finish.
| Laser Type | Clear Acrylic | Colored Acrylic | Best Use | Main Limitation |
|---|---|---|---|---|
| CO₂ laser | Strong general compatibility | Strong general compatibility | Frosted engraving, signs, awards, panels and combined engraving and cutting | Incorrect settings can cause melting, haze or heat buildup |
| Blue diode laser | Difficult on clear untreated acrylic | More suitable for dark or light-absorbing colors | Selected small projects and tested coated surfaces | Visible wavelengths may pass through transparent acrylic |
| UV laser | Material-dependent | Suitable for selected formulations | Fine text, detailed surface marks and lower-heat processing | Compatibility must be confirmed through testing |
| Fiber laser | Limited on ordinary clear PMMA | May work with selected additives or coatings | Specialized marking tests | Not the standard solution for general acrylic engraving |
The best laser source depends on acrylic formulation, color and required result.
CO₂ laser engraving acrylic is generally the most versatile option because the wavelength is effectively absorbed by PMMA. A CO₂ laser can produce detailed frosted engraving on clear and colored acrylic and can also cut the sheet when power, speed, focus, airflow and support are correctly configured.
Users researching the best laser for engraving on acrylic should normally begin with CO₂ unless the project has a specialized marking requirement. CO₂ is particularly suitable for clear acrylic engraving, Plexiglass engraving, acrylic photo engraving, awards, signs and LED panels.
For users researching how to engrave clear acrylic with a diode laser, the main limitation is wavelength absorption rather than sheet thickness alone. A typical blue diode laser usually cannot engrave clear, untreated acrylic effectively because much of the visible laser energy passes through the material.
Diode laser engraving acrylic works more reliably on dark, opaque or light-absorbing colors. Clear acrylic may require a tested absorbing layer that is compatible with PMMA and safe for laser processing. When explaining how to engrave clear acrylic with diode laser equipment, always distinguish between direct engraving of untreated material and engraving through a temporary absorbing layer.
UV laser engraving acrylic can create fine surface marks on selected PMMA formulations. Its smaller heat-affected area may be useful for small text, detailed graphics, barcodes and precision marking where deep engraving is not required.
UV laser engraving acrylic remains material-dependent. Test the exact sheet color, additives, coating and surface finish rather than assuming that one UV setting will work across all acrylic materials. A UV laser is generally evaluated for fine marking rather than cutting.
| Engraving Method | Mirror the Artwork? | Typical Result | Best Use |
|---|---|---|---|
| Front engraving | Usually no | Visible and tactile engraving on the front surface | Signs, labels and direct-view designs |
| Reverse engraving | Usually yes | Design visible through a smooth front surface | Awards, plaques and premium displays |
| Edge-lit engraving | Depends on the viewing direction | Engraved lines capture and scatter LED light | Lamps, light panels and illuminated signs |
The artwork direction depends on the engraving side and final viewing direction.
Mirror the artwork when reverse acrylic engraving is performed from the back and viewed through the front. Front engraving normally does not require mirroring. Always check text direction in the software preview before sending the acrylic laser engraving file to the machine.
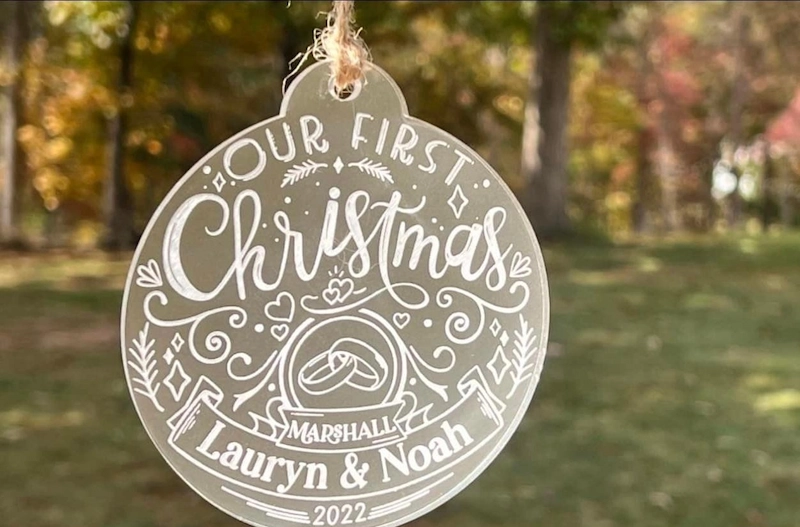
Acrylic ornaments can include names, line drawings, decorative patterns, dates and personalized messages. Clear and colored cast acrylic are commonly used for gifts, seasonal decorations and home décor.
Personalized ornament created by engraving on acrylic.
Acrylic awards and plaques can combine engraved names, logos, dates and decorative graphics. Reverse acrylic engraving helps preserve a smooth front surface and creates a professional layered appearance.
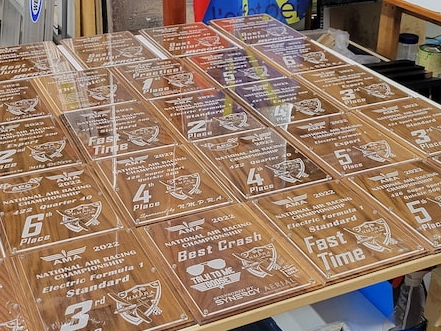
Laser engraved acrylic medals and awards.
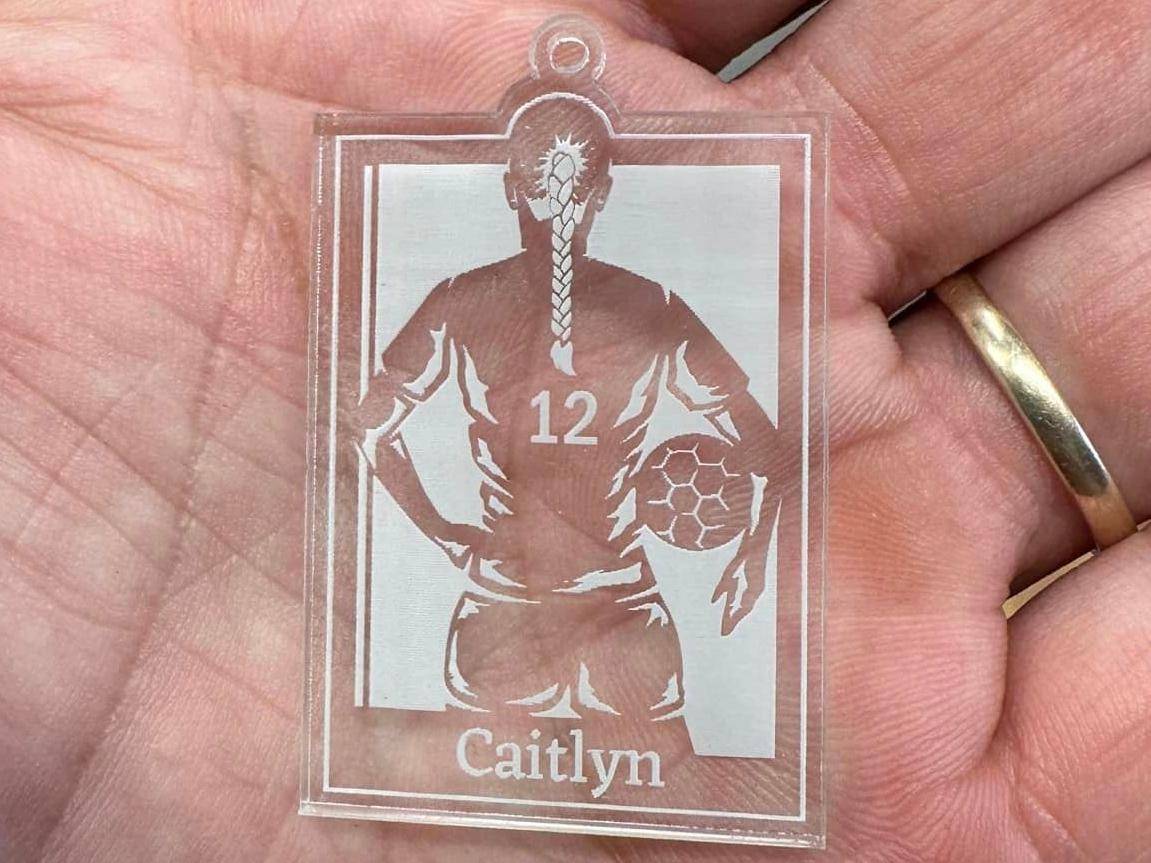
Photographs can be converted into grayscale or dithered images and engraved onto cast acrylic. Image preparation, acrylic type, engraving direction, DPI, line interval, power and speed all influence facial details, shadows and overall contrast.
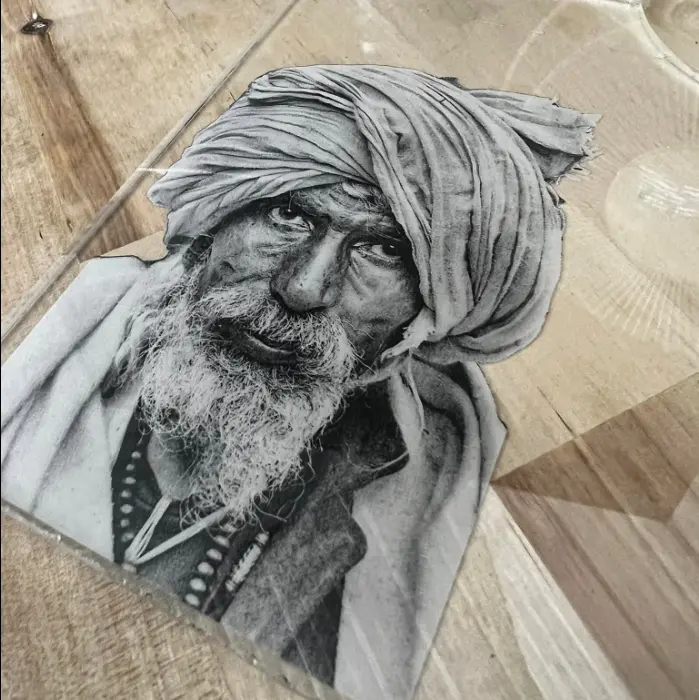
A portrait produced by laser engraving clear acrylic.
Engraved acrylic panels can be combined with LED bases or edge lighting. The engraved lines scatter light, making logos, illustrations and text glow against the transparent panel. Clear acrylic engraving is especially popular for LED lamps because the unengraved areas remain transparent.
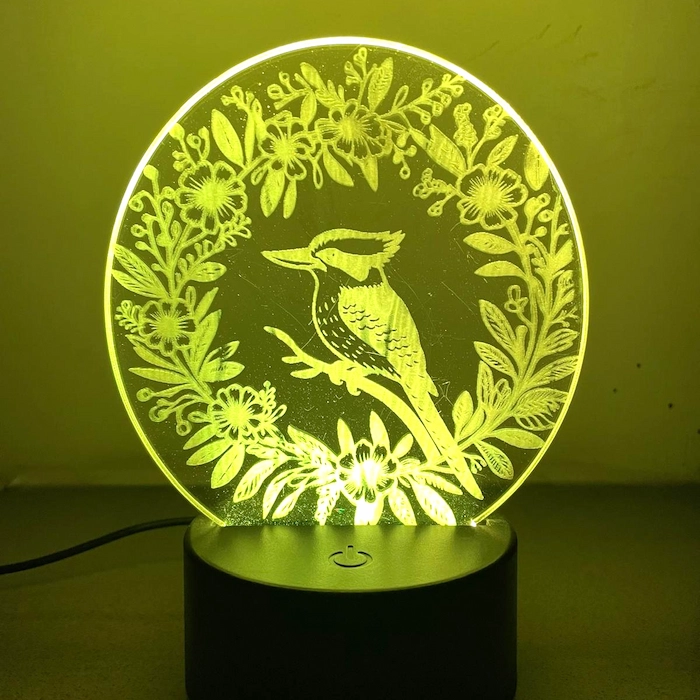
An LED panel made with acrylic sheet engraving.
Explore more acrylic laser engraving projects in the Thunder Laser Inspiration Library.
Verify that the sheet is PMMA acrylic. Do not process an unknown plastic based only on its appearance. Check the supplier label, technical data or material documentation before laser engraving on acrylic.
Remove dust, fingerprints and loose debris with a clean, soft, non-abrasive cloth. Avoid harsh solvents that may cloud, craze or damage acrylic. A clean surface helps maintain consistent acrylic sheet engraving and reduces visible marks around fine details.
Identify whether the protective layer is paper or plastic. Paper masking may help protect the surface from residue in some acrylic laser engraving workflows. Plastic film may melt, curl or affect fine details and should be removed or replaced when testing shows that it interferes with the result.
Test the exact protective film on a scrap section before running the final project.
For consistent acrylic sheet engraving, place the sheet flat on the worktable and confirm that it does not move during processing. Use suitable stops, fixtures or clamps outside the engraving area, and avoid placing weights where the laser head could contact them.
Decide whether the project will use front engraving or reverse acrylic engraving. Mirror the artwork when required and confirm the final reading direction before processing.
Speed controls how long the laser interacts with each area, while power controls the level of laser output. These acrylic engraving settings must be adjusted together.
DPI and line interval determine the spacing between raster engraving lines. Higher DPI or tighter line spacing increases line density and total heat input. This may create a denser result, but excessive density can also cause melting, haze, loss of detail and longer processing time.
A setting around 300 DPI can be used as a starting point for selected projects, but acrylic engraving settings should always be tested with the actual machine, sheet and image. Compare model-specific starting points in the Thunder Laser CO₂ laser settings library.
Bidirectional engraving can reduce processing time because the laser works in both travel directions. Unidirectional scanning may improve alignment and detail in selected photographs or fine graphics, but it takes longer.
Correct focus helps maintain fine details and consistent acrylic sheet engraving. Use the machine’s autofocus system or the correct manual focusing tool, and confirm that the entire sheet is flat before starting.
Engraving on acrylic commonly uses low or weak airflow to help control smoke and residue without unnecessarily cooling or disturbing the engraving area. Acrylic cutting may require a different airflow configuration. Air assist does not replace extraction or continuous operator supervision.
The following Thunder Bolt acrylic engraving settings are retained from the original project record and can be used as starting references for shallow engraving. The source record identifies the machine as Thunder Bolt but does not state the exact model, rated power, acrylic formulation, sheet thickness, lens or number of passes. Confirm these conditions before production.
| Process | Speed | Power | Scan Mode | DPI | Air Assist |
|---|---|---|---|---|---|
| Shallow raster engraving — photo | 500 mm/s | 15% | Horizontal Double | 300 | Weak |
| Shallow raster engraving — text | 500 mm/s | 18% | Horizontal Double | 300 | Weak |
| Shallow raster engraving — label | 500 mm/s | 20% | Horizontal Double | 300 | Weak |
Original Thunder Bolt starting settings for three shallow acrylic engraving processes.
These values are starting points rather than universal settings. Results may vary with the Bolt model, rated laser power, acrylic type, color, thickness, surface finish, lens, focus, airflow, number of passes and desired result. For an exact sheet or production requirement, use the Thunder Laser material testing service to obtain tested settings and sample results.
Confirm that the material is PMMA acrylic and identify whether it is cast or extruded. Record the color, thickness, surface finish and protective-film type.
Select front engraving when you want a visible tactile surface. Select reverse acrylic engraving when you want the design to be viewed through a smooth front face. Mirror the artwork for reverse engraving.
Import or create the design in LaserMaker, LightBurn or another compatible design program. Check the size, orientation, text direction, fill mode and raster settings. For photographs, convert the image to grayscale, adjust contrast and test a suitable dither or raster-processing method.
Clean the sheet, check the protective film and position the material flat on the worktable. Secure it without placing fixtures inside the laser path. Use autofocus or the correct manual focusing tool and confirm that the acrylic remains level across the full engraving area.
Test several combinations of speed and power on the same acrylic batch. Keep other variables consistent so the results can be compared accurately. Use the machine’s frame, border-tracing or positioning function to confirm that the complete design fits within the acrylic surface.
Start the job and monitor the laser throughout processing. Watch for unexpected melting, smoke buildup, flame, material movement or excessive residue. Allow the material to cool before handling, then inspect the laser engraved acrylic for contrast, detail, haze and deformation.
This case study combines reverse acrylic engraving and cutting to create an acrylic award. The project demonstrates how to laser engrave acrylic from the back so the finished design can be viewed through a smooth front surface.
Laser engraving and cutting an acrylic award with a Thunder Laser machine.
Because the design is engraved from the back and viewed through the front, mirror the artwork before processing. Select the appropriate scan direction. Bidirectional scanning is faster, while unidirectional scanning may improve alignment for selected detailed designs.
Use 300 DPI as the starting point shown in this project. Higher line density increases total heat input, so test the final acrylic engraving settings rather than assuming that higher DPI will always improve the result. Use weak air assist for the engraving layer and the tested cutting airflow for the outline layer.
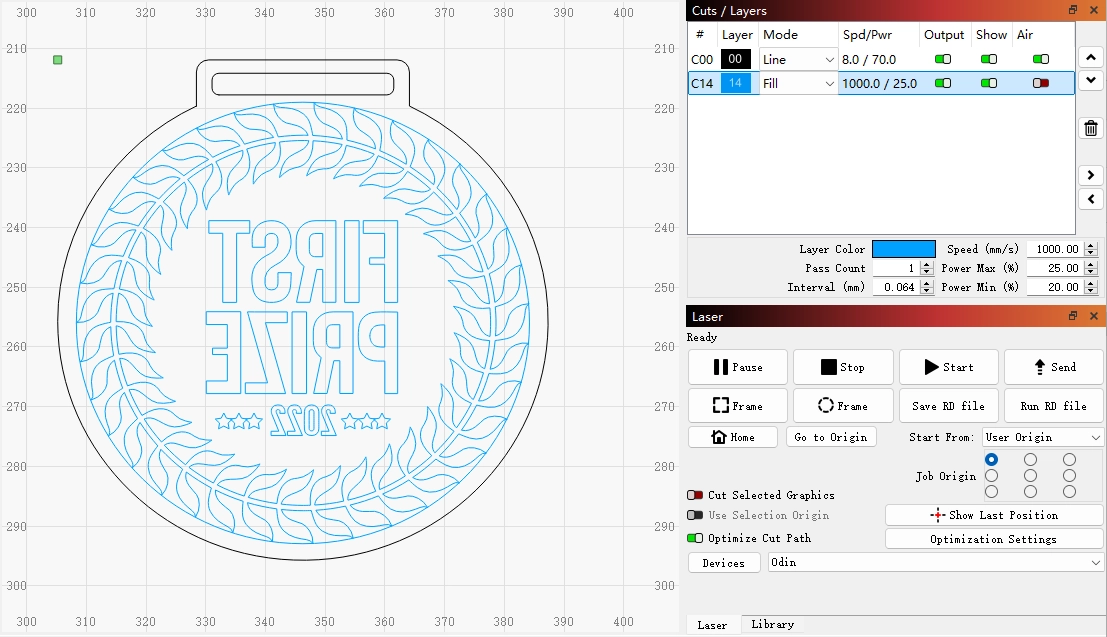
Mirrored artwork and processing layers prepared for the acrylic award.
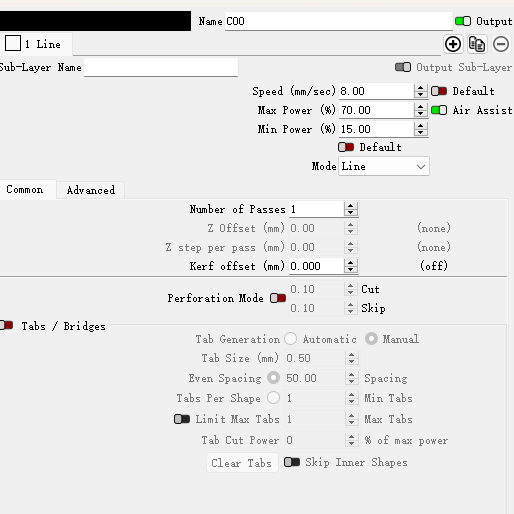
Cutting settings used in the acrylic award project.
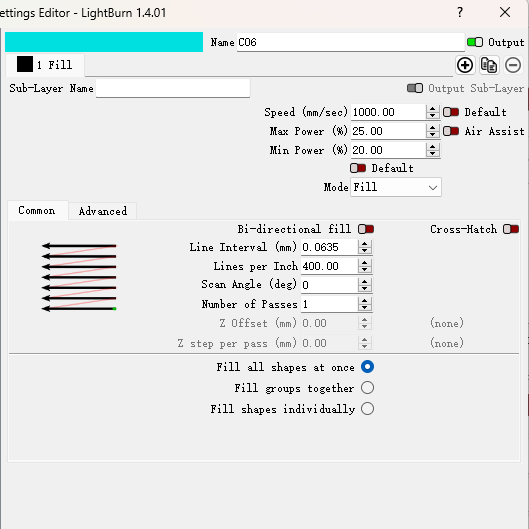
Engraving settings used in the acrylic award project.
Set the starting position to the midpoint when this supports easier alignment and border tracing. Send the file to the machine using a short, recognizable file name. Place the acrylic on the worktable, focus the laser and use border tracing to confirm that the complete design remains within the sheet.
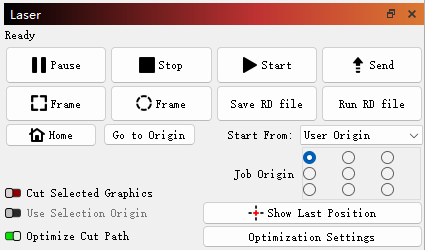
Sending the prepared acrylic award file to the machine.
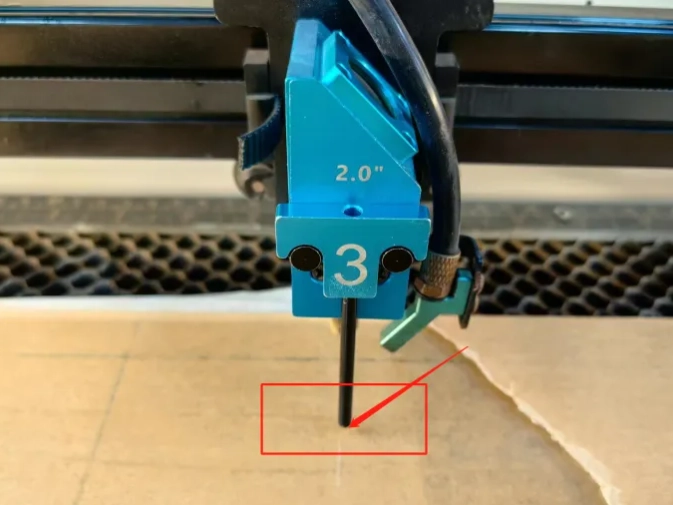
Focusing the laser before acrylic laser engraving.
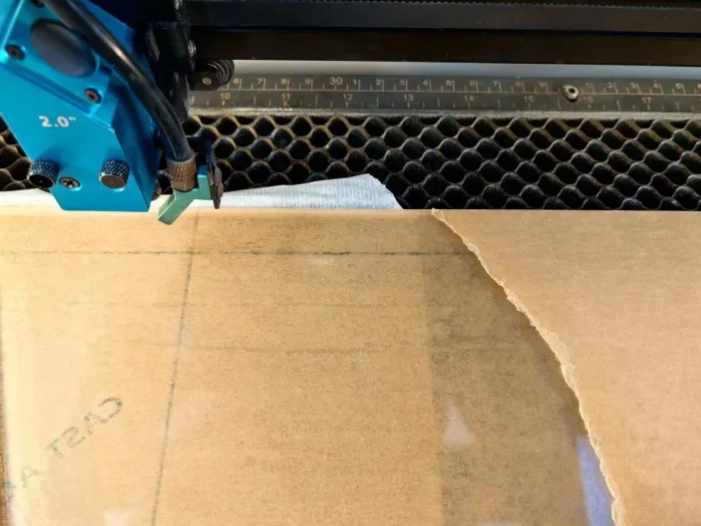
Confirming the processing position with border tracing.
Start the job and monitor both the engraving and cutting stages. Do not leave the laser unattended while processing acrylic.
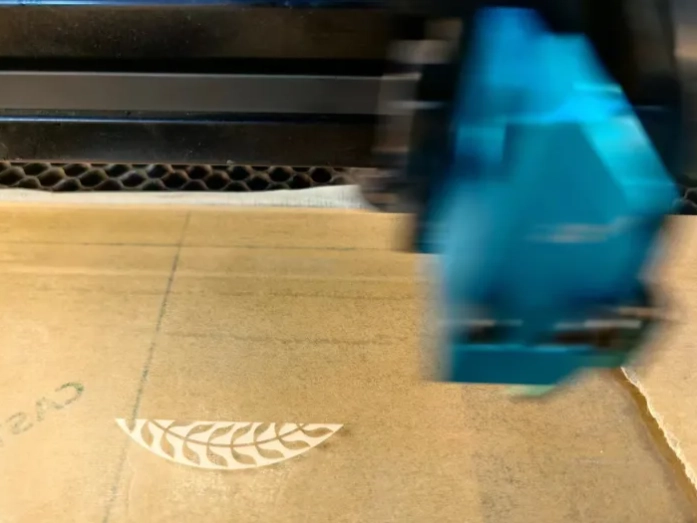
Engraving the design on the acrylic award.
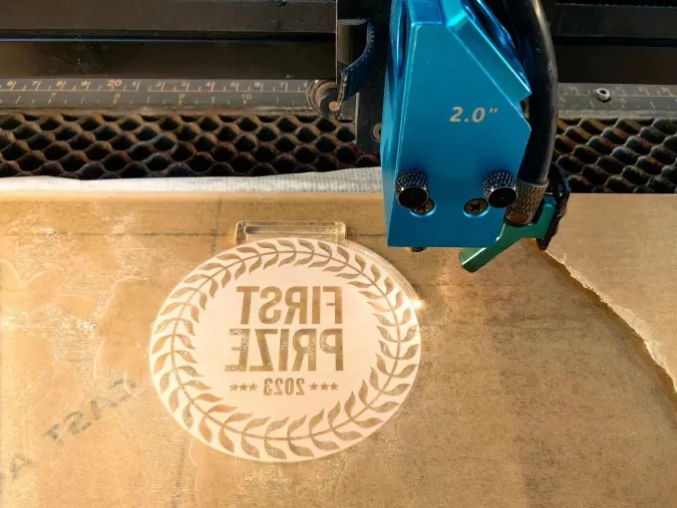
Cutting the outside profile of the acrylic award.
After processing and cooling, remove the paper mask or protective layer when appropriate. Clean the acrylic using a material-compatible method and wipe it with a soft, non-abrasive cloth.
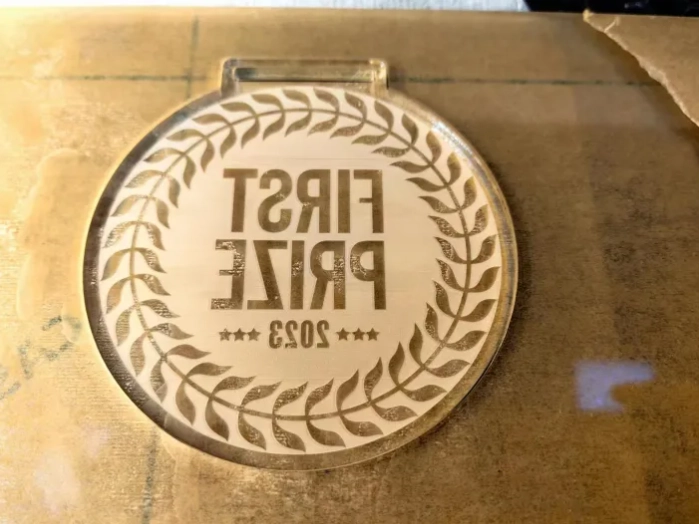
Cleaning the finished laser engraved acrylic award.
A frosted engraving is the desired textured effect inside the design. Haze and surface residue are unwanted deposits that may appear around the processed area when vaporized acrylic recondenses on the sheet.
Engraving from the bottom of the design toward the top may reduce residue deposited onto areas that have already been processed. The effectiveness of this method depends on machine airflow and scan direction.
In the Thunder Laser comparison shown below, a thin and even layer of dish soap reduced visible residue around the processed area. Test this method on scrap acrylic first and confirm that it does not interfere with engraving detail or surface appearance.
Dish soap is used as a surface-protection test method in this example. It is not certified fire protection and must not replace suitable parameters, airflow, extraction and continuous operator supervision. For more ways to improve cutting and engraving on acrylic, read 7 Expert Tips to Improve Acrylic Laser Results.
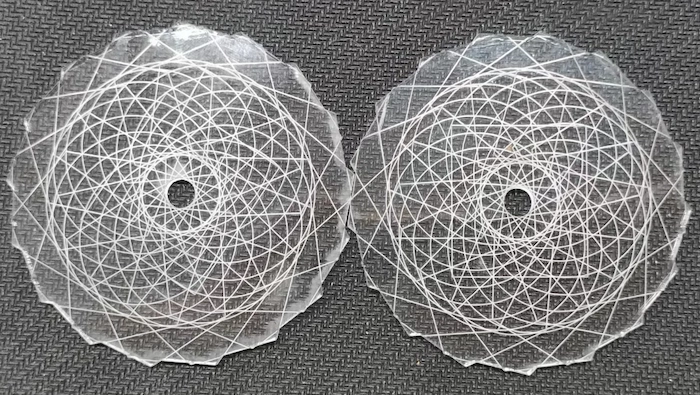
The left sample is untreated. The right sample was processed with a tested surface-protection layer.
| Problem | Possible Cause | Adjustment Direction |
|---|---|---|
| Engraving is too light | Insufficient energy, unsuitable acrylic or low contrast | Test lower speed or slightly higher power and confirm the acrylic type |
| Clear acrylic does not respond to a diode laser | Low absorption of the visible wavelength | Use compatible colored acrylic, a tested absorbing layer or a CO₂ laser |
| Fine details are melting | Excessive heat input or incorrect focus | Increase speed, reduce power and confirm focus |
| The sheet is warping | Heat accumulation or poor material support | Reduce energy, allow cooling and support the sheet evenly |
| Haze appears around the design | Vapor redeposition or ineffective extraction | Improve extraction, test scan direction and use a suitable masking method |
| Reverse text appears backward | The artwork was not mirrored | Mirror the design before reverse acrylic engraving |
| Frosting is uneven | Material variation, sheet curvature or inconsistent focus | Flatten the sheet and test the actual acrylic batch |
| Photo shadows merge together | Image contrast or heat input is too high | Reprocess the image and test lower energy or wider line spacing |
Common acrylic engraving problems and practical adjustment directions.
A CO₂ laser is generally the most versatile choice for laser engraving on acrylic. The correct machine depends on required detail, acrylic sheet size, cutting needs, production volume, workspace and budget.
The Thunder Laser Bolt Series uses RF CO₂ technology for detailed engraving and fast response. Bolt is suited to compact acrylic laser engraving, while Bolt Plus 24 and Bolt Pro 36 provide larger working areas for studio and production use.
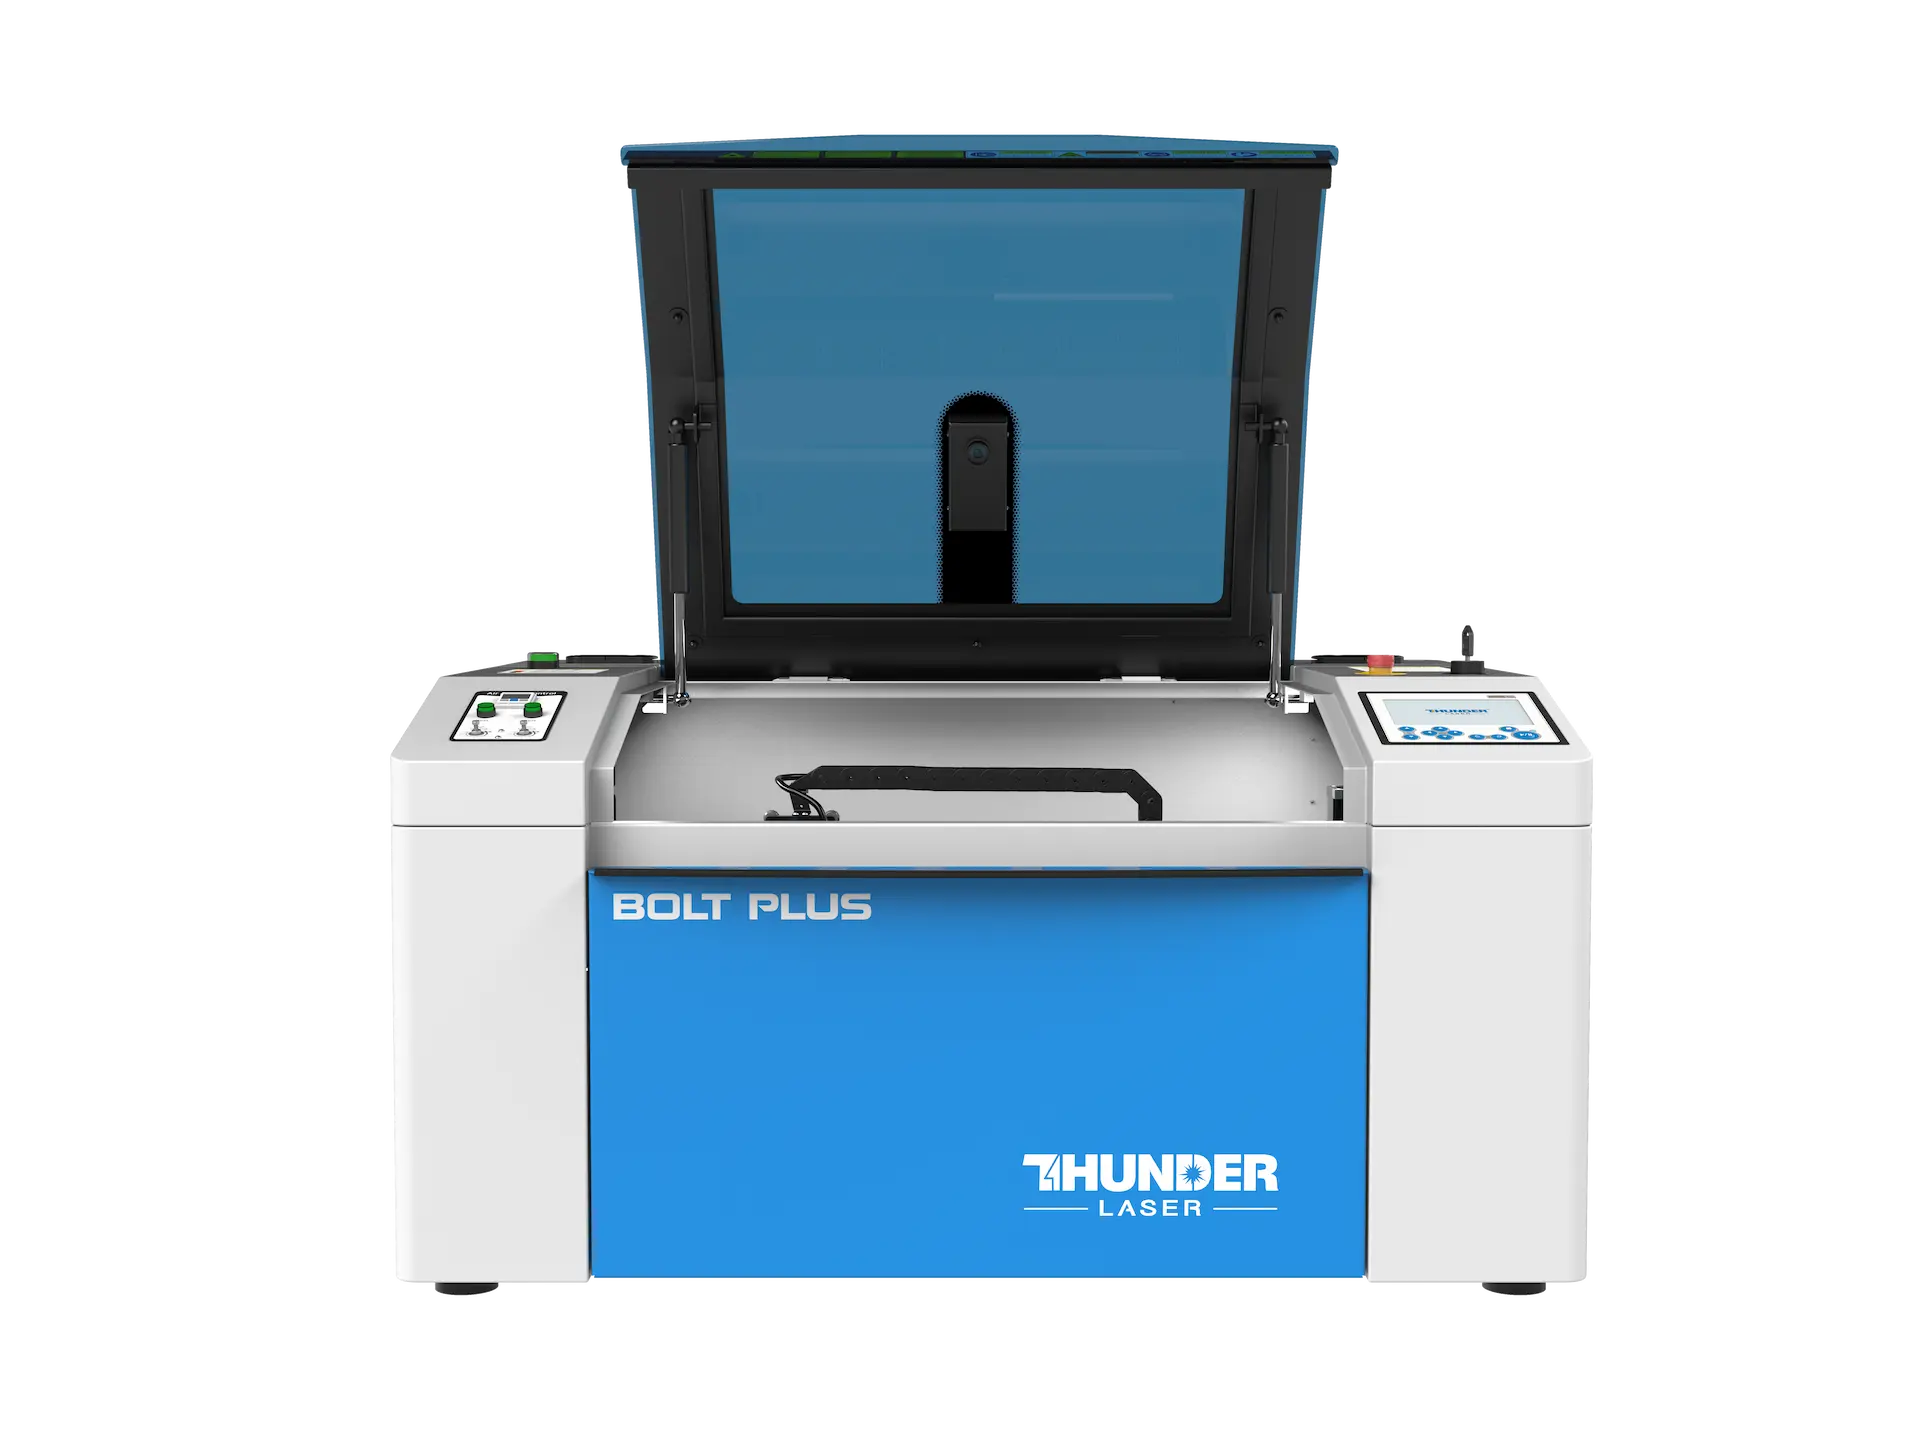
Thunder Laser Bolt Series for detailed acrylic laser engraving.
Explore the Thunder Laser Bolt Series or compare broader production options on the Acrylic Material Application page.
Learning how to laser engrave acrylic begins with correct material identification, a suitable laser source and controlled acrylic engraving settings. Cast acrylic is usually preferred for strong frosted contrast, while extruded acrylic may produce a lighter result. Clear, colored, mirrored and frosted sheets should each be tested before production.
CO₂ laser engraving acrylic remains the most versatile approach for general projects. Diode laser engraving acrylic works best with dark, opaque or suitably coated material, while UV laser engraving acrylic should be tested on the exact PMMA formulation. For clear acrylic engraving, also decide whether front or reverse acrylic engraving provides the best finished appearance.
Whether the goal is to etch acrylic, create Plexiglass engraving, produce acrylic sheet engraving or build an LED panel, test speed, power, DPI, focus, airflow and passes on the actual material. For additional cutting guidance and material comparisons, read the Acrylic Laser Cutting and Engraving Guide.
Need help selecting an acrylic laser engraver or testing a specific sheet? Contact Thunder Laser for machine selection and material testing.
Talk To Our Experts Now!
Please leave your contact information so that we can serve you better.
FAQs About
Laser Engraving on Acrylic
Yes. A CO₂ laser can directly engrave clear PMMA acrylic because the material absorbs the infrared wavelength. The result is commonly a white, frosted or translucent surface effect. Cast clear acrylic usually provides stronger engraving contrast than extruded acrylic.
Yes, provided that the sheet is PMMA acrylic. Plexiglass is a name commonly used for acrylic sheet. Check the material documentation before processing because other transparent plastics may look similar but react differently under a laser.
Cast acrylic is generally preferred for visible engraving because it commonly produces a stronger frosted-white result. Extruded acrylic can still be engraved, but its mark is often lighter and more transparent.
A typical blue diode laser generally has difficulty engraving clear, untreated acrylic because much of the visible laser energy passes through the material. Dark, opaque or suitably coated acrylic is more compatible. Clear acrylic may require a tested absorbing layer.
A UV laser can mark selected acrylic formulations with fine details and limited heat impact. Compatibility varies by acrylic color, additives and surface finish, so the exact sheet should be tested before production.
Front engraving creates a visible tactile design on the front surface. Reverse engraving is performed from the back and viewed through the smooth front, making it popular for awards, plaques and premium signs.
Mirror the artwork when engraving from the back and viewing it through the front. Front engraving normally does not require mirroring. Always verify text direction in the software preview.
Reduce excessive heat input by testing lower power, faster speed, wider line spacing or fewer passes. Keep the acrylic flat, confirm focus, improve extraction and allow the sheet to cool before repeating the engraving.
It depends on the protective layer. Paper masking may protect the surface in some workflows, while plastic film may melt or reduce detail. Test the exact film and remove or replace it when it affects the result.
Surface engraving can be performed on many acrylic thicknesses. Sheets around 3 mm are common for ornaments, LED panels and signs, but the best thickness depends on product rigidity, mounting, appearance and whether the sheet also needs to be cut.
FIND THE RIGHT LASER FOR YOUR NEXT PROJECT
Explore Thunder Laser solutions designed for different materials, workflows, and production needs.


 Stable & Consistent MachinesUnlimited ApplicationsRobust After-sales SupportFactory Direct Supply


