


Color Laser Engraving and Marking: Methods, Materials & Color Effects
 2025-01-07
WHAT ARE YOU LOOKING FOR?
Search Across Products, Blog Posts, Support Content, And Resources.

Color Laser Engraving and Marking: Methods, Materials & Color Effects
2025-01-07

Color laser engraving can mean several very different processes. On suitable stainless steel, a MOPA fiber laser can create visible colors by precisely controlling the surface oxide layer. On double-color acrylic, coated glass, painted metal, wood, and other materials, the color may instead come from revealing another layer or adding paint, enamel, wax, or resin after engraving.
If your goal is direct multicolor marking on stainless steel, MOPA is the most important technology to understand. Adjustable pulse width and frequency give the operator more control over heat input and surface reactions than a standard Q-switched fiber source, making it easier to build and reproduce a controlled color process.
This guide focuses first on MOPA color marking on stainless steel: how the colors are created, how to build a parameter matrix, how to improve repeatability, and how to choose a suitable laser. It then explains other methods commonly grouped under the term “color laser engraving,” including layered acrylic, coated glass, and post-engraving color fill.
Quick Answer: For direct color marking on suitable stainless steel, a MOPA fiber laser is generally the most flexible choice because adjustable pulse width, frequency, speed, power, and hatch settings provide greater control over oxide formation and heat input. A standard Q-switched fiber laser remains excellent for general metal marking and can create selected color effects on materials such as titanium, while CO₂ and UV lasers are better suited to different material and color workflows rather than direct rainbow-style color marking on bare stainless steel.
Yes, but “color laser engraving” is not one universal laser process. The phrase is commonly used for several methods that create a colorful or high-contrast result in different ways.
| Color Process | How Color Is Created | Typical Materials | Typical Laser Direction |
|---|---|---|---|
| Direct color marking | Controlled surface oxidation or another surface reaction creates visible color without adding ink | Suitable stainless steel, titanium and selected metals | MOPA fiber; validated Q-switched processes for selected applications |
| Coating removal | The laser changes or removes a top layer and reveals the material underneath | Anodized aluminum, coated metal, painted glass and coated products | Fiber, MOPA, CO₂ or UV depending on material |
| Layered-material engraving | A colored face layer is removed to expose a contrasting core | Double-color acrylic and engraving laminates | CO₂ laser |
| Post-engraving color fill | Paint, wax, enamel or resin is added after the recess is engraved | Wood, acrylic, stone, leather and selected metals | Choose the laser according to the base material |
“Color laser engraving” describes several processes; first identify where the visible color actually comes from.
Marking vs. engraving: Direct multicolor effects on stainless steel are more accurately described as color laser marking because the goal is usually to modify the surface rather than create a deep recess. “Color laser engraving” remains a widely used search and marketing term, so both expressions appear in this guide.
For a broader explanation of metal marking, etching and engraving terminology, see the Laser Engraving and Cutting Metal Guide.
On suitable stainless steel, precisely controlled laser energy can produce a thin oxide layer on the surface. Different oxide conditions change the way visible light is reflected, so the surface can appear gold, bronze, purple, blue, green, or another color without adding conventional pigment or ink.
The result depends on much more than power. Pulse width, frequency, scanning speed, line interval, hatch strategy, focus, number of passes, alloy grade, surface finish, cleanliness, and thermal history can all change the final appearance.
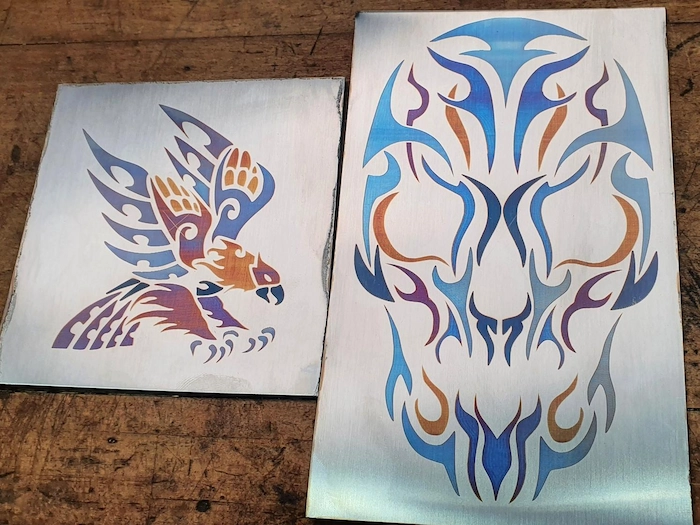
Multicolor marking on stainless steel requires precise control of laser parameters and surface condition. Original page credit: Jens Gürtler via Facebook.
A standard Q-switched fiber laser is highly effective for conventional metal marking, but it provides a narrower process window. A MOPA source adds adjustable pulse width and a much broader frequency range, which gives the operator more control over how laser energy is delivered to the stainless steel surface.
| Laser Type | Pulse Control | Color-Marking Role |
|---|---|---|
| MOPA Fiber | Adjustable pulse width and broad frequency control | Primary direction for controlled stainless steel color marking |
| Q-Switched Fiber | More limited pulse behavior | General metal marking and selected color effects on materials such as titanium |
| UV | Fine lower-heat processing | Selected glass, plastics, ceramics and heat-sensitive materials rather than rainbow stainless marking |
| CO₂ | Different wavelength and material interaction | Layered acrylic, coatings, glass and color-fill workflows |
Match the laser source to the mechanism that creates the color rather than choosing by wattage alone.
For a deeper comparison of the two fiber technologies, read Fiber vs. MOPA Laser Marking.
Some laser-created metal colors behave as interference colors. Their appearance can change as the lighting direction, light spectrum, viewing angle, or surface texture changes. A vivid blue under directional light may appear less saturated under diffuse office lighting.
This matters in production. Approve your reference sample under the lighting conditions in which the finished product will normally be used or displayed rather than judging color under one convenient workshop lamp.
Not every metal produces the same type of color effect. Material composition and surface chemistry determine what is possible, so direct color marking should always be validated on the actual production material.
Stainless steel is the main material associated with MOPA color laser marking. Suitable grades can produce gold, bronze, purple, blue, green and mixed interference effects when the oxide layer is controlled consistently.
Surface finish matters. Brushed, polished, mirror-polished and bead-blasted stainless steel can show noticeably different brightness, saturation and viewing-angle behavior even when processed with the same machine.
For broader preparation, black marking, white marking and engraving guidance, see Laser Engraving Stainless Steel: Settings & How-To Guide.
Titanium can also form vivid oxide colors. A suitable Q-switched fiber laser may create selected titanium color effects, while MOPA provides additional pulse and frequency flexibility when tighter process control is required.
As with stainless steel, titanium color is sensitive to surface preparation and viewing conditions. Do not assume a parameter developed for stainless steel will transfer directly to titanium.
Brass and other metals can show decorative color or contrast effects under selected laser processes, but the mechanism and repeatability are not necessarily the same as stainless steel oxide-color marking. Evaluate the specific alloy and surface instead of assuming every colored metal sample can use the same MOPA recipe.
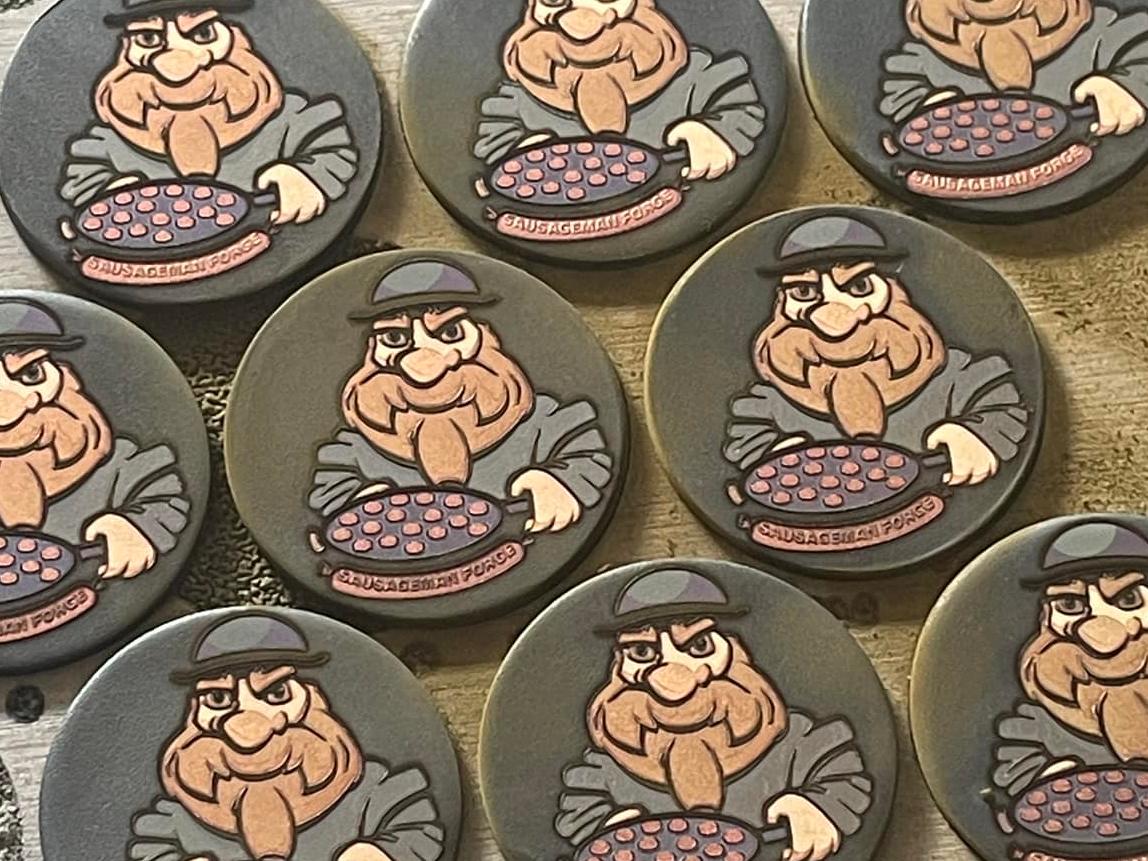
A decorative color laser effect on a brass sample. The exact mechanism and repeatability depend on alloy, surface condition and process parameters. Original page credit: Corin Urquhart via Facebook.
See the Metal Laser Engraving and Marking Guide for a broader comparison of metal materials and laser processes.
Reliable color marking is a process-development task rather than a one-click effect. Start with controlled material and test conditions, then build a repeatable parameter library before using the process on finished products.
Whenever possible, use the same stainless steel grade, supplier batch and surface finish as the final product. A test performed on one polished 304 stainless sheet may not transfer perfectly to another finish or alloy.
Oil, fingerprints, polishing residue and dust can change heat transfer and surface reaction. Clean every test sample using the same process and avoid touching the marking area afterward.
Keep the surface flat and stable. Color marking is sensitive to changes in energy density, so a tilted workpiece or inconsistent focal position can create visible color differences across the same design.
Instead of searching for one universal “blue setting” or “gold setting,” create a controlled matrix. Hold most parameters constant and vary one or two variables at a time so you can see how the process window changes.
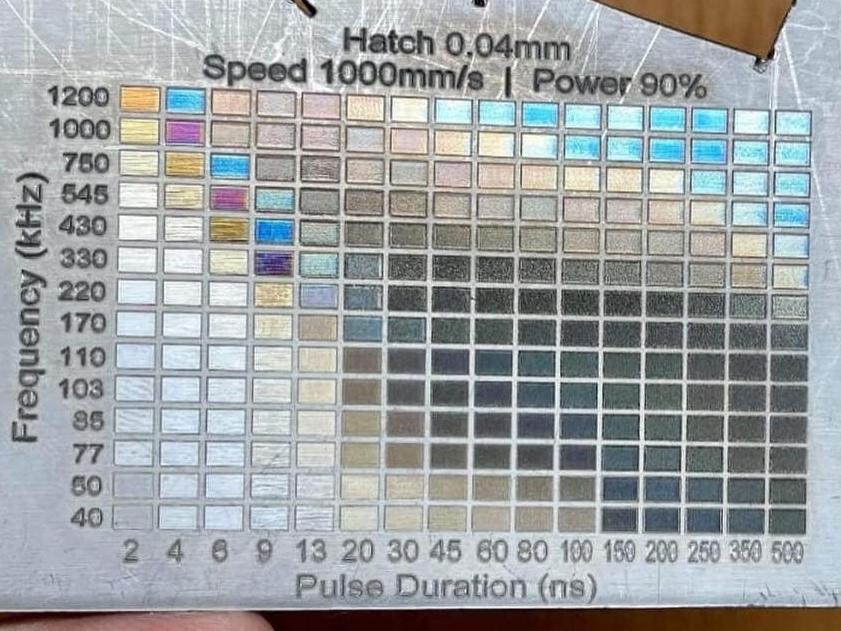
A labeled color test matrix helps compare hue, texture and repeatability across controlled parameter combinations. Original page credit: Lucas Liu via Facebook.
The brightest square on a test plate is not automatically the best production setting. Repeat the most promising combinations and check whether the same color appears consistently on multiple samples.
Also inspect background texture, edge quality, color shift after cleaning and the amount of variation between different areas of the workpiece.
Once repeatable colors are identified, separate the artwork into layers and assign the validated parameter set to each layer. Complex multicolor graphics therefore become a combination of several proven laser processes rather than one multicolor laser setting.
Use the same cleaning method during testing and final production. Judge the final color only after loose residue or contamination has been removed, then inspect the sample under the lighting conditions in which it will normally be viewed.
Keep an approved physical reference plate together with the digital settings record. If the stainless steel supplier, finish, lens, machine configuration, software file or fixture changes, repeat the validation instead of assuming the old color library will remain identical.
Color marking is highly sensitive to parameter interaction. Instead of treating power as the main control, think of the process as a balance between energy per pulse, pulse behavior, overlap and total heat accumulation.
| Parameter | What It Changes | How to Use It in Testing |
|---|---|---|
| Pulse Width | Changes how energy is delivered during each pulse | One of the most important MOPA variables when exploring new color windows |
| Frequency | Changes pulse repetition behavior and heat accumulation | Pair with pulse width or speed in a controlled matrix |
| Speed | Changes how long the laser interacts with a given area | Useful for fine-tuning total energy and color appearance |
| Power | Changes delivered energy | Keep within a controlled range rather than assuming more power creates better color |
| Line Interval / DPI | Controls overlap between scan lines | Fine-tune after a useful pulse, frequency and speed region is identified |
| Hatch Direction | Changes scanning pattern and heat distribution | Test when banding or directional texture is visible |
| Focus | Changes spot size and energy density | Keep repeatable; test intentional offsets only after establishing a baseline |
| Passes | Changes accumulated heat and total surface exposure | Keep constant during initial testing unless passes are the variable being studied |
Color development is a multi-variable process; controlled testing is more reliable than copying a single setting from another machine or material batch.
Important: Thunder Laser does not recommend treating a published “gold,” “blue,” or “green” setting as a universal formula. Material grade, surface finish, lens, focus, machine, software configuration and environmental conditions can change the final color. Validate the exact production material first.
You can use Thunder Laser's Fiber and MOPA Laser Settings Library to understand how current Aurora parameters are documented for different materials and marking effects, then build a dedicated color matrix on the actual stainless steel you plan to process.
| Problem | Likely Causes | What to Check |
|---|---|---|
| Color appears gray or weak | Unsuitable material, incorrect pulse behavior, poor focus, contamination or excessive heat | Verify material, clean the surface, refocus and rebuild the matrix with smaller changes |
| Color is uneven across the design | Part not level, focus changes, uneven finish or inconsistent hatch overlap | Check fixture flatness, focus, field calibration and line interval |
| Same settings produce a different color | Material batch, cleaning method, focus or process setup changed | Compare supplier batch, surface preparation, lens, fixture height and saved settings |
| Dark edges or rough background texture | Excess heat, tight hatch spacing, repeated passes or unsuitable pulse settings | Reduce heat accumulation and compare spacing, pulse width and scanning strategy |
| Visible stripes or banding | Hatch direction, line spacing, calibration or artwork resolution | Test another hatch angle, confirm spacing and inspect the source artwork |
| Color changes after cleaning | Residue, contamination or unstable surface result | Use a standardized cleaning method and evaluate only the cleaned sample |
| Color changes under another light | Interference color responds to lighting spectrum, angle and surface finish | Approve the sample under intended display or workplace lighting |
Troubleshooting should begin with material consistency, focus, surface preparation and a controlled parameter matrix.
MOPA stainless steel marking is only one route to a colored laser result. If your product is acrylic, glass, wood, leather or coated metal, the better process may be to reveal an existing layer or add color after engraving.
Double-color acrylic contains a thin face layer over a contrasting core. A CO₂ laser removes the top layer and exposes the second color underneath. The laser is not generating the color chemically; the color is already built into the material.
The goal is to remove the face layer cleanly without cutting unnecessarily deep into the core. This makes layered acrylic particularly useful for labels, signs, control panels, nameplates and two-tone graphics.
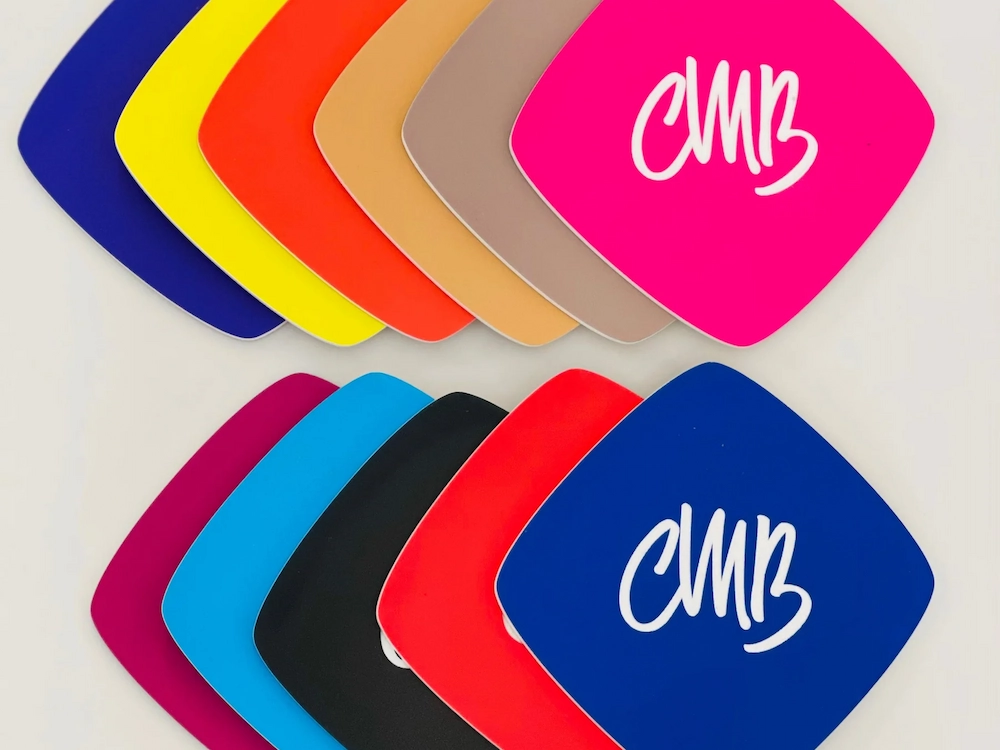
Double-color acrylic reveals a contrasting core when the face layer is removed. Original page credit: Custom Made Better.
For larger layered-material and non-metal workflows, see the Thunder Nova Plus Series.
Bare glass generally produces a frosted or etched appearance rather than a direct rainbow effect. Color is usually created through paint, a backing layer, a coating, a transfer process or post-engraving fill.
CO₂ lasers are widely used for decorative glass engraving, while UV lasers can support fine lower-heat marking on selected glass products. The correct method depends on the glass composition, thickness, geometry and coating.
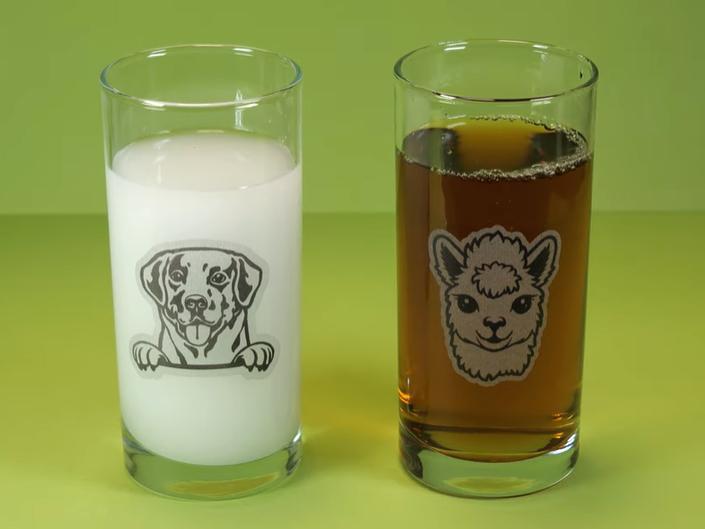
Color on glass usually comes from a coating, backing layer or fill rather than direct multicolor formation in bare glass. Original page credit: Harvey71 via YouTube.
Review the Glass Laser Engraving Guide before choosing a process for glass products.
Wood, stone, leather, acrylic and selected metals can be engraved first and filled afterward. Acrylic paint, enamel, wax, pigment and resin are commonly used to create contrast inside the recessed design.
Masking the surface before engraving can make cleanup easier, particularly on porous or textured materials. The engraving should be deep enough to hold the fill without unnecessarily weakening the product.
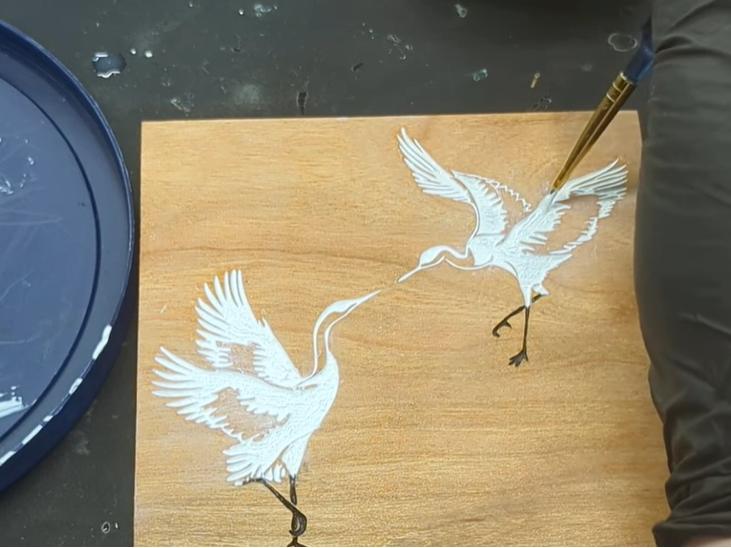
Paint or resin can be added to recessed laser engraving to create strong contrast on wood. Original page credit: Elephant Memories by JoBeMac Studios via YouTube.
Never laser a coating, adhesive, plastic or unknown material until its composition and laser safety are confirmed.
The right machine depends first on the material and on how the color is being created. Do not choose a machine only because it is marketed as a “color laser.”
The Thunder Aurora MOPA uses a 100W MOPA fiber source with adjustable pulse control and is the main Aurora configuration for advanced stainless steel color marking.
Aurora Fiber and Aurora Lite use 50W Q-switched fiber sources and are better suited to efficient general metal marking, engraving and selected titanium color applications. Aurora UV uses a 5W UV source and is intended for fine lower-heat work on materials such as selected plastics, glass, ceramics and electronic components.
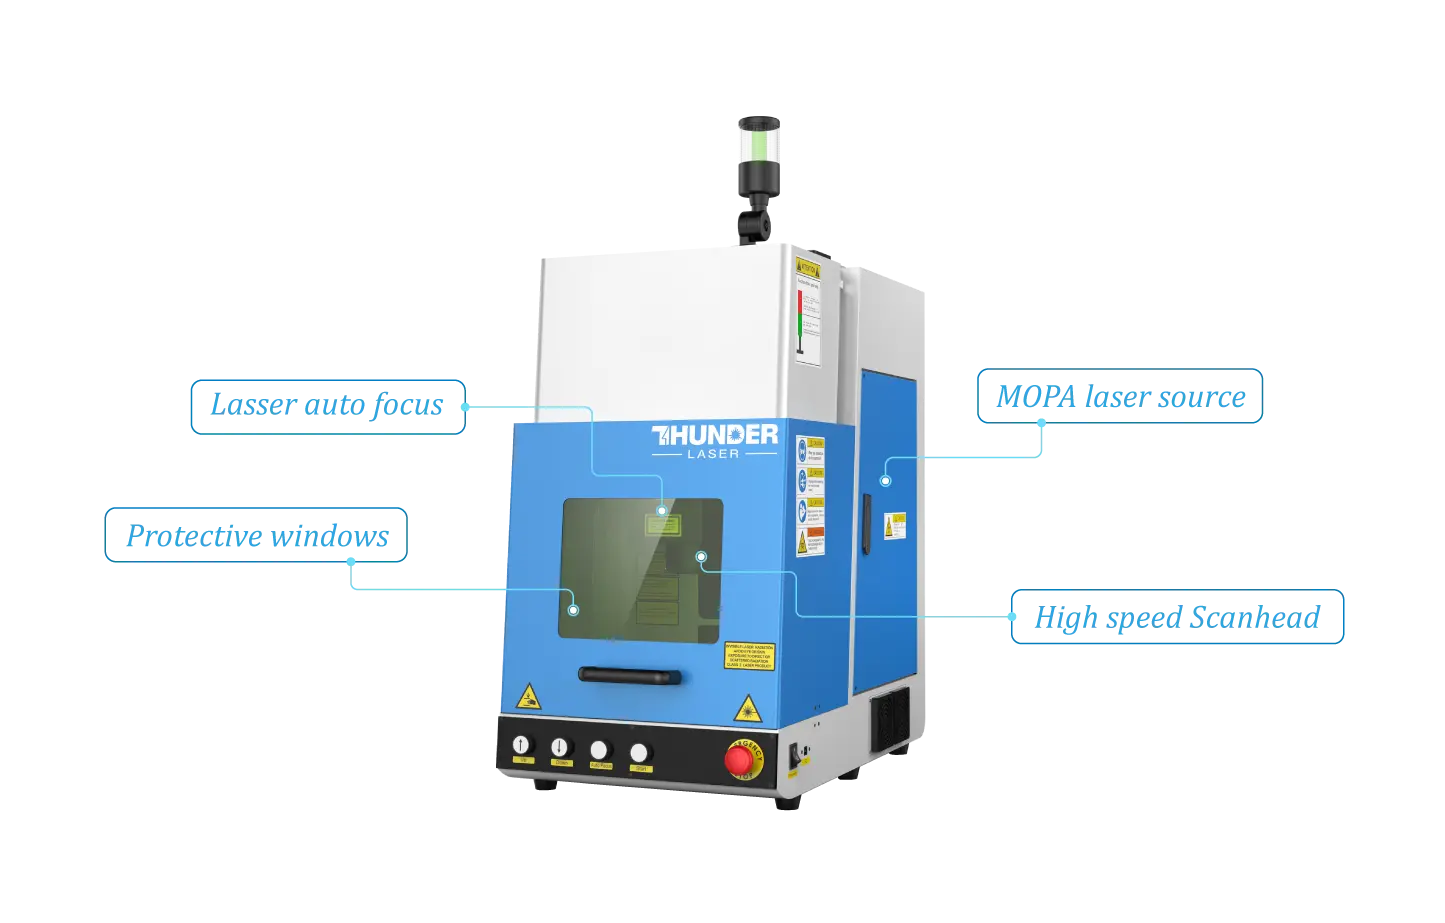
Aurora MOPA provides adjustable pulse control for advanced stainless steel color-marking applications.
For direct metal color marking, parameter flexibility can be more important than simply increasing wattage. Ask whether the system provides the pulse-width and frequency control required for the effect you want and whether the supplier can repeat the effect on your actual material.
Marking field size, lens choice, working distance, Z clearance and fixture height determine whether the product physically fits and remains within an acceptable focal range. Larger marking fields can increase coverage but should be evaluated together with the required detail and workflow.
Rings, cups, tubes and cylindrical parts may require a rotary attachment. Repeated products benefit from custom nests, positioning blocks or fixtures that keep height and orientation consistent between parts.
If production regularly combines direct metal marking with acrylic, wood, leather and other CO₂-compatible materials, separate machines may be appropriate. For larger industrial mixed-material workflows, the Thunder Titan Pro Series combines RF CO₂ and 100W MOPA capability in one production platform.
Color marking is one of the applications where generic sample photos are not enough. The most useful test uses your actual alloy, finish, geometry and quality target.
Thunder Laser's Material Testing Service can evaluate representative materials and provide process feedback before machine selection. You can also review the Laser Marking Machine Guide for broader selection criteria.
Once a color process is stable, it can add visual value to both functional and decorative products. Common applications include premium metal cards, jewelry, watch parts, tumblers, tools, knives, nameplates, art panels, awards and branded promotional products.
For production parts, consistency matters more than a one-off dramatic sample. Use positioning fixtures for batch work, a rotary where cylindrical geometry requires it, and keep an approved physical reference so operators can compare future output against the accepted standard.
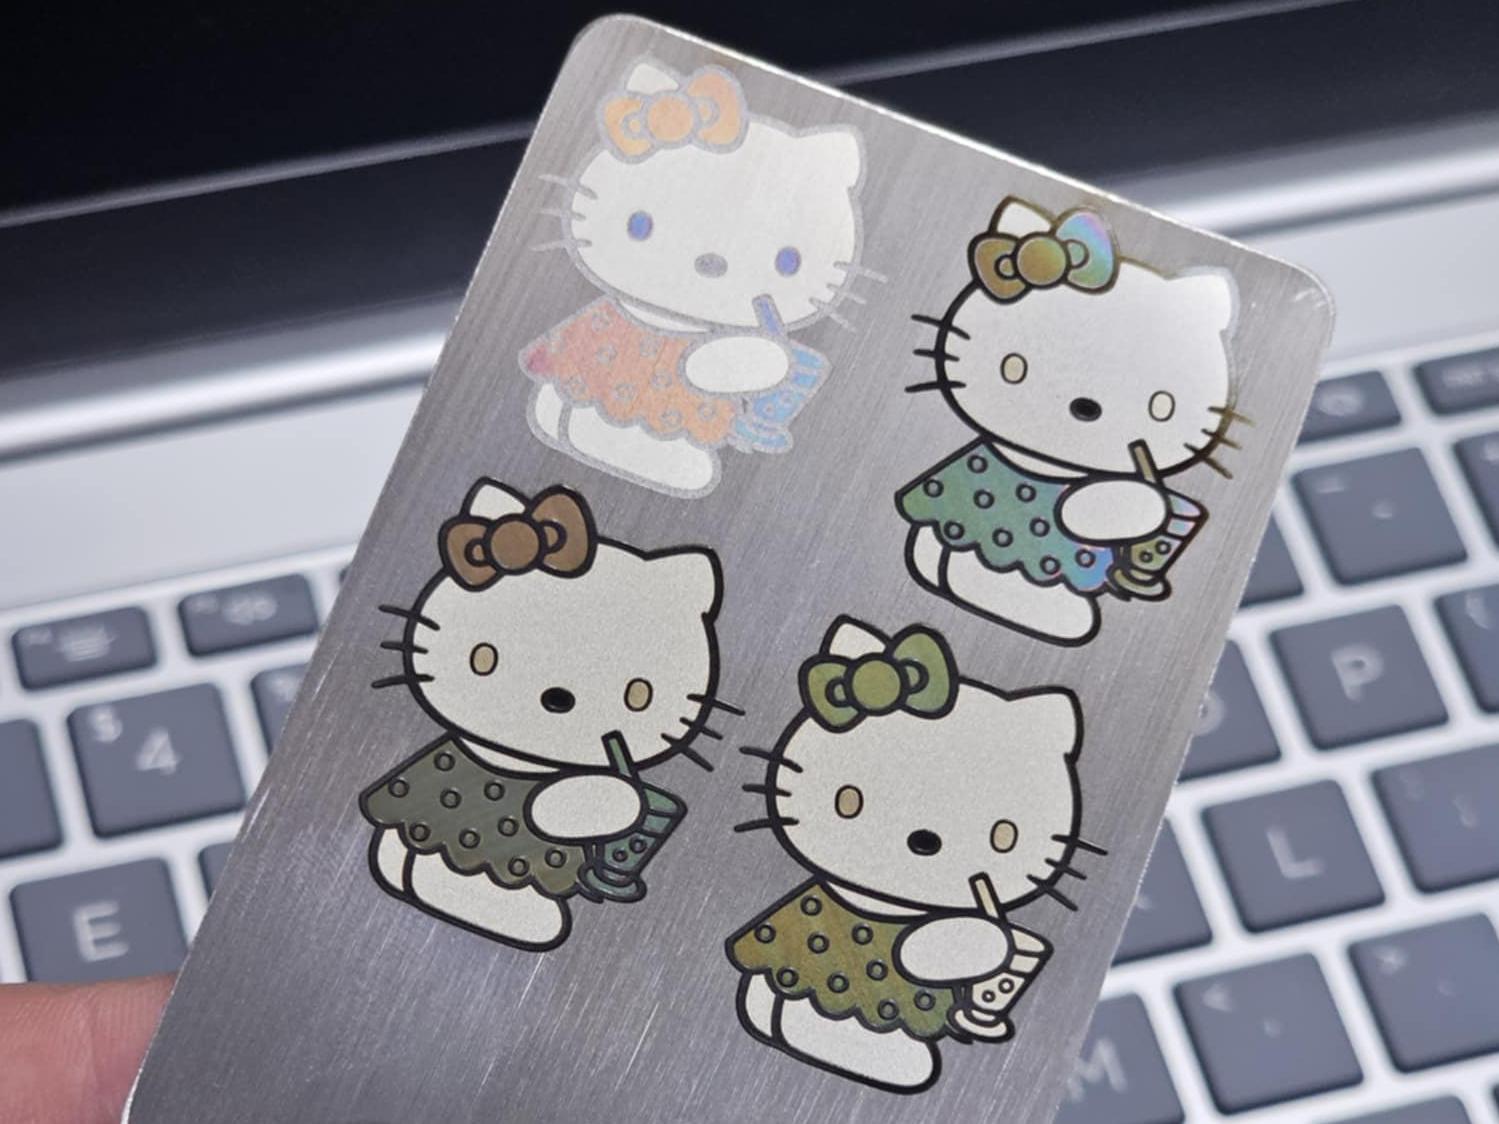
Detailed multicolor metal artwork demonstrates the creative potential of a validated and repeatable color-marking process. Original page credit: Pascal Liu via Facebook.
For additional project examples and application ideas, explore the Thunder Laser Inspiration Library.
Color laser engraving is best understood as a group of processes rather than a single effect. For suitable stainless steel, MOPA color marking is the most important direct-color workflow because adjustable pulse width and frequency provide greater control over surface oxidation and heat input.
The key to successful production is not finding one universal blue, gold or green setting. It is building a controlled test matrix on the real material, identifying repeatable parameter windows, standardizing surface preparation and focus, and keeping a physical reference for future jobs.
When the color comes from a coating, layered material or post-engraving fill, choose the laser according to the base material instead. Double-color acrylic, coated glass and color-filled wood can create excellent colorful results, but they are technically different from direct MOPA color marking on stainless steel.
Want to Test Color Marking on Your Own Material?
Send Thunder Laser your stainless steel or application requirements. Our team can help evaluate the material, test suitable laser configurations and determine whether Aurora MOPA or another system better fits your process.
Request Material TestingTalk To Our Experts Now!
Please leave your contact information so that we can serve you better.
FAQS
FIND THE RIGHT LASER FOR YOUR NEXT PROJECT
Explore Thunder Laser solutions designed for different materials, workflows, and production needs.


 Stable & Consistent MachinesUnlimited ApplicationsRobust After-sales SupportFactory Direct Supply


