Home>Blog>How to Laser Engraving for Customized Earrings
How to Laser Engraving for Customized Earrings
21/08/2024
Share:
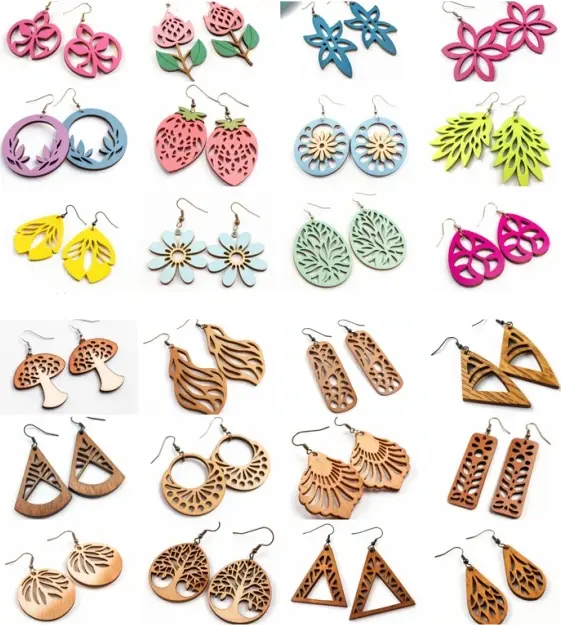
Laser engraving for customized earrings brings endless possibilities to the world of personalized jewelry. From delicate patterns to symbolic designs, this technique allows for high precision and creativity across a variety of materials like wood, acrylic, leather, and metal.
In this guide, we’ll explore how to design and produce a pair of personalized goldfish earrings that are not only meaningful but also eye-catching and unique.
1. Understanding Laser Engraving for Customized Earrings
Laser engraving for customized earrings is a cutting-edge technique that allows for intricate, high-precision designs to be etched onto various materials, including metal, acrylic, wood, and leather.
Unlike traditional methods, which often involve physical tools, laser engraving uses a focused beam of light to vaporize the surface of the material, creating detailed patterns, logos, text, or images. This process ensures that each design is permanent and highly detailed, making it ideal for personalized jewelry.
Whether you’re adding names, dates, or unique symbols to your earrings, laser engraving offers a level of customization that can turn any pair of earrings into a one-of-a-kind piece of art. The result is not only visually striking but also long-lasting, as the engravings are resistant to wear and fading over time.
2. Material Selection for Laser Engraving Customized Earrings
Earrings can be made from a variety of materials, including wood, acrylic, leather, metal, and even certain stones. The material chosen for engraving will impact the design’s outcome, as different materials interact with the laser in unique ways.
Wood: Laser engraving on wood creates deep, textured designs, with darker engraving effects on light-colored wood.
Acrylic: Laser engraving on acrylic are often detailed and clean, with vibrant contrast.
Metal: Metals like stainless steel or brass can be engraved with intricate text or patterns, offering a sleek, professional appearance.
Leather: Leather can be engraved with text or designs that give a classic, luxurious look.
3. Design Process for Customized Goldfish Earrings
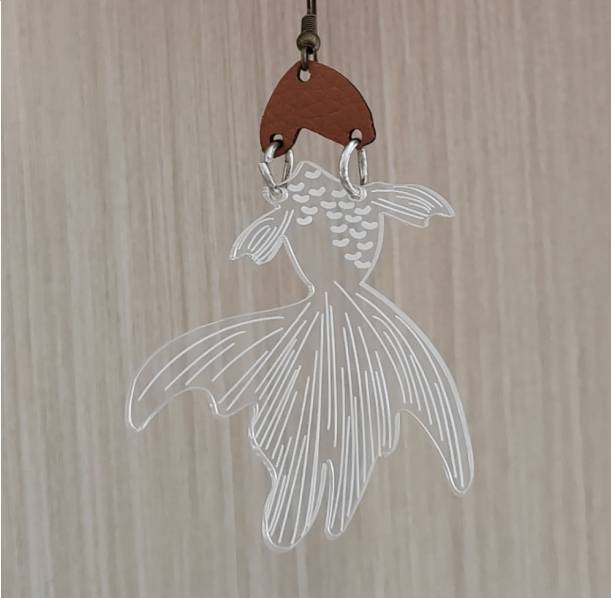
The focus of this project is to create custom “Goldfish Earrings,” which symbolize luck.
To complete the “Goldfish Earrings,” it is necessary to first design the style and then consider how to connect the different elements to achieve the desired effect.
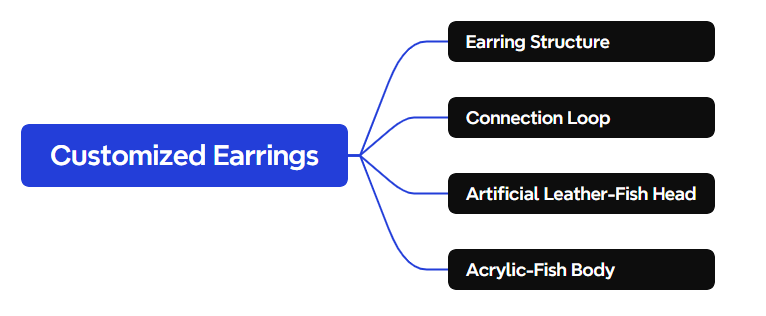
In this design, we primarily use different materials. The head of the goldfish will be made of leather, while the body will be crafted from acrylic.
To transform this design into earrings, we need to use connecting rings to join the two parts, and finally attach them to the earring hooks to create the final product, the “Goldfish Earrings.”
4. Materials List
Number
Name
Quantity
1
Earring Hooks
1
2
Connecting Rings
1
3
1mm Artificial Leather
1
4
3mm Acrylic
1
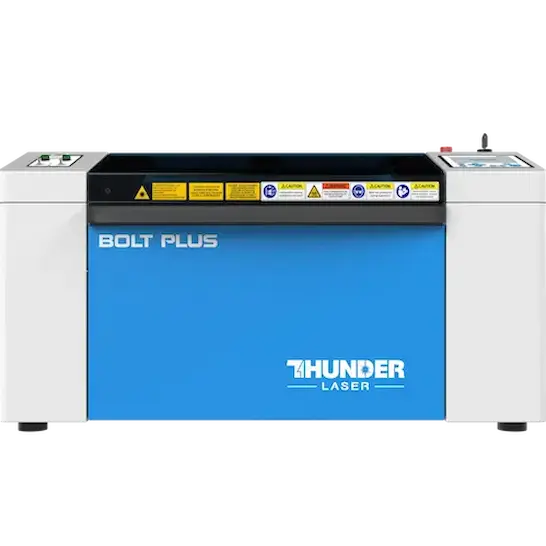
5. Best Machine for Laser Engraving for Customized Earrings
When it comes to creating personalized earrings with fine detail and clean cuts, the Thunder Laser Bolt series stands out as a top choice. Designed for precision and efficiency, this compact CO₂ laser engraver is particularly well-suited for working with materials commonly used in jewelry design, such as acrylics, wood, and artificial leather.
The Bolt series is available in 30W and 55W models, offering ample power for both engraving intricate patterns and cutting through layered materials.
Its high-speed motion system ensures smooth, consistent engraving—even on small, delicate pieces like custom earrings. Whether you’re outlining a goldfish motif or layering multiple elements for added texture, the Bolt handles it with accuracy.
One of the key advantages of the Thunder Laser Bolt is its seamless compatibility with LightBurn software, which simplifies the process of importing designs, adjusting engraving layers, and fine-tuning cutting parameters. The software also allows users to preview the earring layout, helping avoid errors before production.
Compact and user-friendly, the Bolt series is ideal for home studios, craft businesses, or startup brands looking to produce high-quality, custom laser-cut earrings with ease.
Once the design for the goldfish earrings is finalized, the next step is to bring it to life through precise shape creation and process configuration. This involves extracting contours from reference images, segmenting the design for different materials, and adjusting the laser settings to ensure each part of the earrings is crafted with accuracy. Below are the detailed steps for setting up the design.
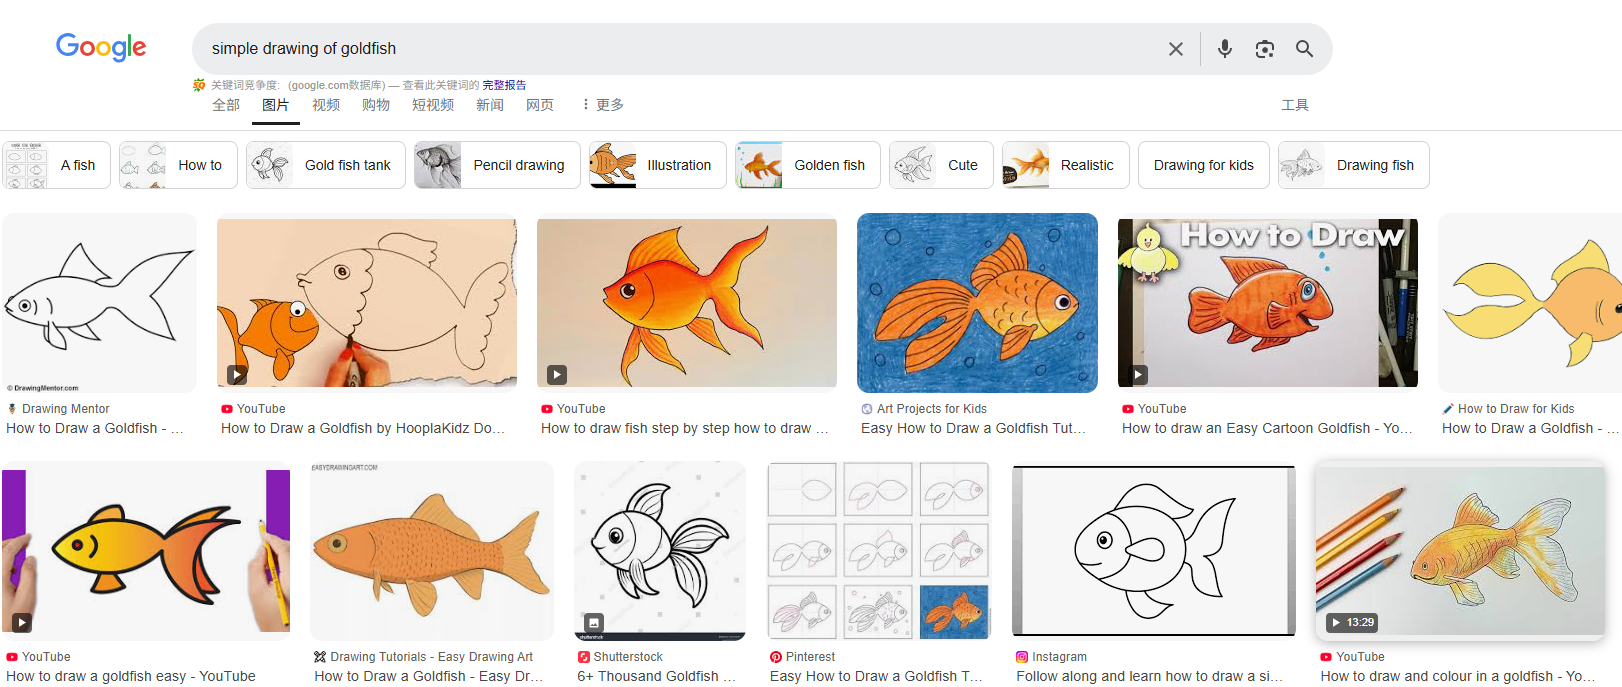
6.1. Image Preparation
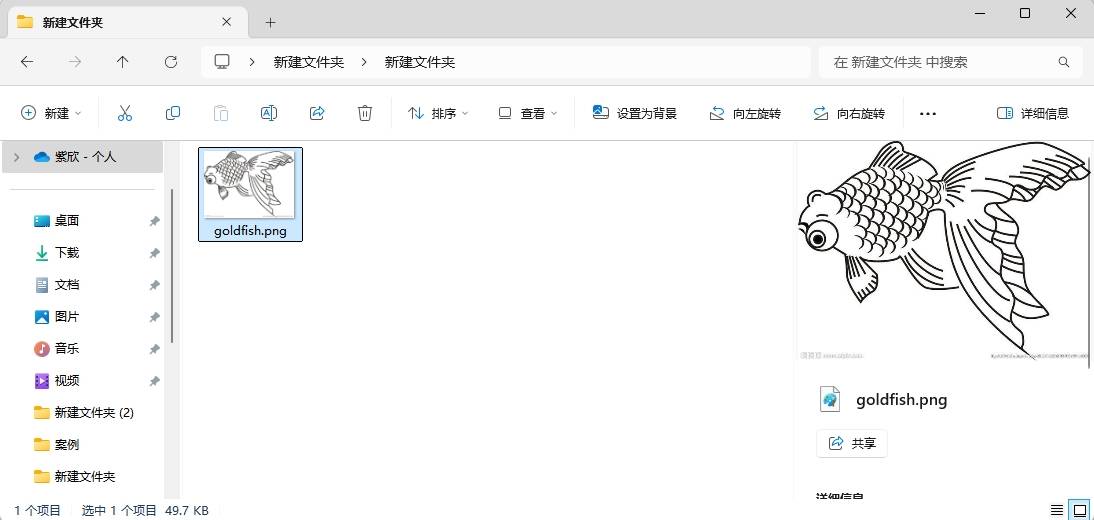
First, enter the keyword “simple drawing of goldfish” in Google and select a picture you like to save.
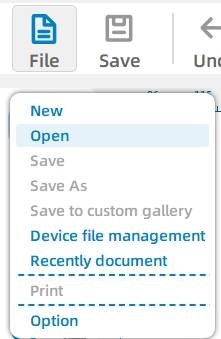
In the “Functional Area” at the top, click “File,” then “Open,” and double-click to open the saved goldfish image. See the image below for reference:
Second, click on “File” in the upper “Functional Area,” then click “Open” and double-click to open the saved gear image, as shown in the figure below:
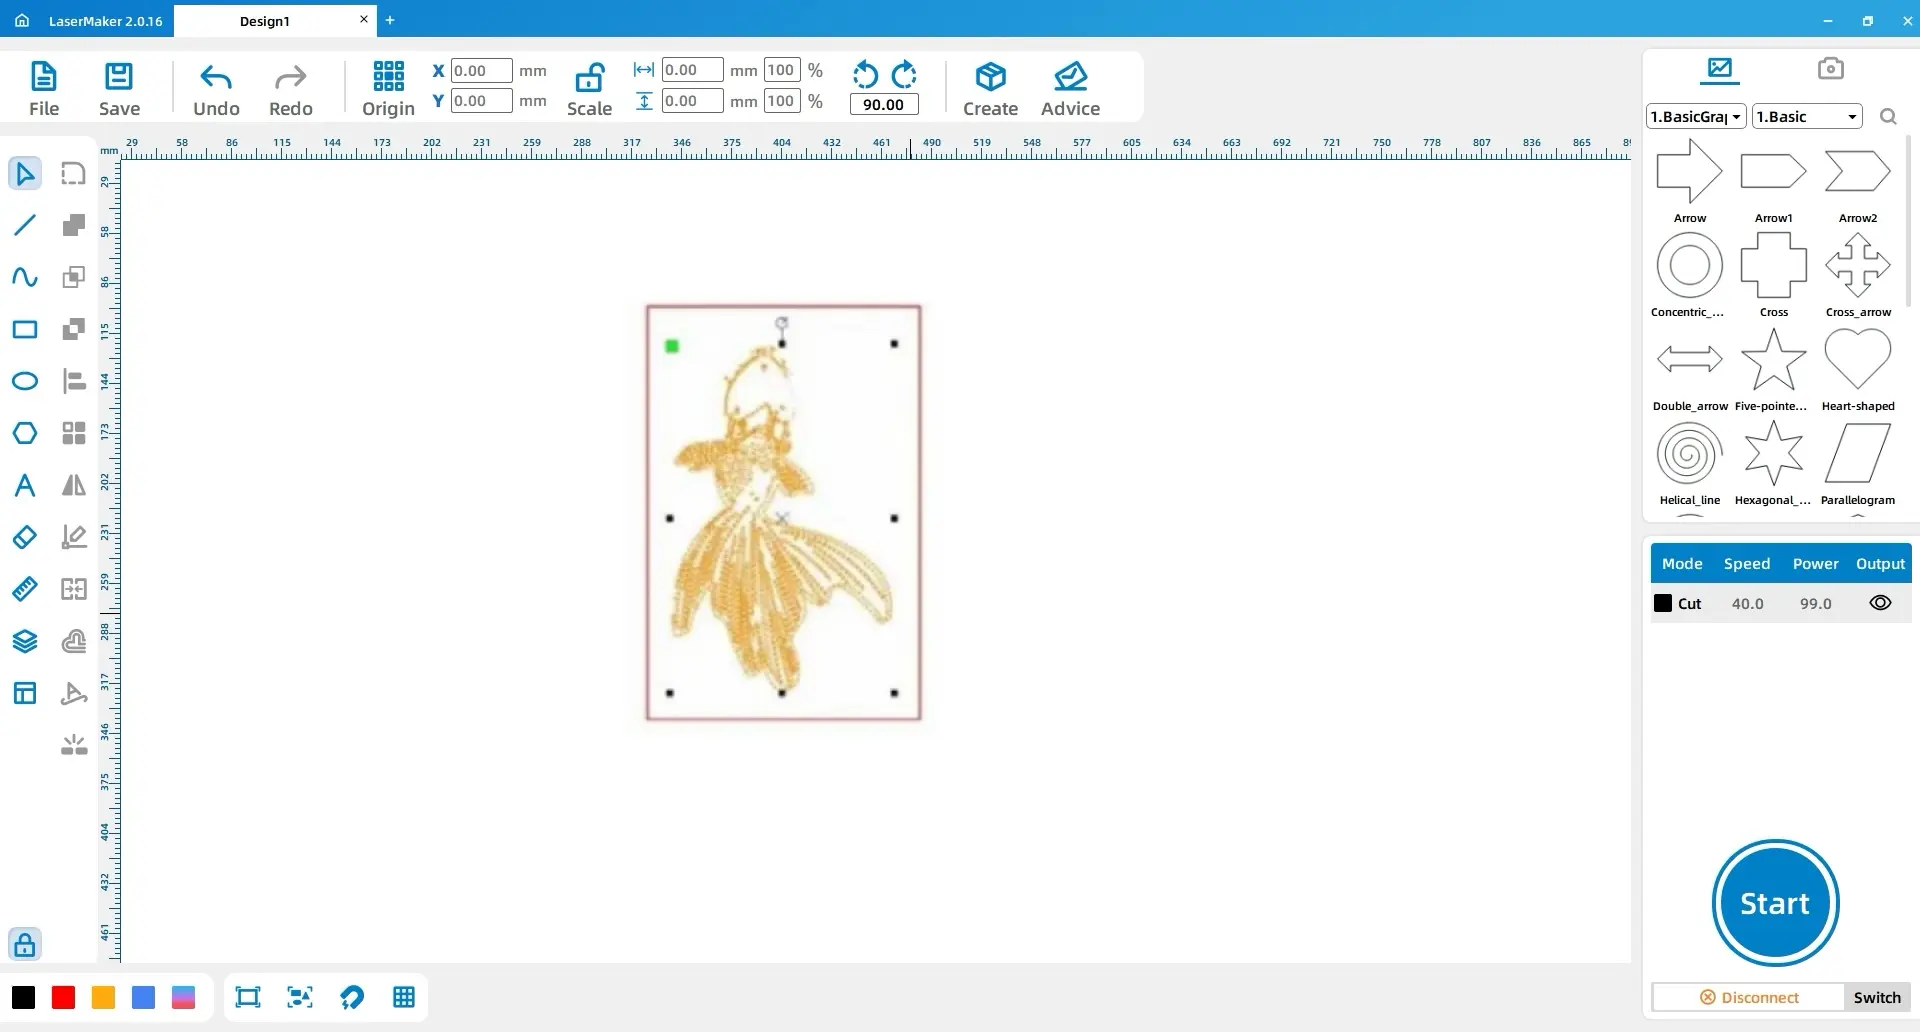
Third, using the left mouse button, click on the image and select “Extract Contour.” Delete any extra lines to obtain the outline of the goldfish, as shown in the figure below:
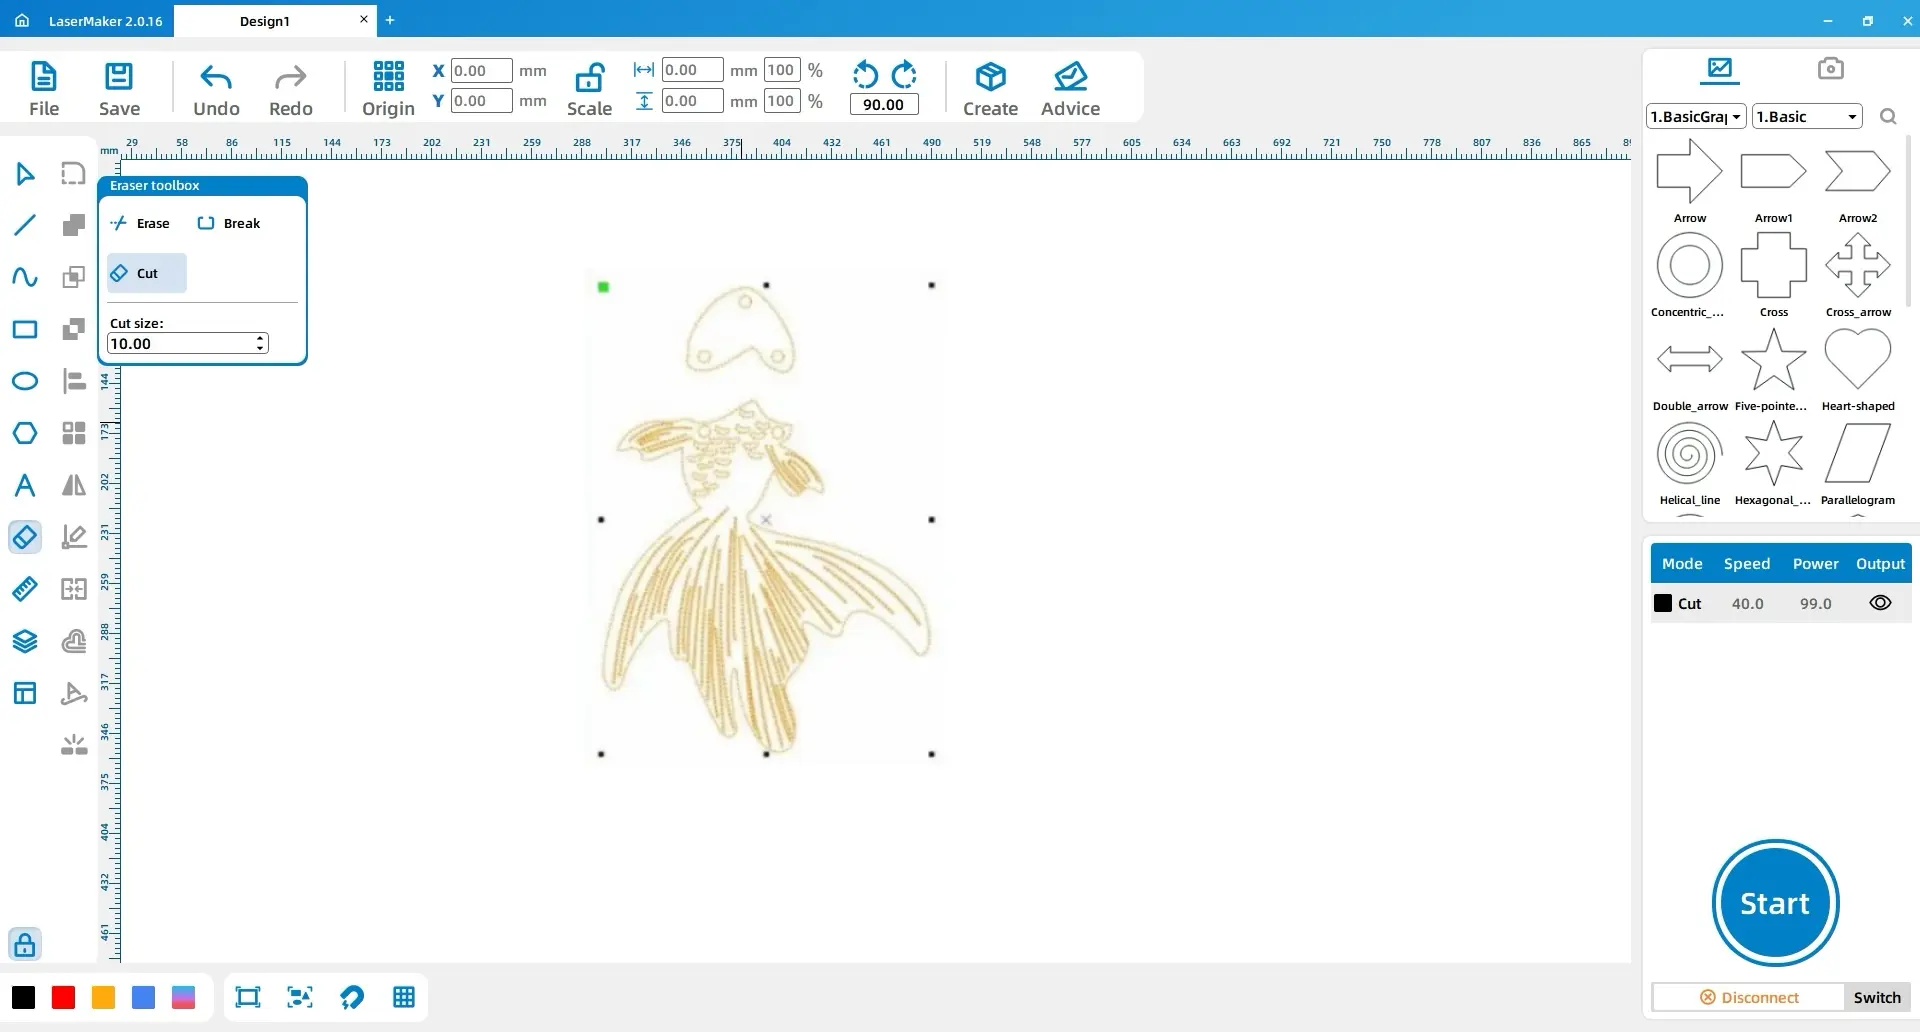
Next, select the pattern with the mouse, and from the “Drawing Toolbar” on the left, click on the “Eraser” tool. Choose “Break Line Segment” to divide the goldfish into two parts, as shown in the figure below:
Tips: Dividing the goldfish into two parts is necessary for two reasons: first, different materials will be used in the production process; second, adding a connecting ring in the middle will make the earrings appear more lively and agile when worn.
6.2. Process Setting
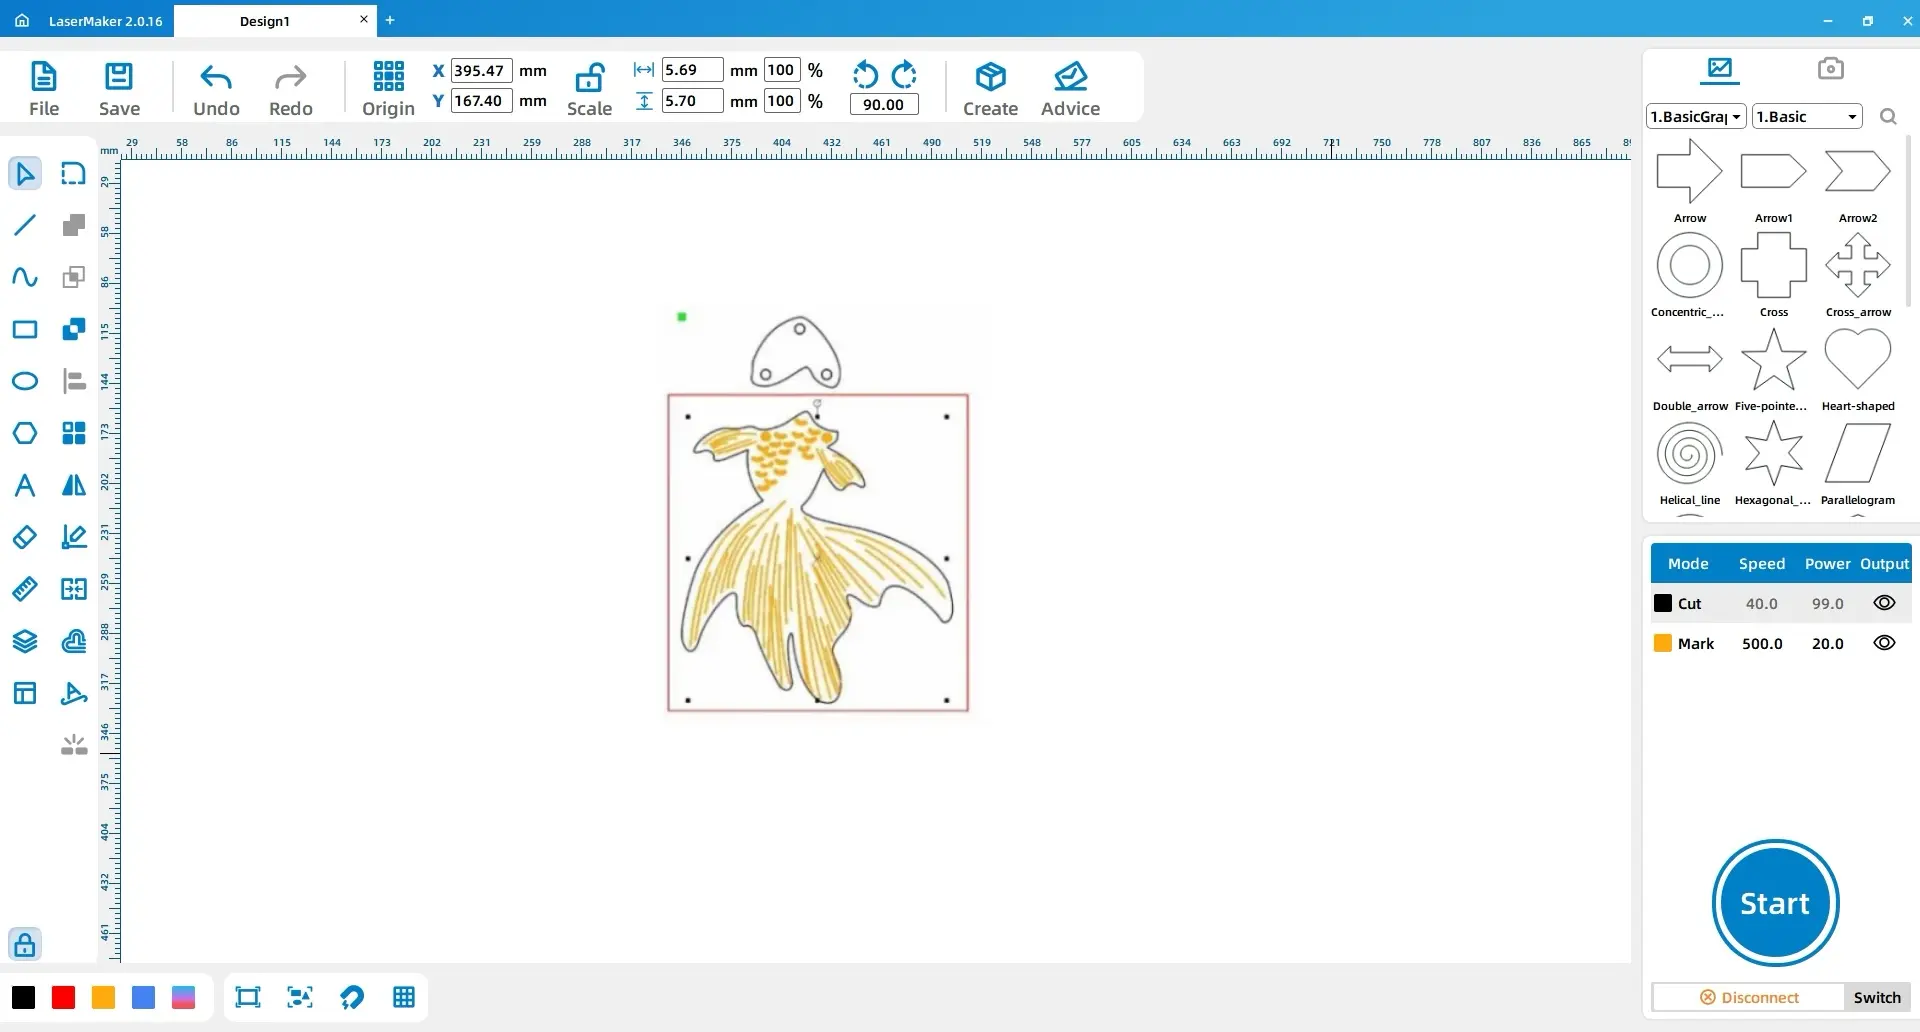
First, select the “fish scales” and “fish patterns” of the fish body, and left-click the layer panel on the lower left to change the contour layer to yellow. Then, select the “fish head” and left-click the layer panel to change the contour layer to red, as shown in the figure below:
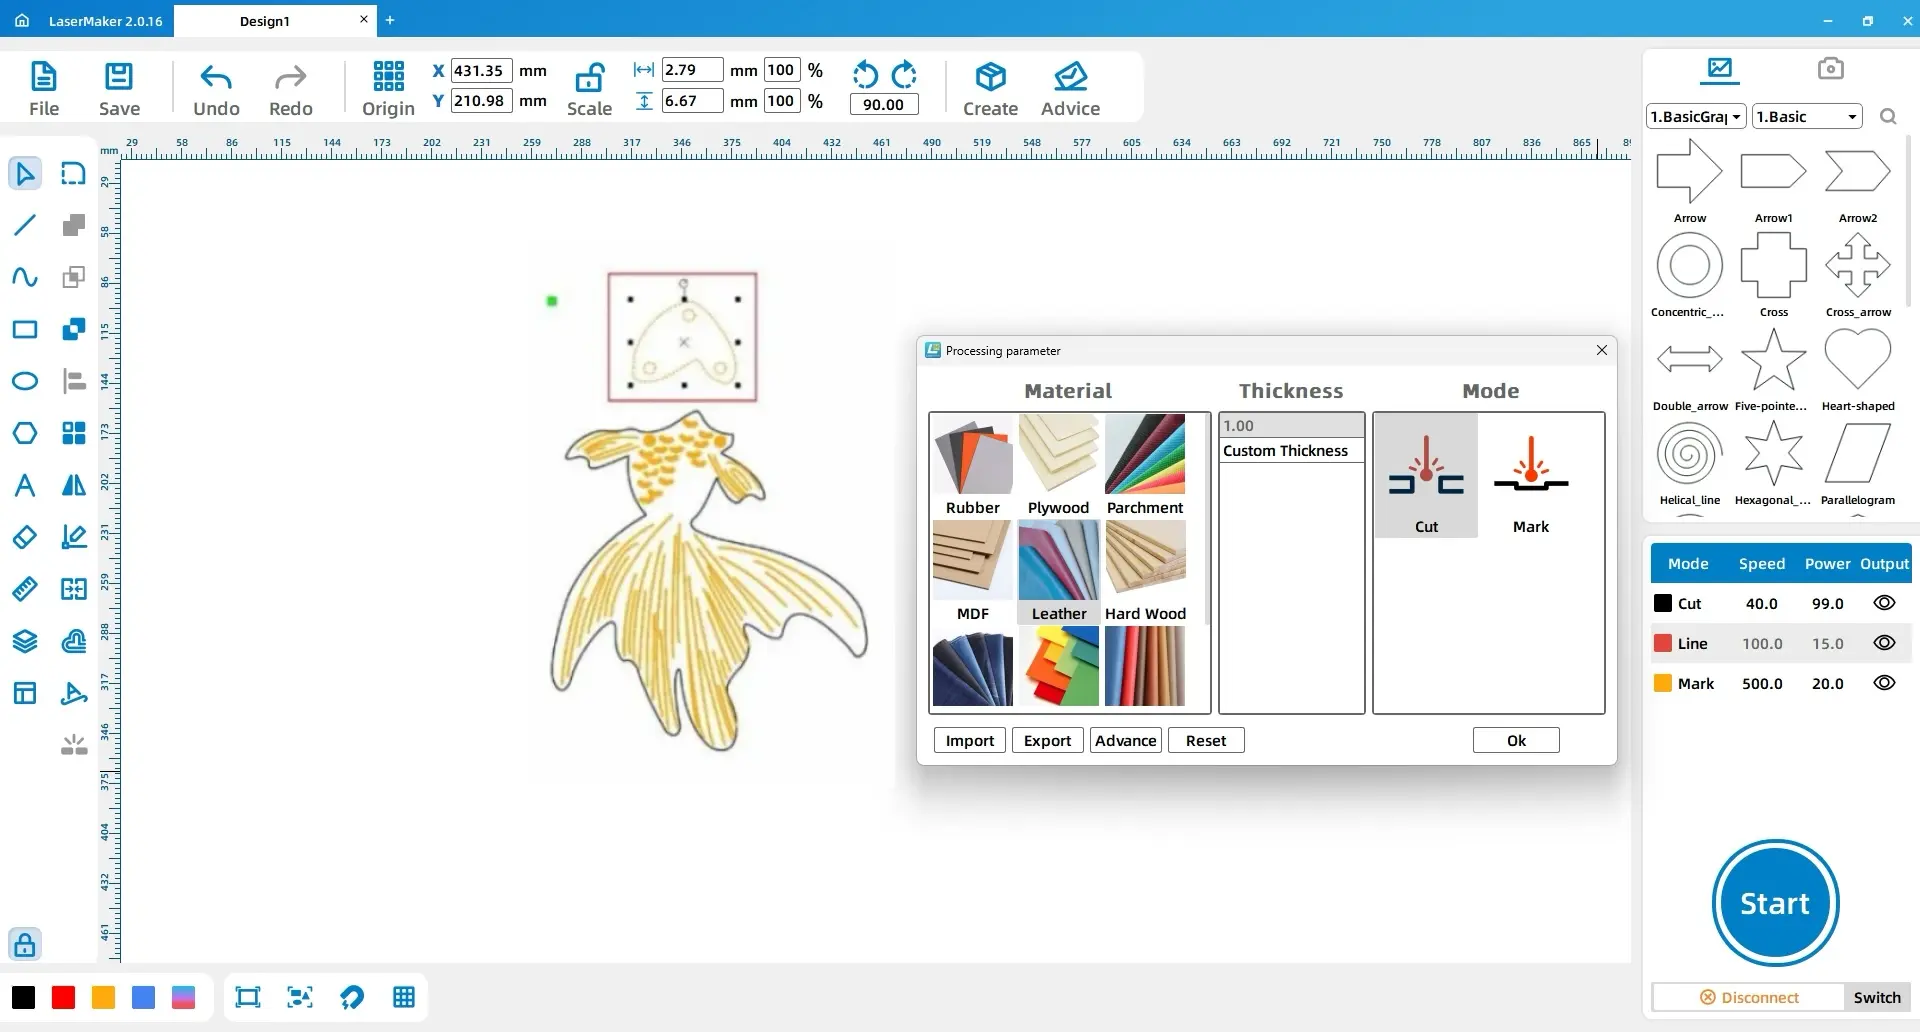
Next, adjust the layer order in the lower right corner, arranging them in the order of “shallow engraving, cutting.” Double-click the yellow layer with the left mouse button and set the material, thickness, and process to acrylic, 3mm, and shallow engraving, respectively.
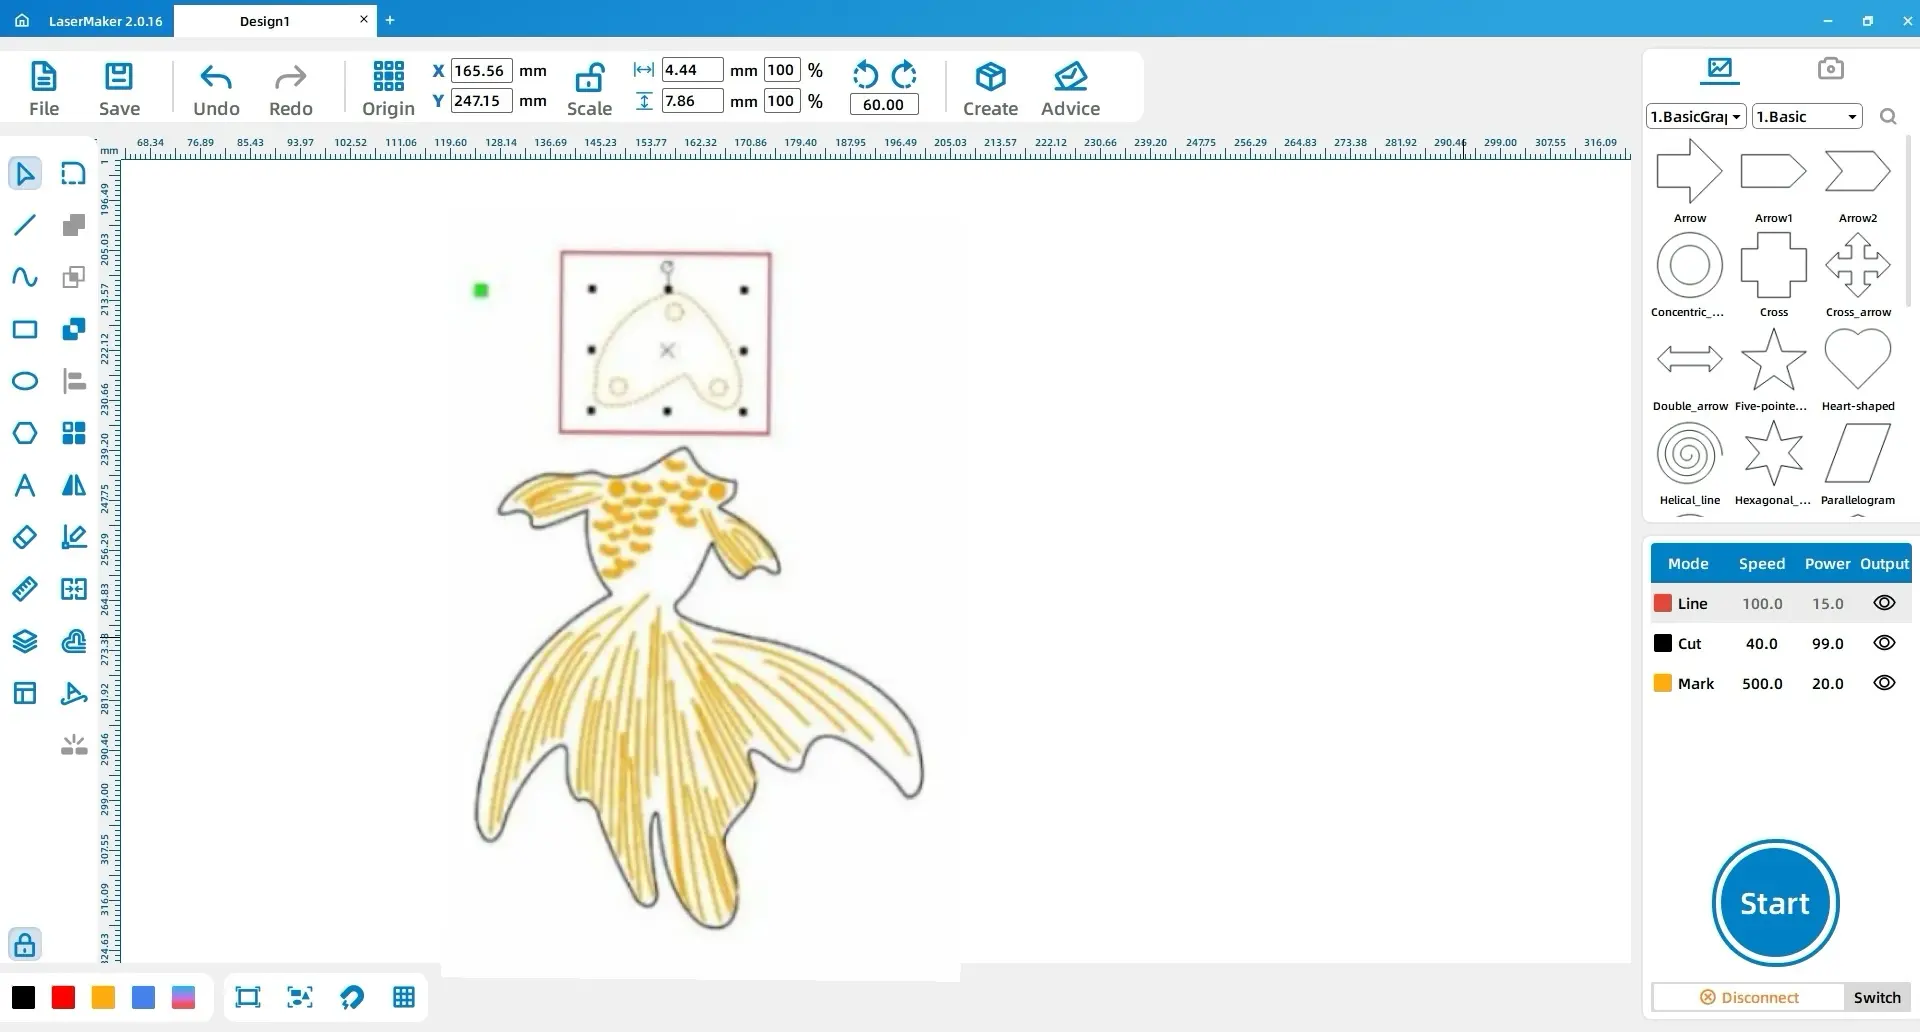
Third, double-click the black layer with the left mouse button and set the material, thickness, and process to acrylic, 3mm, and cutting, respectively.
Finally, double-click the red layer with the left mouse button and set the material, thickness, and process to artificial leather, 1mm, and cutting, respectively, as shown in the figure below:
6.3. Final Product Showcase
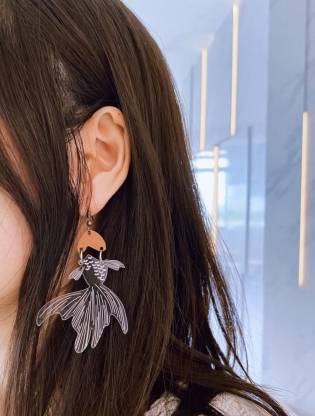
After completing the engraving and cutting processes, the goldfish earrings come to life with vibrant detail and layered textures. The use of different materials—acrylic for the body and artificial leather for the head—adds a rich contrast and a playful dynamic.
The split design allows the two parts of the goldfish to move slightly when worn, mimicking the fluidity of a swimming fish. This thoughtful combination of technique and creativity results in a unique piece of wearable art that is lightweight, eye-catching, and perfect for personalized fashion.
Conclusion
Laser engraving turns creative ideas into wearable works of art. By combining thoughtful design with the right materials and techniques, you can create earrings that are rich in detail and full of personality. Whether inspired by tradition, symbolism, or modern aesthetics, each piece becomes a reflection of personal style and craftsmanship.
FAQs About Laser Engraving for Customized Earrings
Q1. Can I use laser engraving to add shading effects to my earrings?
Laser engraving can create shading through depth and contrast—especially on wood, leather, or coated metals. For colored effects, you can combine engraving with paint filling or UV printing.
Q2. How long does it typically take to engrave a pair of custom earrings?
It usually takes 2–5 minutes for simple designs and up to 10–15 minutes for more detailed ones. The time depends on the material, engraving depth, and design complexity.
Q3. What are the best practices for maintaining and cleaning laser-engraved earrings?
Use a soft cloth for cleaning. Avoid harsh chemicals, especially on acrylic or wood. For leather and metal, mild cleaners work best. Always keep earrings dry and stored properly.
Q4. What are the common challenges when laser engraving curved or uneven earring surfaces?
Curved surfaces can cause focus and distortion issues. Solutions include using rotary attachments, adjusting the focus manually, or creating custom jigs to stabilize the piece during engraving.
Q5. Is it safe to wear laser engraved earrings on skin?
Yes, as long as you use skin-friendly materials like stainless steel, acrylic, or leather, and avoid toxic coatings or unsealed burnt surfaces, the engraved earrings are safe to wear.
.png "laser cutter Globle") International
International
 United States
 Brasil
 Canada
 Costa Rica
 Mexico
 Česká
Česká
 Romania
 Polska
 Ireland
 Italia
 Lietuva
 Россия
 Deutschland
 Britain
 Україна
 France
 Sverige
 Norway
 Denmark
 Ελλάδα
 Portugal
 한국
한국
 中国
中国
 中国香港
中国香港
 Israel
 中國臺灣
中國臺灣
 ジャパン
ジャパン India
India
 پاکستان
 پශ්රී ලංකා
 ประเทศไทย
 Australia
 New Zealand
 South Africa