A laser rotary typically refers to a rotary attachment for a laser engraving or cutting machine. This attachment allows the laser to engrave or cut cylindrical objects, such as bottles, glasses, and pens.
The laser rotary consists of a chuck or clamp to securely hold the cylindrical object in place, and a motorized rotary axis. This allows the laser to engrave or cut around the entire circumference of the object, creating a uniform design or pattern.
What is laser rotary
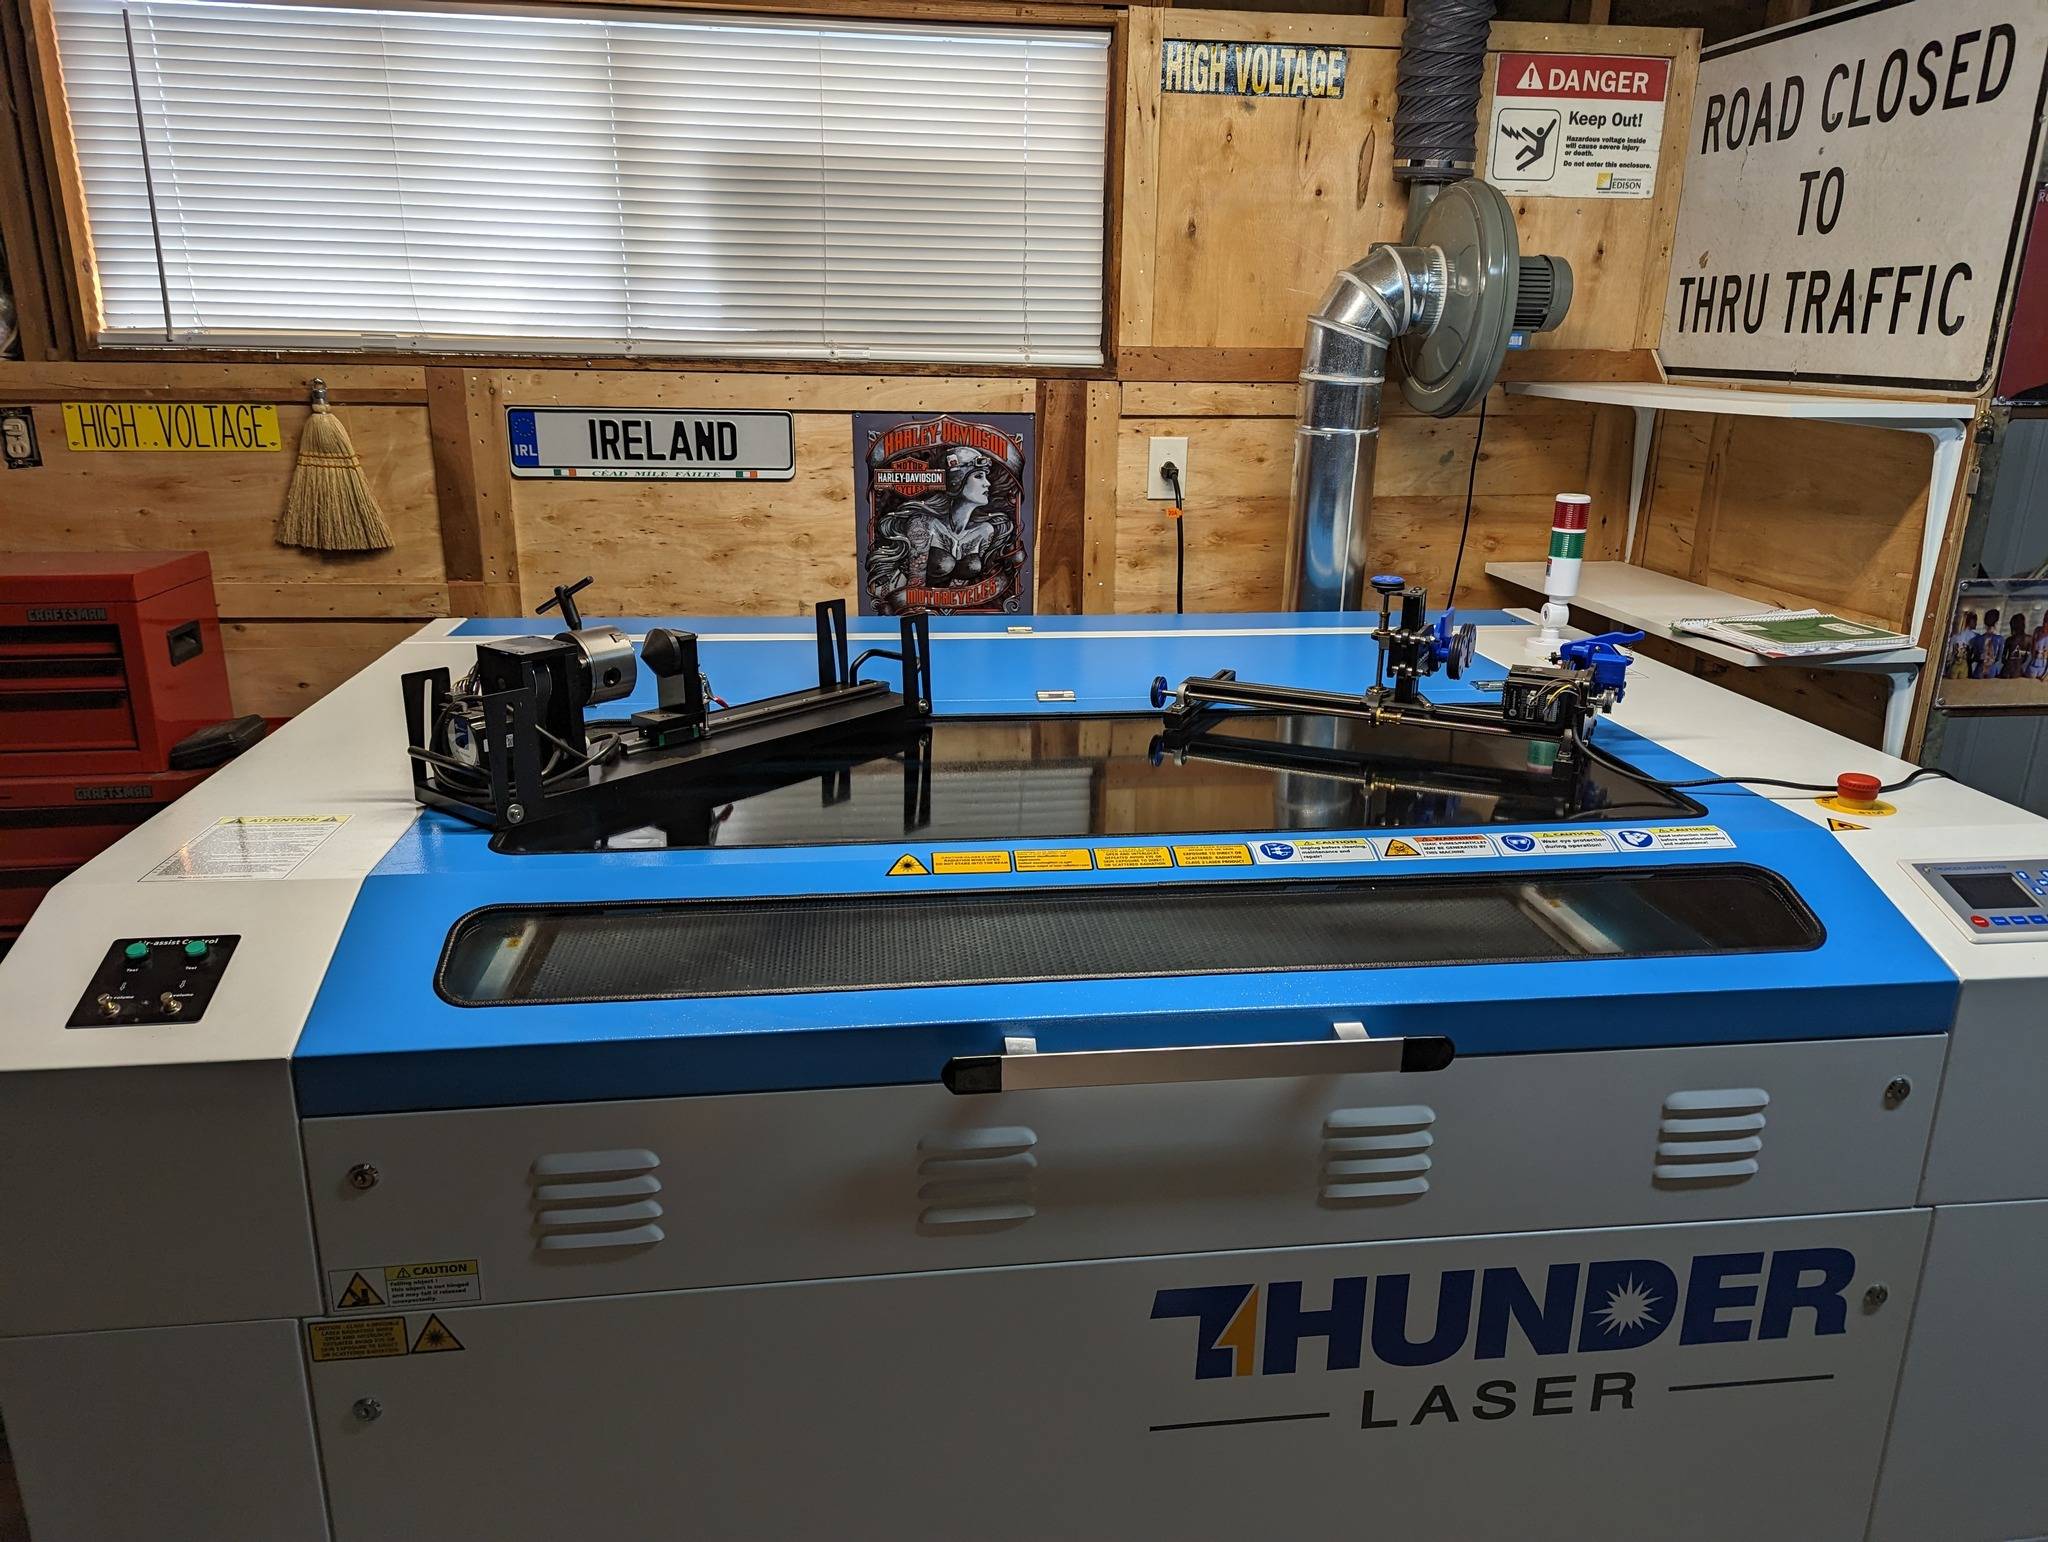
The laser rotary device usually refers to the rotary attachment of a laser engraving machine. This attachment allows the laser to engrave cylindrical objects such as bottles, cups, and baseball bats by rotating the object during engraving.
The laser rotary device is typically composed of a chuck or a roller to securely hold the cylindrical object in the correct position, and an electric motor to rotate the object. That allows the laser engraving machine to engrave three-dimensional shapes.
There are a variety of applications . They are personalizing glassware and bottles, creating promotional items, and adding serial numbers or other identification marks to cylindrical parts. The most commonly used application among our customers is engraving tumblers.
What are the different types of laser rotaries?
There are two types of rotary attachments for laser engraving machines.
1.Chuck rotary attachment

2. Roller rotary attachment

The main difference between them is the way they hold and rotate cylindrical objects during engraving.
The drum rotary attachment uses a set of rollers to hold and rotate cylindrical objects during engraving. You can drive rollers by a motor . And it can be adjusted to accommodate different sizes of cylindrical objects. The drum rotary attachment is typically used for engraving large, heavy cylindrical objects such as bottles or vases.
On the other hand, the chuck rotary attachment requires the use of a chuck to clamp the rotating object. And larger objects may not fit the chuck. Therefore, the chuck rotary attachment is used for engraving small to medium-sized cylindrical objects such as pens or wine glasses.
Generally, It is more suitable for larger and heavier cylindrical objects, while the chuck rotary attachment is more suitable for smaller and lighter cylindrical objects. For batch processing, the drum rotary attachment is more advantageous because it does not require the step of tightening the chuck. If you are unsure which type of chuck is suitable for you, you can contact Thunder Laser’s engineers for recommendations.
Using a laser rotary attachment has several advantages
Enhanced versatility: A laser rotary attachment allows laser engraving to work on cylindrical objects, increasing the range of personalized and manufactured products. This means that businesses can offer more products and services to their customers.
Improved precision: A rotary attachment helps ensure consistent focus on the curved surface of an object, resulting in more precise and professional engraving work.
Scalability: Laser rotary attachments can be used for large-scale production of high-precision and high-quality customized products. It is an ideal choice for businesses looking to expand their production scale.
In summary, a laser rotary attachment enables laser engraving machines to process cylindrical objects, expanding the range of materials.


Laser engraving glass 3 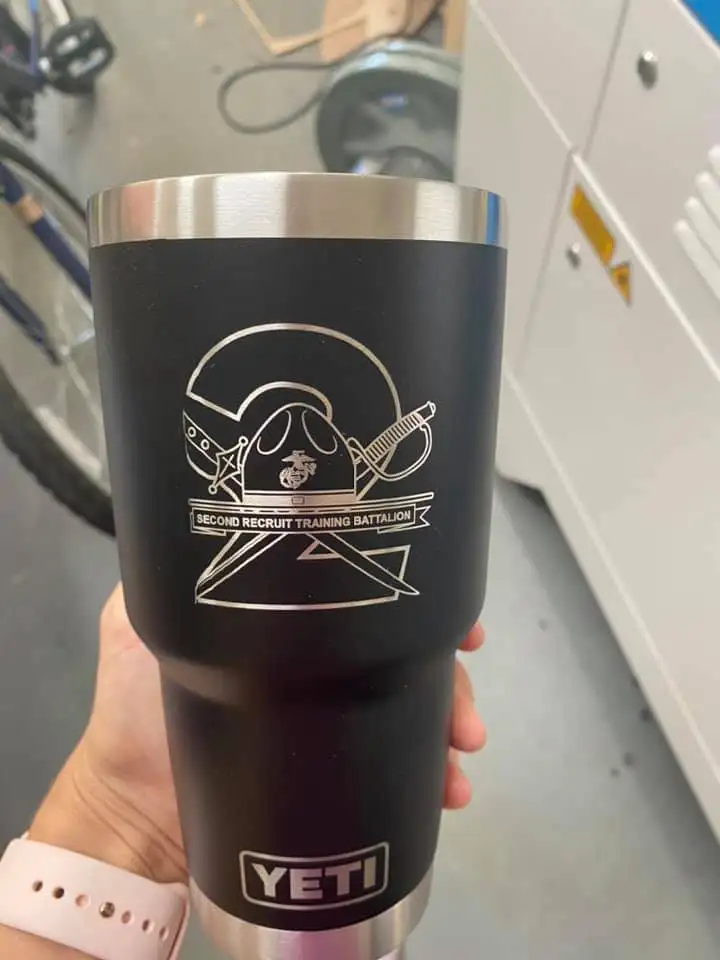

Laser engraving tumblers 1 1
How to use your laser rotary
To use a laser rotary attachment, the operator first places the cylindrical object into the chuck or rollers and secures it in place. Then, the operator will set up the laser engraving project in the software, including the size and position of the design.
Machine and software settings
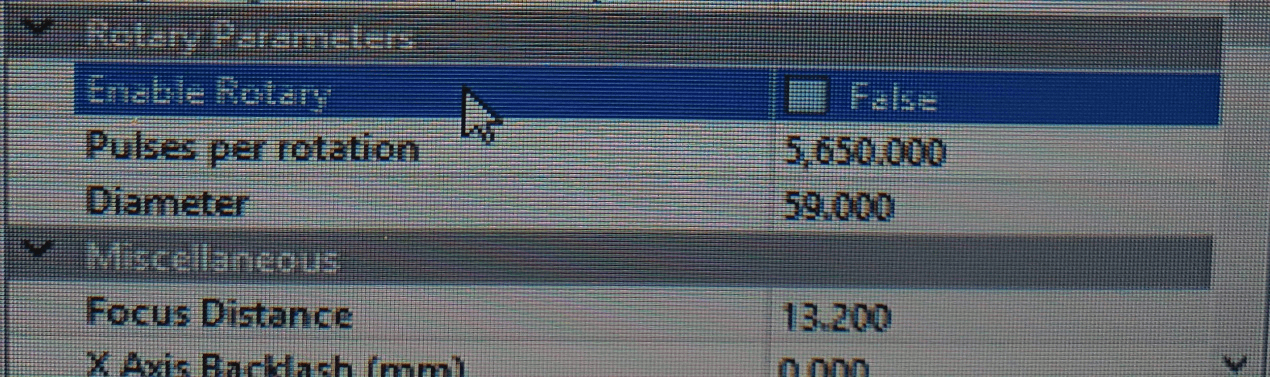
Note: These settings after testing with the described machine and are baseline numbers .
Ruida controller settings for the laser:
Thunder Laser: Set the circular pulse to = 4400 and the diameter to = 59mm. Using Lightburn, set as follows: On the main screen, click the “Edit” tab and scroll down to the “Machine Settings” tab. (Making sure the laser is on and connected to your PC) Scrolling down to “Rotary Setup” and fill in as shown below. Your numbers may vary depending on your machine. You can also use this screen to turn the rotary on or off or use the button below displayed on the Lightburn main screen. I found that if you use the Rotary Setup screen, it won’t work as they may ask for additional information.
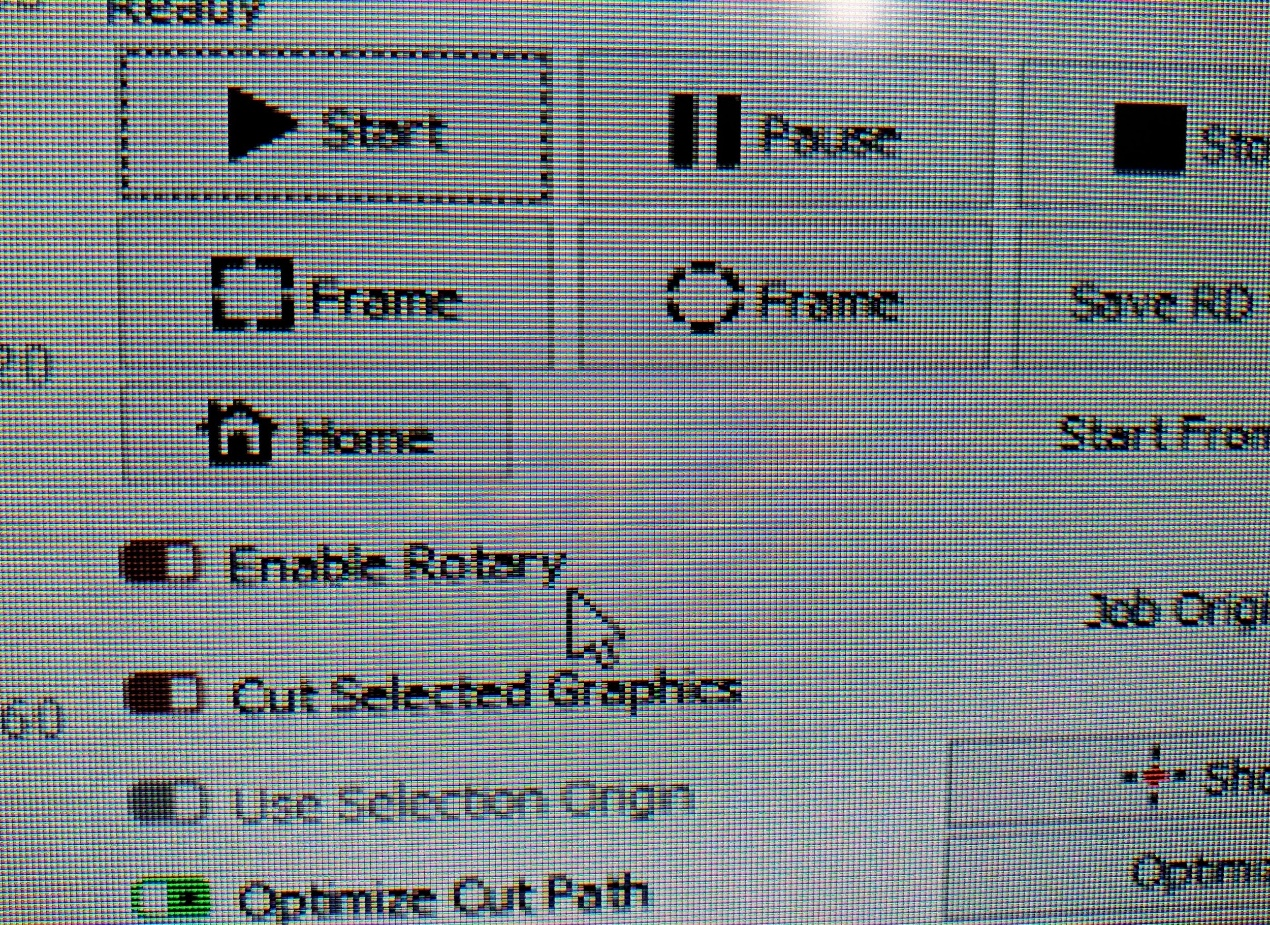
For Lightburn, if you don’t have the Rotary Enable switch on your main screen, do the following. Go to the Edit tab, scroll down to Settings. Look for the tab that displays Rotary Enable, and click green. Click OK, it will exit to the main screen and you should now have the Enable Rotary button under the laser tab on the right.
Testing before running the machine:
Create a 25.4 x 25.4 mm box and fine-tune the settings from there. If the image is stretched, reduce your circular pulses per revolution, and vice versa if it’s too small.
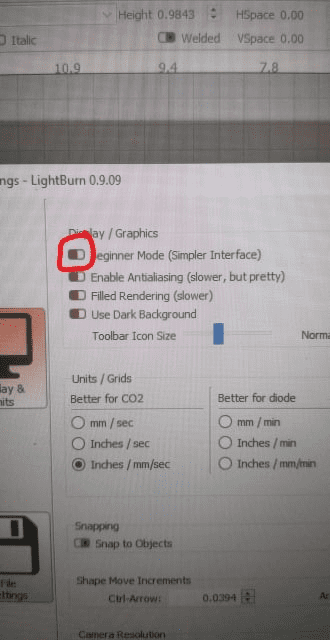
When attempting to enable the Rotary button on the main screen, follow the instructions above to search for Beginner Mode (circled below) and make sure it’s also disable.
Get the image from RDWorks and rotate it 90 degrees (the top of the image should face left)
Get the image from LightBurn and rotate it 270 degrees (the top of the image should face left)
Click Please: Detailed Chuck rotary video tutorial
How the Laser Rotary attachment works

.png "laser cutter Globle")


