Laser Cutting Tips for Better Results and Machine Care
 23-01-06
WHAT ARE YOU LOOKING FOR?
Search Across Products, Blog Posts, Support Content, And Resources.

Laser Cutting Tips for Better Results and Machine Care
23-01-06

Proper laser cutting results do not depend only on machine power or material type. They also start with consistent maintenance and a clear understanding of laser processing techniques. Whether you are a beginner or an experienced user, mastering basics such as lens care, air assist settings, platform selection, and focal distance can significantly improve laser cutting efficiency and precision.
This guide walks through essential laser machine maintenance routines and practical laser cutting tips to help you improve your processing workflow, achieve cleaner edges, and get more stable results from your machine.
Before starting any laser cutting task, make sure the key parts of your laser system are in good condition. Clean optics, a flat working surface, and the correct focal distance are essential for smooth and precise cutting. Neglecting these details can reduce cutting quality and may shorten the life of the machine.
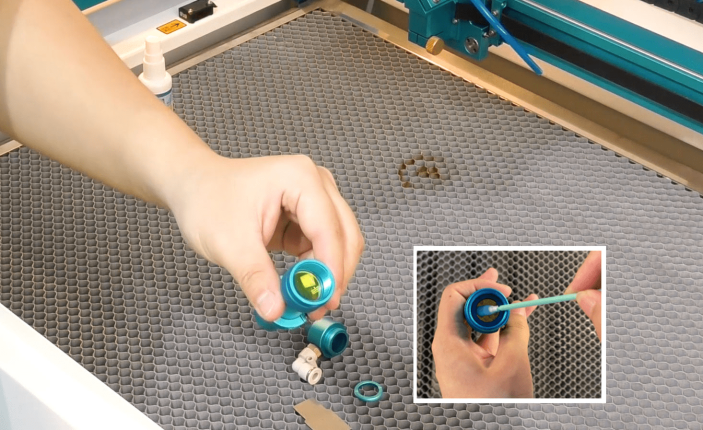
Before running the machine for the first time, remove, inspect, and clean the optics. During transportation, optics may become dirty or slightly tarnished because of environmental conditions. Every machine is tested before leaving the factory, but the optics can still become fouled before first use. In most cases, the optics are not damaged and only need proper cleaning before operation.
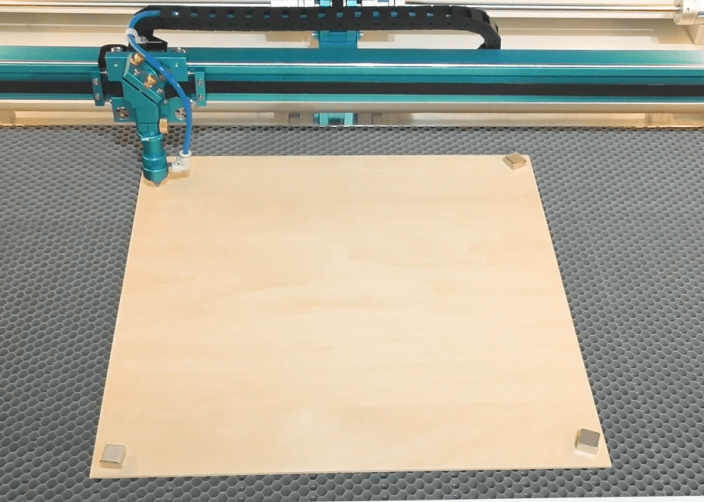
Flatness is often underestimated in laser processing. Many objects may look flat to the eye, but they may not be flat enough for precise cutting or engraving. In laser machining, material flatness is one of the key factors that affects cutting accuracy, focus consistency, and engraving quality.
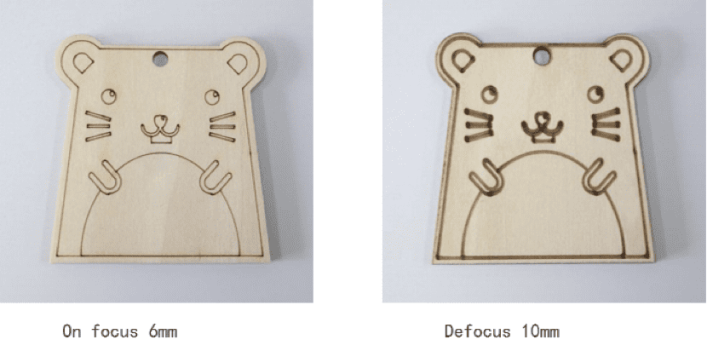
The smaller the laser spot is when the beam reaches the material, the better the cutting or engraving result can be. To get a good cut or engraving, you need to know where your laser focuses correctly. Taking a Thunder Laser laser cutter as an example, 6 mm is the most appropriate distance.
Beyond routine maintenance, different accessories and machine setups can also influence final processing results. Air pressure, worktable choice, motorized table adjustment, and rotary attachments all play important roles in refining the laser cutting and engraving process.
The following laser cutting tips can help you achieve cleaner edges, reduce material damage, improve engraving quality, and unlock more creative processing possibilities.
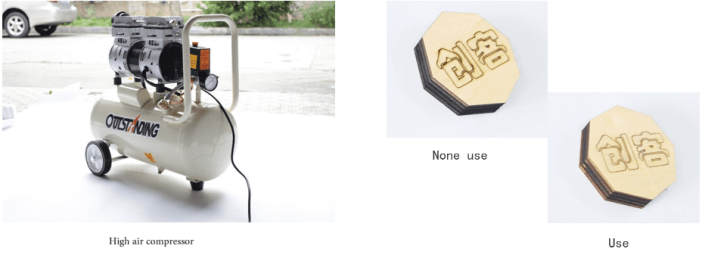
When laser cutting thick materials over 10 mm, using a high-pressure air compressor can help reduce material carbonization. Proper air assist removes smoke and debris from the cutting path and can improve edge quality during thick-material cutting.
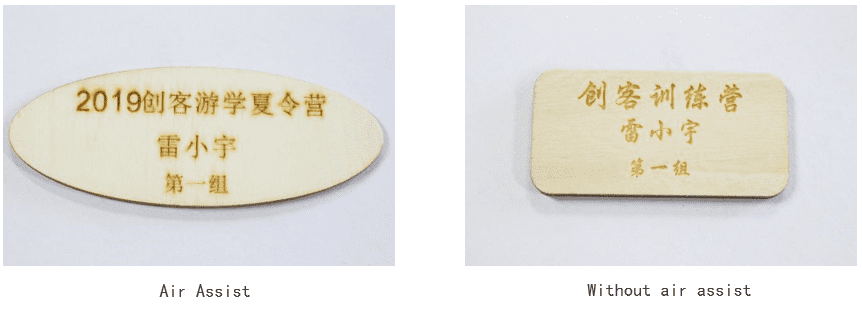
Different materials need different air assist strategies. Too much air or too little air can affect engraving quality, cutting edges, smoke control, and final appearance.
When engraving wood, setting no blowing can often produce the best engraving effect. It helps keep the surface of the workpiece clean and clear during the engraving process.
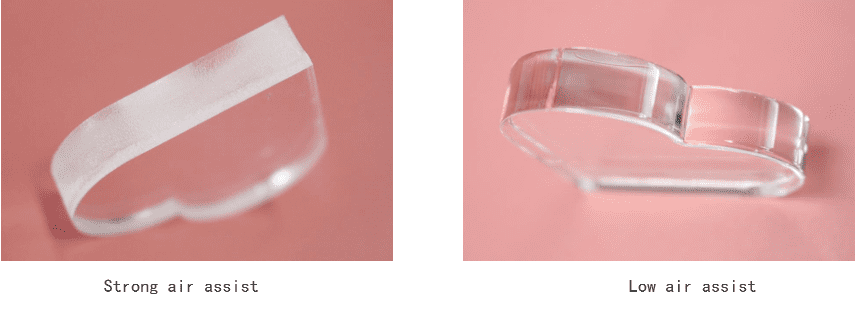
When cutting acrylic, too much air can cause a frosted edge because the airflow cools and solidifies the acrylic too quickly. For a smoother, flame-polished edge, use only enough air to reduce flame risk and expel the resulting gases.
For a weaker blowing effect, it is recommended to use the 6 mm nozzle in the toolbox. By slowing down the cutting speed and reducing air pressure, you can achieve smoother acrylic cutting results.
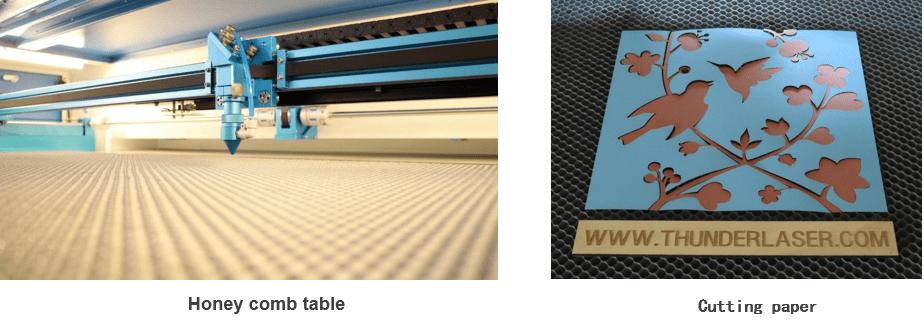
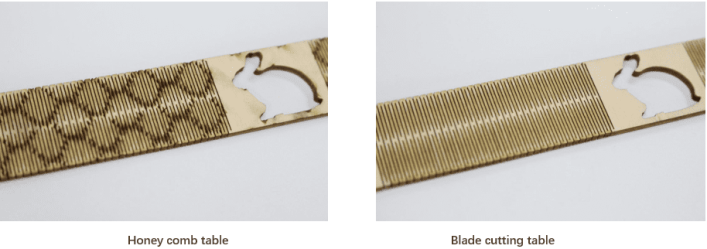
Before processing, keep the honeycomb platform clean and remove fine waste left on the surface. A vacuum cleaner or similar tool can make platform cleaning more convenient.
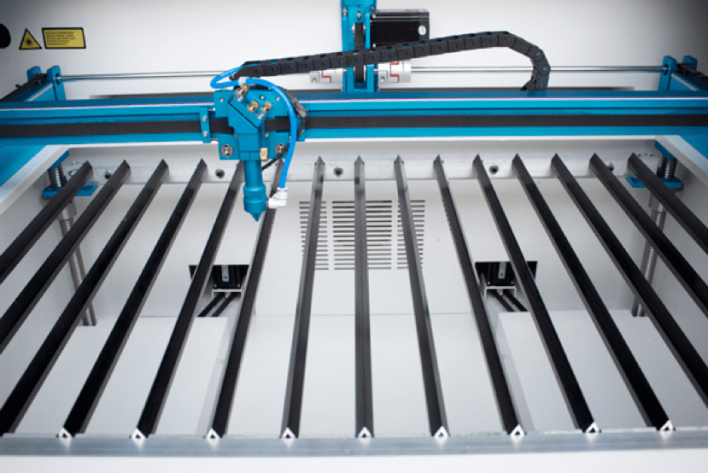
The blade platform is located under the honeycomb platform. After removing the honeycomb platform, you can use the blade platform directly. The blade density can be adjusted according to the size of the workpiece. During processing, the workpiece is suspended over a larger area, which reduces the influence of laser reflection and can improve cutting results.
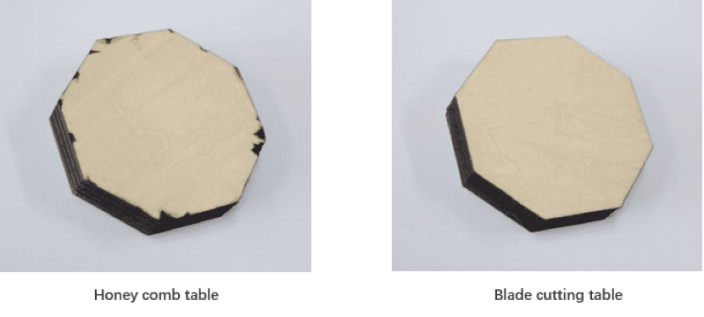
When processing thick materials such as 10 mm wood, high power and slower processing are often required. Using a honeycomb platform may cause serious reflection and yellowing on the bottom of the workpiece. A blade cutting table can reduce reflection and help improve the bottom surface result.
When processing bending structures, many dense line segments are usually involved. Processing on the blade cutting table can reduce reflection on the back of the material and produce a better effect.
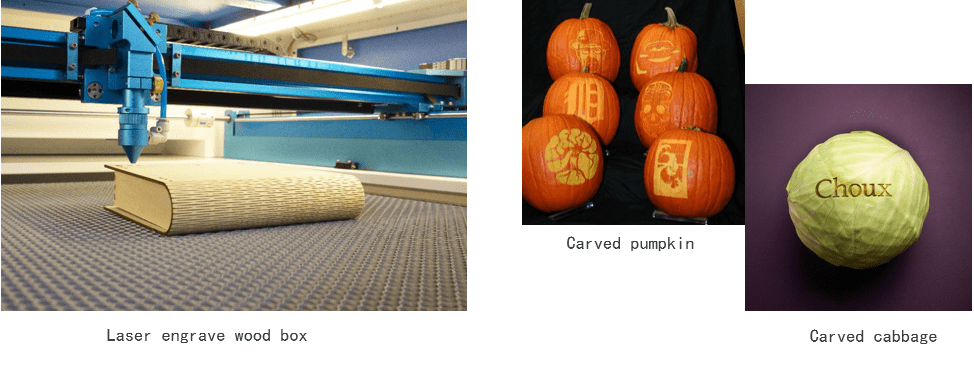
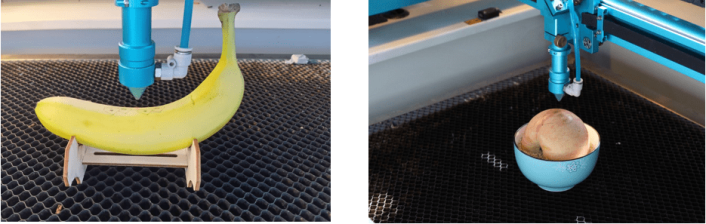
When processing large wooden boxes or other large objects, the motorized table can be used to adjust the workpiece to the proper processing position. With a fixed mold, users can also process larger vegetables and fruits, such as big watermelons and pumpkins, for more creative engraving projects.
By lowering the motorized table and setting a larger focal length, the larger focus distance and thicker light spot can deepen and thicken the tracing effect, creating a different processing style.
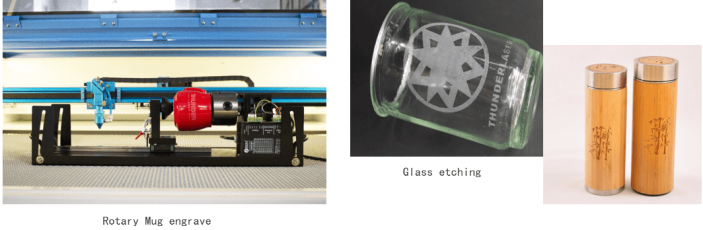
Rotary tools are used for cylindrical objects such as glasses, cups, and bamboo tubes. Because the rotary attachment has a certain height, it should be used together with the motorized table. Before processing, lower the processing platform to a suitable height.
When processing objects that are difficult to fix, make a fixture or mold according to the shape of the object. A stable fixture keeps the object in place and makes the engraving process easier and more accurate.
From routine maintenance to airflow control, worktable selection, motorized table adjustment, and rotary use, every detail can affect laser cutting and engraving performance. Consistent maintenance helps improve accuracy, create cleaner cuts, and extend the life of your laser machine.
By inspecting optics, keeping materials flat, setting the correct focal length, using air assist properly, and choosing the right worktable setup, users can achieve more stable and professional laser processing results.
Need Help Improving Your Laser Cutting Results?
Contact Thunder Laser for guidance on laser cutting setup, maintenance, air assist, worktable selection, and machine accessories.
Contact UsTalk To Our Experts Now!
Please leave your contact information so that we can serve you better.
LASER CUTTING TIPS FAQS
TAKE THE NEXT STEP WITH THUNDER LASER

 Stable & Consistent MachinesUnlimited ApplicationRobust After-sales SupportFactory Direct Supply