


How to Laser Engrave Stainless Steel: Tools, Settings & Creative Ideas
 2026-09-26
WHAT ARE YOU LOOKING FOR?
Search Across Products, Blog Posts, Support Content, And Resources.

How to Laser Engrave Stainless Steel: Tools, Settings & Creative Ideas
2026-09-26

Stainless steel is used everywhere from jewelry and drinkware to tools, medical components, industrial identification plates, and everyday products. It can also produce very different laser results depending on the laser source and parameters you use: a smooth black mark, a bright white mark, visible engraving depth, or even controlled color effects.
The challenge is that there is no single “stainless steel engraving setting” that works for every job. Stainless steel grade, surface finish, laser source, focus, frequency, hatch density, number of passes, and the result you want all affect the process.
This guide explains how to laser engrave stainless steel step by step, how marking differs from true engraving, which laser type to choose, and how to start testing settings for black, white, deep, and color results. You can also explore Thunder Laser's broader metal laser engraving and marking guide for other metal applications.
Quick Answer: Yes, stainless steel can be directly laser marked and engraved. A Q-switched fiber laser is a practical choice for general black and white marking, logos, serial numbers, QR codes, and everyday metal customization. A MOPA fiber laser provides more control when you need color marking, advanced black effects, or demanding engraving. CO₂ lasers are generally better suited to coated stainless steel or bare stainless steel used with a compatible metal-marking compound rather than direct bare-metal engraving.
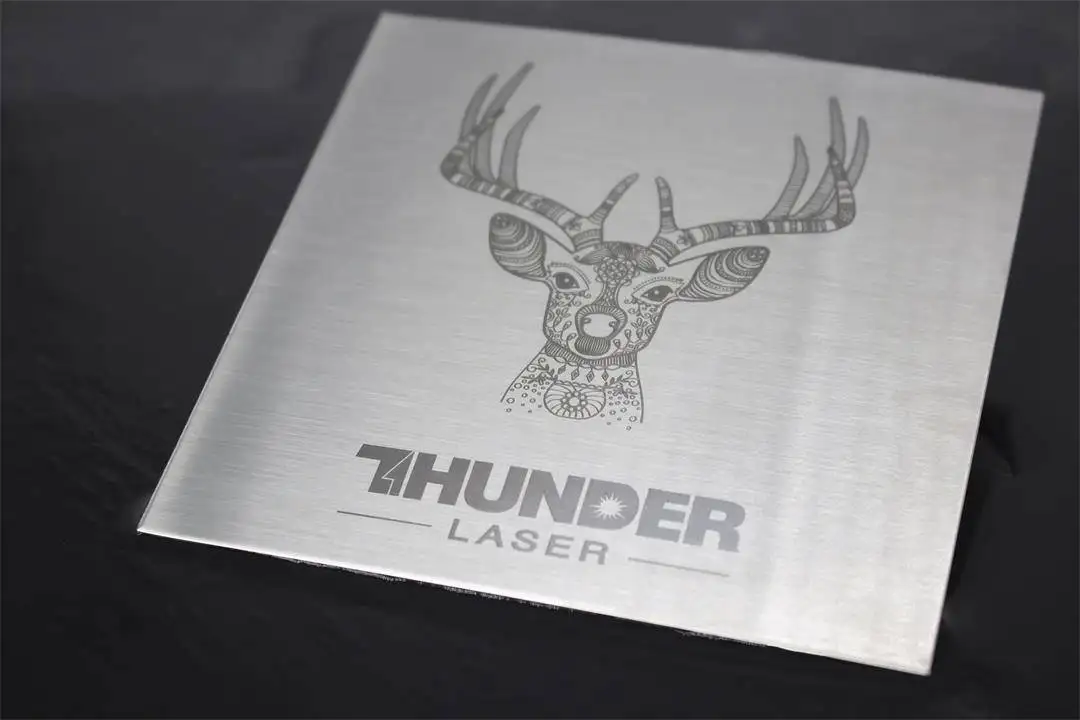
Stainless steel can produce permanent black, white, engraved, and decorative laser-marked results.
People often use “laser engraving” as a general term for almost any permanent laser effect on stainless steel. Technically, however, several different processes may be involved. Understanding the difference matters because each result requires a different balance of laser energy, speed, frequency, pulse behavior, and number of passes.
| Process | What Happens | Typical Result | Typical Use |
|---|---|---|---|
| Laser Marking | Creates a permanent surface change with little or controlled material removal. | Black, dark, white, or high-contrast mark | Logos, serial numbers, QR codes, identification |
| Annealing | Uses controlled heat to change the oxide layer with minimal material removal. | Smooth dark surface mark | Identification and decorative marking |
| Laser Engraving | Removes metal from the surface through repeated laser exposure. | Visible and measurable depth | Tools, molds, durable logos, industrial parts |
| Color Marking | Controls heat and oxide-film formation on compatible stainless steel. | Blue, gold, brown, purple and other colors | Premium personalization and decorative metal products |
Stainless steel laser processing can range from surface marking to material-removing deep engraving.
Stainless steel is corrosion resistant because chromium at the surface forms a protective oxide layer. Its hardness, reflective surface, surface finish, and response to heat mean that poor parameter control can produce weak contrast, unwanted discoloration, rough edges, excessive heat input, or inconsistent results.
For bare stainless steel, fiber laser technology is normally the most practical starting point. The 1064 nm wavelength used by common fiber systems interacts effectively with metals and supports fast, permanent marking without the consumable tools required by mechanical engraving. If you want a deeper explanation of why wavelength matters, see our laser wavelength guide.
A Q-switched fiber laser is well suited to general stainless steel work such as logos, text, serial numbers, QR codes, barcodes, identification marks, decorative graphics, and many black or white marking applications.
For users who mainly need reliable day-to-day metal marking rather than highly specialized surface effects, it offers a practical balance between processing capability, speed, and cost.
A MOPA fiber laser provides more control over pulse width and frequency. That wider processing window is valuable when the result depends strongly on heat input or pulse behavior, including color marking on stainless steel, high-contrast black marking, premium surface effects, and demanding engraving applications.
MOPA should not be viewed only as a “color marking laser.” Its main advantage is greater control over how energy is delivered to the surface, which expands the range of effects that can be optimized.
A typical CO₂ engraving system is not the first choice for directly engraving bare stainless steel. It can, however, remove coatings from coated stainless steel or create a permanent surface mark when used with a compatible metal-marking spray or compound.
This distinction matters for products such as coated tumblers. In many tumbler projects, the laser is removing the colored coating to reveal the metal below rather than directly engraving the stainless steel itself. For a broader comparison, see our laser engraving and marking metal guide.
UV lasers can mark selected metals, including stainless steel under suitable conditions, but they are not normally the default choice when stainless steel is the main workload. Their greatest advantage is low-heat, fine marking on materials such as glass, plastics, ceramics, electronics, and other heat-sensitive substrates.
| Laser Type | Bare Stainless Steel | Best Fit |
|---|---|---|
| Q-Switched Fiber | Yes | General black/white marking, identification, logos and customization |
| MOPA Fiber | Yes | Color, advanced black marking, greater process control and demanding engraving |
| CO₂ | Not normally directly | Coating removal or marking compound applications |
| UV | Possible on selected jobs | Fine, low-heat marking when the broader material mix justifies UV |
Fiber and MOPA lasers are generally the most practical choices for direct stainless steel marking and engraving.
Good stainless steel engraving starts before the laser fires. Instead of choosing one setting and hoping it works, first identify the material and desired result, then build a controlled test around those requirements.
Confirm the stainless steel grade when possible and inspect the surface. Brushed, polished, mirror-polished, coated, bead-blasted, and untreated surfaces can react differently even when the underlying alloy is similar.
This is one reason a setting that works perfectly on one stainless steel tag may produce a noticeably different result on another product.
Before changing power or speed, define the target:
These are not interchangeable processes. A parameter set optimized for deep material removal is unlikely to be the best setting for a smooth black surface mark.
Oil, fingerprints, dust, polishing residue, and other contamination can change how the surface absorbs laser energy. Clean the processing area using a suitable method for the part and allow it to dry completely before testing.
Import the artwork into your laser software, set the final dimensions, and confirm that fine text or codes are large enough for the required readability. Position the product securely so it cannot shift during processing.
When marking QR codes, Data Matrix codes, or barcodes, always verify the finished mark using the scanner or inspection method that will be used in the real application.
Focus directly affects energy density and detail. An incorrect focal position can make fine lines less sharp, reduce contrast, widen the effective spot, and make parameter comparisons unreliable.
For curved products such as bowls or cylindrical drinkware, consider whether the full design stays within an acceptable focal range. A rotary setup may be preferable when the marking area wraps significantly around the product.
Instead of adjusting several variables randomly, use a controlled test matrix. Keep most variables constant and change one or two parameters at a time. Depending on the laser source, the most important variables can include:
For more tested starting points, use Thunder Laser's fiber and MOPA laser settings library. Treat every setting as a starting reference rather than a universal recipe.
Once the test result matches your target, run the final design using the same surface preparation, focus, and parameters. After processing, inspect contrast, edge quality, surface texture, depth, and consistency before repeating the job in production.
If you want to see a complete real-world workflow, the 304 stainless steel photo marking tutorial shows material preparation, file setup, focusing, framing, marking, and post-processing in sequence.
Laser settings should always be matched to the laser source, material surface, lens, and desired effect. The settings below are Thunder Laser tested starting references for current Aurora fiber and MOPA configurations. They are not universal values, so test on scrap or a non-critical area before processing the final product.
| Machine | Material | Result | Speed | Power | Pulse Width | Frequency | LPI / DPI | Passes |
|---|---|---|---|---|---|---|---|---|
| Aurora Lite 50W | 304 Stainless Steel | Black | 200 mm/s | 10% | — | 100 kHz | 1270 | 10 |
| Aurora MOPA 100W | 304 Stainless Steel | Black | 500 mm/s | 20% | 52 ns | 520 kHz | 5080 | 2 |
| Aurora MOPA 100W | Mirror Stainless Steel | Black | 350 mm/s | 26% | 32 ns | 640 kHz | 5080 | 2 |
| Aurora MOPA 100W | Mirror Stainless Steel | White | 1000 mm/s | 13% | 150 ns | 100 kHz | 1270 | 2 |
Thunder Laser tested stainless steel settings are starting references; actual results vary with material grade, finish, lens, focus, and desired effect.
A dark stainless steel mark does not simply require maximum power. The goal is to control how much energy reaches the surface and how that energy is distributed over time. Speed, frequency, hatch density, focus, and number of passes can all change the final black level.
When a black mark looks brown, blue, rough, or inconsistent, adding more power may make the result worse. Run a matrix around the closest successful setting instead.
White or bright marking usually relies on a different surface interaction than black marking. A relatively fast process can create a light-reflective or frosted appearance rather than a dark oxide effect. The exact appearance depends heavily on the original surface finish, so brushed and mirror-polished stainless steel should be tested separately.
Deep engraving physically removes stainless steel rather than only changing its appearance. It normally requires repeated passes and more total processing energy. Greater depth does not mean every parameter should simply be maximized.
Watch for debris, excessive heat, rough edges, lost detail, and changes in the focal relationship as depth increases. For deeper jobs, removing debris between stages and checking focus can help maintain cleaner detail.
Stainless steel color marking uses precisely controlled laser energy to create thin oxide layers on the surface. Changes in those layers can produce different visible colors under reflected light.
MOPA fiber lasers are particularly useful here because pulse width, frequency, speed, and power can be adjusted over a wider processing window. Small parameter changes may produce significant changes in hue, saturation, or consistency, so color work should always begin with a test grid on the actual material.
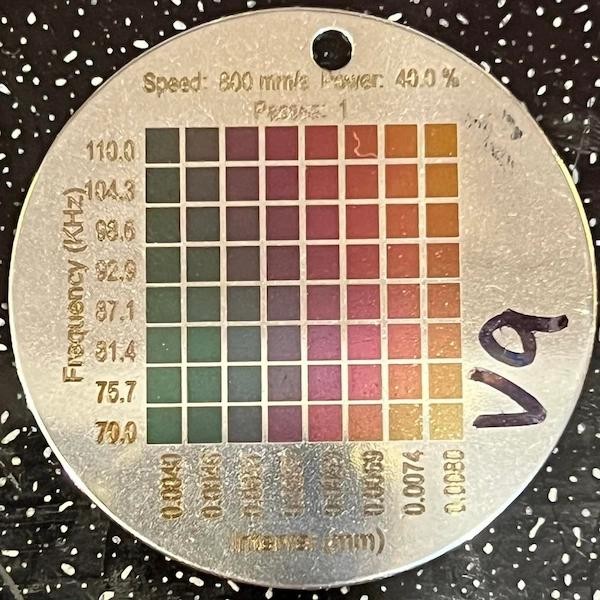
Stainless steel color marking depends on precise control of heat input and laser parameters.
Coated stainless steel is a different application from bare-metal engraving. On powder-coated tumblers, painted products, or other coated parts, the laser may remove or alter the coating to reveal the stainless steel underneath.
Because the coating determines much of the laser response, settings should be tested for the coating itself rather than copied from bare stainless steel parameters.
Wattage alone does not determine whether a stainless steel result will be good. For general metal marking, a professional 50W Q-switched fiber system can cover a wide range of everyday stainless steel applications. Higher-power MOPA systems expand the processing window for advanced effects, deeper material removal, and production tasks where stronger processing capability matters.
The correct choice depends on the result you need, not simply on choosing the highest available wattage.
Two stainless steel products can require different settings even when the design is identical. Before copying a parameter from another job, check the variables that can change the result.
Practical rule: Save successful parameter combinations together with the exact material grade, surface finish, lens, machine, and desired result. Over time, this creates a far more useful production database than a single generic stainless steel setting.
| Problem | Likely Cause | What to Test |
|---|---|---|
| Mark is too light | Insufficient effective energy, unsuitable frequency, loose hatch, or incorrect focus | Adjust speed, frequency, hatch spacing, power, or passes in a controlled matrix |
| Black mark turns brown or blue | Heat input is producing a different surface reaction than intended | Test speed, frequency, pulse width on MOPA, and total passes rather than only increasing power |
| Edges look rough | Excessive material removal, heat accumulation, or debris | Reduce total energy per stage, clear debris, or divide deep engraving into controlled passes |
| Fine details look blurry | Incorrect focus, excessive heat, inappropriate hatch density, or artwork limitations | Check focus first, then test hatch and energy settings |
| Same setting gives different results | Different alloy, finish, contamination, coating, or focal position | Standardize cleaning, material sourcing, positioning, and focusing |
| Color marking is inconsistent | Color effects are highly sensitive to heat input and surface condition | Use the actual production material and build a MOPA parameter matrix before production |
Troubleshooting should begin with material consistency, focus, and controlled parameter testing rather than changing every setting at once.
Once the process is dialed in, stainless steel supports both industrial and creative applications. The same underlying laser technology can create identification marks for production parts or personalized graphics for consumer products.
Popular examples include jewelry, tags, tools, tumblers, kitchenware, photo plaques, pet bowls, bottle openers, knives, golf clubs, and industrial components.
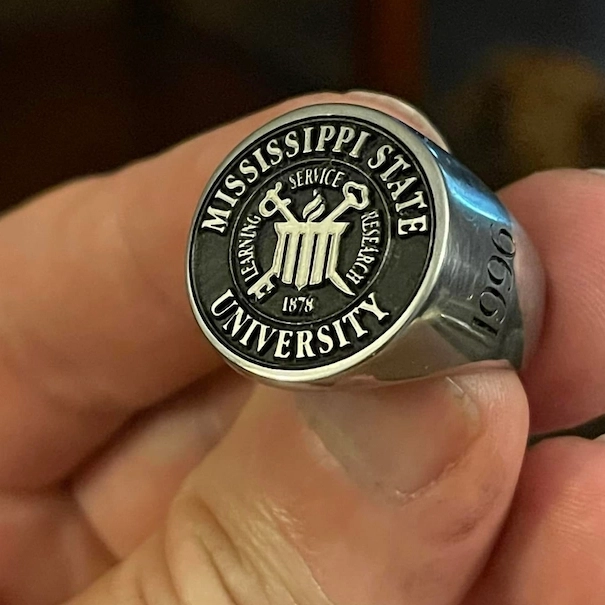
Stainless steel jewelry engraving
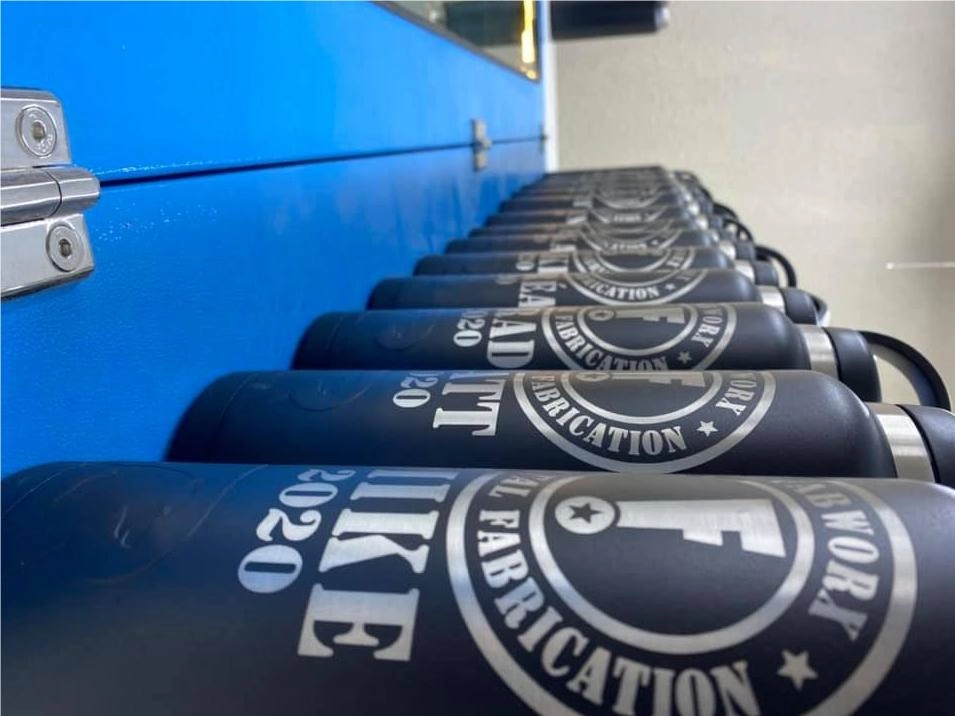
Coated stainless steel tumbler engraving
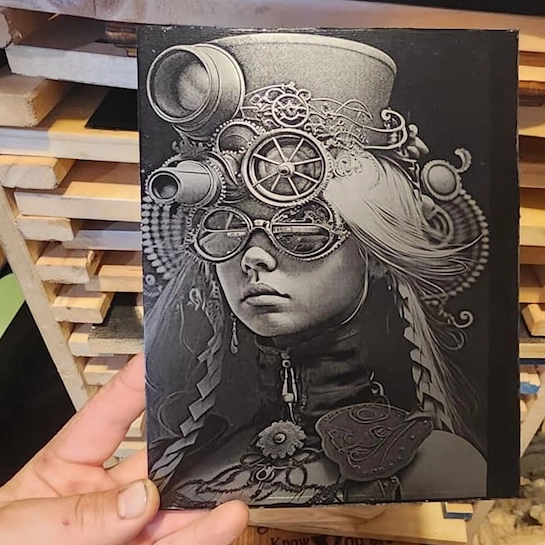
Photo marking on stainless steel
If you are interested in photo work, see our 304 stainless steel photo marking project. Jewelry makers can also review the stainless steel puzzle necklace tutorial.
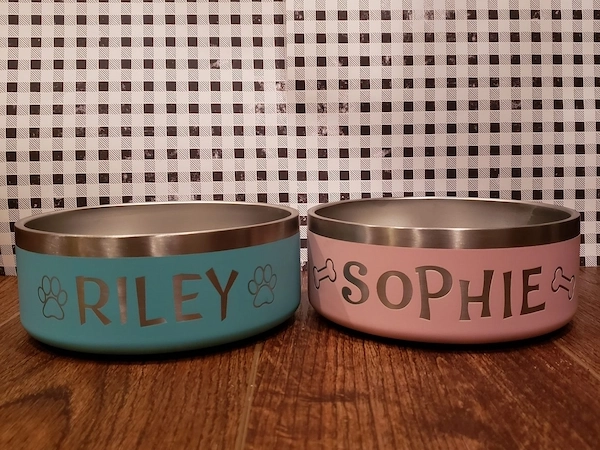
Personalized stainless steel pet bowl
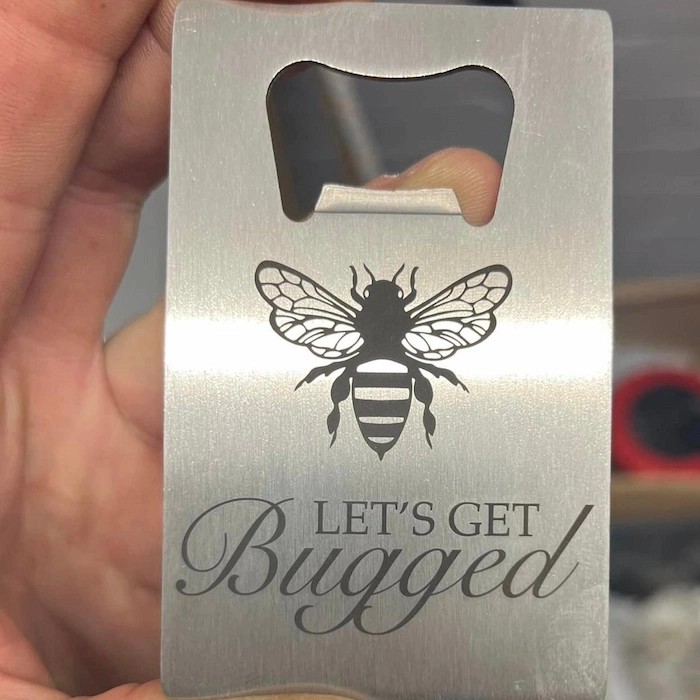
Custom stainless steel bottle opener
For more production-style examples, see our stainless steel golf club marking project, stainless steel tableware tutorial, and custom pet bowl project.
You can find additional tested projects and downloadable files in the Thunder Laser Inspiration Library.
After processing, remove loose residue, dust, and contamination using a cleaning method suitable for the final product. Avoid assuming that every stainless steel part needs the same post-treatment.
For decorative consumer products, cleaning may be all that is required. For industrial, medical, food-contact, marine, or corrosion-critical components, the effect of laser processing on the required corrosion performance should be evaluated as part of the manufacturing process.
Passivation or other surface treatment may be appropriate for some applications, but the process should follow the material specification and applicable manufacturing requirements rather than a generic one-size-fits-all procedure. Protective oils, waxes, or sealants can also change appearance or product suitability, so they should be selected according to the end use.
The Thunder Aurora Series is designed for high-speed marking and engraving applications, with different laser configurations for different processing goals. For stainless steel, the right model depends primarily on the effect and workflow you need.
| Model | Laser Source | Power | Best Stainless Steel Fit |
|---|---|---|---|
| Aurora Lite | Q-Switched Fiber | 50W | General metal marking, logos, serial numbers, QR codes, personalization, and users who want a lower purchase barrier |
| Aurora Fiber | Q-Switched Fiber | 50W | General stainless steel marking with a more complete day-to-day positioning, focusing, and production workflow |
| Aurora MOPA | MOPA Fiber | 100W | Color marking, advanced black marking, wider pulse control, premium metal effects, and more demanding engraving |
Choose the Aurora configuration according to the desired stainless steel effect and production workflow rather than wattage alone.
For straightforward stainless steel marking, Aurora Lite provides the core 50W Q-switched fiber capability needed for a wide range of everyday metal jobs. Aurora Fiber is a better fit when frequent setup, positioning, autofocus, and a more complete production workflow matter.
If your work involves stainless steel color marking, high-contrast premium effects, deeper engraving, or greater control over the laser pulse, Aurora MOPA is the more appropriate option.
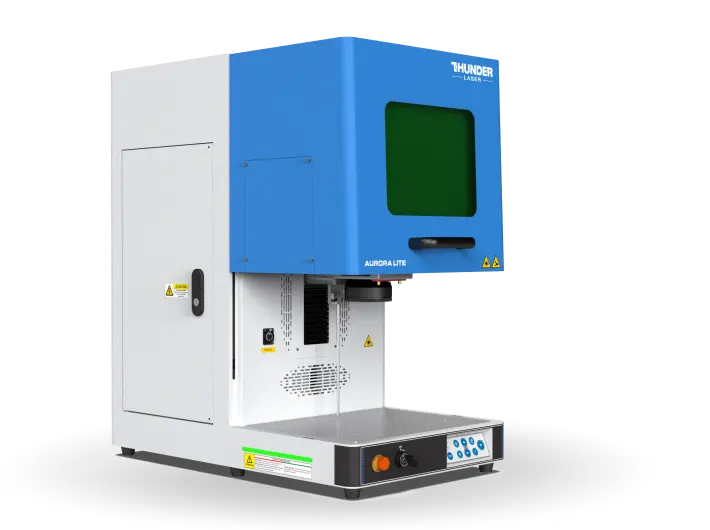
Thunder Aurora laser markers are designed for precise metal marking and engraving workflows.
Stainless steel marking sample produced with a laser marking workflow.
Ready to Start Laser Engraving Stainless Steel?
Explore the Thunder Aurora Series to compare Q-switched fiber and MOPA options for stainless steel marking, engraving, personalization, and production.
Explore Thunder AuroraTalk To Our Experts Now!
Please leave your contact information so that we can serve you better.
STAINLESS STEEL LASER ENGRAVING FAQS
FIND THE RIGHT LASER FOR YOUR NEXT PROJECT
Explore Thunder Laser solutions designed for different materials, workflows, and production needs.


 Stable & Consistent MachinesUnlimited ApplicationsRobust After-sales SupportFactory Direct Supply


