How to Clean Laser Lens and Mirrors
 24-09-29
WHAT ARE YOU LOOKING FOR?
Search Across Products, Blog Posts, Support Content, And Resources.

How to Clean Laser Lens and Mirrors
24-09-29

Keeping your laser optics clean is essential for maintaining engraving and cutting quality, protecting your equipment, and reducing avoidable performance issues. When you work with wood, acrylic, or other materials, the laser lens and mirrors are exposed to dust, smoke, debris, and residue that can affect focus, beam transmission, and precision.
This guide explains when to clean your laser lens and mirrors, what to prepare before cleaning, and how to clean optical components safely without damaging the lens, mirror surfaces, or coatings.
How often you should clean laser optics depends on your working environment and the materials you process. As a general rule, inspect and clean the laser lens, second mirror, and third mirror daily because these parts are closer to the material and tend to collect residue faster.
If you frequently do deep engraving on wood or acrylic, you may need to check and clean the lens twice a day. Once a week, give the laser mirrors, laser lens, beam combiner, and tube dust cover a more thorough cleaning to keep the optical path in good condition.
Tip: If engraving quality drops, cutting power seems weaker, or the laser mark becomes inconsistent, check the lens and mirrors before adjusting your design or machine settings.
Proper preparation protects both the optical components and the laser machine. Before cleaning, make sure the machine is safe to work on and that you have the right cleaning tools ready.
Before cleaning, make sure the laser button is completely turned off and the optics have cooled down. Optical components may be hot after the machine has been running, so never clean the laser lens, mirrors, or other optics while the laser cutter is powered on.
Using the right tools is important because ordinary cloths or rough materials can scratch optical surfaces. Prepare the following items before you begin:
After gathering the necessary tools and confirming that the laser machine is powered off, clean the optical components carefully. The goal is to remove dust, smudges, and residue without scratching the lens or mirror surfaces.
Use the included tool kit to remove the optics for thorough cleaning. Be careful during disassembly to avoid breaking the lens or scratching the mirror. You can place a cloth on the honeycomb bed directly under the laser head so that if a small component slips, it falls onto the cloth instead of the machine bed.
Start by using a blowing ball to gently remove dust or particles from the surface of the optics. Do not blow on the lens or mirrors with your mouth, as saliva can create additional contamination. A blowing ball removes loose dust without requiring direct contact with the optical surface.
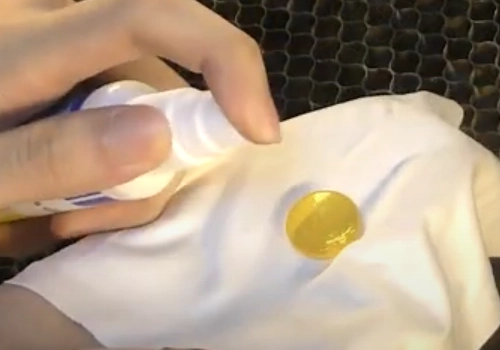
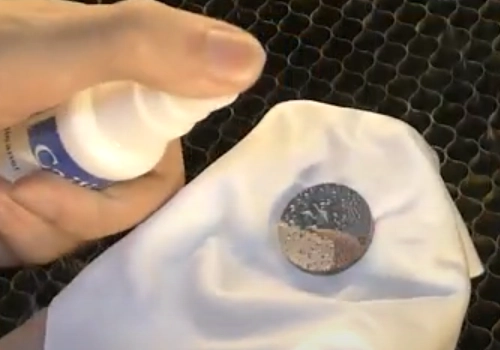
If there are stubborn smudges or spots, apply a small amount of laser lens cleaning solution to a dust-free cloth or cotton swab. You can either wipe the laser lens and mirror with a cloth or swab dipped in the cleaning solution, or spray the cleaning solution directly onto the optics and then wipe them carefully.
Gently wipe the laser lens and mirrors in a circular motion or Z-pattern, starting from the center and moving outward. Avoid pressing too hard because excess pressure may scratch the surface, especially if the optics have anti-reflective coatings.
After cleaning, inspect the laser lens and mirrors under a bright light to make sure no residue remains. Tilt the lens or mirror at an angle to check for smudges, spots, or streaks. If you still see dirt, repeat the cleaning process until the surface is clean, then reinstall the optics carefully.
Regular maintenance, including proper cleaning of the laser lens and mirrors, is key to maintaining laser performance and avoiding preventable machine issues. By following the correct cleaning routine, you can keep your optics in better condition and support more stable engraving and cutting results.
Always power off the machine and allow the optics to cool before cleaning. With the right tools and careful technique, you can maintain your laser optics safely and keep your machine ready for precise, high-quality work.
Need More Laser Maintenance Support?
Explore Thunder Laser machines, accessories, and support resources for smoother daily laser operation.
Contact UsTalk To Our Experts Now!
Please leave your contact information so that we can serve you better.
LASER LENS AND MIRRORS CLEANING FAQS
TAKE THE NEXT STEP WITH THUNDER LASER

 Stable & Consistent MachinesUnlimited ApplicationRobust After-sales SupportFactory Direct Supply