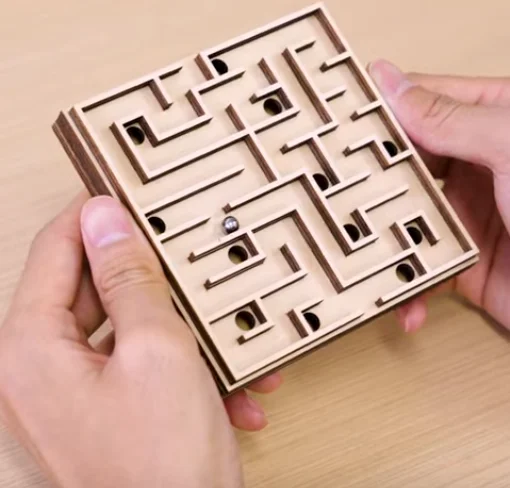
Let’s bring a touch of interactive fun to your laser projects with laser cutting ball-in-maze toy! These clever, hands-on maze come to life with precision-cut paths and satisfying movement. This toy invites focus, curiosity, and a little bit of friendly competition with a custom challenge.
Ready to roll into your next creative idea with style and precision?
Verify the lens is clean or there's no problem in the laser.
Make sure the exhaust fan is working well.
Ensure the air assist is on.
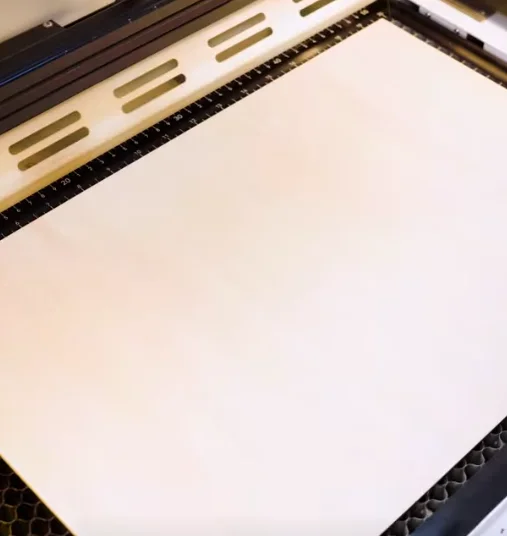
Step 1: Flatten Your Plywood
Plywood boards are very flexible. If the material is uneven, it will negatively affect laser cutting. Ensure the plywood is flat before starting; if it isn’t, you’ll need to flatten it.
There are several ways to level plywood. Using magnets or pins is the most common method for flattening during laser cutting.
Tips:
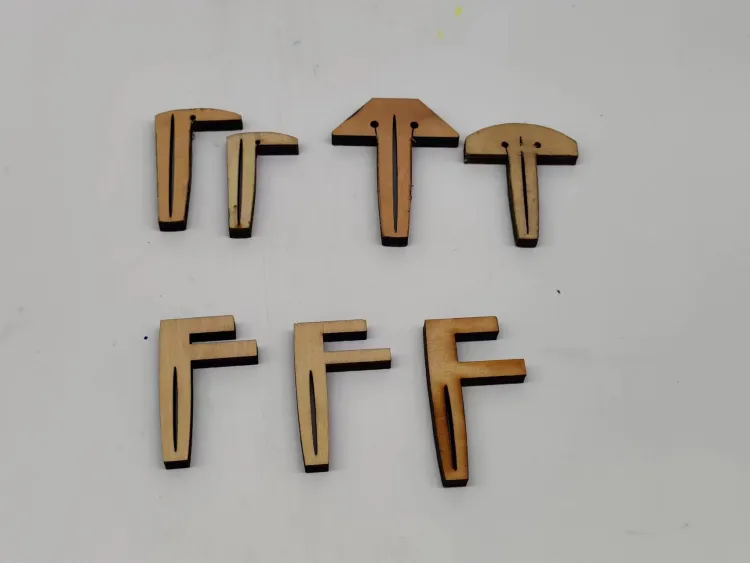
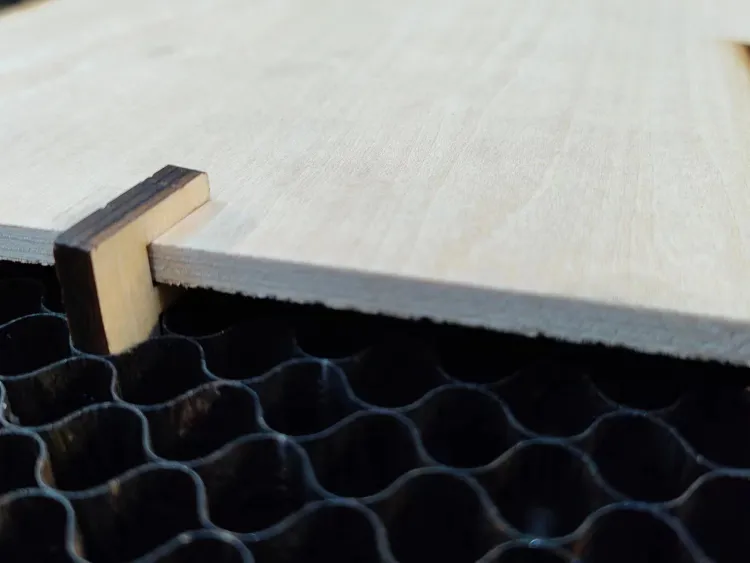
There are three common types of pins: T-shaped, L-shaped, and F-shaped. A special use for F-shaped pins is clamping up the plywood to prevent burn marks.
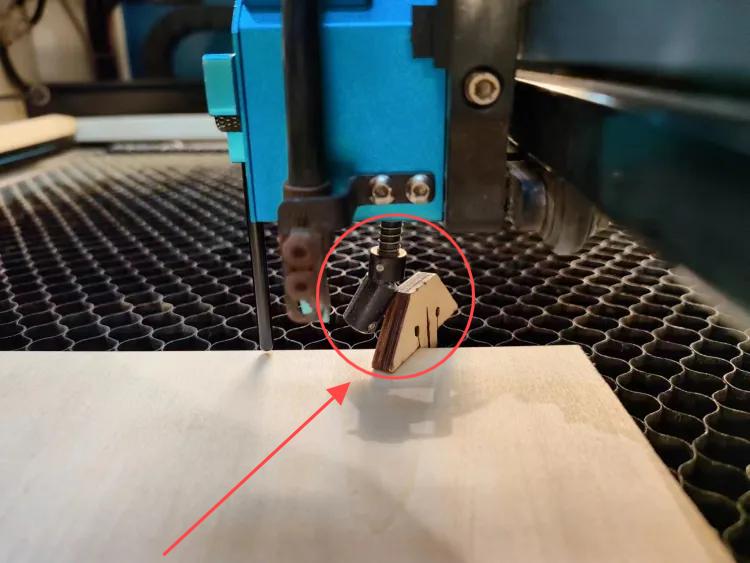
Be mindful of the height of the magnets and pins. If they are too tall, the sensor might hit them and become damaged during processing.
3 common types of pins
F-shaped pin usage
Sensor hits a too high pin
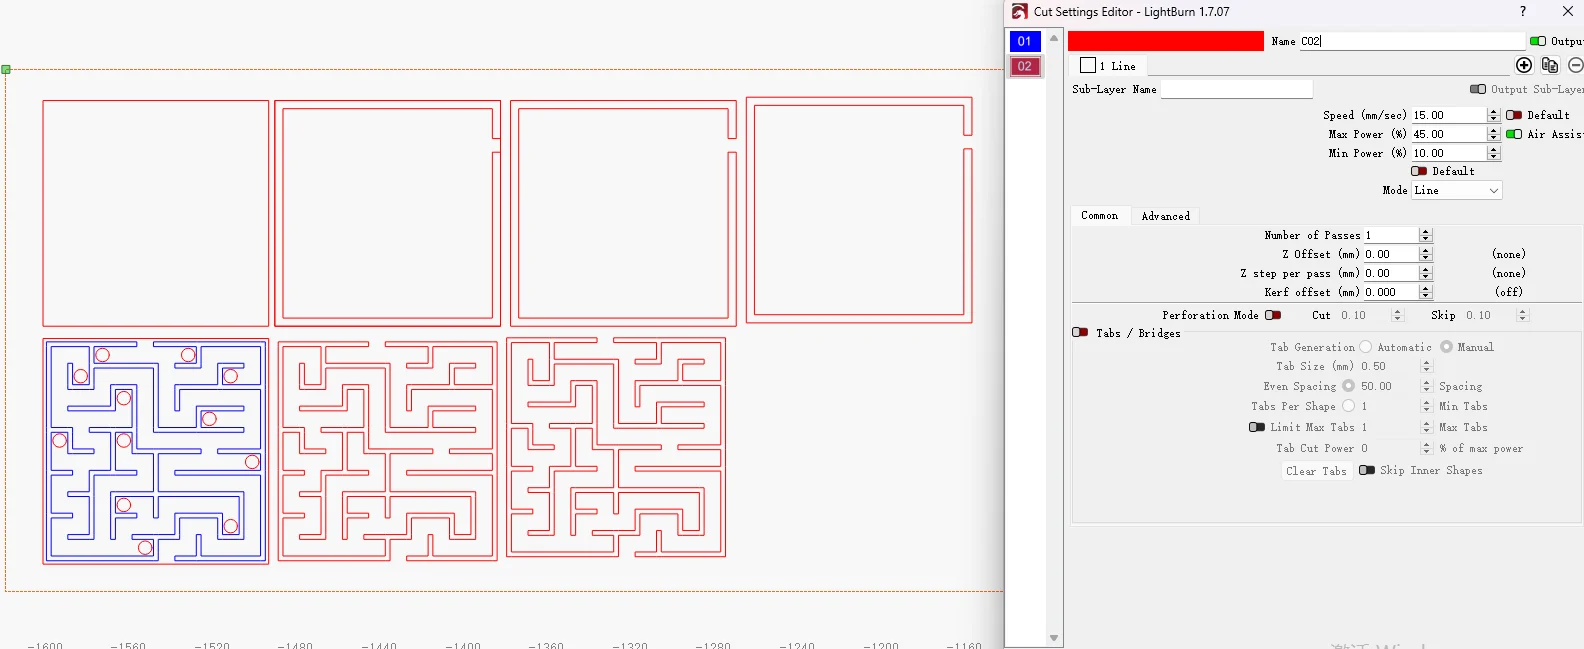
Step 2: Open the Ball-in Maze File and Check the Laser Toy Settings
Import the ball-in maze toy design in LightBurn and check if your plywood size is large enough. For laser cutting ball-in maze toy design with a lot of elements, ensure there are no misalignments or unnecessary overlaps in the file. Double-check everything, and decide if you want to add or subtract elements according to your preferences.
Ensure that the parameters are set correctly to achieve the ideal laser cutting ball-in maze toy. We added a stroking layer for alignment to ensure proper positioning while gluing.
For the laser cutting layers, pay extra attention to the minimum power setting. If the min power is too low, it will cause the cutting corners will not cut through; if the min power is too high, the laser cutting will be bad at the corners.
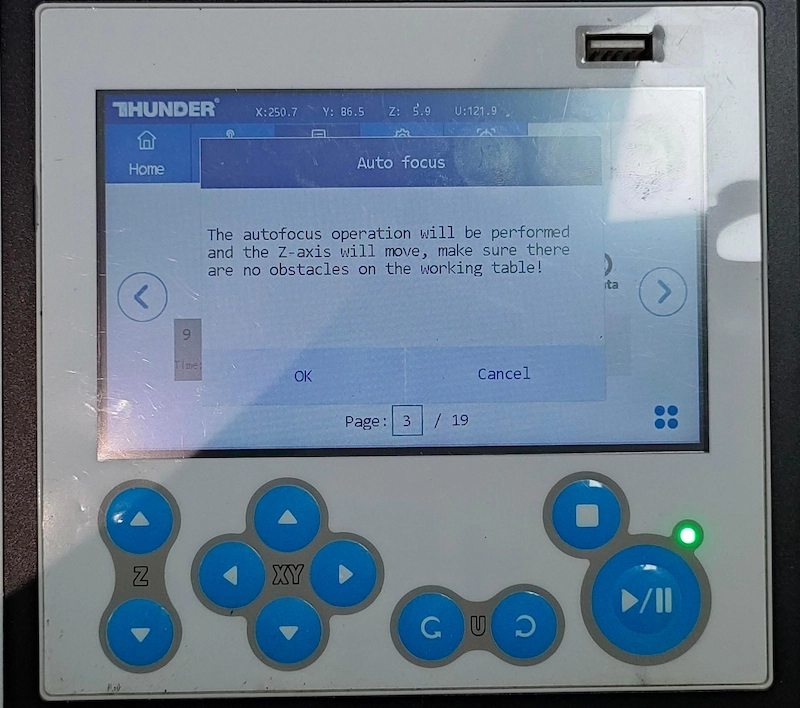
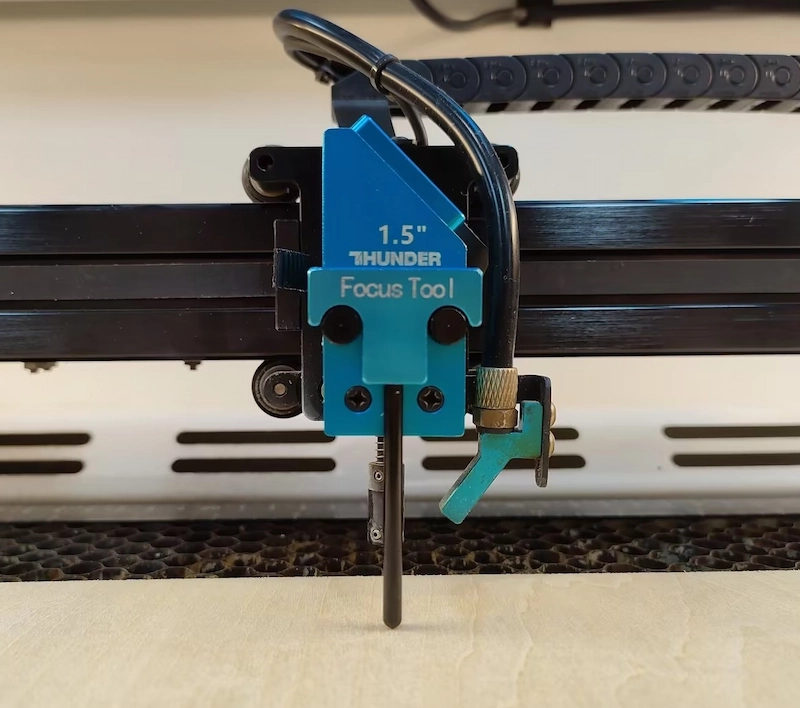
Step 3: Focus on the Plywood
Without focusing, your outcomes may fall short of expectations. So before starting, make sure you’ve rightly focused.
For focusing, you have two options: Auto Focus, which is simple—just press the AF button on the Thunder Bolt screen. If you prefer manual focus, adjust the z-axis height to ensure the focal stick touches the plywood surface.
Auto focus
Manual focus
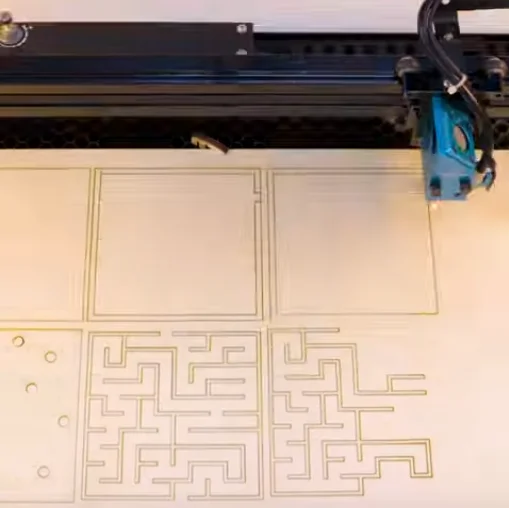
Step 4: Frame the Ball-in Maze Toy Design and Start Laser Cutting
When you click “Frame”, the red light will display the laser cutting area. This is a safe process, and the frame will align with the plywood.
Once aligned, simply press “Start” to begin the plywood laser cutting with the Thunder Bolt!
Step 5: Monitor the Laser Cutting Process
To avoid any issues, carefully monitor the laser cutting, especially when unusual conditions like alarms arise.
Considering the laser cutting energy, for safety reasons, we advise against staring directly at the cutting process, even with the laser door closed.
Step 6: Complete the Ball-in Maze Toy Cutting
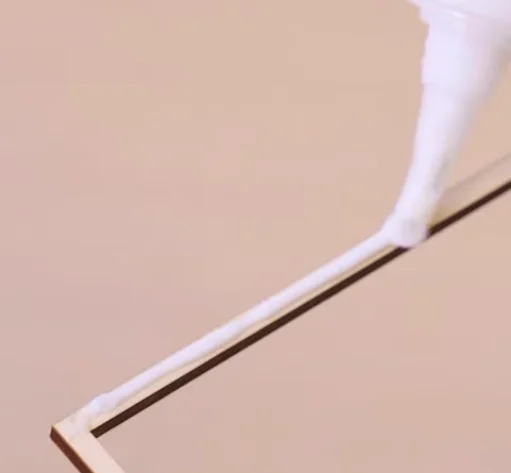
When the laser cutting ball-in maze toy is completed, it’s time to get it out! No special treatment required, just take it out and lightly wipe the dust off the surface. After that it’s just a matter of gluing the layers of ball-in maze toy.
Cutting basswood boards can produce a lot of grease stains, especially in mass production. To maintain the laser engraver, it’s important to clean the lens and the autofocus sensor after using.
Come and Try!
Imagine children building focus and dexterity as they guide a tiny ball through the twists and turns of a laser cutting maze, its pathway precisely crafted to challenge and delight. The ball-in-maze toy isn’t just fun; it’s also a captivating way to develop problem-solving skills, patience, and hand-eye coordination through play.
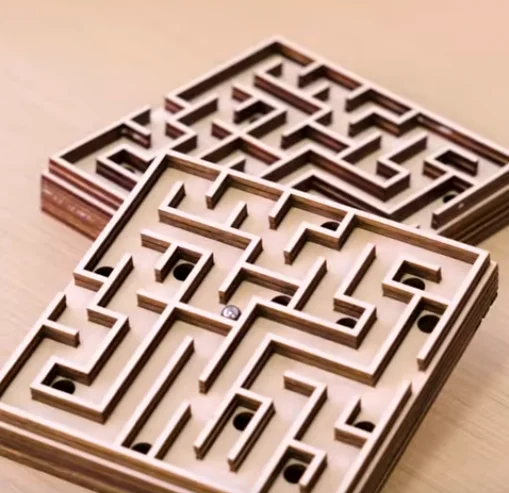
Perfect for curious minds of all ages, laser cutting makes it easy to create mazes in a variety of shapes and difficulty levels. Whether used at home, in classrooms, or as creative gifts, these interactive maze encourage learning through movement, bringing joy and discovery with every roll.
.png "laser cutter Globle") International
International
 United States
 Brasil
 Canada
 Costa Rica
 Mexico
 Česká
Česká
 Romania
 Polska
 Ireland
 Italia
 Lietuva
 Россия
 Deutschland
 Britain
 Україна
 France
 Sverige
 Norway
 Denmark
 Ελλάδα
 Portugal
 한국
한국
 中国
中国
 中国香港
中国香港
 Israel
 中國臺灣
中國臺灣
 ジャパン
ジャパン India
India
 پاکستان
 پශ්රී ලංකා
 ประเทศไทย
 Australia
 New Zealand
 South Africa