Making an acrylic book stand with a laser cutter is a simple yet satisfying project—perfect for organizing your desk with a personal touch.
This guide walks you through the entire process, from importing your design to shaping the final form. With just a few tools and some acrylic sheets, you’ll be able to create a functional and stylish stand in no time.
Check if the lens is clean and that there are no issues with the laser.
Ensure the exhaust fan is functioning properly.
Make sure the air assist is turned on.
2. Steps for Laser Cutting Acrylic Book Stand
Before you begin cutting your acrylic book stand, it’s crucial to follow a structured approach to ensure the design is accurate and the cutting process is smooth. Each step—from preparing the file to bending the material—requires attention to detail to achieve the best results. Below is a breakdown of the process, guiding you through the essential tasks to create a high-quality book stand.
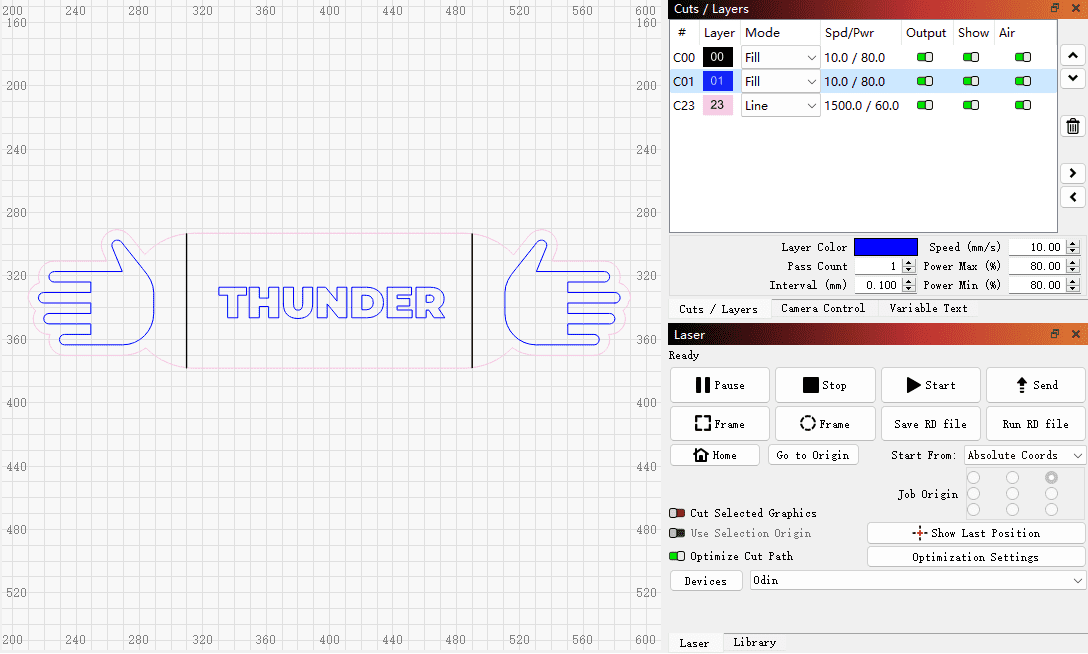
2.1. Step 1: Import the File and Adjust Settings
Import the file into LightBurn, adjust the size, position, and settings. Check out to ensure everything is in order.
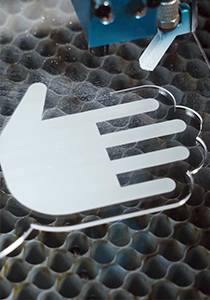
2.2. Step 2: Start the Laser Cutting Process
Once everything is set, click ‘Print’ to initiate your laser machine’s operation.
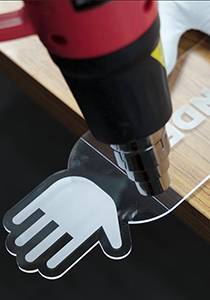
2.3. Step 3: Softening the Acrylic for Bending
Take out the heat gun and blow air into the straight line marked on both sides until the part softens and can bend hard.
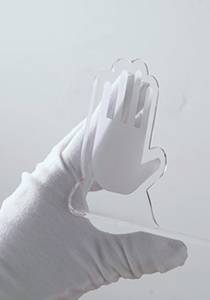
2.4. Step 4: Bend the Acrylic to the Desired Shape
After blowing both straight lines with a heat gun, bend the palm pattern on both sides by 90 degrees to set.
Conclusion
And that’s it—your custom acrylic book stand is now complete! With clean laser cuts and crisp 90-degree bends, it’s both practical and visually appealing. Whether you’re using it to display books, tablets, or artwork, this project proves just how versatile laser cutting can be.
.png "laser cutter Globle") International
International
 United States
 Brasil
 Canada
 Costa Rica
 Mexico
 Česká
Česká
 Romania
 Polska
 Ireland
 Italia
 Lietuva
 Россия
 Deutschland
 Britain
 Україна
 France
 Sverige
 Norway
 Denmark
 Ελλάδα
 Portugal
 한국
한국
 中国
中国
 中国香港
中国香港
 Israel
 中國臺灣
中國臺灣
 ジャパン
ジャパン India
India
 پاکستان
 پශ්රී ලංකා
 ประเทศไทย
 Australia
 New Zealand
 South Africa