


Best Wood for Laser Engraving and Cutting in STEAM Classrooms
 2024-08-03
WHAT ARE YOU LOOKING FOR?
Search Across Products, Blog Posts, Support Content, And Resources.

Best Wood for Laser Engraving and Cutting in STEAM Classrooms
2024-08-03

In this STEAM maker course, students and teachers learn how to choose wood for laser engraving and cutting projects. The lesson explains how grain, resin content, hardness, density, and natural color affect engraving contrast, edge quality, smoke, residue, and final project appearance.
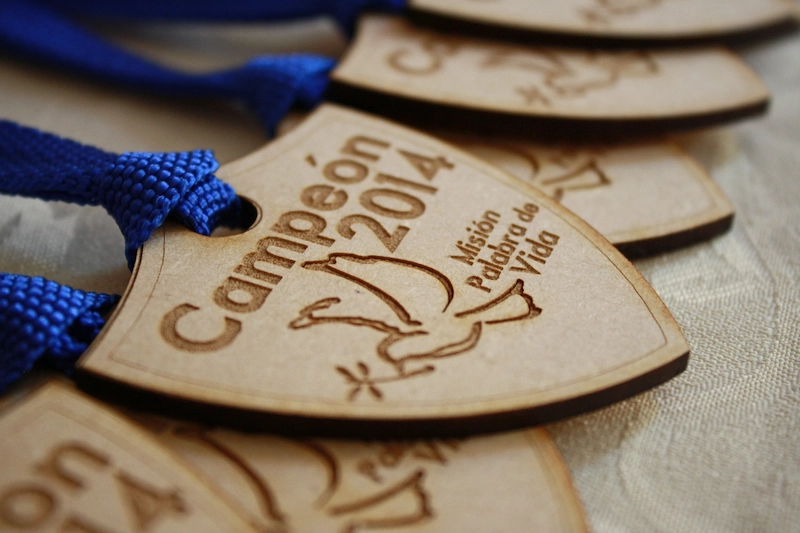
This guide is useful before students begin wood-based projects such as personalized gifts, classroom signage, models, medals, decorative items, kitchenware samples, and product prototypes.
| Item | Details |
|---|---|
| Topic | Choosing wood for laser engraving and cutting |
| Main Materials | Plywood, solid wood, MDF, pine, maple, cherry, walnut, birch, basswood, bamboo, and other wood materials |
| Main Skills | Material comparison, grain analysis, resin awareness, density comparison, surface preparation, masking, air assist, ventilation, and test engraving |
| Classroom Fit | STEAM maker projects, wood engraving, laser cutting, product design, classroom prototyping, signage, and beginner material-selection lessons |
Students will learn how to evaluate wood before laser processing and choose a material that matches the project goal. They will compare how different woods behave under a laser beam and understand why test engraving is important before running a final project.
For teachers: Use this guide as a material-selection lesson before wood engraving, sign-making, model-building, or product-design projects.
For students: Use it to compare wood surfaces, predict engraving contrast, and understand why preparation affects the final result.
For makerspaces: Use it as a practical onboarding reference for learners who are new to laser engraving wood.
Explain how grain structure affects engraving consistency and fine detail.
Compare low-resin and high-resin woods and predict how smoke, charring, and residue may affect results.
Understand how hardness and density influence engraving speed, power, edge definition, and job time.
Choose wood color and surface tone based on the desired engraving contrast and project style.
Prepare wood with sanding, masking, air assist, ventilation, and small test passes before final engraving or cutting.
Design thinking: Choose materials based on the final product, visual style, function, and user experience.
Computational thinking: Compare variables such as grain, density, resin, color, speed, power, and masking to improve repeatability.
Engineering thinking: Test material behavior, adjust laser settings, reduce residue, and improve engraving quality through controlled experimentation.
Students should only process materials approved by their teacher or lab supervisor. Pressure-treated, painted, stained, or unknown wood may release unsafe fumes when lasered, so these materials should be checked carefully before use. Proper ventilation, air assist, and supervised operation are essential for wood laser projects.
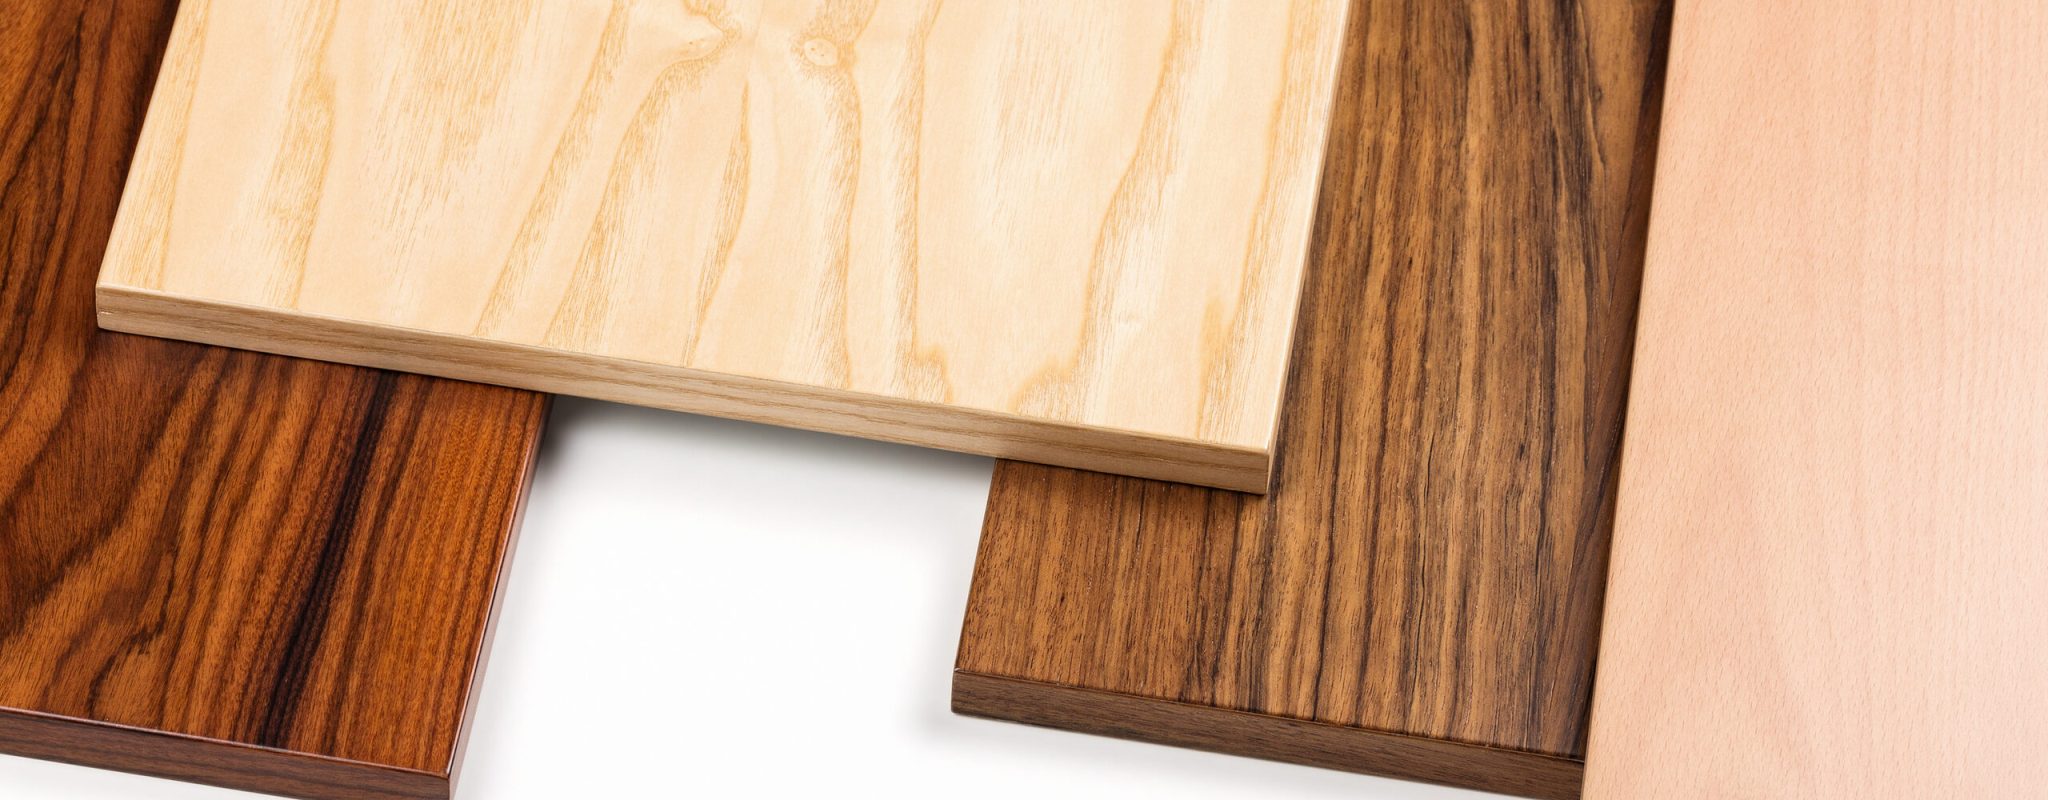
Laser engraving on wood is affected by the physical and chemical properties of the material. A wood that looks attractive by hand may not always engrave evenly, so students should evaluate the grain, resin content, hardness, density, and color before choosing it for a project.
Wood grain describes the alignment and texture of wood fibers. Fine-grain woods such as maple and alder usually provide a more consistent surface for detailed engraving. The laser can mark the material more evenly, which helps produce sharper lines and clearer small details.
Open-grain woods such as oak and ash may engrave less evenly because the fiber density changes across the surface. This can create mixed burn depth or a more textured result.
Teacher Tip: Ask students to engrave a small test design with and across the grain. Comparing the two results helps them understand how grain direction affects detail and texture.
Resin-heavy woods such as pine and cedar may create more smoke, charring, and sticky residue. This can make cleanup more difficult and may reduce engraving consistency.
Lower-resin woods such as cherry, alder, and maple often produce cleaner marks and leave less residue on the surface. If students use resinous wood, masking can help reduce staining and simplify cleanup.
Harder woods such as walnut and hard maple can produce crisp detail and strong edge definition, but they may require slower engraving speeds or higher power settings. This can increase job time while improving the professional look of the finished piece.
Softer woods such as basswood and balsa cut and engrave quickly, making them useful for prototypes and lightweight classroom projects. However, soft woods can overburn more easily, so students should test settings carefully.
Lighter woods such as birch and maple often create stronger visible contrast after engraving. Darker woods such as walnut may create a subtler look, which can be useful for artistic or premium-style projects.
Choosing the right wood color helps students control the visual effect of their finished work without relying only on laser settings.
The following table summarizes common wood options and their general appearance and features. Students should still test the exact material they plan to use because wood can vary by supplier, thickness, finish, and storage conditions.
| Wood | Color | Features |
|---|---|---|
| Oak | Light brown | Durable with prominent grain, but open grain may produce uneven burns on detailed engraving. |
| Maple | Pale cream | Hard, fine-grained, and strong for detailed engraving. |
| Cherry | Reddish-brown | Attractive color that darkens over time and can engrave with good contrast. |
| Walnut | Dark brown | Rich color and strong visual character, often used for premium-looking projects. |
| Birch | Pale yellow | Smooth surface and useful for detailed work, classroom projects, and prototypes. |
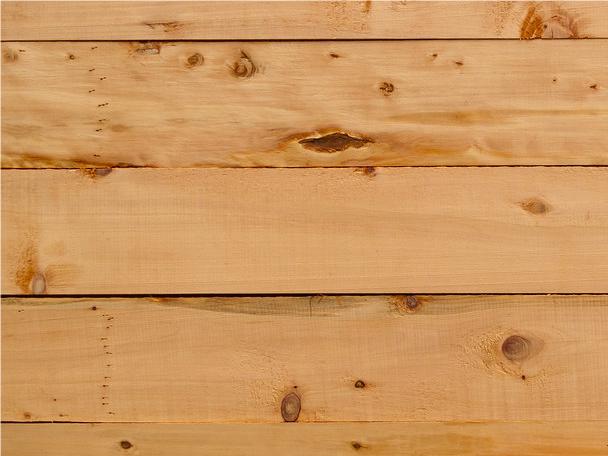
| Pine | Light yellow | Soft, affordable, and easy to engrave, but resin can cause smoke and residue. |
| Cedar | Reddish-brown | Aromatic and naturally decay-resistant, but resin may create extra smoke and residue. |
| Beech | Pale cream | Hard, tight-grained, and suitable for precision work. |
| Poplar | Pale green or brown | Affordable and easy to work with for simple classroom projects. |
| Basswood | Very pale | Very soft and useful for intricate designs, prototypes, and beginner projects. |
| Bamboo | Light yellow | Consistent density and often selected for sustainable-looking projects. |
| Teak | Golden brown | Naturally oily and may create more smoke and residue. |
| Ebony | Black | Very dense and can create high-contrast effects, but requires careful testing. |
| Balsa | Very pale | Light and easy to cut, but may have a higher risk of burning. |
| Rosewood | Dark brown or purple | Dense and able to hold fine detail when settings are controlled. |
| Ash | Light brown | Strong and flexible with a distinct grain pattern. |
When choosing wood for laser engraving and cutting, students should consider workability, burn contrast, engraving depth, and final appearance. The best choice depends on whether the project is decorative, structural, artistic, or prototype-focused.
Plywood is made from multiple thin layers of wood veneer. Its engineered structure provides good stability and can reduce warping, making it useful for larger projects, signage, decorative items, and prototypes.
Plywood can cut and engrave consistently when the layers and adhesive are suitable for laser processing. Students should remember that plywood edges show visible layers, which may become part of the design style.

Solid wood brings natural grain and character to laser projects. Hardwoods such as oak or maple can produce crisp, high-contrast detail, while the natural variation in grain can make each project look unique.
Because solid wood varies from board to board, engraving depth and color may not be perfectly uniform. For many creative projects, this natural variation can add character to the finished piece.

Medium-density fiberboard, or MDF, is an engineered wood product with a smooth surface and uniform density. It can produce clean, precise cuts and engravings because it does not have a natural grain pattern that interferes with small details.
MDF is useful for prototypes, architectural models, text, and repeated classroom projects. However, it can create more dust than solid wood or plywood, and some MDF may contain formaldehyde-based adhesives, so ventilation is especially important.
Pine can be a good choice for beginners or budget-focused projects because it is soft, affordable, and widely available. Its light color can provide good engraving contrast.
However, pine can also contain resin, which may create more smoke, staining, or sticky residue. Students should run a test engraving, use masking when appropriate, and avoid placing very fine details over inconsistent grain or knots.
Some woods may create poor engraving results or raise safety concerns. Students should always ask a teacher or lab supervisor before using unfamiliar wood.
Pine: Pine can be affordable and easy to engrave, but its resin content may cause inconsistent burns and sticky residue.
Oak: Oak is strong and attractive, but its open grain can make very fine engraving appear less even.
Pressure-treated or painted wood: These materials may release harmful fumes when lasered and should not be used unless they are confirmed safe for laser processing.
Knotted wood: Knots can change engraving depth and color. Avoid placing small text or detailed graphics directly over knots.
Testing Reminder: When in doubt, run a small test pass first. A quick sample can show whether the material burns evenly, smokes too much, or leaves excessive residue.
Even a good wood choice needs proper preparation. Surface preparation helps students achieve cleaner lines, reduce residue, and create a more professional-looking result.
Sand the surface: Use fine-grit sandpaper to smooth the surface before engraving.
Use masking: Apply laser masking tape when appropriate to reduce surface staining and make cleanup easier.
Turn on air assist: Air assist helps move smoke and debris away from the engraving area and can help keep the lens cleaner.
Use ventilation: Good airflow helps remove smoke and fumes from the work area during wood processing.
Run a sample first: Test engraving power, speed, contrast, and cleanup before processing the final project.
The source material highlights Thunder Laser Bolt Pro and Nova Plus as wood engraving and cutting options. For schools, makerspaces, and STEAM labs, the Thunder Laser Bolt Series can support compact classroom wood engraving workflows, while the Thunder Laser Nova Plus Series can support larger wood projects and more production-oriented classroom or makerspace work.
Machine choice should be based on available classroom space, project size, material thickness, engraving detail, ventilation setup, and supervision needs. No matter which machine is used, students should prepare the material carefully and test settings before running a final design.
By the end of this lesson, students should understand that choosing wood for laser engraving is not only about appearance. Grain, resin, density, hardness, color, surface preparation, and machine setup all affect the final result.
When students compare materials, test settings, and reflect on their results, they build better maker habits and become more confident in wood-based laser projects.
Talk To Our Experts Now!
Please leave your contact information so that we can serve you better.
NEED HELP FINDING THE RIGHT SOLUTION?
Talk to our team for machine recommendations, application advice, and support based on your needs.

 Stable & Consistent MachinesUnlimited ApplicationRobust After-sales SupportFactory Direct Supply


