Custom Leather Bottle Opener Laser Engraving Project: A LaserMaker STEAM Course
 2024-08-20
WHAT ARE YOU LOOKING FOR?
Search Across Products, Blog Posts, Support Content, And Resources.

Custom Leather Bottle Opener Laser Engraving Project: A LaserMaker STEAM Course
2024-08-20

In this LaserMaker STEAM course, students will customize an elegant leather bottle opener using laser engraving. The lesson introduces text layout, image placement, copy and paste shortcuts, rotation, layer assignment, and shallow engraving on artificial leather.
A bottle opener is a practical everyday object, and laser engraving turns it into a personalized design project. Students will combine brand-style text, a slogan, and decorative wine bottle graphics to create a finished engraved accessory.
This project guides students through the process of designing a custom engraving for a leather bottle opener. Students first measure the processable area, then create two text elements, import a wine bottle graphic, duplicate and rotate decorative graphics, assign layer colours, set shallow engraving processes, and upload the file to the laser device.
The example design uses the text “LaserMaker” and the slogan “Creating Unique Value for Customers.” Teachers can keep the source text for the original activity or ask students to replace it with a school name, club name, event title, or personal message.
Teacher note: This lesson is useful for beginner LaserMaker practice because it combines text tools, graphic duplication, rotation, keyboard shortcuts, layer control, and engraving setup in one small product-design activity.
Custom bottle openers are useful examples of small personalized products. They can be used as gifts, event souvenirs, club merchandise, café accessories, workshop samples, or student maker projects.
In a classroom or makerspace, this activity helps students understand how a digital design must fit the shape and size of a real object. It also shows how text, graphics, and layout choices can turn a functional item into a branded or personalized product.
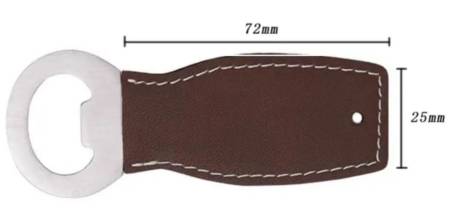
Before drawing the design, students need to consider whether the artwork will exceed the available engraving area. In the source project, the processable area of the leather bottle opener is measured as 72mm long and 25mm wide.
The design should stay within this measured range. This step helps students connect physical measurement with digital layout planning.
| Measured Item | Value | Design Meaning |
|---|---|---|
| Processable Length | 72mm | Maximum horizontal design range |
| Processable Width | 25mm | Maximum vertical design range |
Design tip: Always measure the real object before engraving. Even a simple text-and-icon design can fail if it extends beyond the usable surface.
Prepare the following materials and tools before starting the bottle opener engraving project.
| Number | Name | Quantity | Project Use |
|---|---|---|---|
| 1 | Leather Bottle Opener | 1 | Main engraving object |
| 2 | Straight Ruler | 1 | Measure the processable area |
Equipment note for teachers: This small artificial leather engraving activity can be completed on a classroom laser engraver such as the Thunder Laser Bolt Series. Always test the material and supervise laser operation.
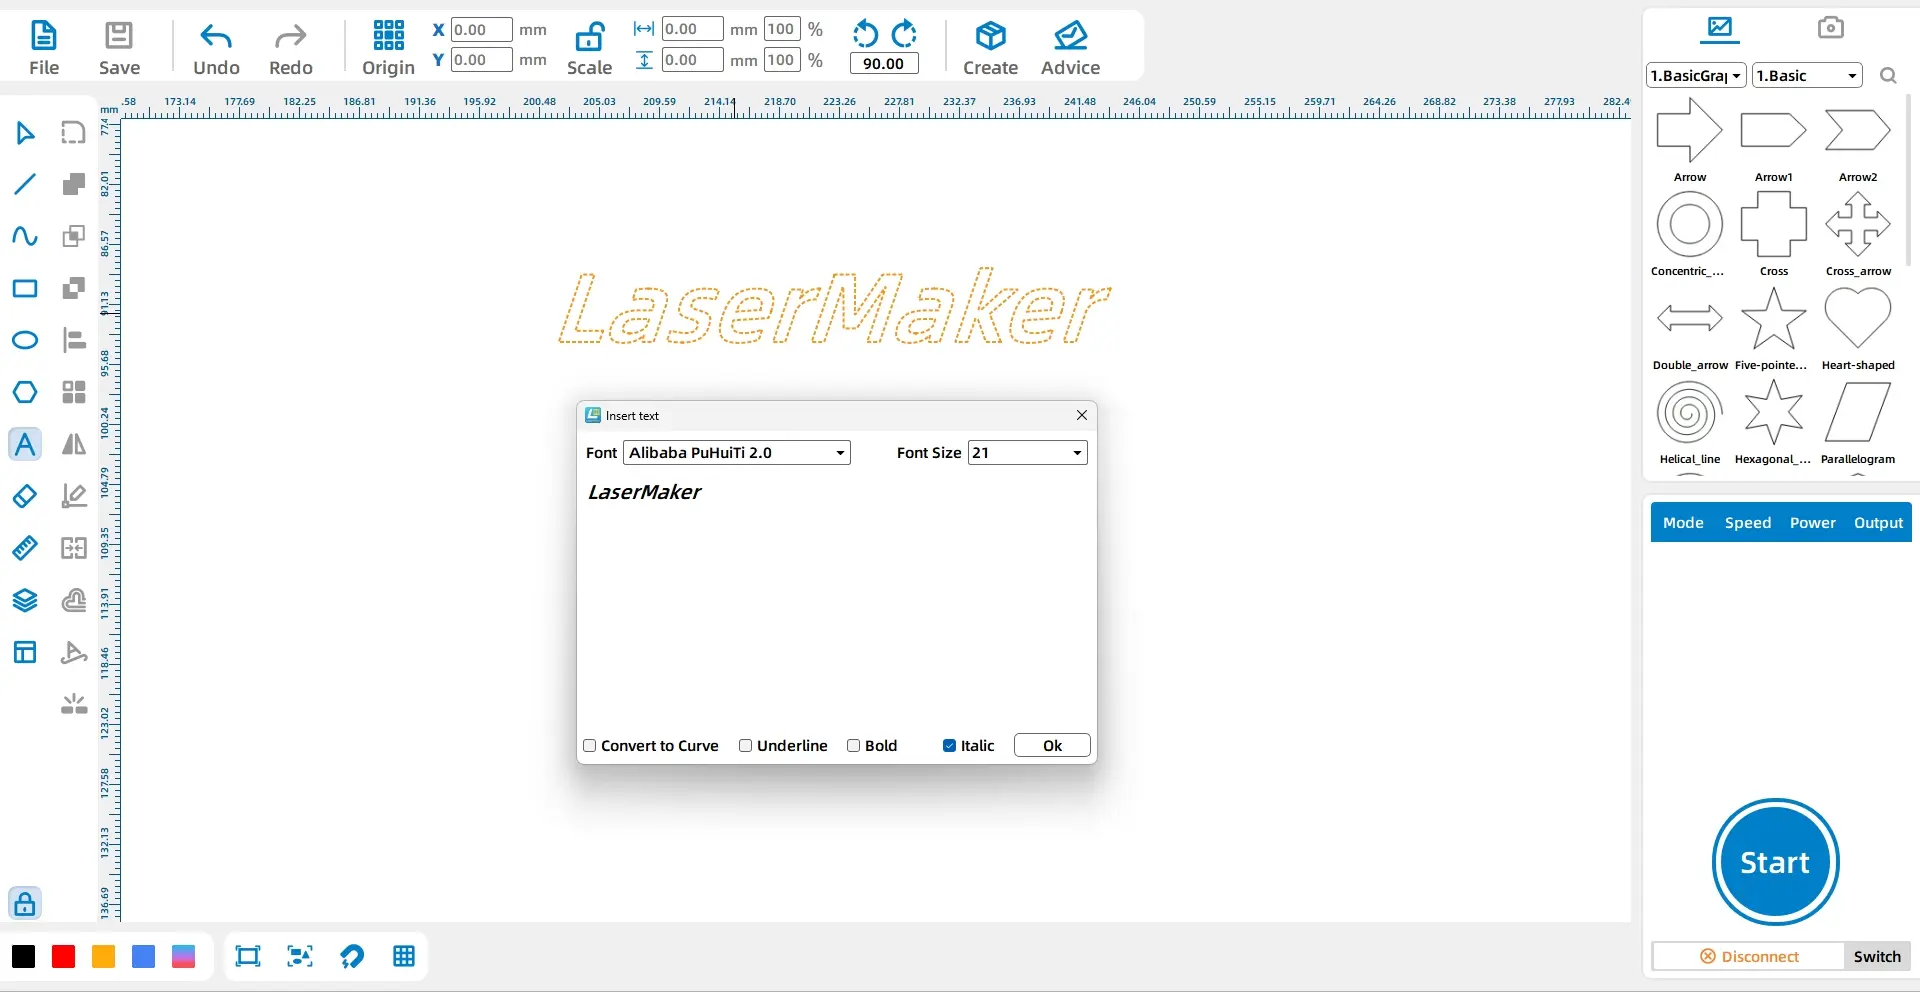
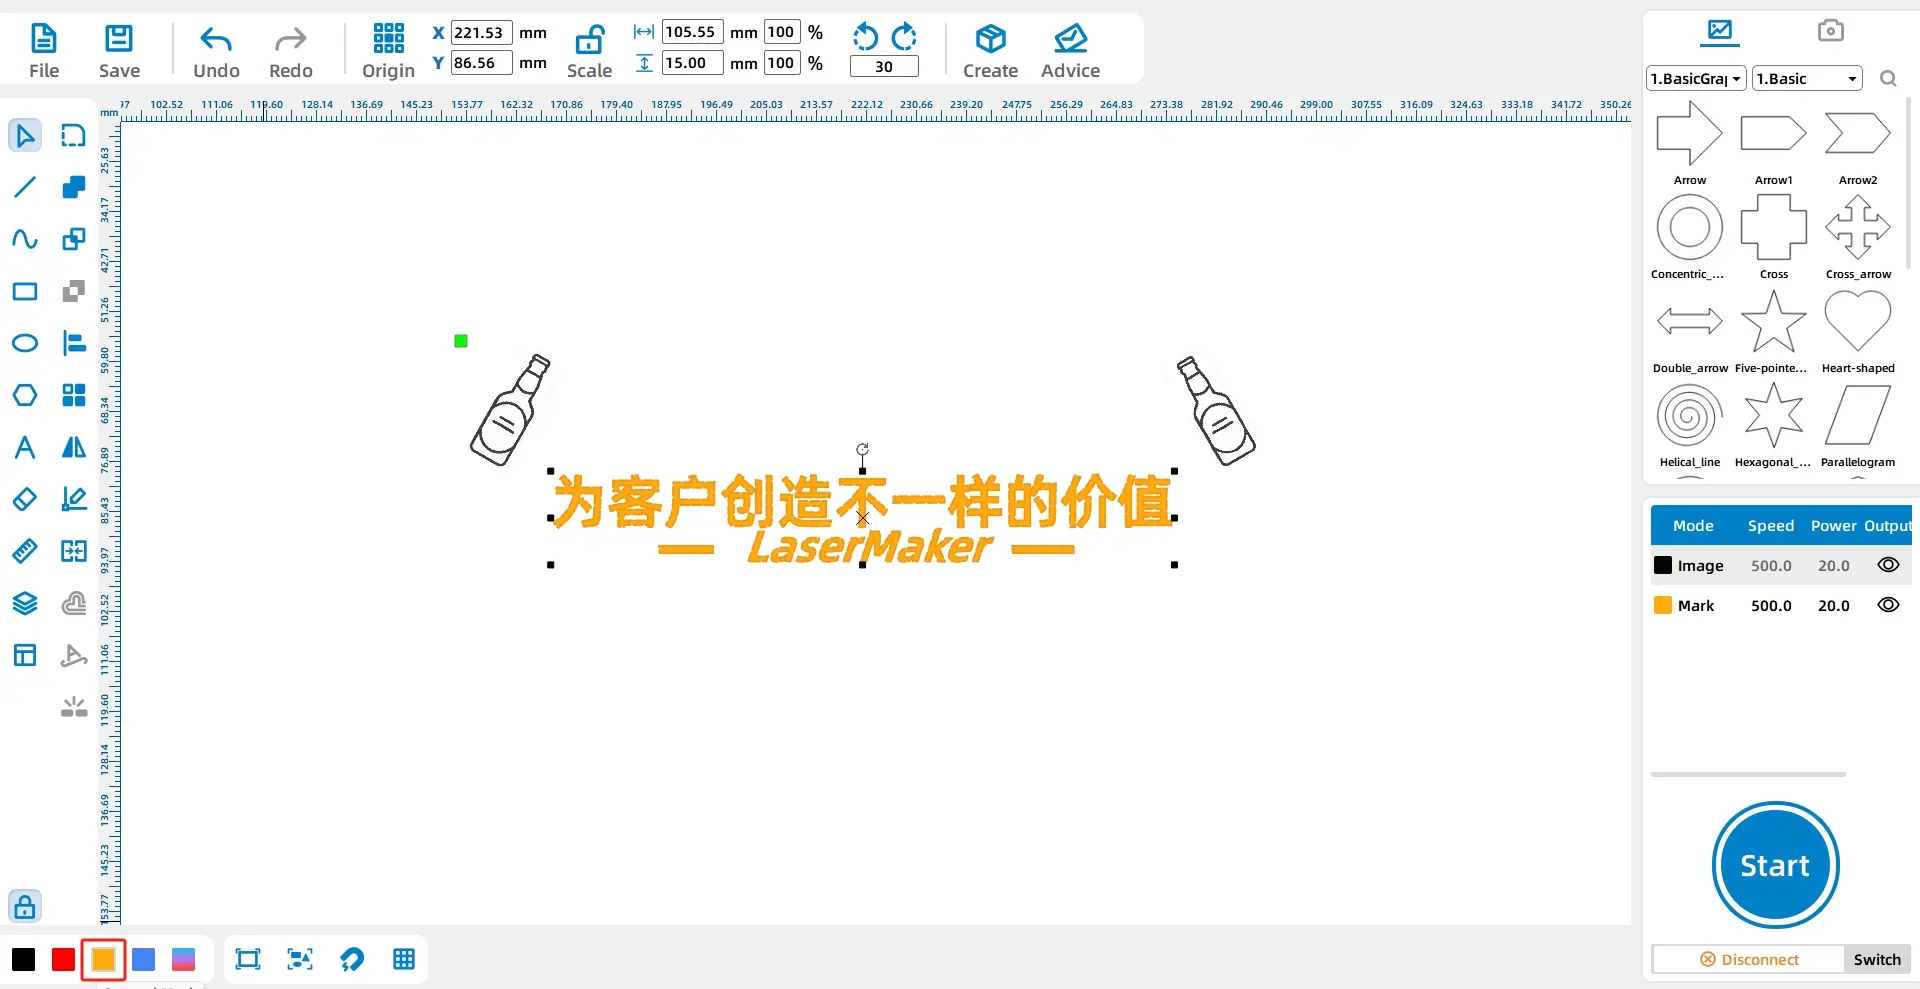
Click the Font tool from the drawing toolbar on the left side. Enter “LaserMaker,” and set the font to Alibaba PuHuiTi 2.0 and the font size to Small Five. Select both Bold and Italic, then use this as Text 1.
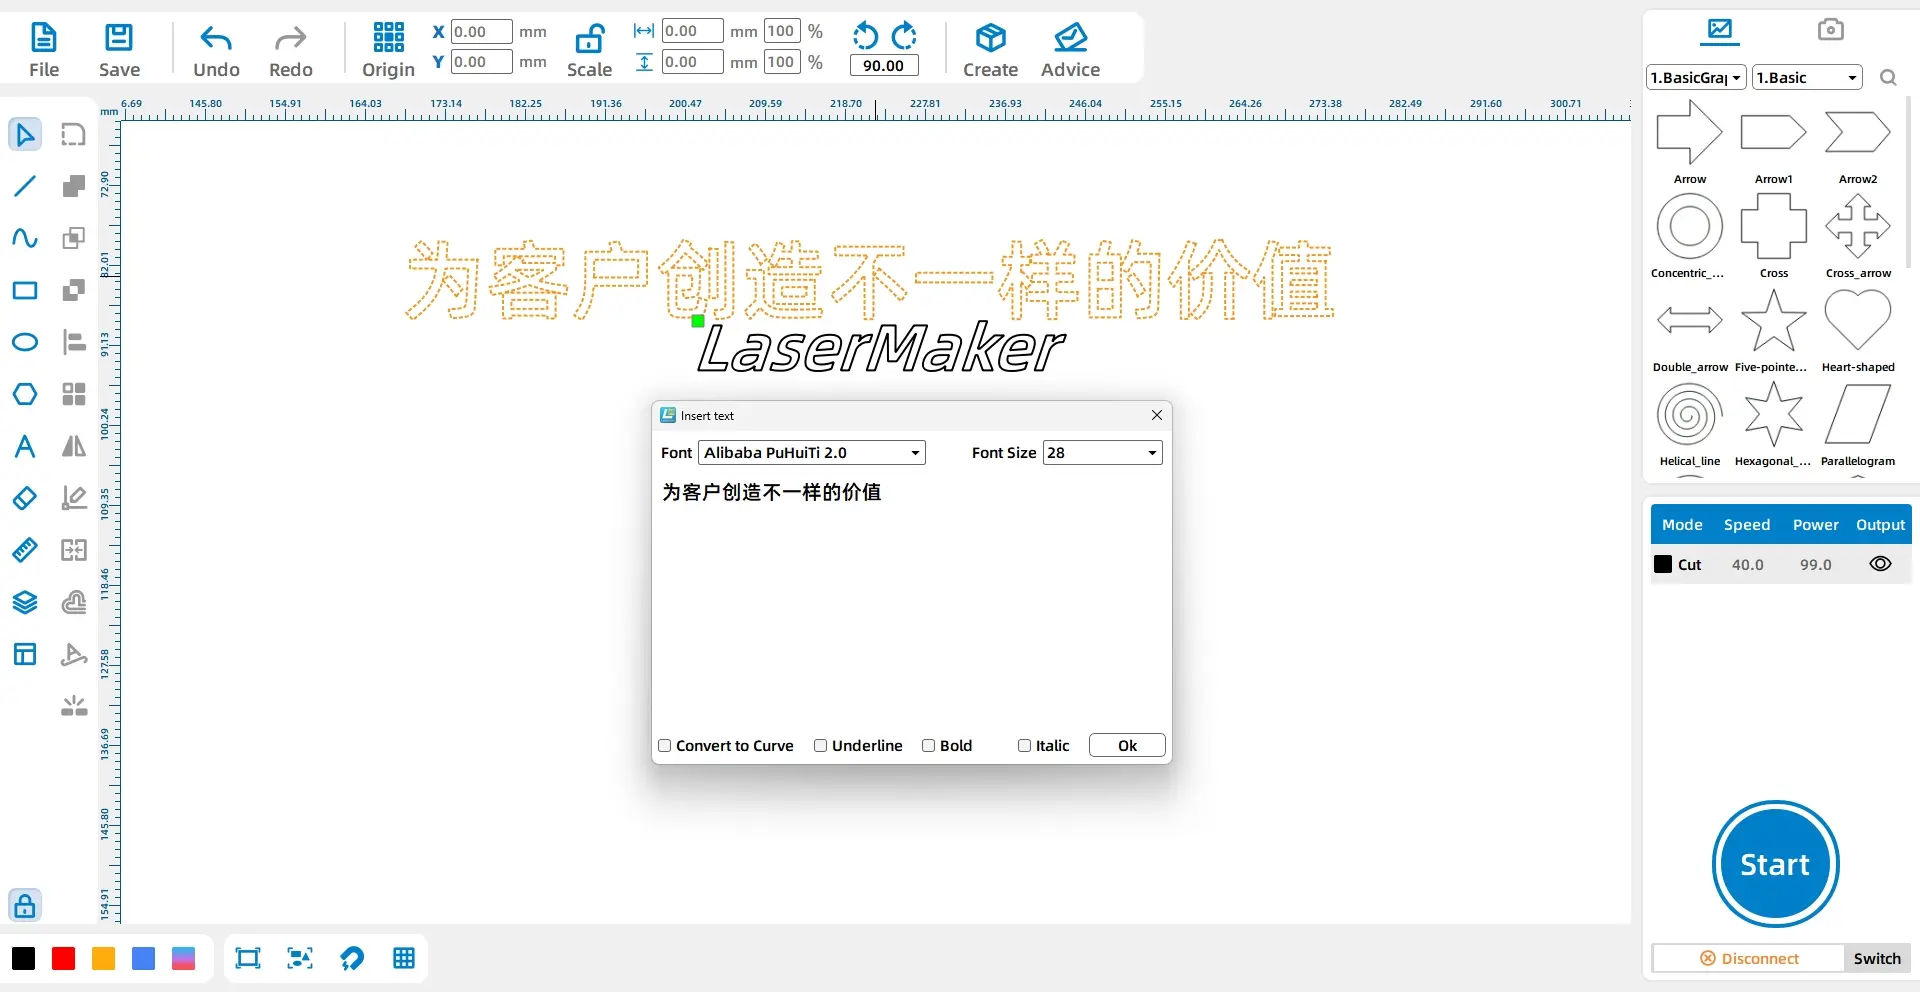
Click the Font tool again and enter “Creating Unique Value for Customers.” Set the font to Chinese Kai and the font size to Wuhao. Use this as Text 2, then move it to the centre and directly above Text 1.
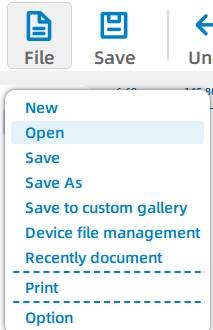
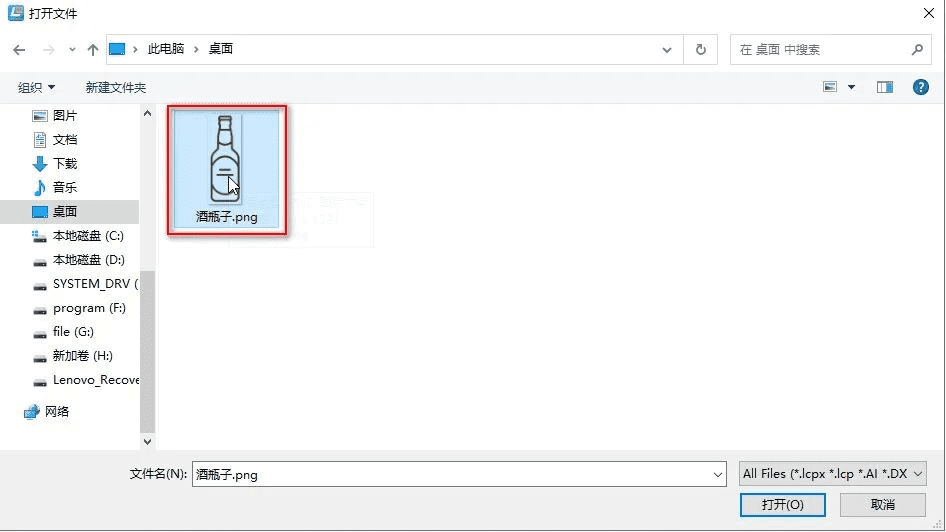
Click File in the top ribbon, then click Open. Double-click to open the wine bottle image that needs to be engraved.
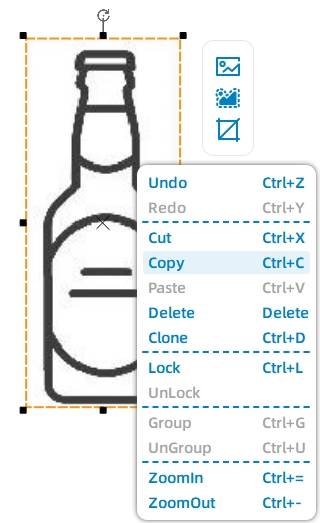
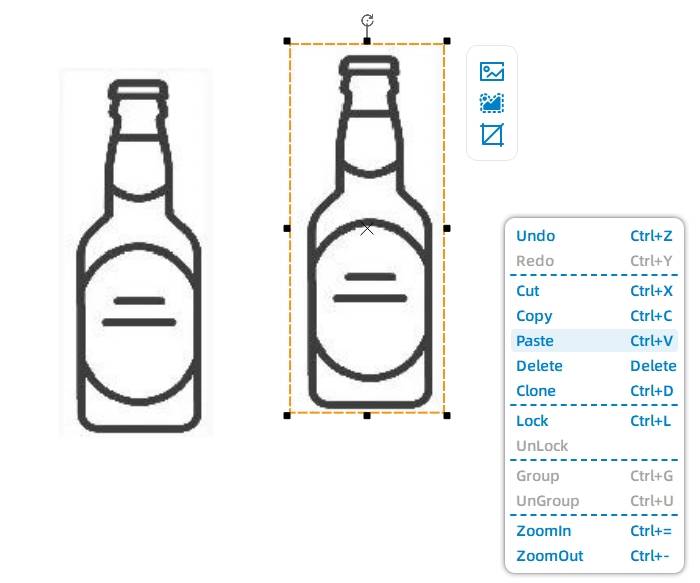
Select the wine bottle graphic, right-click it, and choose Copy. Then right-click the target location and choose Paste to duplicate the graphic. Label the two graphics as Graphic 1 and Graphic 2.
LaserMaker shortcut: To duplicate a graphic more quickly, select it and press Ctrl+C to copy, then press Ctrl+V to paste.
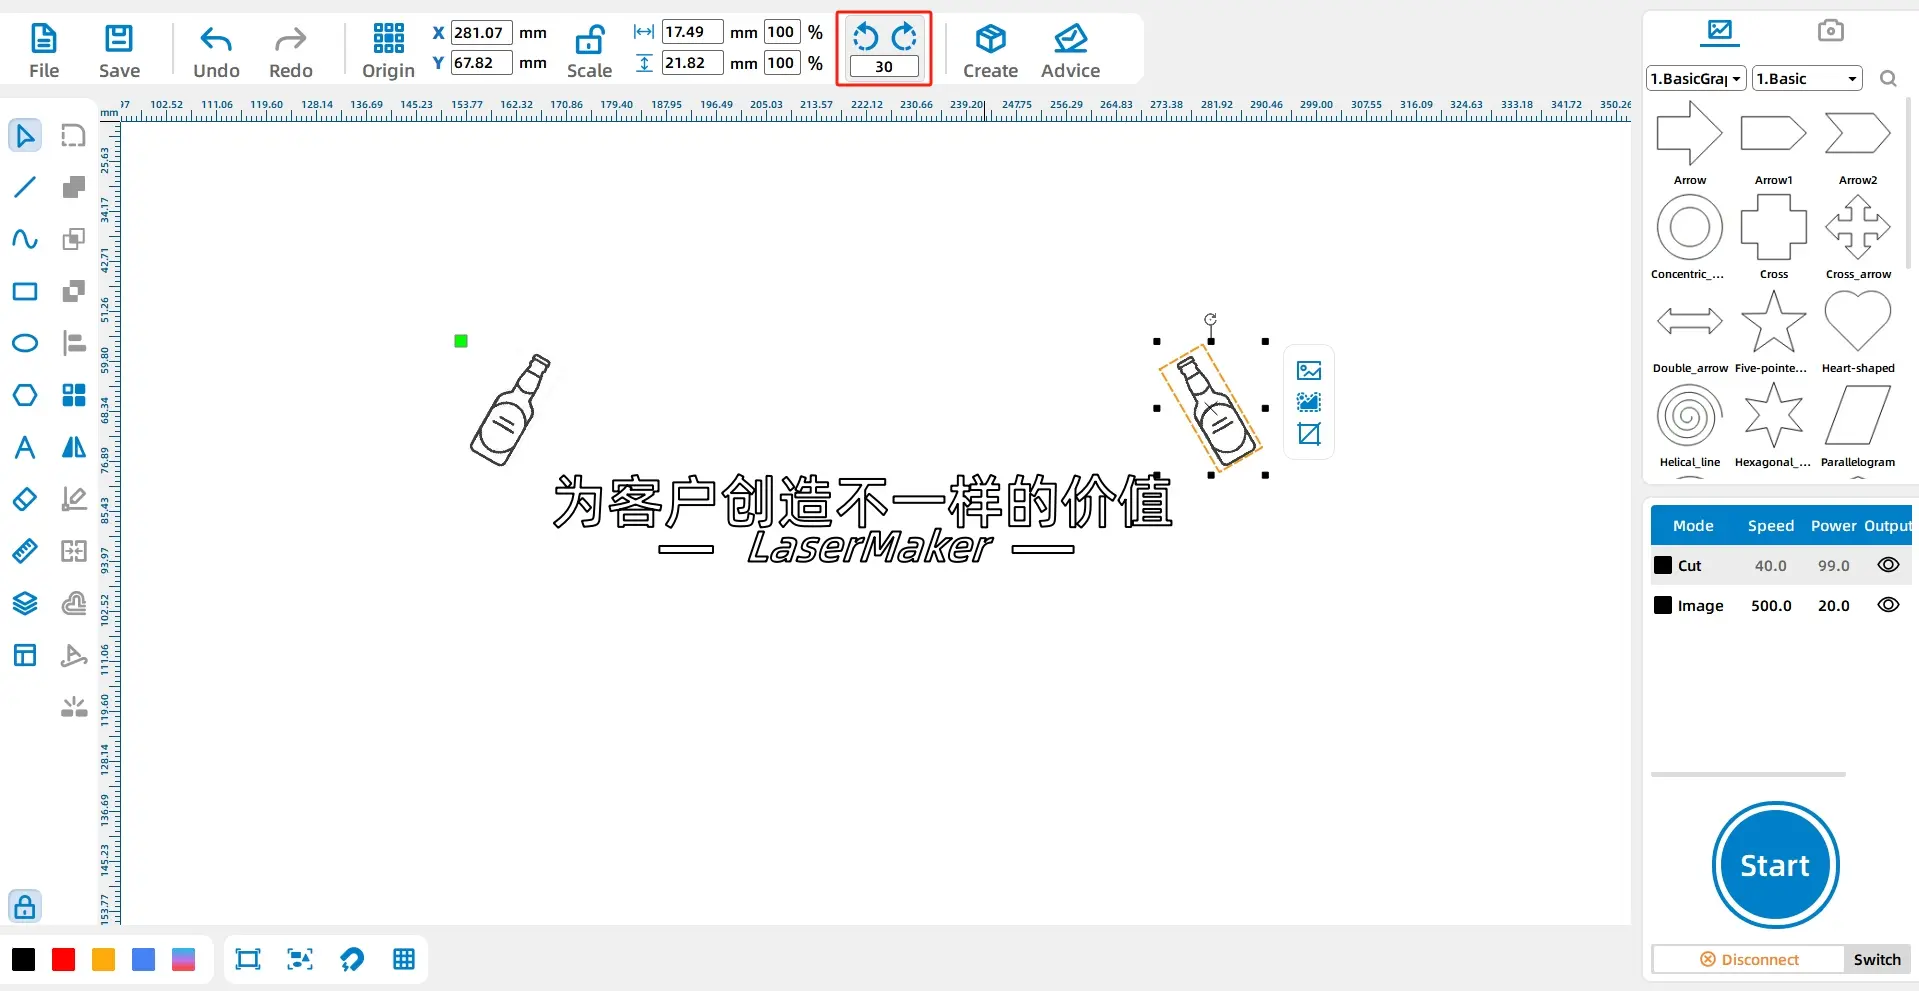
Select Graphic 1, left-click and hold the rotation icon above the graphic, then move the mouse until the angle reaches 30 degrees. Release the mouse to rotate the graphic clockwise by 30 degrees.
For Graphic 2, enter “-30” in the rotation value and click the rotate button to rotate it counterclockwise by 30 degrees. Move the two graphics to the upper sides of Text 1 to create a balanced layout.
Select Text 1 and Text 2, then click the yellow layer in the layer palette at the lower left corner. This sets both text elements to the yellow layer.
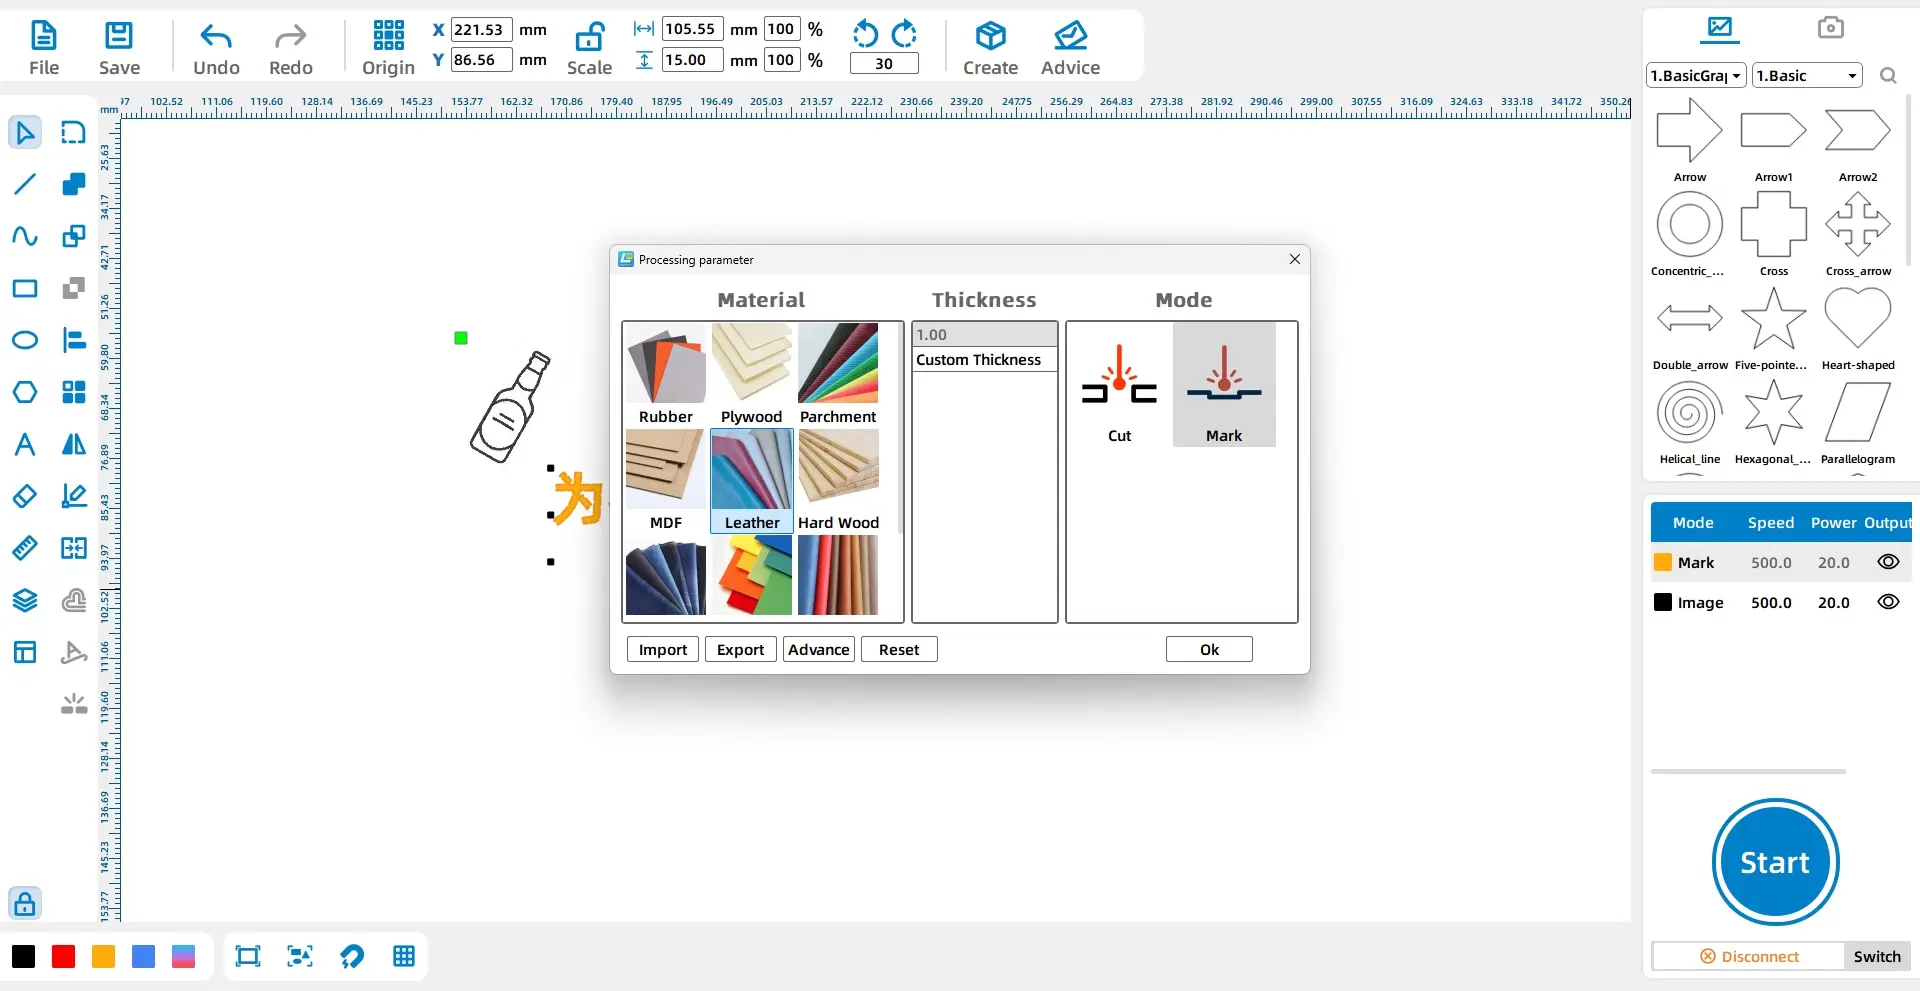
In the processing panel at the lower right corner, double-click the black image layer. Set the material to Artificial Leather, the thickness to 1mm, and the process to Shallow Engraving.
Repeat the same settings for the yellow layer: Artificial Leather, 1mm, and Shallow Engraving.
| Layer | Material Setting | Thickness Setting | Process | Project Use |
|---|---|---|---|---|
| Black | Artificial Leather | 1mm | Shallow Engraving | Wine bottle graphics |
| Yellow | Artificial Leather | 1mm | Shallow Engraving | Main text and slogan |
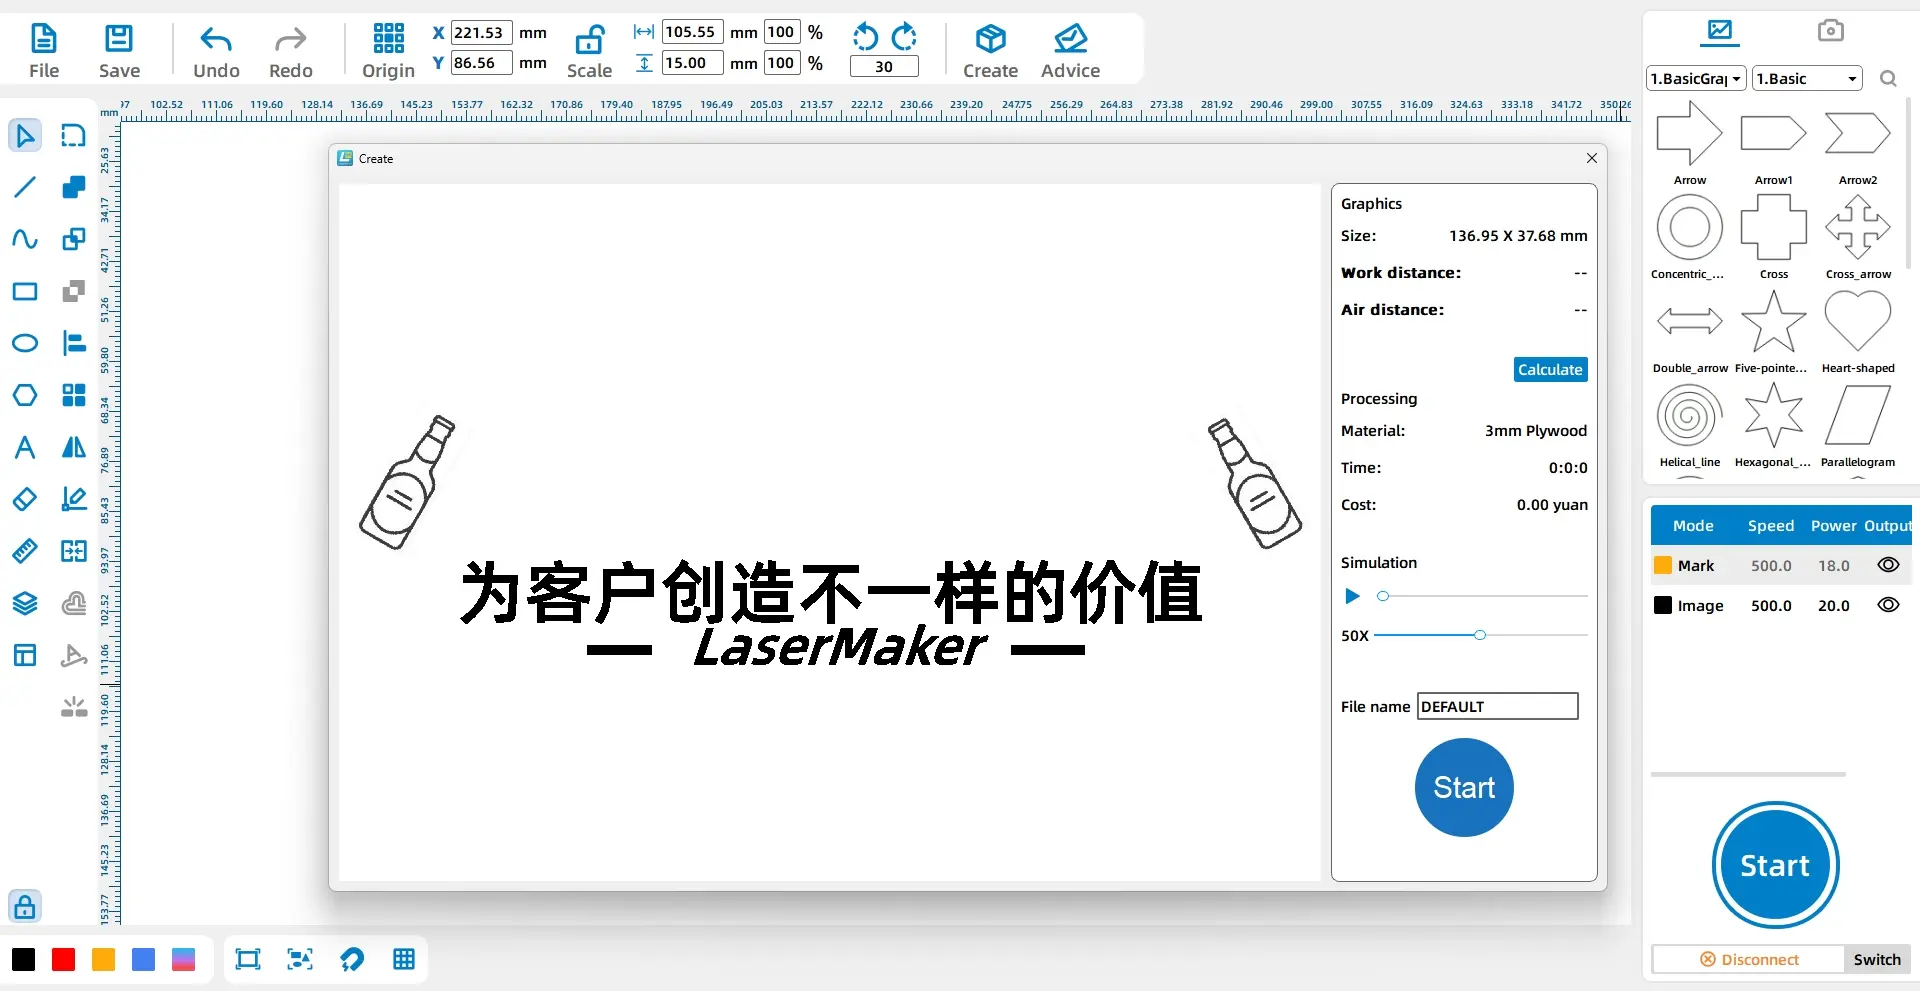
Click the Start button in the processing panel at the lower right corner to upload the file to the laser device.
Before engraving the final bottle opener, students should check the design size, text position, graphic rotation, layer settings, and engraving process. The full design should stay within the 72mm by 25mm processable area.
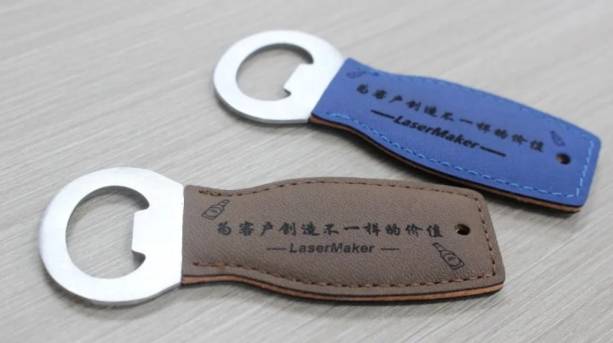
After laser engraving, the leather bottle opener becomes a personalized product with text and decorative wine bottle graphics. Students can compare how font choice, rotation angle, and spacing affect the final result.
Once students understand the workflow, they can design their own custom bottle opener. They can replace the text, change the slogan, use a different icon, adjust the rotation angle, or create a design for a school event, club activity, restaurant, café, or personal gift.
Extension idea: Ask students to create a bottle opener for a real audience. They should explain why they chose their text, icon, font style, and layout, and how the design fits within the 72mm by 25mm engraving area.
In this custom leather bottle opener project, students learn how to measure a real product, create text in LaserMaker, import and duplicate graphics, use copy and paste shortcuts, rotate objects, assign layer colours, and set shallow engraving for artificial leather.
The project shows that digital modeling becomes easier with practice. By trying small product customization activities like this one, students can build confidence with LaserMaker tools and understand how laser engraving can turn everyday items into personalized designs.
Create More LaserMaker STEAM Projects
Explore Thunder Laser machines for classroom laser engraving projects, personalized accessories, artificial leather engraving, student maker activities, and hands-on digital fabrication lessons.
Explore Bolt SeriesTalk To Our Experts Now!
Please leave your contact information so that we can serve you better.
NEED HELP FINDING THE RIGHT SOLUTION?
Talk to our team for machine recommendations, application advice, and support based on your needs.

 Stable & Consistent MachinesUnlimited ApplicationRobust After-sales SupportFactory Direct Supply