Custom City Road Sign Laser Cutting Project: A LaserMaker STEAM Course
 2024-08-19
WHAT ARE YOU LOOKING FOR?
Search Across Products, Blog Posts, Support Content, And Resources.

Custom City Road Sign Laser Cutting Project: A LaserMaker STEAM Course
2024-08-19

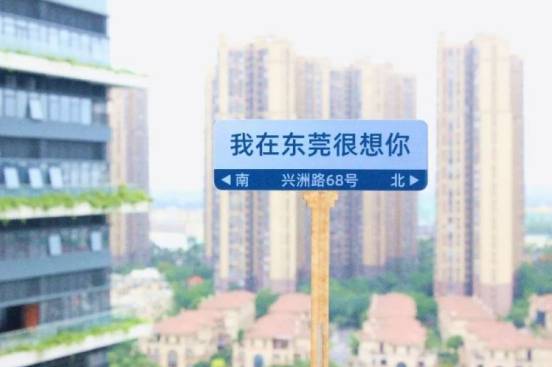
In this LaserMaker STEAM course, students will design and make a custom city road sign using simple shapes, text tools, rounded corners, shallow engraving, and cutting. The project is inspired by popular “check-in” road signs often shared on social media, where a place name or message becomes part of a city’s visual identity.
Through this activity, students learn how a flat sign can communicate location, emotion, and design style. They will build the sign from rectangles, rounded corners, text, triangle direction icons, and layer-based processing settings in LaserMaker.
The finished project is a small custom road sign made from dual-color board. Students will create the sign outline, add directional text and a large message, draw triangle icons, and then use different layers for engraving and cutting.
A key learning point in this lesson is the use of an intaglio-and-relief style effect. When two engraved areas overlap, the overlapping part is left unengraved. This contrast between engraved and unengraved areas helps create clear lettering and graphic effects on the sign surface.
Teacher note: This lesson is suitable for a LaserMaker introduction because it combines simple geometry, text layout, shape editing, layer control, engraving order, and laser cutting in one compact classroom project.
Custom road signs are often used in public spaces, cafés, exhibitions, school events, photo zones, workshops, and creative displays. A simple sign can show direction, identify a location, or express a message that encourages people to take photos and share their experience.
In a classroom or makerspace, this project can be adapted into school club signs, classroom location signs, city-themed displays, event signs, directional labels, or personalised desk and door signs.
Prepare the following materials before starting the road sign project.
| Number | Material Name | Quantity | Project Use |
|---|---|---|---|
| 1 | 1.5mm Dual-Color Board | 1 | Main road sign surface for shallow engraving and cutting |
| 2 | 3mm Acrylic Board | 1 | Listed project material; use according to the classroom version of the project |
Equipment note for teachers: This type of classroom sign project can be completed on a laser cutter suitable for engraving and cutting thin sign materials, such as the Thunder Laser Bolt Series. Always test materials and supervise laser operation.
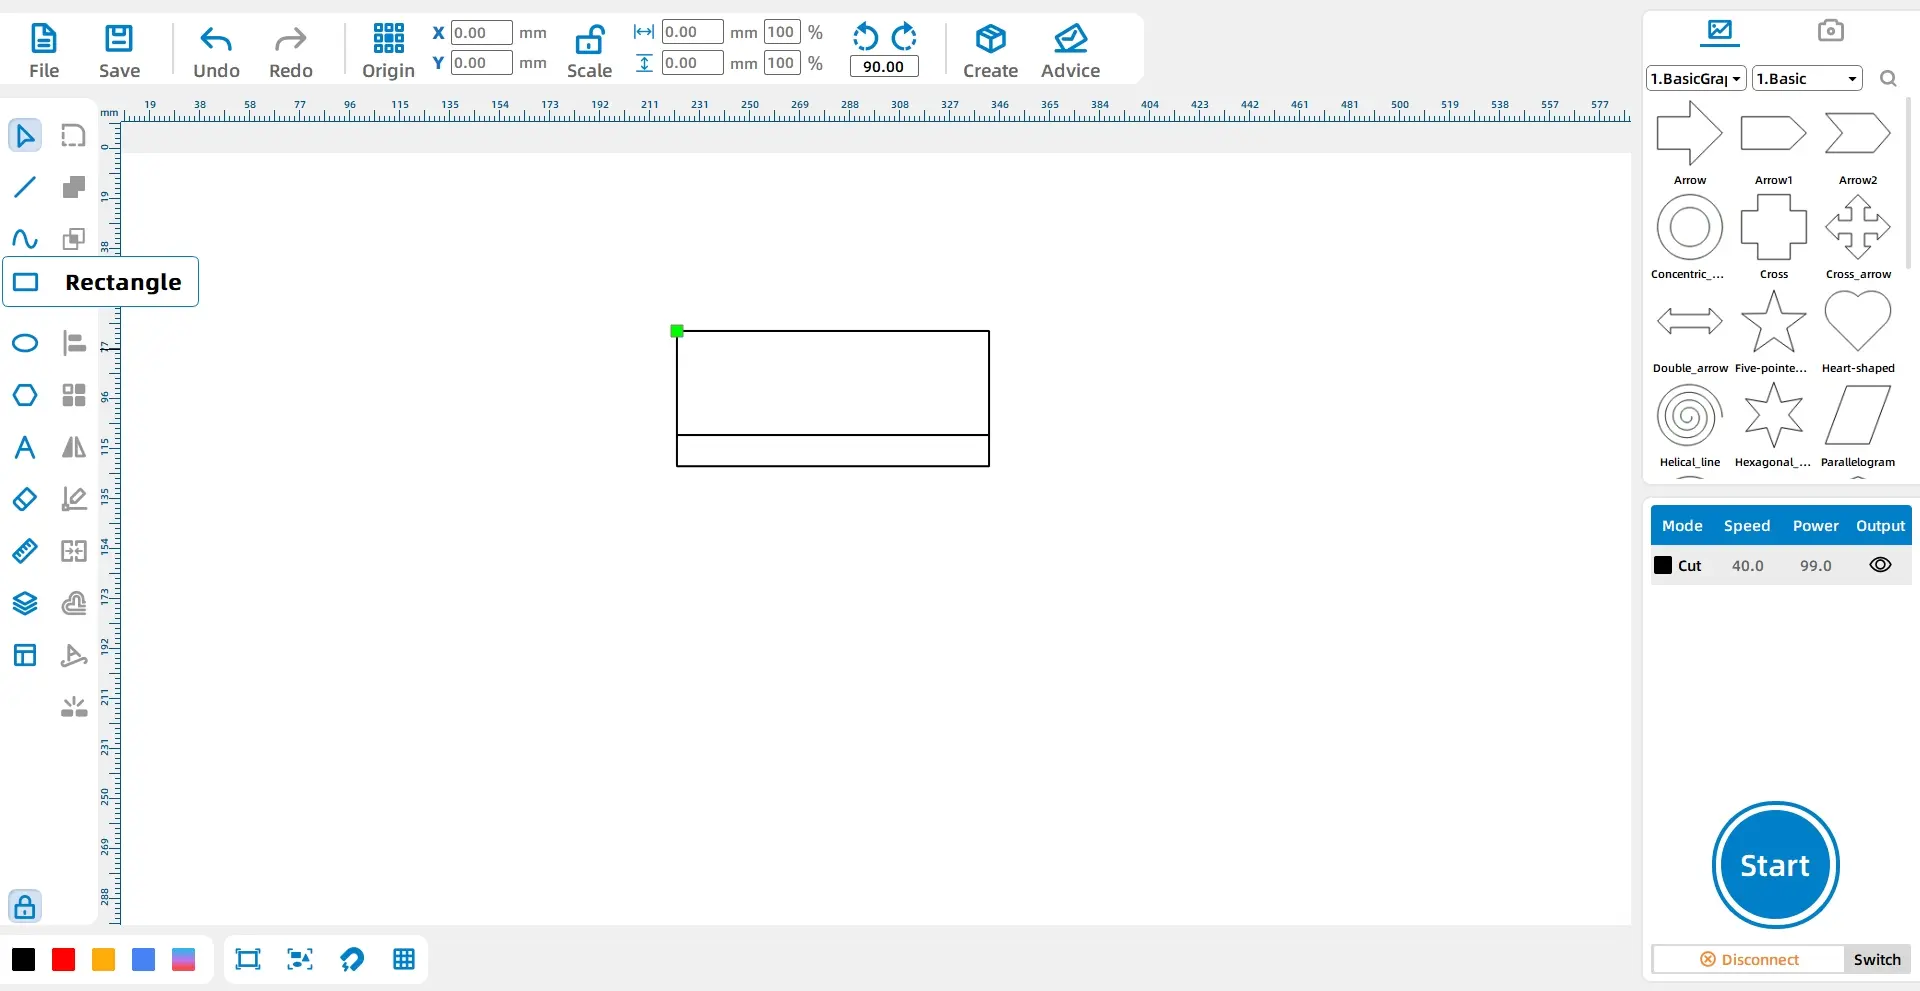
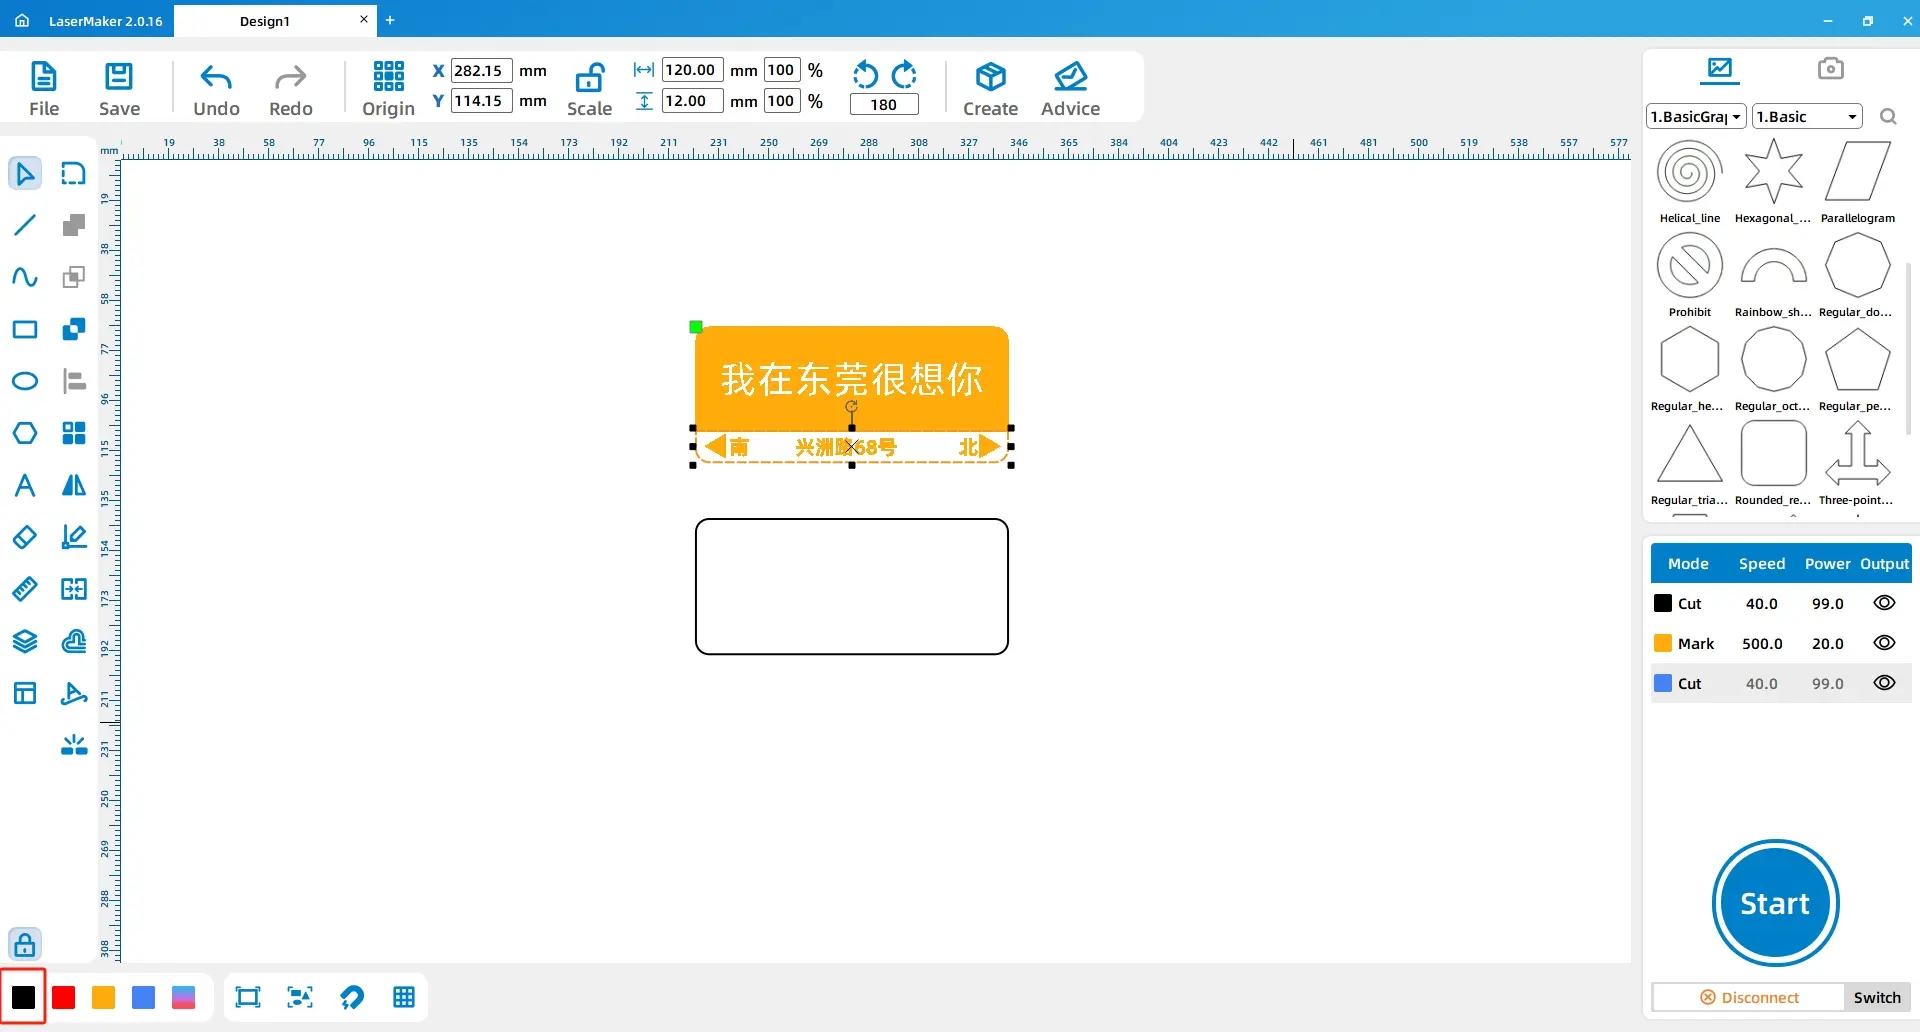
Open LaserMaker and select the Rectangle tool from the drawing tools on the left. In the drawing area, draw the first rectangle with a length of 120mm and a width of 40mm. Then draw a second rectangle with a length of 120mm and a width of 12mm. Move the second rectangle to the bottom so it overlaps with the first rectangle.
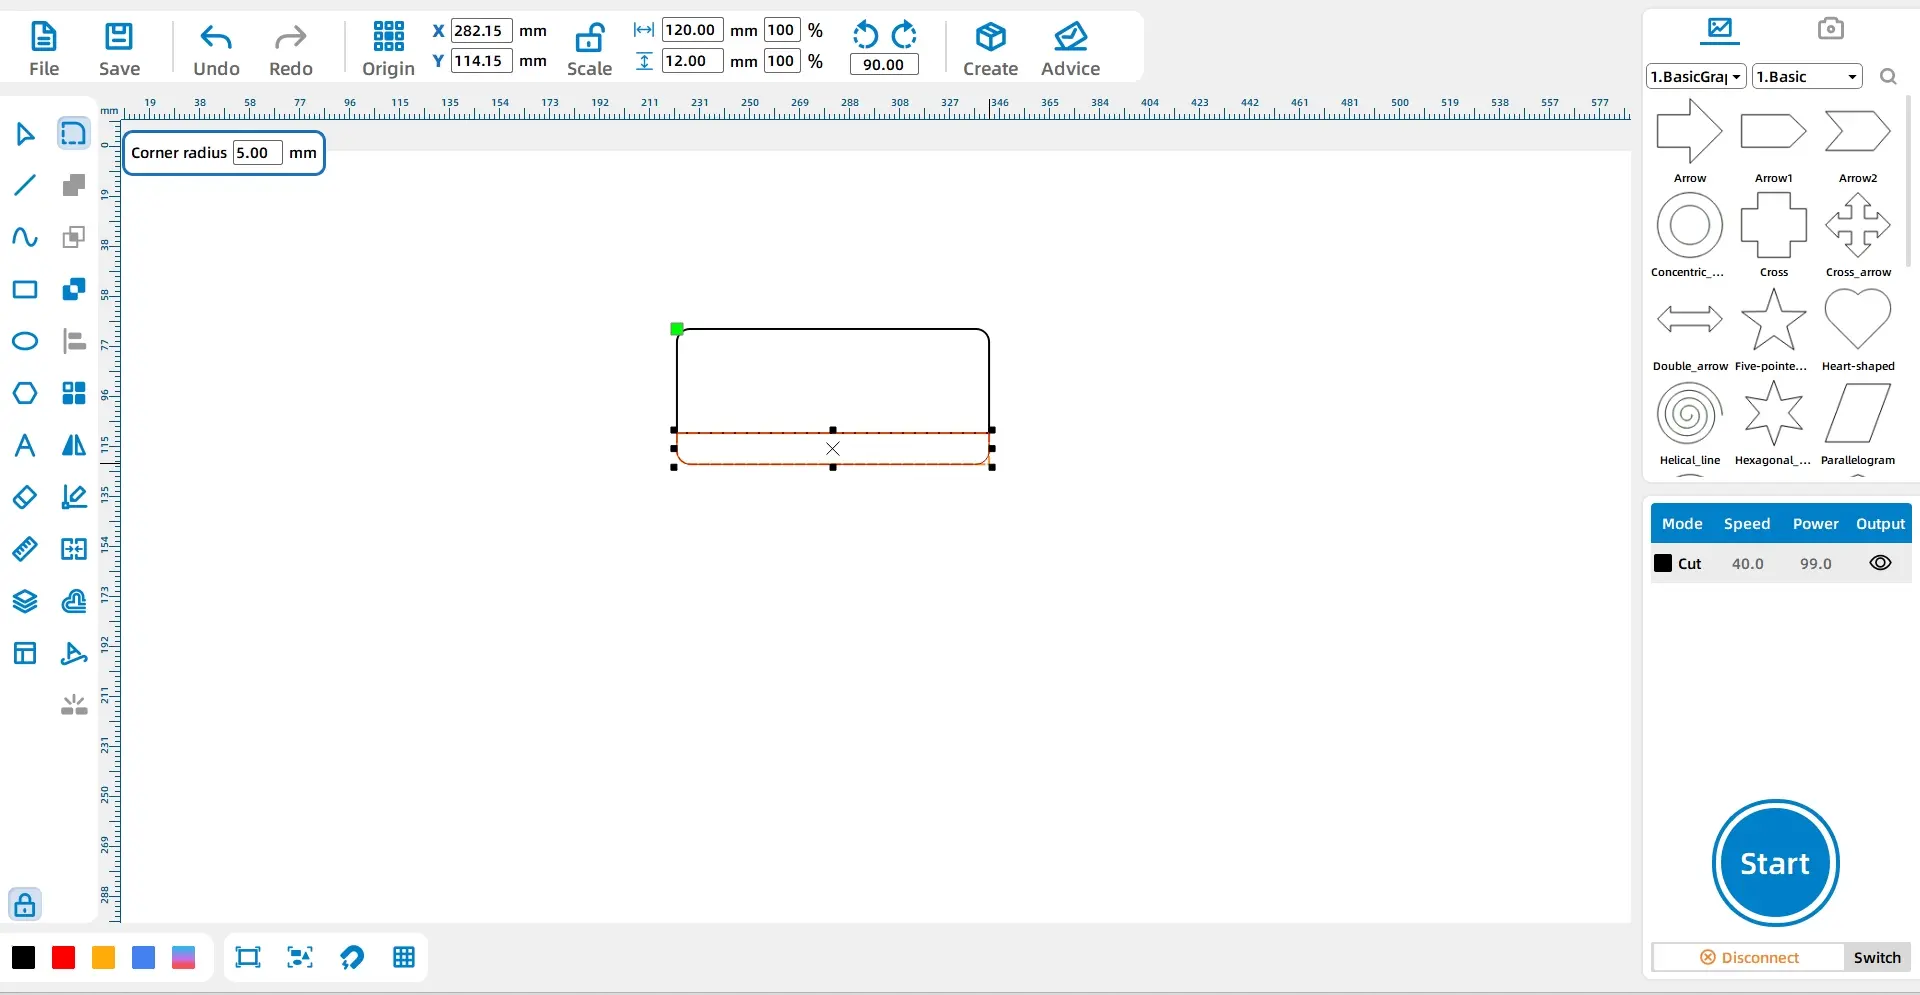
Select the rectangle and choose the Rounded Corners tool from the drawing tools. Set the rounded corner radius to 5mm, then click the rectangle corners to round them.
LaserMaker tip: Tools such as Rounded Corners and Union appear only after a shape is selected. If the tool does not appear, check whether the correct shape is selected first.
Select the first rectangle, press Ctrl + C to copy it, then press Ctrl + V to paste it. This creates a third rectangle that will be used later for the cutting layer.
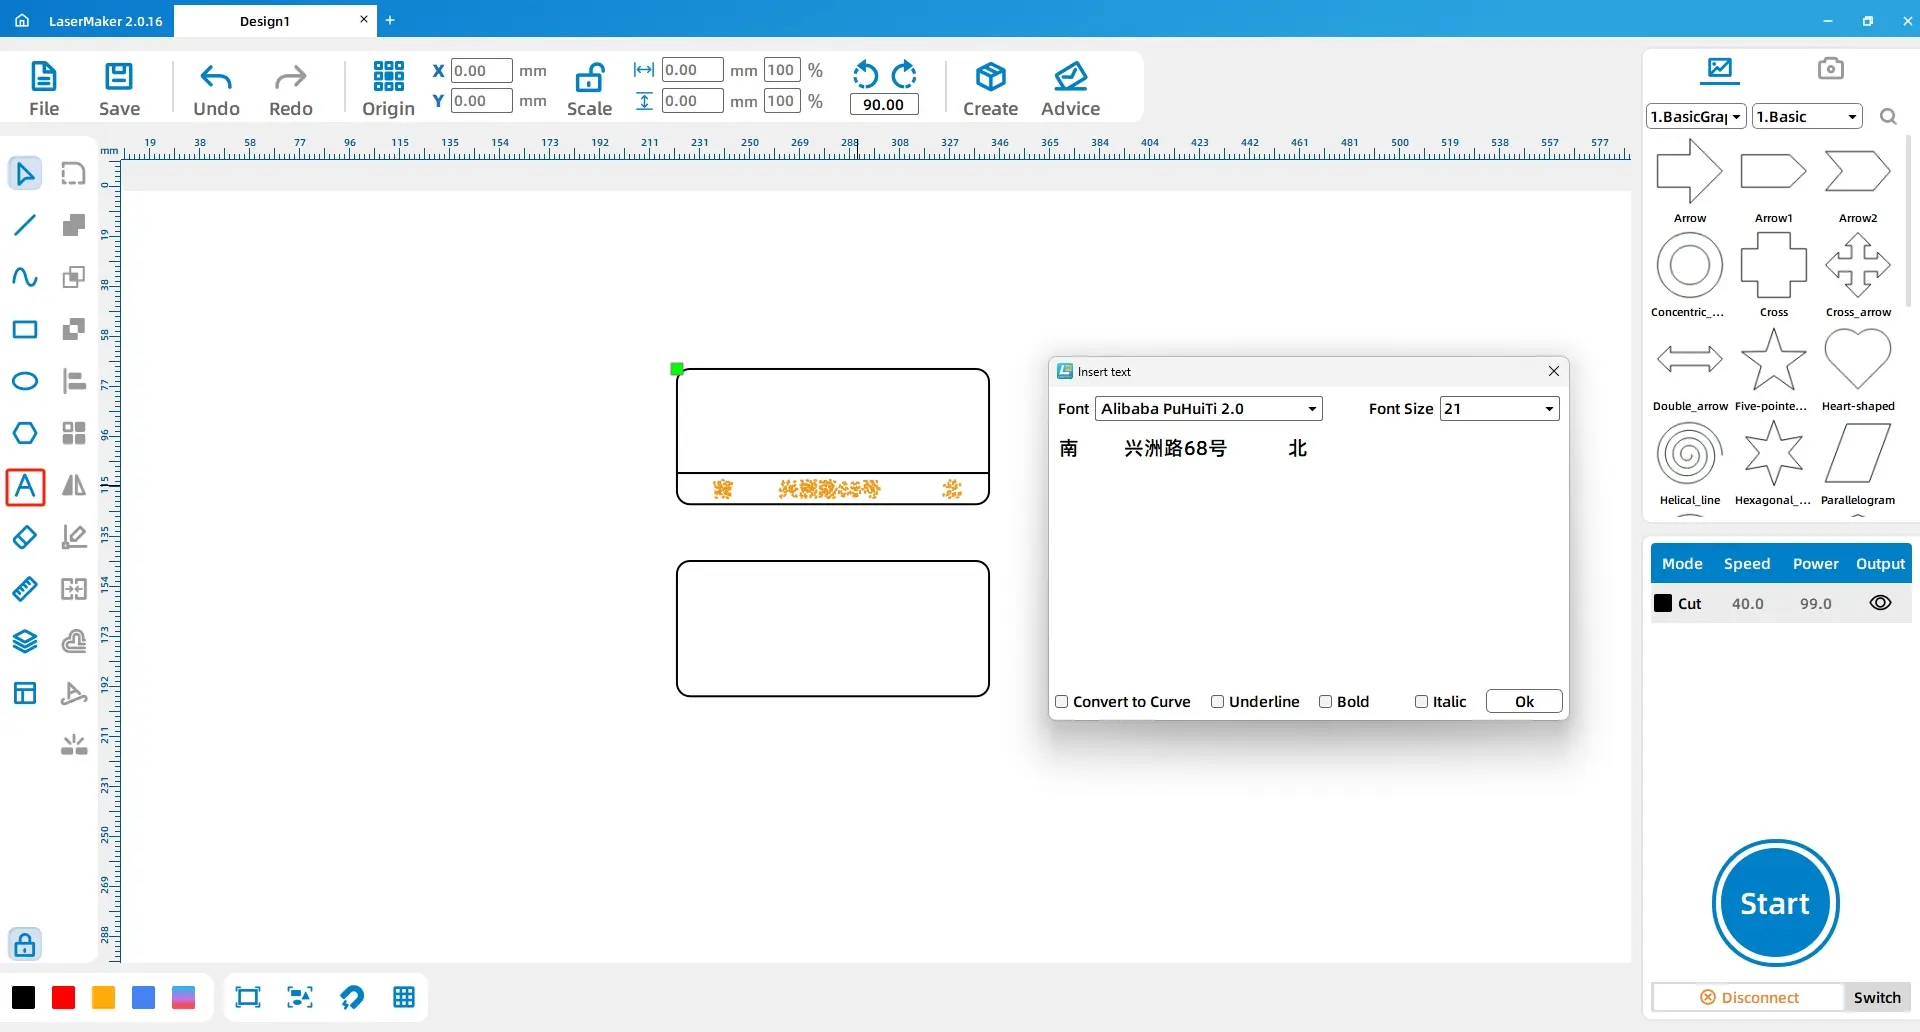
Select the Text tool from the drawing tools. Enter the text “南 兴洲路68号 北”. Set the font to Alibaba PuhuiTi 2.0 Semibold and set the font size to 21.
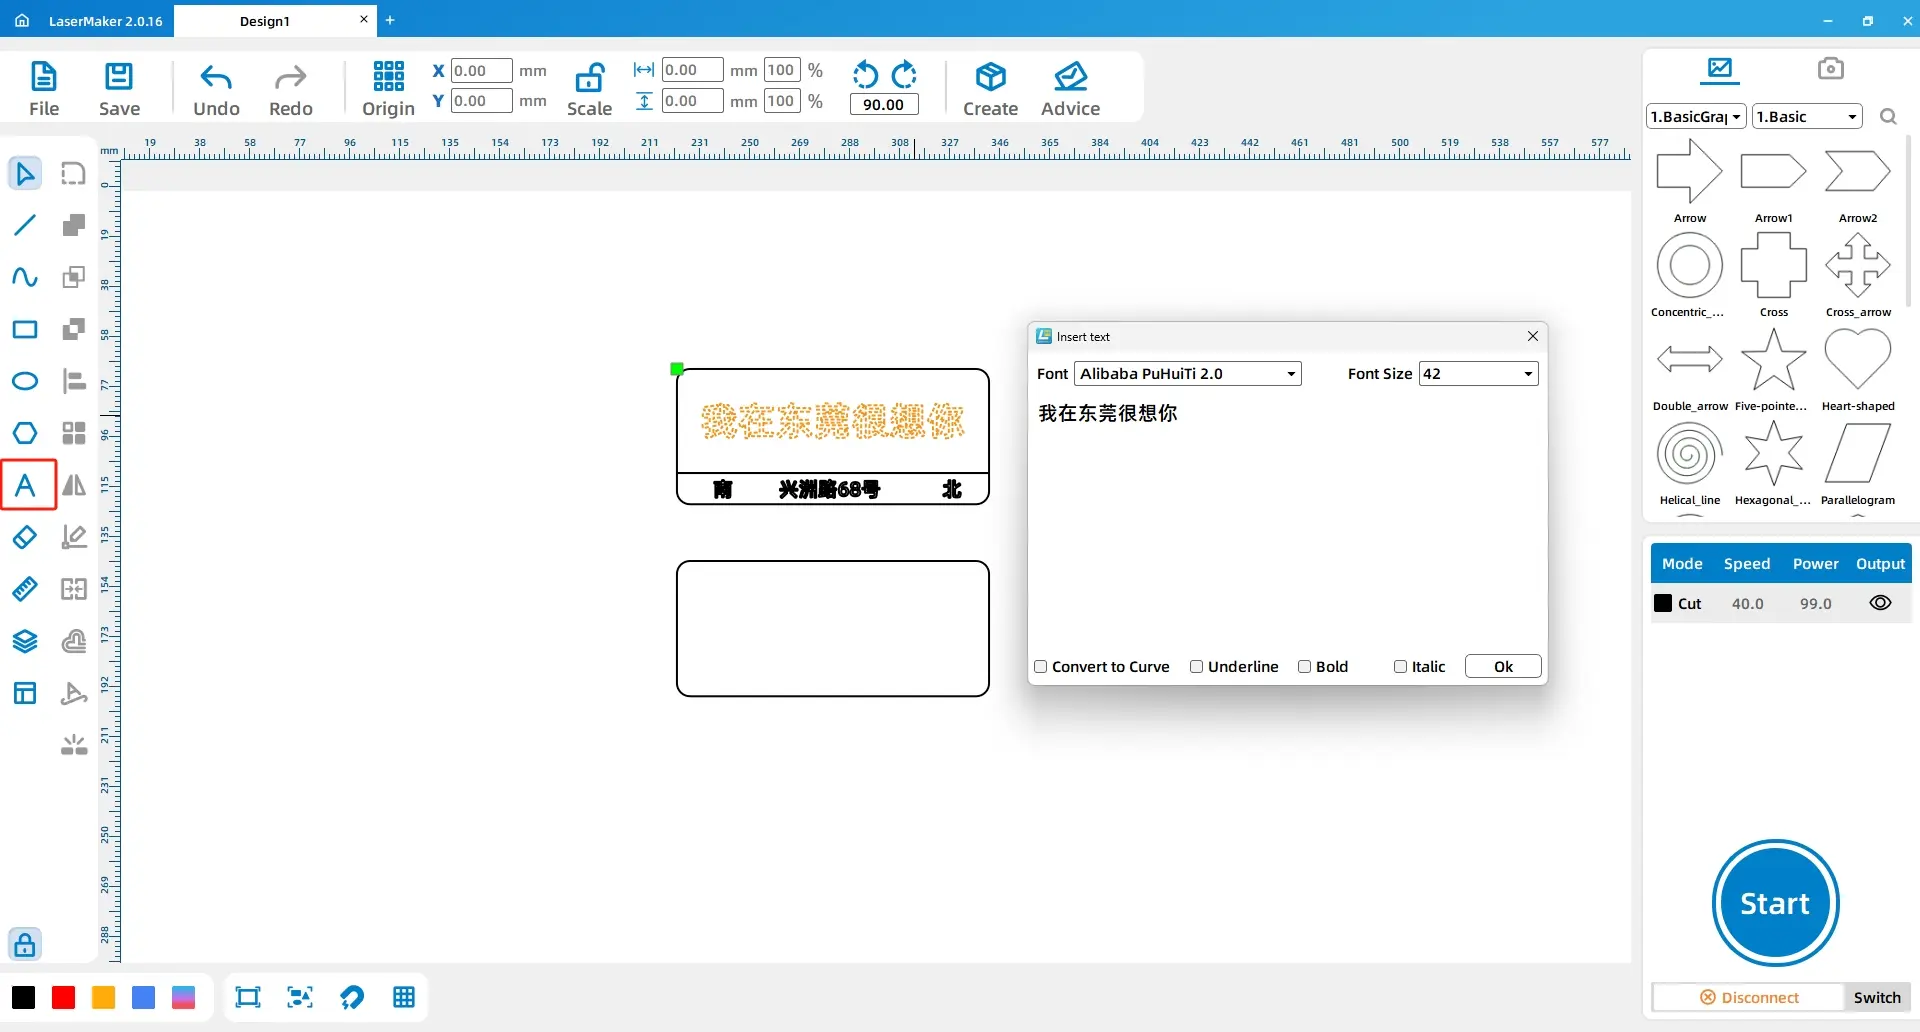
Use the Text tool again and enter the main message “我在东莞很想你”. Set the font to Alibaba PuhuiTi 2.0 Semibold and set the font size to 42.
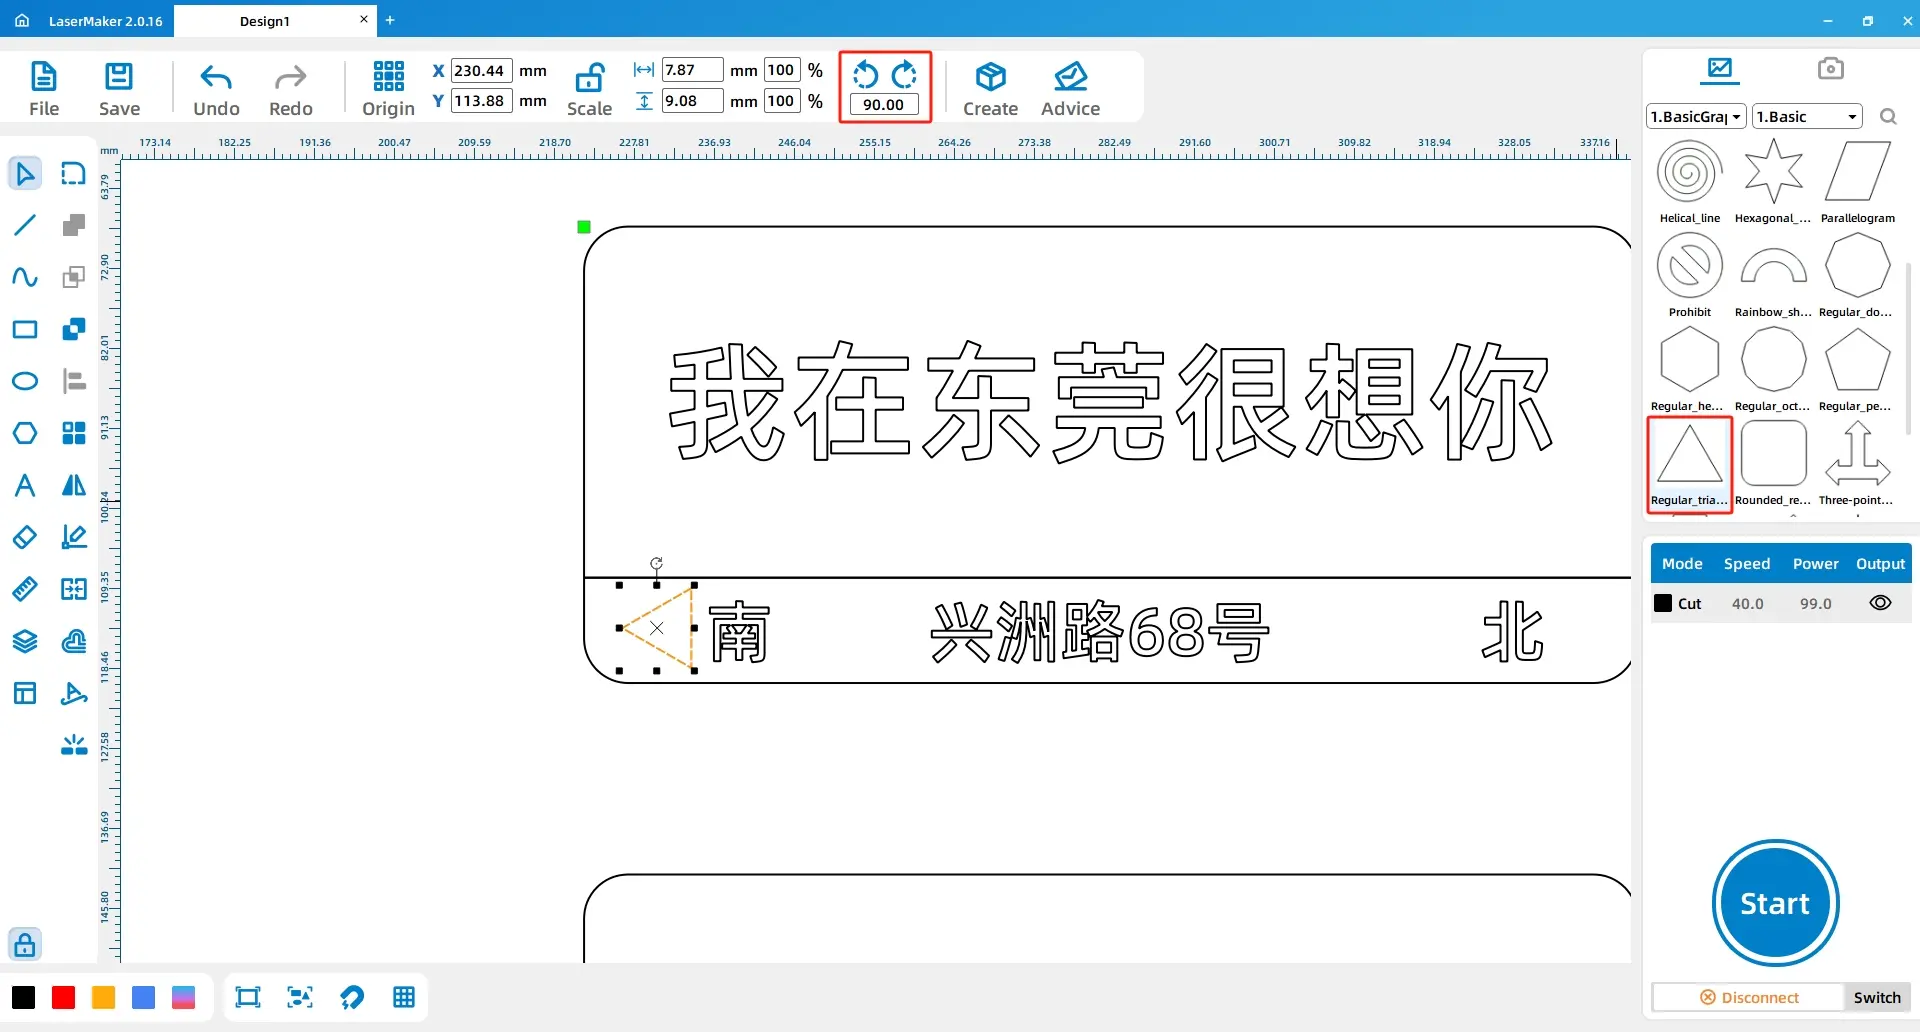
From the Basic Shapes area, select the Equilateral Triangle shape and drag it into the drawing area. Resize it to 6mm. Use the rotation control and set the value to -90 degrees to create the first direction triangle.
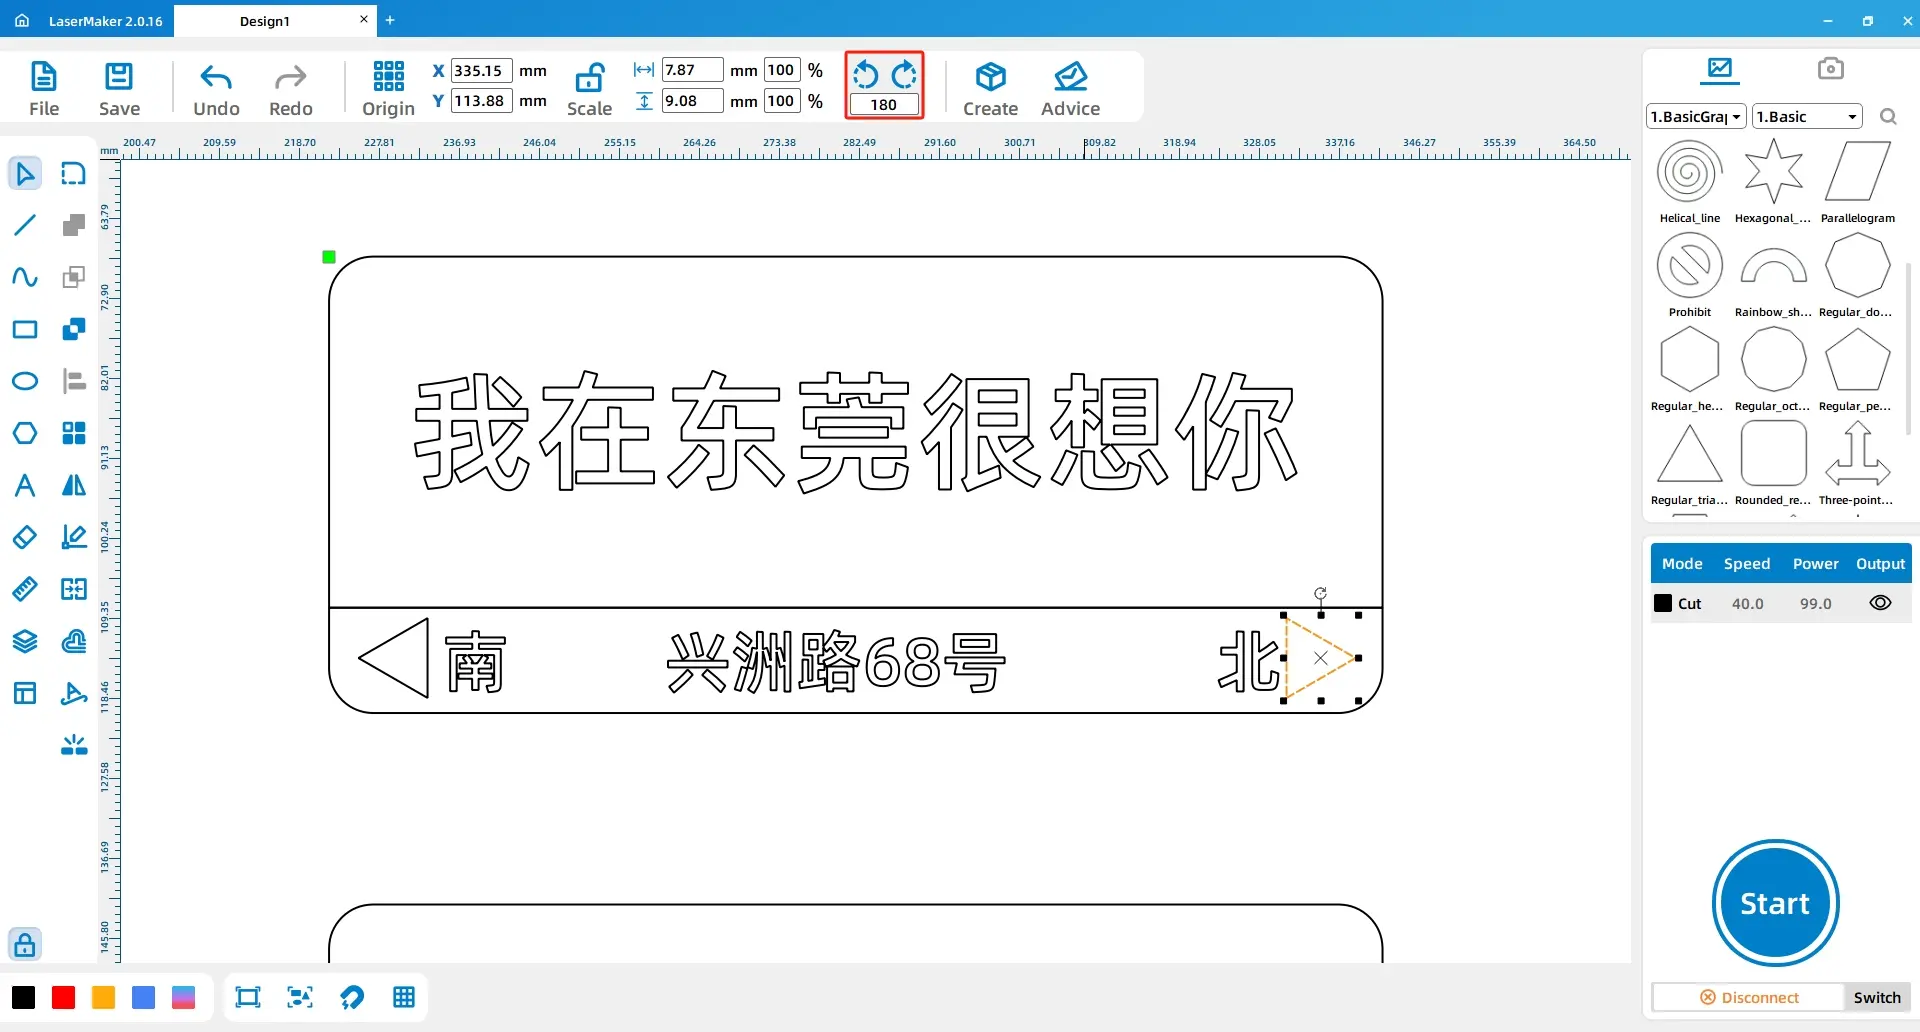
Click the first triangle, press Ctrl + C to copy it, and press Ctrl + V to paste it. Rotate the copied triangle by 180 degrees to create the second direction triangle.
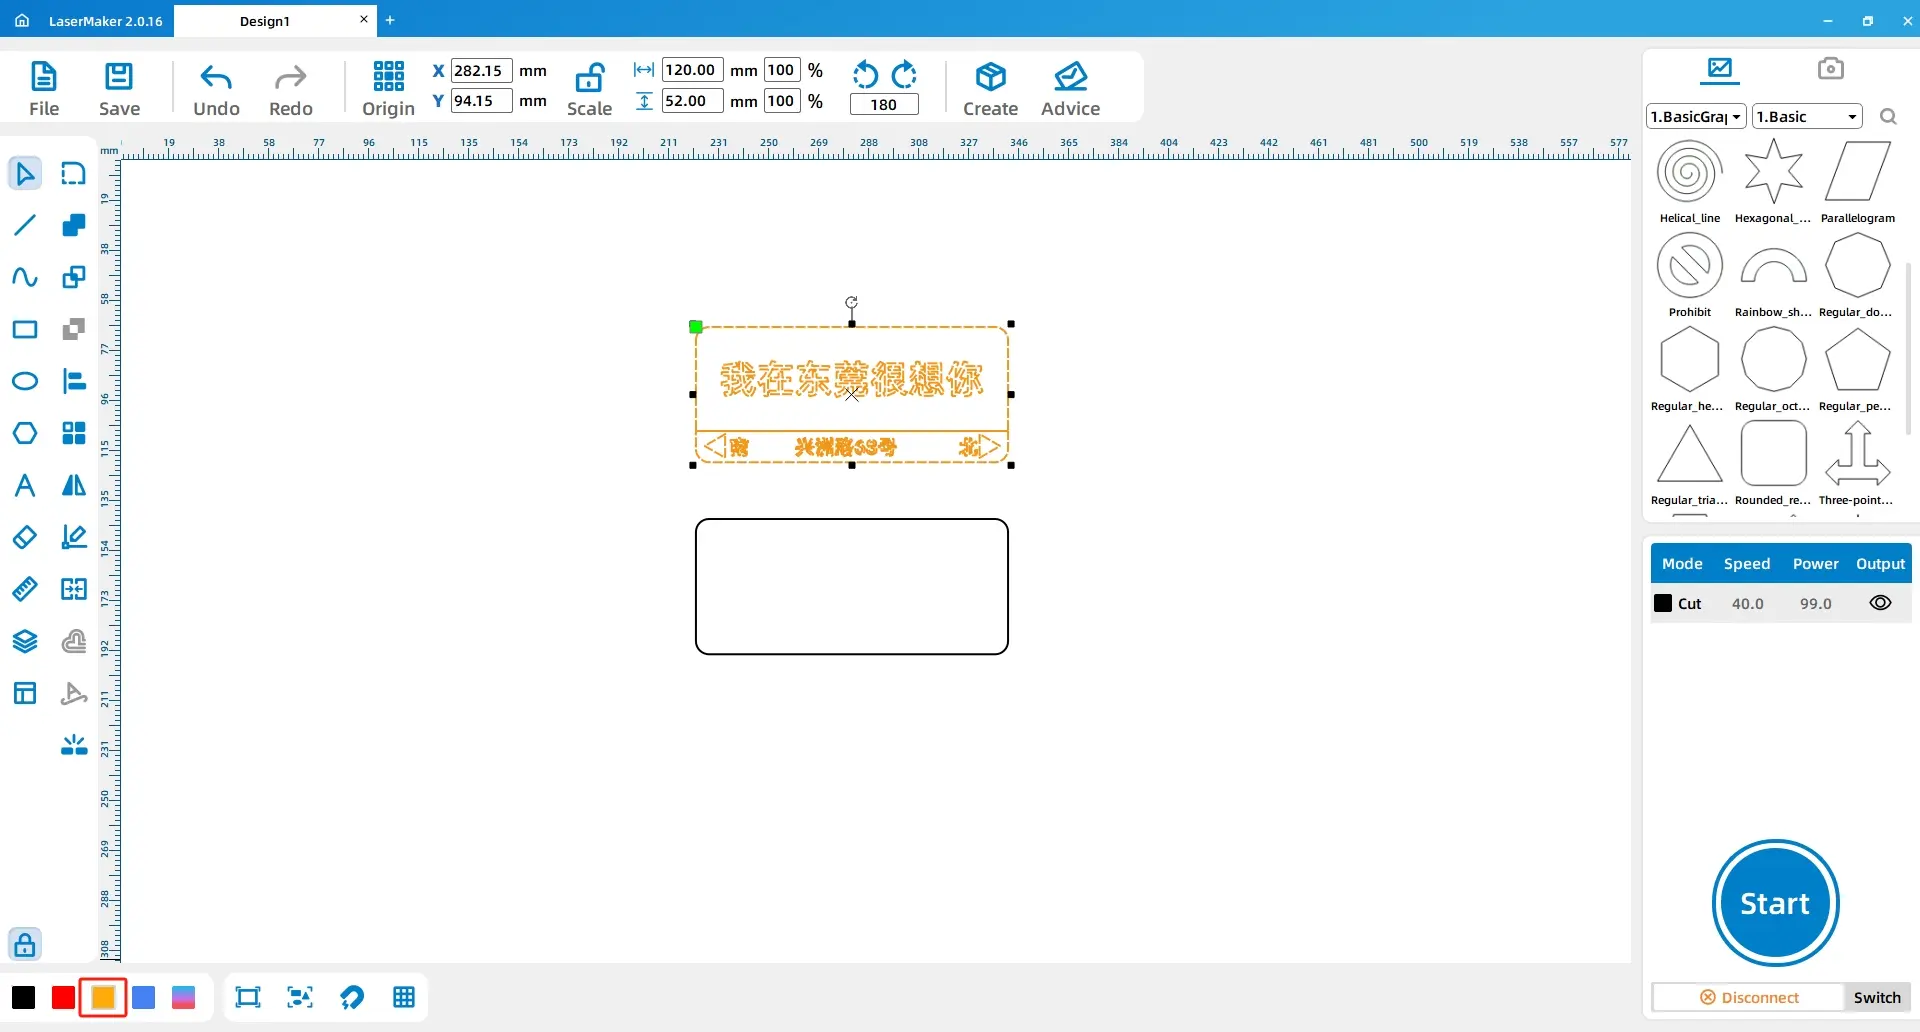
Select all content inside the first rectangle. In the layer panel at the lower left, change the outline colour to yellow. This yellow layer will be used for shallow engraving.
This project uses both intaglio and relief effects. When two engraving layers overlap, the overlapping area is not engraved. In this project, the overlapping part between the main rectangle and the lower rectangle remains unengraved, while the surrounding engraved area creates contrast.
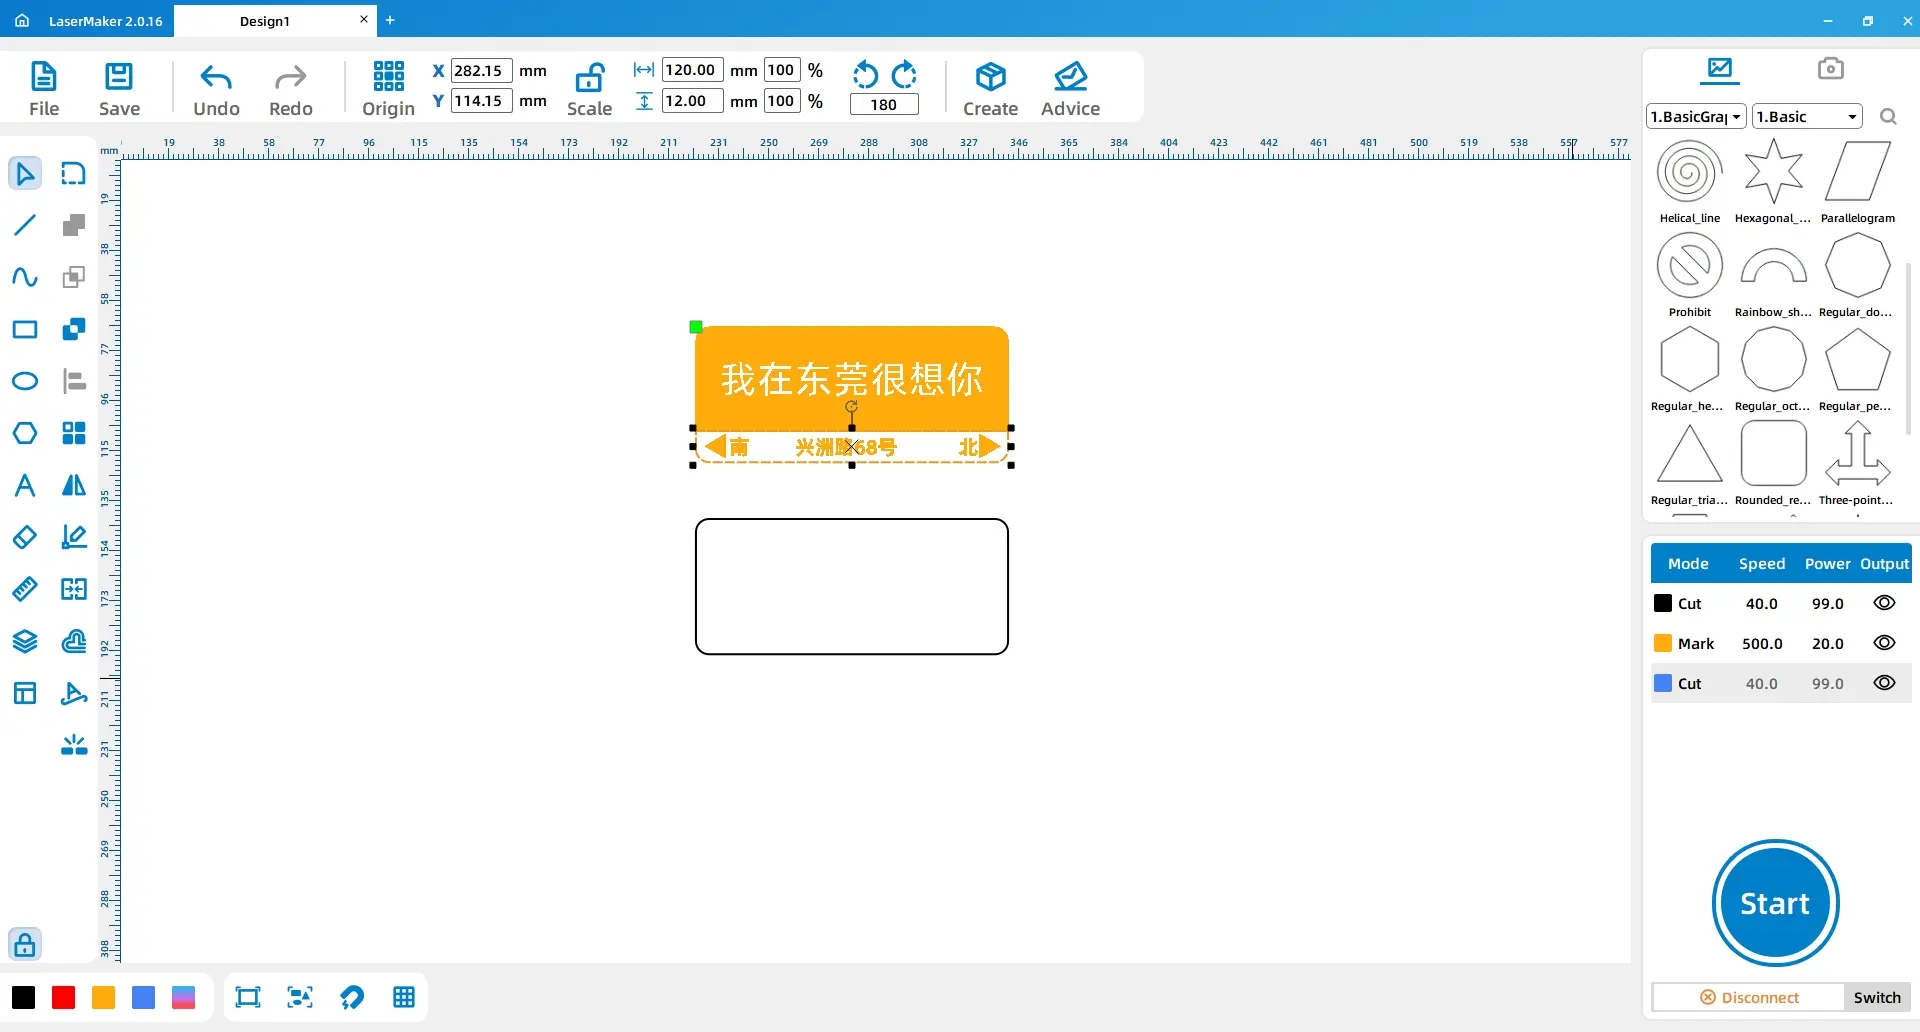
Select the third rectangle and move it so that it overlaps with the first rectangle. With the third rectangle selected, change its outline colour to black in the layer panel. This black layer will be used for cutting the final sign outline.
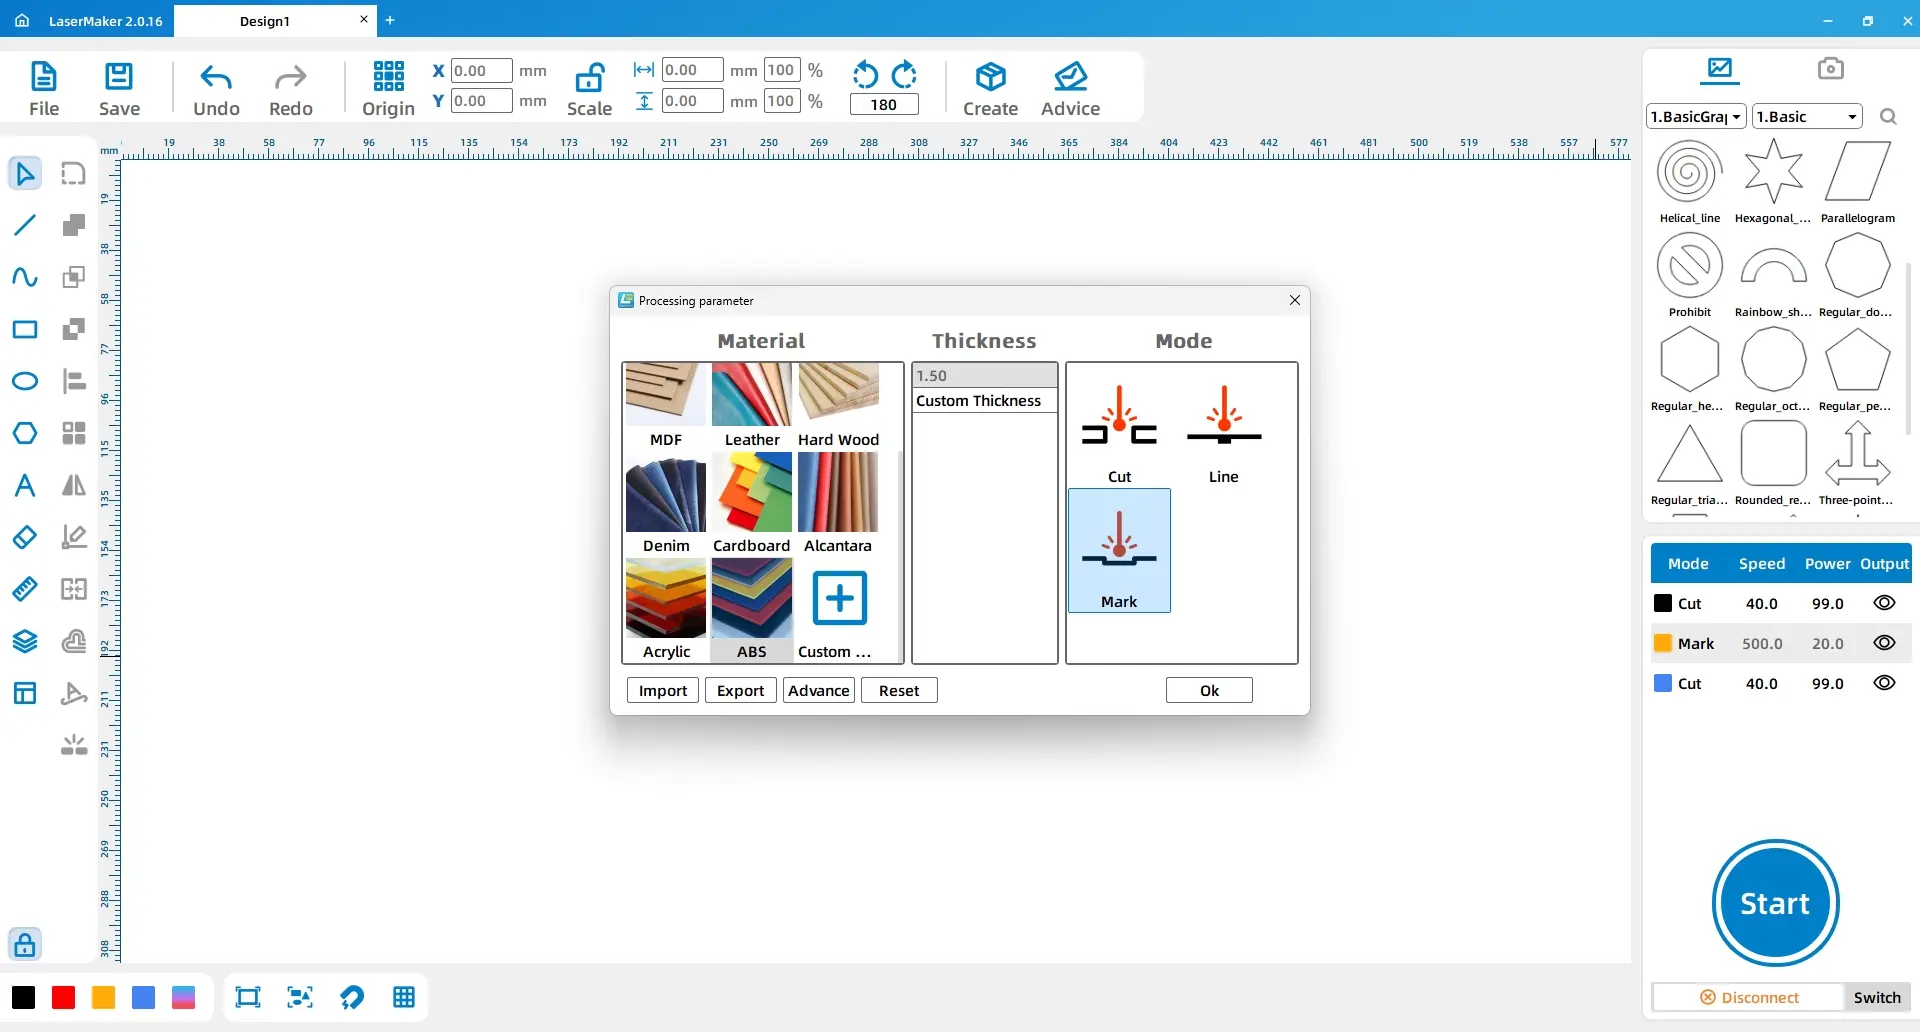
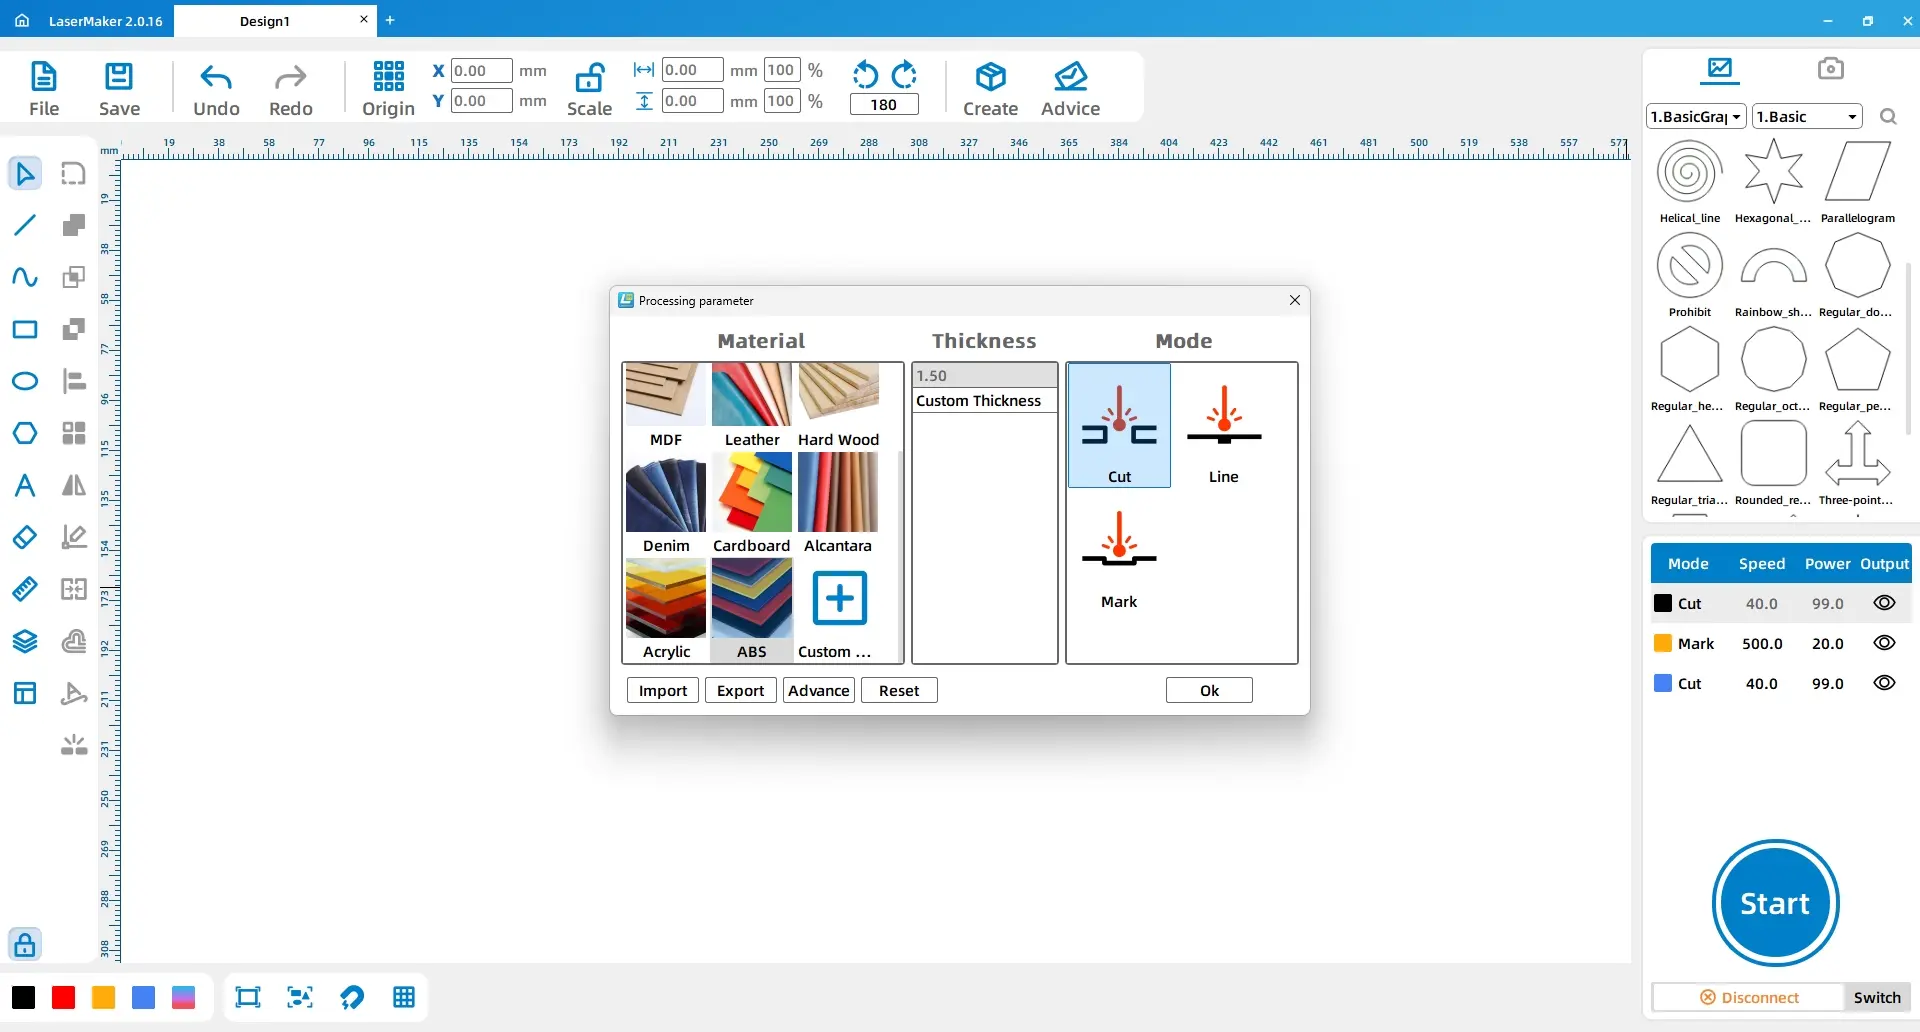
In the processing panel, double-click the yellow layer. Set the material to dual-color board, the thickness to 1.5mm, and the process to shallow engraving. Then double-click the black layer and set the material to dual-color board, the thickness to 1.5mm, and the process to cutting.
| Layer | Material | Thickness | Process | Project Use |
|---|---|---|---|---|
| Yellow | Dual-Color Board | 1.5mm | Shallow Engraving | Text, lower block, and graphic surface effect |
| Black | Dual-Color Board | 1.5mm | Cutting | Final road sign outline |
Process tip: Place the yellow layer above the black layer. Run shallow engraving before cutting so the sign stays stable while surface details are processed.
Before making the final road sign, students should check the design layout, layer order, text readability, triangle direction symbols, and engraving contrast. A small test on the same dual-color board can help confirm whether the shallow engraving effect is clear.
After engraving and cutting, remove the finished road sign from the material sheet. Check the surface contrast, cut edge, and readability of the text.
Once students understand the workflow, they can create their own road sign designs. They can change the city name, classroom name, school club name, direction words, message text, icon shape, colour board, or sign size.
Extension idea: Ask students to design a sign for a real school location, such as a library, makerspace, art studio, science lab, classroom, exhibition area, or event photo zone. They should explain how their text and symbols communicate the meaning of the place.
In this custom city road sign project, students practise using LaserMaker tools such as rectangles, rounded corners, text, basic shapes, rotation, copy and paste, layer colour assignment, shallow engraving, and cutting.
The project also introduces an important engraving concept: when two engraved regions overlap, the overlapping area can remain unengraved, creating an intaglio-and-relief contrast. By experimenting with shape overlap, text layout, and process order, students can create clear and expressive laser-made signs for many classroom and community uses.
Create More LaserMaker STEAM Projects
Explore Thunder Laser machines for classroom laser cutting projects, custom signs, dual-color board engraving, student maker activities, and hands-on digital fabrication lessons.
Explore Bolt SeriesTalk To Our Experts Now!
Please leave your contact information so that we can serve you better.
NEED HELP FINDING THE RIGHT SOLUTION?
Talk to our team for machine recommendations, application advice, and support based on your needs.

 Stable & Consistent MachinesUnlimited ApplicationRobust After-sales SupportFactory Direct Supply