Laser Engraved Bamboo Tube Project: A LaserMaker STEAM Course
 2024-08-19
WHAT ARE YOU LOOKING FOR?
Search Across Products, Blog Posts, Support Content, And Resources.

Laser Engraved Bamboo Tube Project: A LaserMaker STEAM Course
2024-08-19

In this LaserMaker STEAM course, students will create a laser engraved bamboo tube while learning how to prepare artwork for a cylindrical object. The lesson introduces circumference measurement, contour extraction, text layout, rotary axis setup, and laser processing on a curved surface.
Unlike flat boards, a bamboo tube has a curved surface. This means students need to calculate the processable design range before engraving and use a rotary axis to keep the laser focus more consistent across the surface.
This project guides students through the full workflow of engraving a bamboo tube. Students measure the tube, calculate the flat design area, open an image in LaserMaker, extract the contour, add text, assign engraving and outlining layers, enable the rotary axis, and prepare the bamboo tube for laser processing.
The example artwork uses the theme “Guangzhou.” Students can replace it with another city, school name, club name, event title, or personal design once they understand the workflow.
Teacher note: This lesson is useful for STEAM classrooms because it connects measurement, circumference calculation, digital artwork preparation, laser software settings, mechanical rotation, and hands-on laser engraving.
Bamboo tube engraving is a practical example of how laser technology can be used for gifts, cultural crafts, city-themed souvenirs, event displays, handmade products, and classroom maker projects. It also helps students understand how the same design process changes when the material is not flat.
In school projects, students can customize the bamboo tube with a city name, school name, local landmark, club identity, or personal message. This turns the lesson into both a digital design activity and a cultural storytelling project.
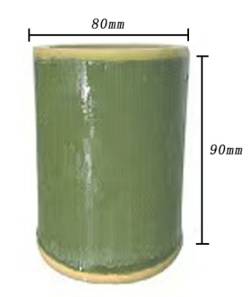
Before designing the engraving artwork, measure the bamboo tube carefully. In the source project, the bamboo tube has a diameter of 80mm, a height of 90mm, and a wall thickness of 8mm.
Based on the circumference formula of a circle, the processable length is calculated as 251.2mm. Therefore, the processable range of the bamboo tube can be treated as a rectangle with a length of 251.2mm and a width of 90mm. The design should not exceed this range.
| Measured Item | Value | Design Meaning |
|---|---|---|
| Diameter | 80mm | Used to calculate the engraving length around the tube |
| Height | 90mm | Used as the maximum vertical design height |
| Wall Thickness | 8mm | Used as the material thickness setting in the source workflow |
| Processable Design Range | 251.2mm × 90mm | The artwork should stay within this rectangular range |
Design tip: For rotary engraving, the “flat” design width comes from the tube circumference. Measuring first helps prevent the design from becoming too wide, too tall, or misaligned on the curved surface.
Prepare the following materials and tools before starting the bamboo tube engraving project.
| Number | Name | Quantity | Project Use |
|---|---|---|---|
| 1 | Bamboo Tube | 1 | Main engraving material |
| 2 | Straight Ruler | 1 | Measure the tube dimensions |
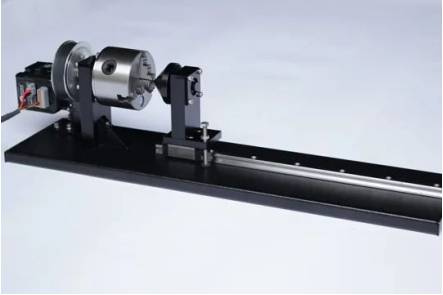
| 3 | Rotating Axis | 1 | Rotate the bamboo tube during laser processing |
Equipment note for teachers: This rotary engraving project can be completed on a classroom laser cutter suitable for engraving cylindrical objects with a rotary axis, such as the Thunder Laser Bolt Series. Always test materials and supervise laser operation.
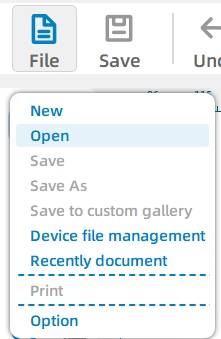
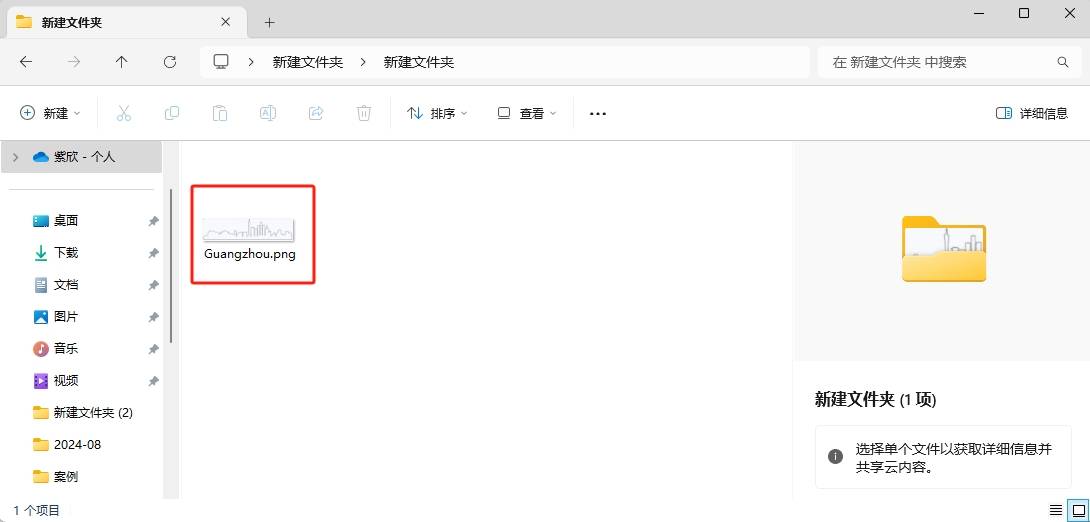
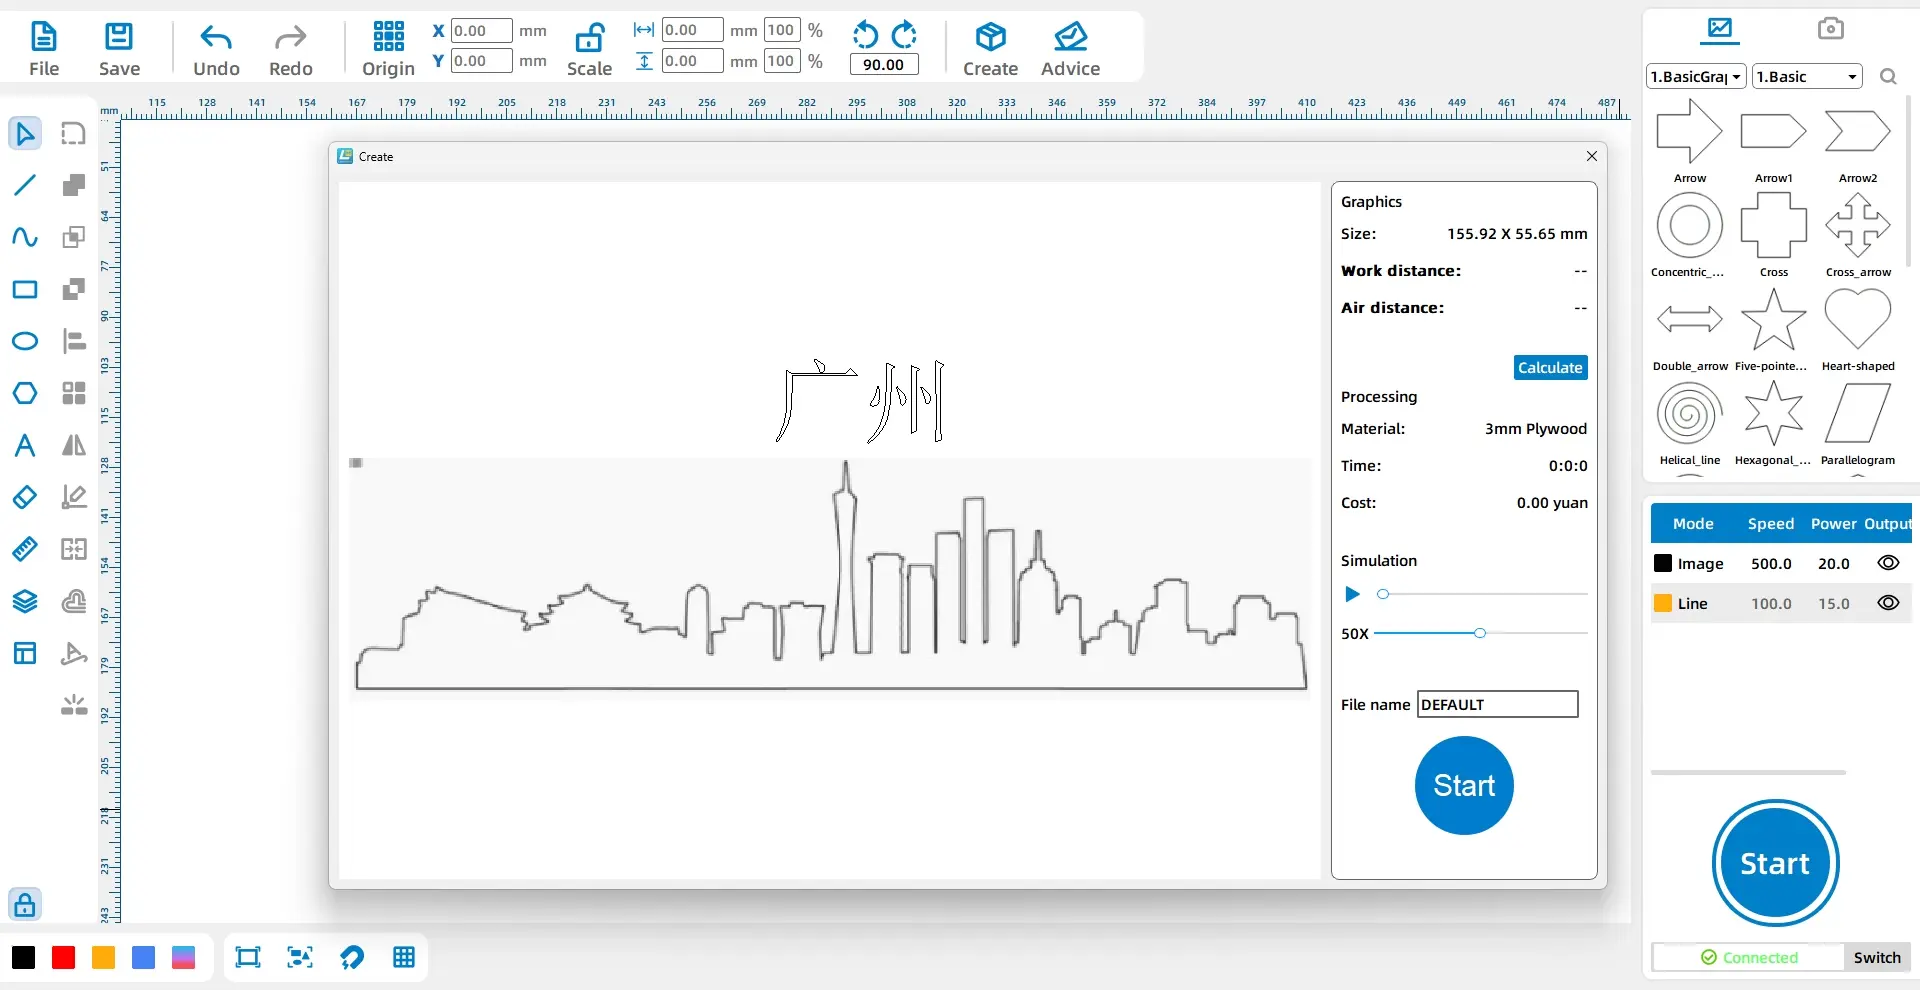
In the upper function area of LaserMaker, click File, then Open. Double-click to open the image that needs to be engraved.
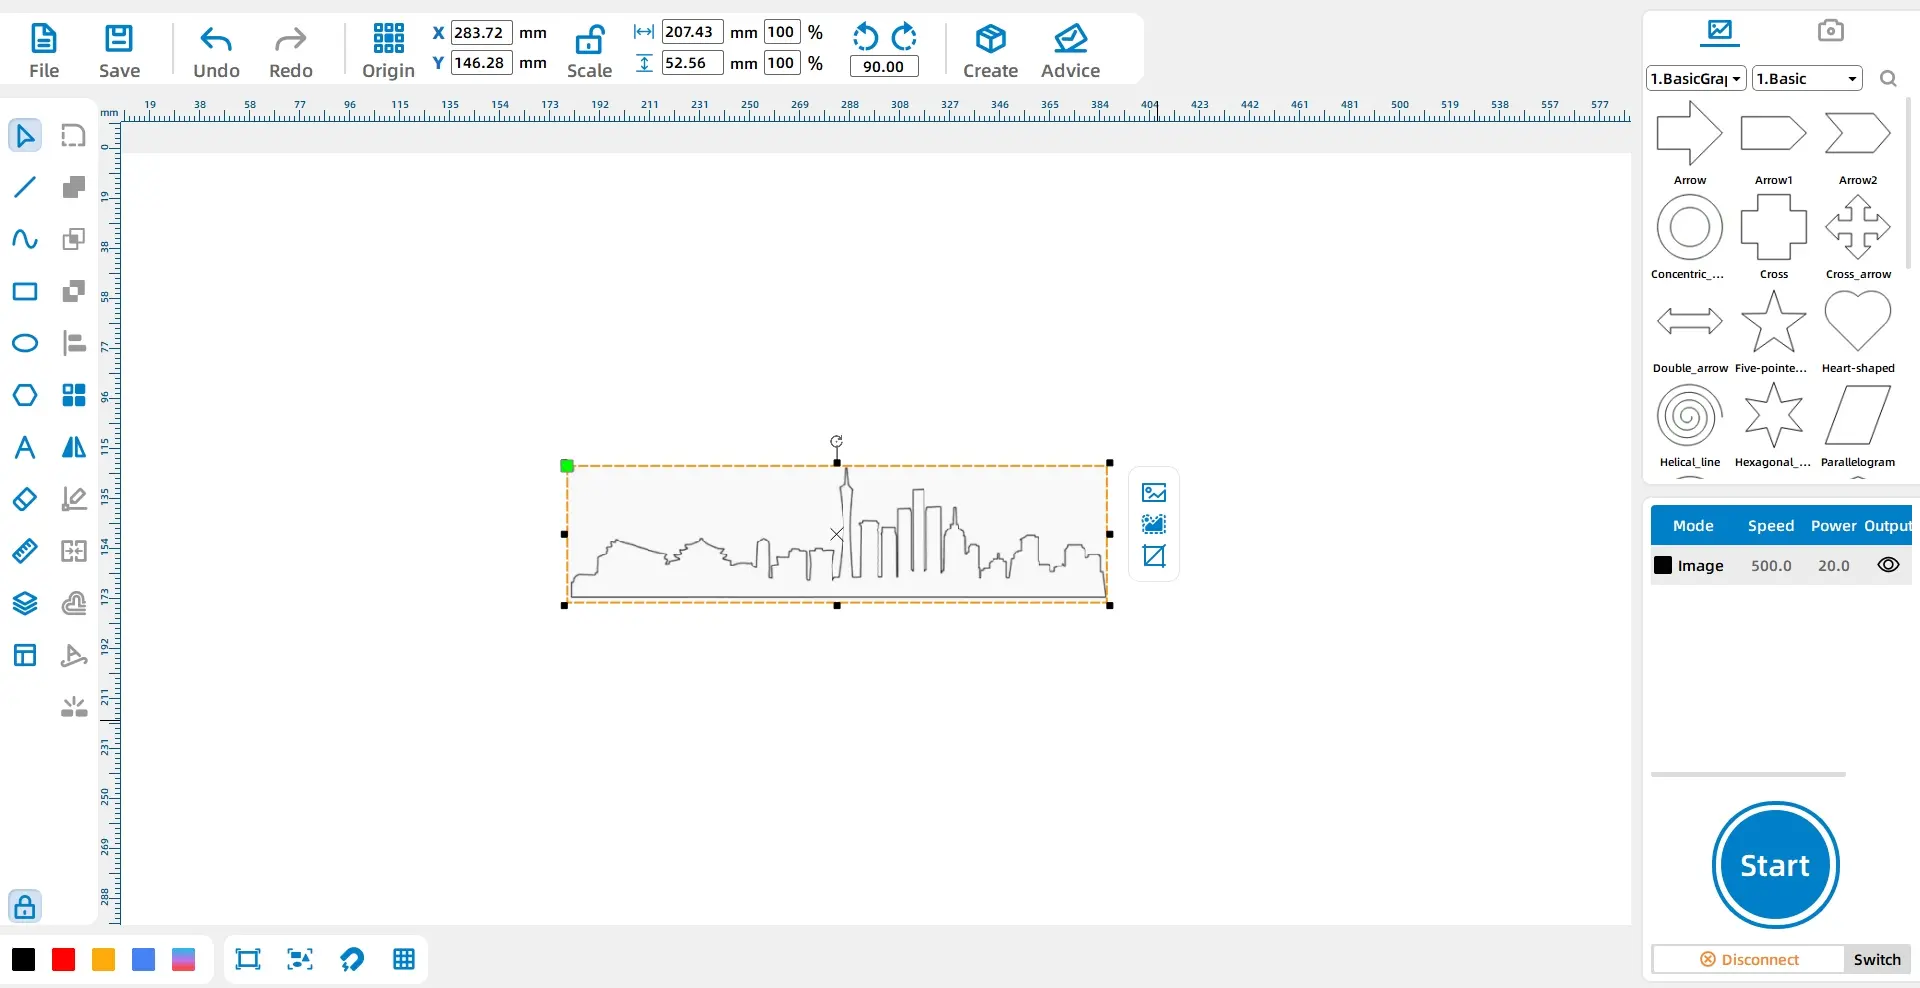
Select the “Guangzhou” image and click Contour Extraction in the graphics toolbar. Delete the original image and any extra graphics, leaving only the clean contour.
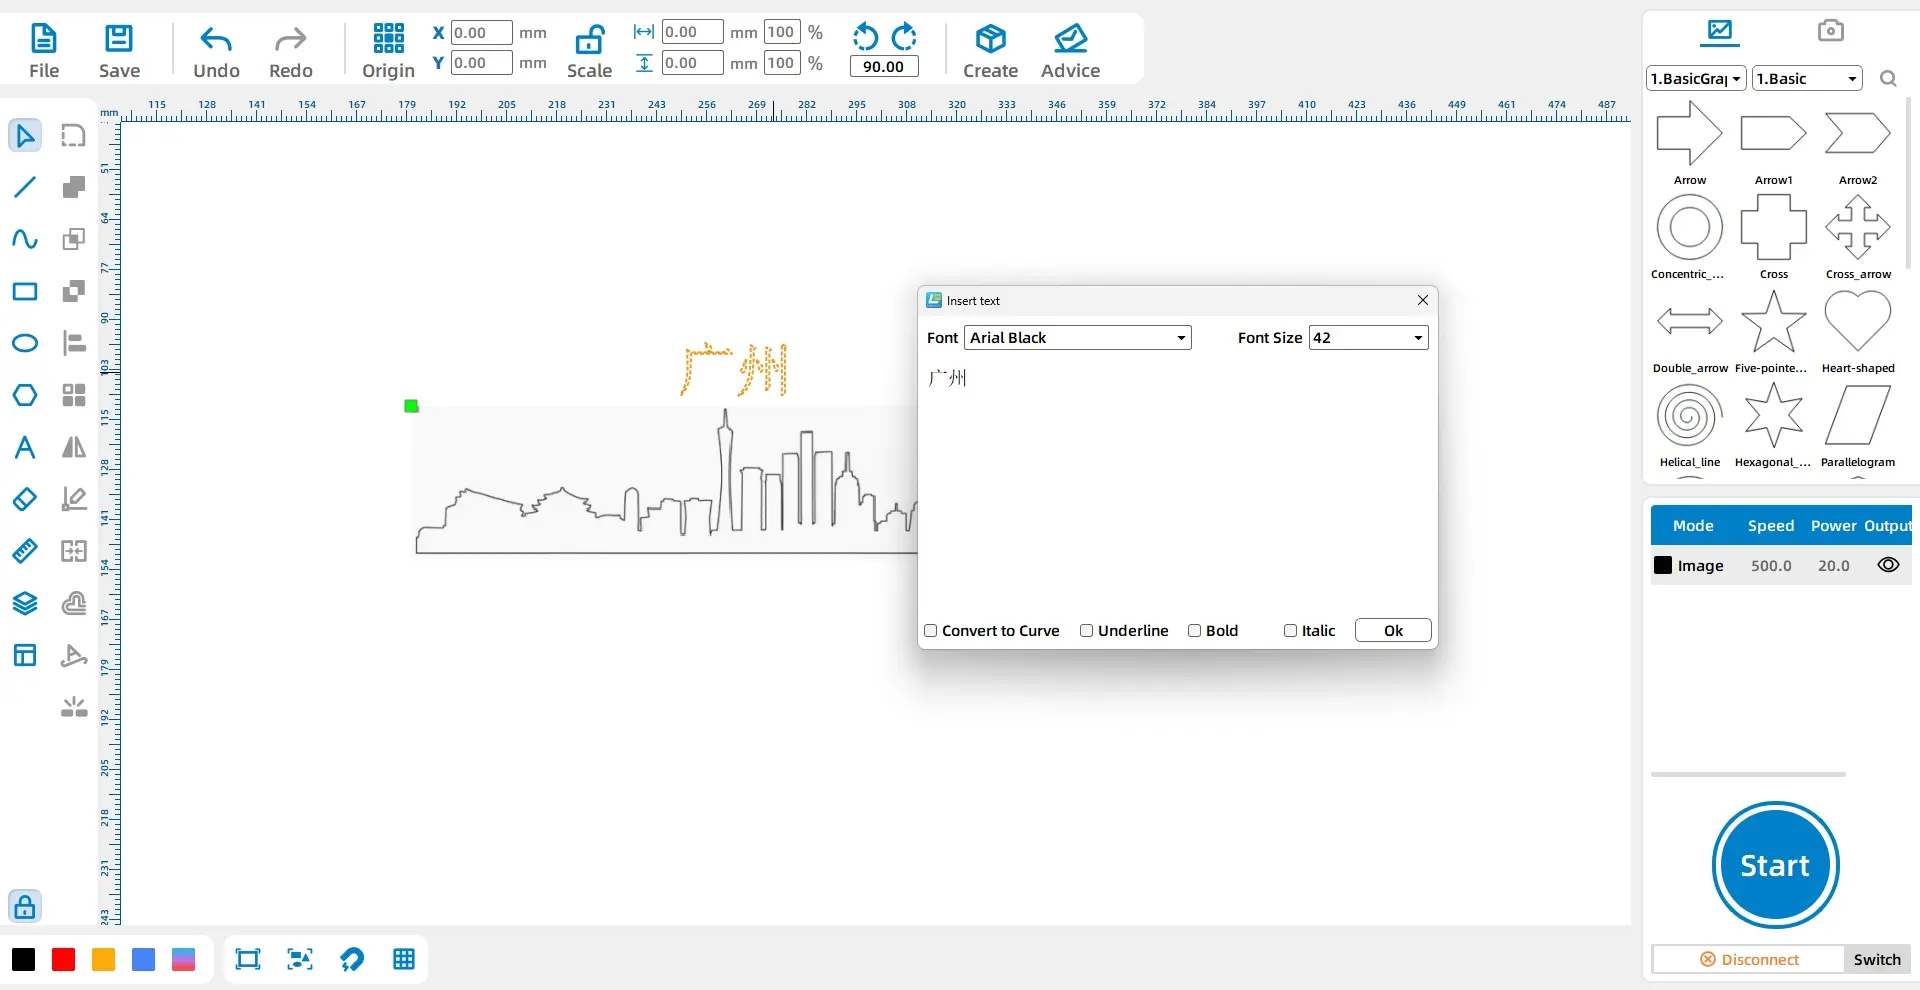
Click the Font tool from the drawing toolbar on the left side. Enter “Guangzhou,” set the font to Chinese Regular Script, set the font size to Initial, choose the Bold option, and drag the text to the top of the graphic.
Select the text and click the yellow layer in the layer palette at the lower left. This sets the text to the yellow layer.
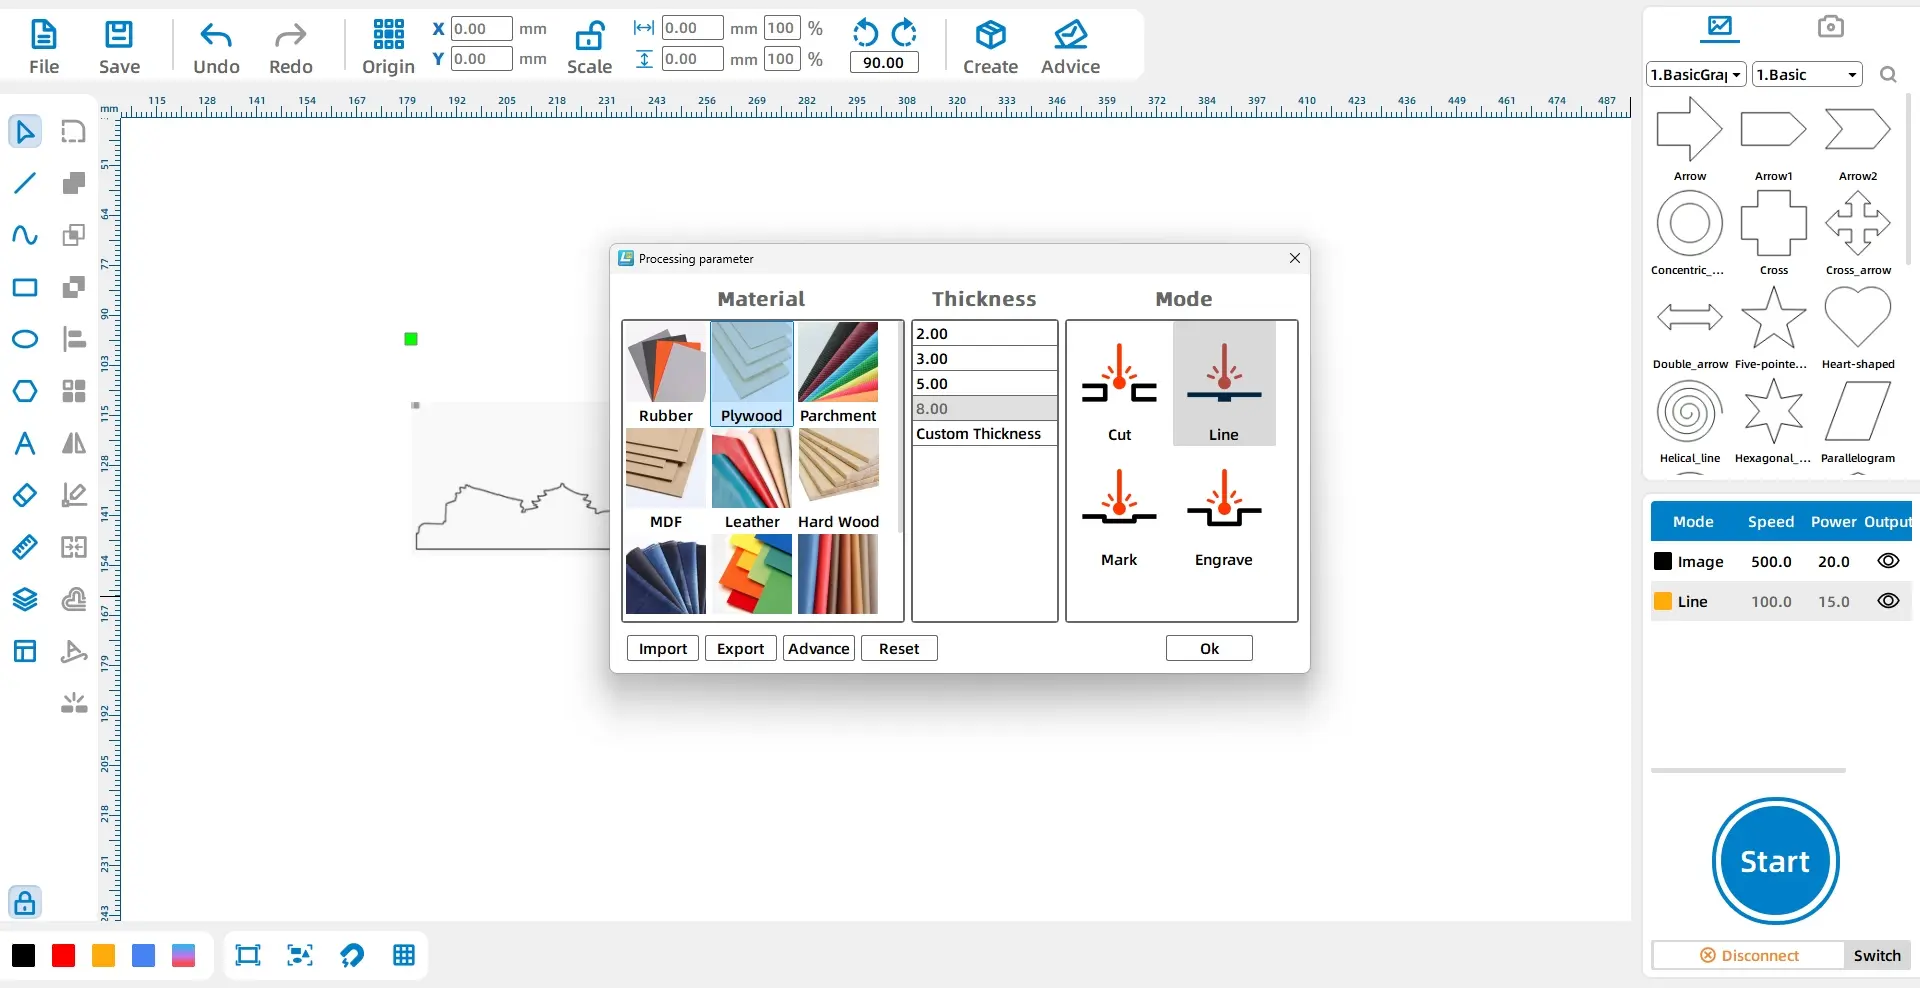
In the processing panel at the lower right, double-click the yellow layer. Set the material to Basswood, the thickness to 8mm, and the process to Shallow Engraving. For the black layer, set the material to Basswood, the thickness to 8mm, and the process to Outlining.
| Layer | Material Setting | Thickness Setting | Process | Project Use |
|---|---|---|---|---|
| Yellow | Basswood | 8mm | Shallow Engraving | Guangzhou text |
| Black | Basswood | 8mm | Outlining | Extracted graphic contour |
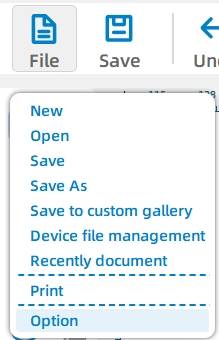
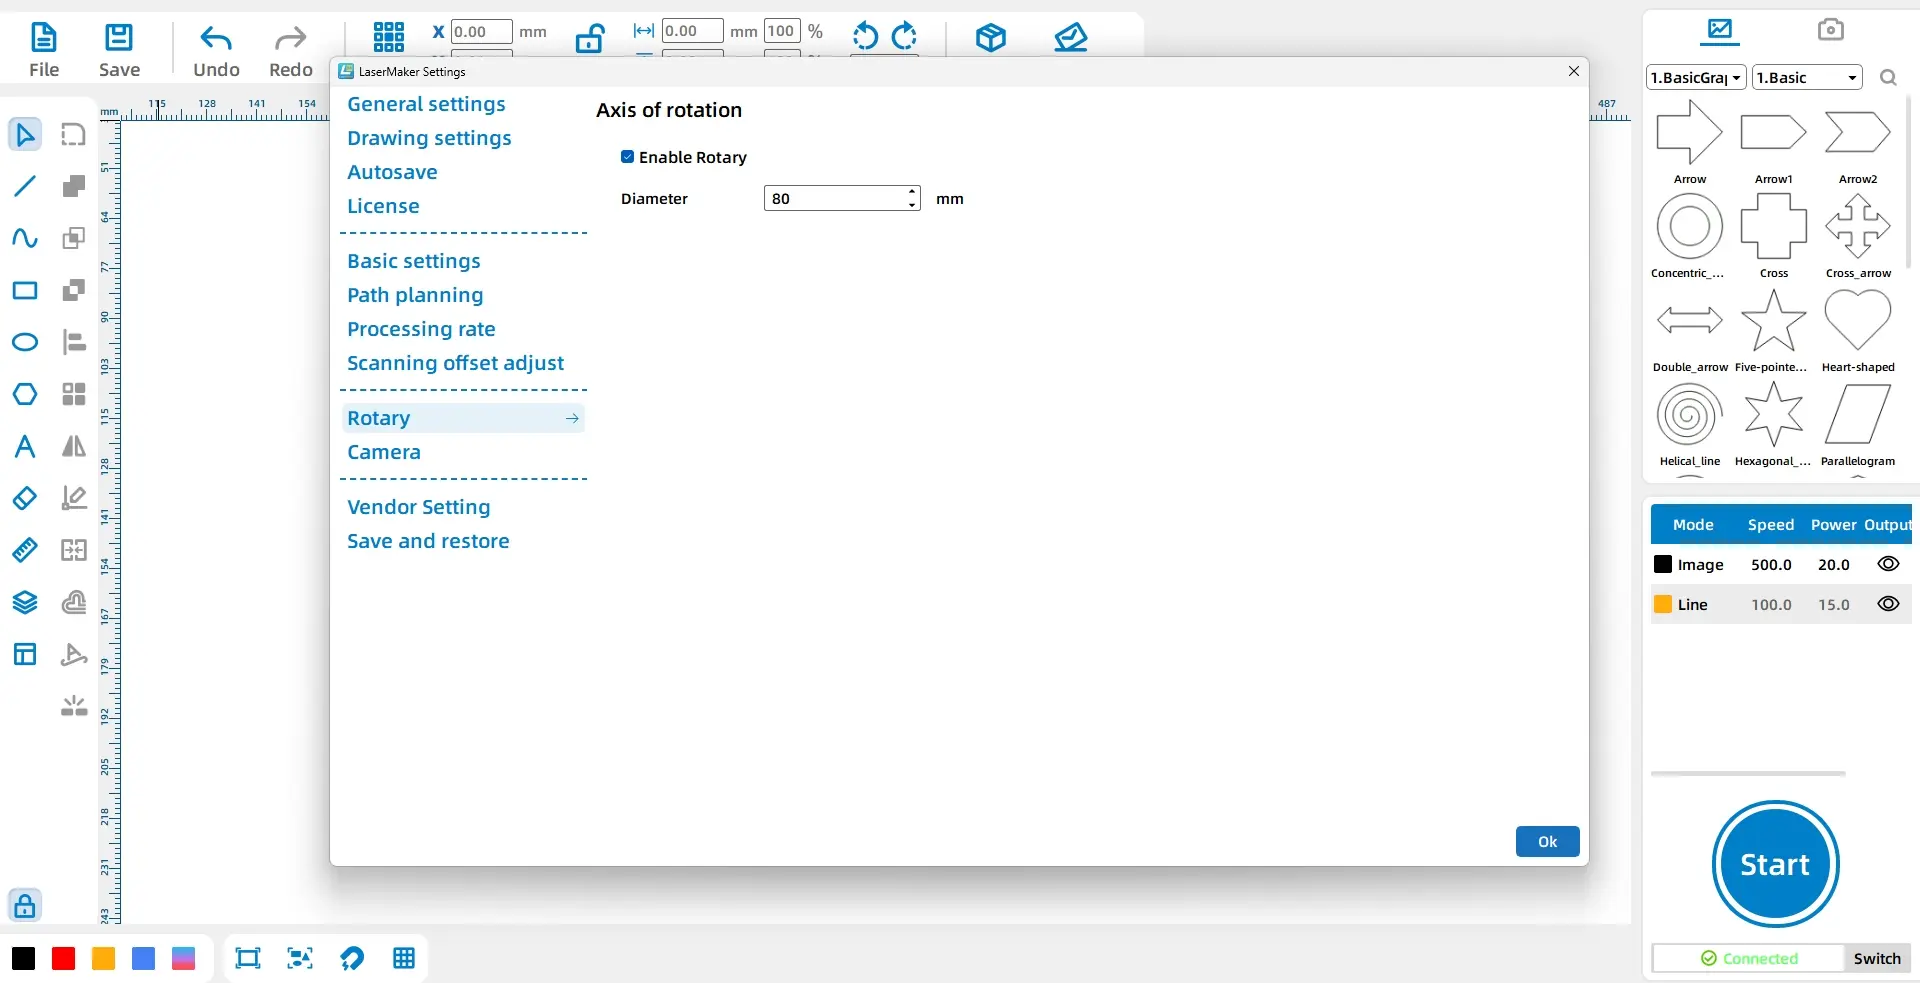
In the upper function area, click File, then Options. On the options page, select Rotating Axis, click Enable Rotating Axis, and change the diameter to 80mm.
Process tip: The rotating axis diameter should match the measured diameter of the bamboo tube. In this project, the diameter is set to 80mm.
Click the Start button in the processing panel at the lower right to upload the file to the laser device.
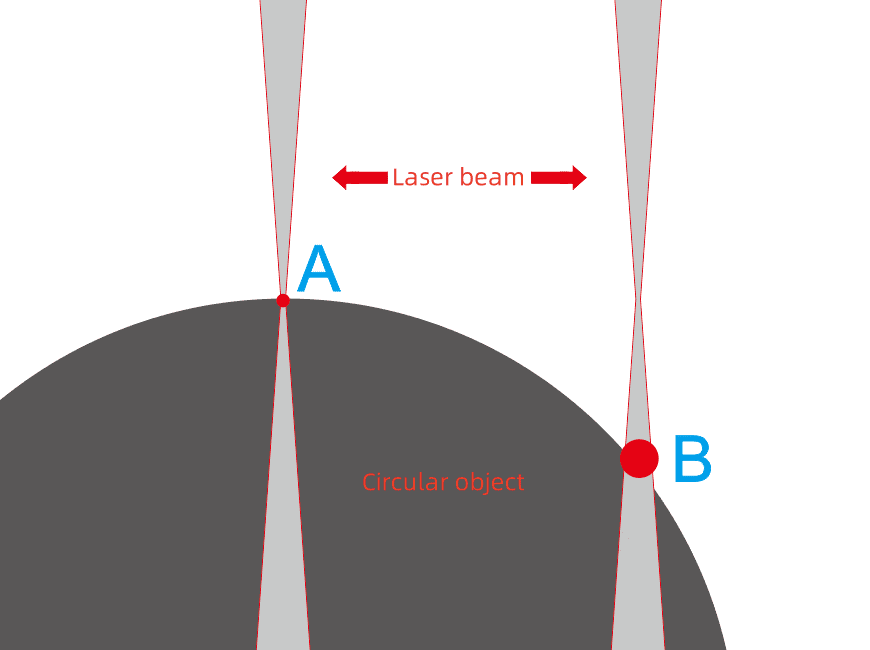
The bamboo tube is a round object. Standard laser processing is designed for flat surfaces, so it cannot process a curved object evenly without support. On a curved surface, the laser spot size changes as the laser moves across the tube, which can cause inconsistent engraving quality.
In the example diagram, the laser spot at point A is fine, while the spot at point B becomes much larger. As the laser moves from point A to point B, the spot keeps changing, which leads to unstable processing effects.
The rotating axis helps solve this problem. It clamps the round object and rotates it while the laser works. By replacing Y-axis movement with rotation, the cylindrical surface can be processed more like a flat plane relative to the X-axis, helping the engraving effect stay more consistent.
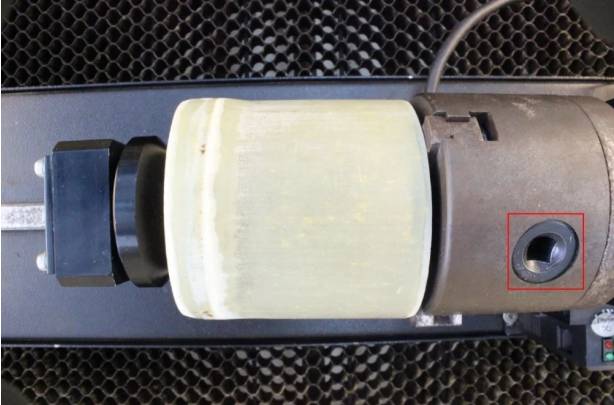
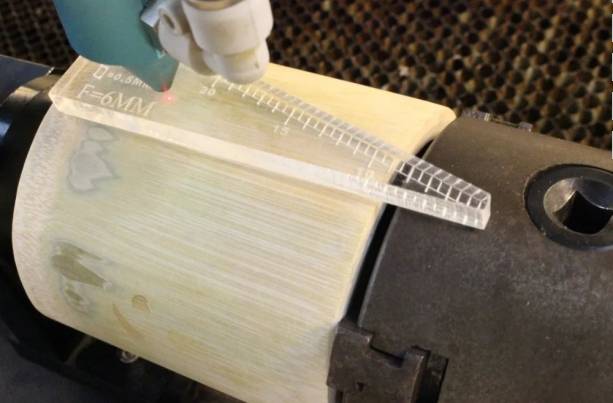
Choose the correct hole position and clamp the bamboo tube onto the rotating axis. Make sure the tube is held securely before processing.
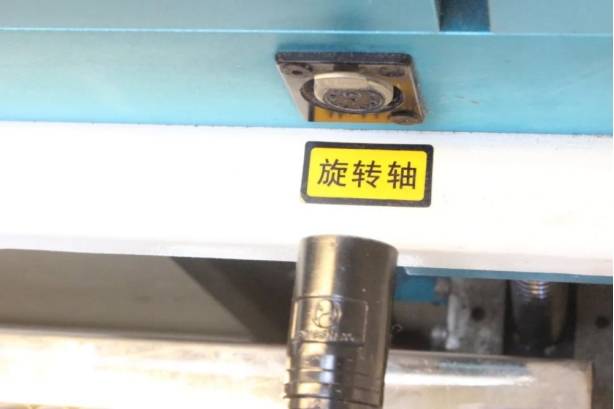
Connect the rotating axis power cord to the recess in the Y-axis rail on the right side of the equipment.
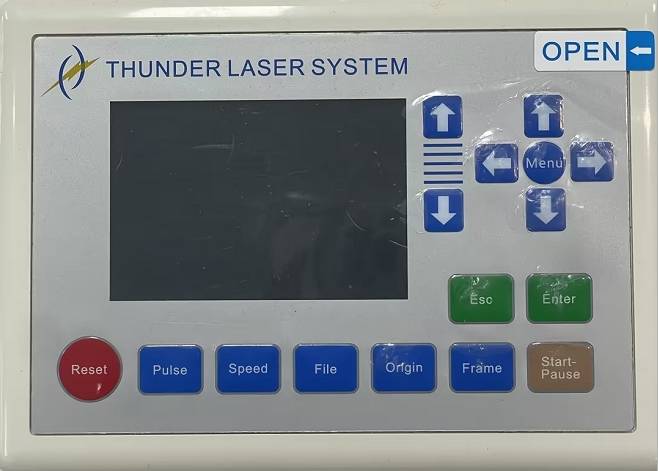
Use the Z-axis direction keys on the control panel to lower the processing platform. Move the laser head above the bamboo tube and use the focusing scale to set the correct focus.
Setup reminder: Before starting the final job, confirm that the tube is clamped securely, the rotary axis is enabled, the diameter is set correctly, and the laser focus is adjusted.
Before engraving the final bamboo tube, students should check the measurement, artwork range, layer settings, rotary axis settings, and physical setup. The design should fit within the calculated 251.2mm by 90mm range.
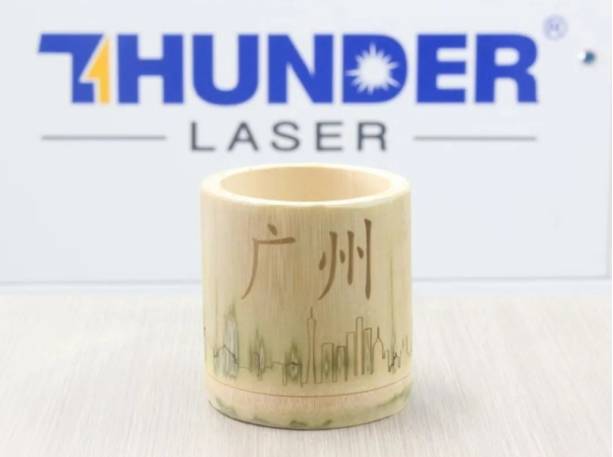
After laser processing, the bamboo tube becomes a custom engraved cylindrical craft. Students can compare the engraved text, outline quality, and overall alignment around the tube.
Once students understand the workflow, they can create their own bamboo tube designs. They can change the city name, landmark image, font style, layout, or decorative pattern while keeping the same measurement and rotary engraving process.
Extension idea: Ask students to design a bamboo tube for a real location or event. They should explain how they calculated the engraving range, why a rotating axis is needed, and how their image and text represent the chosen theme.
In this laser engraved bamboo tube project, students learn how to analyse a cylindrical object, calculate the processable engraving range, use Contour Extraction in LaserMaker, add and style text, set engraving and outlining layers, and enable the rotating axis.
The project also helps students understand why curved materials require a different setup from flat materials. By using the rotating axis, learners can engrave round objects more smoothly and apply the same workflow to other cylindrical craft projects.
Create More LaserMaker STEAM Projects
Explore Thunder Laser machines for classroom laser engraving projects, rotary engraving, bamboo crafts, student maker activities, and hands-on digital fabrication lessons.
Explore Bolt SeriesTalk To Our Experts Now!
Please leave your contact information so that we can serve you better.
NEED HELP FINDING THE RIGHT SOLUTION?
Talk to our team for machine recommendations, application advice, and support based on your needs.

 Stable & Consistent MachinesUnlimited ApplicationRobust After-sales SupportFactory Direct Supply