Laser Engraved Leaf Art Project: A LaserMaker STEAM Course
 2024-08-20
WHAT ARE YOU LOOKING FOR?
Search Across Products, Blog Posts, Support Content, And Resources.

Laser Engraved Leaf Art Project: A LaserMaker STEAM Course
2024-08-20

In this LaserMaker STEAM course, students will create laser engraved leaf art by turning an image into a delicate carving on a natural leaf. The project introduces size analysis, contour extraction, image extraction, layer colour settings, and basic laser process setup.
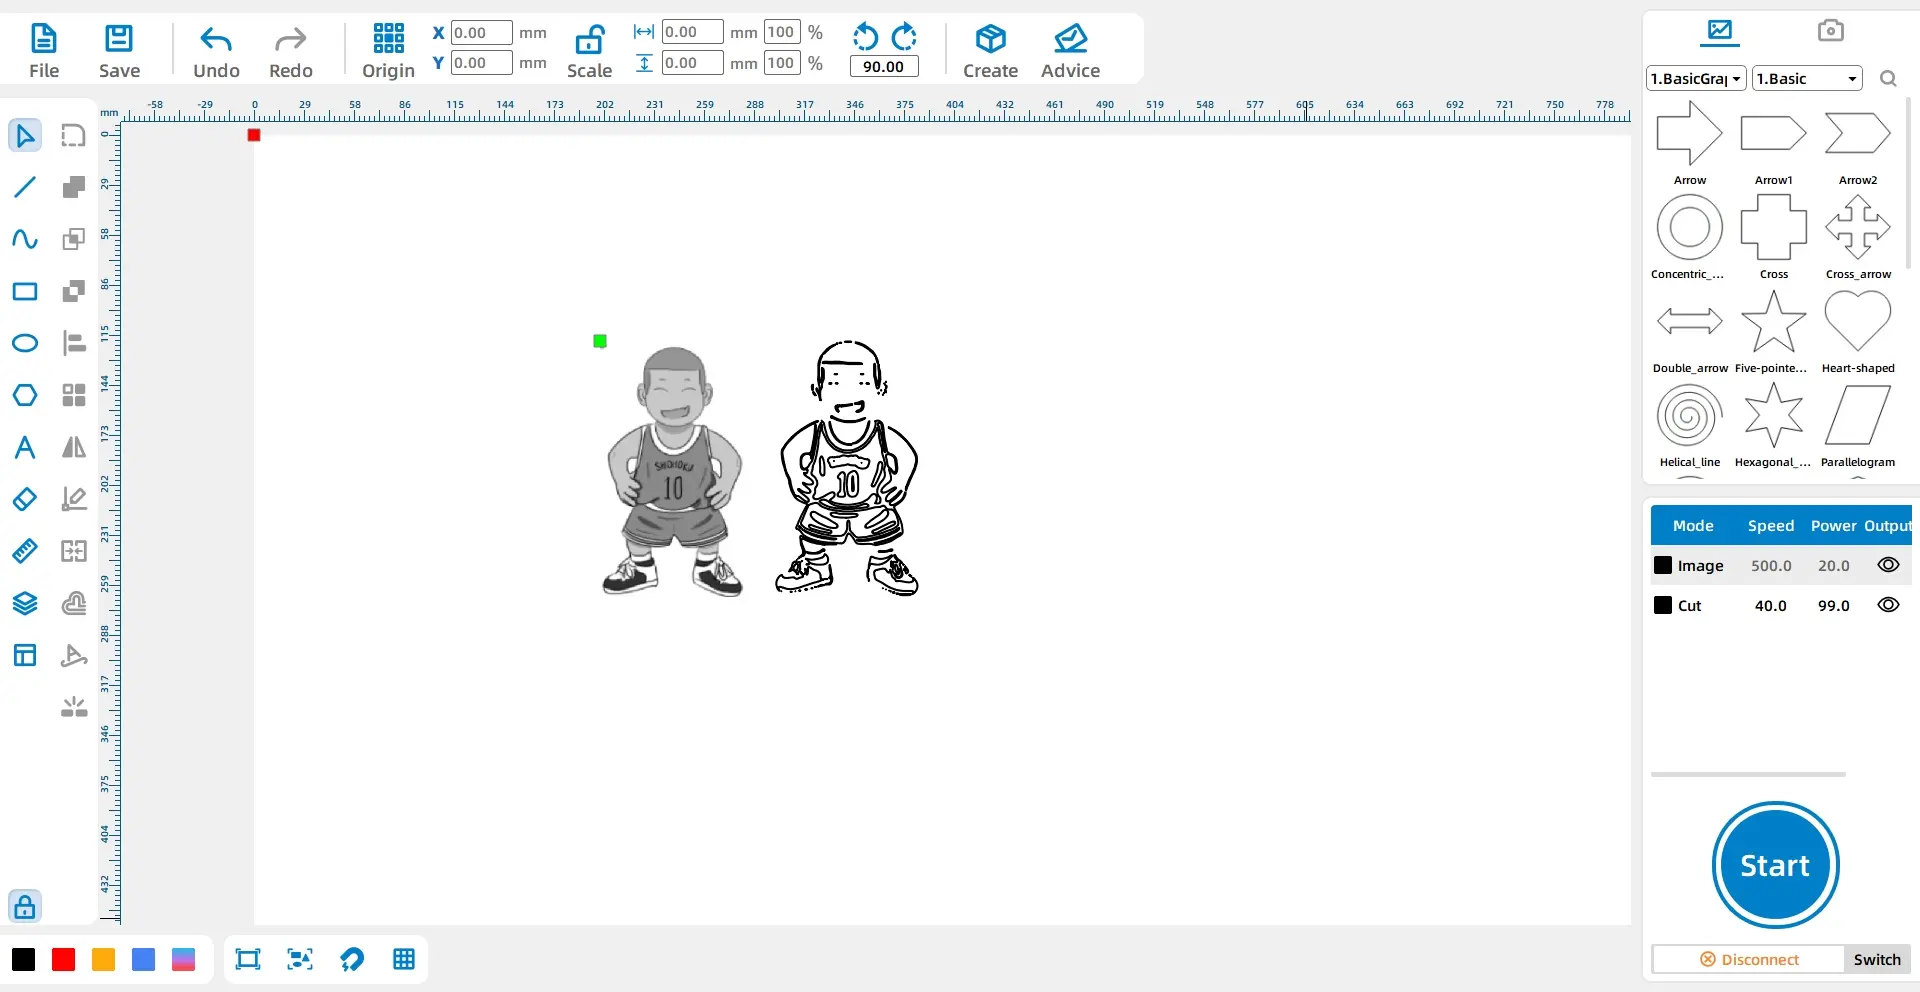
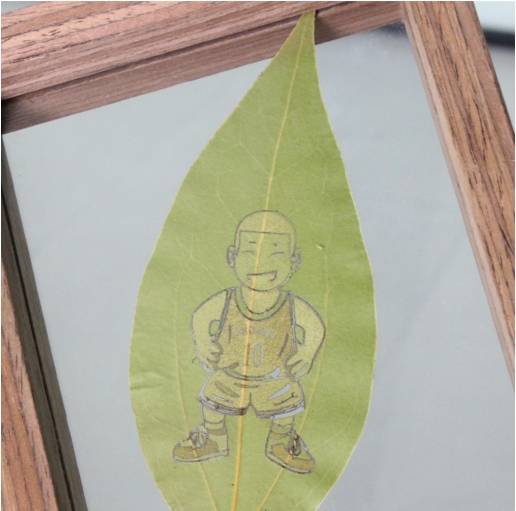
“One leaf, one world.” A leaf can become a creative carrier for visual storytelling. In this lesson, students use a leaf as the material surface and prepare a “Slam Dunk Master” image for laser carving, learning how digital artwork can be adapted to a small, organic material.
This project focuses on image-based laser engraving. Students first measure the usable area of the leaf, then prepare the artwork in LaserMaker. They extract the image contour, improve the image quality with Image Extraction, assign process layers, and complete the laser carving workflow.
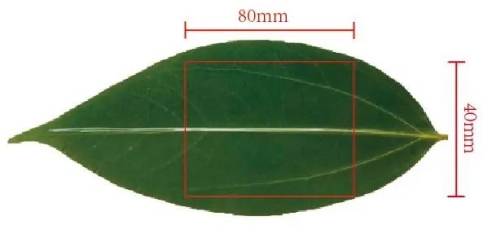
Because leaves are small and delicate, this lesson also teaches students to design within a limited processing area. The source project measures the workable area as 80mm long and 40mm wide, so the final design must stay within that range.
Teacher note: This project is useful for STEAM classrooms because it connects natural materials, measurement, image processing, digital drawing tools, laser layer settings, and creative storytelling.
Leaf engraving is a creative example of how laser technology can work with natural materials. It can be used for art lessons, nature-inspired design, handmade gifts, seasonal displays, cultural craft projects, botanical studies, and creative exhibitions.
In a classroom, this activity can encourage students to observe natural forms, think about scale, and choose images that match the size and shape of the leaf. It also helps students understand that material selection affects design decisions.
Before preparing the artwork, measure the processable area of the leaf. In the source project, the workable area is 80mm long and 40mm wide. The image design should not exceed this area.
Design tip: When working with natural materials, measure the actual object first. Leaves may vary in shape and size, so the usable area should be confirmed before finalizing the artwork.
Prepare the following materials and tools before starting the leaf carving activity.
| Number | Name | Quantity | Project Use |
|---|---|---|---|
| 1 | Leaf | 1 | Main carving surface |
| 2 | Photo Frame | 1 | Display the finished leaf artwork |
| 3 | Straight Ruler | 1 | Measure the leaf processing area |
Equipment note for teachers: This image-based engraving project can be completed on a classroom laser cutter suitable for delicate engraving tasks, such as the Thunder Laser Bolt Series. Always test the material and supervise laser operation.
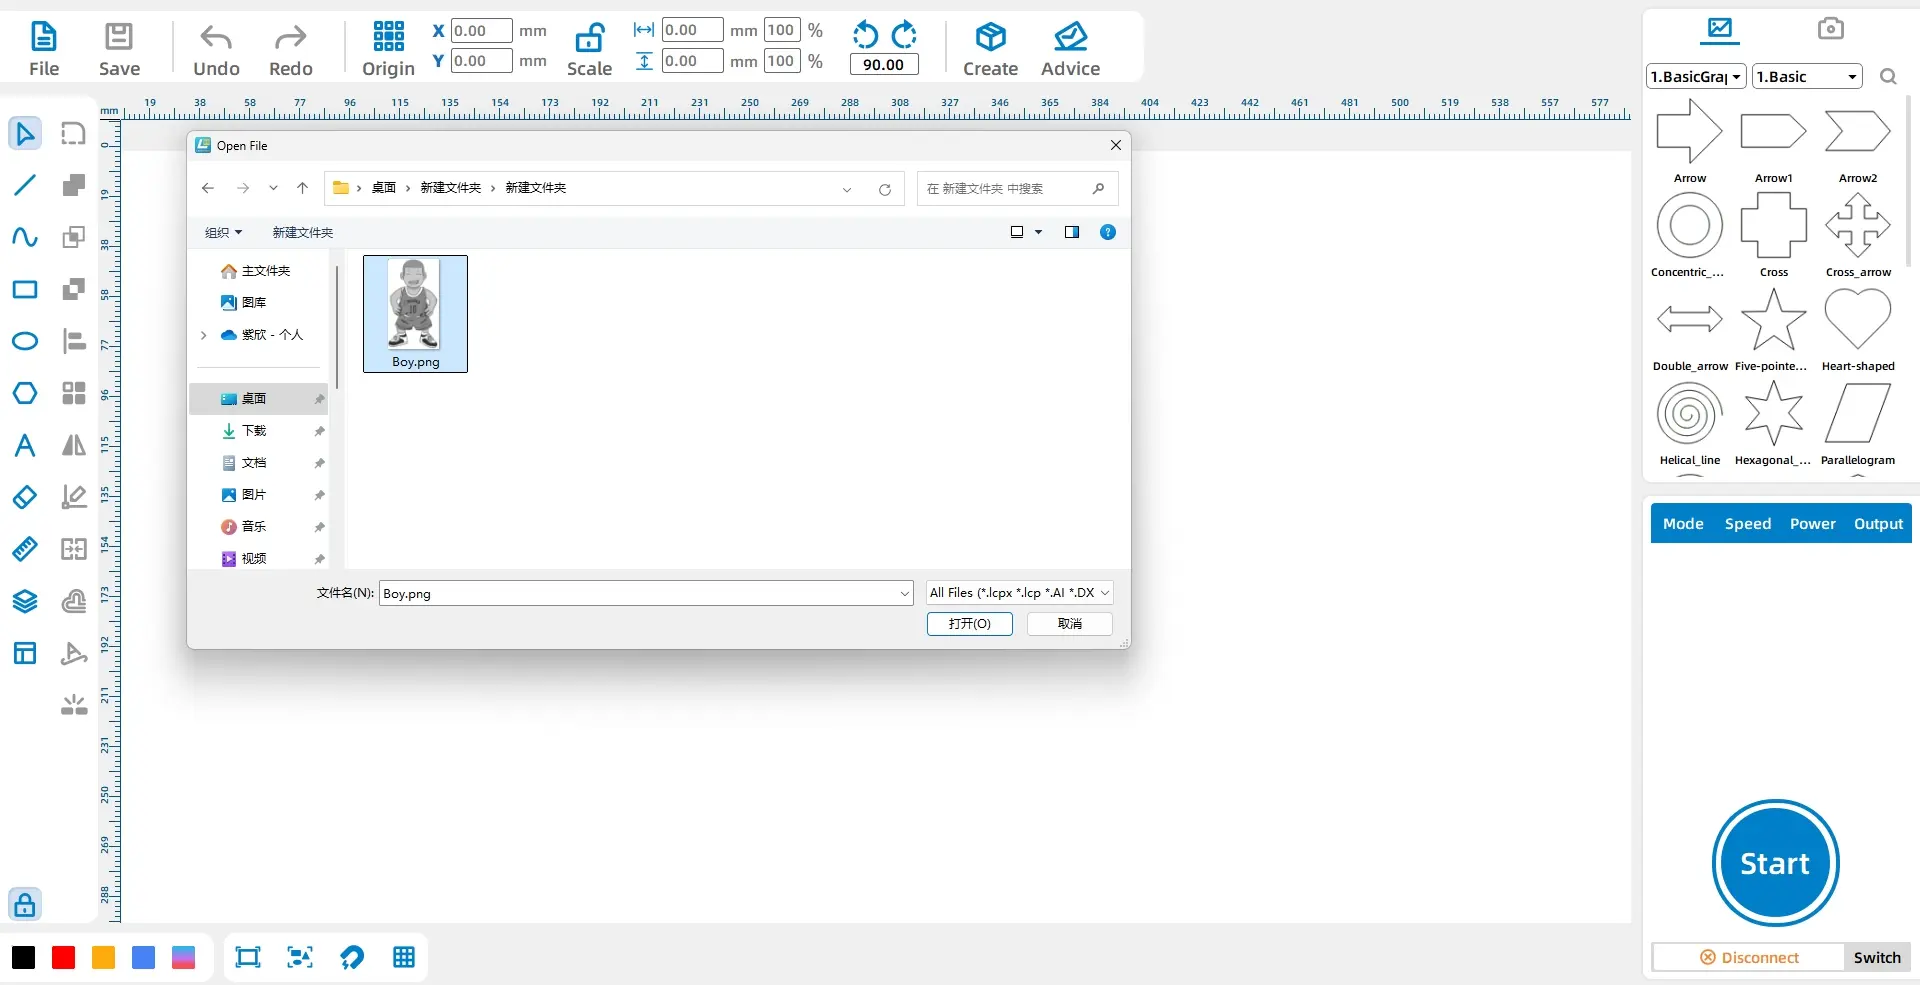
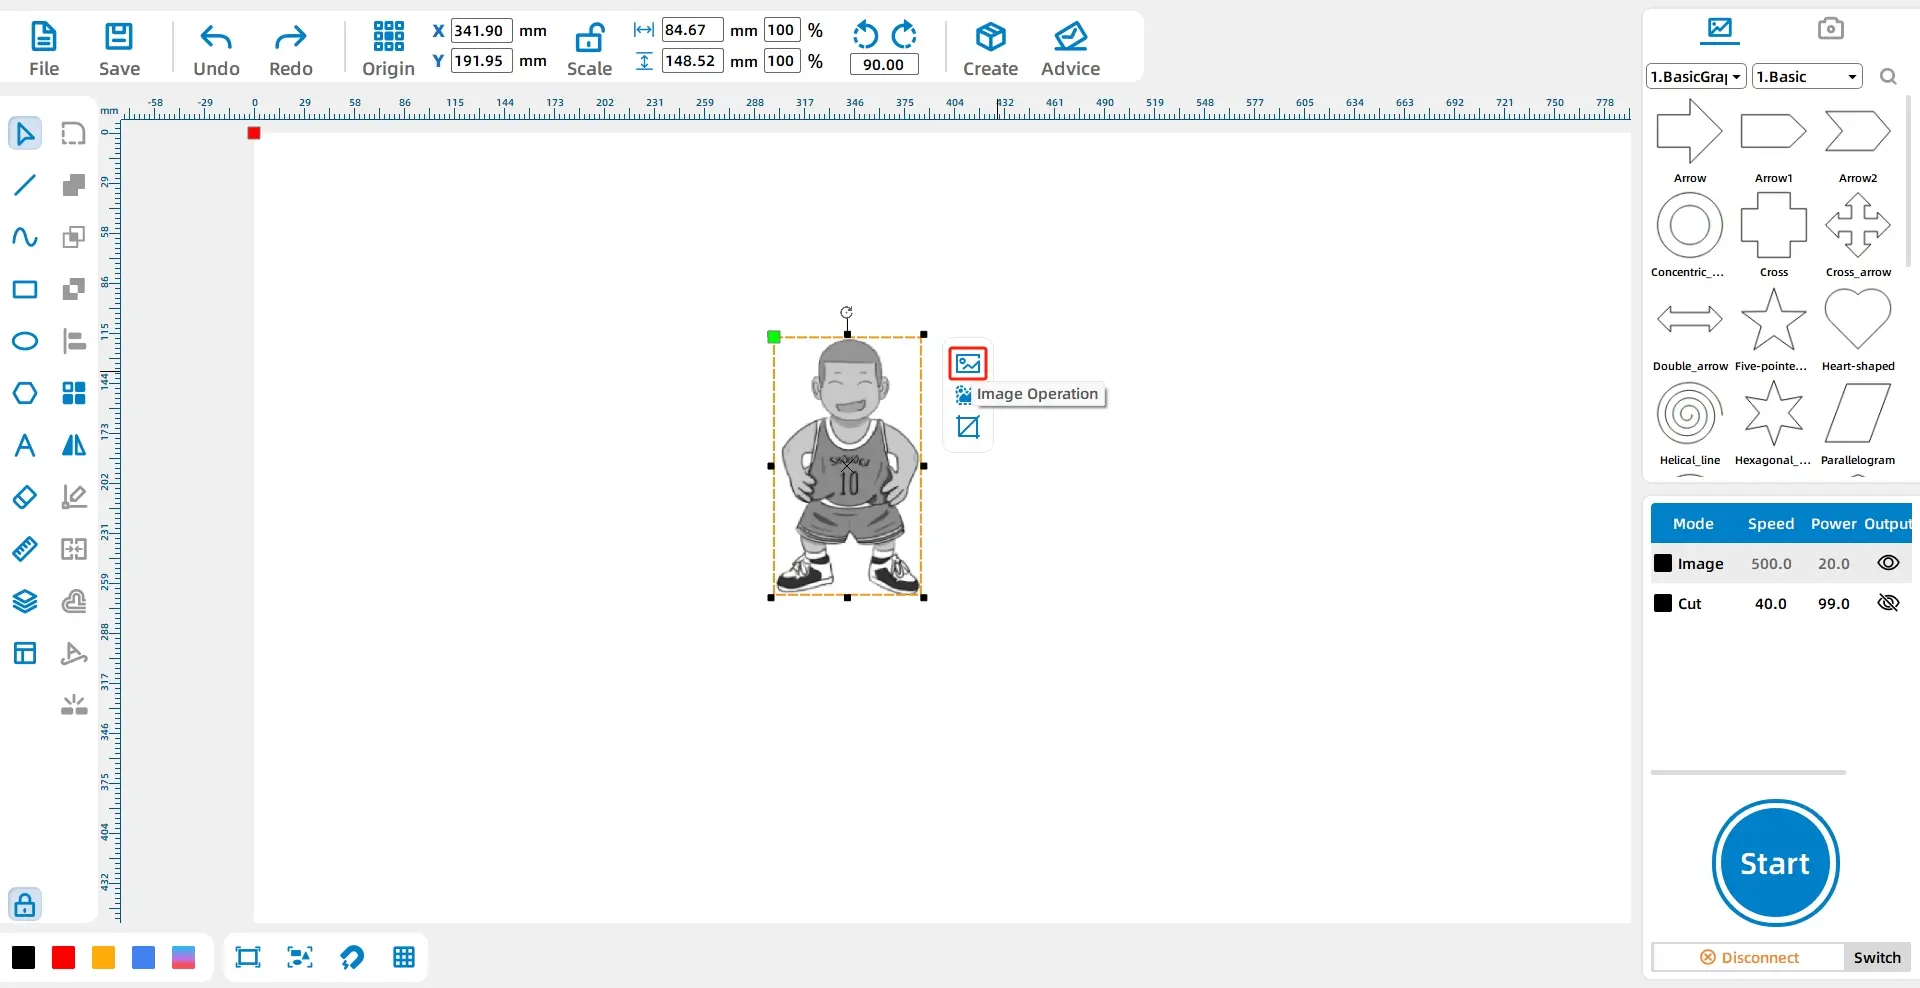
In the top function area of LaserMaker, click File, then Open. Double-click to open the image that will be carved on the leaf.
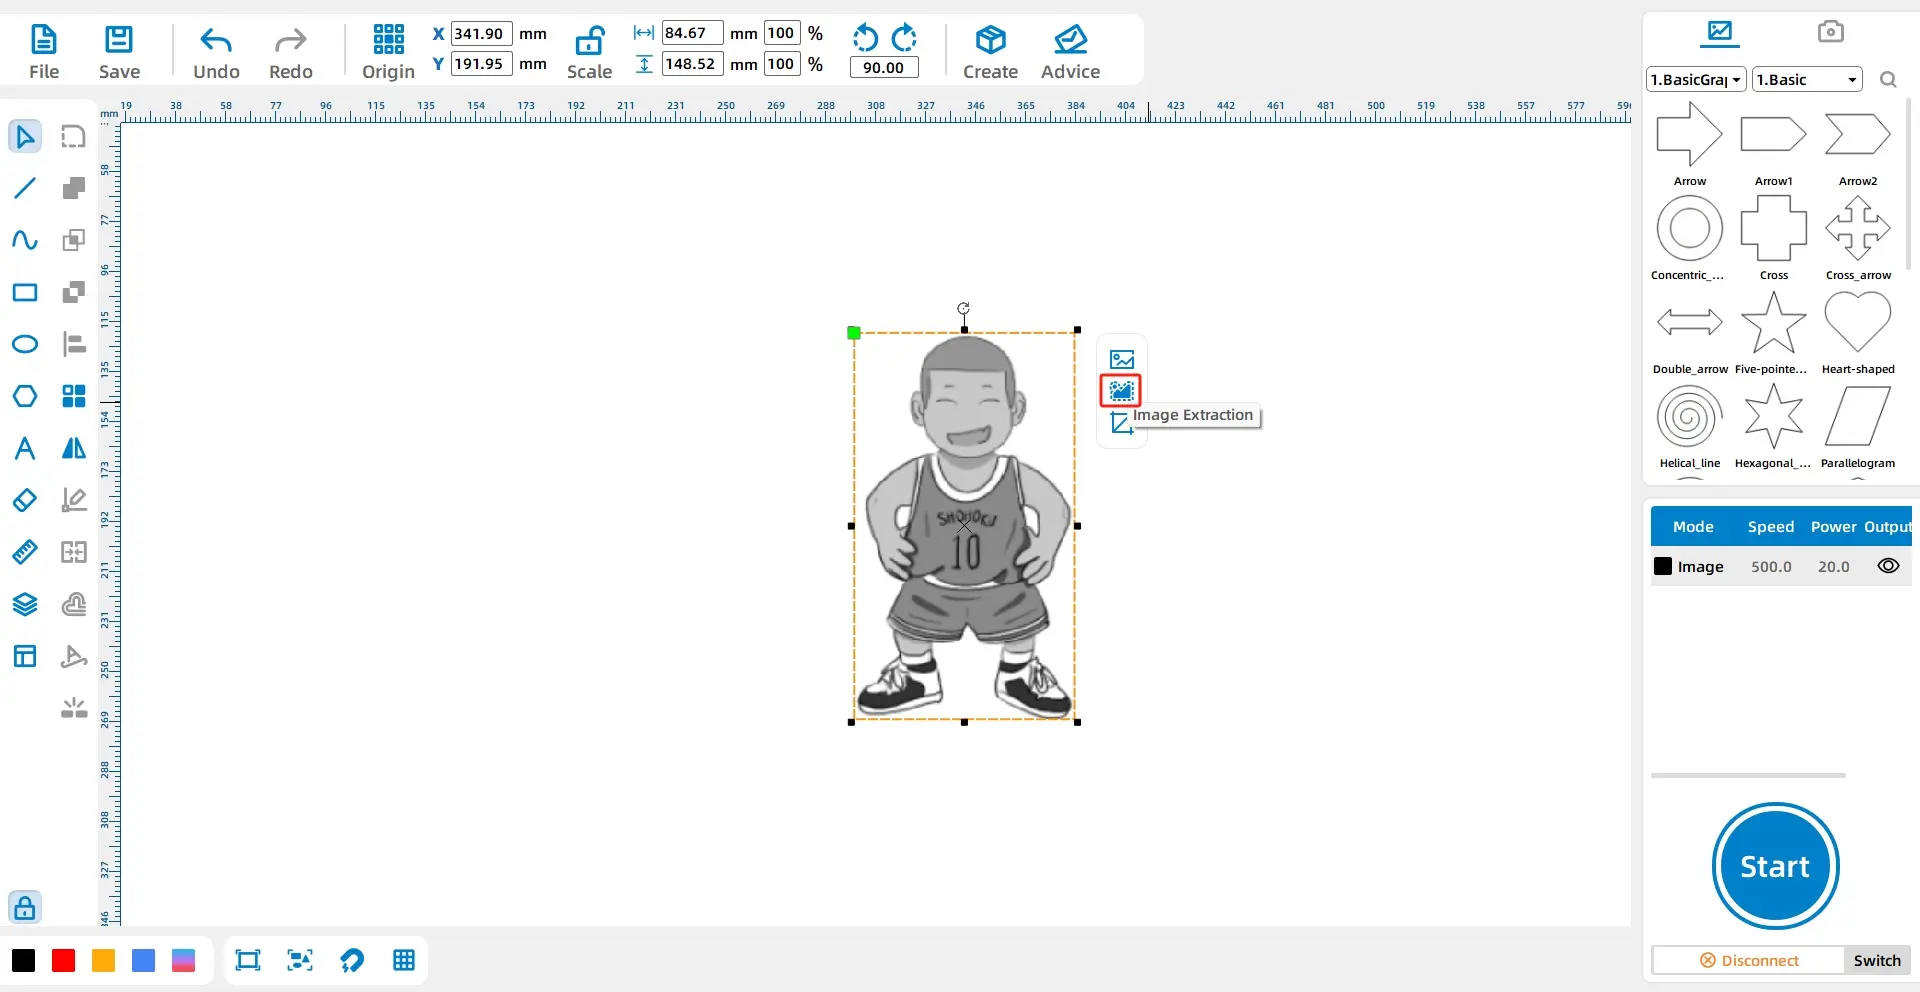
Select the “Slam Dunk Master” image and click Contour Extraction in the toolbar. After extracting the contour, delete the original image and any extra graphics so that only the outline remains.
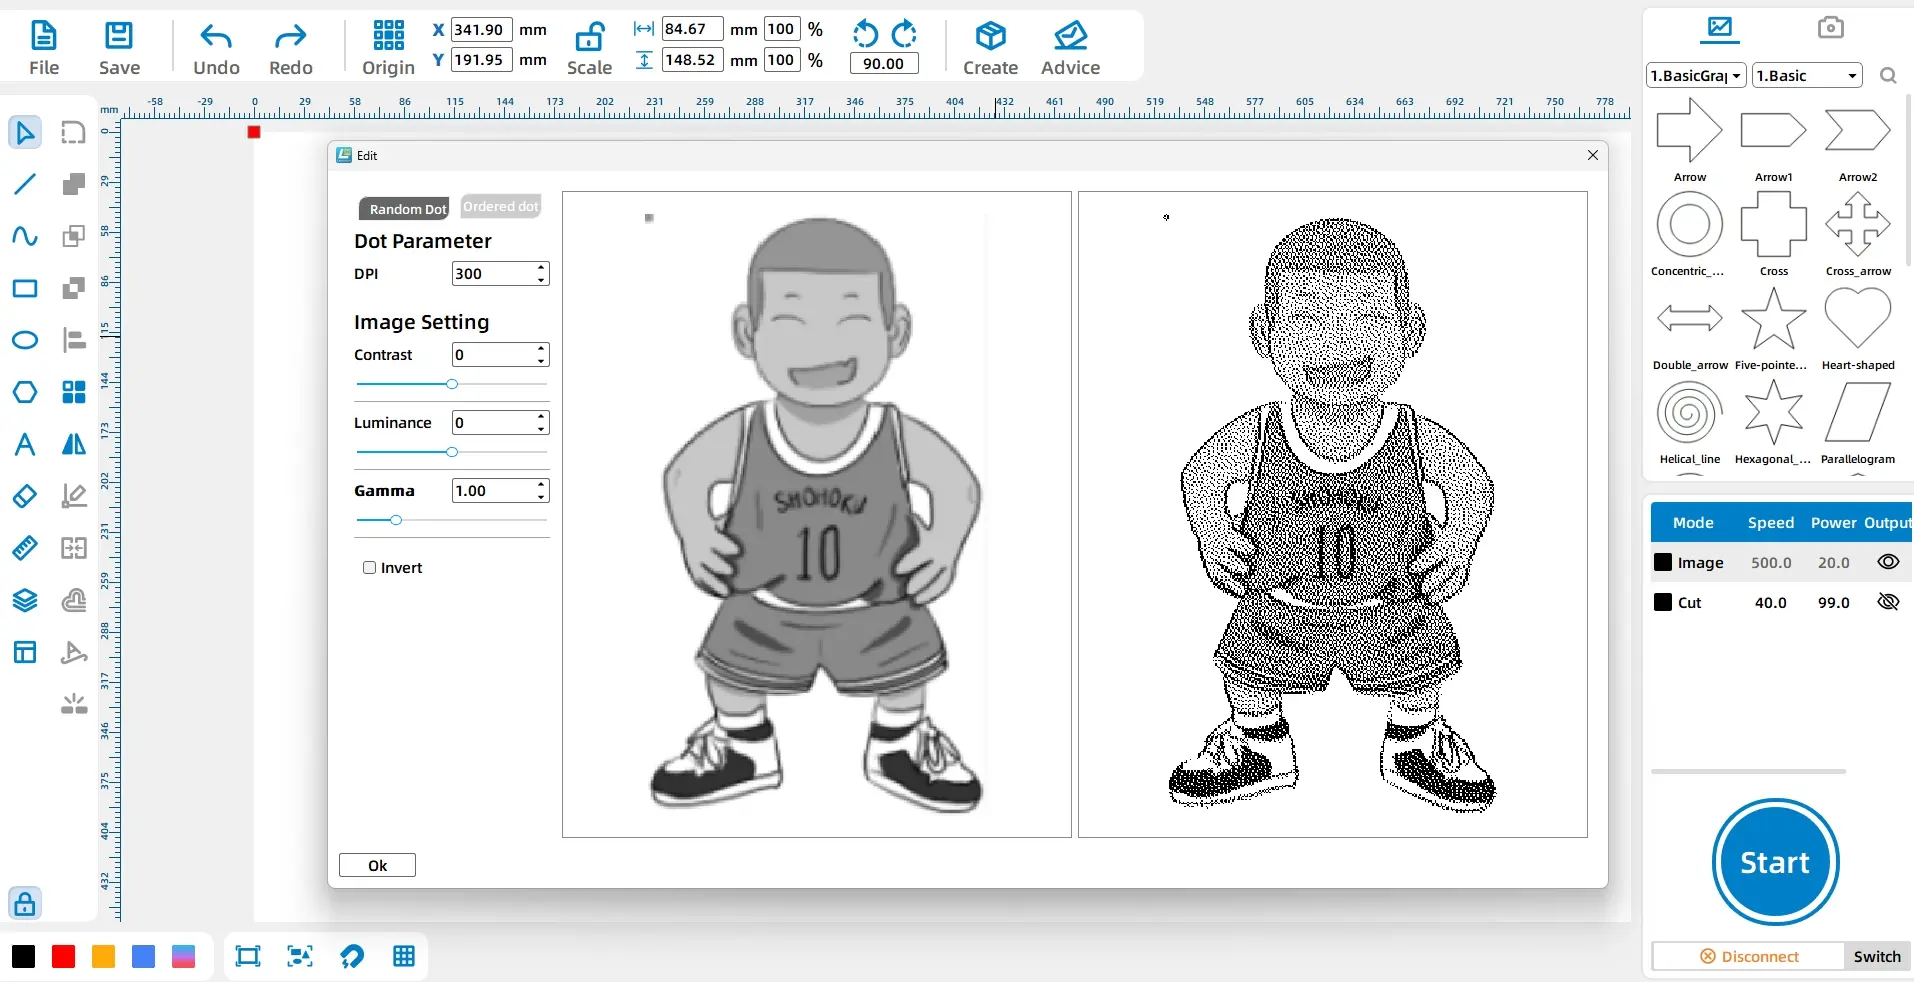
Select the image again and click Image Extraction in the toolbar. Adjust the image DPI to 300 so the image becomes clearer for laser processing.
LaserMaker tip: Image Extraction is useful when working with picture-based engraving. A clearer image helps the final engraving show more detail, especially on a small material surface.
Select the contour. In the layer panel at the bottom left, change the contour layer colour to red.
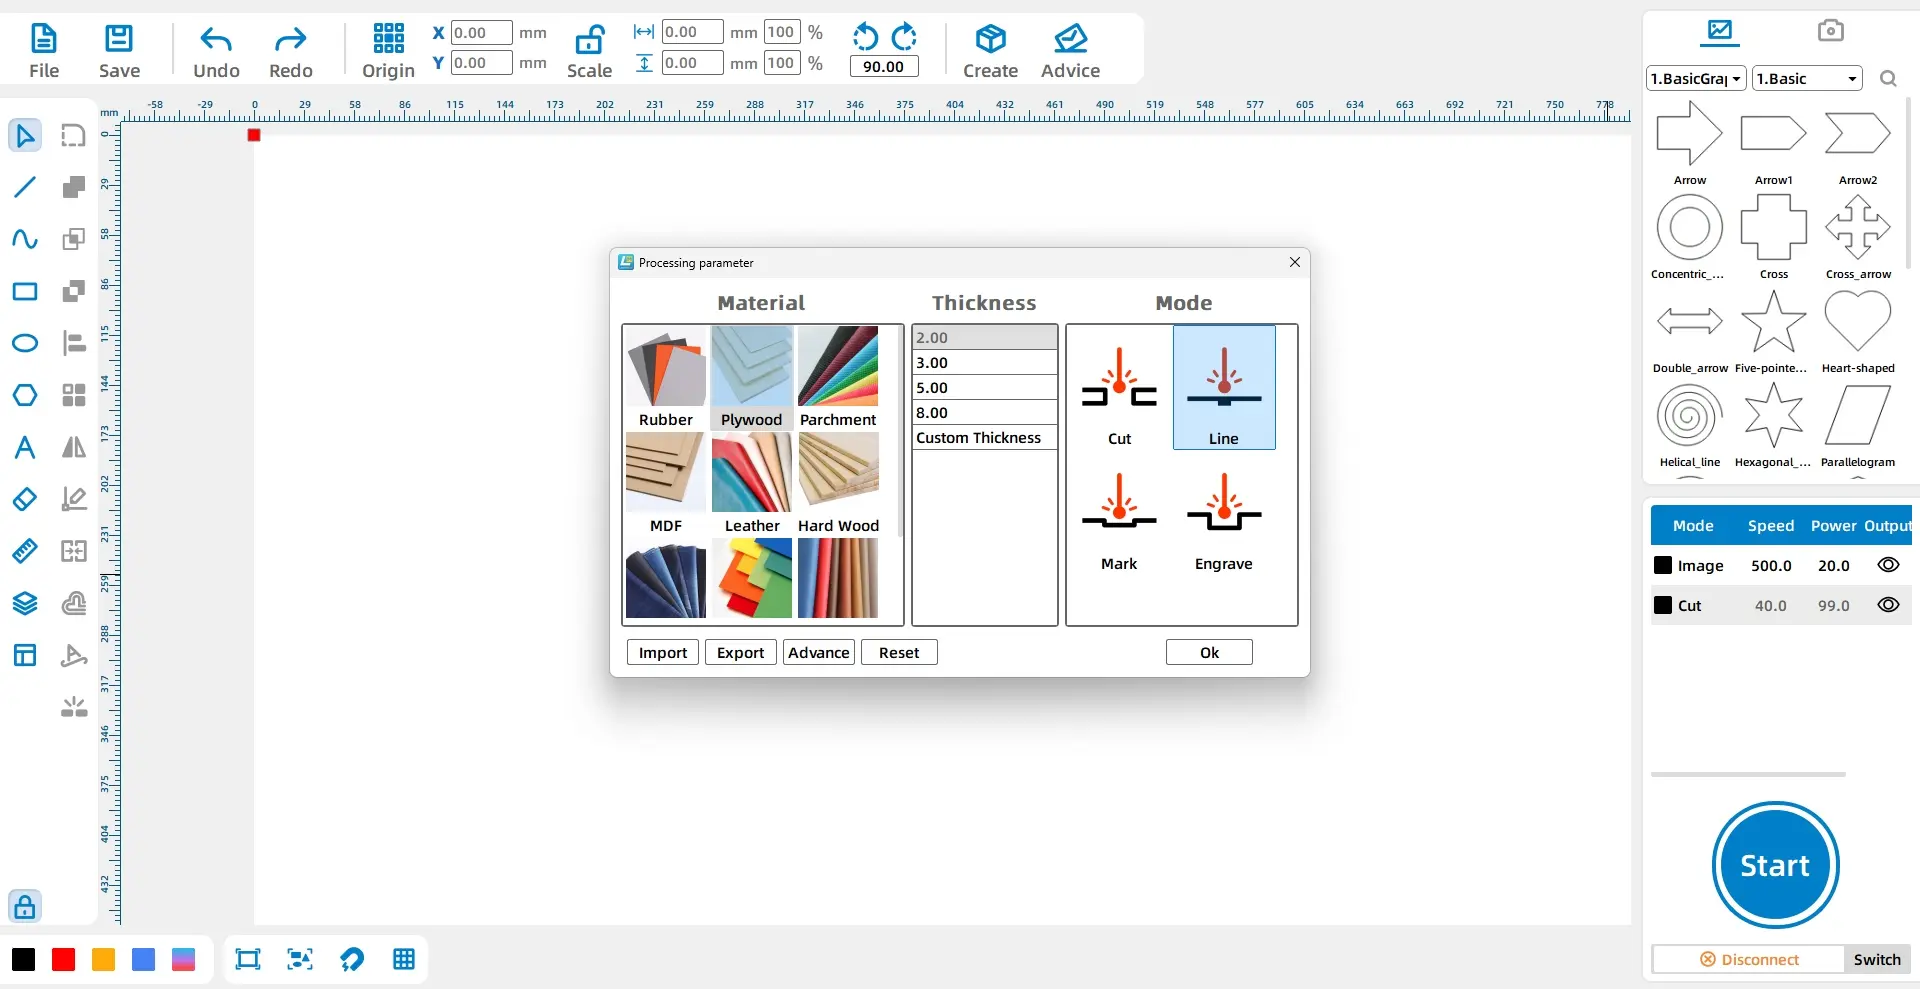
In the processing panel at the lower right, double-click the red image layer. Set the material to Basswood, the thickness to 0.6mm, and the process to Outlining. Then double-click the black image layer and set the material to Basswood, the thickness to 0.6mm, and the process to Cutting.
| Layer | Material Setting | Thickness Setting | Process | Project Use |
|---|---|---|---|---|
| Red | Basswood | 0.6mm | Outlining | Image contour |
| Black | Basswood | 0.6mm | Cutting | Image layer processing setup |
Testing reminder: Leaves are delicate natural materials. Before making the final work, test settings carefully on a similar material and keep the design within the measured leaf area.
Before processing the final leaf, students should check the image size, contour position, DPI setting, and layer assignments. The artwork should fit inside the 80mm by 40mm leaf area without extending beyond the usable surface.
After laser processing, the leaf becomes a small engraved artwork. Place the finished leaf in a photo frame to protect it and make it easier to display.
Once students understand the workflow, they can create their own leaf carving designs. They can choose different image themes, such as animals, sports, flowers, portraits, classroom symbols, seasonal patterns, or short visual stories.
Extension idea: Ask students to select an image that matches the shape of their leaf. They should explain how they adjusted the image size, detail level, and position to fit the natural material.
In this laser engraved leaf art project, students learn how to measure a material, prepare image artwork, extract contours, use Image Extraction, set image DPI to 300, assign layer colours, and configure basic process settings in LaserMaker.
The project shows that drawing and modeling can become easier with practice. By starting with a small natural object, students can explore how laser creation combines digital tools, material awareness, and artistic storytelling.
Create More LaserMaker STEAM Projects
Explore Thunder Laser machines for classroom laser engraving projects, nature-inspired art, student maker activities, and hands-on digital fabrication lessons.
Explore Bolt SeriesTalk To Our Experts Now!
Please leave your contact information so that we can serve you better.
NEED HELP FINDING THE RIGHT SOLUTION?
Talk to our team for machine recommendations, application advice, and support based on your needs.

 Stable & Consistent MachinesUnlimited ApplicationRobust After-sales SupportFactory Direct Supply