


Animal Keychain Laser Cutting Project for STEAM Classrooms
 2024-08-19
WHAT ARE YOU LOOKING FOR?
Search Across Products, Blog Posts, Support Content, And Resources.

Animal Keychain Laser Cutting Project for STEAM Classrooms
2024-08-19

In this STEAM maker project, students design and make a simple animal keychain using LaserMaker and a laser cutting machine. The lesson introduces basic drawing tools, circle sizing, keyhole placement, animal graphics from the library panel, proportional scaling, laser layer settings, device connection, and the full workflow from digital design to a finished physical object.
A keychain is a familiar everyday item, which makes it a useful beginner project. Students can start with a simple round keychain, add an animal graphic, and then customize the design with different animals, shapes, or decorative details.
| Item | Details |
|---|---|
| Project | Animal keychain laser cutting project |
| Software | LaserMaker |
| Main Skills | Ellipse drawing, Select tool, Ctrl key circle drawing, alignment guides, Library Panel graphics, Isometric scaling, layer setup, processing order, USB communication test, and file upload |
| Suggested Materials | 3 mm basswood board and key ring |
| Classroom Fit | Beginner laser cutting, maker projects, personalized objects, digital design practice, classroom gifts, and LaserMaker introduction lessons |
Students will create a round animal keychain by drawing a 45 mm outer circle, adding a 3 mm keyhole, placing an animal graphic in the center, setting the correct engraving and cutting layers, uploading the file to the laser cutter, and assembling the finished keychain with a key ring.
For teachers: Use this project as a first LaserMaker activity to introduce simple shapes, library graphics, layer colors, and machine communication.
For students: Use the activity to turn a small digital design into a useful object that can be carried, gifted, or customized.
For makerspaces: Use it as a quick onboarding project for learners who are new to laser cutting and want a successful first result.
Use the Ellipse tool and Ctrl key to draw accurate circles in LaserMaker.
Place a small keyhole correctly so the finished keychain can connect to a key ring.
Import an animal graphic from the LaserMaker Library Panel and resize it proportionally with the Isometric function.
Assign design elements to different processing layers for outlining and cutting.
Connect LaserMaker to the laser cutting machine, test communication, upload the file, and complete a physical product.
Design thinking: Choose a practical object, add a visual theme, and make the final design personal and usable.
Computational thinking: Use dimensions, proportional scaling, alignment guides, and layer order to create a repeatable production file.
Engineering thinking: Consider material thickness, keyhole size, cutting order, graphic placement, and whether the finished keychain is strong enough for everyday use.
Students should operate the laser cutter only under teacher or lab supervisor guidance. Before processing, check the material, focal length, layer order, USB connection, file name, and cutting setup. After processing, handle small parts carefully and attach the key ring only after the cut part is fully removed from the machine bed.
| No. | Material or Part | Quantity |
|---|---|---|
| 1 | 3 mm basswood board | 1 |
| 2 | Key ring | 1 |
The source lesson uses a simple basswood keychain structure. Teachers can prepare extra boards and key rings so students can test different animal graphics or make a second version if time allows.
A keychain is small, practical, and easy to personalize. That makes it a good first project for learning how software design becomes a real object. Students can use a rabbit, another animal, or a classroom theme to express their interests while practicing accurate digital fabrication.
The project also helps students understand that even a simple object needs design decisions. The outer shape must be large enough to hold the graphic, the keyhole must be placed carefully, and the laser layers must be set correctly so the machine outlines and cuts in the right order.
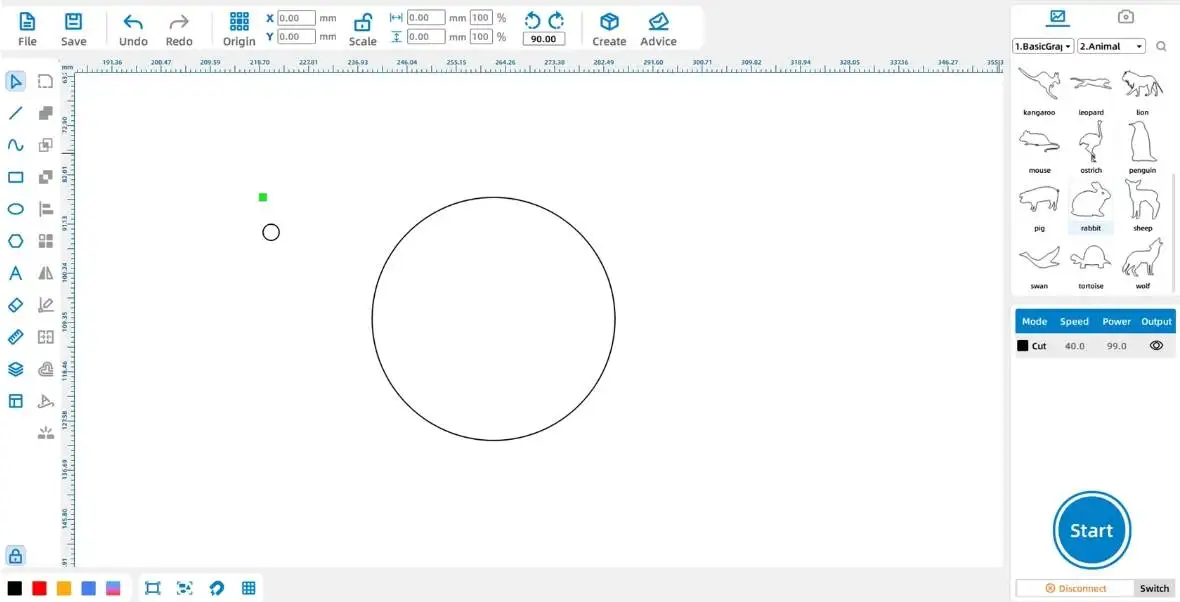
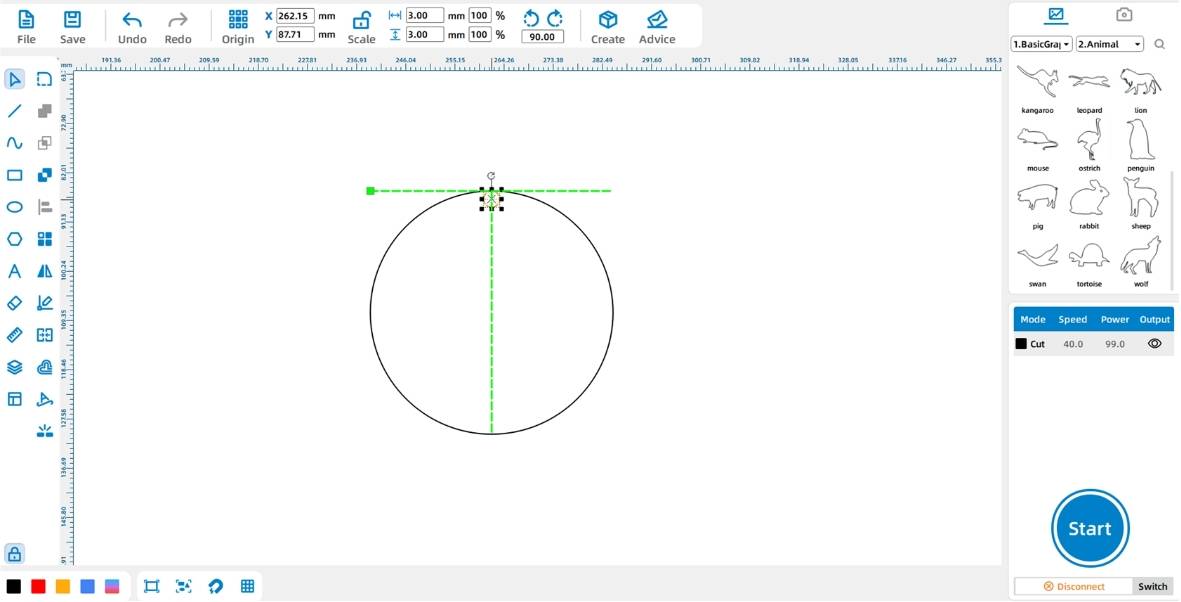
From the left-side Drawing Toolbar, select the Ellipse tool. Move the mouse to the drawing area, hold down the left mouse button, and press the Ctrl key while dragging to draw a perfect circle. Create one 45 mm circle for the outer keychain shape and one 3 mm circle for the keyhole.
Tool Tip: When using Rectangle or Ellipse tools, holding down Ctrl while dragging creates a 1:1 shape, such as a square or perfect circle.
Click the Select tool and move the 3 mm circle to the top area of the 45 mm circle. Use the software alignment guides to help place the keyhole neatly and accurately.
Find Animal Graphics in the right-side Library Panel. Drag the Rabbit graphic into the drawing area. Teachers can also let students choose another animal if the classroom activity allows personalization.
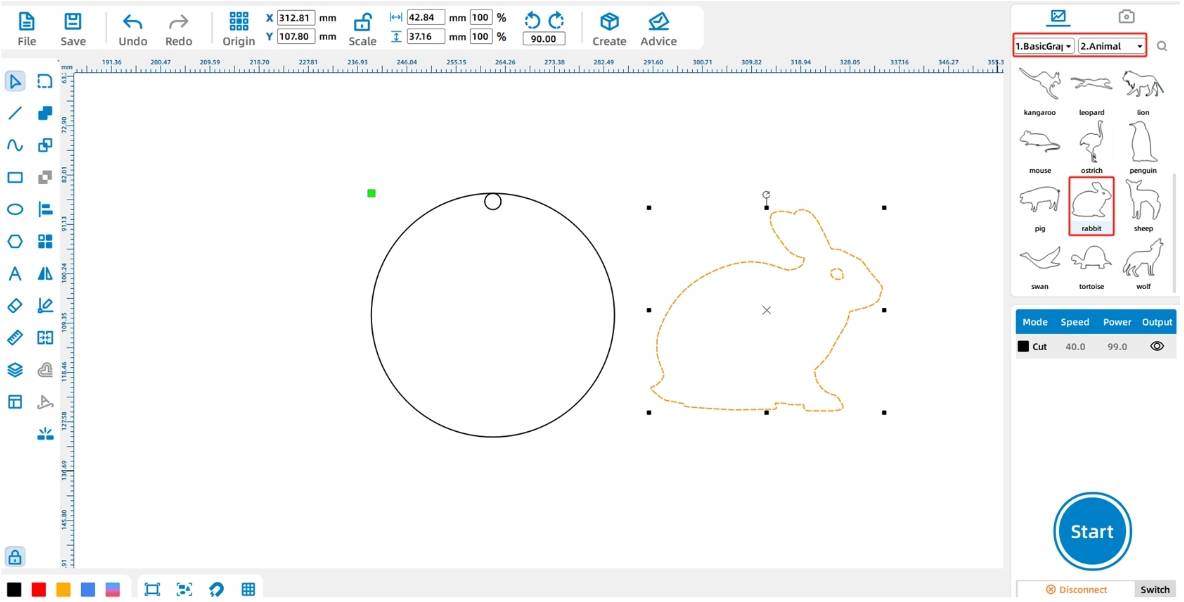
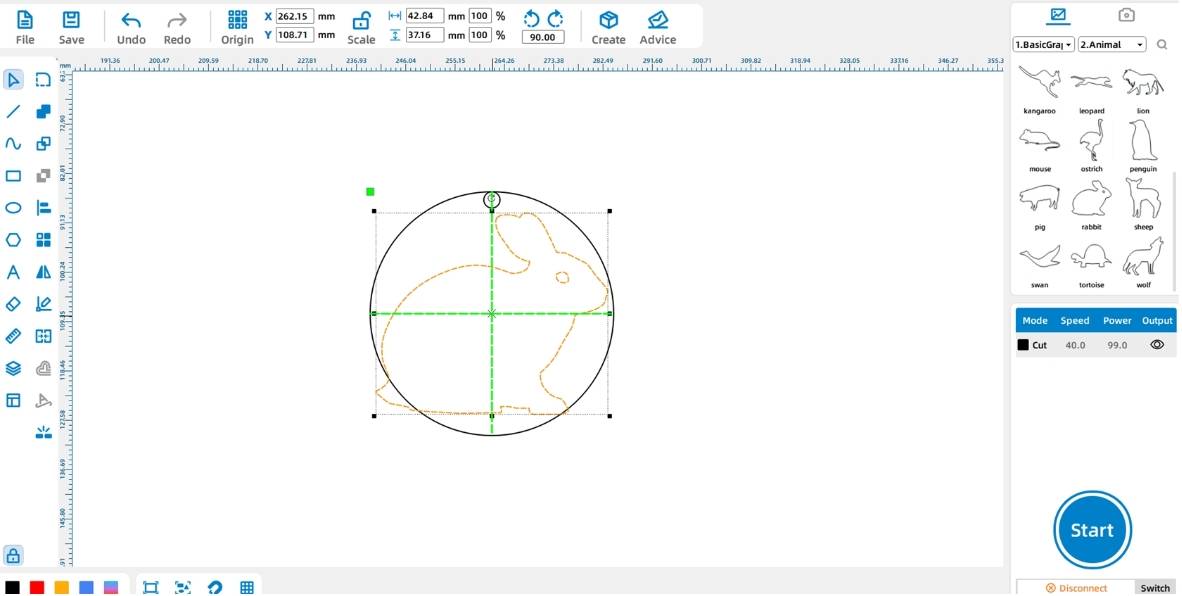
Select the rabbit shape and click the Isometric function in the Function Area. Set the width to 32 mm. The height will change automatically based on the original width-to-height ratio. Then place the rabbit in the center of the 45 mm circle.
Design Tip: The Isometric function locks the width-to-height ratio. This helps students resize graphics without stretching or distorting the animal.
Select the rabbit shape and click the red layer in the lower-left Layer Palette. This sets the rabbit graphic to the red layer for outlining.

In the source workflow, the default layer techniques are black for cutting, red for outlining, yellow for shallow engraving, and blue for deep engraving. For this keychain, set the black layer to basswood board, 3 mm, cutting. Set the red layer to basswood board, 3 mm, outlining.
Drag the black cutting layer to the bottom of the processing stack. This helps keep the workpiece stable because the final outside cut happens after the internal outline is processed.

Click the Switch button in the lower-right Processing Panel to enter the device management interface. Click the Test icon in the row labeled usb. Continue after the Communication Successful message appears.
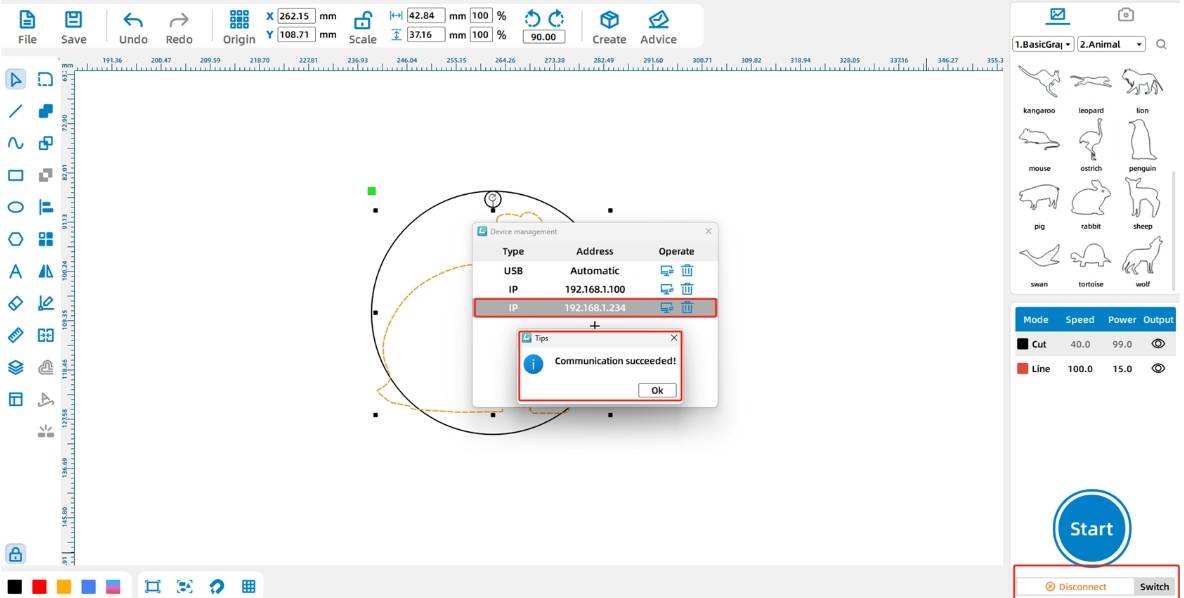
Connection Reminder: Before connecting the device, make sure the PC-USB cable is connected to the device and computer, and that the required dongle is inserted into the computer USB port if your classroom setup uses one.
Click the Start button in the lower-right Processing Panel to upload the file to the machine. Remind students that uploading a file with the same name may overwrite a previously uploaded file on the device.

After the file is uploaded and the teacher confirms the setup, process the keychain with the laser cutting machine. Once cutting is complete, remove the keychain from the machine bed, check the keyhole and outline quality, and attach the key ring.
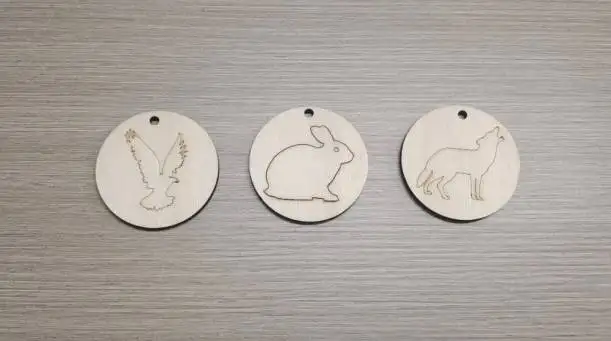
Check whether the keyhole is fully cut and large enough for the key ring.
Check whether the animal outline is clear and centered inside the circle.
Check whether the cutting layer was processed last to keep the workpiece stable.
Compare different animal graphics and discuss which designs work best at a small size.
Try a second version with another animal, name, date, or decorative border.
Shape design: Students draw the outer circle and keyhole using the Ellipse tool and Ctrl key.
Graphic design: Students import an animal graphic, resize it proportionally, and place it in the center.
Layer setup: Students assign outlining and cutting layers and place the cutting layer at the bottom of the processing stack.
Machine workflow: Students test device communication and upload the file under teacher supervision.
Assembly: Students attach the key ring and review the finished keychain.
Demonstrate how holding Ctrl creates a perfect circle before students begin drawing.
Ask students to keep the animal graphic simple enough to read clearly at keychain size.
Use the layer setup step to explain the difference between outlining and cutting.
Remind students that the cutting layer should normally be processed after the internal design details.
Prepare extra key rings and small scrap pieces for students who want to test a second design.
What tools did you use to create the animal keychain?
Why does the keyhole need to be placed carefully?
Why should the cutting layer be processed after the outlining layer?
How would you make the keychain more personal in a second version?
Students can evaluate their own work and give peer feedback based on design clarity, technical process, finished appearance, and classroom collaboration.
| Evaluation Item | Self-Evaluation | Peer Evaluation |
|---|---|---|
| Design and Creativity, 30 points | ||
| Technical Process, 30 points | ||
| Finished Appearance, 20 points | ||
| Collaboration and Care, 20 points | ||
| Total, 100 points |
At the end of the lesson, students can present their animal keychains, explain which animal they chose, describe how they set the layers, and discuss what they would improve next time. This helps students connect software operations with real design decisions.
After finishing the basic animal keychain, students can create a themed keychain collection with pets, school mascots, wildlife, seasonal icons, or student-designed symbols. They can also add text, initials, dates, or decorative frames if the design remains clear and strong.
For a design challenge, students can compare different outer shapes, animal sizes, keyhole positions, and outlining styles to see which version is the most attractive and practical.
This project is suitable for classroom laser cutters that support cutting and outlining of thin basswood board for small maker projects. For schools and beginner STEAM labs, projects like animal keychains, classroom tags, small gifts, and beginner LaserMaker activities can be completed with a classroom laser cutter such as the Thunder Laser Bolt Series.
Teachers can choose the machine and material setup based on classroom space, student supervision needs, material thickness, project size, and ventilation setup. Students should always test settings, check focus, and follow the school’s laser safety rules before final cutting.
Talk To Our Experts Now!
Please leave your contact information so that we can serve you better.
NEED HELP FINDING THE RIGHT SOLUTION?
Talk to our team for machine recommendations, application advice, and support based on your needs.

 Stable & Consistent MachinesUnlimited ApplicationRobust After-sales SupportFactory Direct Supply


