


Laser Cutting Wood Basics for STEAM Classrooms
 2024-08-02
WHAT ARE YOU LOOKING FOR?
Search Across Products, Blog Posts, Support Content, And Resources.

Laser Cutting Wood Basics for STEAM Classrooms
2024-08-02

In this STEAM maker course, students and teachers learn the basics of laser cutting wood with a CO2 laser cutter. The lesson explains which woods are suitable for laser cutting, how material thickness affects cutting results, how to reduce burn marks, and how to choose the right setup for clean classroom projects.
This guide is useful before students begin wood-based laser cutting projects such as models, signs, coasters, decorations, classroom prototypes, and simple product-design activities.
| Item | Details |
|---|---|
| Topic | Laser cutting wood with a CO2 laser cutter |
| Main Materials | Basswood, cherry wood, MDF, birch plywood, walnut, and other suitable wood materials |
| Main Skills | Wood selection, material testing, laser setup, cutting parameters, burn-mark reduction, post-processing, and troubleshooting |
| Classroom Fit | STEAM maker projects, woodworking design, product prototyping, model making, classroom laser cutting, and beginner fabrication lessons |
Students will understand how wood responds to laser cutting, how to choose a suitable wood type, how to prepare a design and material, and how to adjust cutting settings to create cleaner, safer, and more reliable results.
For teachers: Use this guide as an introduction before running wood laser cutting projects in a classroom, makerspace, or fabrication lab.
For students: Use it to learn how material choice, thickness, speed, power, air assist, and focus affect the final cut.
For makerspaces: Use it as a practical onboarding page for learners who are new to CO2 laser cutting with wood.
Identify common woods used for laser cutting and compare their basic characteristics.
Understand how density, resin content, thickness, flatness, and moisture can affect cutting quality.
Prepare a design, place the wood correctly, focus the laser, and perform a test cut before final processing.
Use power, speed, air assist, masking, and multiple passes to improve cutting results.
Clean and finish laser-cut wood parts by removing dust, residue, and burn marks when needed.
Design thinking: Select a wood type and project format based on the desired appearance, function, and finished result.
Computational thinking: Compare material thickness, laser speed, power, DPI, air pressure, and pass count to improve repeatability.
Engineering thinking: Test cuts, observe edge quality, troubleshoot incomplete cuts, reduce charring, and adjust the setup based on evidence.
Students should only cut materials approved by their teacher or lab supervisor. Painted, stained, or treated wood should be checked carefully before laser processing because some coatings may release unsafe fumes. Always use proper ventilation, air assist, and supervised machine operation.
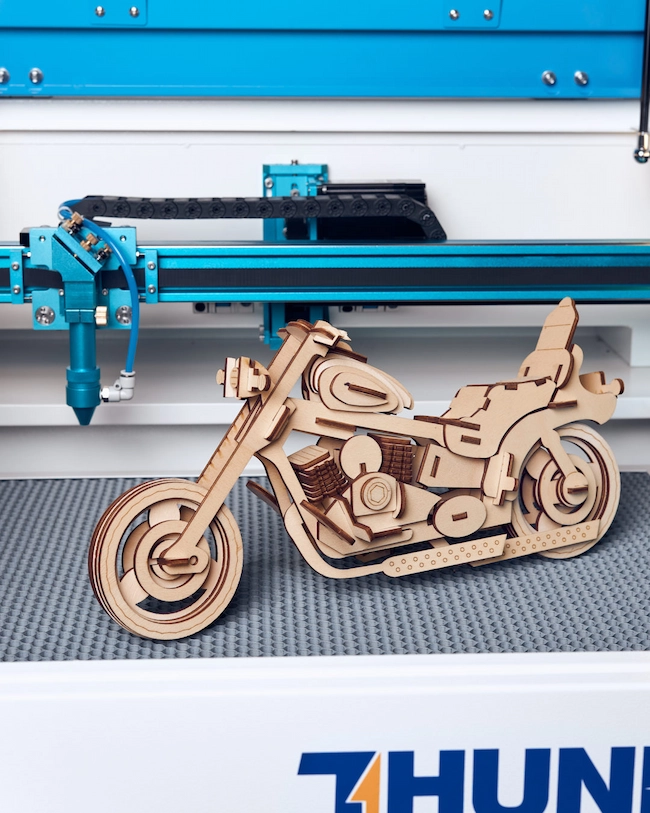
Yes. CO2 laser cutters are well suited for cutting and engraving many types of wood. Compared with hand tools such as saws, planers, drills, and chisels, laser cutting can produce precise shapes, intricate patterns, and repeatable results with less physical tool wear.
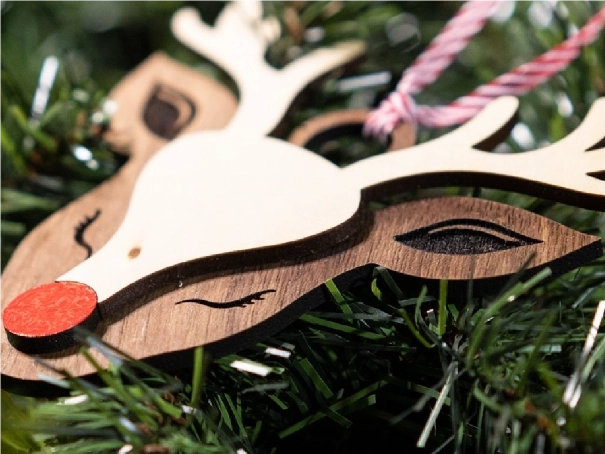
For classroom projects, laser cutting wood is useful because students can move from a digital design to a physical object quickly. It also supports detailed work such as model parts, signs, coasters, ornaments, and personalized decorations.
As a general reference, a 40–60 watt CO2 laser can often cut wood up to about 1/4 inch or 6 mm thick. Higher-power CO2 lasers, such as 100 watts or more, may cut wood up to about 1 inch or 25 mm thick, depending on the material and setup.
Thicker wood usually requires slower cutting speeds, higher power, multiple passes, and careful testing. Teachers should always ask students to test settings on a small sample before cutting the final project.
Different wood types produce different cutting and engraving results. Students should choose the material based on the project goal, required strength, appearance, edge quality, and machine capability.
Basswood is soft, light in color, and has a fine, even grain. It is easy to laser cut and engrave, making it a strong choice for beginner projects, models, ornaments, and detailed classroom work.
Cherry wood is a hardwood with a reddish-brown color that can darken over time. Its fine, straight grain can produce attractive, high-contrast engraving and polished-looking project results.
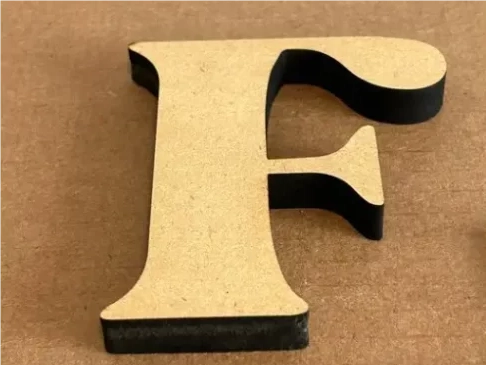
MDF is an engineered wood product that is dense, flat, and stable. It can cut cleanly with minimal warping, but it may create more dust and residue during processing, so good ventilation and cleanup are important.
Birch plywood is strong, lightweight, smooth, and versatile. It is often used for both structural and decorative laser cutting projects because it combines useful strength with a clean surface.
For a deeper material guide, teachers and students can review wood options for laser engraving and cutting.
The best wood for laser cutting depends on the project. Material density, resin content, moisture level, thickness, and flatness can all affect how cleanly the laser cuts.
Thickness: Thinner and flatter material is usually easier to cut cleanly and consistently.
Density: Denser hardwoods may require slower speeds, more power, or multiple passes.
Moisture: Wood with too much moisture may cut unevenly or produce more smoke.
Appearance: Choose the grain, color, and surface finish based on the intended product.
Project function: Structural parts may need stronger plywood, while decorative projects may prioritize color and surface finish.
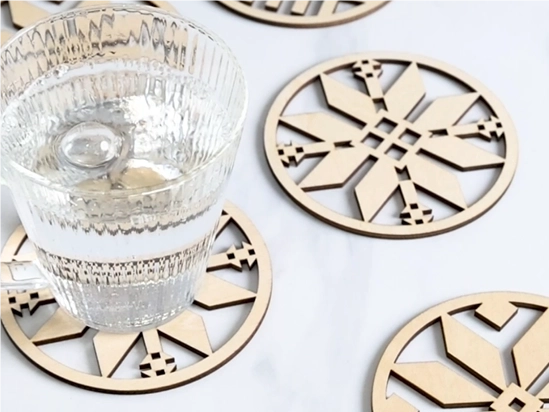
Wood laser cutting can support many classroom and maker projects, from decorative objects to functional prototypes.

Laser cutting wood is a step-by-step process. Students should prepare carefully, test settings, and monitor the job while the machine is running.
Step 1: Prepare the design. Create or import the design into laser cutting software.
Step 2: Choose the wood. Select material based on thickness, type, flatness, and project requirements.
Step 3: Set up the laser cutter. Place the wood flat on the working table and align it properly.
Step 4: Adjust laser settings. Set power, speed, frequency, DPI, and air assist based on the wood and design.
Step 5: Focus the laser. Make sure the laser is focused correctly on the wood surface.
Step 6: Perform a test cut. Use a small sample to check whether the cut is complete and the edge quality is acceptable.
Step 7: Start cutting. Run the full design while monitoring smoke removal, air assist, and cutting progress.
Step 8: Post-process the parts. Let the wood cool, remove the pieces, clean residue, and sand edges if needed.
Laser cutting uses heat, so some darkening may occur. However, students can reduce burn marks by optimizing speed and power settings, using masking tape, applying air assist, or testing thin wood preparation methods before final cutting.
Teacher Tip: Ask students to compare several small test cuts with different settings. This helps them understand how power, speed, air assist, and masking affect edge color and surface cleanliness.
If the laser does not cut through the wood, students should troubleshoot the issue systematically instead of immediately repeating the same cut.
Adjust settings: Increase power or reduce cutting speed so the laser has more time and energy to cut through the material.
Use multiple passes: For thicker or denser wood, multiple passes may produce a cleaner result than one aggressive pass.
Check the wood type: Dense hardwoods, high resin content, or inconsistent plywood layers may make cutting more difficult.
Review the focal lens: For thicker materials, a longer focal lens may improve depth performance when used appropriately.
The surface beneath the wood affects support, airflow, smoke removal, and cutting quality. The right support can also reduce back reflections and protect the machine bed.
| Working Table Option | Classroom Use |
|---|---|
| Honeycomb cutting bed | Provides strong support and airflow for many wood cutting projects. |
| Sacrificial material | Thin MDF, plywood, or acrylic sheets can protect the bed and be replaced after use. |
| Aluminum slats | Provide support and help dissipate heat during cutting. |
| Pins or raised supports | Lift the wood so smoke and debris can move away from the cut area. |
Burn marks can often be reduced after cutting. Students can sand the edges with fine-grit sandpaper, then move to finer grits for a smoother finish. For stubborn surface marks, teachers may demonstrate appropriate cleaning methods, such as a mild paste or approved wood-cleaning approach, depending on the material and classroom safety rules.
After cleaning, make sure the wood is dry before applying paint, stain, oil, or another finish.
CO2 lasers are widely used for wood because the laser wavelength is well absorbed by many wood materials. This makes CO2 laser cutting efficient for classroom wood projects, model making, decorations, signs, and small-batch production.
Fiber lasers are not the typical choice for cutting wood, and diode lasers are often used for lighter work rather than thicker wood cutting. For many schools and makerspaces, a CO2 laser cutter is the practical option for wood cutting and engraving.
The following settings are provided as reference values from the source material for Thunder Laser Nova 130W on birch plywood and cherry wood. Students and teachers should always run test cuts and adjust settings based on the actual machine, material batch, lens, air assist, and project design.
| Material | Thickness | Processing | Speed | Min Power | Max Power | Air Pressure | DPI |
|---|---|---|---|---|---|---|---|
| Birch Ply | / | Engraving | 500 mm/s | 10% | 90% | Low | 300 |
| Birch Ply | 3 mm | Cutting | 55 mm/s | 10% | 90% | High | |
| Birch Ply | 6 mm | Cutting | 25 mm/s | 10% | 90% | High | |
| Birch Ply | 10 mm | Cutting | 18 mm/s | 10% | 90% | High | |
| Cherry Wood | / | Engraving | 500 mm/s | 10% | 20% | Low | 300 |
| Cherry Wood | 3 mm | Cutting | 85 mm/s | 10% | 90% | High | |
| Cherry Wood | 8 mm | Cutting | 24 mm/s | 10% | 90% | High | |
| Cherry Wood | 11 mm | Cutting | 16 mm/s | 10% | 90% | High |
For additional reference values, teachers can review laser settings for different materials.
For schools, makerspaces, and wood-focused classroom projects, a CO2 laser cutter can support detailed cutting, engraving, prototyping, and small-batch production. The source article highlights Nova as a strong option for woodworkers; teachers can explore the Thunder Laser Nova Series for larger wood projects and the Thunder Laser Bolt Series for classroom and beginner STEAM lab use.
Machine choice should be based on classroom space, material size, cutting thickness, ventilation setup, project frequency, and supervision needs. No matter which machine is used, students should test settings before final cutting and follow the school’s laser safety rules.
By the end of this guide, students should understand that successful wood laser cutting depends on more than one setting. Good results come from the combination of material choice, clean design, correct focus, suitable support, air assist, test cuts, safe monitoring, and careful finishing.
Talk To Our Experts Now!
Please leave your contact information so that we can serve you better.
NEED HELP FINDING THE RIGHT SOLUTION?
Talk to our team for machine recommendations, application advice, and support based on your needs.

 Stable & Consistent MachinesUnlimited ApplicationRobust After-sales SupportFactory Direct Supply


