


Bottle Laser Engraving: Materials, Rotary Setup & Tips
 2026-10-29


Bolt Series
Professional High-Precision Laser Engraving Machine

Nova Series
Large Format Glass Tube Laser Cutting Machine

Nova Plus Series
Business-grade RF CO₂ Laser Cutter

Nova Pro Series
Professional Laser Cutting & Engraving System

Titan Series
Industrial-grade Laser System

Titan Pro Series
Industrial-grade Dual-laser System


WHAT ARE YOU LOOKING FOR?
Search Across Products, Blog Posts, Support Content, And Resources.

Bottle Laser Engraving: Materials, Rotary Setup & Tips
2026-10-29

Bottle laser engraving can add names, logos, decorative patterns, and personalized messages to glass, coated metal, anodized aluminum, and bare stainless steel bottles. The right process depends on the bottle’s surface—not simply whether it is described as a glass or metal bottle.
A rotary attachment helps when the design extends around the bottle, while some small, localized designs can be engraved with the bottle held stationary. This guide explains how to choose the process, support different bottle shapes, prepare the artwork, and check the finished result.
Start by identifying the surface you want to engrave. Frosting glass, removing a colored coating, and marking bare metal are different processes and should not share one universal setting.
| Bottle surface | Typical result | Process to consider | What to check |
|---|---|---|---|
| Glass | A frosted surface mark | CO₂ surface engraving; UV marking for suitable glass and application requirements | Glass composition, surface quality, chipping, detail, and heat response |
| Coated stainless steel or other coated metal | Selected coating is removed to reveal the substrate | CO₂ coating removal or another process verified for the specific coating | Coating composition, clean removal, residue, and substrate appearance |
| Anodized aluminum | A contrasting mark in the anodized finish | CO₂ or fiber marking, depending on the finish and desired result | Contrast, fine-detail retention, and consistency across the finish |
| Bare stainless steel | A direct metal mark or engraved surface | Fiber or MOPA marking; conventional CO₂ systems generally require a compatible metal-marking compound for surface marking | Required contrast, depth, finish, and marking-compound requirements where applicable |
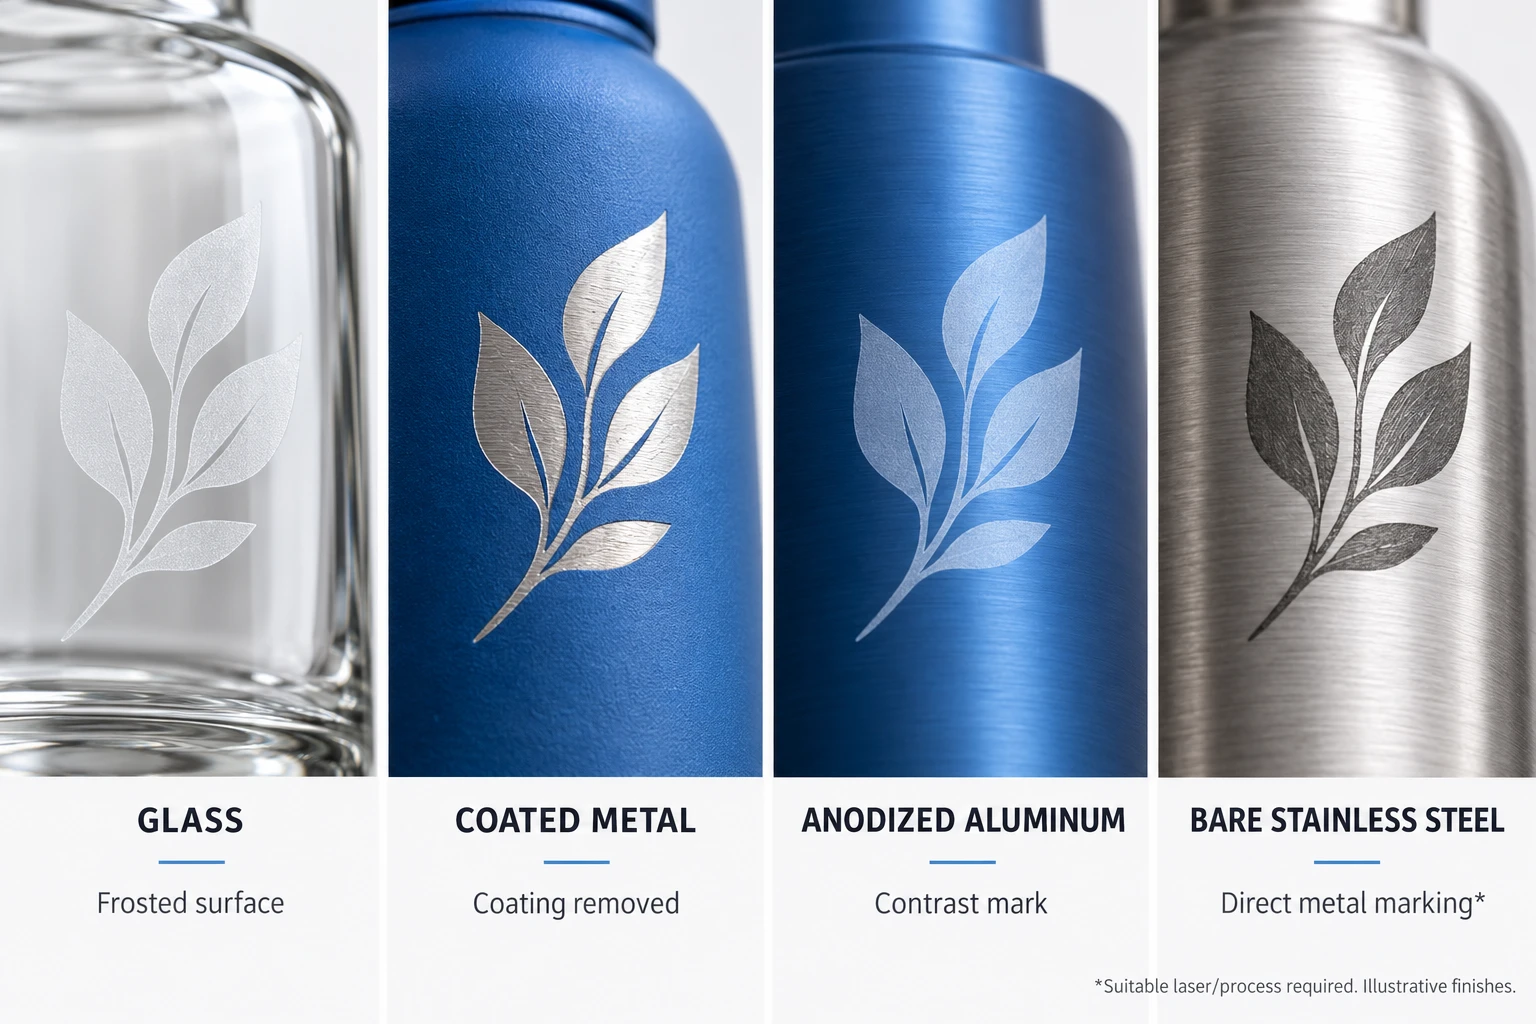
Illustrative surface comparison: glass frosting, coating removal, anodized-surface marking, and direct stainless steel marking require different processing conditions.
Verify unfamiliar coatings, decorative layers, and plastic components before processing. A successful mark on one bottle does not establish compatibility or settings for another product with a similar appearance.
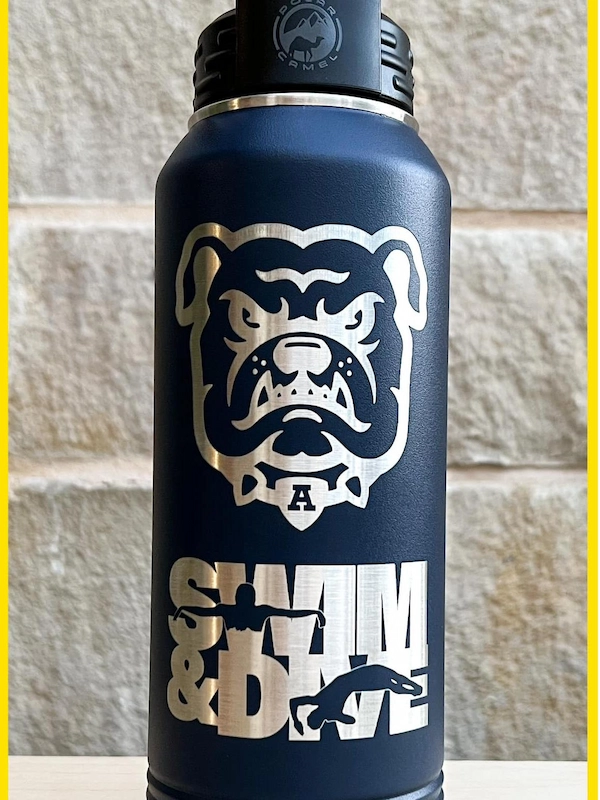
Bottle engraving project example. Select the process according to the bottle’s actual surface and the finish you want to produce.
A bottle does not automatically require a rotary, and a tumbler does not automatically work without one. The important factors are the shape of the engraving area, the design’s reach around the surface, focus variation, and how securely the object can be held.
| Design scope | Possible setup | Main limitation |
|---|---|---|
| A small name, date, or logo on one side | A stationary bottle in a suitable fixture, if the engraving area remains within the usable focus range | The surface curves away from focus toward the sides of the design |
| A wider design extending around the body | A compatible rotary attachment | Support, rotation accuracy, focus, and software configuration must match the bottle |
| A 360° full-wrap design | A rotary setup with verified scale and stable positioning | The artwork, rotation, and start-to-end alignment must agree |
A short design on a gently curved area may be possible without rotating the bottle. Secure it against rolling, frame the complete design, and check the focus across the intended engraving width.
There is no universal maximum width for stationary bottle engraving. Bottle diameter, lens, material response, and the required detail all affect the usable area.
For an example of localized engraving without a rotary, see the wedding wine bottle project. Its fixed-bottle workflow should not be used as a rotary setup tutorial.
When the design extends farther around the bottle, a rotary turns the surface through the processing area. It can make a wider design practical, but it does not correct slipping, inaccurate scale, poor support, or an uneven engraving surface.
Look at the bottle from the side before choosing where to grip or support it. Identify the engraving zone, neck, shoulder, base, and any feature that could interfere with a complete rotation.
A straight cylindrical body is often the simplest starting point. A roller rotary can support suitable bottles on their body, while a chuck rotary grips the bottle using appropriate jaws or an adapter. Confirm that the bottle rotates without walking, wobbling, or contacting the laser head.
A narrow neck and wider body require particular attention on a roller rotary. If the driven wheels contact the neck while the laser engraves the wider body, the surface travel at the engraving area can differ from the expected travel, causing distorted artwork.
Use the rotary manufacturer’s recommended contact arrangement. On a chuck rotary, measure the engraving-region diameter as required by the software and support the bottle so it remains centered. Do not overtighten a fragile glass neck.
A tapered bottle changes diameter along its length. Adjust the fixture so the selected engraving region stays within a usable focus range, then evaluate whether the artwork needs taper compensation.
Tilting the bottle to improve focus does not remove the geometry of the taper. A narrow logo and a full-height wrap may need different design and setup decisions.
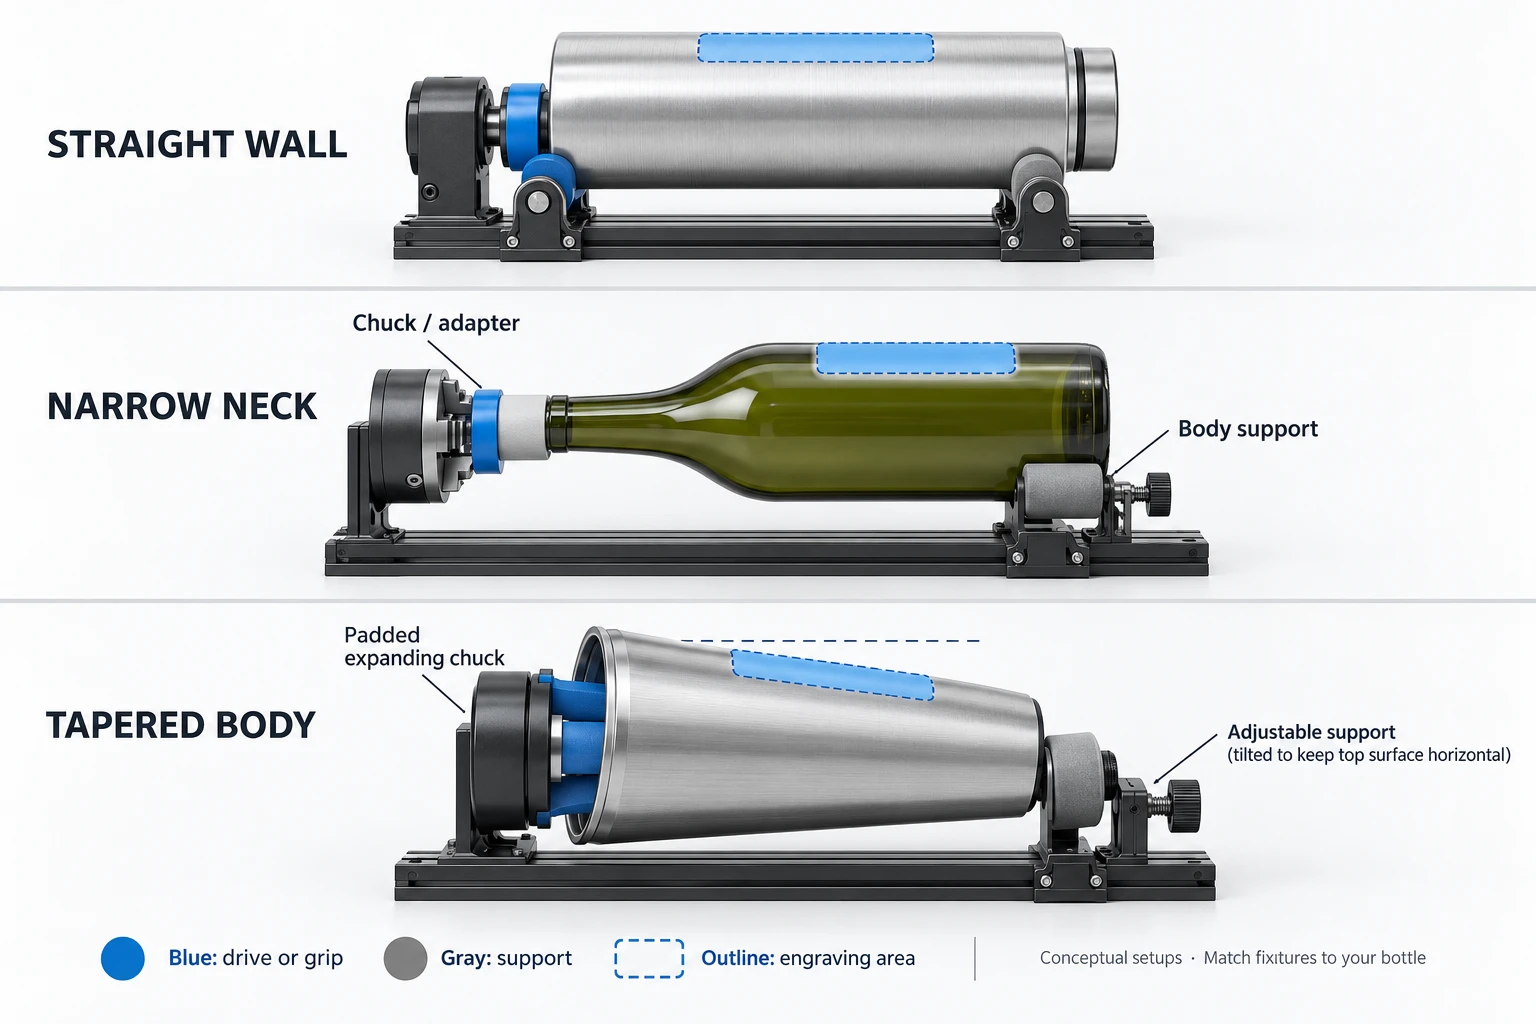
Conceptual chuck-rotary arrangements for three bottle shapes. Match jaws, adapters, supports, and clearance to the actual bottle and rotary; the illustration is not a model-specific installation diagram.
| Rotary type | How it moves the bottle | What deserves attention |
|---|---|---|
| Roller rotary | Driven rollers turn the object through surface contact | Contact diameter, traction, support, slipping, and axial movement |
| Chuck rotary | Jaws or an adapter grip the object and turn it about its axis | Secure grip, centering, object-diameter configuration, and support for the free end |
Neither type is automatically best for every bottle. Select a compatible rotary that supports the bottle without damaging it and keeps the engraving region stable throughout the job.
Use a clean, empty bottle with a known material and surface finish. Remove detachable parts that are not needed for the job and could obstruct movement. Do not process sealed or pressurized containers as ordinary engraving blanks.
Measure the usable straight-body length and the diameter or circumference at the engraving region. Keep the design clear of shoulders, raised lettering, seams, and surface changes unless they are deliberately included in a verified process.
Install and connect the rotary according to the machine’s instructions, with the system powered down where required. Keep the rotary secure and support the bottle so it cannot shift or fall.
Check the entire rotation path, including the neck, cap fittings, handles, supports, and laser head. Align the rotary and bottle with the intended processing direction.
Check the surface where the artwork will be placed rather than assuming the bottle base or rotary frame establishes the correct height. Adjust the support or fixture as intended by its manufacturer, then confirm focus at separated points along the design.
Select the configuration for your machine, controller, software, and rotary model. Save the original configuration before making changes, and use the rotary manufacturer’s calibration values and verification procedure.
For the specific LightBurn DSP behavior, consult the official rotary mode documentation.
Set the artwork orientation and dimensions for the chosen rotary axis. Confirm the job origin, rotation direction, and engraving position. Frame the complete design using the machine’s approved procedure before enabling the engraving job.
Focus with the lens and setup intended for that machine. If the design crosses a changing diameter, check both the focus variation and any required artwork compensation.
Use an equivalent spare bottle or an approved test area. A small test containing a circle, lettering, and a filled patch can help reveal scale errors, missing detail, coating residue, or excessive heat.
Correct positioning and scale before optimizing the surface finish. Changing power cannot fix a design stretched by the rotary setup.
Keep the process attended and use the required extraction. After engraving, clean the bottle with a method suitable for its surface and inspect the result under consistent lighting.
The original customer video below provides an additional view of bottle engraving with a Thunder Laser machine and rotary attachment. Use the setup instructions for your own equipment rather than assuming every adjustment in another installation transfers directly.
Customer bottle engraving demonstration using a rotary attachment.
More laser engraved bottle videos on our YouTube channel
A full wrap adds another requirement: the beginning and end of the artwork must reach the intended positions around the bottle. First establish correct rotary scale and stable motion, then adjust the design.
For a straight cylindrical region, circumference equals π × diameter. Measure at the actual engraving area and use the correct rotary configuration. The usable artwork height runs along the bottle’s axis and must avoid unwanted shoulders or changes in profile.
A tapered bottle does not have one circumference across its full length. Treat it as a separate layout problem rather than stretching a rectangular wrap until it appears to fit.
A seamless design needs compatible artwork at both edges. Correct bottle measurements cannot join two unrelated pattern edges. If the design intentionally leaves a gap, size and position that gap deliberately.
Check the artwork after any rotation or taper compensation so its dimensions still correspond to the intended bottle directions.
Choose the start and end position before engraving. When possible, place the join where it is less visually prominent and keep it clear of features that interrupt support or rotation.
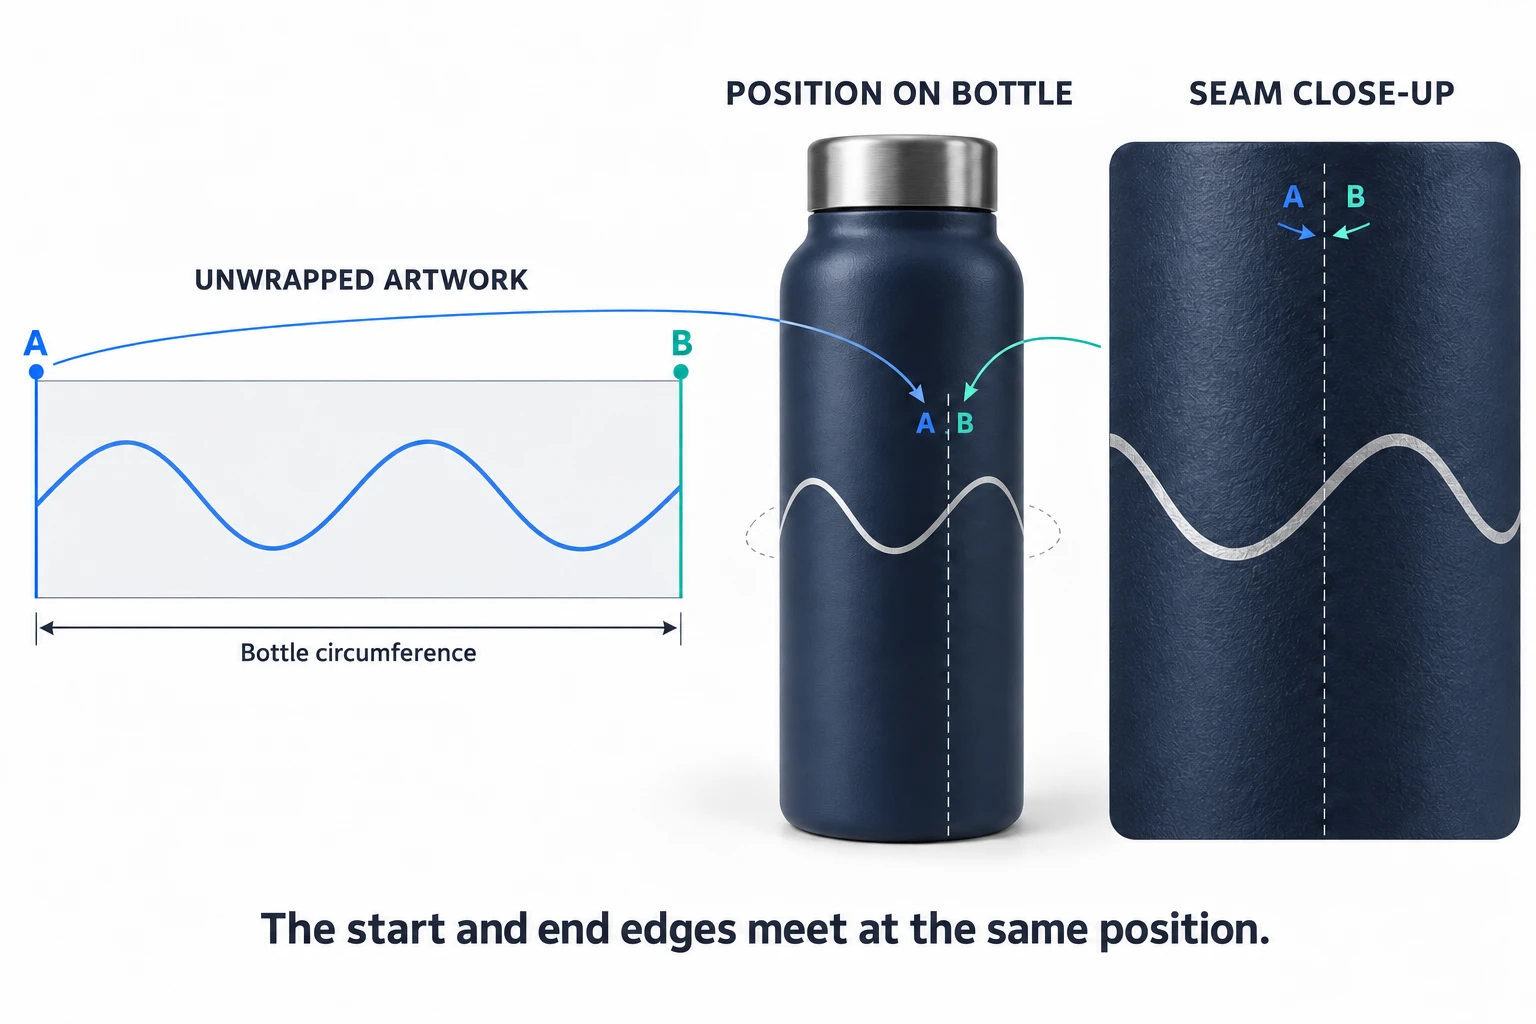
Full-wrap layout concept: the artwork’s start and end edges correspond to the planned join on the bottle. This illustration explains alignment; it is not a measured seamless-wrap test.
If a test wrap overlaps or leaves an unexpected gap, check file dimensions, rotary calibration, the applicable diameter measurement, and possible slipping. Do not compensate for an unstable setup by repeatedly resizing the artwork.
Judge the bottle after cleaning, not only while it is still on the machine. A mark can look strong from a distance while retaining residue, losing fine lettering, or showing uneven texture.
| Surface or feature | What to inspect |
|---|---|
| Glass engraving | Frosted appearance, readable detail, rough areas, and visible chipping or cracks |
| Coating removal | Remaining coating, edge cleanliness, substrate discoloration, and cleaning requirements |
| Anodized aluminum | Contrast, consistency, and retention of fine details |
| Bare stainless steel marking | The required color or texture, legibility, and any application-specific durability requirement |
| Rotary positioning | Correct proportions, level placement, alignment, and wrap-seam position |
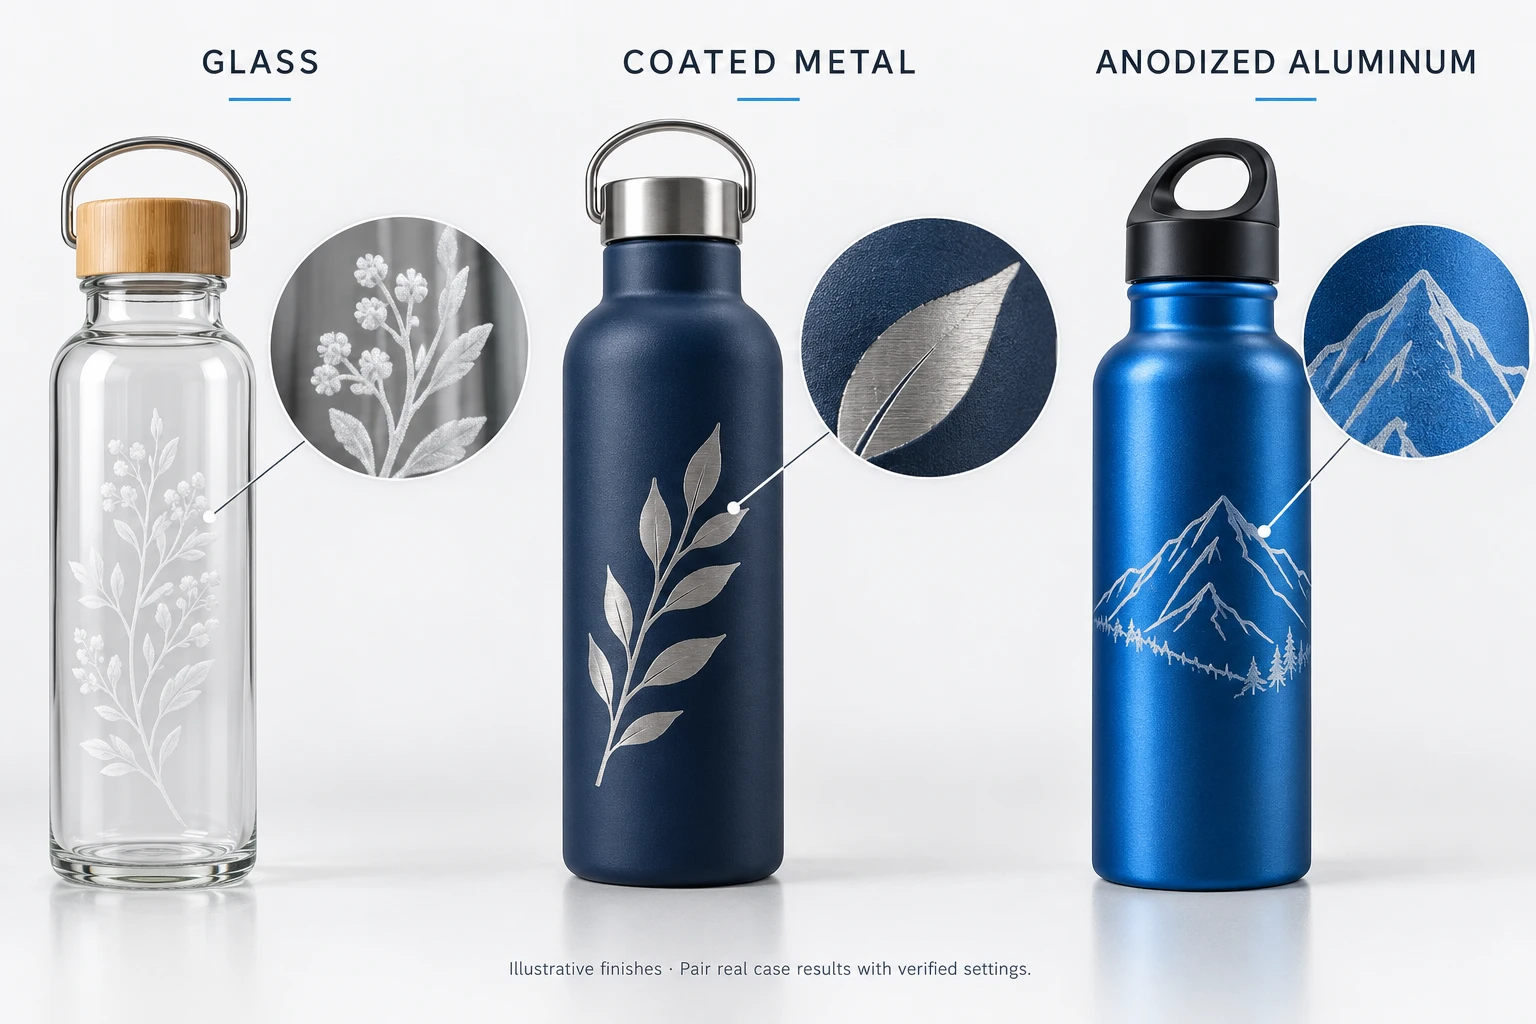
Illustrative finish details show the areas to inspect. Record actual sample results with their machine, material, and settings.
Keep the accepted bottle or a representative sample with a photograph and a settings record. Include the bottle product, surface finish, machine and laser source, lens, rotary model, software, focus, speed, power, scan interval or DPI, and passes. For fiber marking, retain the relevant frequency and pulse settings as well.
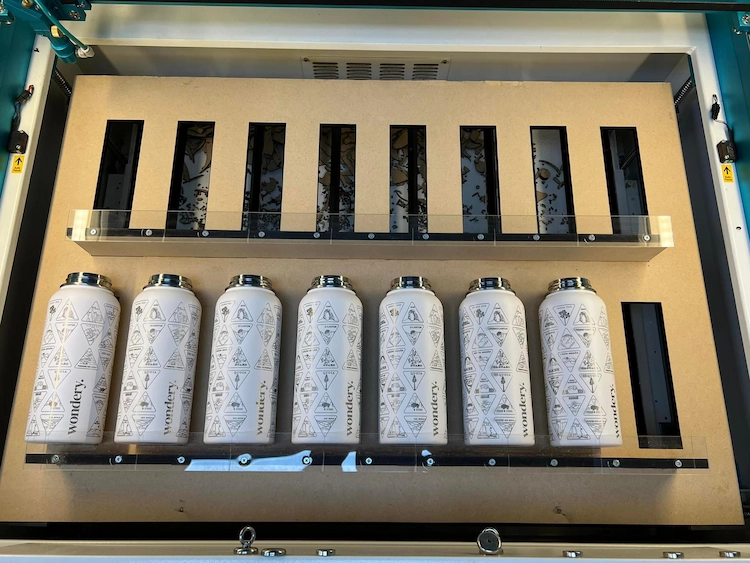
Bottle engraving project example. Inspect the cleaned design and placement against the requirements of the finished product.
There is no single useful time for every bottle. A small name, a filled logo, and a full-wrap photograph can have very different processing times. Artwork area, scan interval, speed, passes, laser system, and the required finish all matter.
For production planning, record first-time setup, bottle loading and positioning, machine runtime, and cleaning separately. Measure repeat loading with the same bottle model rather than estimating hourly output from laser runtime alone.
| Problem | Check first | Useful next step |
|---|---|---|
| Artwork is stretched or compressed | Rotary type, calibration, applicable object or roller diameter, and the driven contact region | Verify scale with a simple test shape before changing the final artwork |
| Parts of the design shift or double | Slipping, loose grip, support movement, and stability during direction changes | Check the mounting arrangement and follow the rotary manufacturer’s motion guidance |
| The design appears tilted | Alignment of the bottle, rotary axis, and artwork | Recheck positioning before compensating by rotating the file |
| One area is sharp while another is blurred | Surface-height variation, taper, focus, and the reach of the design | Check focus at separated points and reconsider the engraving area |
| A full wrap overlaps or leaves a gap | Artwork continuity, wrap dimensions, calibration, and slipping | Separate a file-layout problem from a rotation problem using a simpler test |
| Coating remains in some areas | Coating consistency, focus, settings, and cleaning | Compare a small parameter test on an equivalent spare bottle |
| Glass engraving is rough or visibly chipped | Glass suitability, local heat input, scan settings, and the preparation method | Stop if damage is visible and review the process on a suitable spare sample |
Change one relevant factor at a time and keep the failed and improved samples together. Similar symptoms can have different causes, so a photograph alone does not always establish the correct adjustment.
Choose the laser source first, then check rotary compatibility, bottle dimensions, vertical clearance, and the complete rotation path. A larger flat work area alone does not establish how many bottles can be engraved in one setup.
For compatible glass and coated-bottle applications, the Bolt Series is a practical workshop starting point. Its RF CO₂ source and magnetic rotary tray support a workflow that switches between flat work and cylindrical jobs. Confirm the rotary, tray, and clearance for the selected model and bottle.
The Thunder Nova laser cutter is a glass-tube CO₂ option for workshops that combine compatible bottle engraving with larger flat-material projects. Choose the machine according to the overall workload, then verify the bottle and rotary installation separately.
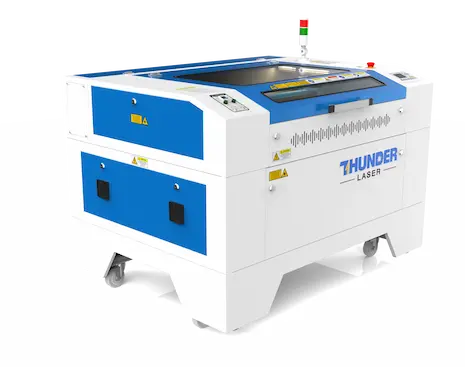
Thunder Nova 35. Bottle processing requires a compatible setup and sufficient working clearance.
Watch the Nova video demonstration
The Aurora Series offers different laser sources for different marking requirements. Fiber and MOPA configurations are relevant to direct metal marking, while UV is an option for suitable glass and other application-specific work.
These sources are not interchangeable. Match the desired mark and bottle material to the selected configuration, then confirm rotary support, marking field, focus, and enclosure clearance.
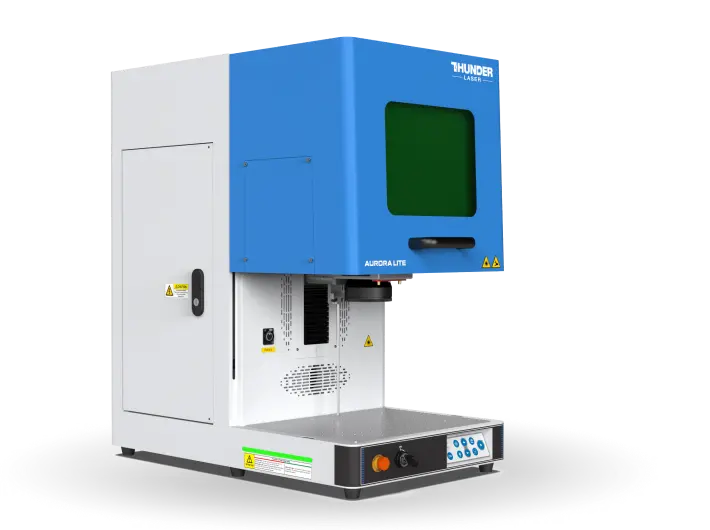
Aurora Lite shown. Select the Aurora laser-source configuration according to the required material and marking effect.
Watch the Aurora video demonstration
Bottle engraving can support personalized gifts, company branding, event keepsakes, and decorative projects. Use the design idea to define the engraving area and finish before selecting the setup.
Add names, dates, monograms, or decorative artwork for gifts and celebrations. Begin process development with an equivalent empty bottle and keep the design within the verified engraving area.
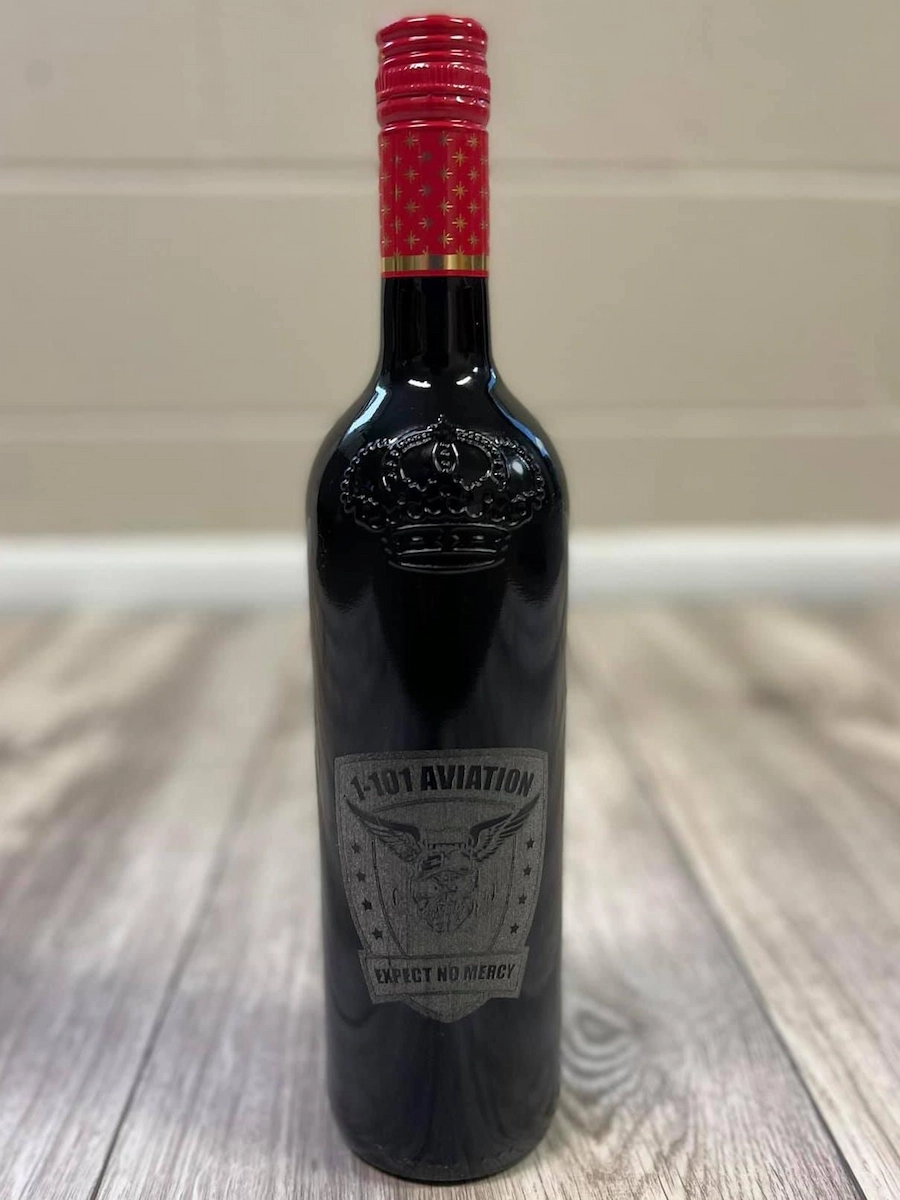
Wine and spirits bottle personalization example.
Create travel souvenirs, commemorative designs, or message-in-a-bottle gifts. Smaller designs may allow simpler fixed positioning, while artwork extending around the body needs a suitable rotary workflow.
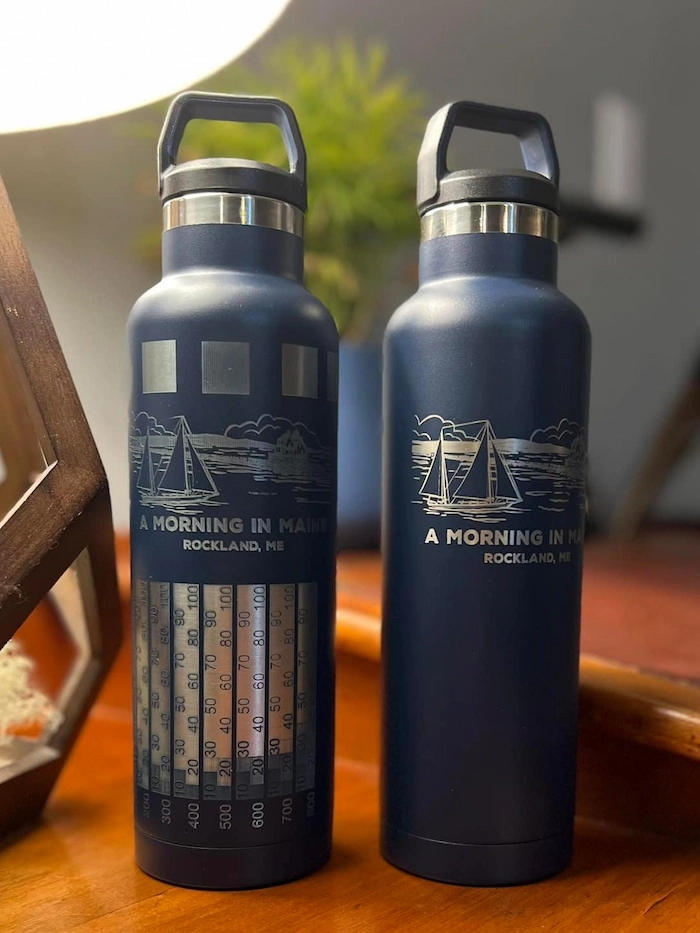
Message and souvenir bottle project example.
Names, team graphics, and business logos work well as clearly defined projects. For repeat orders, keep the bottle model, artwork position, fixture arrangement, and accepted finish together in the job record.
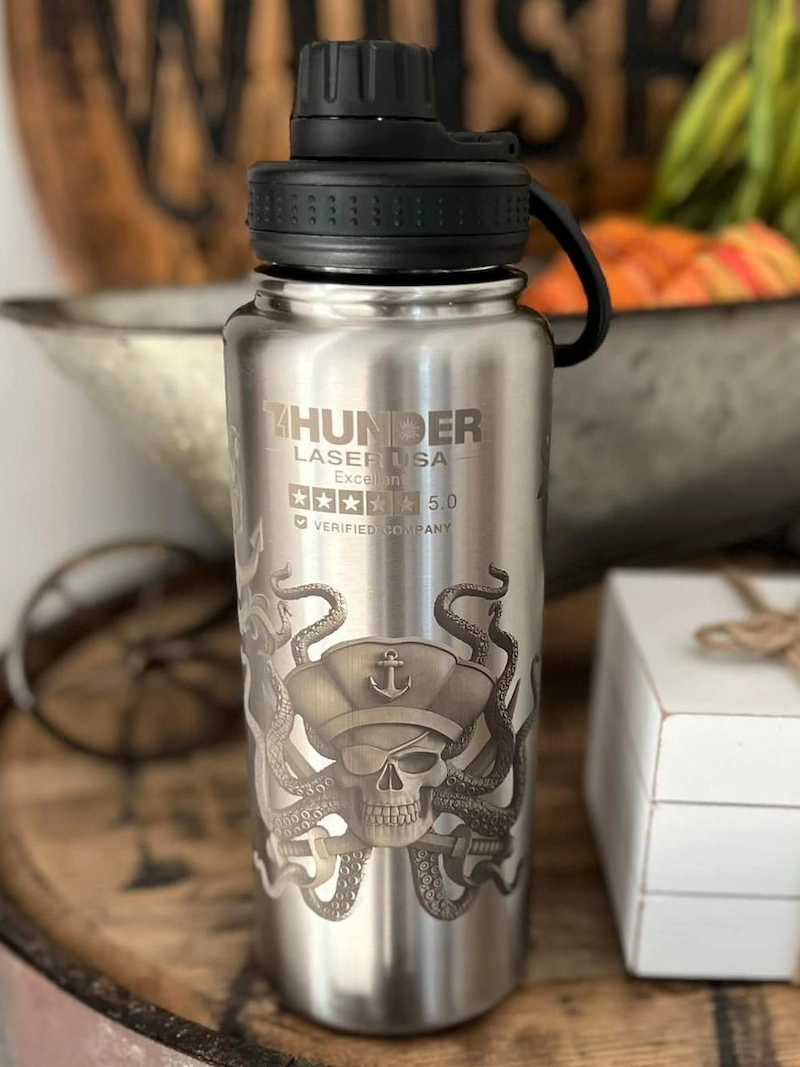
Personalized water bottle project example.
Add external identification or decoration to suitable bottles for home, restaurant, or event use. Keep the design away from sealing surfaces and food-contact areas, and confirm that the chosen blank is suitable for the intended processing.
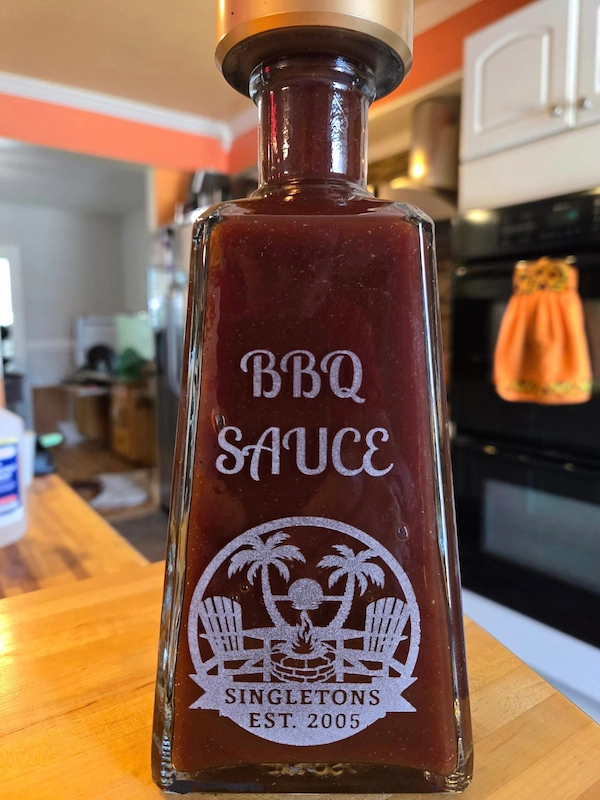
Condiment bottle personalization example.
Explore more bottle laser engraving ideas, or use the CO₂ laser settings library to find an appropriate starting reference for your machine and material.
Glass Engraving Ideas: Explore personalized glassware, bottle designs, wedding gifts, and decorative projects.
Wedding Wine Bottle Project: View a localized glass bottle engraving project without a rotary, including settings and a downloadable design.
Rotary Attachment Guide: Compare rotary types and learn what to consider when engraving bottles and other cylindrical objects.
CO₂ Laser Settings: Find starting parameters for your machine and material before testing on a suitable bottle sample.
Successful bottle laser engraving starts with the surface and the design scope. Choose a suitable laser process, decide whether the bottle can stay fixed or needs a rotary, and verify support, focus, scale, and placement before engraving.
Keep the cleaned sample and its settings as the reference for repeat work. For full wraps or unfamiliar bottle shapes, establish a stable setup and correct proportions before refining the final surface finish.
Ready to develop your bottle engraving workflow? Explore Thunder Laser machines and discuss your bottle material, dimensions, design area, and required result with our team.
Talk To Our Experts Now!
Please leave your contact information so that we can serve you better.
BOTTLE LASER ENGRAVING FAQS
FIND THE RIGHT LASER FOR YOUR NEXT PROJECT
Explore Thunder Laser solutions designed for different materials, workflows, and production needs.

 Stable & Consistent MachinesUnlimited ApplicationsRobust After-sales SupportFactory Direct Supply


