Looking to elevate your earrings jewelry designs with a personal, professional touch? Laser marking offers an elegant way to transform simple pieces into wearable art.
In this tutorial, we’ll walk you through the process of making custom butterfly earrings using the Aurora Lite 50W—perfect for gifts, boutiques, or your own signature style.
Clean the lens and make sure the machine is in a good condition.
Don't forget to take the cover off the lens!
2. Steps for the Earrings Jewelry
Before you start marking, make sure to follow these step-by-step instructions carefully. Each stage plays a key role in turning your earring design into a polished piece of laser jewelry.
2.1. Step 1: Place the Earrings Jewelry
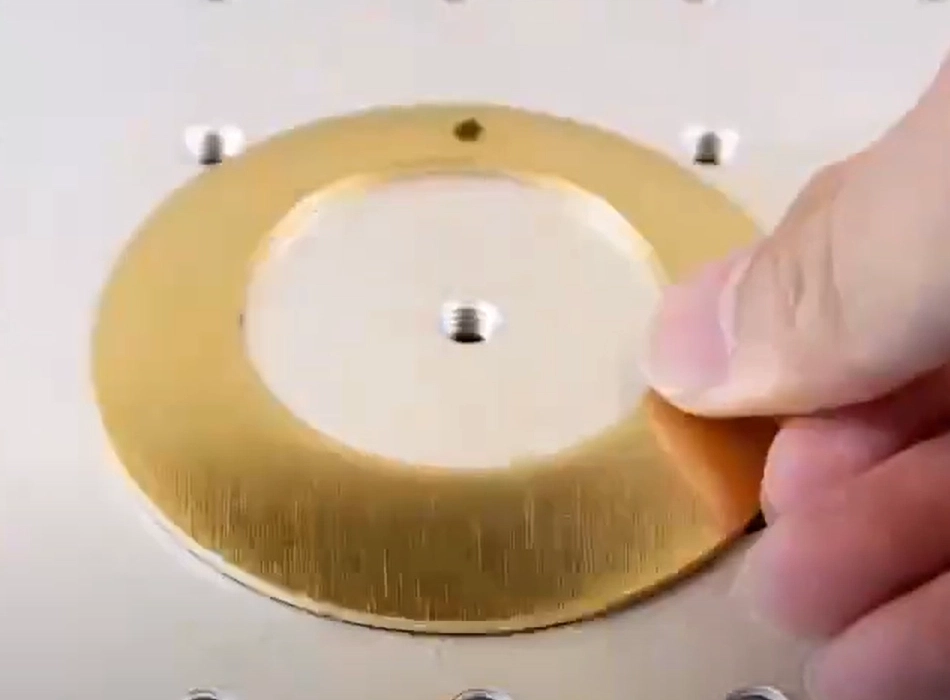
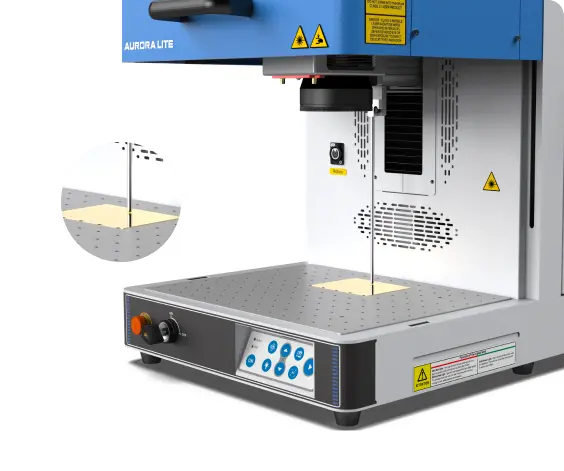
Put your jewelry on the plate, prefer to keep them close to the center of plate.
For the earrings are flat, we can just place it without additional steps. You just have to check out that they are oriented in the same direction as your design.
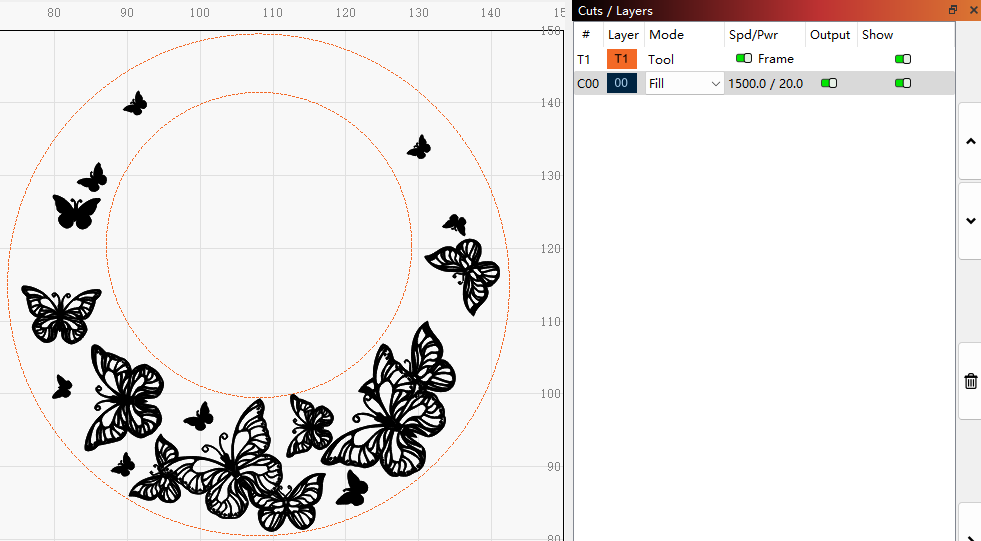
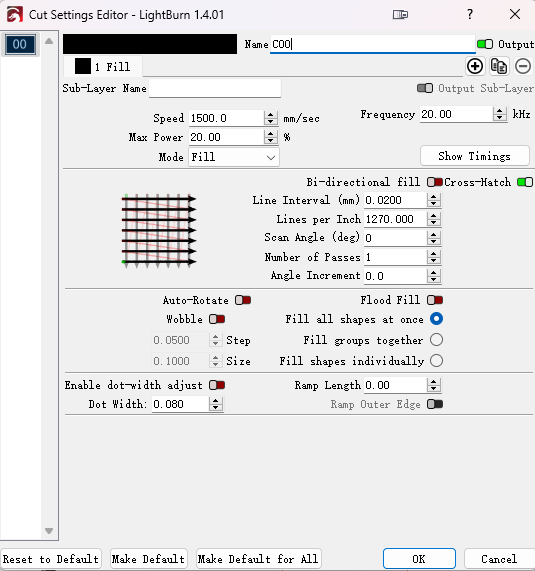
2.2. Step 2: Import and Adjust Design
Import the patterns into LightBurn, and adjust their sizes to your earrings jewelry. Design and arrange the main part of the lace-like butterflies according to the shape of earrings to make your earrings for a light, airy and endearing look!
TIPs : For positioning, draw the outline of the earrings by using a frame tool layer. A hoop earrings consists of 2 circles, so measure and draw them with the circle tool, then put the circles in the right place. You can confirm them with the ruler tool.
2.3. Step 3: Check the Settings
Set the fill mode. Cross-hatching is a common method to create a uniform pattern when using laser marking machines.
In general, marking metal jewelry requires a high DPI; here, set the DPI to 1270.
Now, ensure everything is in order.
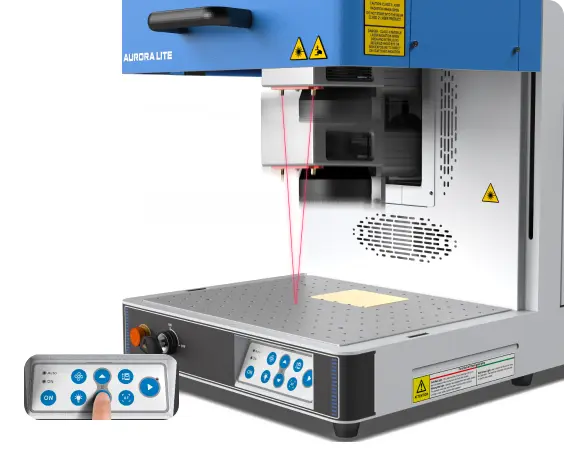
2.4. Step 4: Focusing
Focusing is an important step before starting. If you forget to focus, it will fail.
You can choose between auto focus and manual focus. When choosing auto-focus, press the AF button on the device. If using manual focus, make sure the bottom of the focal stick touches the earrings.
Auto focus
Manual focus
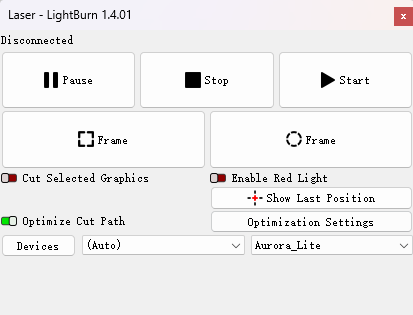
2.5. Step 5: Framing and Starting
Press the frame button, the safe visual red light will show the area to be marked. The frame should be on the earrings. If not, move your jewelry or pattern positions until they overlap.
Once the confirmation is complete, you can close the door and press the start button. Aurora Lite’s operation beginning!
2.6. Step 6: Monitor the Laser Marking Process
To prevent any accidents, do not leave the machine unattended while it is running. You need to be aware of any special conditions such as alarms or strange noises.
Staying with Aurora Lite not only ensures that the monitoring is safe, but waiting for the earring marking completion is also a very rewarding experience!
However, because the laser energy is so strong, to ensure your complete safety, we don’t recommend that you look directly at the marking for too long, even when the door is closed.
2.7. Step 7: Finish the Task
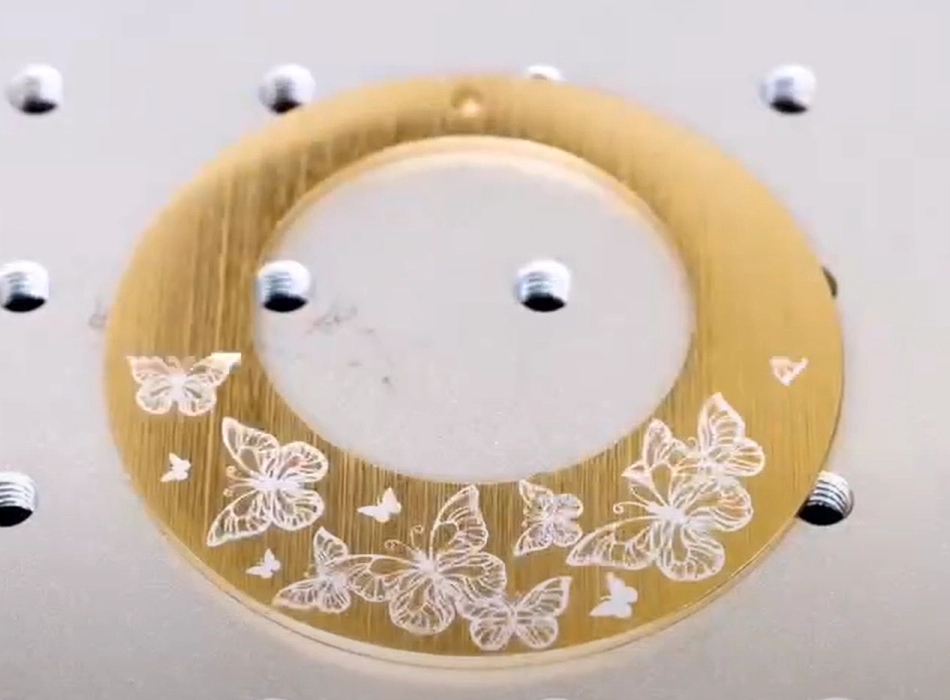
When the laser marking is finished, open the door and enjoy your earrings artwork!
Conclusion
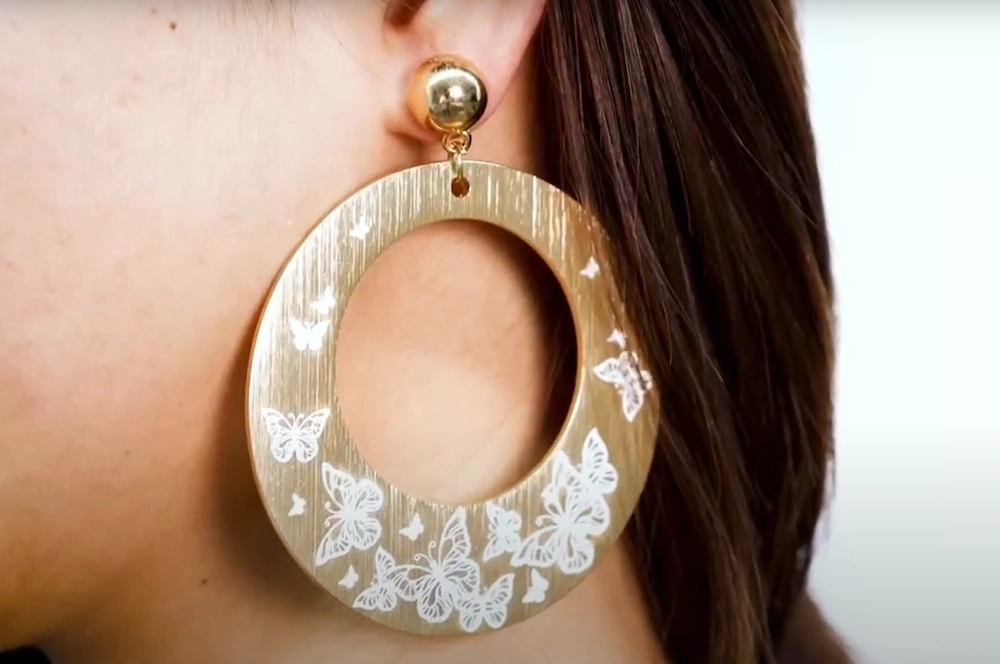
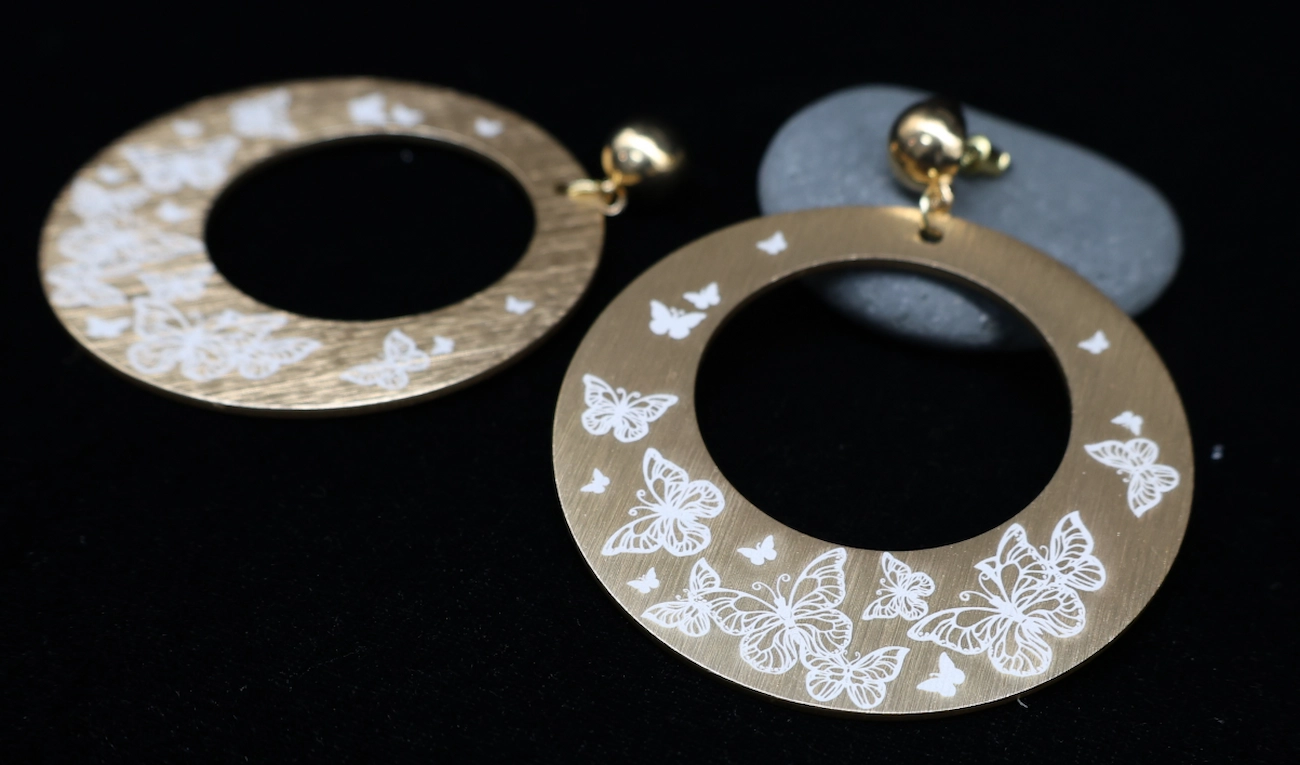
The result is more than just a pair of earrings jewelry—it’s a blend of precision and personality. The delicate golden butterflies shimmer with light and meaning, turning everyday accessories into unforgettable statements. Whether for yourself or someone special, let each engraved wing speak to your creativity and craftsmanship.
.png "laser cutter Globle") International
International
 United States
 Brasil
 Canada
 Costa Rica
 Mexico
 Česká
Česká
 Romania
 Polska
 Ireland
 Italia
 Lietuva
 Россия
 Deutschland
 Britain
 Україна
 France
 Sverige
 Norway
 Denmark
 Ελλάδα
 Portugal
 한국
한국
 中国
中国
 中国香港
中国香港
 Israel
 中國臺灣
中國臺灣
 ジャパン
ジャパン India
India
 پاکستان
 پශ්රී ලංකා
 ประเทศไทย
 Australia
 New Zealand
 South Africa