DIY Rubber Stamp Printing: A LaserMaker STEAM Course
 2024-08-20
WHAT ARE YOU LOOKING FOR?
Search Across Products, Blog Posts, Support Content, And Resources.

DIY Rubber Stamp Printing: A LaserMaker STEAM Course
2024-08-20

In this LaserMaker STEAM course, students will design and create a DIY rubber stamp using rubber brick, beechwood, laser engraving, shallow relief, deep relief, and three-dimensional assembly. The project helps students understand how a stamp is built from separate parts and why each material is chosen for a specific function.
Rubber stamp printing is a creative way to transfer an engraved design onto paper by applying ink and pressing the stamp gently. Patterns can include portraits, cartoon characters, flowers, trees, symbols, logos, or classroom-themed artwork. In this activity, students will learn how to prepare a mirrored rubber stamp pattern, design a beechwood block, add a custom material in LaserMaker, and assemble the finished stamp.
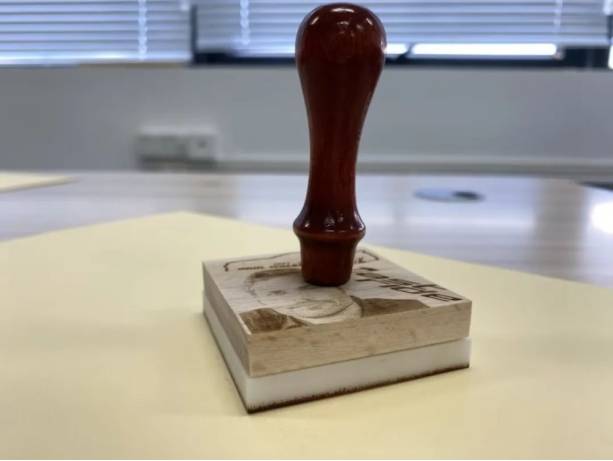
This lesson focuses on a three-dimensional stamp project. Students will first analyse the structure of the stamp, then create each component separately in LaserMaker. The final project includes a handle, a beechwood block, and a rubber brick pattern surface.
The rubber brick is used as the pattern carrier because it can produce clearer stamp impressions. The beechwood block is used as an intermediate part because the soft rubber brick cannot be connected directly to the handle and may not allow enough pressure when stamping. A hole is added to the beechwood block so the handle can connect securely to the stamp body.
Teacher note: This project is useful for STEAM classrooms because it combines material analysis, image preparation, laser engraving settings, custom material creation, mechanical connection, and hands-on assembly.
Rubber stamps are used in stationery, packaging, classroom activities, art projects, craft workshops, personal branding, and office workflows. A stamp can turn a digital image into a repeatable physical mark, making it a useful bridge between graphic design and hands-on making.
In a school or makerspace, this project can be adapted for student name stamps, club logos, event stamps, classroom reward stamps, handmade cards, packaging labels, or creative art prints.
Before drawing in LaserMaker, students should understand why the stamp uses different materials. A rubber brick is suitable for creating the printed pattern, but it is soft and difficult to attach directly to a handle. Beechwood is stronger and can connect to the handle, but it may deform if used for deep pattern carving. By combining both materials, the stamp becomes easier to hold and produces a better printing result.
Prepare the stamp components and materials before starting the LaserMaker workflow.
| Number | Material or Component | Source-Supported Detail | Project Use |
|---|---|---|---|
| 1 | Rubber Brick | 10mm process setting | Stamp pattern carrier |
| 2 | Beechwood Block | 10mm custom material setting | Intermediate block between handle and rubber stamp surface |
| 3 | Handle | Used with a drilled hole in the beechwood block | Allows users to press the stamp evenly |
Equipment note for teachers: This classroom stamp project can be completed on a laser cutter suitable for engraving rubber and wood materials, such as the Thunder Laser Bolt Series. Teachers should test materials, supervise laser operation, and ensure suitable ventilation or filtration.
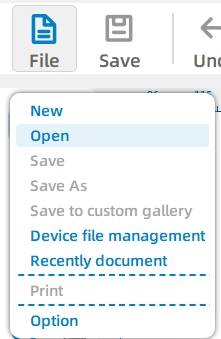
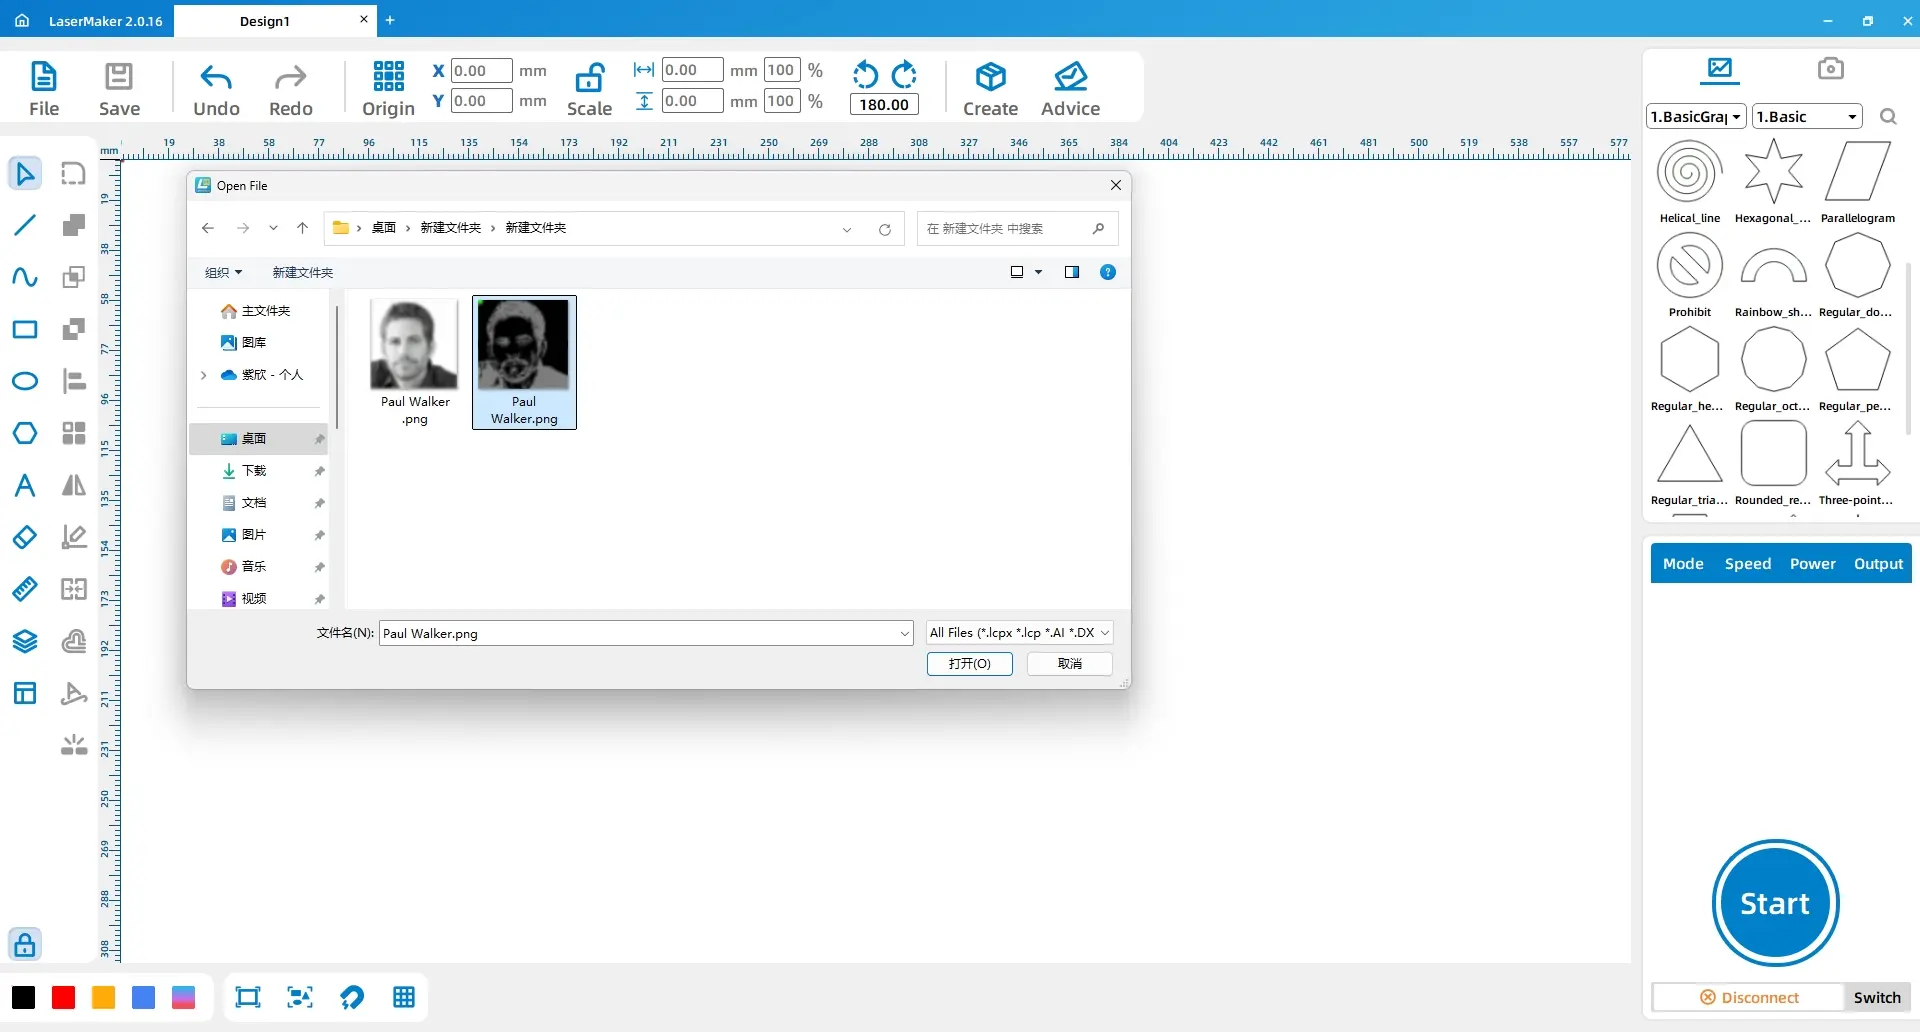
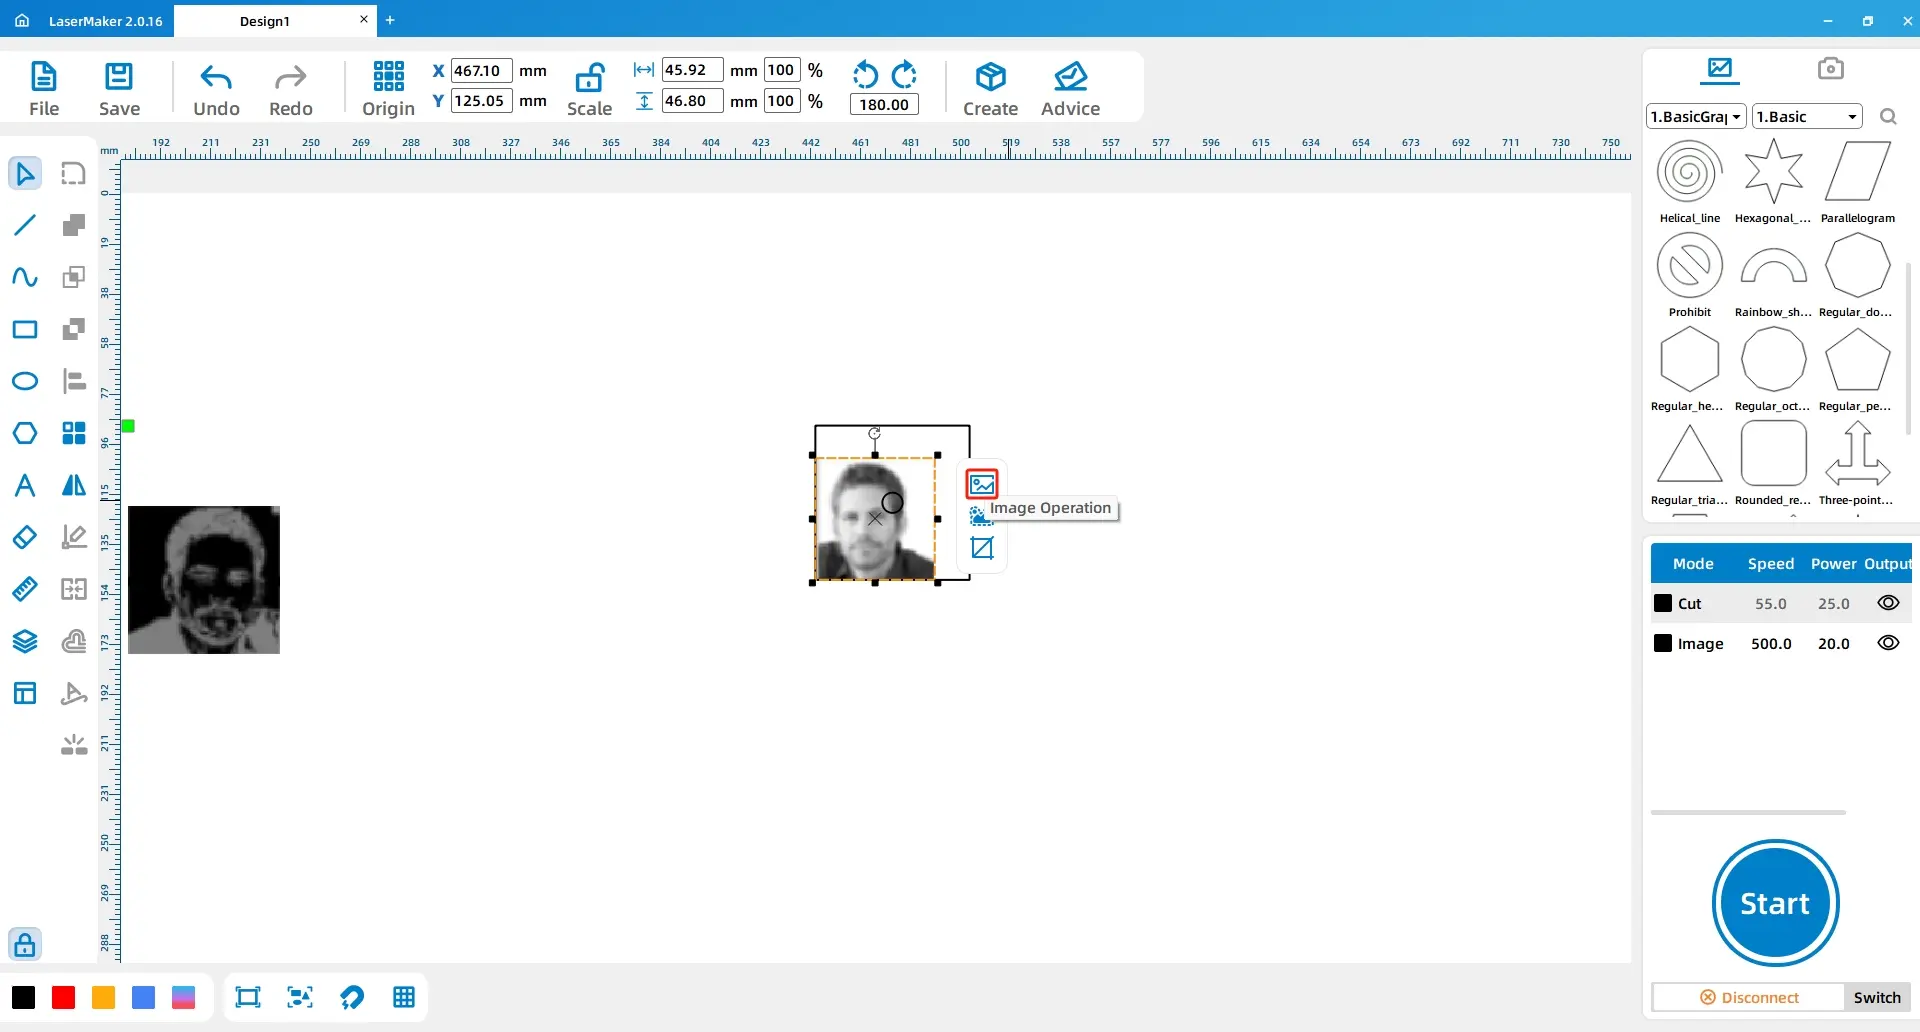
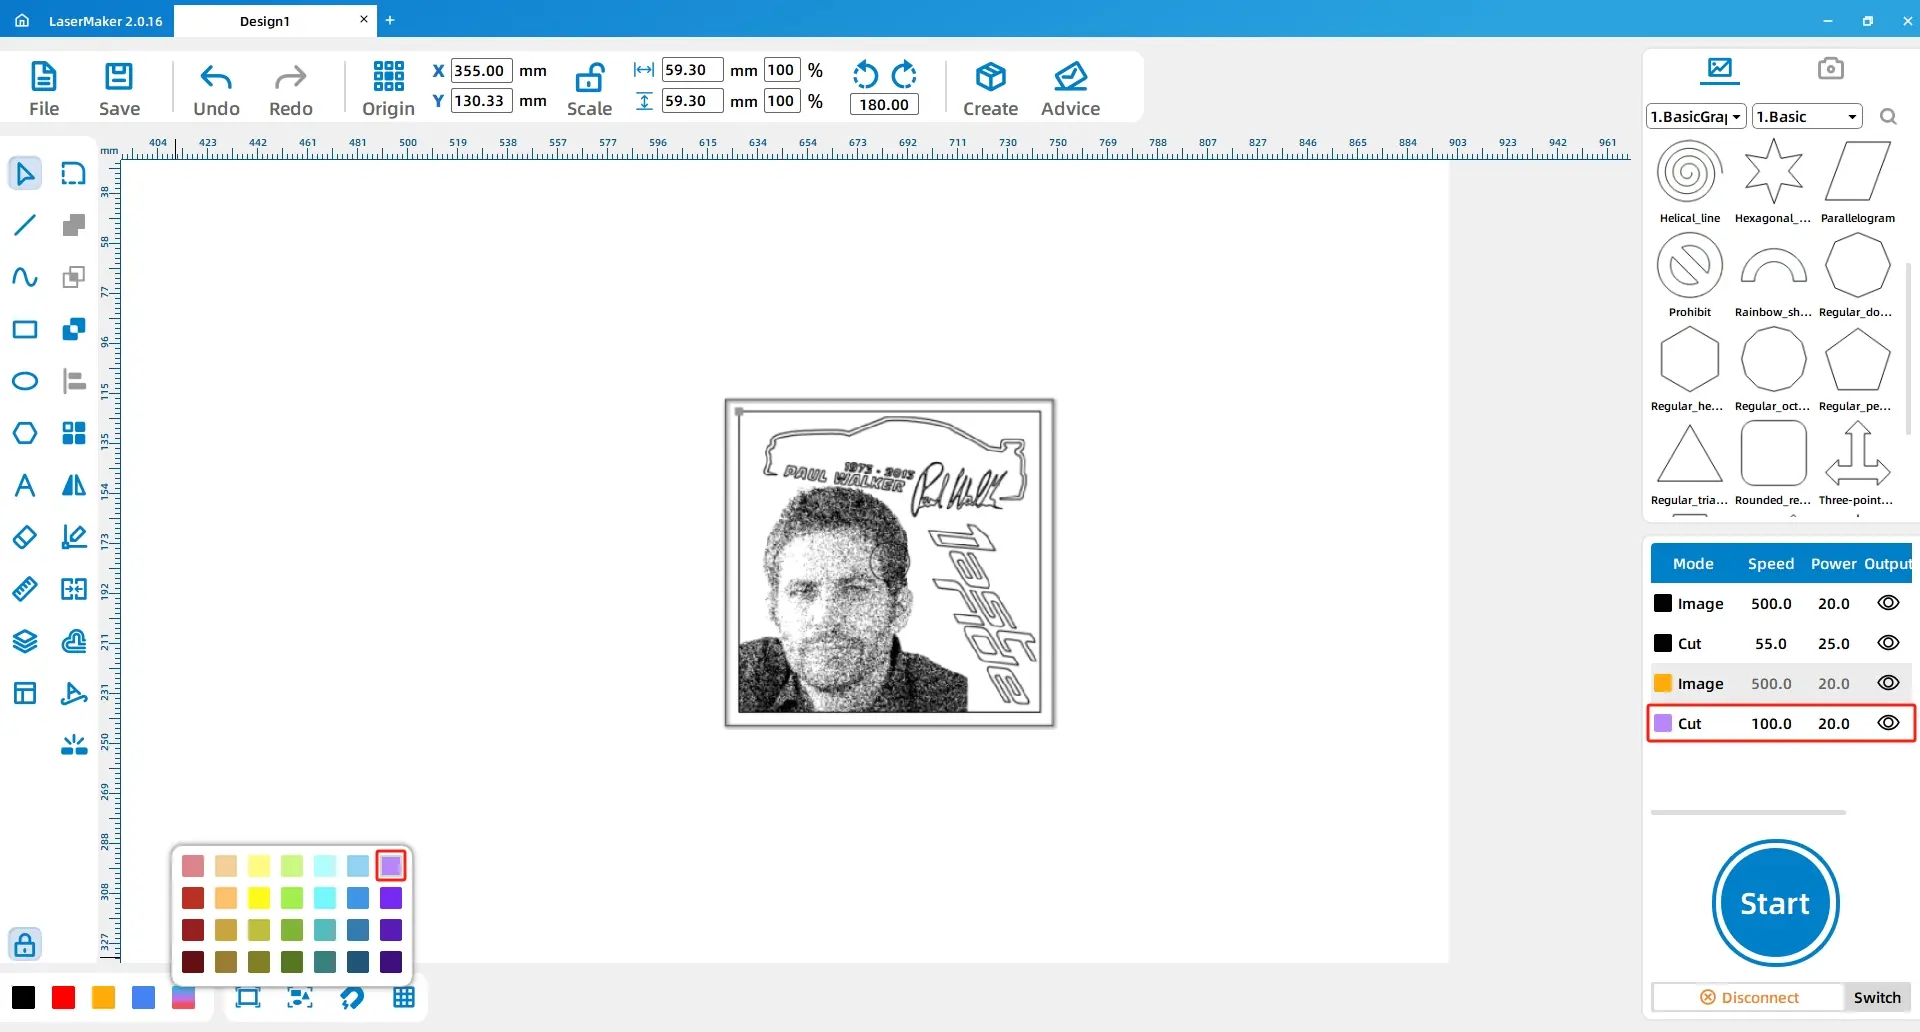
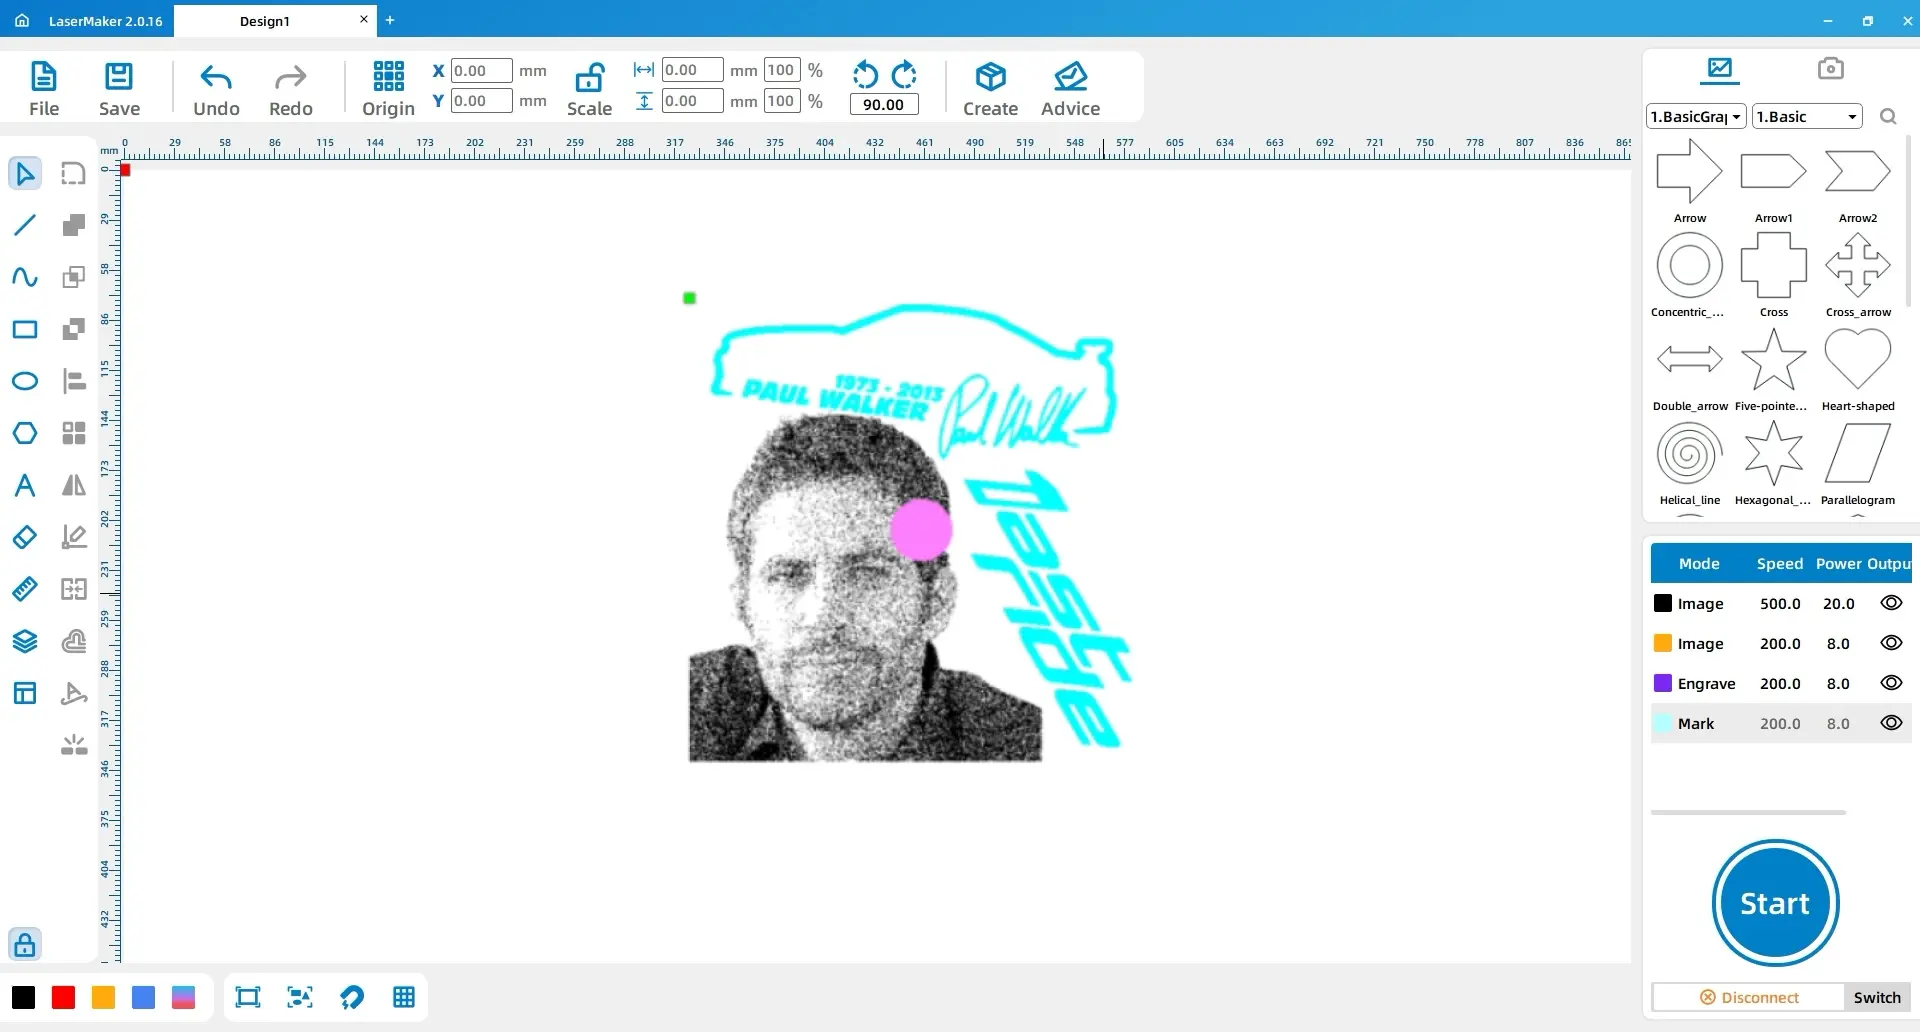
Start by opening the image material that will become the stamp pattern. In LaserMaker, click File, choose Open, and select the saved image. Place the image inside the rectangle and adjust it to a suitable position.
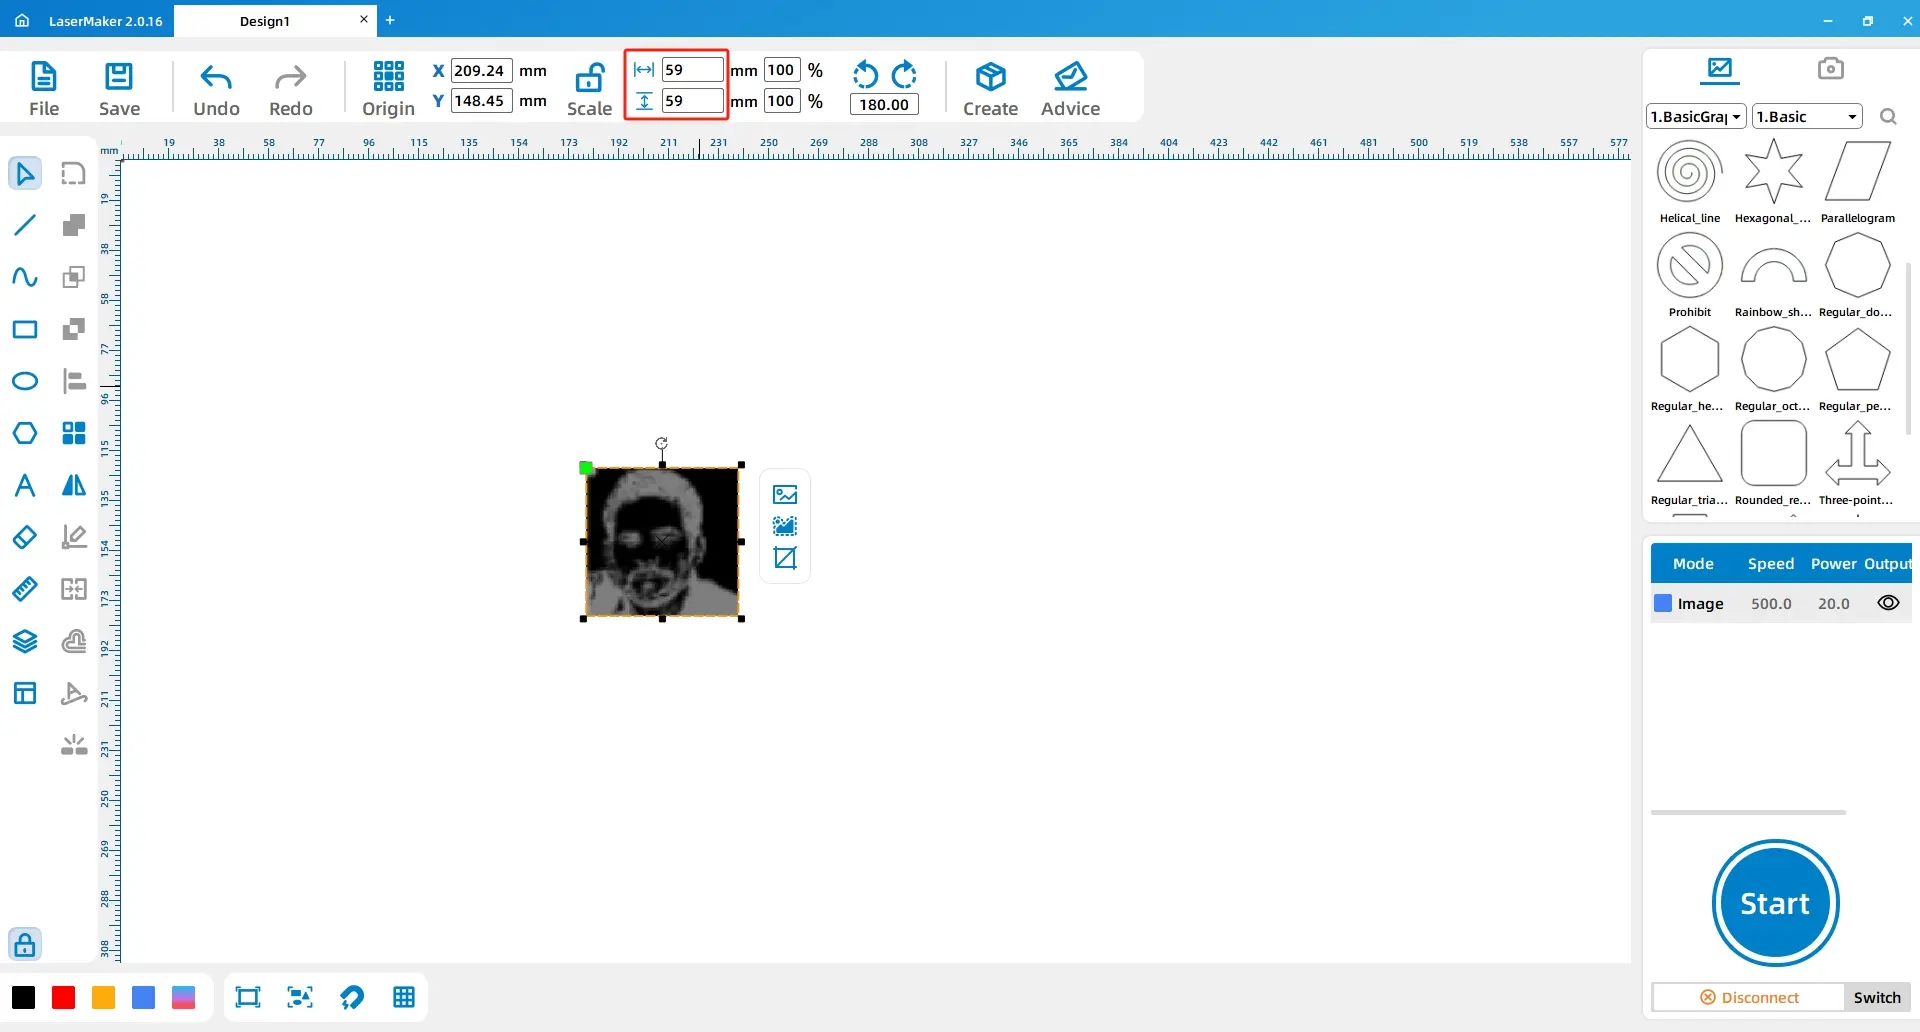
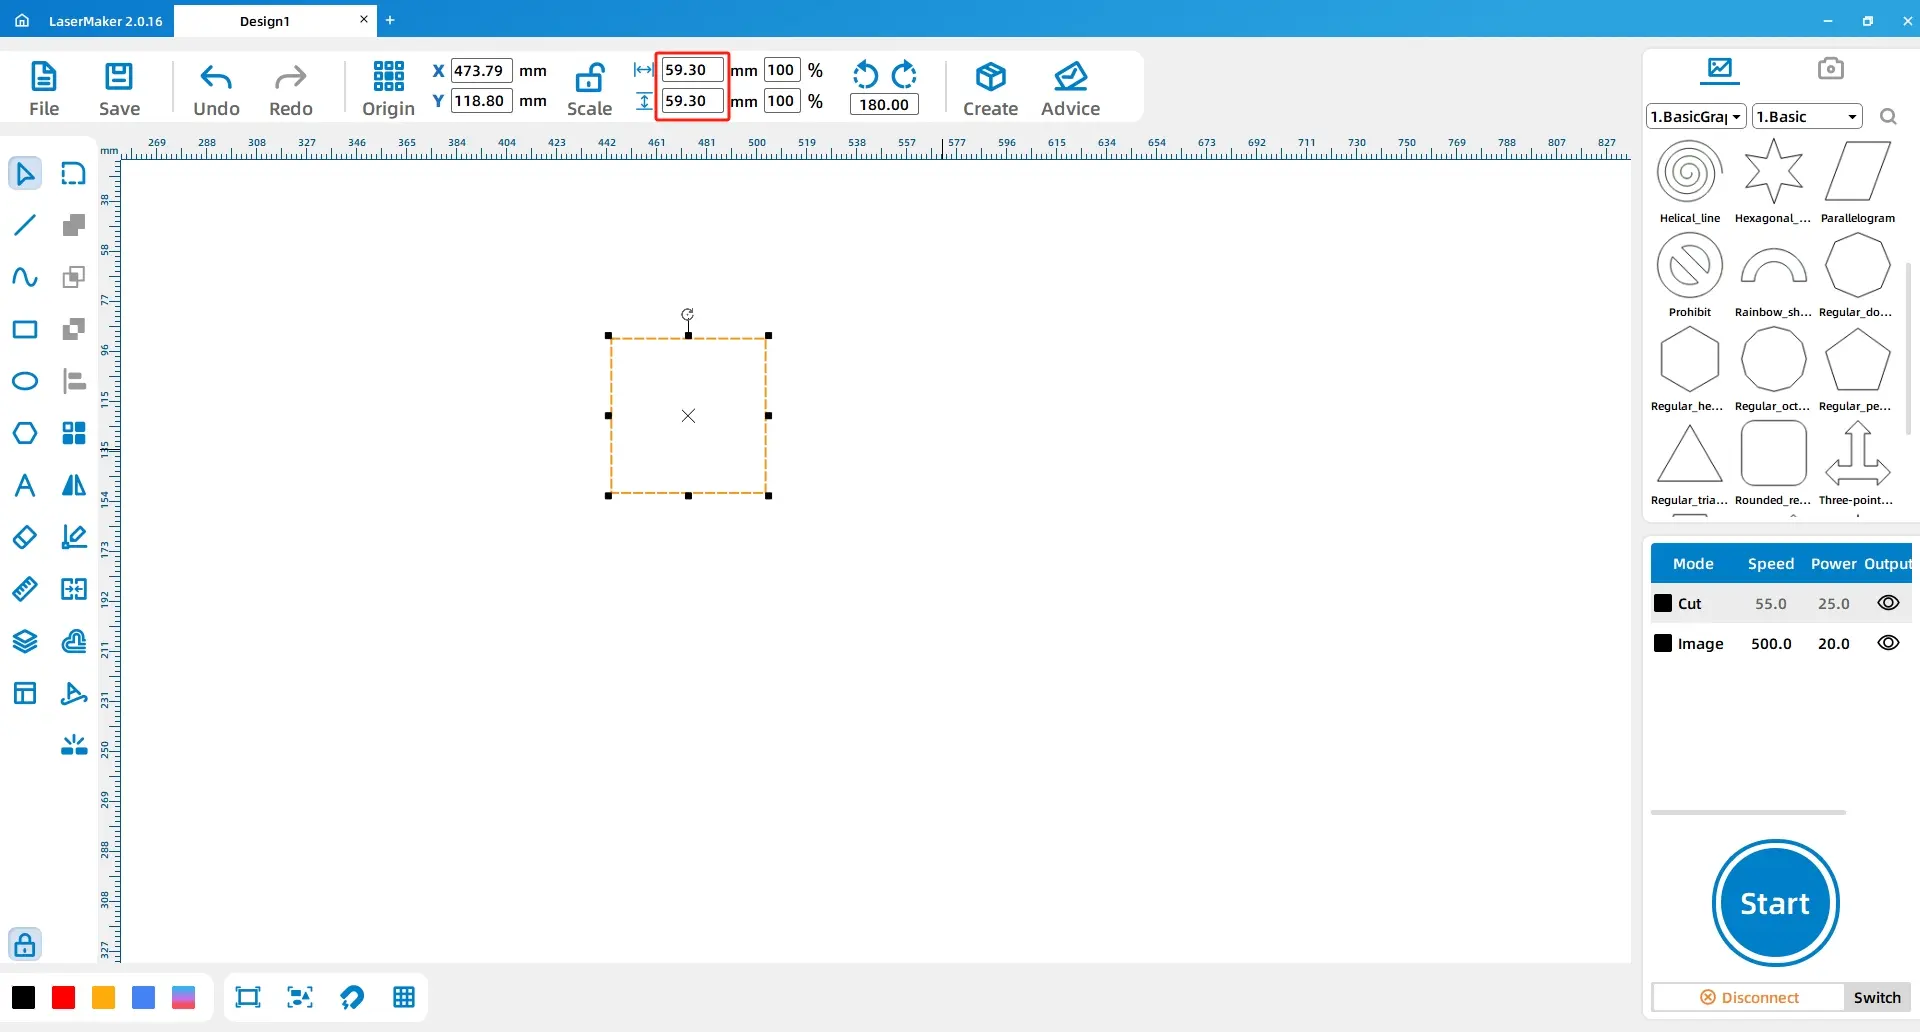
Select the image and use the drawing toolbar to resize it to 59mm by 59mm. Move the image so it aligns with the lower-left corner of the rectangle.
Select the image again. From the drawing toolbar, choose Horizontal Mirror. This mirrors the stamp pattern before engraving.
Design tip: A stamp creates a mirrored print. Mirroring the pattern once during production helps the final stamp impression appear in the correct direction on paper.
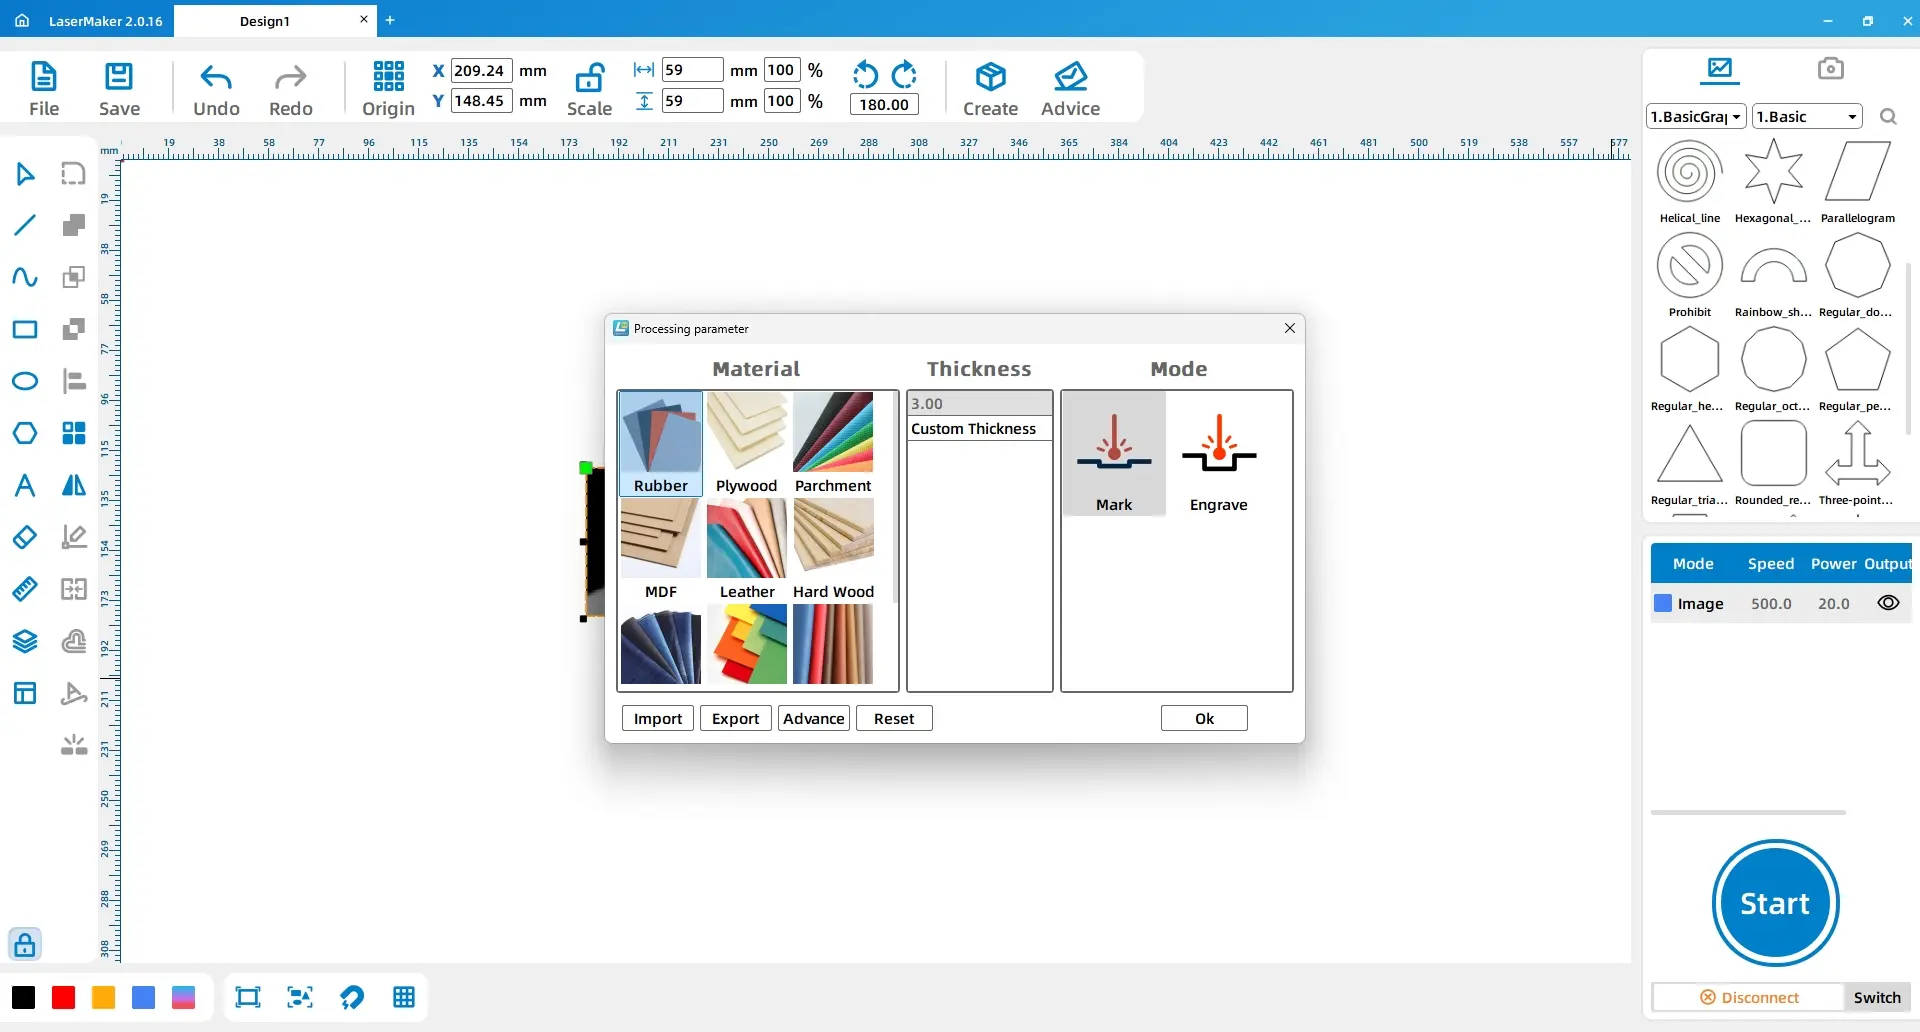
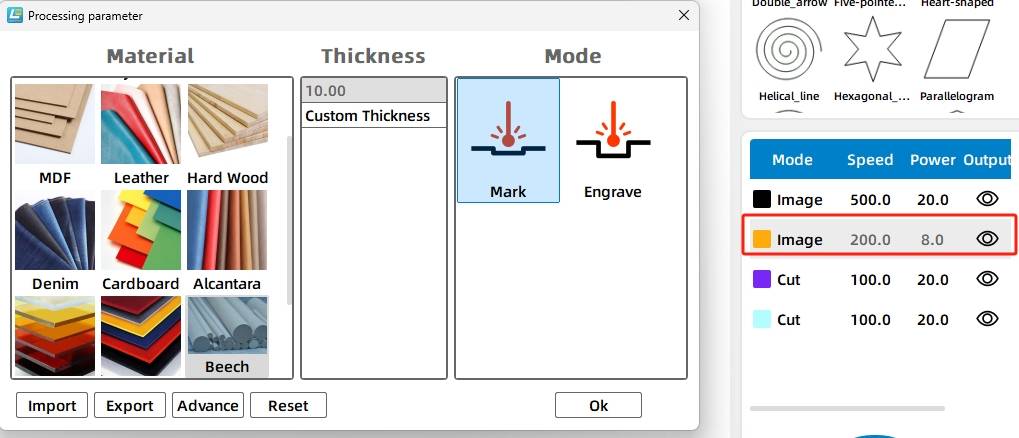
Double-click the black layer in the processing panel. Set the material to Rubber Brick, the thickness to 10mm, and the process to Shallow Relief.
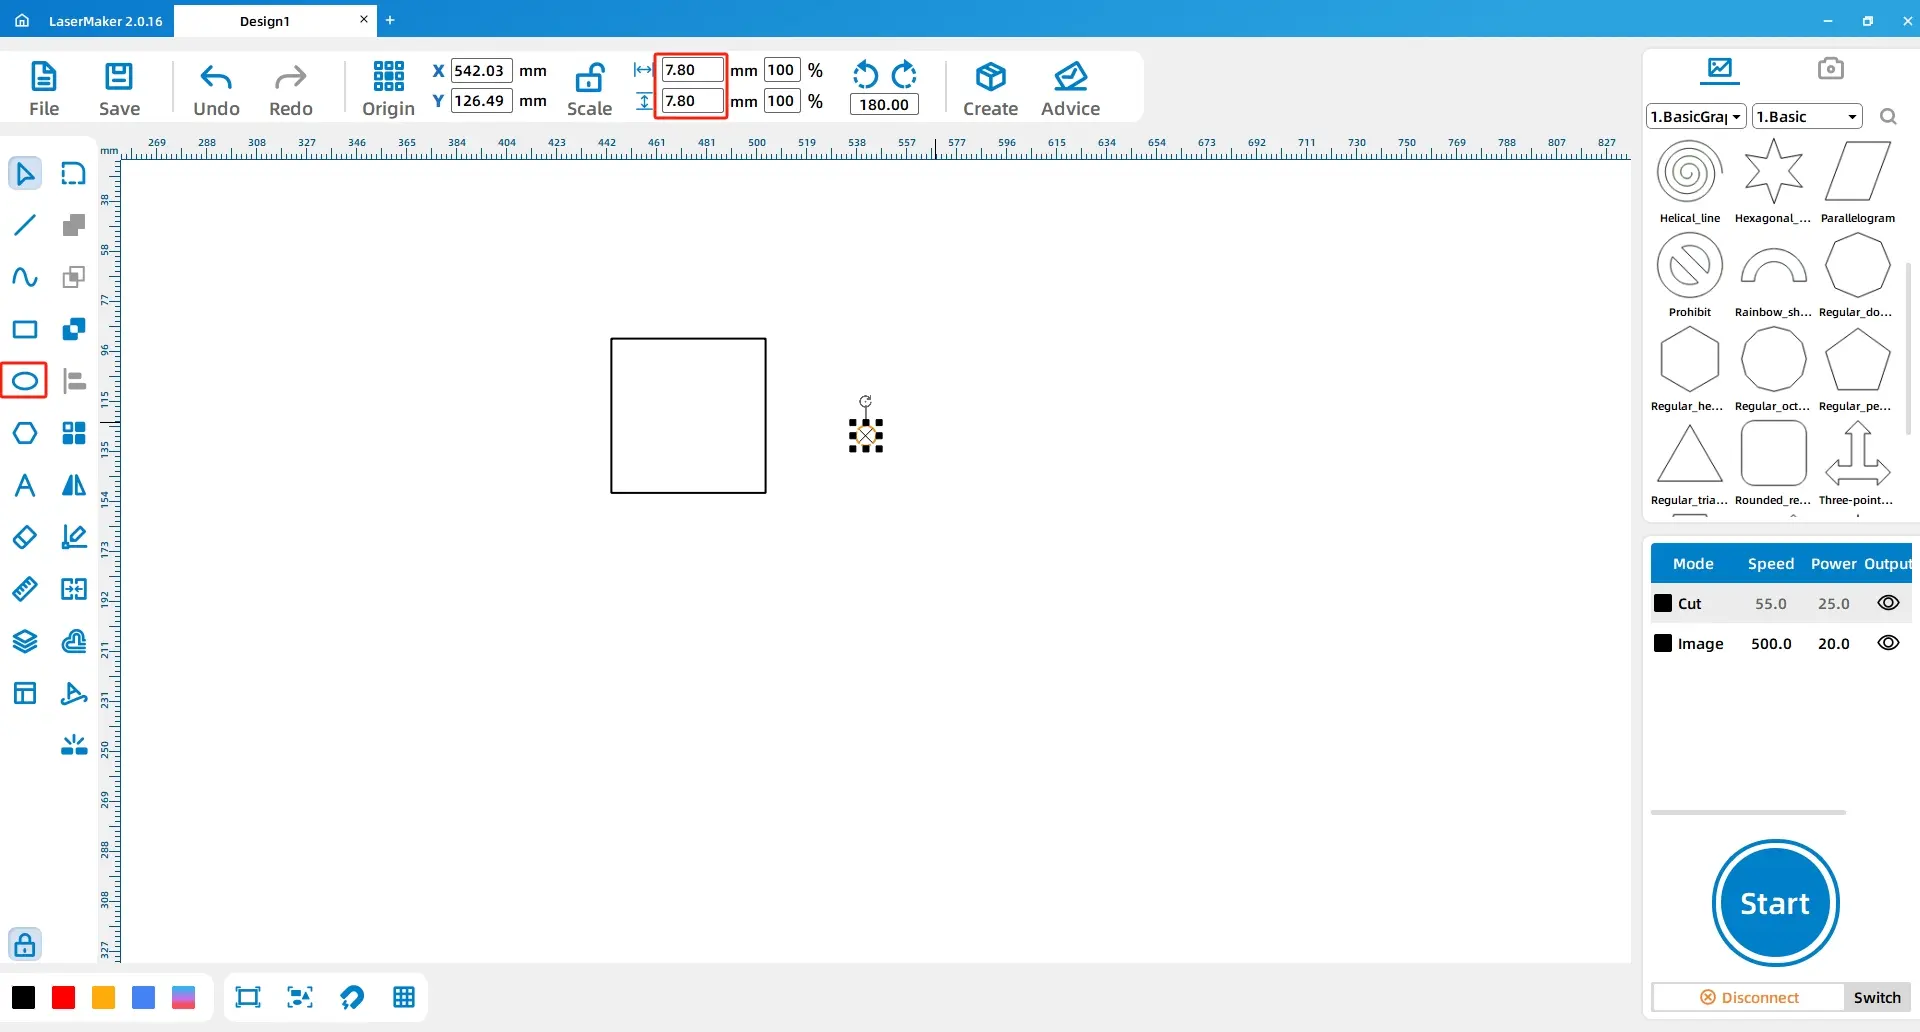
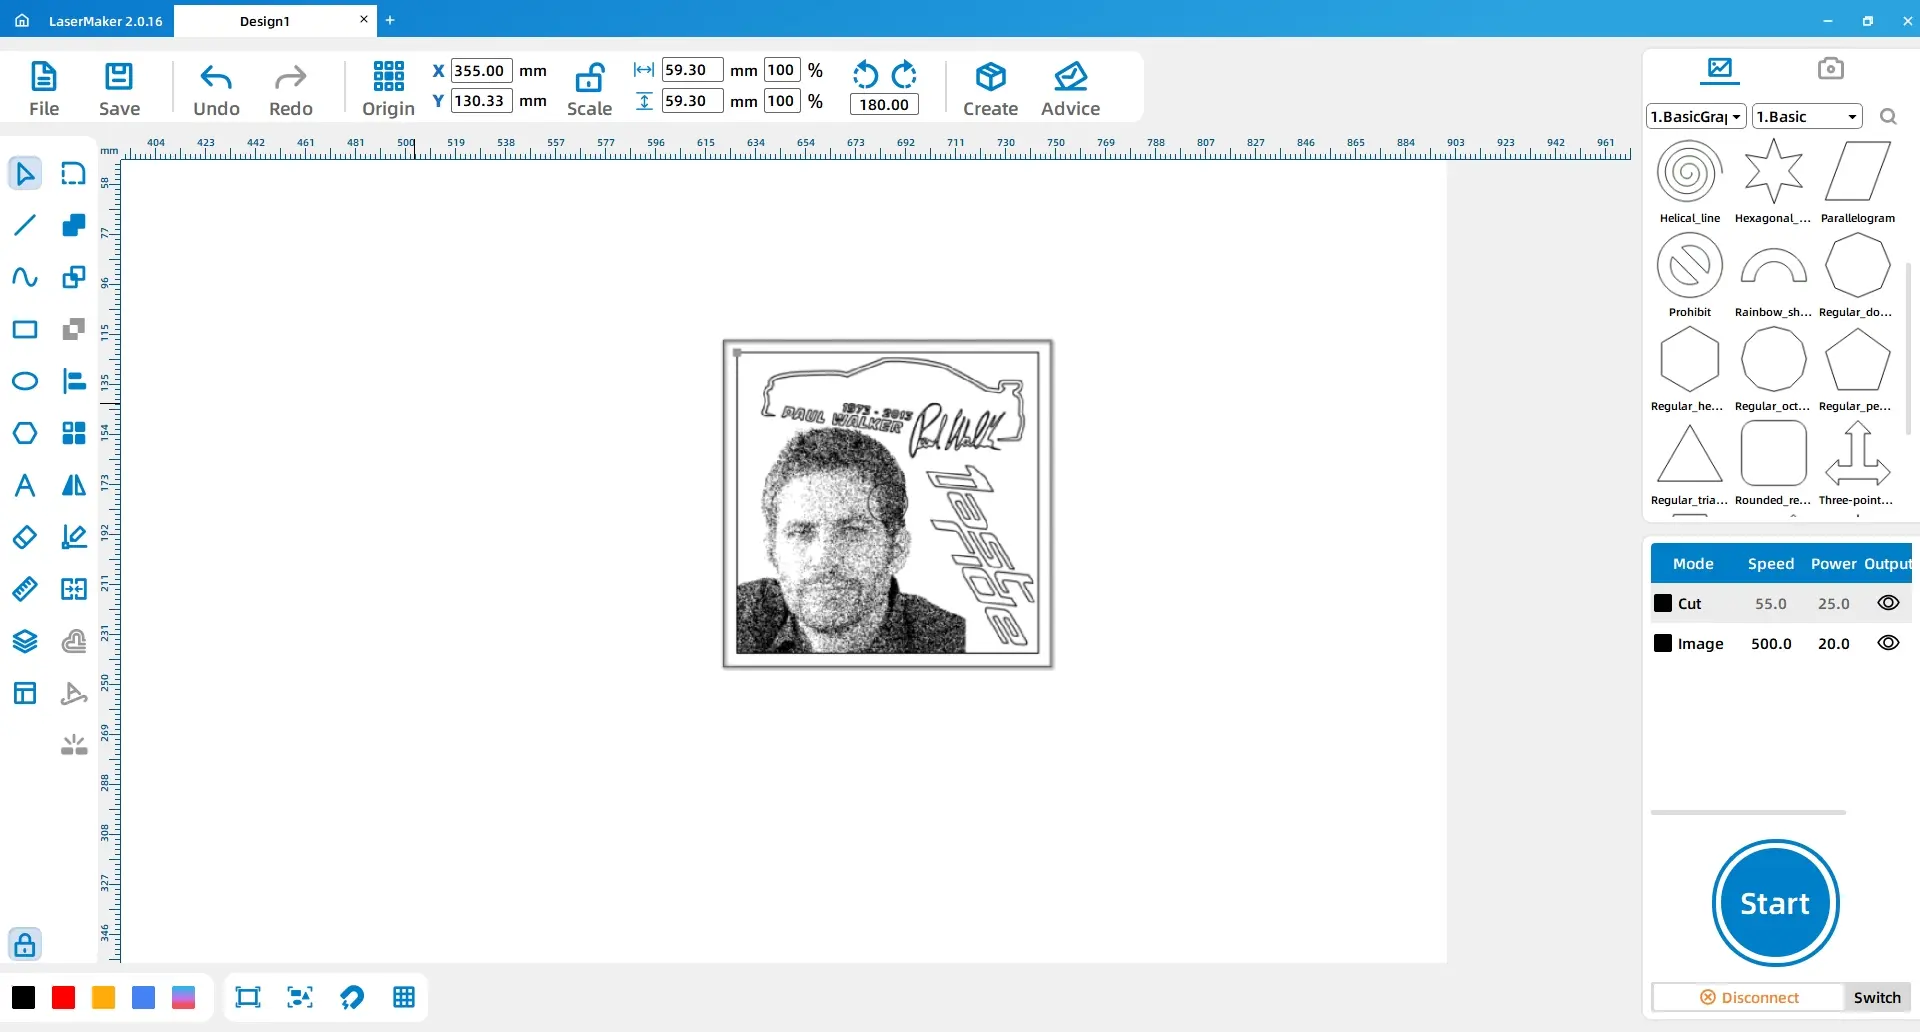
Open LaserMaker and select the Rectangle tool from the drawing toolbar. Draw a rectangle with a length of 59.3mm and a width of 59.3mm. Then use the Ellipse tool to draw a perfect circle with a diameter of 7.8mm.
Construction tip: The circle is used to create a hole that connects the beechwood block with the stamp handle.
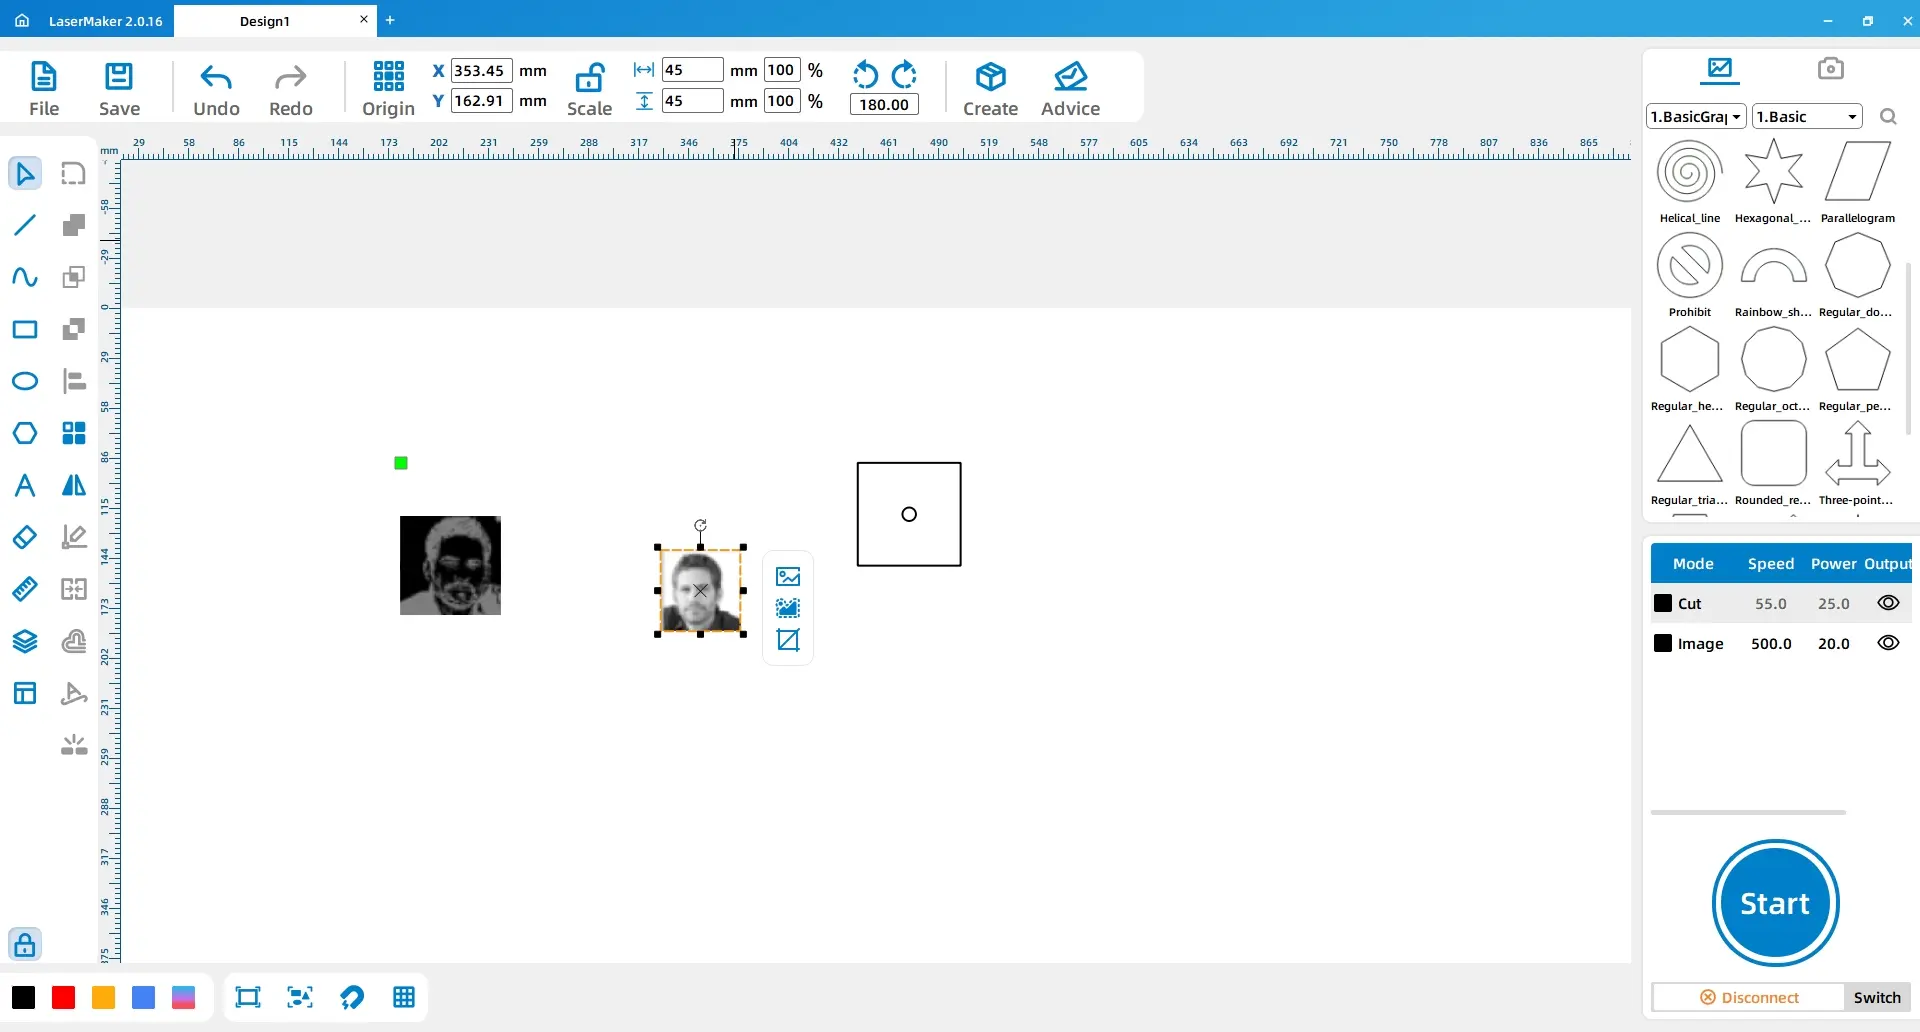
Select the rectangle and the circle. Use Horizontal Align and Vertical Align so the circle is correctly positioned in the centre of the block.
Open the image that needs to be engraved on the beechwood block. Place it in the working area and prepare it for resizing.
Select the image and resize it to 45mm by 45mm. Move it so it aligns with the lower-left corner of the rectangle.
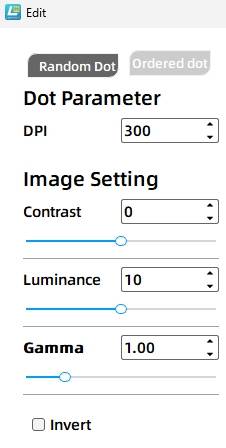
Select the image and use Extract Image from the graphics toolbar. Set the image DPI to 300 to improve clarity before engraving.
Open another material image and place it within the rectangle. This image is used as decoration on the beechwood block, not on the rubber brick.
Design tip: Decorative images on the beechwood block help improve the appearance of the stamp body, while the rubber brick remains responsible for creating the printed pattern.
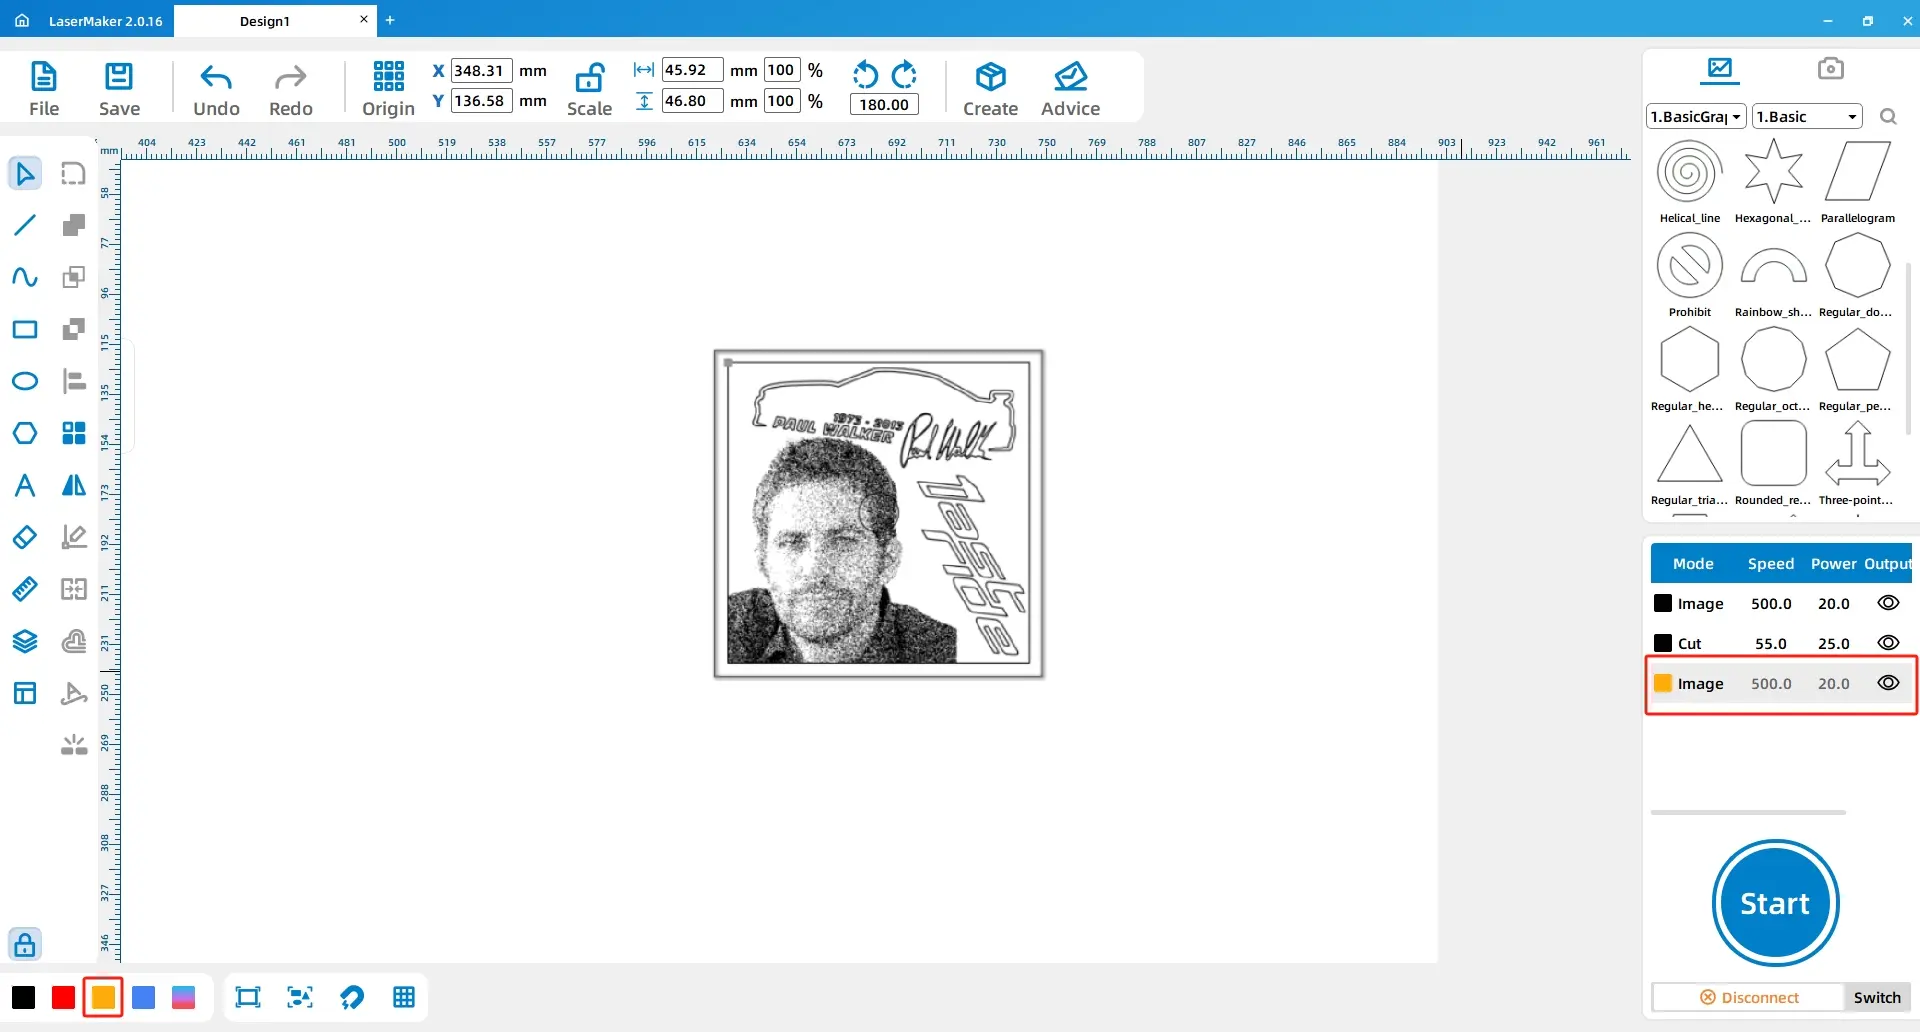
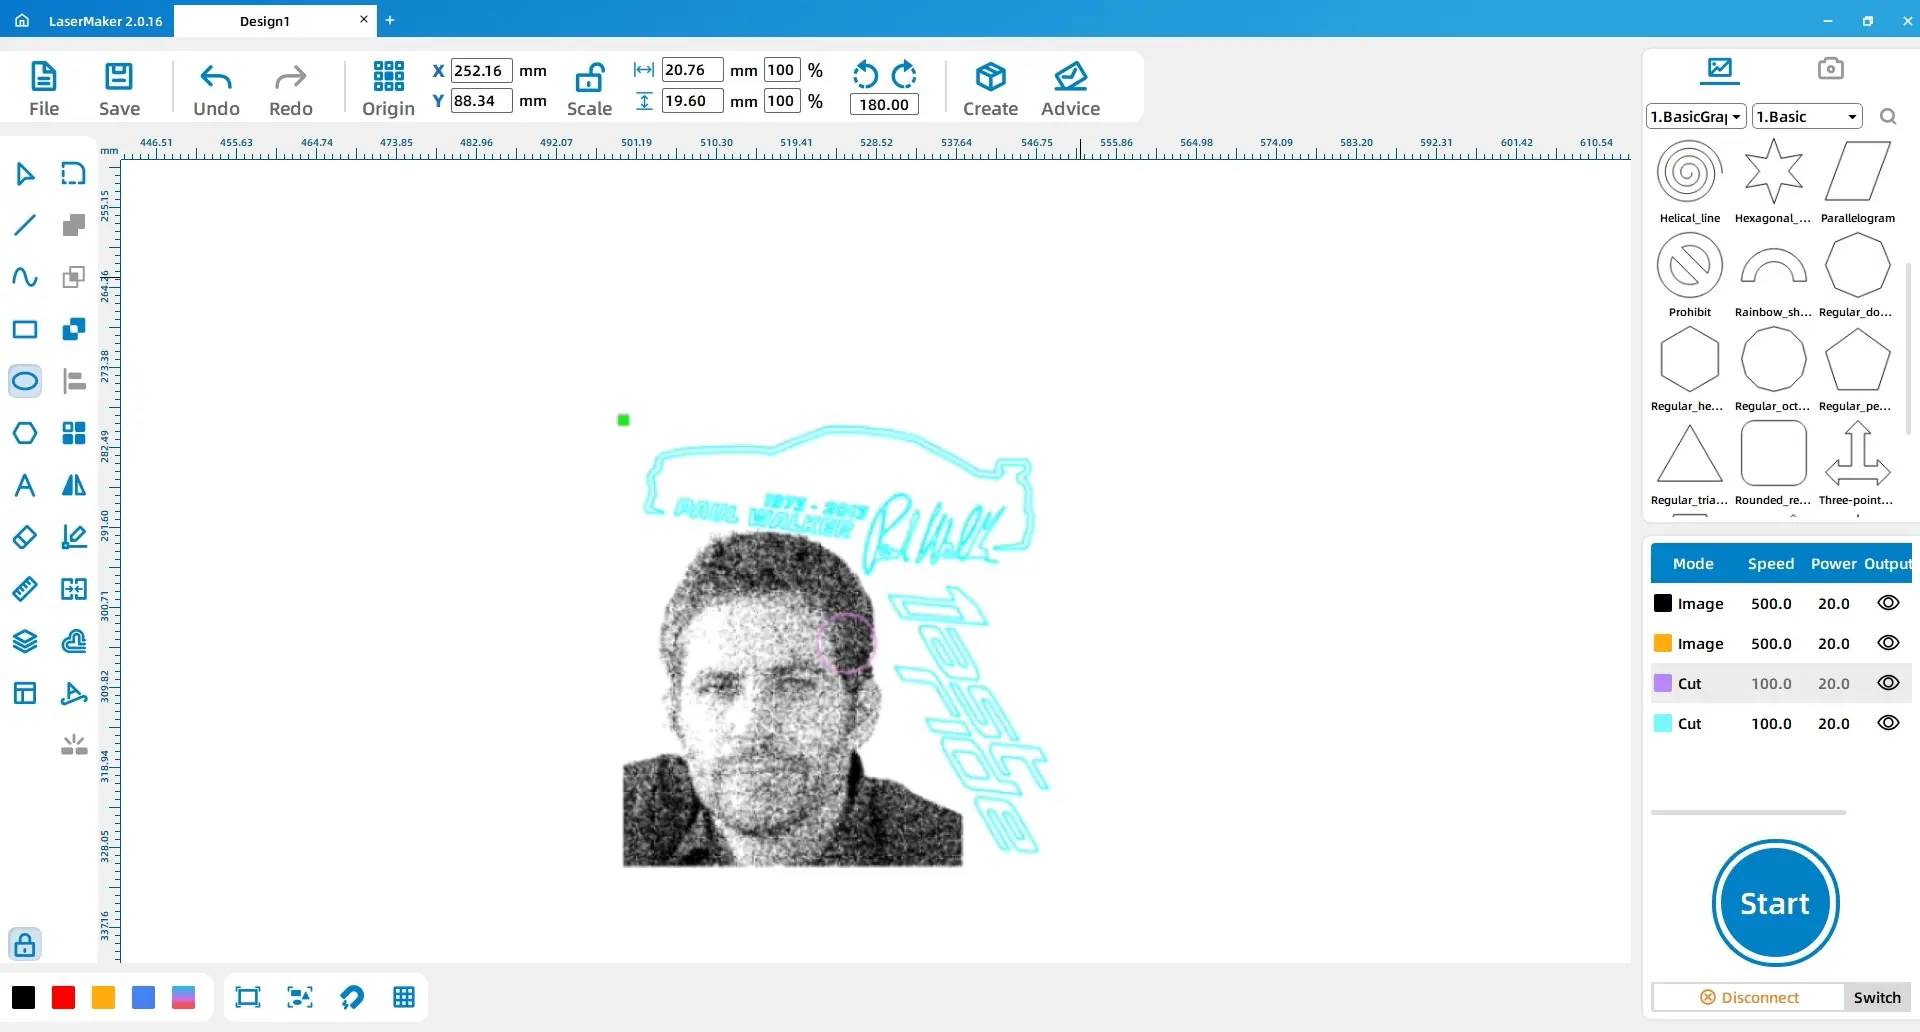
Select the main beechwood image and change its contour layer to yellow. Select the perfect circle for the handle hole and change its contour layer to purple. Select the second decorative image and change its contour layer to blue.
Double-click the black layer in the processing panel and use the eye icon to hide the layer. This prevents the black layer from being processed during the beechwood block stage.
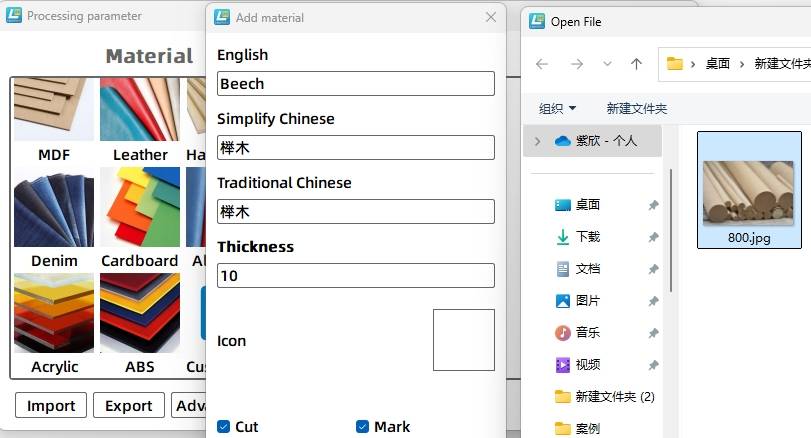
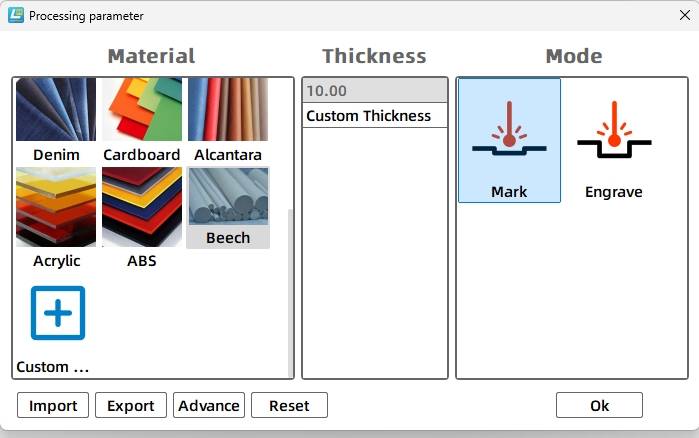
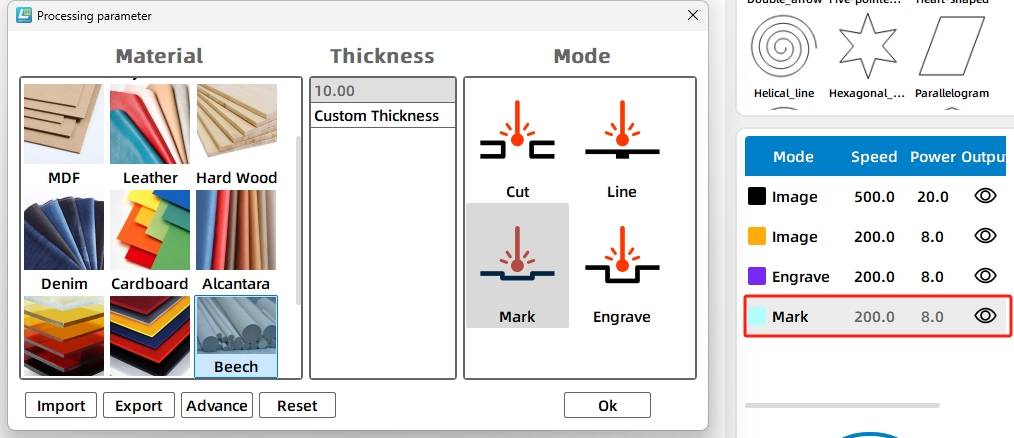
In the processing panel, double-click the yellow layer and add a custom material named beech. Set the material thickness to 10mm and select a suitable beechwood material image. Then set the yellow layer to beechwood, 10mm, and Shallow Relief.
Next, set the purple layer to beechwood, 10mm, and Deep Relief. Set the blue layer to beechwood, 10mm, and Shallow Relief. Adjust the layer order so the shallow relief process runs before the deep relief process.
| Layer | Material | Thickness | Process | Project Use |
|---|---|---|---|---|
| Black | Rubber Brick | 10mm | Shallow Relief | Stamp pattern surface |
| Yellow | Beechwood | 10mm | Shallow Relief | Main beechwood image engraving |
| Purple | Beechwood | 10mm | Deep Relief | Handle connection hole |
| Blue | Beechwood | 10mm | Shallow Relief | Decorative beechwood image |
Before making the final stamp, students should check the mirrored pattern, material settings, layer order, and alignment of the beechwood block. A small test engraving can help confirm whether the shallow relief creates enough detail and whether the stamp impression is clear after applying ink.
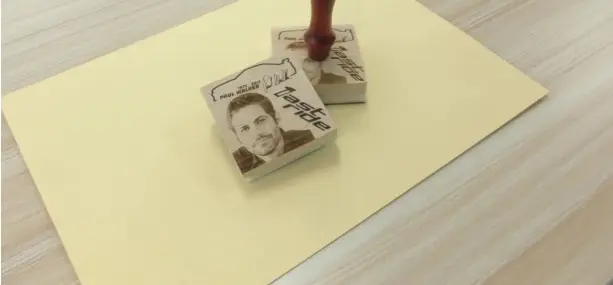
After laser processing, assemble the rubber brick, beechwood block, and handle. Apply ink to the rubber surface and press the stamp gently onto paper to test the final impression.
Once students understand the basic workflow, they can create their own stamp designs. They can replace the original pattern with a classroom logo, club icon, student artwork, flower design, animal illustration, or simple text-based stamp.
Extension idea: Ask students to design a stamp for a real classroom use case, such as book labels, reward cards, handmade packaging, event tickets, or art project signatures. They should explain why the image must be mirrored before engraving.
In this DIY rubber stamp printing project, students learn how to use LaserMaker to prepare a mirrored rubber brick pattern, draw a beechwood block, create a handle connection hole, add a custom beechwood material, and assign shallow relief and deep relief processes.
The project also reinforces an important design principle: a three-dimensional object should be analysed by its parts before it is made. By designing the rubber brick, beechwood block, and handle separately, students can better understand structure, material behaviour, and assembly. With repeated testing and practice, students can use the same workflow to create many original stamp designs.
Create More LaserMaker STEAM Projects
Explore Thunder Laser machines for classroom laser engraving, rubber stamp projects, wood engraving, student maker activities, and hands-on digital fabrication lessons.
Explore Bolt SeriesTalk To Our Experts Now!
Please leave your contact information so that we can serve you better.
NEED HELP FINDING THE RIGHT SOLUTION?
Talk to our team for machine recommendations, application advice, and support based on your needs.

 Stable & Consistent MachinesUnlimited ApplicationRobust After-sales SupportFactory Direct Supply