


Movable-Type Printing Laser Cutting Project for STEAM Classrooms
 2024-08-18
WHAT ARE YOU LOOKING FOR?
Search Across Products, Blog Posts, Support Content, And Resources.

Movable-Type Printing Laser Cutting Project for STEAM Classrooms
2024-08-18

In this STEAM maker project, students explore movable-type printing by designing and laser cutting reusable character blocks with LaserMaker. The lesson connects cultural history, poem selection, typography, mirrored text, engraving and cutting layers, printing plate design, ink application, paper transfer, and classroom presentation.
This project helps students experience a traditional printing process through modern digital fabrication. Students choose a poem, create individual type blocks, arrange them on a plate, apply ink, and print the final text onto paper.
| Item | Details |
|---|---|
| Project | Movable-type printing laser cutting project |
| Software | LaserMaker |
| Main Skills | Text input, stamp-style character design, Array Copy, text editing, horizontal flip, engraving, cutting, printing plate design, type arrangement, inking, and paper transfer |
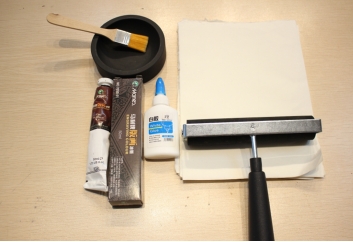
| Suggested Materials and Parts | 3 mm plywood, paper, drawing pen, white latex glue or hot glue, ink, ink stone, brush, rice paper, and roller |
| Classroom Fit | Laser cutting and maker projects, cultural design activities, classroom printing projects, poetry activities, beginner LaserMaker practice, and digital fabrication lessons |
Students will learn the basic idea of movable-type printing, choose a short poem, count the required characters, design square character blocks in LaserMaker, mirror the text for printing, laser cut the type blocks and printing plate, arrange the poem, apply ink, and create a printed result.
For teachers: Use this lesson to connect history, language arts, typography, digital design, laser cutting, and hands-on printmaking.
For students: Use the activity to turn a favorite poem into a physical movable-type printing project.
For makerspaces: Use it as a culture-and-craft project that combines reusable type blocks, custom text, and traditional-style printing.
Describe movable-type printing as a reusable printing method based on individual character blocks.
Choose a five-character or seven-character poem and count how many type blocks are needed.
Design square character blocks using LaserMaker, text tools, layers, and Array Copy.
Mirror the characters before laser processing so the printed text reads correctly.
Assemble a printing plate, arrange characters in order, apply ink, transfer the text to paper, and reflect on the result.
Design thinking: Select a poem, plan the character size, and design a plate layout that supports a clear printed result.
Computational thinking: Count characters, duplicate repeated blocks, edit text, check total layout size, and manage engraving and cutting layers.
Engineering thinking: Consider material thickness, block size, border fit, plate alignment, ink coverage, paper pressure, and print clarity.
Students should operate the laser cutter only under teacher or lab supervisor guidance. Before processing, check the focal length, material placement, cutting layer, engraving layer, and layer order. During printing, keep ink, brushes, paper, and rollers organized so the workspace stays clean and safe.
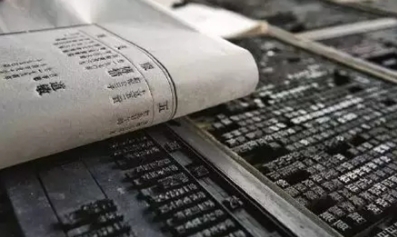
Movable-type printing is a printing method that uses individual reusable type blocks instead of copying text by hand or carving a full fixed page each time. In the source lesson, students discuss China’s four great inventions, Bi Sheng’s role in movable-type printing during the Northern Song Dynasty, and how individual type blocks can be selected, arranged, inked, printed, and reused.
For the classroom project, students use laser-cut wooden type blocks as a hands-on way to understand the process. The goal is not only to make a printed poem, but also to understand why reusable type can make printing more flexible.
Classroom Discussion: Teachers can compare movable-type printing with block printing. Movable type uses separate reusable characters, while block printing usually uses a fixed carved page or block.
Teachers can begin the lesson with short cultural and design questions. These prompts help students connect the printing project with history, language, and production logic.
What are China’s four great inventions?
Who is traditionally associated with the invention of movable-type printing in China?
What is movable-type printing?
How is movable-type printing different from block printing?
Why do the characters need to be mirrored before printing?
Before using LaserMaker, students should choose a short poem and plan the size of each type block. The source lesson suggests choosing a five-character or seven-character poem, counting the number of characters, and designing a square font block before building the full printing plate.
Choose a favorite five-character or seven-character poem.
Count how many characters are needed for the poem.
Design the size of each square character block.
Plan the size of the printing plate based on the character layout.
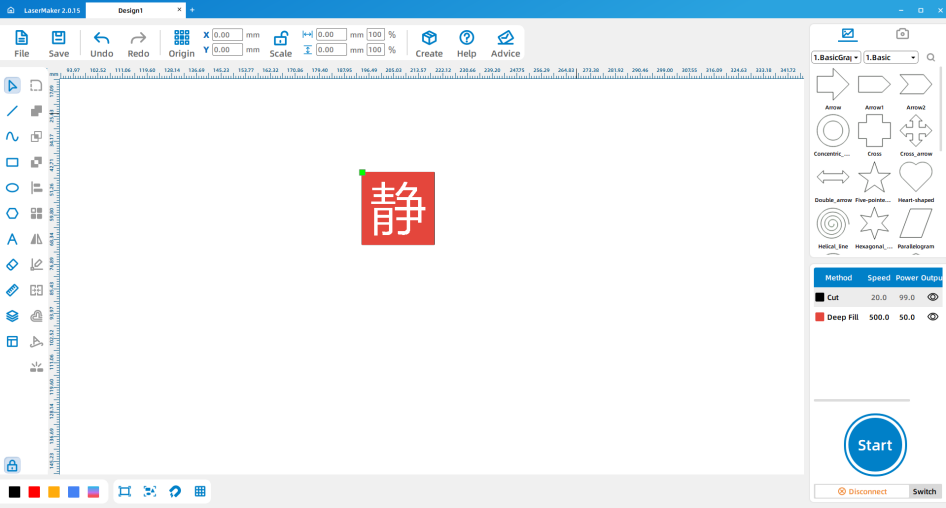
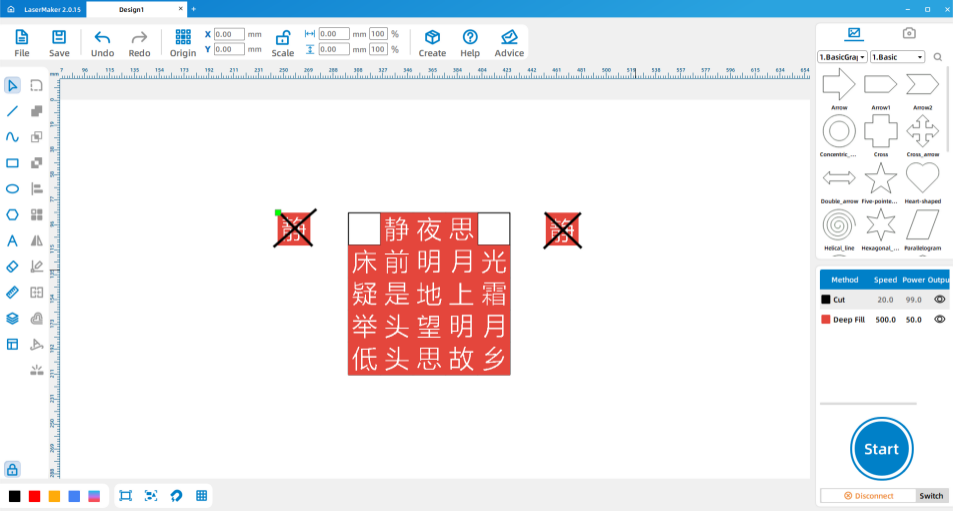
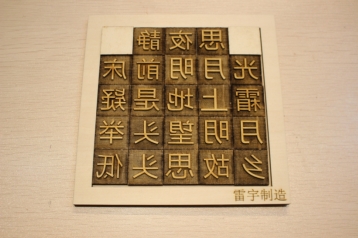
Open LaserMaker and design one character block using the same general method as a single-character seal. The type block should be square so the characters can align neatly on the printing plate.
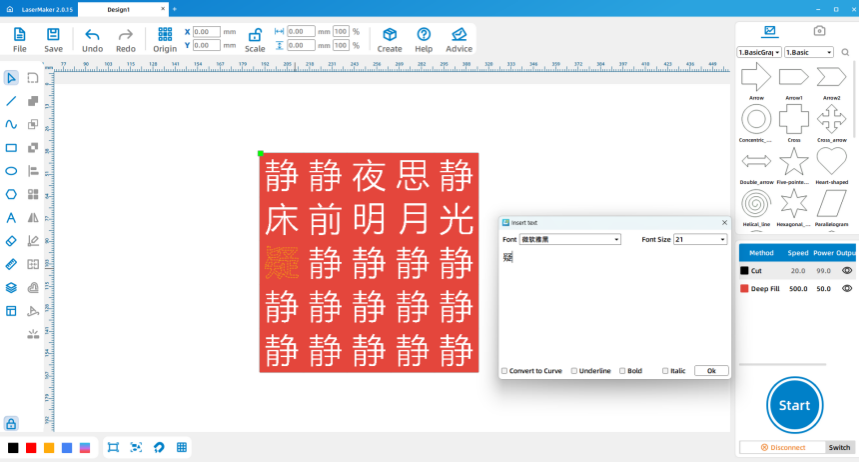
After duplicating the first character block, double-click the text in each square and change it to the correct character from the poem. Remove any extra text or engraving layers that are not needed for the final design.
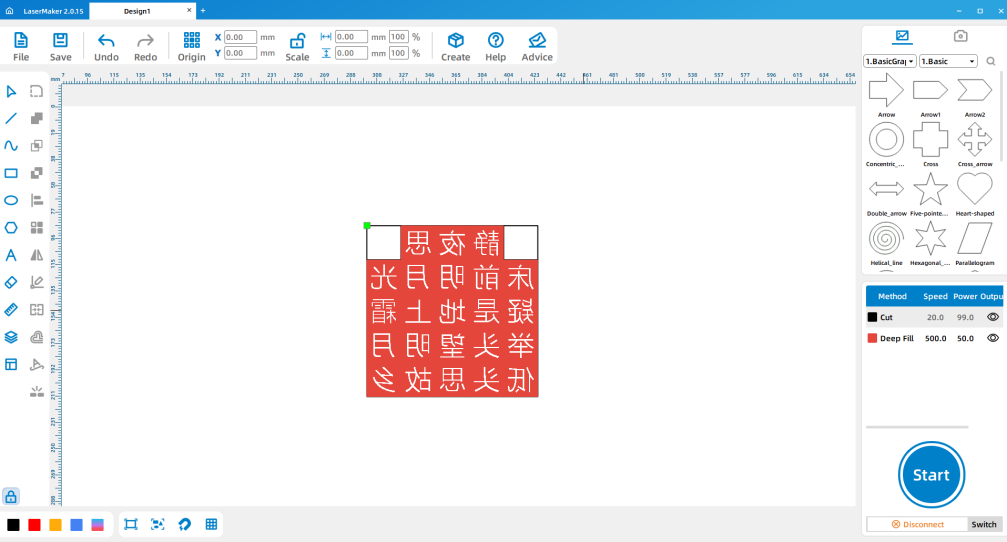
Select all the character blocks and use Rotation > Horizontal Flip to mirror the design. This step is essential because the printed result is reversed from the engraved surface.
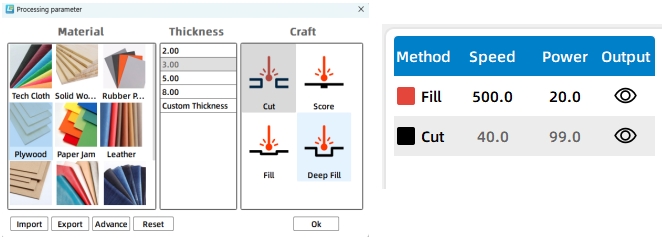
Set the cutting and engraving parameters. The source workflow uses 3 mm plywood, so the cutting parameter should match 3 mm material thickness. After setting parameters, check the layer order carefully before sending the file to the laser cutter.
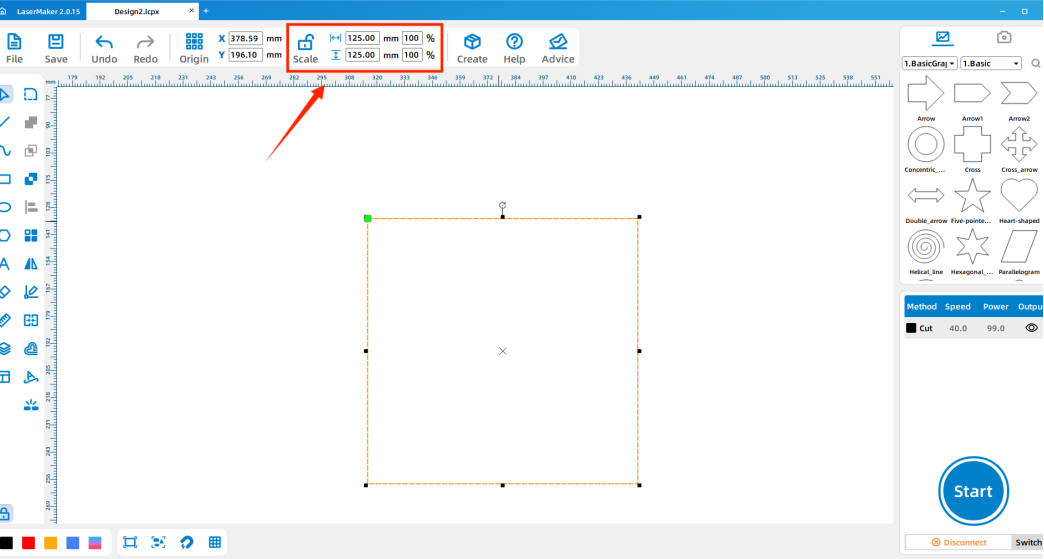
Select all the character blocks and check their total size. In the source workflow, the total character layout is shown as 125 mm by 125 mm.
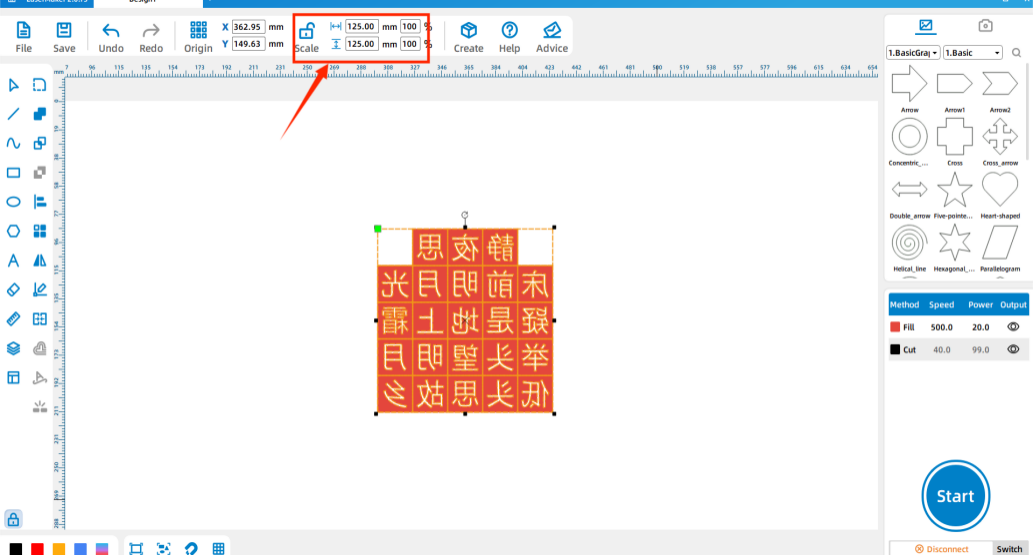
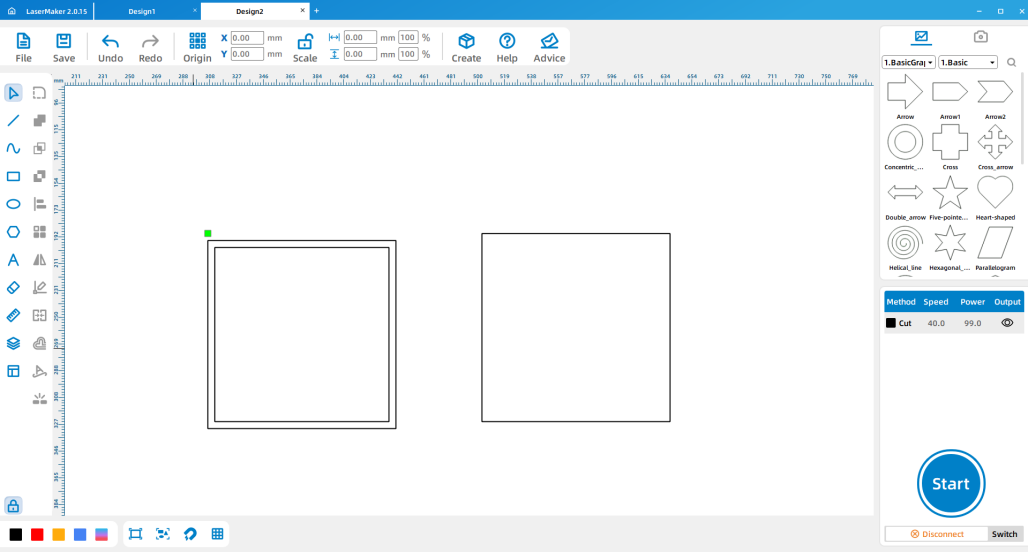
Create a new file or draw a square with the same size as the full character layout. In the source example, this layout square is 125 mm by 125 mm.
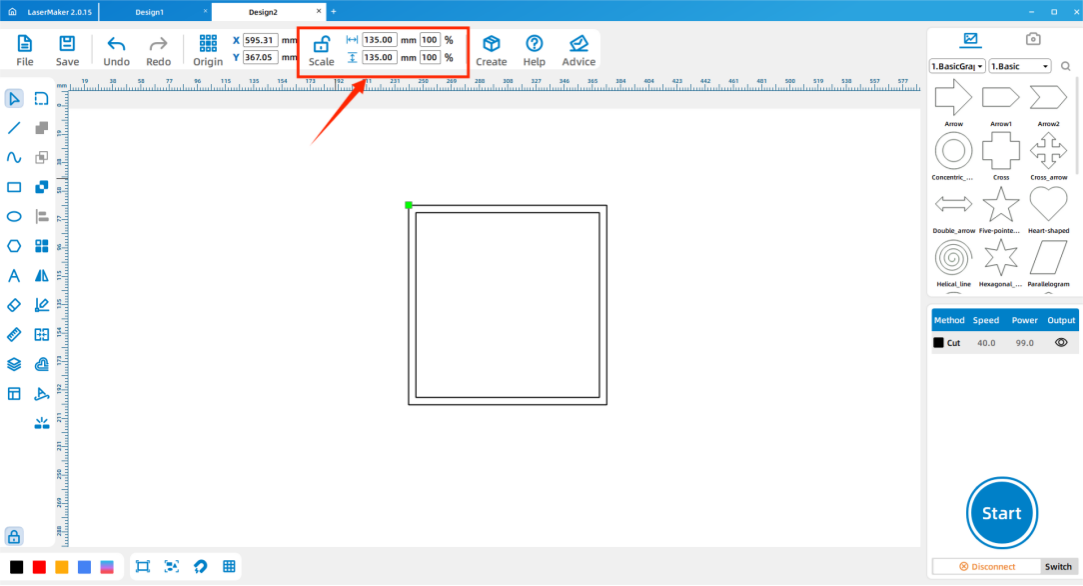
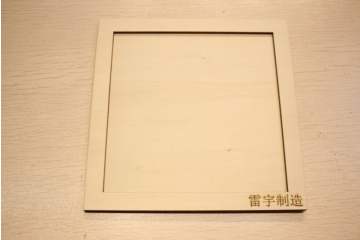
Draw a second square about 10 mm larger than the layout area and place it around the first square. This larger square becomes the outer border of the printing plate. In the source example, the outer border is shown as 135 mm by 135 mm.
Set the cutting parameter for the printing plate. Because the source lesson uses 3 mm plywood, the plate cutting parameter should also match 3 mm material thickness.
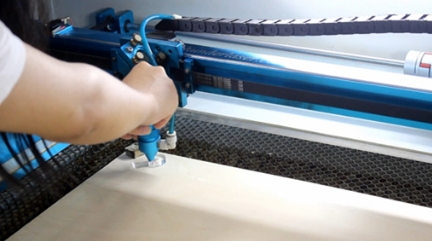
Import the completed design files into the laser cutting machine for processing. Before starting, adjust the focal length to reduce the risk of incomplete cutting.
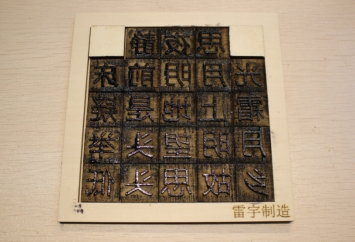
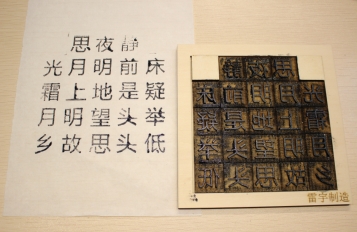
After cutting, align the outer frame with the edge of the plate and secure it with white latex glue or hot glue. Then arrange the finished character blocks on the plate in the order of the selected poem.
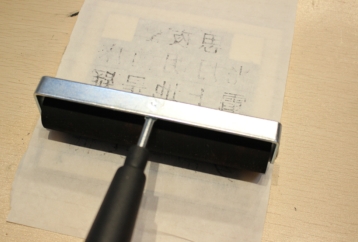
After the type blocks are arranged, students can use the finished type for printing. Prepare ink, an ink stone, a brush, rice paper, and a roller.
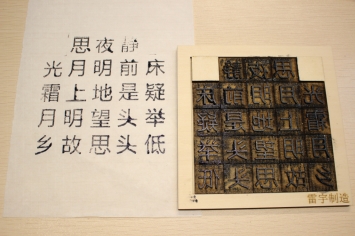
First, use the brush to apply ink evenly across each character block. Then lay the rice paper over the type and gently roll across the paper so the ink transfers evenly. Finally, slowly lift the paper to reveal the printed poem.
Poem selection: Students choose a five-character or seven-character poem and count the characters.
Software design: Students design one type block, duplicate it, edit each character, mirror the text, and prepare the plate.
Machine processing: Students process files in a safe classroom order under teacher supervision.
Assembly: Students glue the outer frame and arrange the type blocks in the correct order.
Printing: Students apply ink, place paper, roll gently, and evaluate the printed result.
Use the single-character seal project as a reference before starting movable-type printing.
Ask students to label or organize character blocks before printing so poem order is easier to manage.
Remind students that all type must be mirrored before laser processing.
Prepare extra paper for test printing, because the first print may not have even ink coverage.
Encourage students to explain why they chose their poem and what meaning or inspiration it has for them.
How would you explain the movable-type printing process in your own words?
Why are movable type blocks similar to stamps?
Besides wood, what other materials might be used for printing type blocks?
What other printing methods can you compare with movable-type printing?
Why did you choose your poem, and what does it express?
Students can evaluate their own work and give peer feedback based on creativity, technical process, artistic effect, and collaboration.
| Evaluation Item | Self-Evaluation | Peer Evaluation |
|---|---|---|
| Creativity, 30 points | ||
| Technology, 30 points | ||
| Art, 20 points | ||
| Assist, 20 points | ||
| Total, 100 points |
At the end of the lesson, students can present their printed poem, explain the type block design, describe how they arranged the characters, and discuss how they would improve ink coverage, alignment, or print clarity in the next version.
After finishing the basic poem print, students can design another printing plate with a short quote, class motto, personal message, or bilingual text. They can also compare different block sizes, character spacing, ink thickness, paper types, and rolling pressure to see how each factor affects print quality.
For a broader challenge, students can compare movable-type printing with block printing, stencil printing, screen printing, and modern digital printing, then explain which method is best for different classroom or design tasks.
This project is suitable for classroom laser cutters that support engraving and cutting of thin plywood for small maker and cultural design projects. For schools and beginner STEAM labs, projects like movable-type printing blocks, seal-style characters, printing plates, and beginner LaserMaker activities can be completed with a classroom laser cutter such as the Thunder Laser Bolt Series.
Teachers can choose the machine and material setup based on classroom space, student supervision needs, material thickness, project size, and ventilation setup. Students should always test settings, check focus, and follow the school’s laser safety rules before final cutting.
Talk To Our Experts Now!
Please leave your contact information so that we can serve you better.
NEED HELP FINDING THE RIGHT SOLUTION?
Talk to our team for machine recommendations, application advice, and support based on your needs.

 Stable & Consistent MachinesUnlimited ApplicationRobust After-sales SupportFactory Direct Supply


