Laser-Cut Christmas Tree Reindeer Ornament STEAM Course
 2024-08-22
WHAT ARE YOU LOOKING FOR?
Search Across Products, Blog Posts, Support Content, And Resources.

Laser-Cut Christmas Tree Reindeer Ornament STEAM Course
2024-08-22

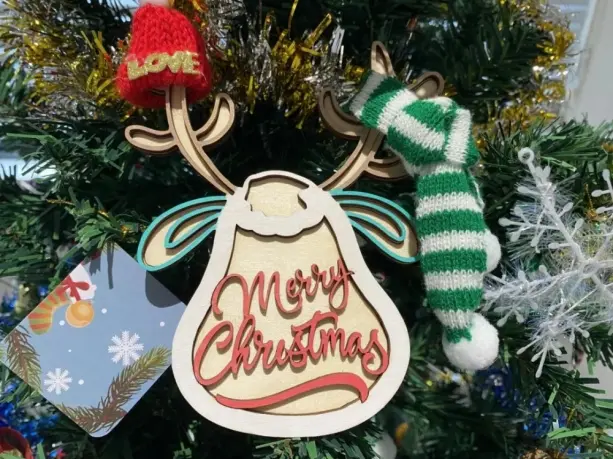
As Christmas approaches, the Christmas tree becomes one of the most familiar holiday symbols. It is often decorated with lights, handmade ornaments, and seasonal details that create a warm festive atmosphere.
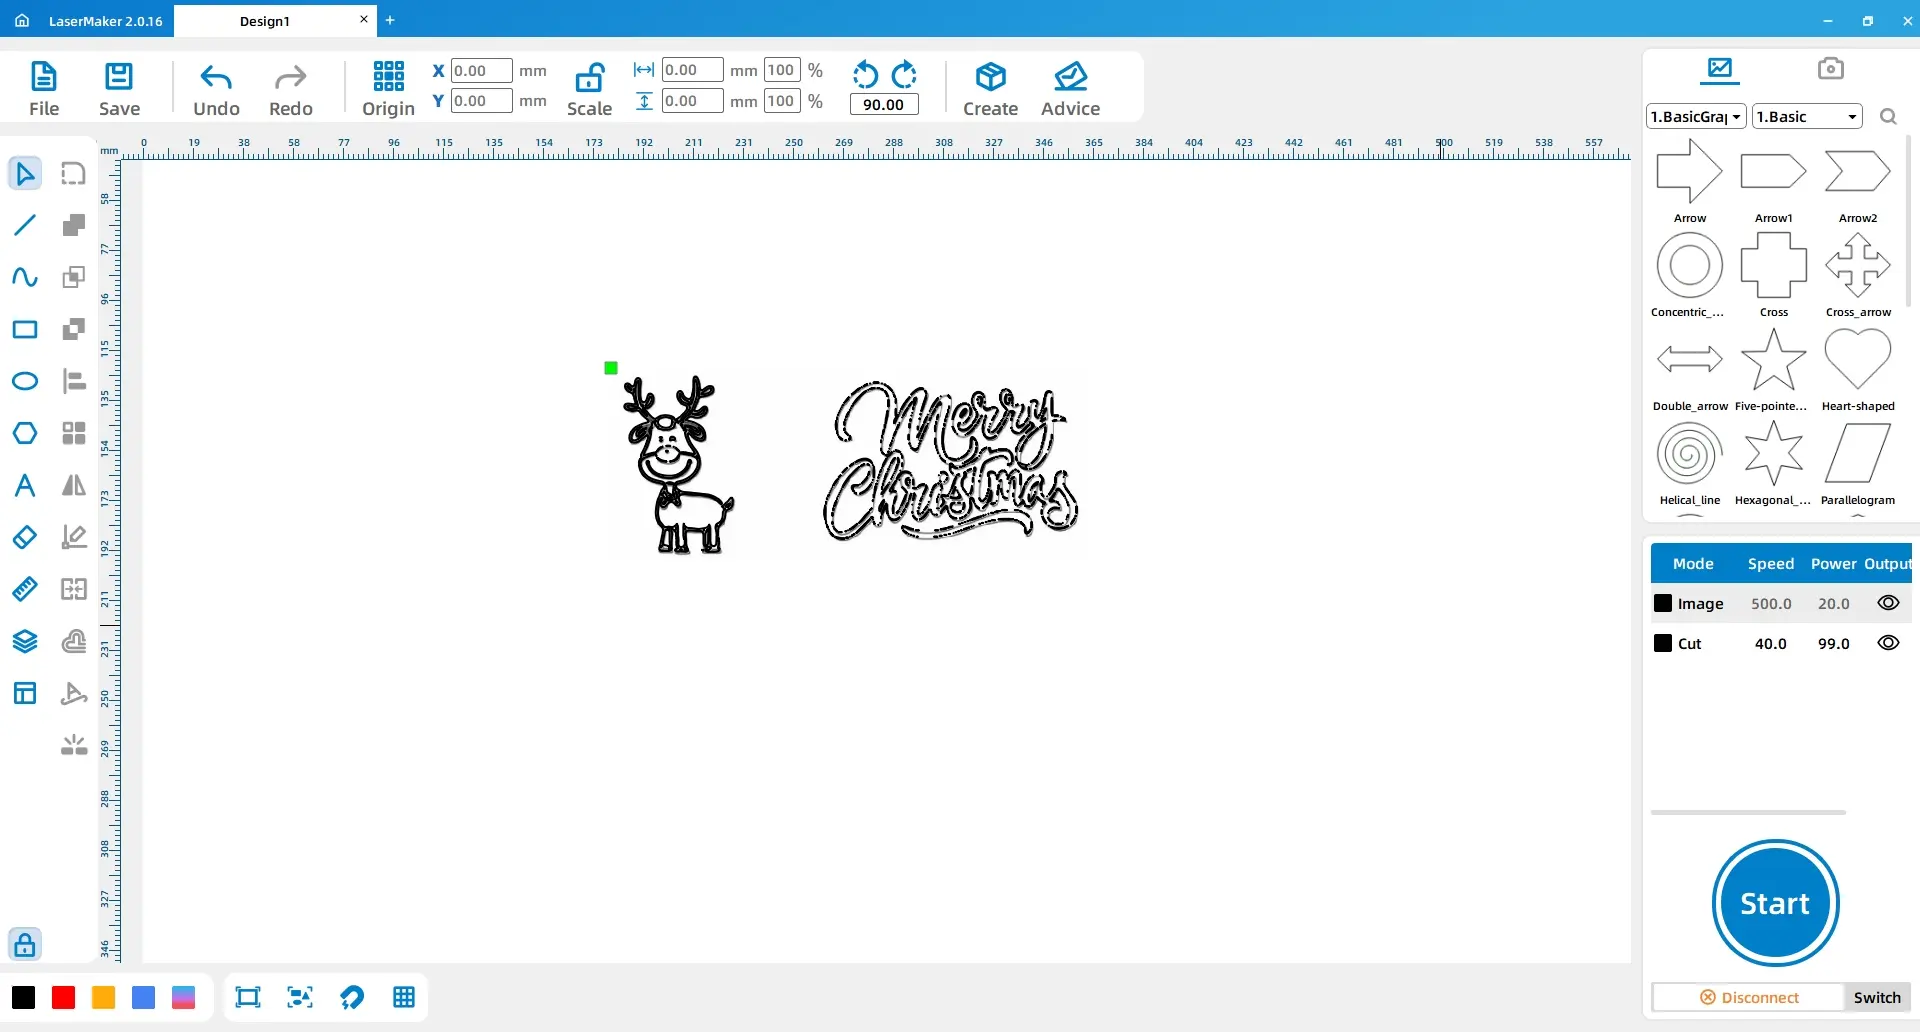
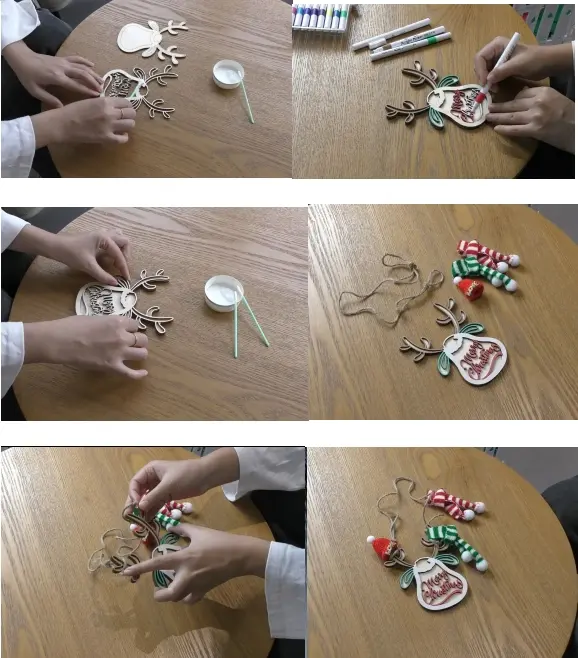
In this laser STEAM lesson, students use LaserMaker to design a Christmas tree reindeer ornament. They will create the reindeer outline, add decorative lettering, set laser processing layers, cut the ornament from 3 mm basswood board, and finish it with colour, rope, glue, and Christmas-themed fabric.
Holiday ornaments are small objects with strong visual meaning. They can represent family traditions, school events, community celebrations, seasonal displays, or student-made gifts. A laser-cut reindeer ornament gives students a practical way to connect digital fabrication with creative holiday design.
Teachers can use this classroom laser cutting project in maker education, art and design, digital fabrication, seasonal activities, or project-based STEAM lessons. Students can also adapt the design for other animals, words, events, or cultural celebrations.
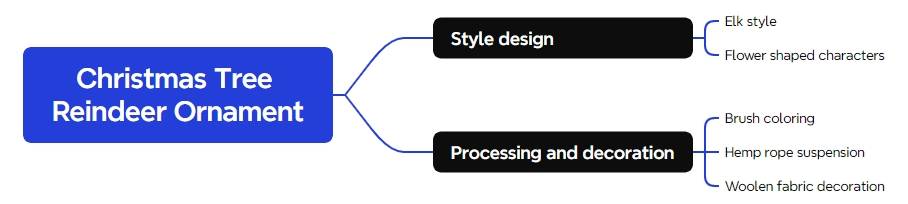
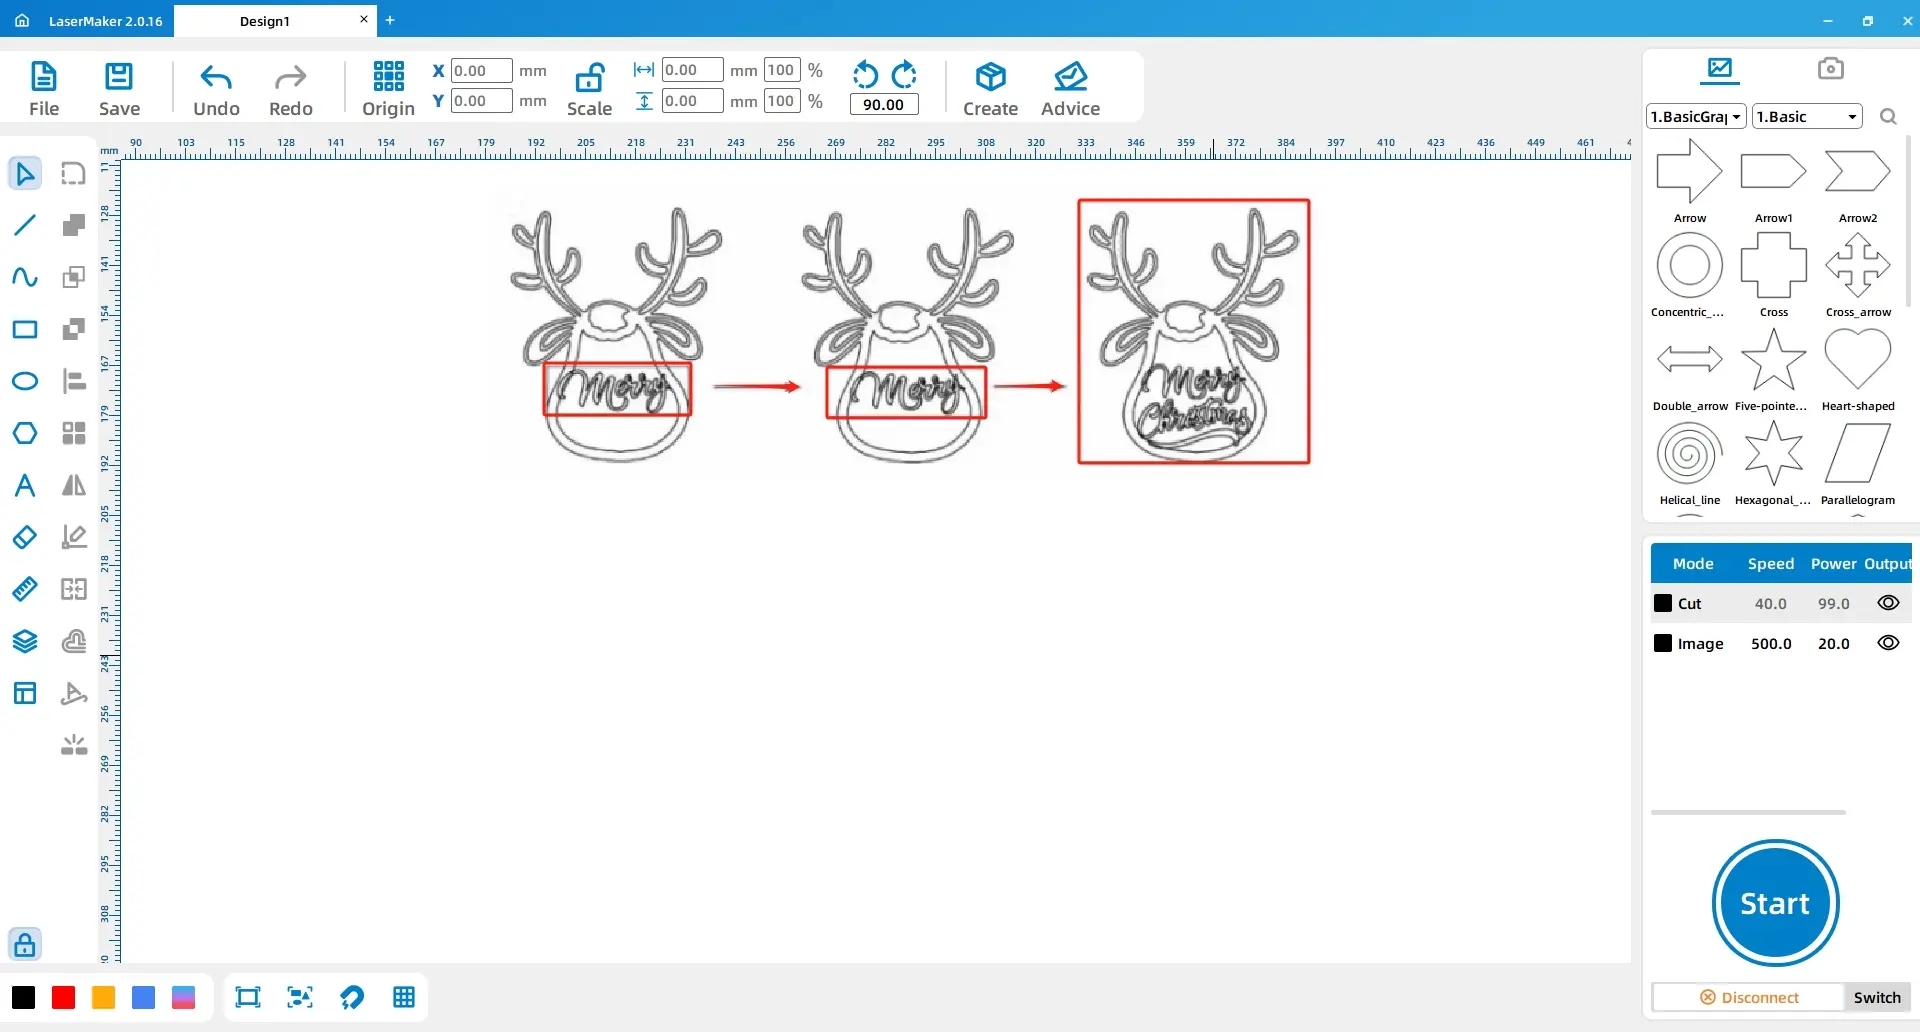
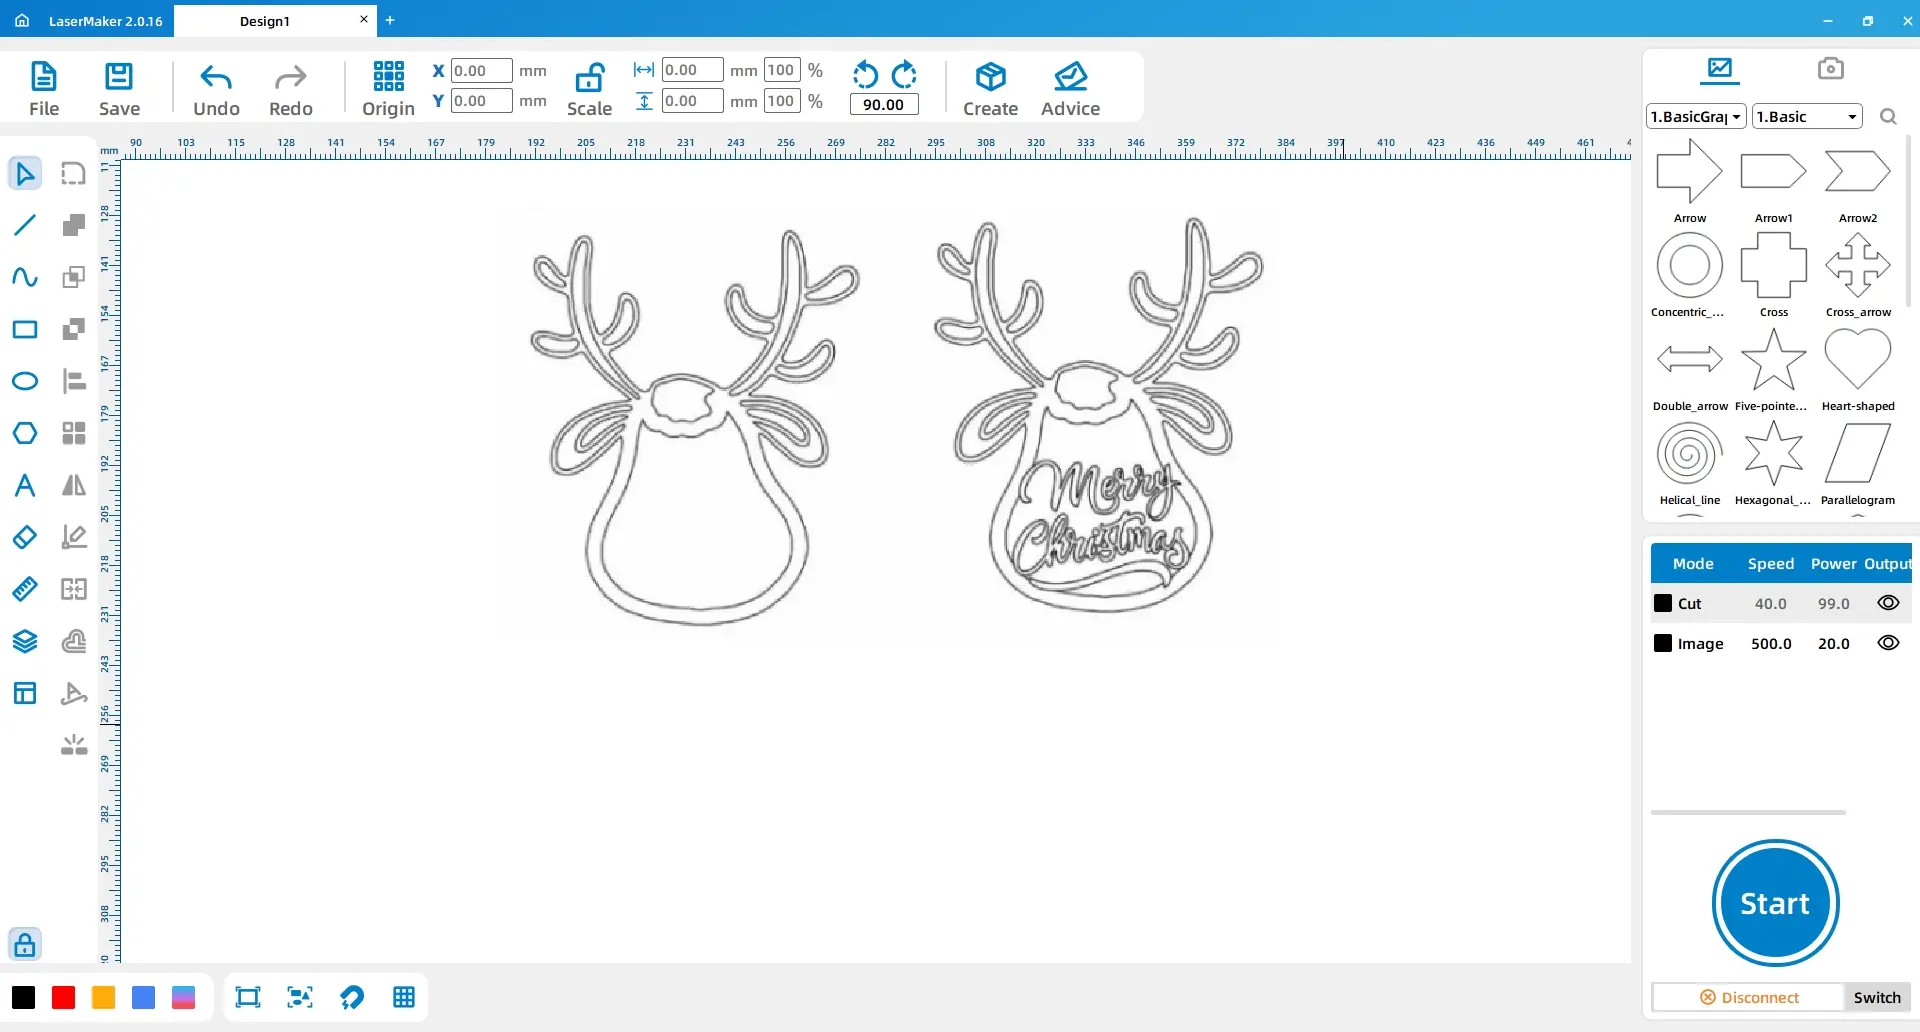
The ornament has two main design layers: a lower reindeer shape and an upper reindeer shape that includes decorative lettering. After laser cutting, the two parts are glued together and finished with colour, rope, and fabric decoration.
Teacher note: Students should use teacher-approved images, lettering, and decorative content. Encourage them to use references for inspiration, then create a respectful and original design suitable for school display.
| Number | Material or Tool | Quantity |
|---|---|---|
| 1 | 3 mm basswood board | 1 |
| 2 | Hemp rope | 1 |
| 3 | Paintbrush | 1 |
| 4 | Glue and cotton swab | 1 |
| 5 | Christmas decorative fabric | 2 |
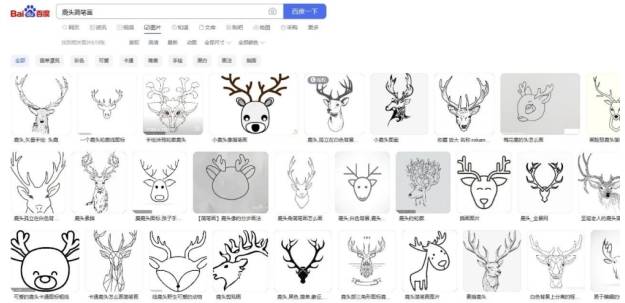
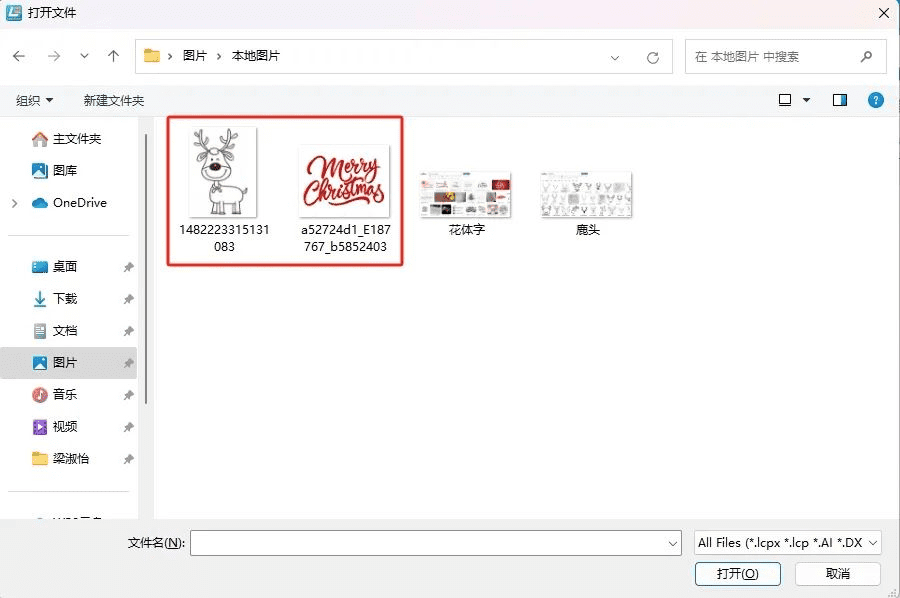
The source lesson begins by searching for reference images using the keywords “Simple Drawing of Reindeer” and “Merry Christmas Calligraphy Font”. In a classroom, teachers can ask students to use approved image sources, teacher-provided references, or original drawings.
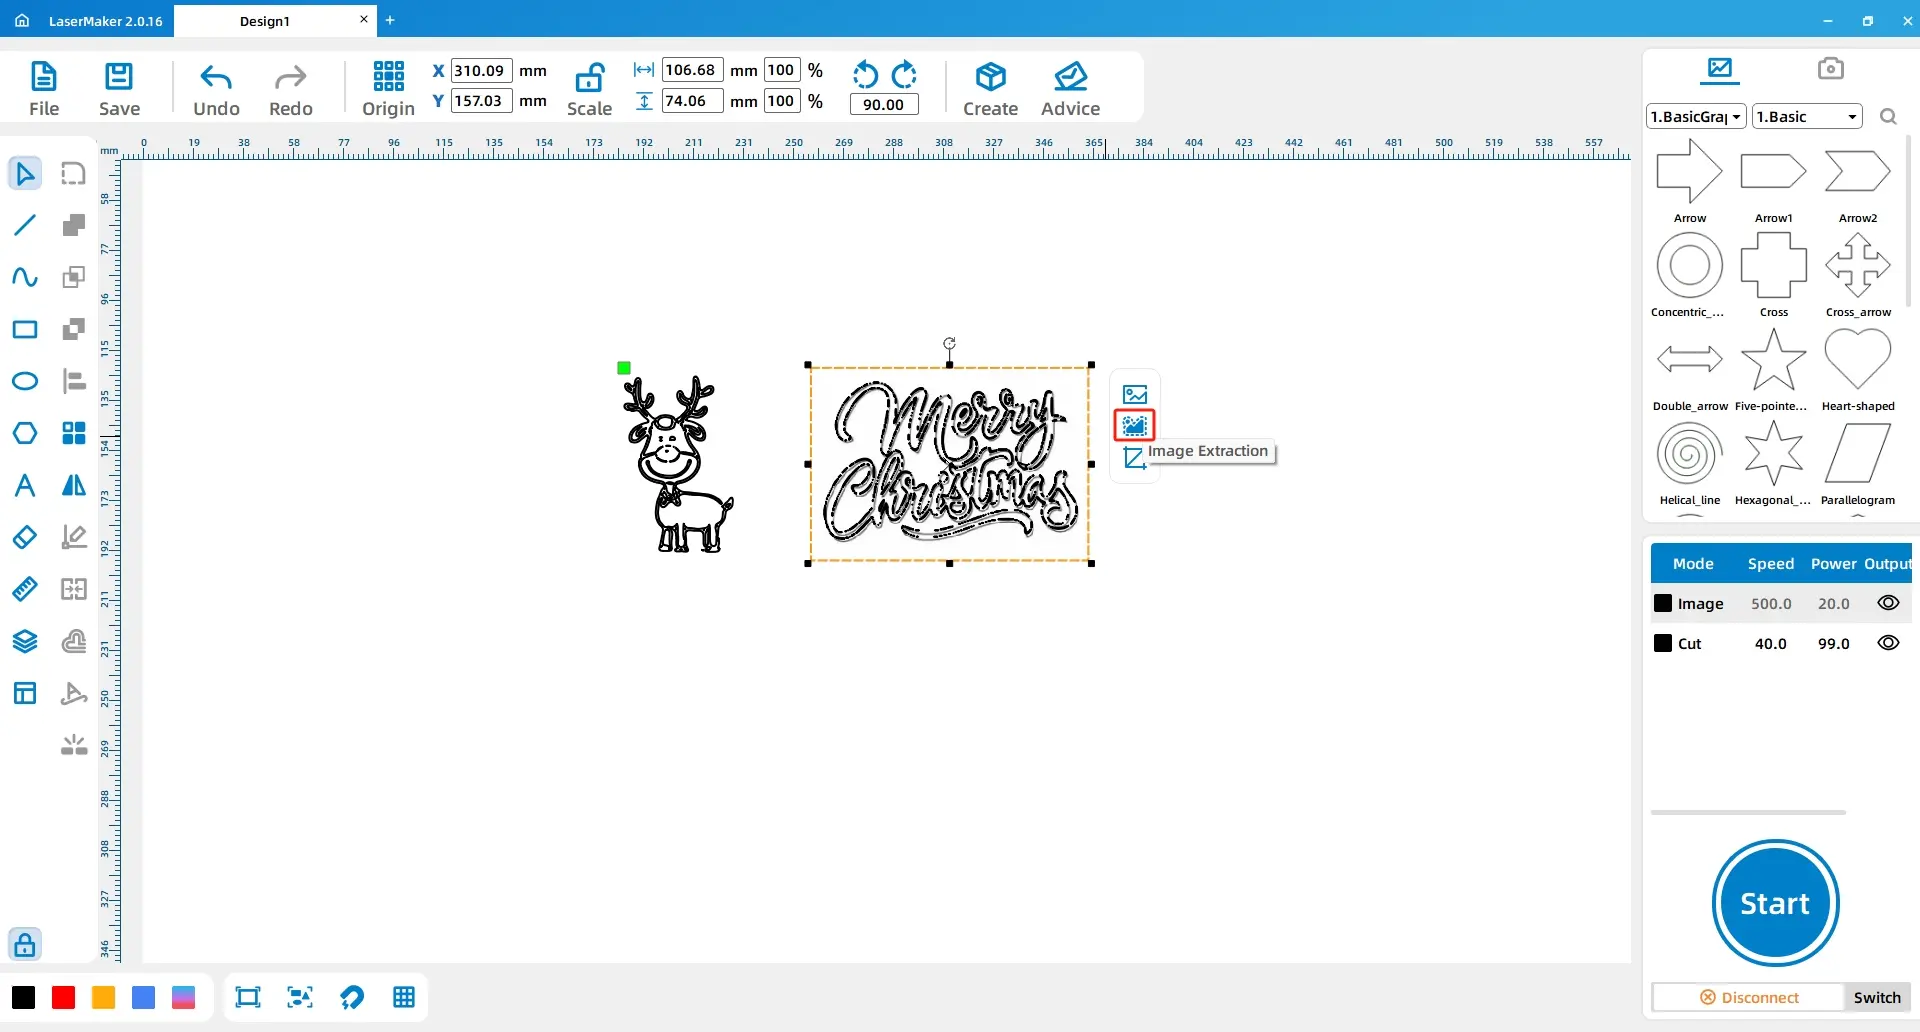
Select the images and click Extract Outline to obtain line drawings of the reindeer and the calligraphy font.
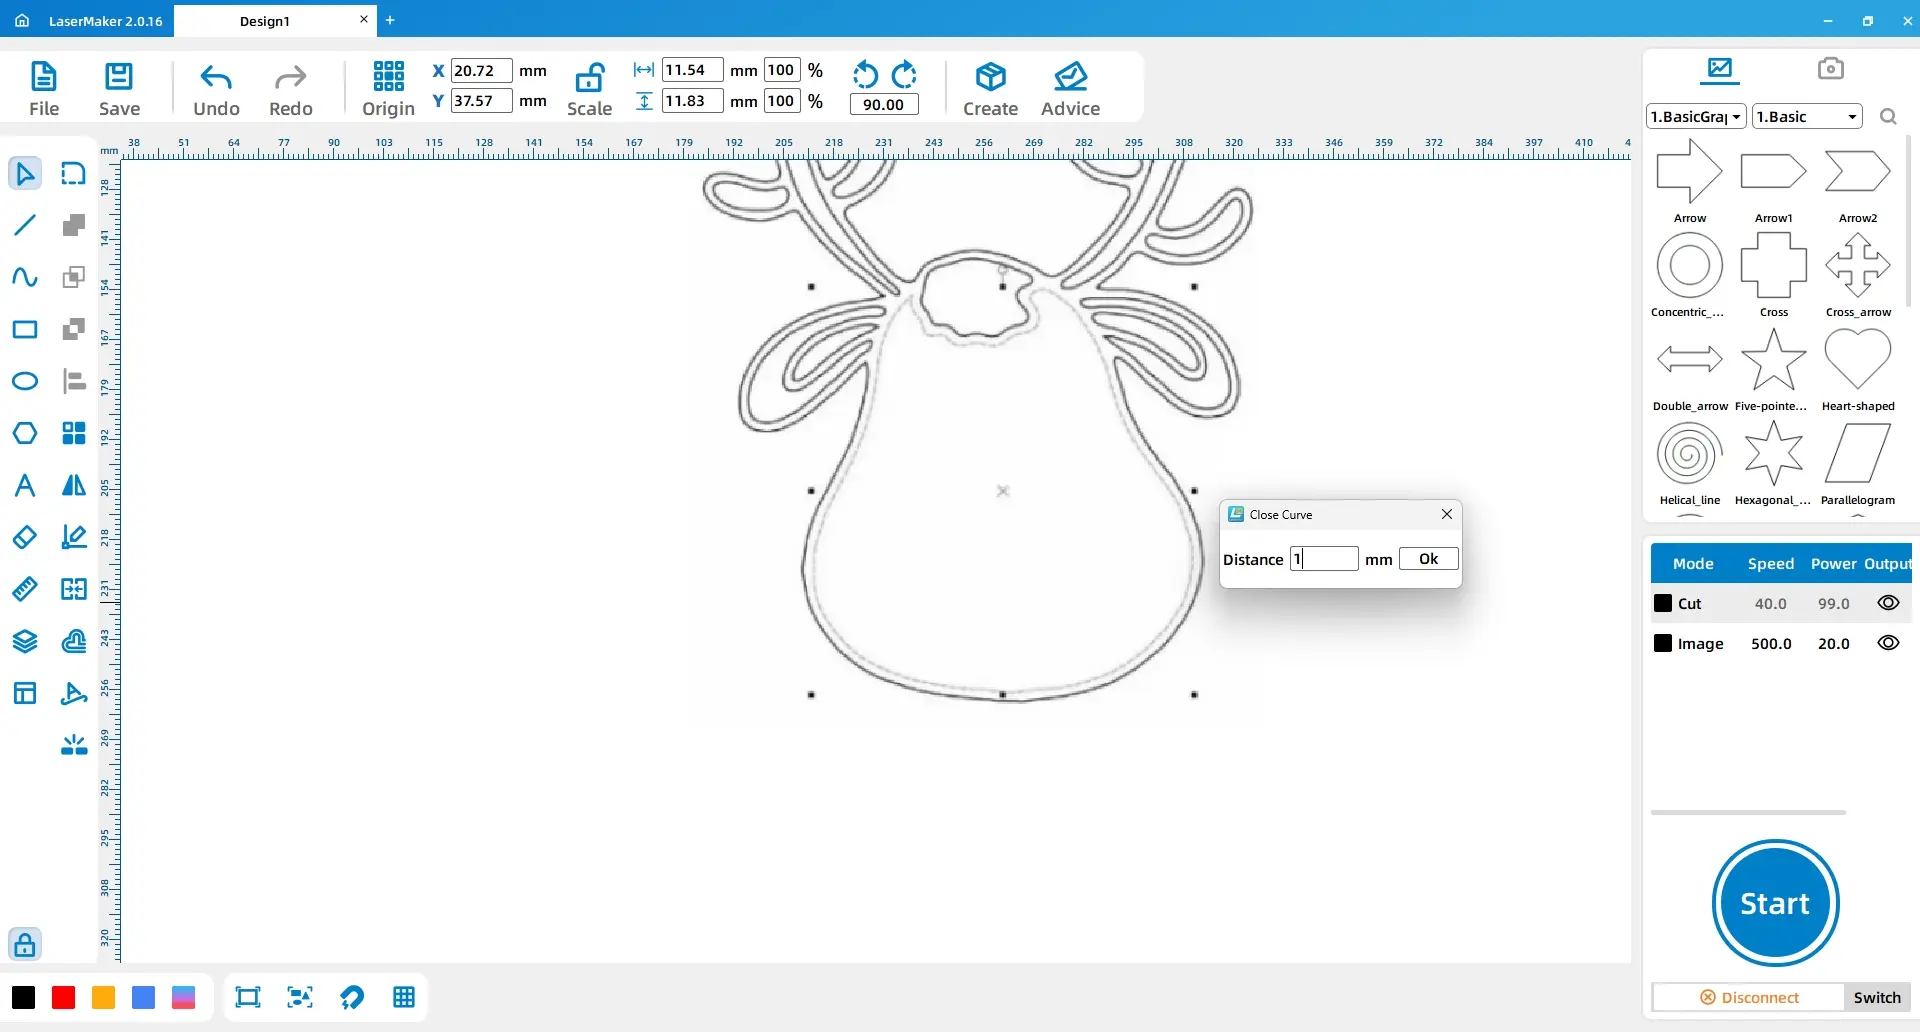
Use the Eraser tool and the Break Line function to disconnect lines at the neck and cheek area of the reindeer head pattern. Then use the Line tool and Connect Line Segments to connect the breakpoints. Delete any remaining unnecessary lines.
Select the internal outline lines of the reindeer and use Combine Curves to combine them into a single curve.
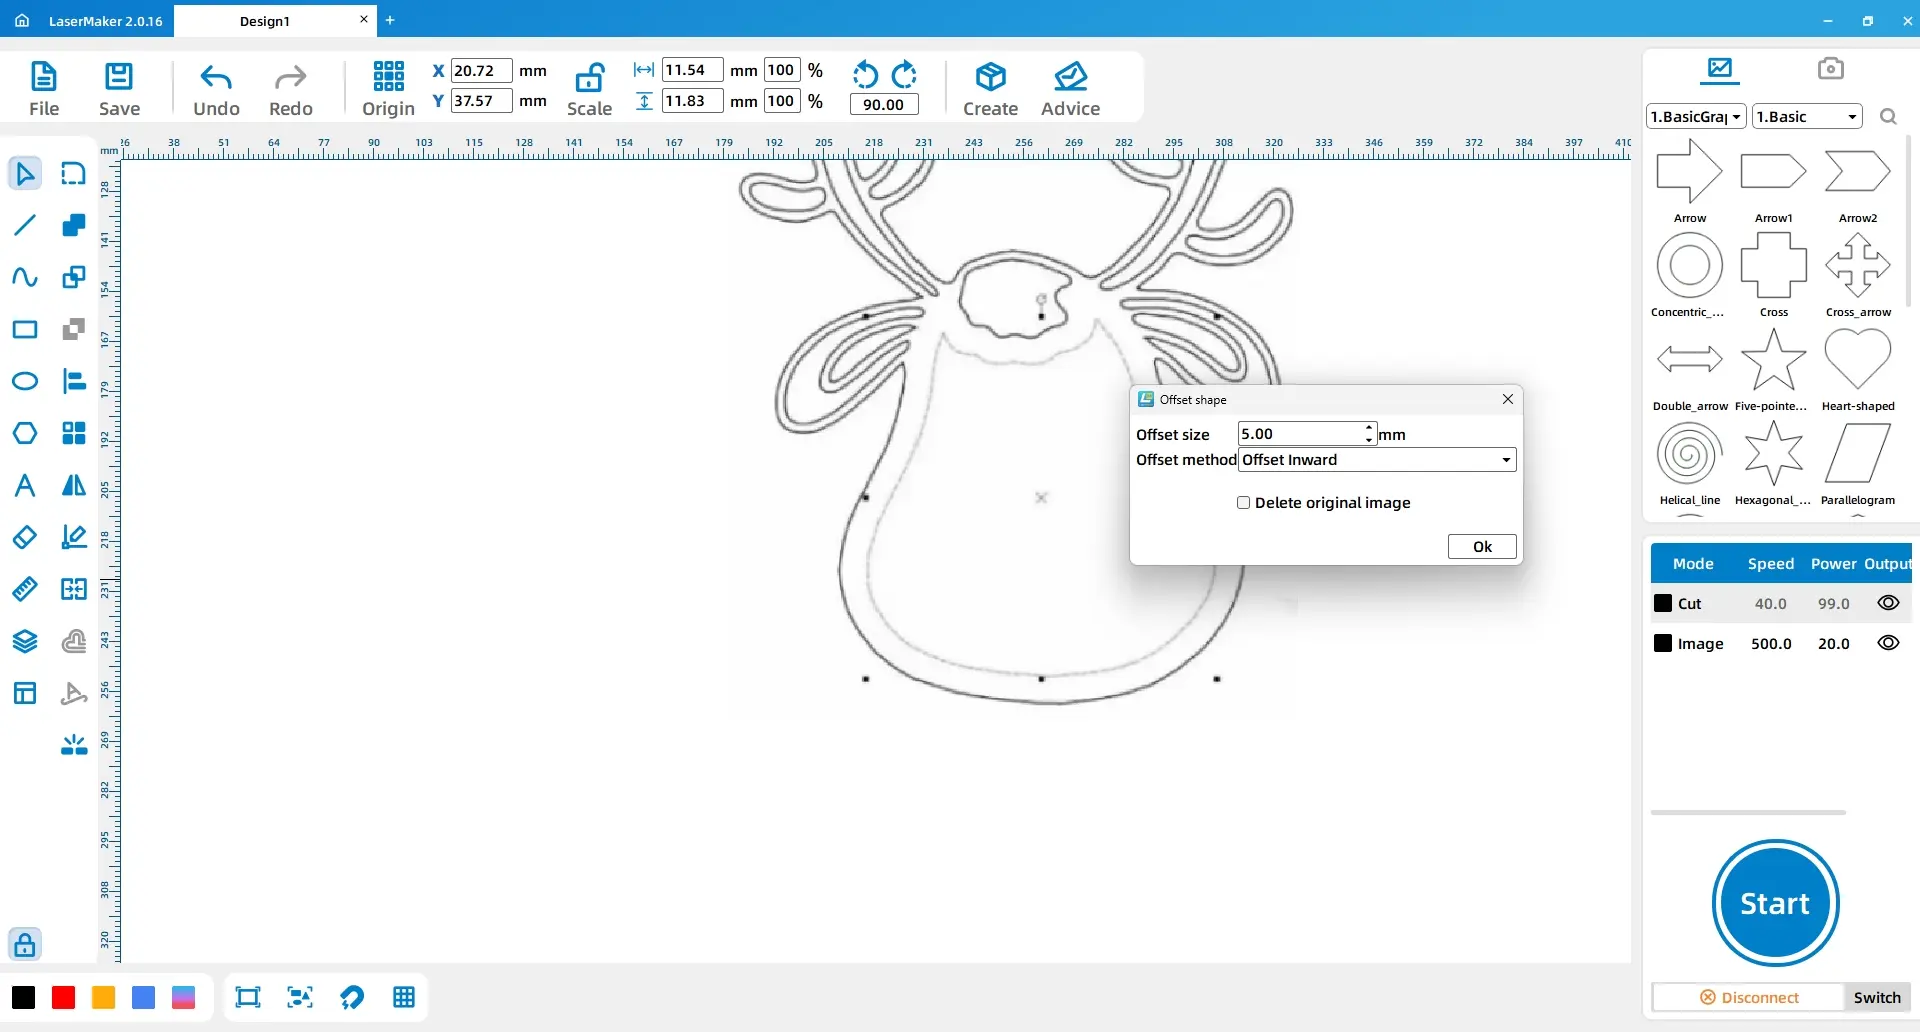
Select the internal outline lines of the reindeer again and use Offset Curve. Set the Offset Distance to 5, select Offset Inwards, and check Delete Original. Duplicate and paste the resulting pattern to create two reindeer designs.
Select the “merry” calligraphy font and move it inside the reindeer outline. If the letters are not connected as a single contour, use the Union Tool to combine them. Resize the other calligraphy fonts and place them in suitable positions inside the reindeer outline.
Use the Break Line tool to disconnect intersections between the inner contour of the reindeer head and the calligraphy font. Delete the disconnected contour lines of the reindeer head to complete the Christmas tree reindeer ornament drawing.
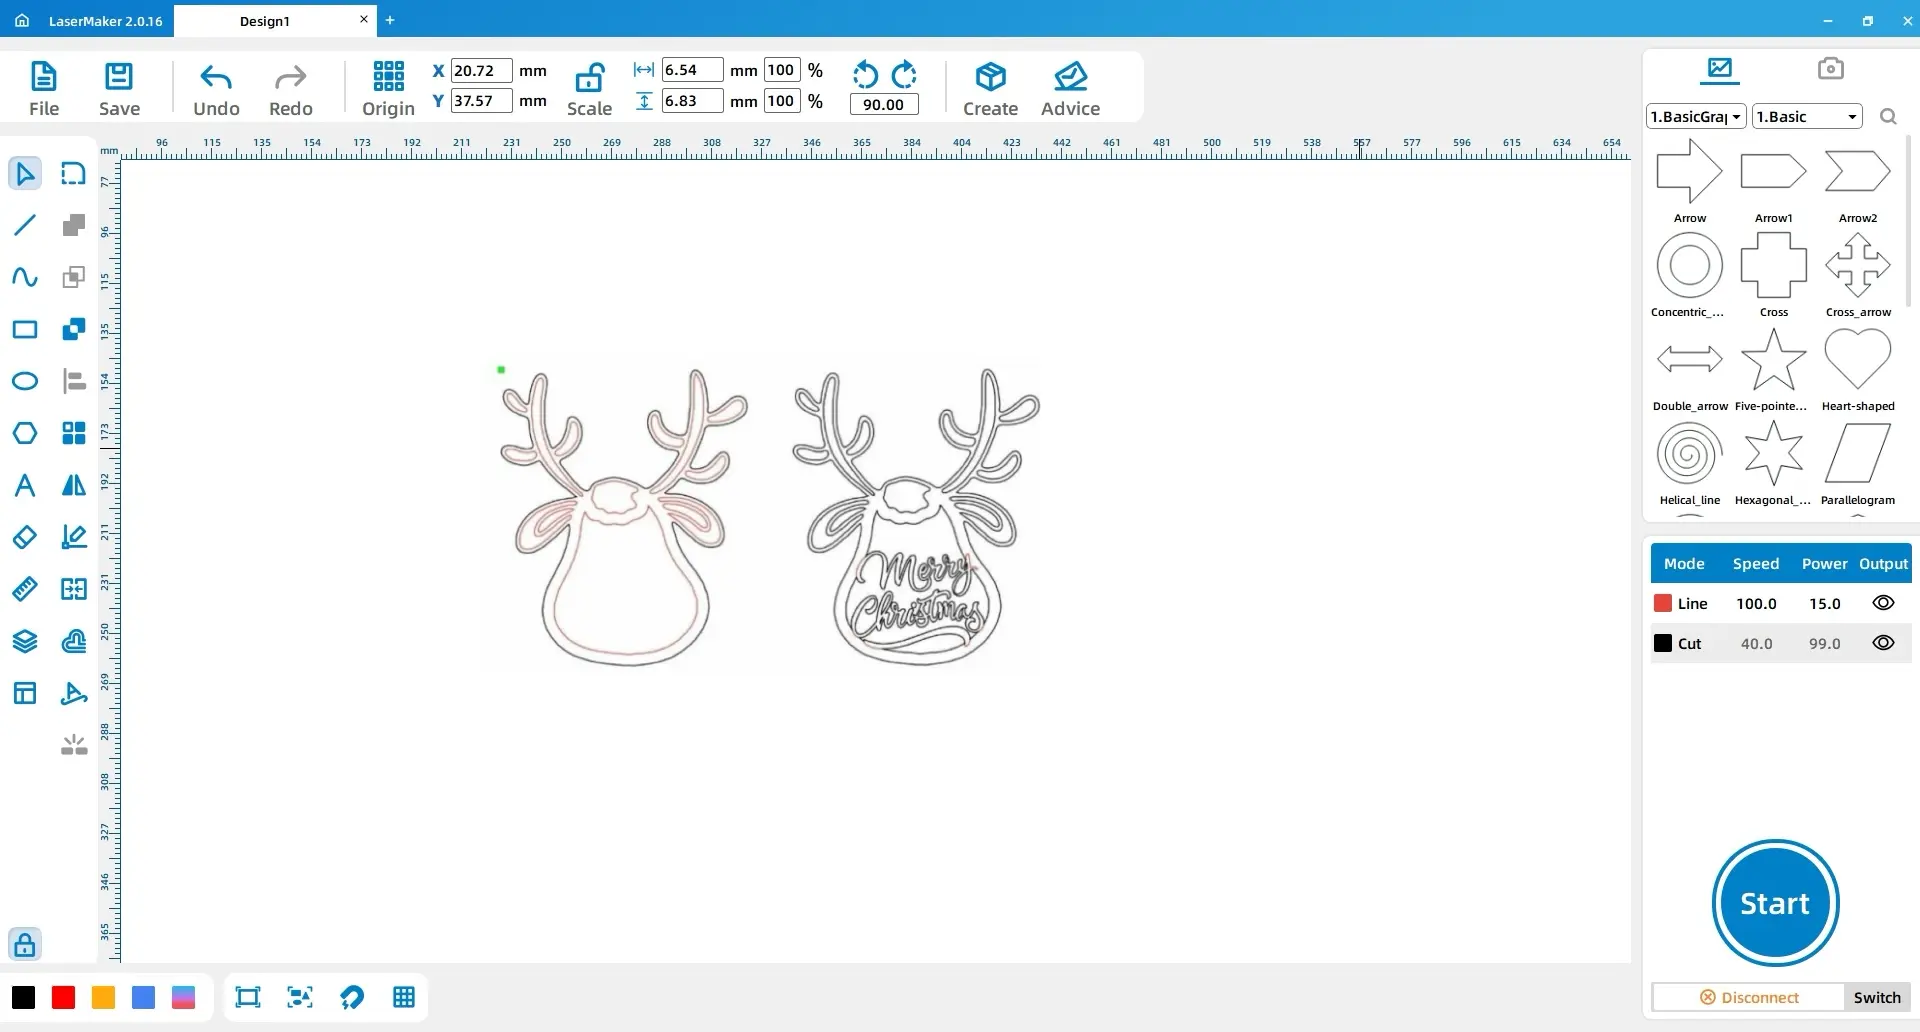
Select all the internal lines of the left reindeer and the lines where the calligraphy font intersects with the reindeer on the right. Change these lines to the red layer. Select all remaining elements and change them to the black layer.
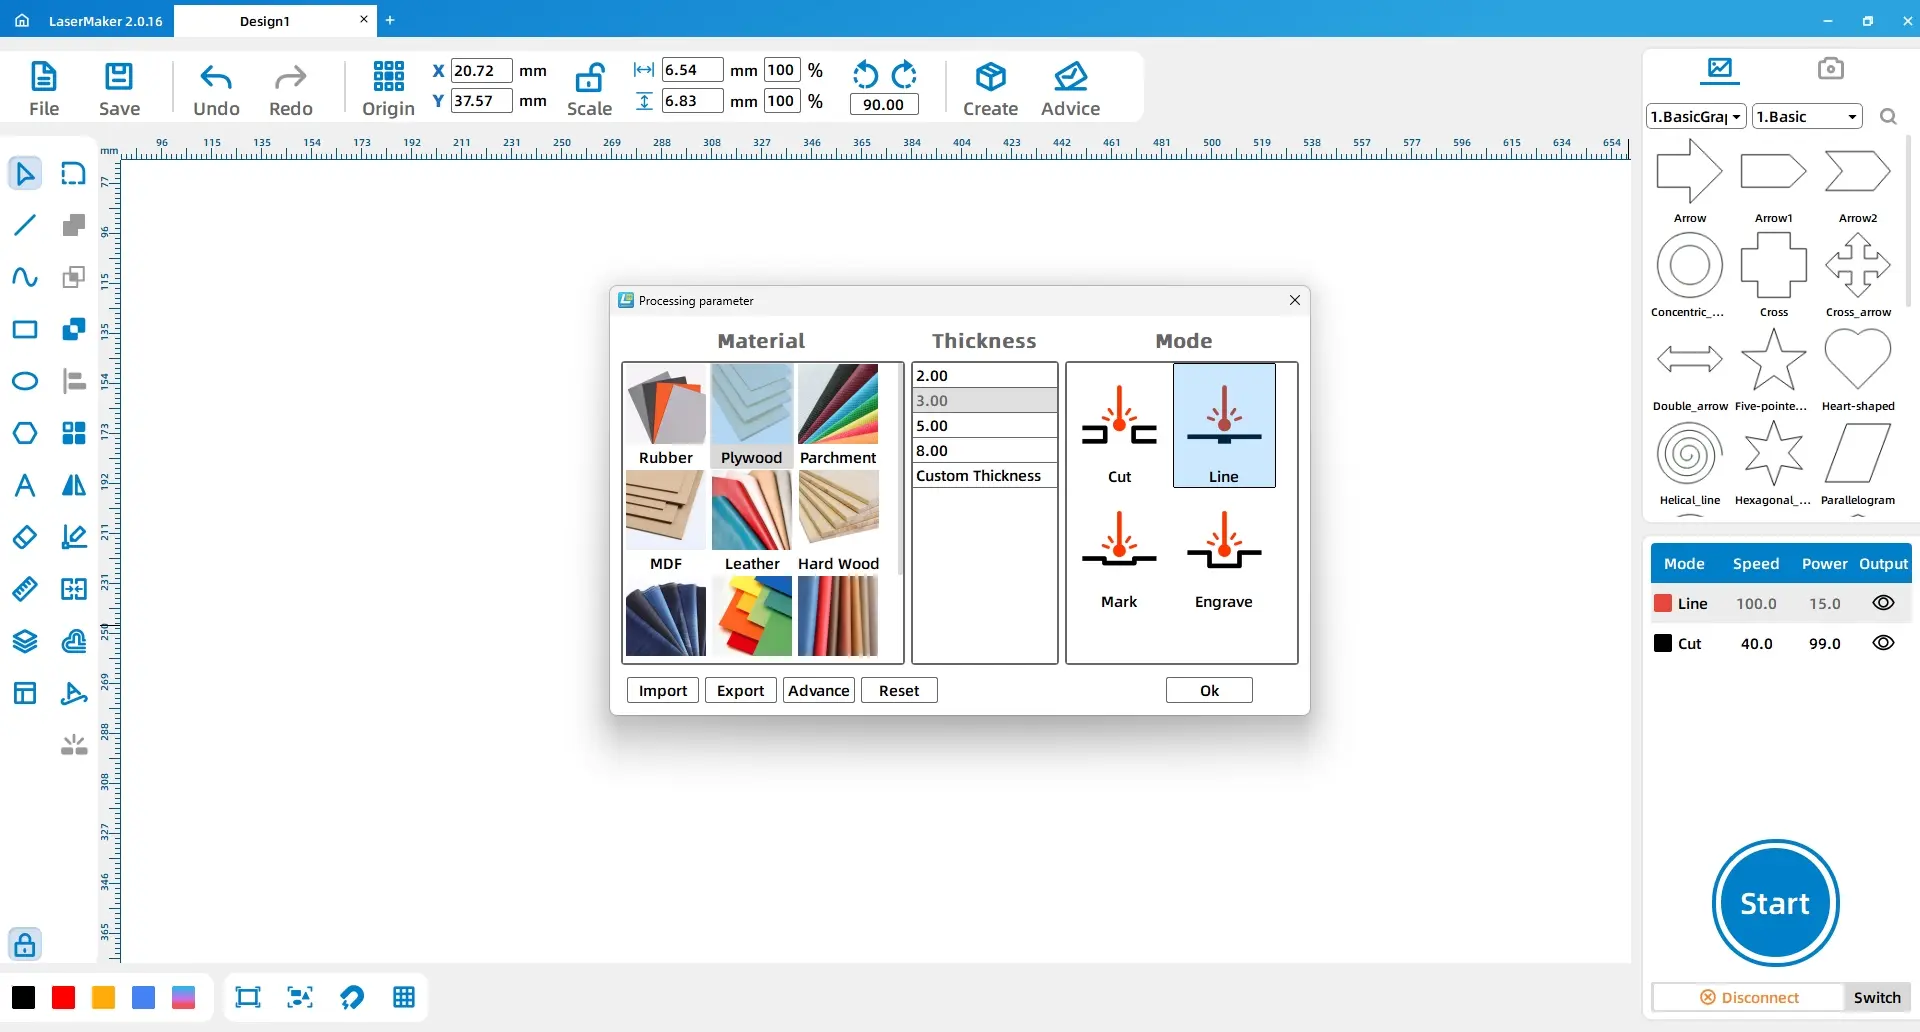
Double-click the red layer and set the material, thickness, and process to basswood board, 3 mm, outlining. Double-click the black layer and set the material, thickness, and process to basswood board, 3 mm, cutting.
| Layer | Material | Thickness | Process |
|---|---|---|---|
| Red layer | Basswood board | 3 mm | Outlining |
| Black layer | Basswood board | 3 mm | Cutting |
Safety reminder: Teachers should review material suitability, supervise cutting, and follow the school’s laser safety procedures and the machine’s operating guidance.
After laser processing, glue the two reindeer layers together. Place the reindeer with the calligraphy font on top and the plain reindeer layer underneath.
Use coloured pencils or classroom-approved colouring materials to decorate the upper reindeer in your favourite colours. Tie knots at both ends of the hemp rope and attach it to the reindeer’s antlers. Finally, add the Christmas decorative fabric to the antlers to complete the ornament.
This project encourages students to think beyond simple colouring. By adding a Santa hat, scarf, rope, or fabric details, students can make the reindeer ornament more expressive while still keeping the laser-cut structure clear.
After finishing the project, students can compare design choices: Which lines were best for cutting? Which lettering style was easiest to recognise? How did colour and accessories change the final visual effect?
Ask students to design a second ornament using the same workflow but a different theme. They might create a snowflake, bell, star, school mascot, winter animal, or personalised holiday word ornament. Encourage them to keep the structure strong enough for hanging and the design simple enough for clear laser cutting.
For schools and beginner STEAM labs, this ornament activity can be completed on a classroom laser cutter such as the Thunder Laser Bolt Series. Teachers should test the material and process settings before class production and supervise all laser cutting operations.
Talk To Our Experts Now!
Please leave your contact information so that we can serve you better.
NEED HELP FINDING THE RIGHT SOLUTION?
Talk to our team for machine recommendations, application advice, and support based on your needs.

 Stable & Consistent MachinesUnlimited ApplicationRobust After-sales SupportFactory Direct Supply