


Single Character Seal Laser Cutting Project for STEAM Classrooms
 2024-08-15
WHAT ARE YOU LOOKING FOR?
Search Across Products, Blog Posts, Support Content, And Resources.

Single Character Seal Laser Cutting Project for STEAM Classrooms
2024-08-15

In this STEAM maker project, students design and make a single character seal using LaserMaker and a laser cutting machine. The lesson connects cultural observation, digital drawing, text input, engraving layers, cutting layers, mirror processing, plywood cutting, handle assembly, and hands-on stamp testing.
This project helps students understand how traditional seal-making ideas can be explored with modern digital fabrication tools. Students design the seal face, add a character or short text, prepare the handle parts, laser process the design, and test the finished seal with ink, watercolor, or gouache.
| Item | Details |
|---|---|
| Project | Single Character Seal laser cutting project |
| Software | LaserMaker |
| Main Skills | Rectangle drawing, custom shape design, text input, layer setup, engraving and cutting parameters, horizontal flip, stamp handle design, laser cutting, gluing, and stamp testing |
| Suggested Materials and Parts | 5 mm plywood, paper, drawing pen, white latex glue, stamp ink or classroom-safe pigments such as watercolor or gouache |
| Classroom Fit | Laser cutting and maker projects, cultural design activities, beginner LaserMaker lessons, personalized stamp making, classroom art projects, and digital fabrication practice |
Students will learn about the purpose and development of seals, sketch a seal idea, create the seal face and handle in LaserMaker, set engraving and cutting layers, mirror the design, laser cut the stamp parts, assemble the seal, and test the finished impression.
For teachers: Use this project to connect cultural history, typography, digital design, laser engraving, and hands-on making.
For students: Use the activity to design a personal seal while learning how engraving and cutting layers work in LaserMaker.
For makerspaces: Use it as a beginner-friendly stamp-making project that introduces text, shapes, mirroring, plywood cutting, and assembly.
Describe how seals were made in the past and how machine-based production changed the process.
Explain common uses of seals in cultural, artistic, educational, and organizational settings.
Use LaserMaker to draw a seal outline, input text, set layers, and prepare the design for engraving and cutting.
Understand why a stamp design needs to be horizontally flipped before processing.
Assemble the laser-cut seal face and handle, then test the finished seal impression.
Design thinking: Choose a seal shape, character, and layout that match the purpose of the finished stamp.
Computational thinking: Use dimensions, layers, text height, fill settings, mirroring, and processing parameters to create a repeatable digital file.
Engineering thinking: Consider material thickness, cutting depth, handle size, glue area, text readability, and stamp impression quality.
Students should operate the laser cutter only under teacher or lab supervisor guidance. Before processing, check the focal length, material selection, engraving layer, cutting layer, and design orientation. When testing the seal, use classroom-approved ink or pigments and keep the work area clean.
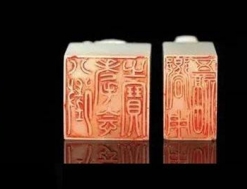
Seals have a long history and are closely connected with writing, art, identity, and certification. The source lesson explains that seals first appeared in early Chinese history and were widely used by the Warring States Period. At first, seals were used as certificates in commercial exchange. Later, they became important symbols of authority, identity, and proof.
Students can also observe seals in everyday examples. A small seal may appear on currency, paintings, calligraphy works, teaching stamps, company documents, and personal items. Modern seals may be made from different materials and by different methods, including machine carving and laser processing.

Teachers can begin the lesson with short discussion questions. These prompts help students connect the hands-on project with history, design, and modern production.
How were seals made in ancient times?
How are many modern seals made?
What purpose did ancient seals serve?
What does a modern seal do?
What are the differences between modern seals and ancient seals?
Classroom Discussion: Students can compare hand carving and machine carving, then discuss how digital tools can make personalized stamp design faster and easier while still requiring careful design choices.
Before opening the software, students should sketch the seal shape and size on paper. They should also decide what character, name, or short word they want to engrave on the seal.

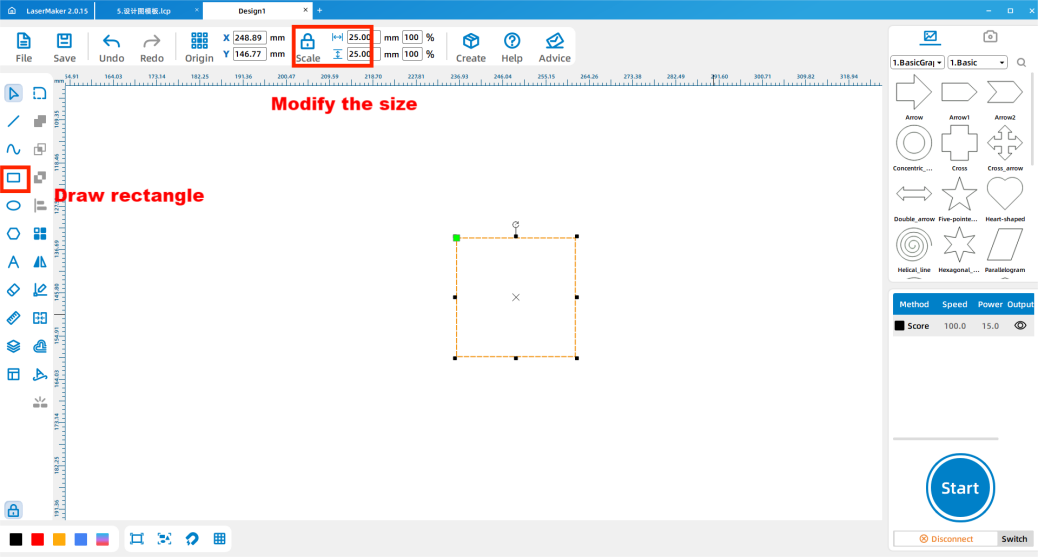
Open LaserMaker. Use a drawing tool such as Draw Rectangle to create the seal face. In the source workflow, the seal starts as a 25 mm by 25 mm square. Students can also choose a rectangle, circle, oval, or another simple shape if it matches the project goal.
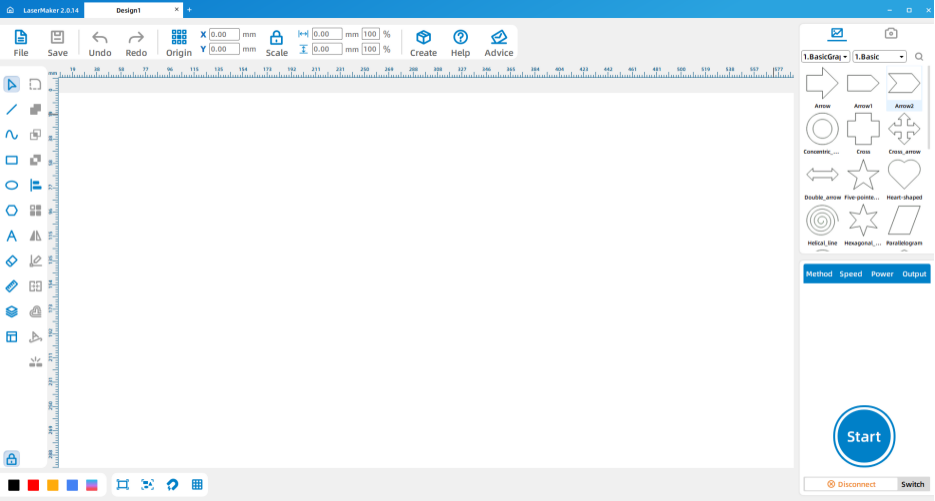
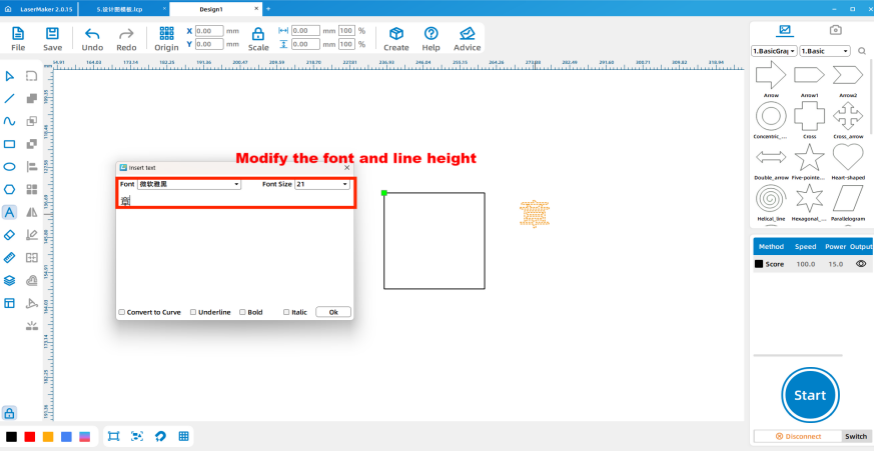
Use the Text Input tool on the left menu bar. Double-click the LaserMaker workspace, type the character or text to be engraved, and adjust the font and text height. The text should fit clearly inside the seal shape.
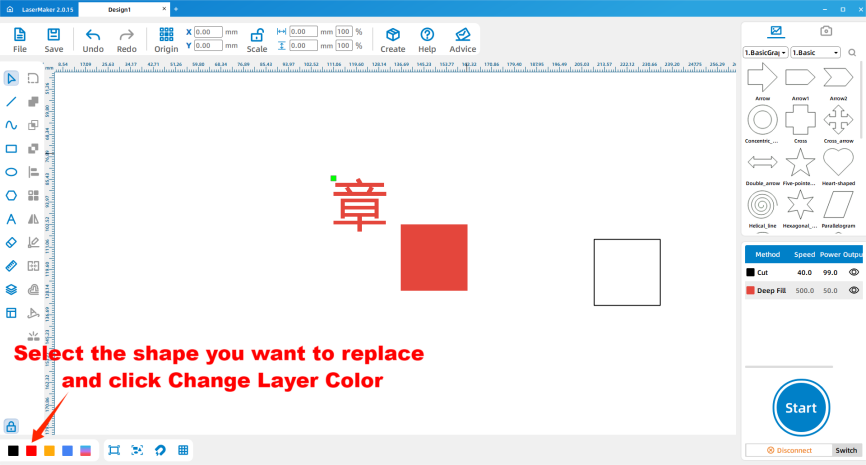
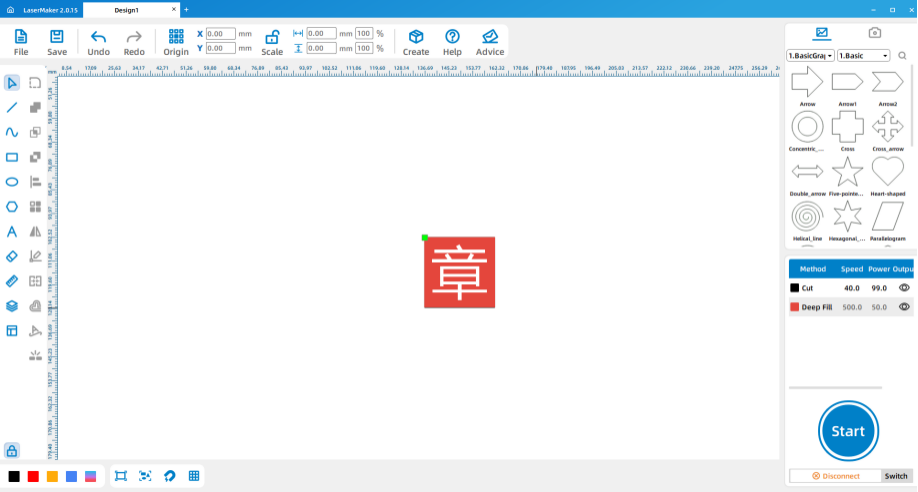
Copy and paste the first rectangle, then set the copied shape and the text to the engraving layer. In the source workflow, the filled graphic is used for engraving, while the unfilled outline is used for cutting.
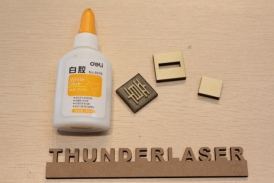
Copy and paste another 25 mm by 25 mm square. Draw a matching rectangle in the center of the square to create the handle-related part. Then copy and paste the middle square and set the height to match the width. The source example uses a 14.85 mm by 14.85 mm square.
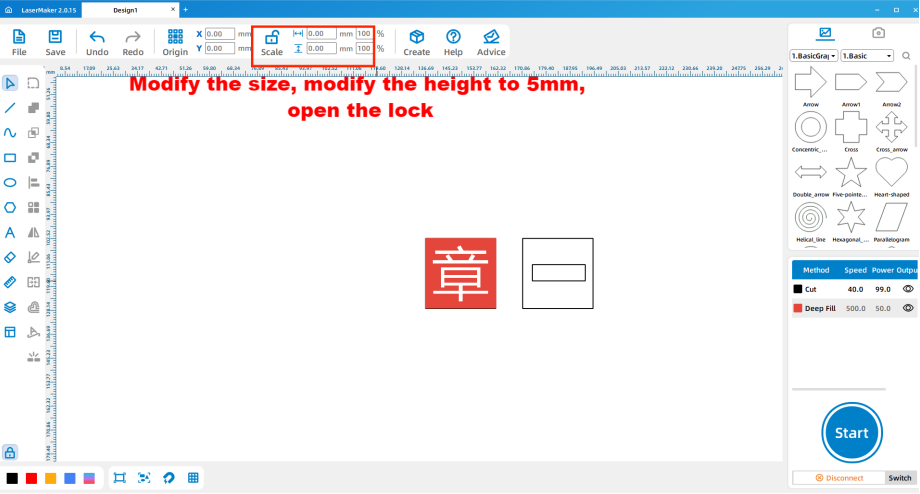

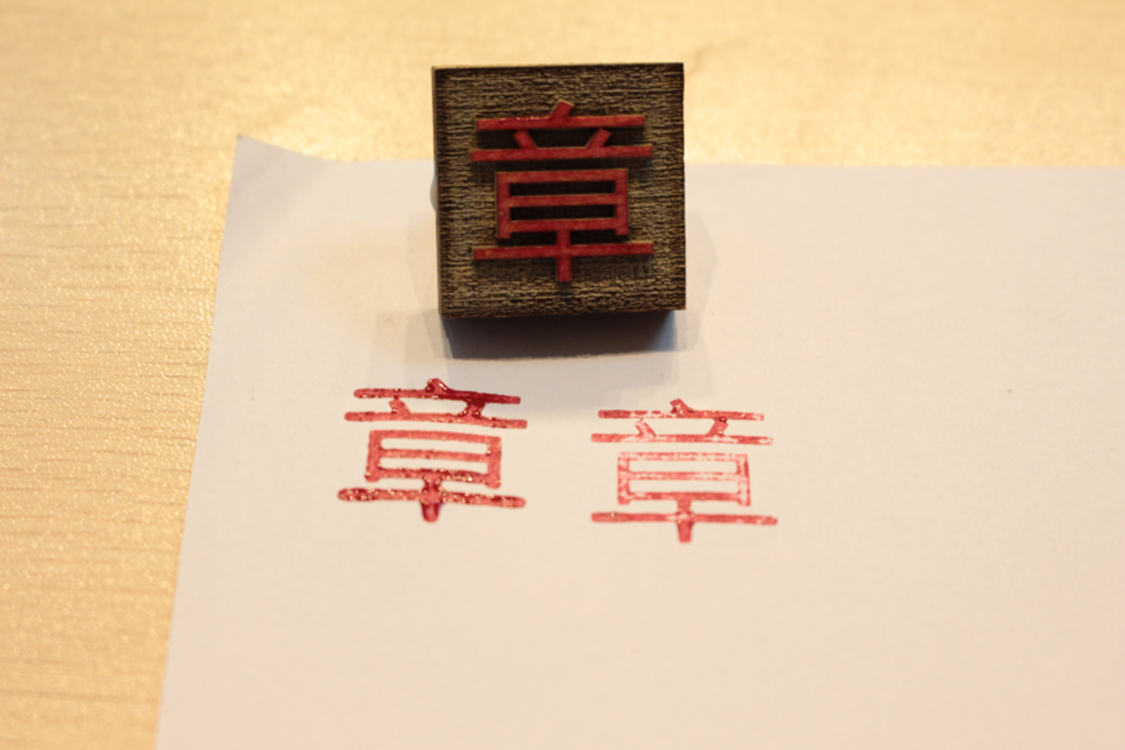
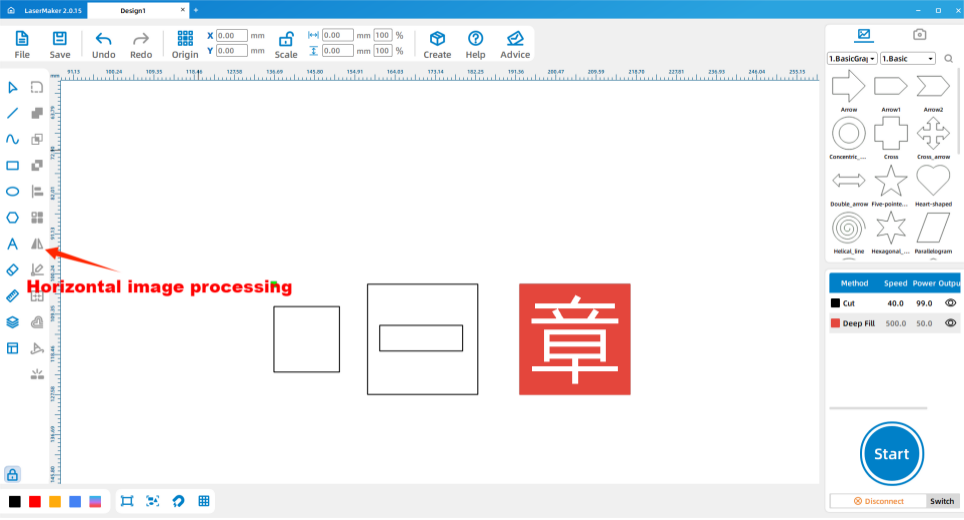
After arranging all seal graphics neatly, use Rotation > Horizontal Flip to mirror the design. This step is important because a stamp must print correctly after it is pressed onto paper.
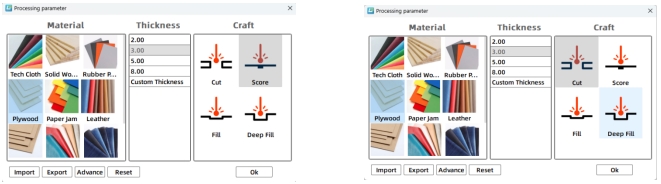
Double-click the black layer in the layer parameter area to set the cutting parameters, and double-click the red layer to set the engraving parameters. The source workflow uses 5 mm plywood, so the cutting parameter should match the 5 mm material setup.
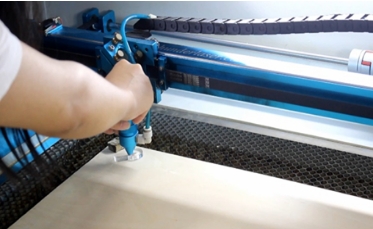
Send the completed design to the laser cutting machine and process it according to the machine operation workflow learned in previous lessons. Before starting, adjust the focal length carefully to avoid incomplete cutting.
After cutting, remove the stamp parts from the machine bed. Glue the stamp face and handle together with white latex glue, then allow the glue to set before using the seal.
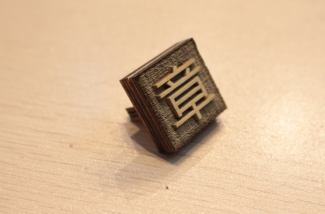
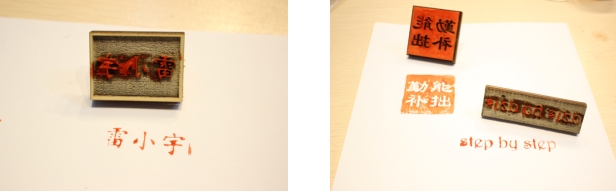
Use the finished seal to make a stamp impression. Students can use regular seal ink, or classroom-approved alternatives such as watercolor or gouache pigments. After testing, students should observe whether the character is readable and whether the engraving depth is suitable.
Planning: Ask students to sketch the seal shape and decide the character or short text before using the software.
Software design: Guide students through drawing the seal shape, adding text, setting engraving and cutting layers, and using horizontal flip.
Machine processing: Process student files in a safe classroom order and confirm the focal length before cutting.
Assembly and testing: Let students glue the handle, test the seal, and compare the printed result with the digital design.
Remind students that the text should not be larger than the seal face.
Explain the difference between filled engraving graphics and cutting outlines before processing.
Use a sample seal to show why stamps need to be mirrored before laser processing.
Prepare spare plywood pieces and extra handle parts when class time is limited.
Ask students to test their seal on scrap paper first, then adjust their next version based on the result.
What do name seals, leisure seals, and collection seals usually express?
Why does a seal design need to be mirrored before processing?
How could you improve the readability or appearance of your seal impression?
Students can evaluate their own work and give peer feedback based on creativity, structural firmness, appearance, and learning attitude.
| Evaluation Item | Self-Evaluation | Peer Evaluation |
|---|---|---|
| Creativity, 30 points | ||
| Firmness, 30 points | ||
| Appearance, 20 points | ||
| Learning Attitude, 20 points | ||
| Total, 100 points |
At the end of the lesson, students can display their seals, demonstrate the stamped impression, and explain why they chose their shape, character, font, and layout. Teachers can also guide students to compare name seals, leisure seals, and collection seals as different design directions.
After finishing the single character seal, students can design a name seal, a short phrase seal, or a decorative stamp for a classroom project. They can also test different shapes, text sizes, font choices, engraving depths, and pigment types to improve the final stamped result.
For a broader design challenge, students can create a small series of seals for notebooks, artwork, classroom labels, handmade packaging, or student portfolios.
This project is suitable for classroom laser cutters that support engraving and cutting of plywood for small maker projects. For schools and beginner STEAM labs, projects like single character seals, name stamps, classroom labels, and beginner LaserMaker activities can be completed with a classroom laser cutter such as the Thunder Laser Bolt Series.
Teachers can choose the machine and material setup based on classroom space, student supervision needs, material thickness, project size, and ventilation setup. Students should always test settings, check focus, and follow the school’s laser safety rules before final cutting.
Talk To Our Experts Now!
Please leave your contact information so that we can serve you better.
NEED HELP FINDING THE RIGHT SOLUTION?
Talk to our team for machine recommendations, application advice, and support based on your needs.

 Stable & Consistent MachinesUnlimited ApplicationRobust After-sales SupportFactory Direct Supply


