Design and Build a Three-Dimensional Tic Tac Toe Game
 2024-08-26
WHAT ARE YOU LOOKING FOR?
Search Across Products, Blog Posts, Support Content, And Resources.

Design and Build a Three-Dimensional Tic Tac Toe Game
2024-08-26

Tic Tac Toe, also known as Three in a Row, is a classic two-player strategy game. The board uses a 3 × 3 grid, and each player places pieces on the board with the goal of being the first to connect three pieces horizontally, vertically, or diagonally.
In this lesson, students will design and make a three-dimensional version of Tic Tac Toe. By moving beyond the traditional flat board, they can explore a new way to play a familiar game while practising digital design, laser cutting, acrylic assembly, and hands-on problem solving.
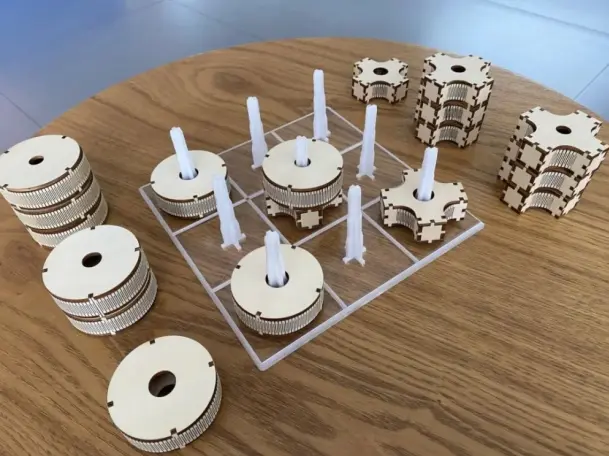
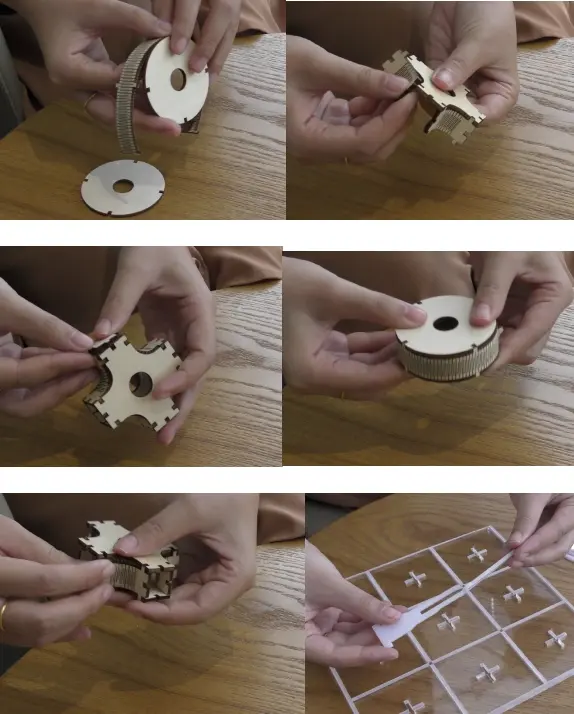
The Three-Dimensional Tic Tac Toe structure includes three main components: the three-dimensional playing pieces, the opaque white acrylic support columns, and the acrylic base. Students will design each part, assign laser processing layers, cut or engrave the materials, and assemble the final tabletop game.
This classroom laser cutting project uses basswood for the game pieces and acrylic for the support columns and board base.
| Number | Material | Quantity |
|---|---|---|
| 1 | 3 mm basswood board | 1 |
| 2 | 3 mm milky white acrylic | 1 |
| 3 | 5 mm transparent acrylic | 1 |
Teacher note: Before laser cutting or engraving, teachers should confirm material suitability, check the design file, and follow the school’s laser safety procedures and machine operating guidance.
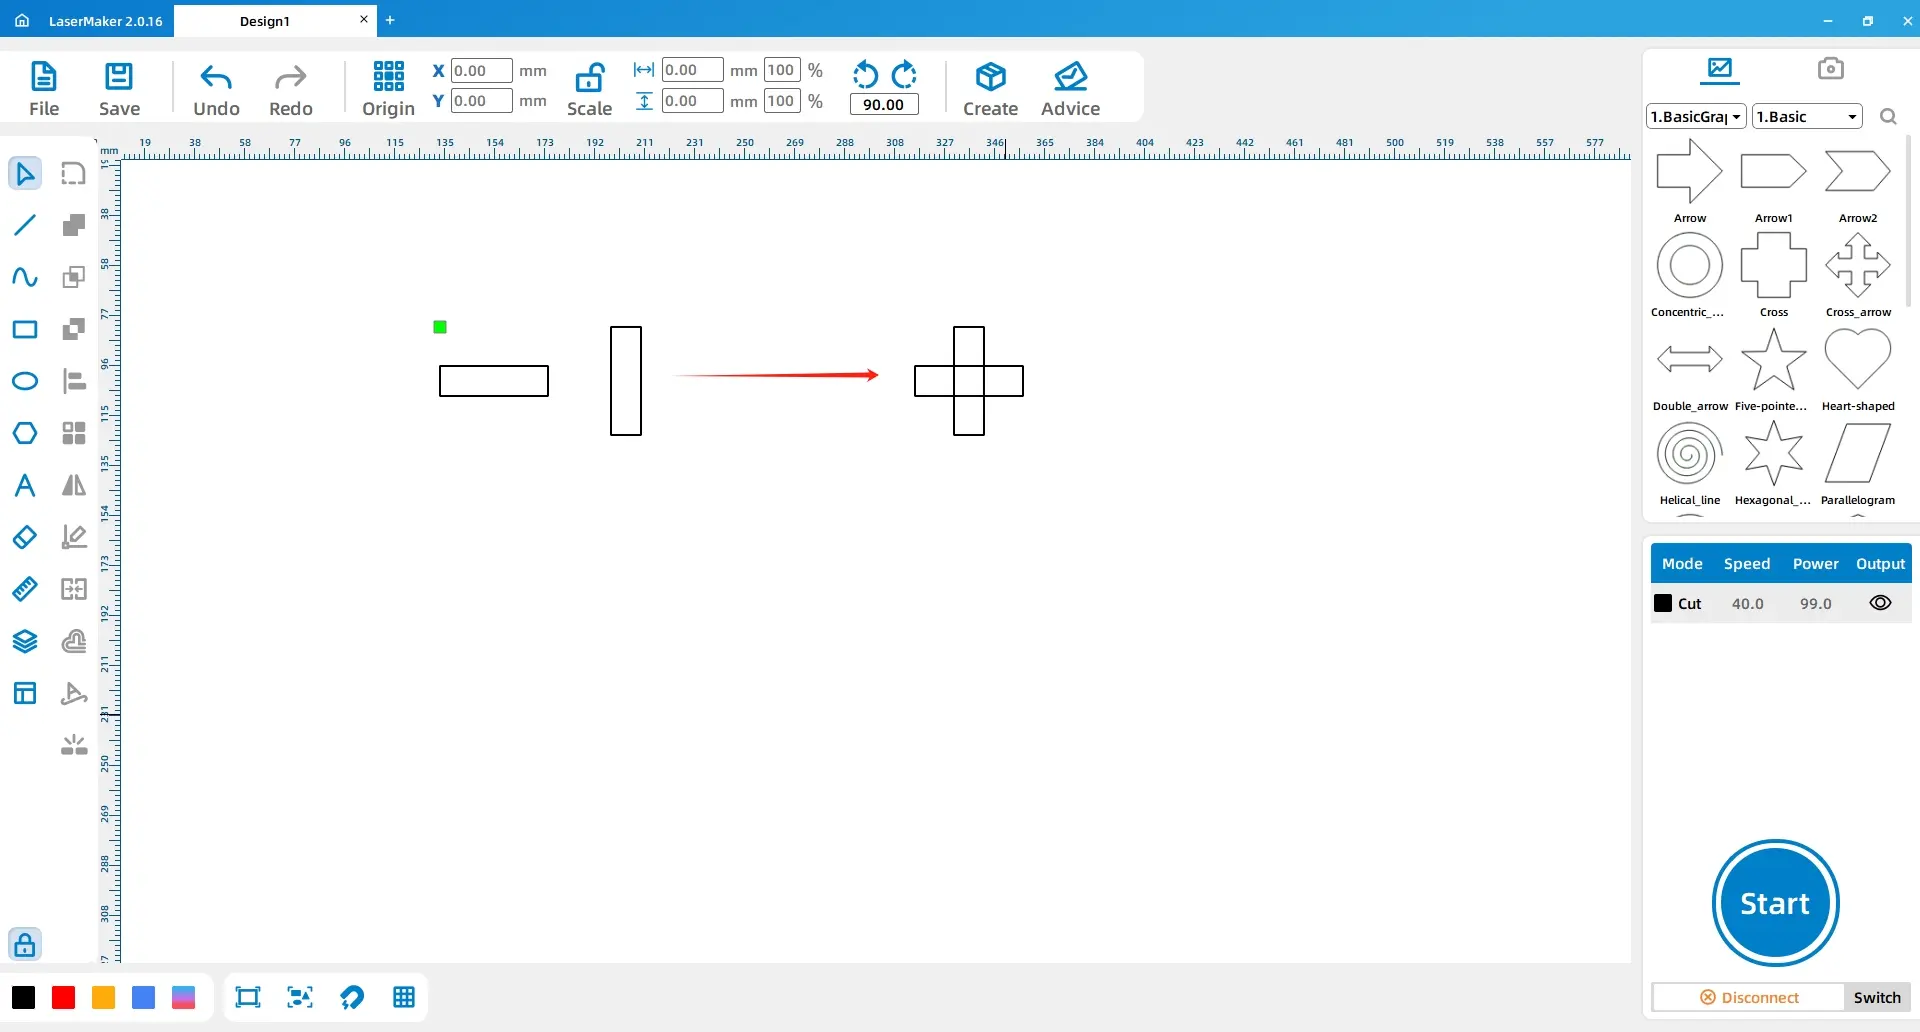
Select the Rectangle tool, draw a rectangle, and set the length and width to 60 mm and 20 mm. Copy and paste the rectangle, rotate the copy by 90°, select both rectangles, and use Center Align to create a cross shape.
Select the Ellipse tool, draw four perfect circles, and set each one to 20 mm × 20 mm. Place them at the four corners of the cross. Use the Eraser tool with a 1 mm size to remove the overlapping areas between the circles and the cross.
Hold Ctrl, select the cross-shaped line segments and the four circular arcs in the middle of the pattern, and delete them. Then select the pattern, use Combine Curves, set the centre value to 1 mm, and confirm.
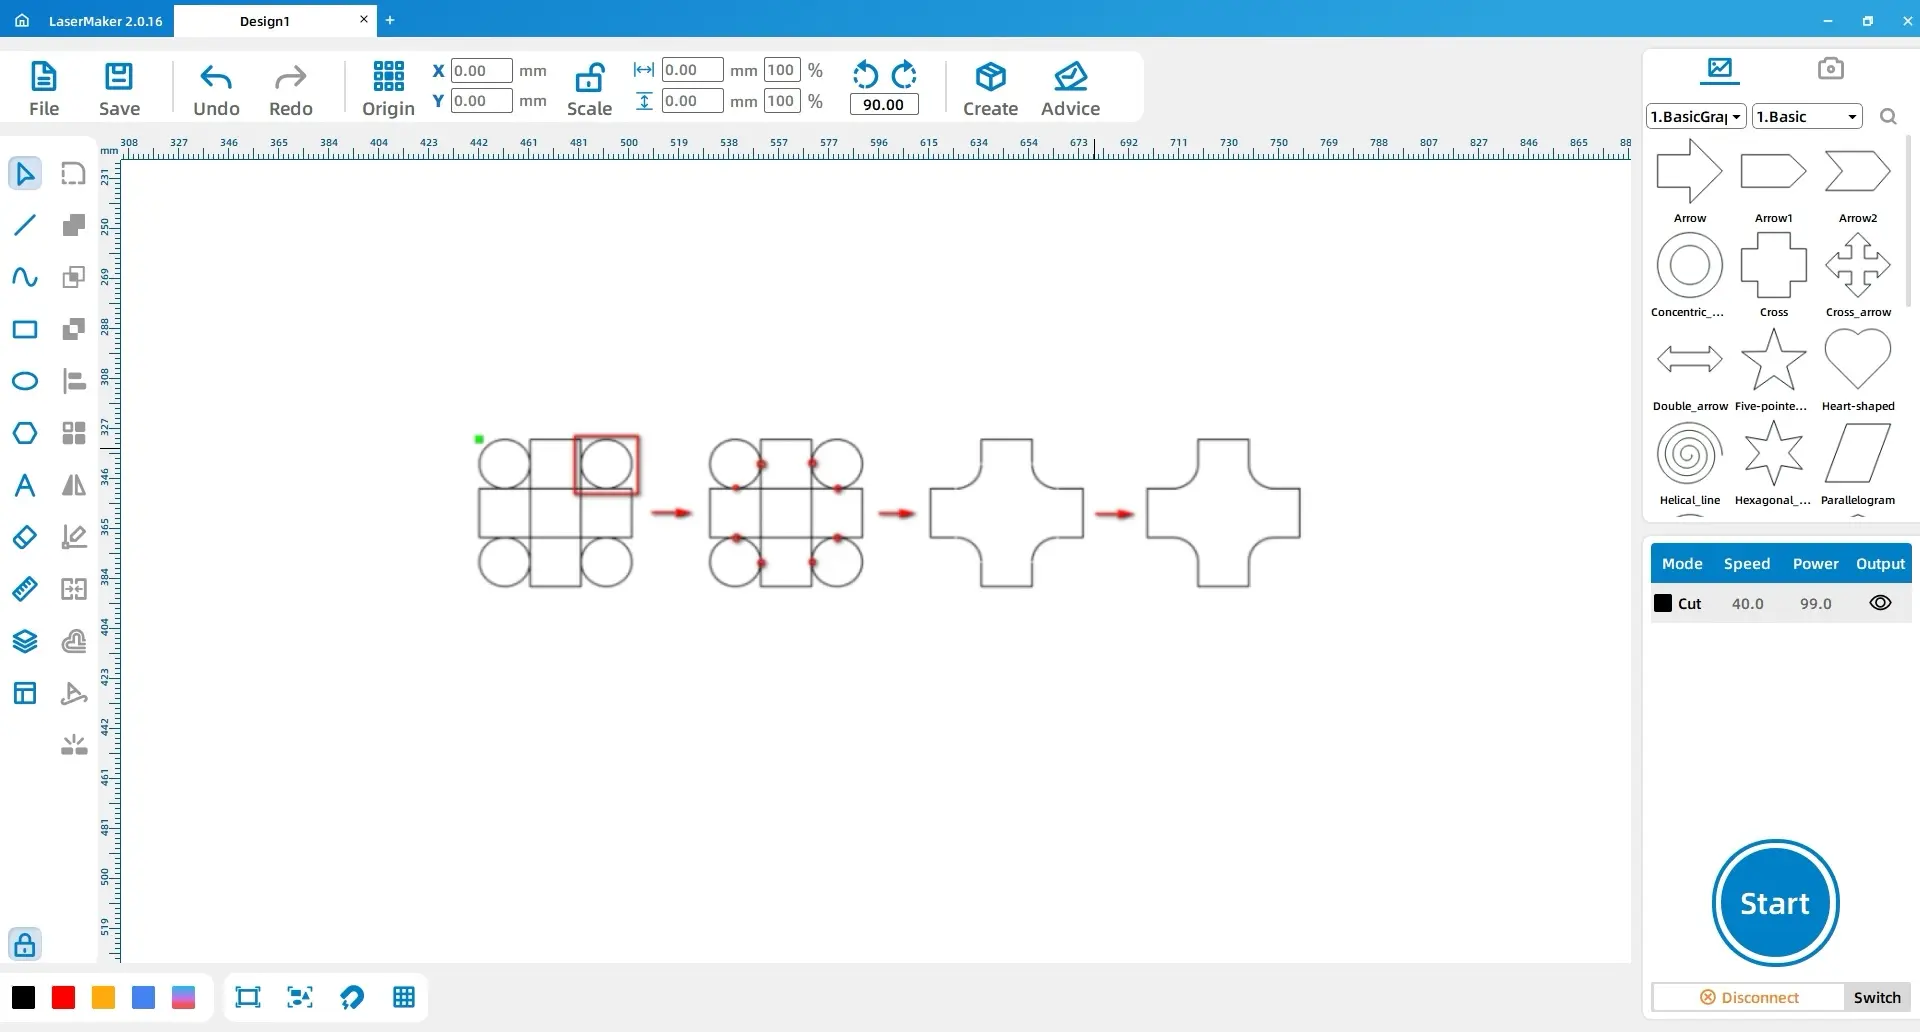
Draw two rectangles with dimensions of 15 mm × 9.4 mm and 9.4 mm × 15 mm, and place them along the edges of the cross. Draw three small rectangles with dimensions of 2.6 mm × 3 mm, then align them horizontally and vertically with the two rectangles and the cross.
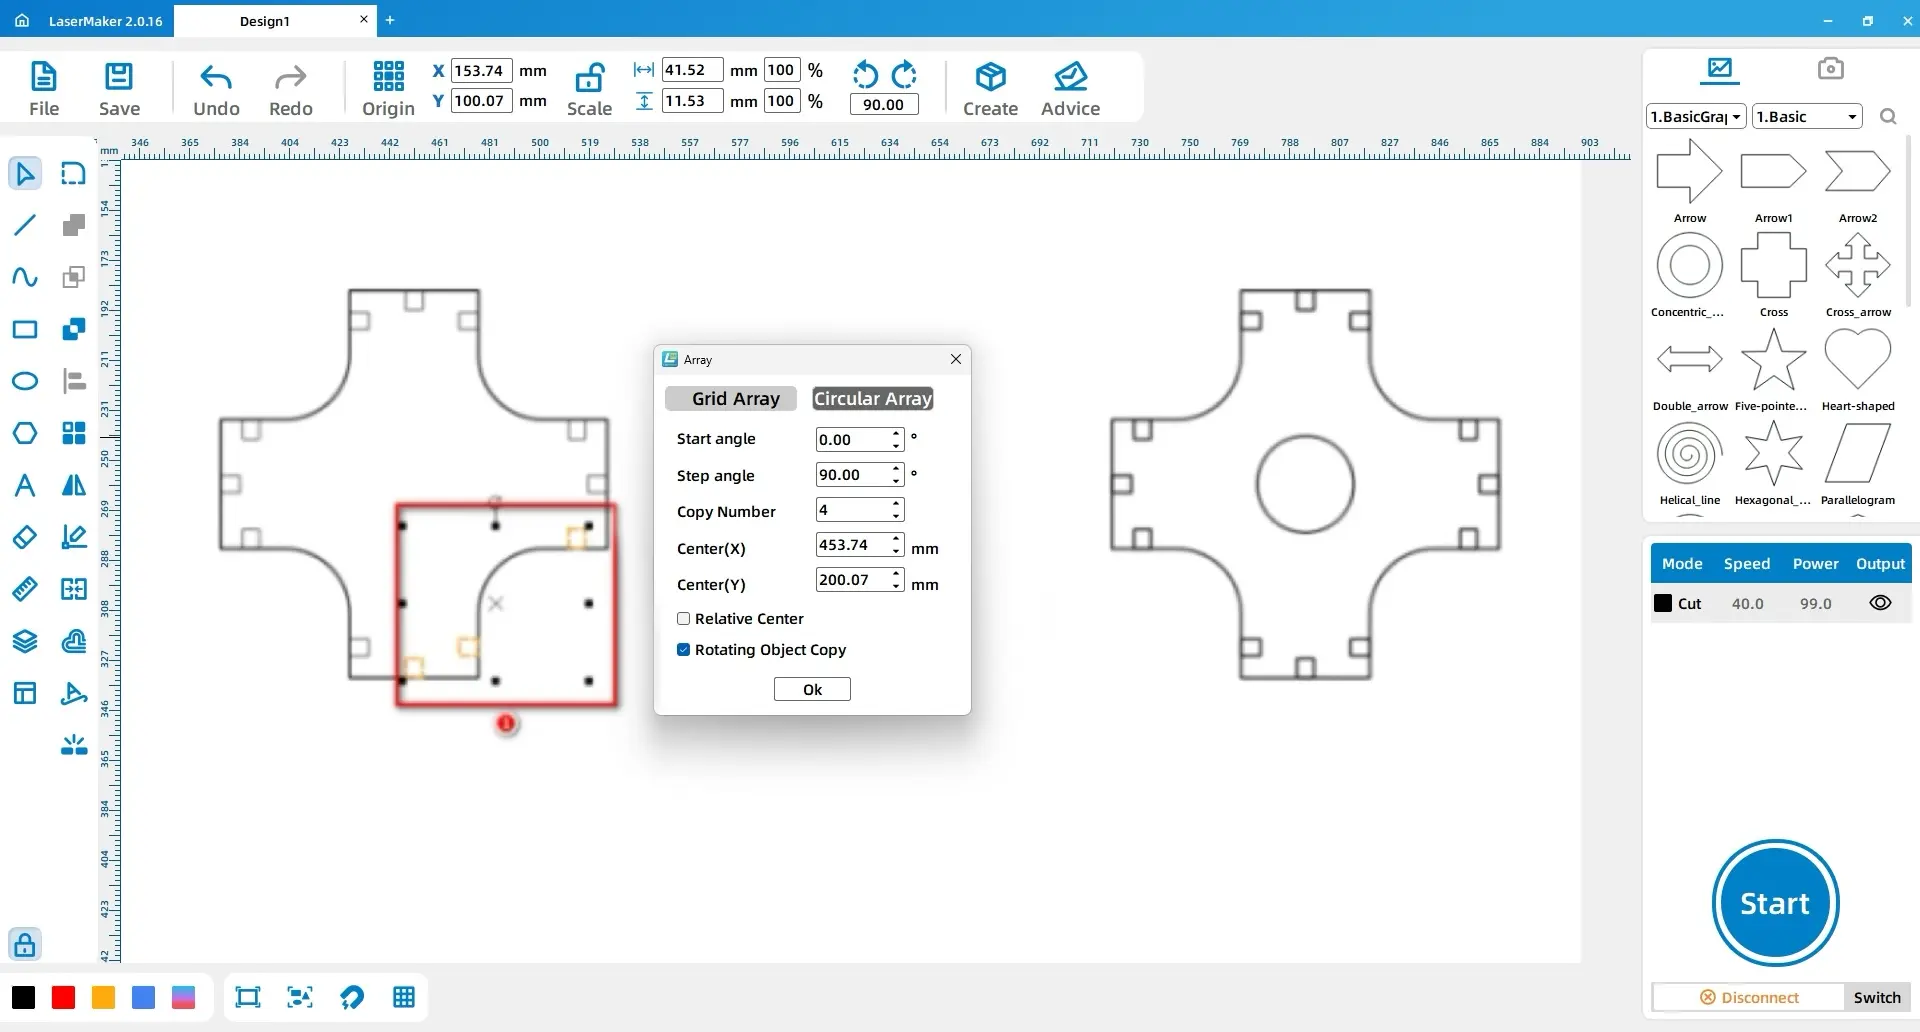
Select the shapes shown in the reference area and use Circular Array. Set the start angle to 0°, the step angle to 90°, and the replication count to 4. Use the reference centre settings shown in the software, then draw a 15 mm × 15 mm circle and center-align it with the cross pattern.
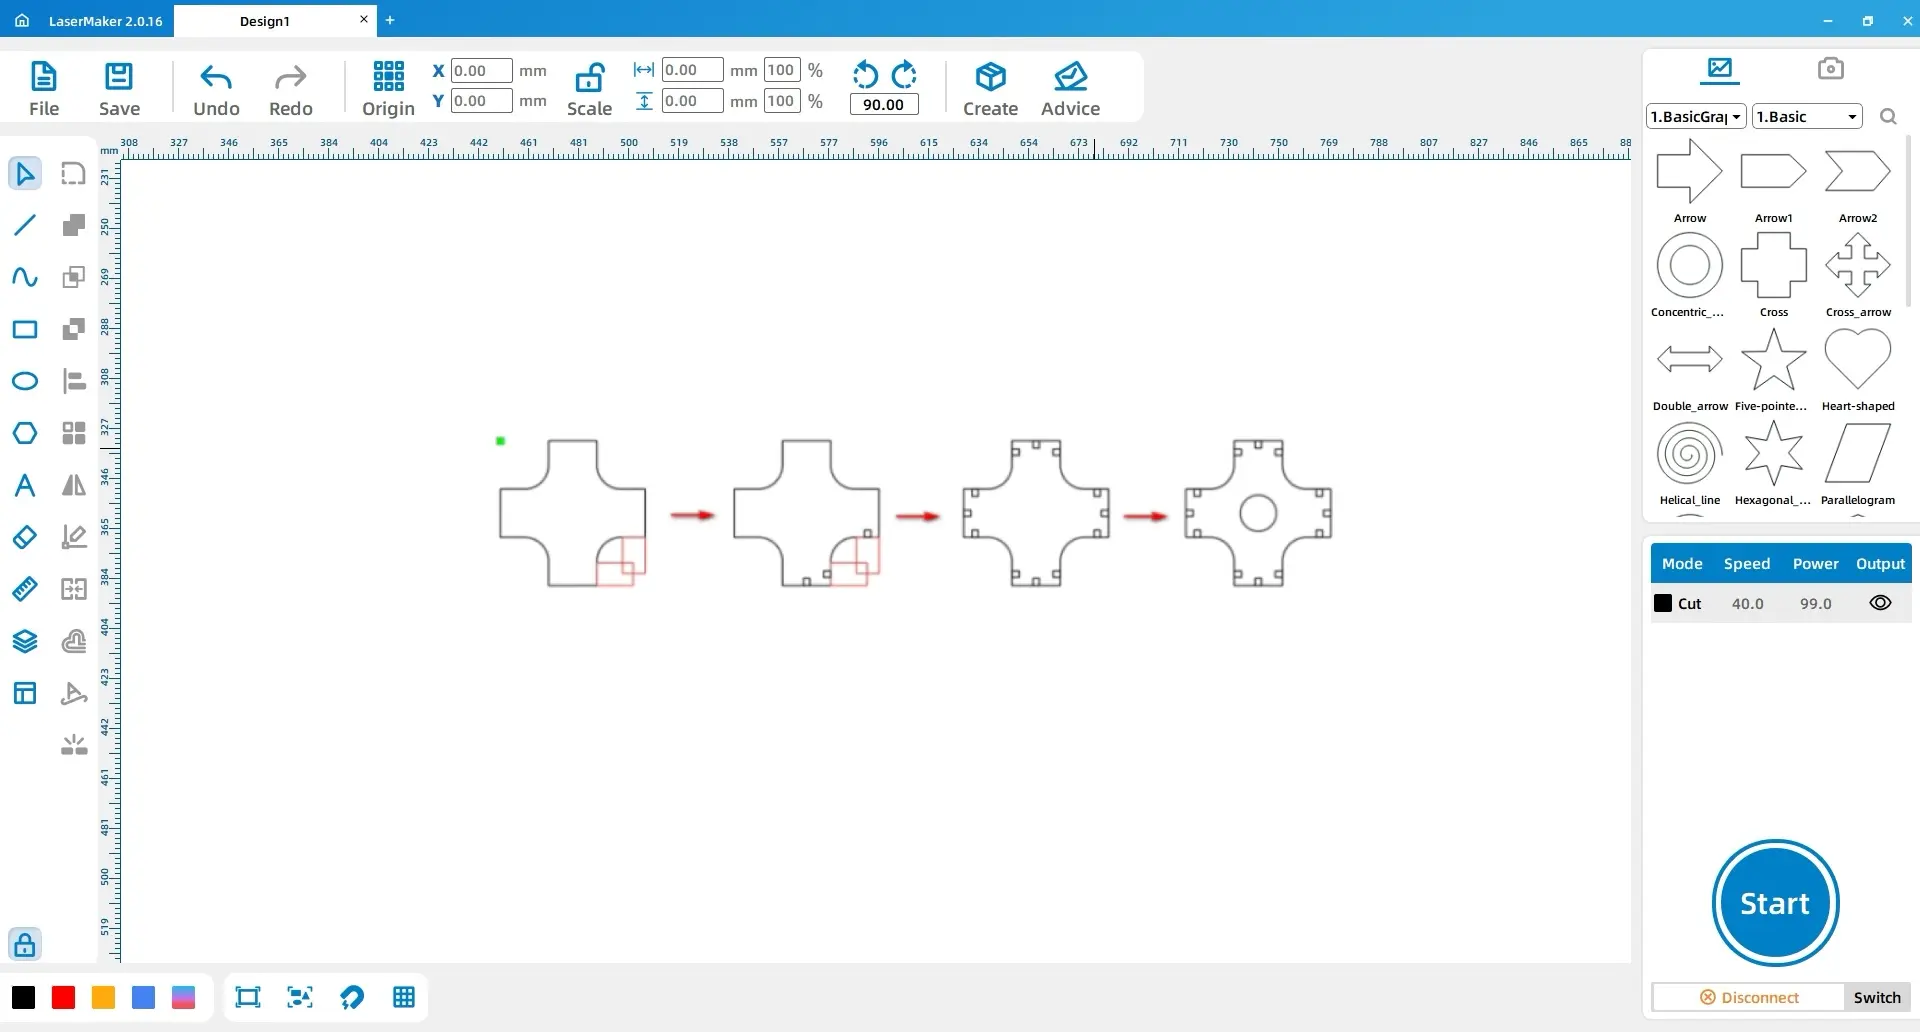
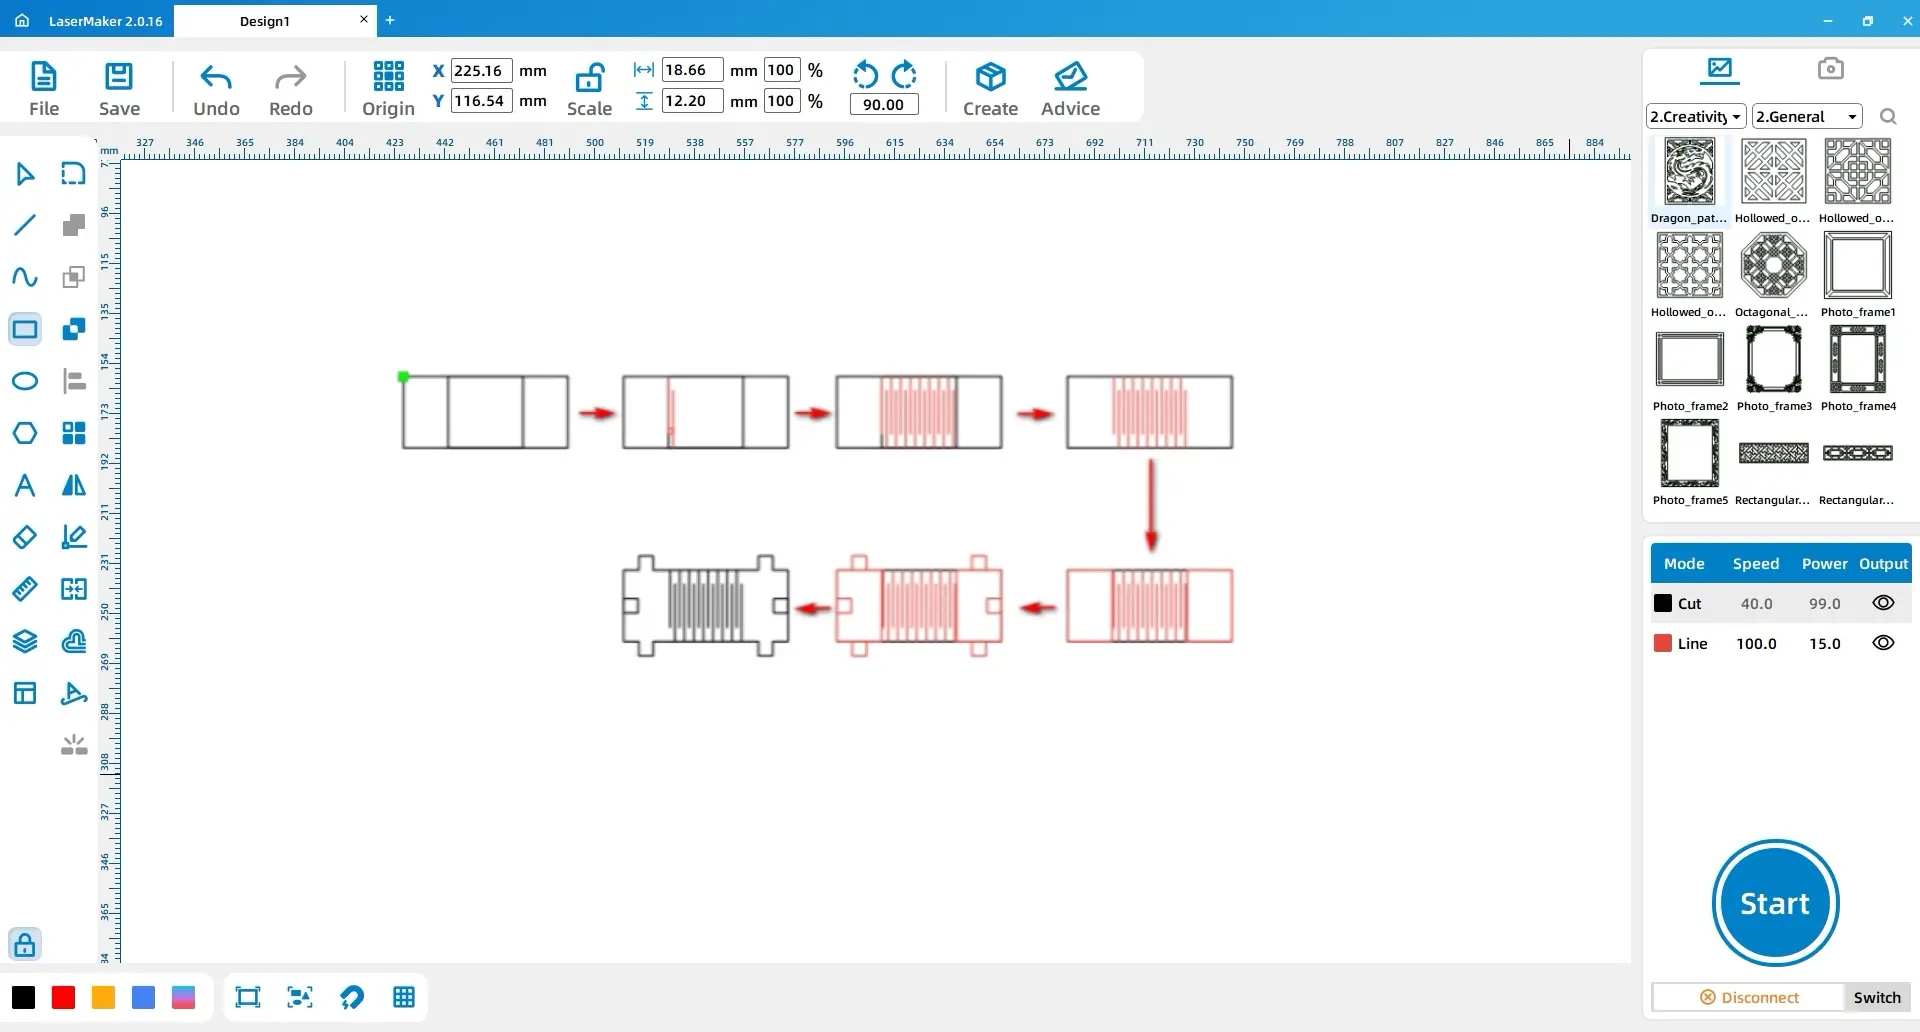
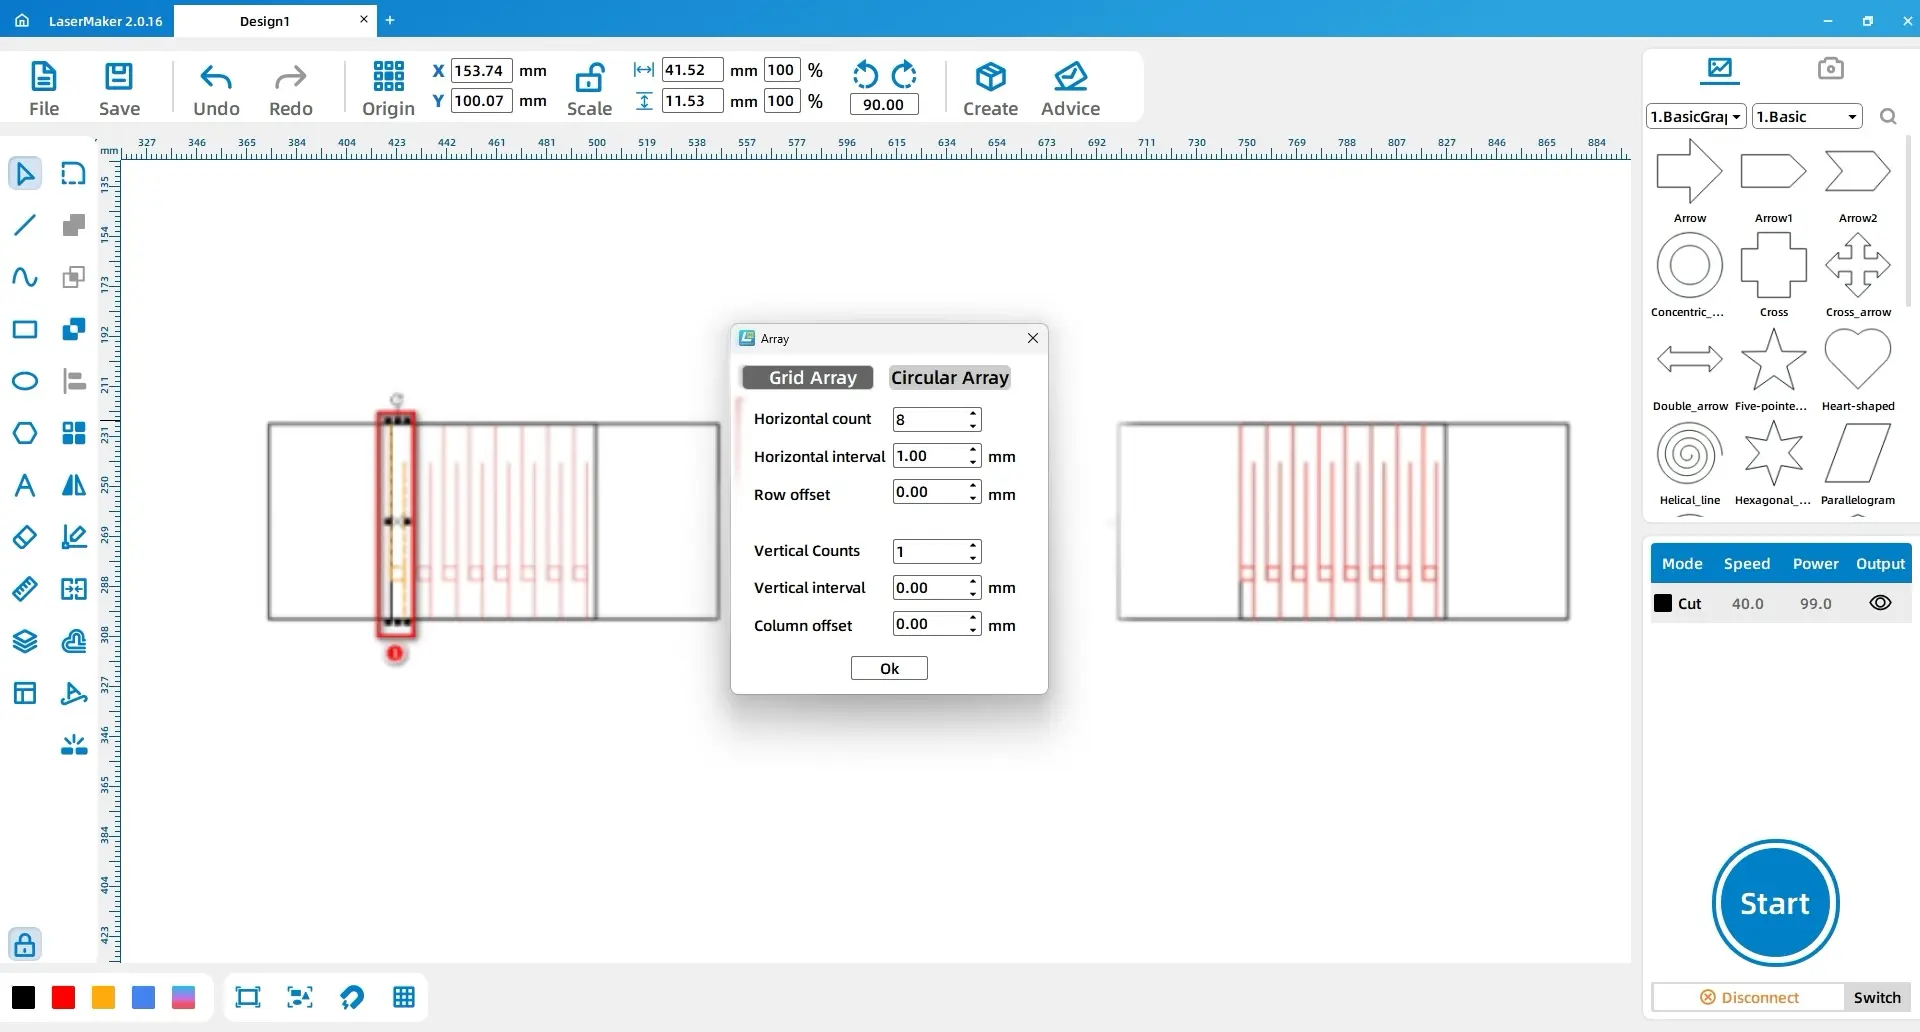
Draw two rectangles with dimensions of 34.5 mm × 15 mm and 15.7 mm × 15 mm, then center-align them. Use the Line tool while holding Ctrl to draw a 12 mm line. Draw a 1 mm × 1 mm rectangle to help with alignment, duplicate the line, align it below the rectangle, and delete the temporary rectangle.
Select the two line segments, open Array, set the horizontal count and horizontal spacing to 8 and 1, and confirm. Group the arrayed pattern, center-align it with the middle rectangle, and delete the middle rectangle after alignment.
Draw two rectangles with dimensions of 9.4 mm × 15 mm and align them to the left and right of the middle rectangle. Add six 3 mm × 3 mm rectangles, align them horizontally and vertically, then delete the two temporary rectangles. Select the four rectangles above and below together with the middle rectangle, apply Union, and set the result to the black layer.
Draw one rectangle with dimensions of 14 mm × 15 mm and four small rectangles with dimensions of 3 mm × 3 mm. Place the four small rectangles on the four sides of the middle rectangle, align them horizontally and vertically, select all shapes, and apply Union.
Draw two circles with dimensions of 60 mm × 60 mm and 15 mm × 15 mm, then center-align them. Draw four small rectangles with dimensions of 2.6 mm × 3 mm and align them as shown. Next, draw a rectangle with dimensions of 182.4 mm × 15 mm.
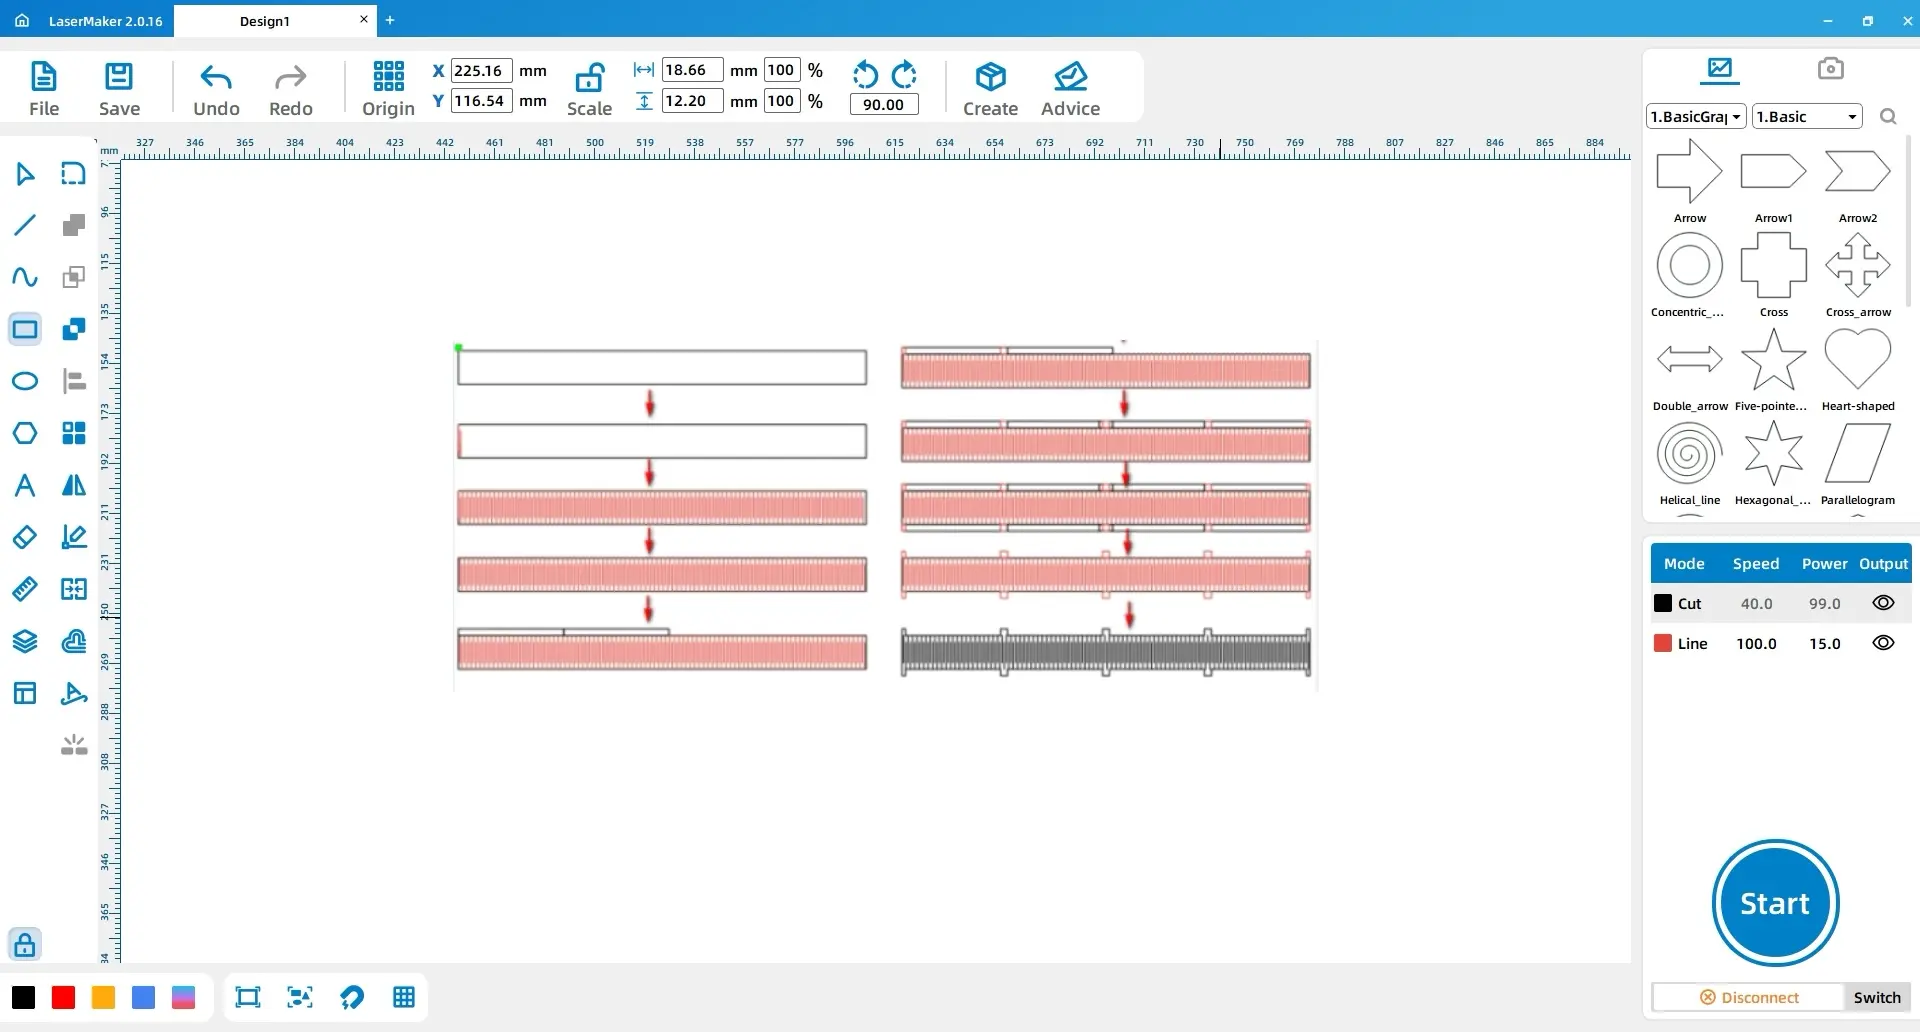
Draw a 12 mm line, then draw a 3 mm × 3 mm square and attach it to the line. Duplicate the line, place the duplicate to the right and below the small square, and delete the temporary square. Select the two lines, open Array, set the horizontal count and horizontal spacing to 91 and 1, and confirm. Group the arrayed lines and center-align them with the rectangle.
Draw two 47.1 mm × 3 mm rectangles and place them above the large rectangle. Add two smaller rectangles with dimensions of 1.5 mm × 3 mm and 3 mm × 3 mm, aligning them to the left and right of the first rectangle. Duplicate the upper pattern, mirror it horizontally, and align it on the other side. Add a 3 mm × 3 mm square at the centre, copy the pattern to the lower side, delete the 47.1 mm rectangles, select the small rectangles and the large rectangle, apply Union, and change the layer to black.
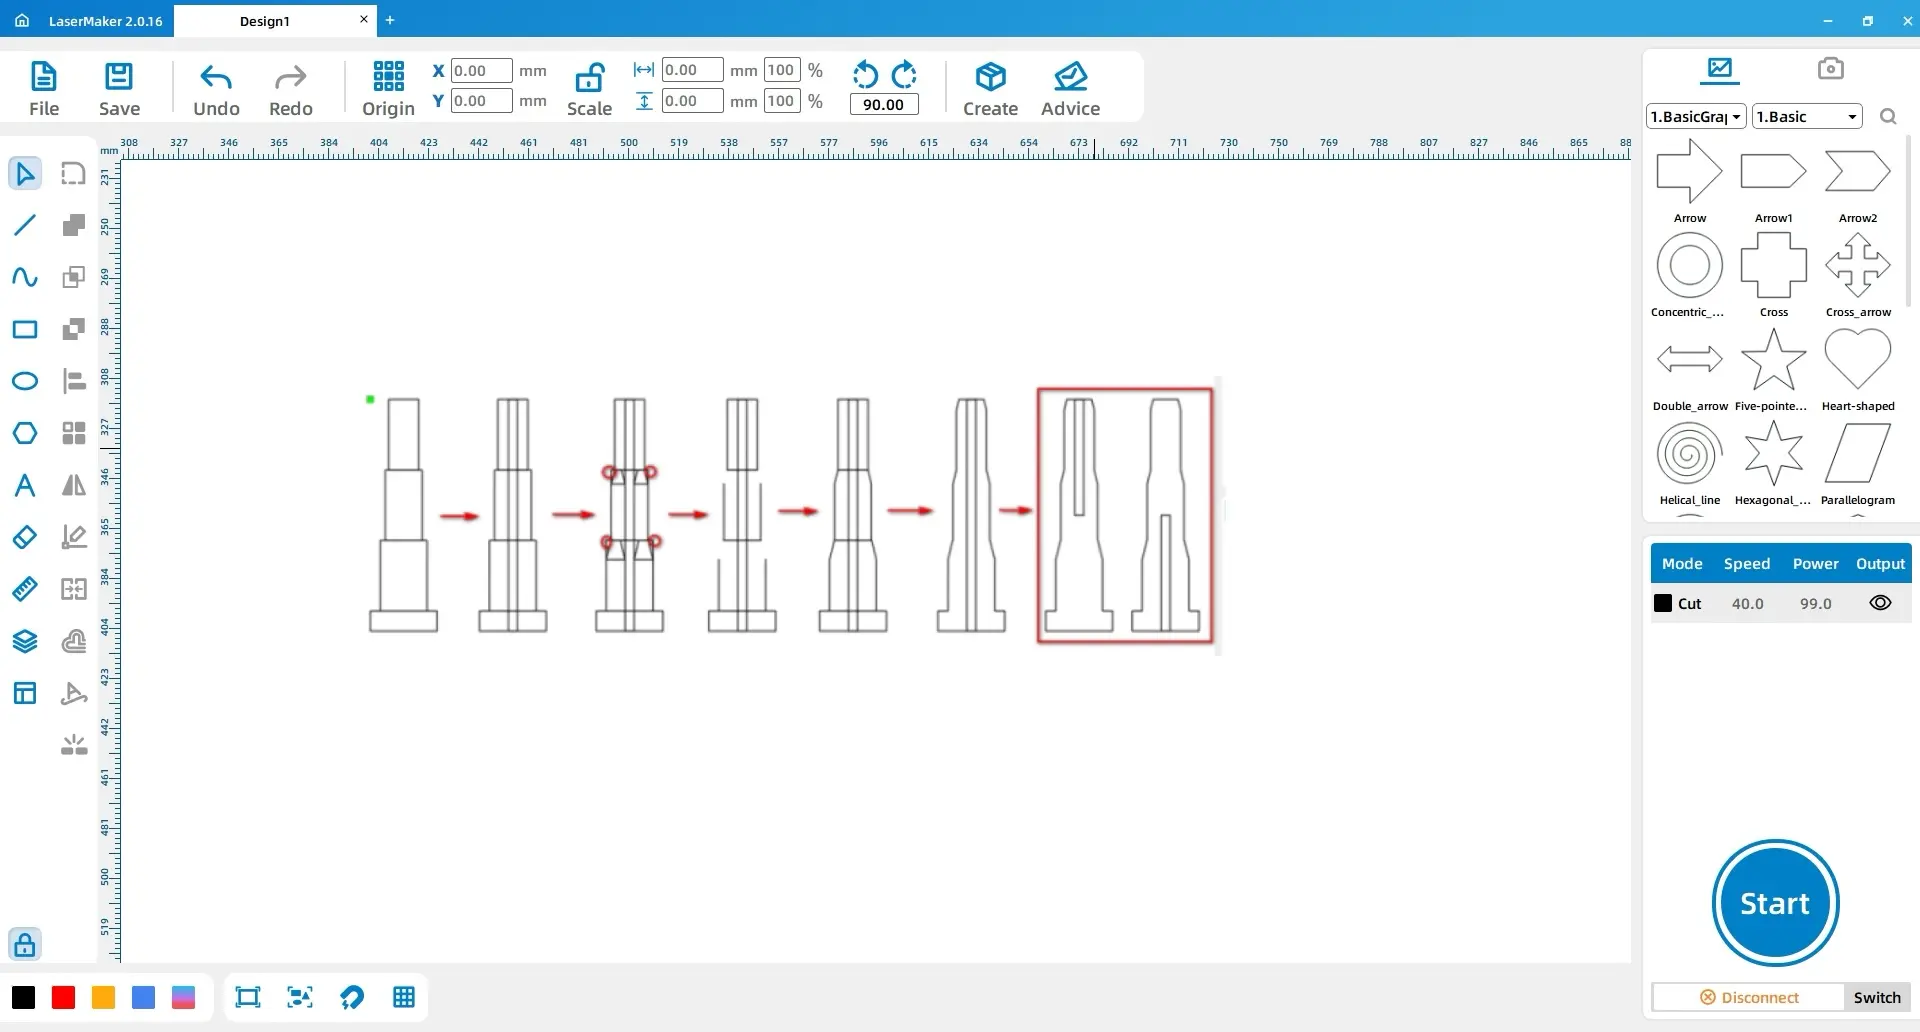
Select the Rectangle tool and draw four rectangles with dimensions of 20 mm × 6 mm, 14 mm × 21 mm, 11 mm × 21 mm, and 9 mm × 21 mm. Stack them vertically and use Horizontal Align.
Draw a 3 mm × 69 mm rectangle and place it in the centre of the combined rectangles. After horizontal alignment, drag a trapezoid from the basic shape library, adjust its size, and place it on both sides of the second and third rectangles.
Use the Eraser tool with Crop Segment to crop the indicated sections, then delete the four trapezoids. Use the Line tool with Connect Segments to close the shapes. Select the four closed rectangles and apply Union.
Duplicate the unioned shape. For one version, set the origin point to Upper Center and divide the width of the middle rectangle by 2. For the other version, set the origin point to Lower Center and repeat the width adjustment. Arrange both results as shown.
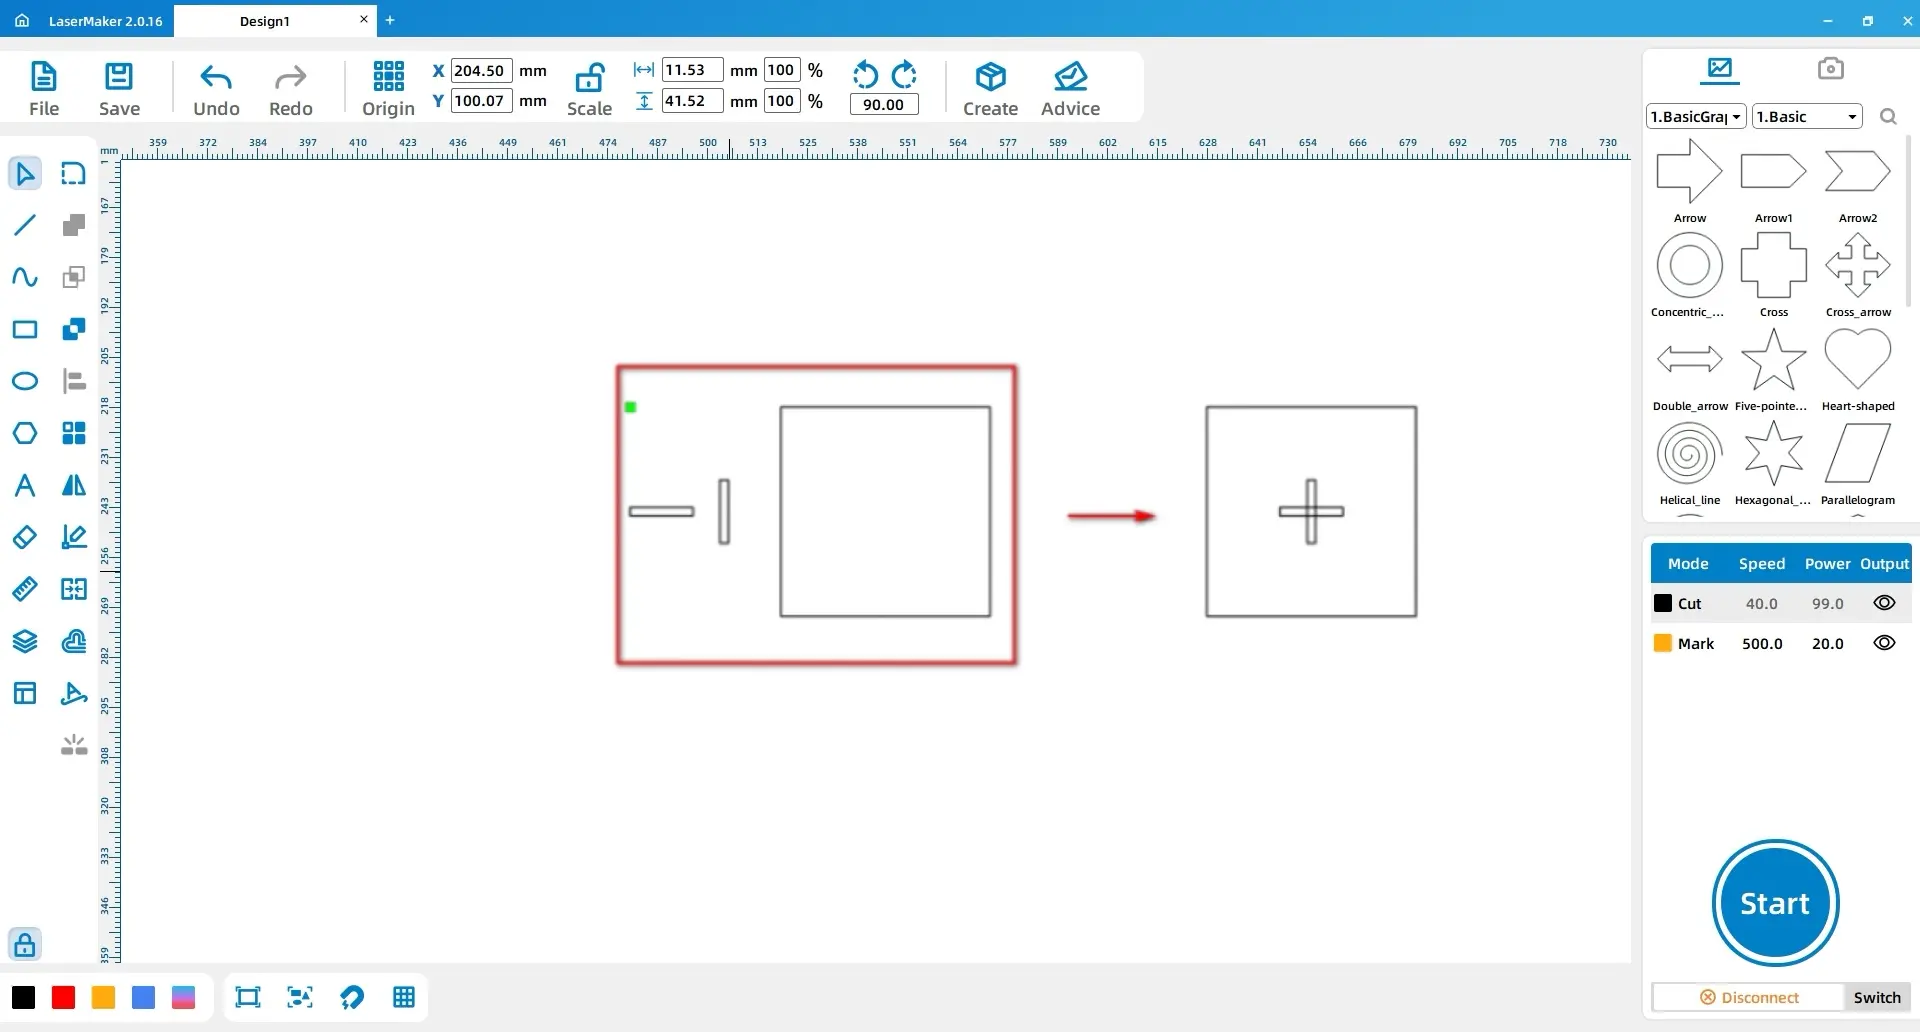
Select the Rectangle tool and draw three rectangles with dimensions of 2.6 mm × 19.6 mm, 19.6 mm × 2.6 mm, and 65 mm × 65 mm. Select all three rectangles and use Center Align.
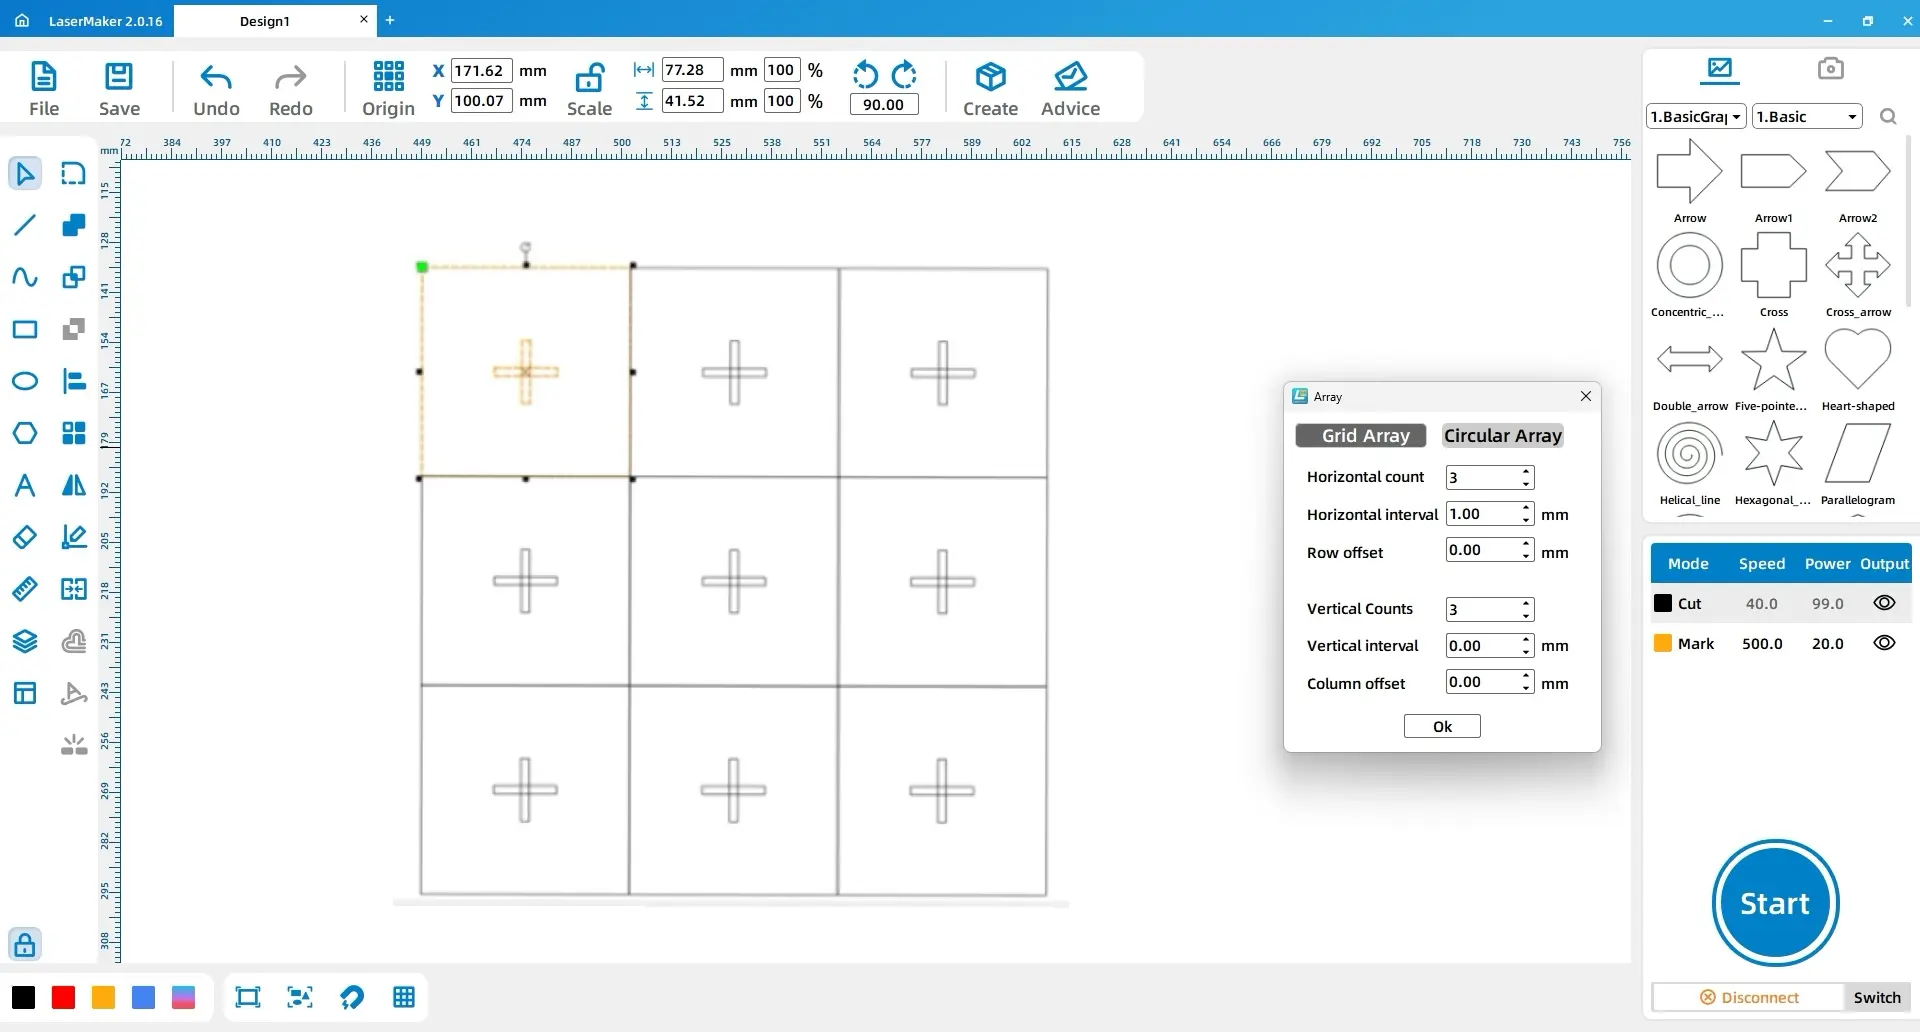
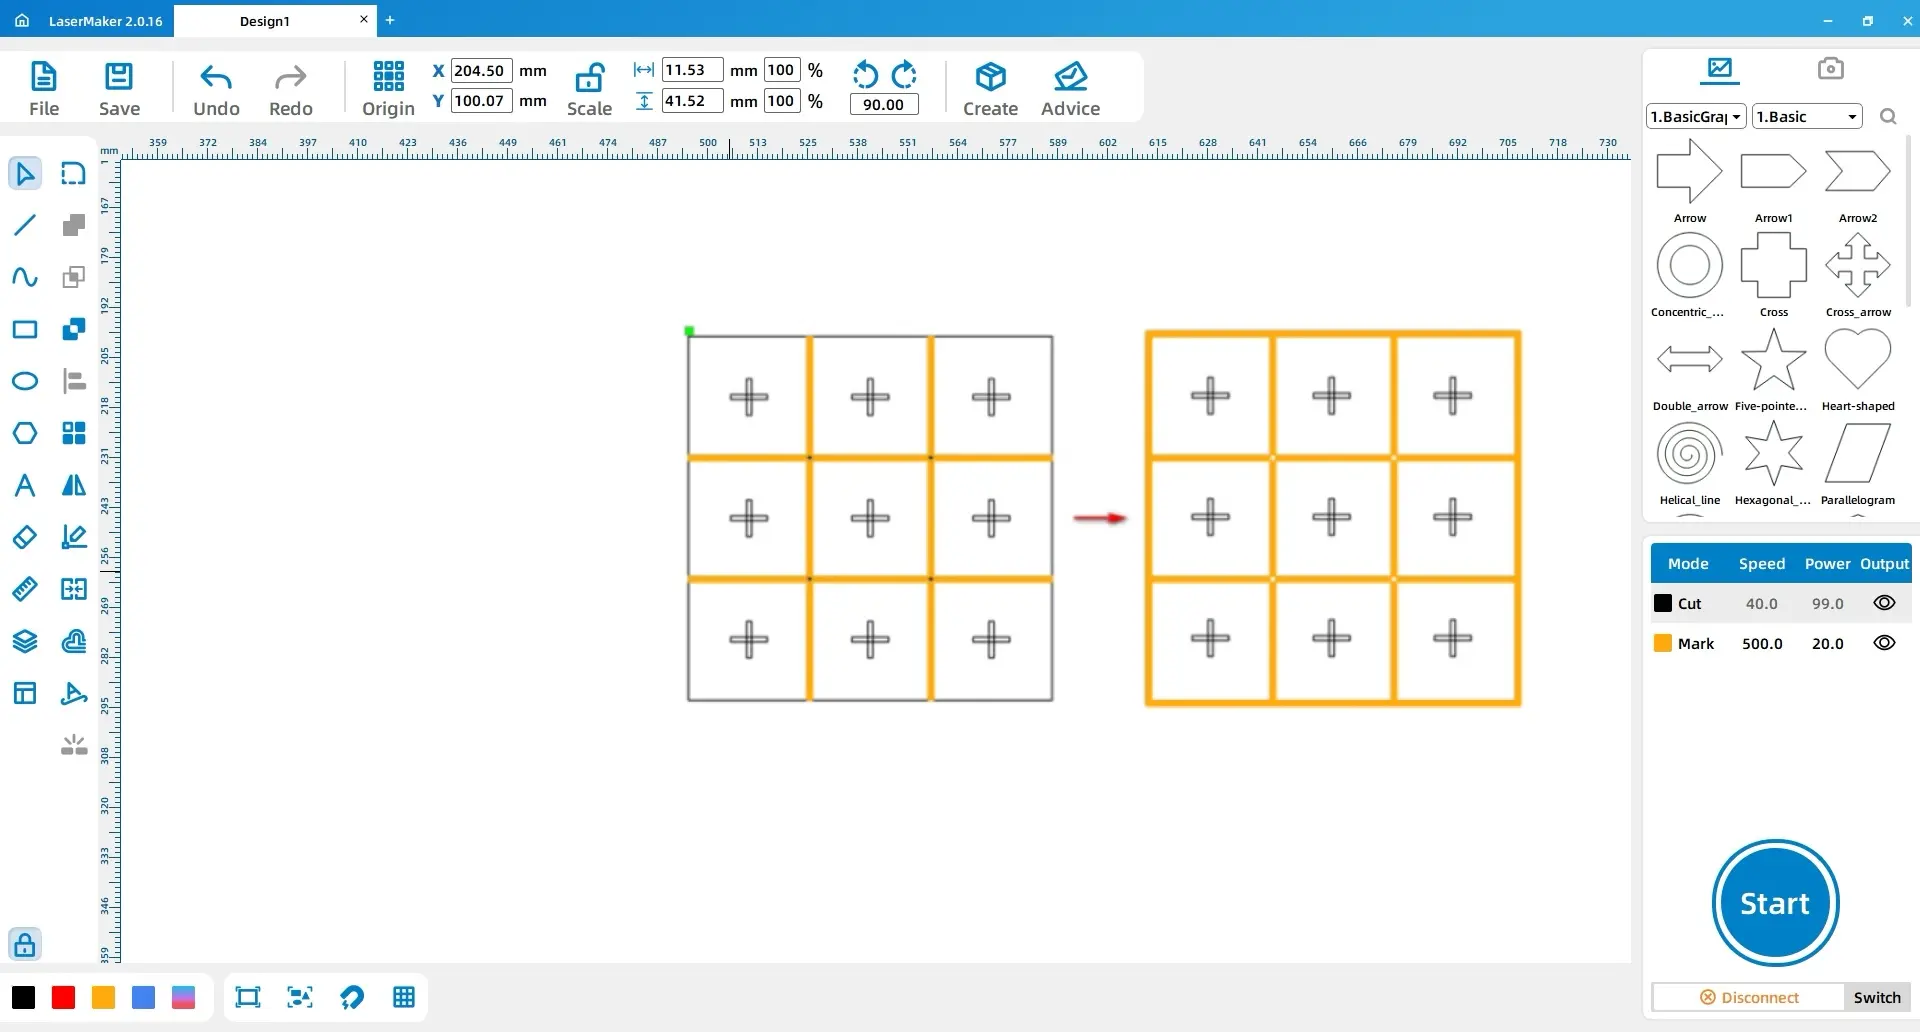
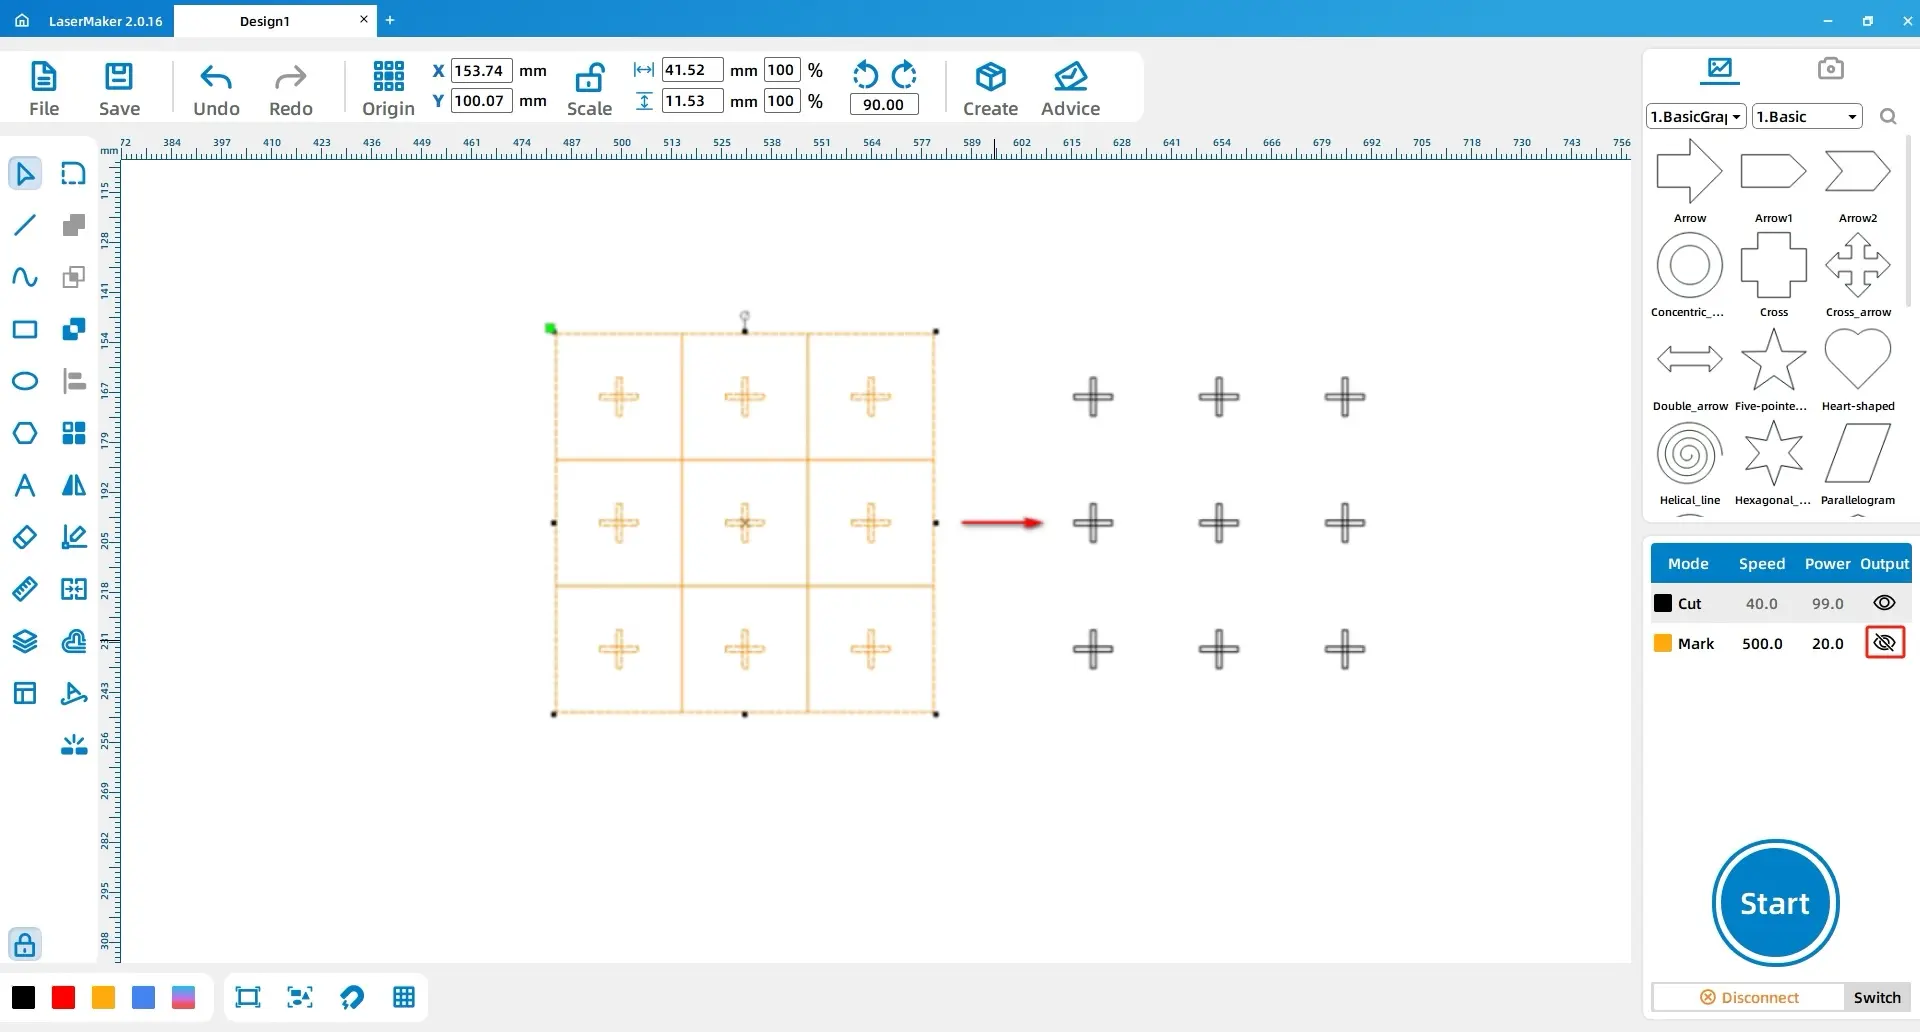
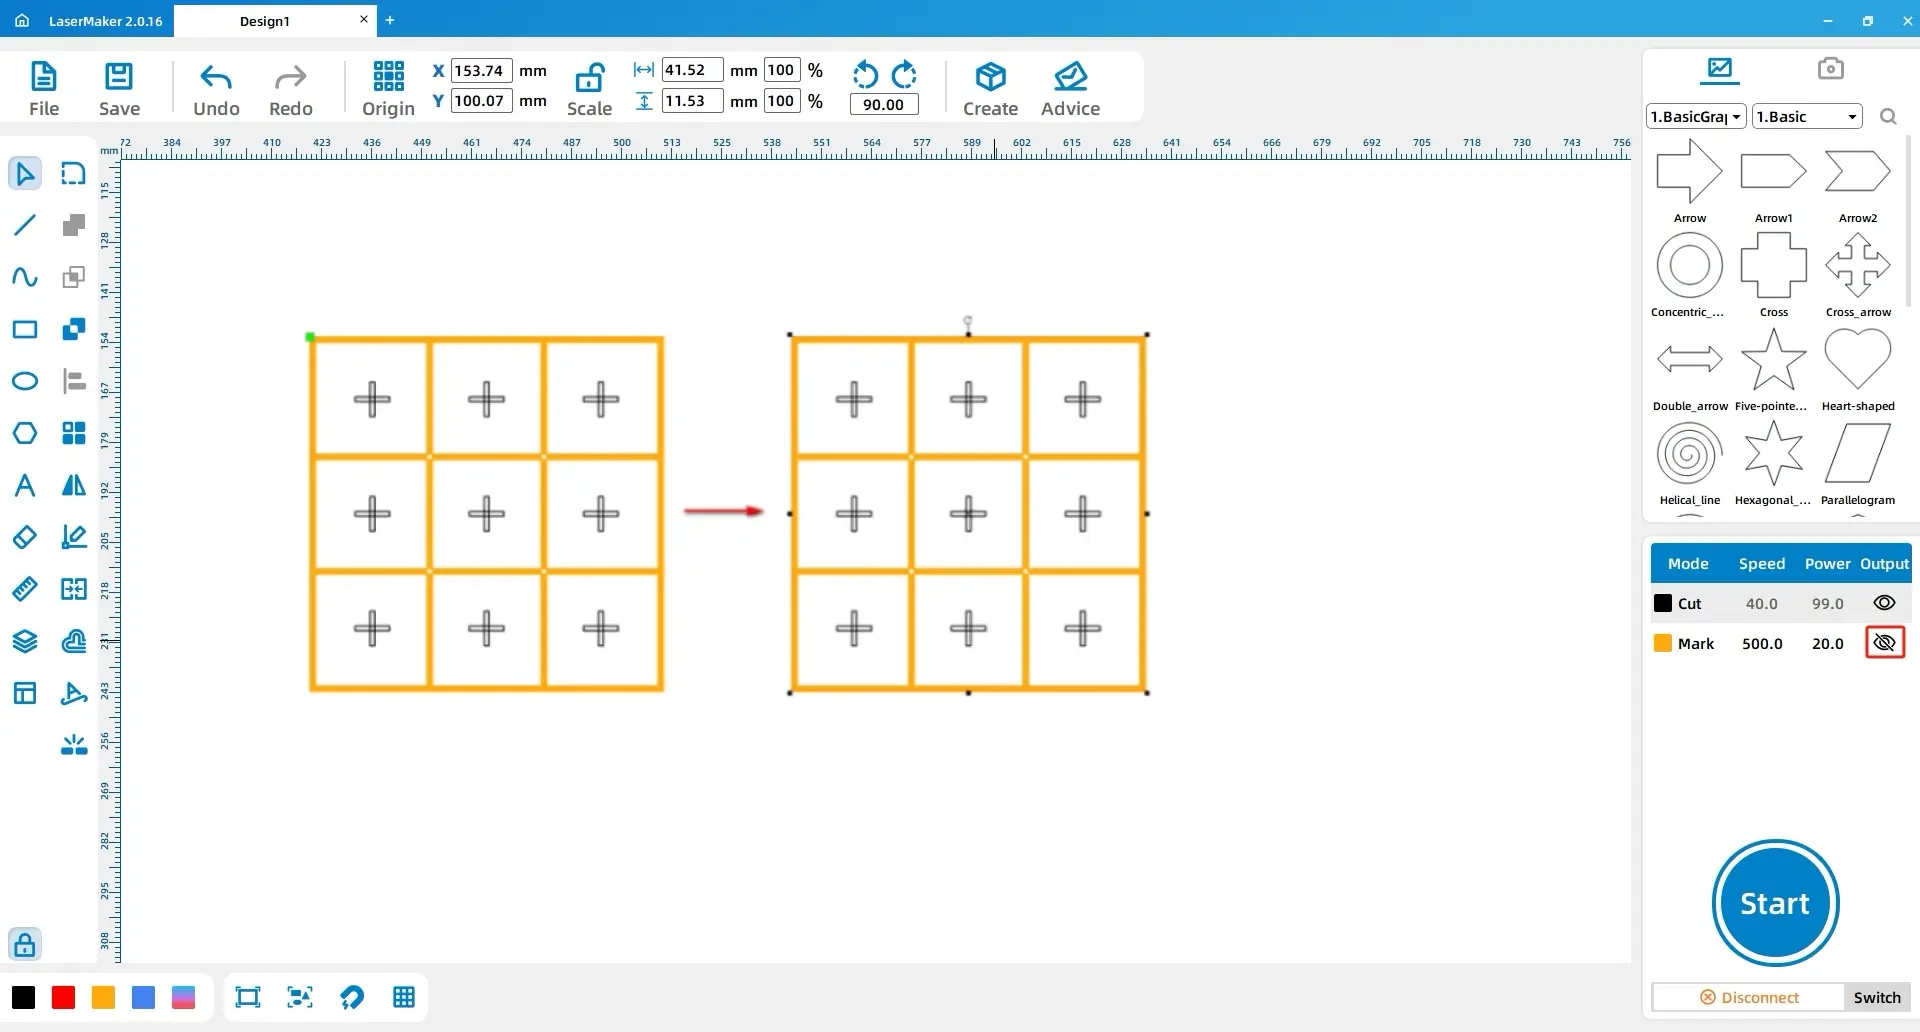
Select the pattern, open Array, set both the horizontal and vertical array counts to 3, and confirm. This creates the full 3 × 3 board layout.
Draw four rectangles with dimensions of 195 mm × 3 mm and place them between the rectangle groups. Then draw another four rectangles with dimensions of 195 mm × 3 mm and 201 mm × 3 mm, and position them around the perimeter.
Use the Output function for shallow engraving in the processing panel and delete the nine rectangle frames.
Activate the Output function for shallow engraving again. Draw a 201 mm × 201 mm rectangle and align it with the nine-square grid.
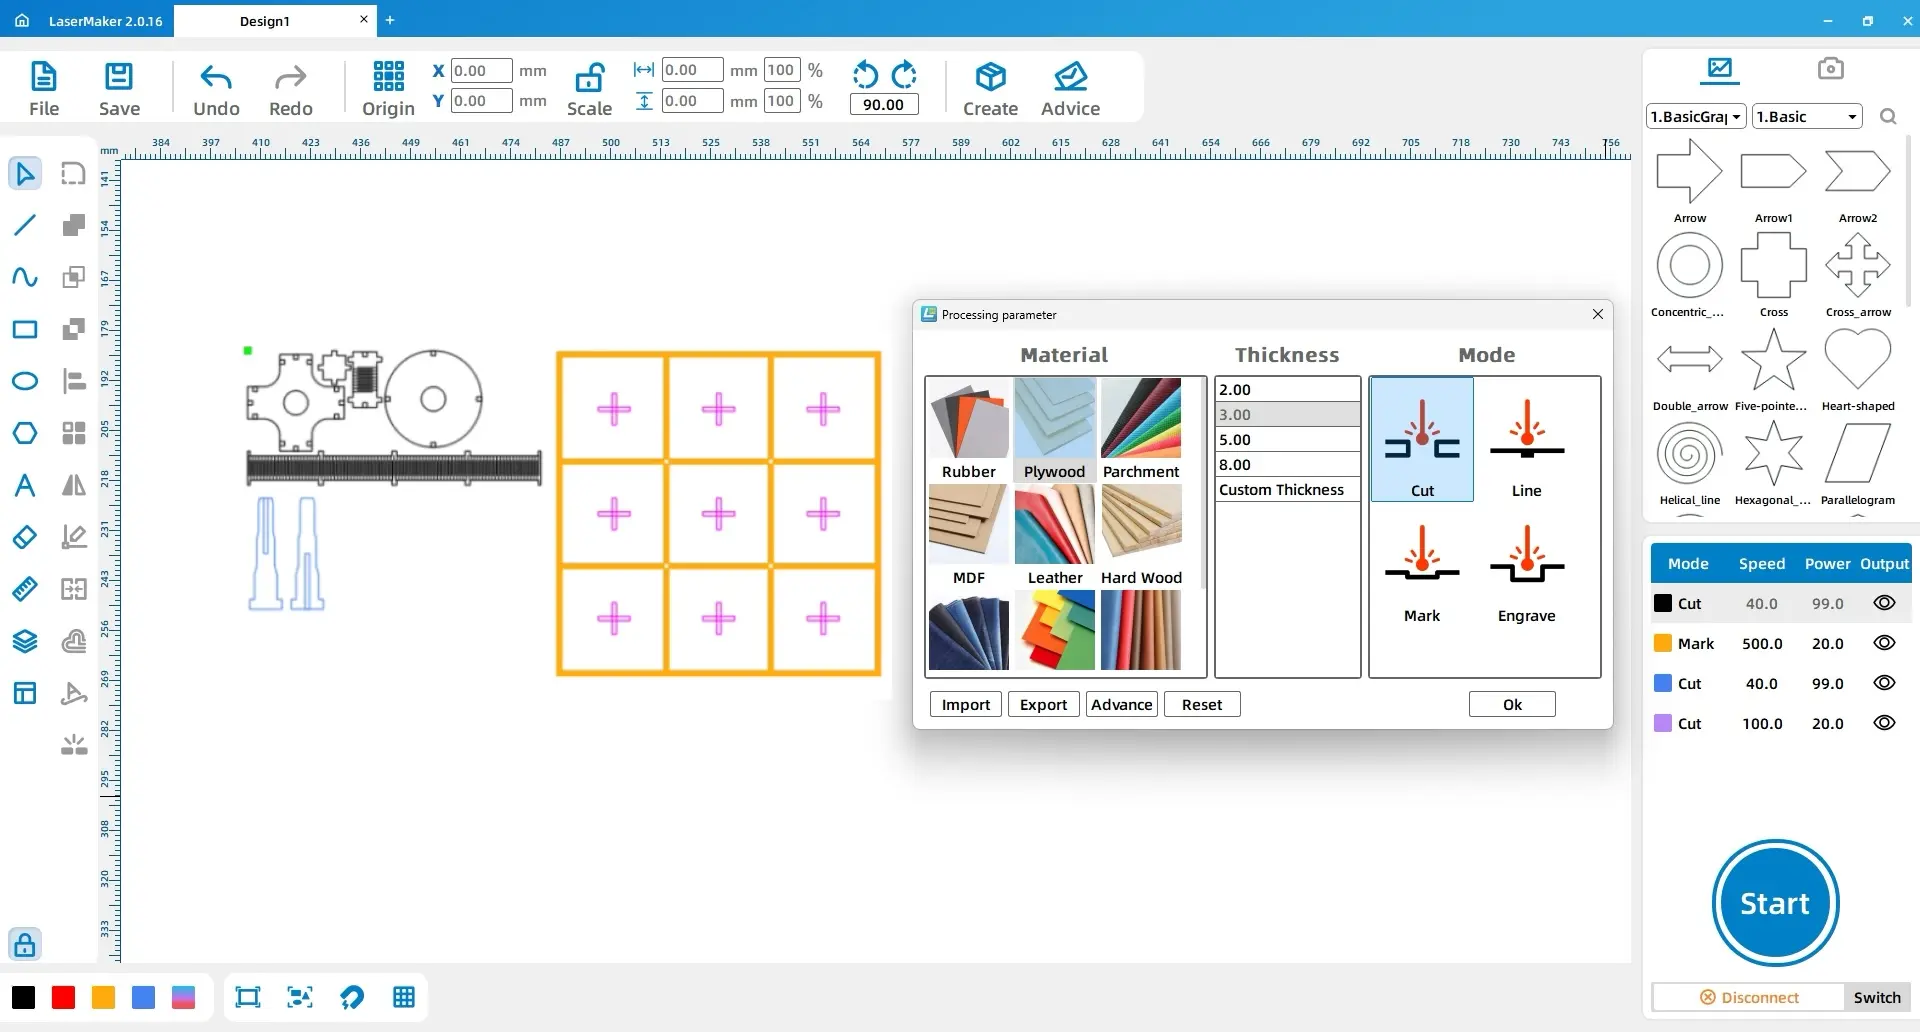
For the Three-Dimensional Tic Tac Toe project, assign each part to the correct layer before processing. Select the chess pieces and change them to the black layer. Select the two support columns on the left and change them to the blue layer. Select the cross within the nine-square grid and change it to the pink layer.
| Layer | Material | Thickness | Process |
|---|---|---|---|
| Black | Basswood | 3 mm | Cutting |
| Blue | Acrylic | 3 mm | Cutting |
| Yellow | Acrylic | 5 mm | Shallow engraving |
| Pink | Acrylic | 5 mm | Cutting |
Double-click each processing layer and set the material, thickness, and process. Use basswood, 3 mm, cutting for the black layer; acrylic, 3 mm, cutting for the blue layer; acrylic, 5 mm, shallow engraving for the yellow layer; and acrylic, 5 mm, cutting for the pink layer.
Processing reminder: Check the layers before output. A wrong layer assignment may cause a part to be engraved instead of cut, or cut instead of engraved.
Make sure each step is completed carefully so the final game is secure and stable. Check the alignment and fit of each part before continuing. If any adjustment is needed, make it before completing the next assembly step.
In this project, students design and create a three-dimensional Tic Tac Toe game. The activity takes a familiar two-dimensional game and turns it into a hands-on design challenge where students can explore structure, assembly, alignment, and creative play.
Reflection prompt: If the finished game is difficult to assemble or does not stand firmly, students can use the problem as a design opportunity. Encourage them to observe, test, adjust, and improve their next version.
Students can extend this project by redesigning the playing pieces, changing the board style, adding engraved labels, or creating a storage box for the game. They can also compare the two-dimensional and three-dimensional versions of Tic Tac Toe and explain how the new structure changes the playing experience.
For schools and beginner STEAM labs, this project can be completed on a classroom laser cutter such as the Thunder Laser Bolt Series.
Talk To Our Experts Now!
Please leave your contact information so that we can serve you better.
NEED HELP FINDING THE RIGHT SOLUTION?
Talk to our team for machine recommendations, application advice, and support based on your needs.

 Stable & Consistent MachinesUnlimited ApplicationRobust After-sales SupportFactory Direct Supply