


Flexible Sticky Note Holder Laser Cutting Project with LaserMaker
 2024-06-27
WHAT ARE YOU LOOKING FOR?
Search Across Products, Blog Posts, Support Content, And Resources.

Flexible Sticky Note Holder Laser Cutting Project with LaserMaker
2024-06-27

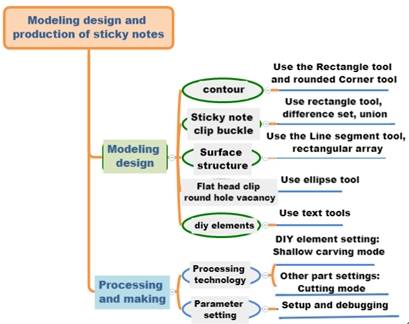
In this STEAM engineering project, students design and make a flexible sticky note holder using LaserMaker. The lesson connects product design, measurement, line arrays, flexible cut patterns, shallow engraving, laser cutting, bending tests, and functional assembly.
This project helps students explore how a hard sheet material can become bendable by reducing material density with repeated cut patterns. Students test how line spacing, material choice, and cut density affect flexibility and real-world usability.
| Item | Details |
|---|---|
| Project | Flexible laser-cut sticky note holder |
| Software | LaserMaker |
| Main Skills | Rectangle Tool, Rounded Corner Tool, Line Segment Tool, Rectangular Array, Oval Tool, Text Tool, Union Tool, Difference Set Tool, shallow engraving, and cutting |
| Suggested Materials | Basswood plywood or corrugated paper |
| Classroom Fit | Engineering challenges, flexible structure design, product design, material testing, maker education, and classroom laser cutting |
Students will design a sticky note holder cover that can fold from one flat sheet into a front cover, back cover, and bendable middle section. They will create a repeated line pattern, add clip holes and text, set engraving and cutting parameters, and test the flexibility of the finished structure.
For teachers: Use this lesson to connect material behavior, cut-pattern density, product function, measurement, and iterative testing.
For students: Use the project to design a practical note holder for reminders, task lists, class notes, or personal planning.
For makerspaces: Use it as an introduction to flexible laser-cut patterns, foldable product design, and material experimentation.
Use the Rectangle Tool and Rounded Corner Tool to create the main note holder outline.
Use Line Segment Tool and Rectangular Array to create a repeated cut pattern for a bendable surface.
Use Union and Difference Set tools to design clip buckles and slots.
Use the Oval Tool to add round holes for the flat clip position.
Set shallow engraving and cutting processes based on material choice and project requirements.
Design thinking: Understand how a flat cover can be shaped into a useful holder with a bendable spine, clip positions, text, and personalized surface design.
Computational thinking: Calculate line spacing, array density, cutout layout, and repeated graphic distribution for the flexible surface.
Engineering thinking: Test how cut density, material brittleness, line layout, and bending direction affect the strength and practicality of the final product.
Students should use school-appropriate text and graphics, protect personal information, and create an original improvement rather than simply copying another design.
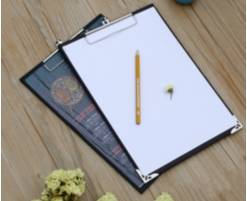
Sticky notes are useful for recording plans, reminders, tasks, and quick ideas. A sticky note holder keeps notes organized and easy to access, making it helpful for classrooms, offices, studios, restaurants, and daily planning.
In this lesson, students use LaserMaker to design a personalized holder that protects sticky notes and demonstrates how repeated cut patterns can create a bendable surface from sheet material.
Before drawing in LaserMaker, students should analyze the sticky note holder as both a functional product and a flexible structure.
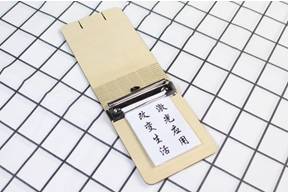
Product shape: The cover and back cover are folded from one workpiece. The folding area needs a flexible curved surface.
Modeling method: A discontinuous line array is used to reduce material density and create a bendable section.
Product size: The cover and back cover should match the size of the sticky note paper and the clip hardware.
Connection method: The source lesson uses a clip buckle method for fixing the note pages.
Material selection: The source lesson suggests basswood plywood and corrugated paper.
Process effect: The project uses shallow engraving for text and cutting for the outline, holes, clip structure, and flexible line pattern.
Students should observe real sticky notes or search for common sticky note sizes, then decide the size of the holder. They should record the cover size, clip length, and hole diameter before drawing the digital design.
| Data Recording / Unit: mm | |
|---|---|
| Length: | Width: |
| Flat clip length: | Hole diameter: |
After measuring, students should sketch the holder outline, fold area, clip position, round holes, surface text, and any personalized design details.
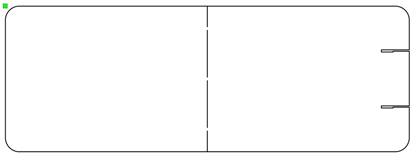
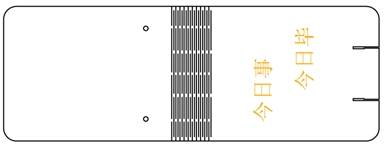
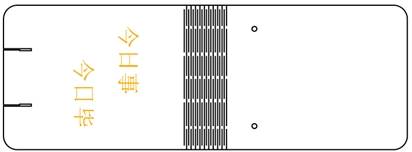
Use the Rectangle Tool to draw the main holder outline. In the source workflow, the rectangle is 290 mm wide and 104 mm high.
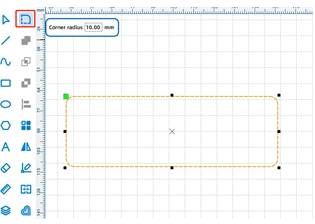
Then use the Rounded Corner Tool with a radius value of 10 to round the four corners of the rectangle.
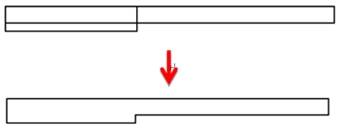
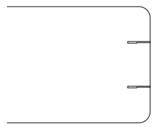
Use the Rectangle Tool to draw the clip buckle shape. In the source workflow, one rectangle is 20 mm wide and 1 mm high, and another is 8 mm wide and 1.5 mm high. Move the smaller rectangle to overlap with the larger one, then use the Union Tool to merge them into one shape.
Move the merged shape to the right-center area of the rounded rectangle. Adjust its Y position to create two buckle positions, one shifted upward and one shifted downward.
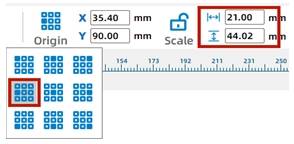
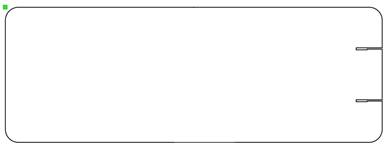
Set the object origin to the left and adjust the width to 21 mm so the buckle shape expands in the correct direction. Then use the Difference Set Tool to cut the buckle slots from the rounded rectangle.
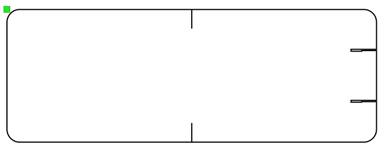
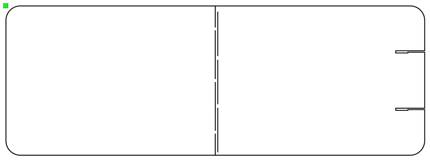
Use the Line Segment Tool to draw a 15 mm vertical line segment inside the rounded rectangle. Move one line to the top center and copy another to the bottom center.
Draw a 34 mm line segment, align it with the previous line, then shift and copy the line downward by 2 mm. This creates a staggered arrangement that supports bending.
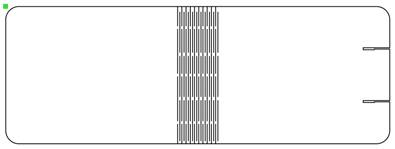
Draw another line segment with a height of 31 mm. Use Rectangular Array with 1 horizontal copy, 3 vertical copies, and 2.5 mm vertical spacing. Move the group to align with the earlier lines, then shift it 1.68 mm to the right.
Select all line segments and use Rectangular Array again. In the source workflow, the horizontal number is 10, the vertical number is 1, and the horizontal spacing is 1.5 mm. Move the completed line pattern to the center of the rounded rectangle.
Use the Oval Tool to draw a 3.5 mm diameter circle. Align it near the first line segment on the right, then move it 20 mm to the left. Copy the circle and move the copy 70 mm downward so the two holes are vertically spaced.
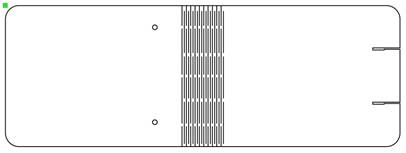
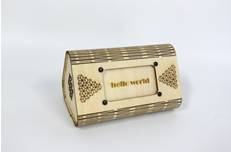
Rotate the design by 90 degrees if needed, then use the Text Tool to add text. In the source workflow, the sample text is “Do today” and “Finish today,” with a line height of 15 mm.
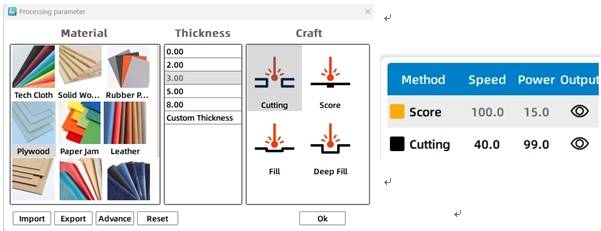
Select the text object and assign it to the yellow shallow engraving layer. In the source workflow, the material is set to basswood plywood, the process is set to shallow engraving, and the processing thickness is set to 0.1 mm.
Select the other objects in the sticky note holder and assign them to the cutting layer. In the source workflow, the material is set to basswood plywood, the process is set to cutting, and the processing thickness is set to 3 mm.
Adjust the line dislocation and observe how the layout affects bending.
Delete some lines to increase spacing and compare how line density affects flexibility.
Test different line or graphic arrays to compare their bending results.
Compare how basswood plywood and corrugated paper behave after cutting and bending.
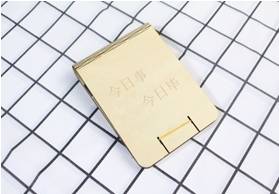
After the final settings are confirmed, students can complete the engraving and cutting process, then fold the flexible section and install the sticky notes or clip hardware.
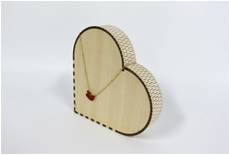
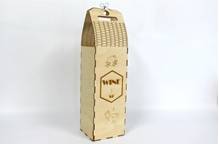
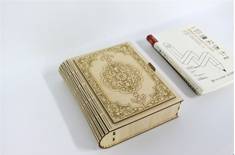
After completing the sticky note holder, students can apply the same flexible surface method to a notebook cover. They can design a creative wooden notebook shell and test how different line patterns affect the bending area.
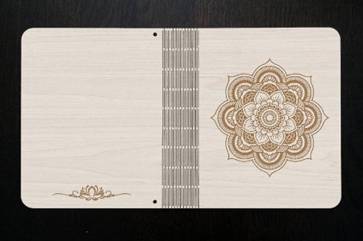
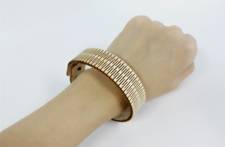
The following examples can be used for classroom discussion and design inspiration. Encourage students to compare curved structures, line density, bending direction, material choice, and final usability.

This project is suitable for classroom laser cutters that support small-format engraving and cutting of sheet materials. For schools, makerspaces, and beginner STEAM labs, projects like sticky note holders, flexible covers, notebook shells, desk accessories, and product prototypes can be completed with a classroom laser cutter such as the Thunder Laser Bolt Series.
Teachers can choose the machine and material setup based on classroom space, material thickness, bending requirements, project size, and learning goals. The same flexible-cutting workflow can also be adapted for other CO2 laser machines when students move on to larger covers or more advanced engineering projects.
Talk To Our Experts Now!
Please leave your contact information so that we can serve you better.
NEED HELP FINDING THE RIGHT SOLUTION?
Talk to our team for machine recommendations, application advice, and support based on your needs.

 Stable & Consistent MachinesUnlimited ApplicationRobust After-sales SupportFactory Direct Supply


