


STEAM Train Inventor Laser Cutting Project with LaserMaker
 24-08-13
WHAT ARE YOU LOOKING FOR?
Search Across Products, Blog Posts, Support Content, And Resources.

STEAM Train Inventor Laser Cutting Project with LaserMaker
24-08-13

In this STEAM maker project, students continue the “magic brush” design journey by turning a hand-drawn train into a laser-cut wooden model using LaserMaker. The lesson reviews image scanning, cropping, outlining, engraving, and cutting, then extends the activity with train wheels, couplers, carriage connections, optional gears, a small motor, and rails.
This project builds on the earlier car inventor lesson. Students compare cars and trains, then apply what they already know to a new transportation model with multiple connected sections.
| Item | Details |
|---|---|
| Project | Train Inventor laser cutting project |
| Software | LaserMaker |
| Main Skills | Hand drawing, image scanning, picture cropping, outline extraction, bitmap engraving, vector cutting, wheel design, array copy, bayonet-style joint design, coupler design, gear placement, motor upgrade, and assembly |
| Suggested Materials and Parts | Plywood, paper, drawing pen, small wooden sticks, wooden rings, small motor, gears, battery box, wires, glue, and optional rail parts |
| Classroom Fit | Laser cutting and maker projects, STEAM art and engineering, transportation design, beginner LaserMaker review, classroom prototyping, and creative upgrade activities |
Students will draw an original train, scan it into LaserMaker, prepare a clean outer cutting contour, engrave the drawing, cut the train pieces, design a three-dimensional train body, connect train cars with coupler-style parts, and explore optional upgrades such as a motorized front section and laser-cut rails.
For teachers: Use this project to help students review the car inventor workflow while introducing connected vehicle bodies, couplers, rails, and powered movement.
For students: Use the activity to transform a drawing into a train model, then make it more realistic with wheels, carriages, couplers, gears, and tracks.
For makerspaces: Use it as a beginner-friendly transportation project that combines creative drawing with laser-cut assembly and simple motion upgrades.
Compare the basic structure of cars and trains, especially the difference between one vehicle body and multiple connected train cars.
Create a train drawing with a clear outer edge, then scan and process it in LaserMaker.
Use Picture Crop and Picture Outline to prepare a bitmap engraving layer and an outer vector cutting path.
Design train wheels, wooden fixing rings, splicing plates, bayonet-style joints, and coupler-style connecting parts.
Upgrade the train with gears, a small motor, a battery box, and optional rails for a more realistic model.
Design thinking: Start with a hand-drawn idea, then improve the train through structure, connection, movement, and environmental details.
Computational thinking: Use cropping, outlining, layers, dimensions, arrays, mirroring, and repeated parts to create a production-ready laser file.
Engineering thinking: Consider train-car connection, wheel rotation, joint fit, motor placement, gear engagement, and how rails support the final model.
Students should operate the laser cutter only under teacher or lab supervisor guidance. Before cutting, check focus, layer output, material placement, and processing parameters. When adding a motor and battery box, keep wires away from gears and wheels, and test the train slowly before running it for longer periods.
This lesson guides students to make a train based on skills learned in the previous car inventor lesson. The key new challenge is that a train is not just one body. A train includes a locomotive, carriages, wheels, coupler-style connections, and, in many real-world examples, rails.
Teachers can begin the lesson with transportation comparison questions. These prompts help students connect observation, structure, and function before they start drawing.
What is the difference between a car and a train?
What does a train look like in real life?
What are two common types of trains?
Where does a train usually run?
Classroom Discussion: Students can describe trains as transportation systems with a front section, carriages, tail section, underframe, wheels, and coupler-style connections. They can also compare ordinary trains and high-speed trains, and discuss why trains usually run on tracks.
Ask students to sketch the train they imagine. Unlike a simple car model, a train usually includes a locomotive and several carriages, so students should draw the front and carriages separately.
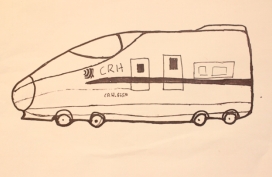
Use a scanning app or another classroom-approved method to scan the drawing and import it into LaserMaker. First, use Picture > Crop to remove blank space around the image.
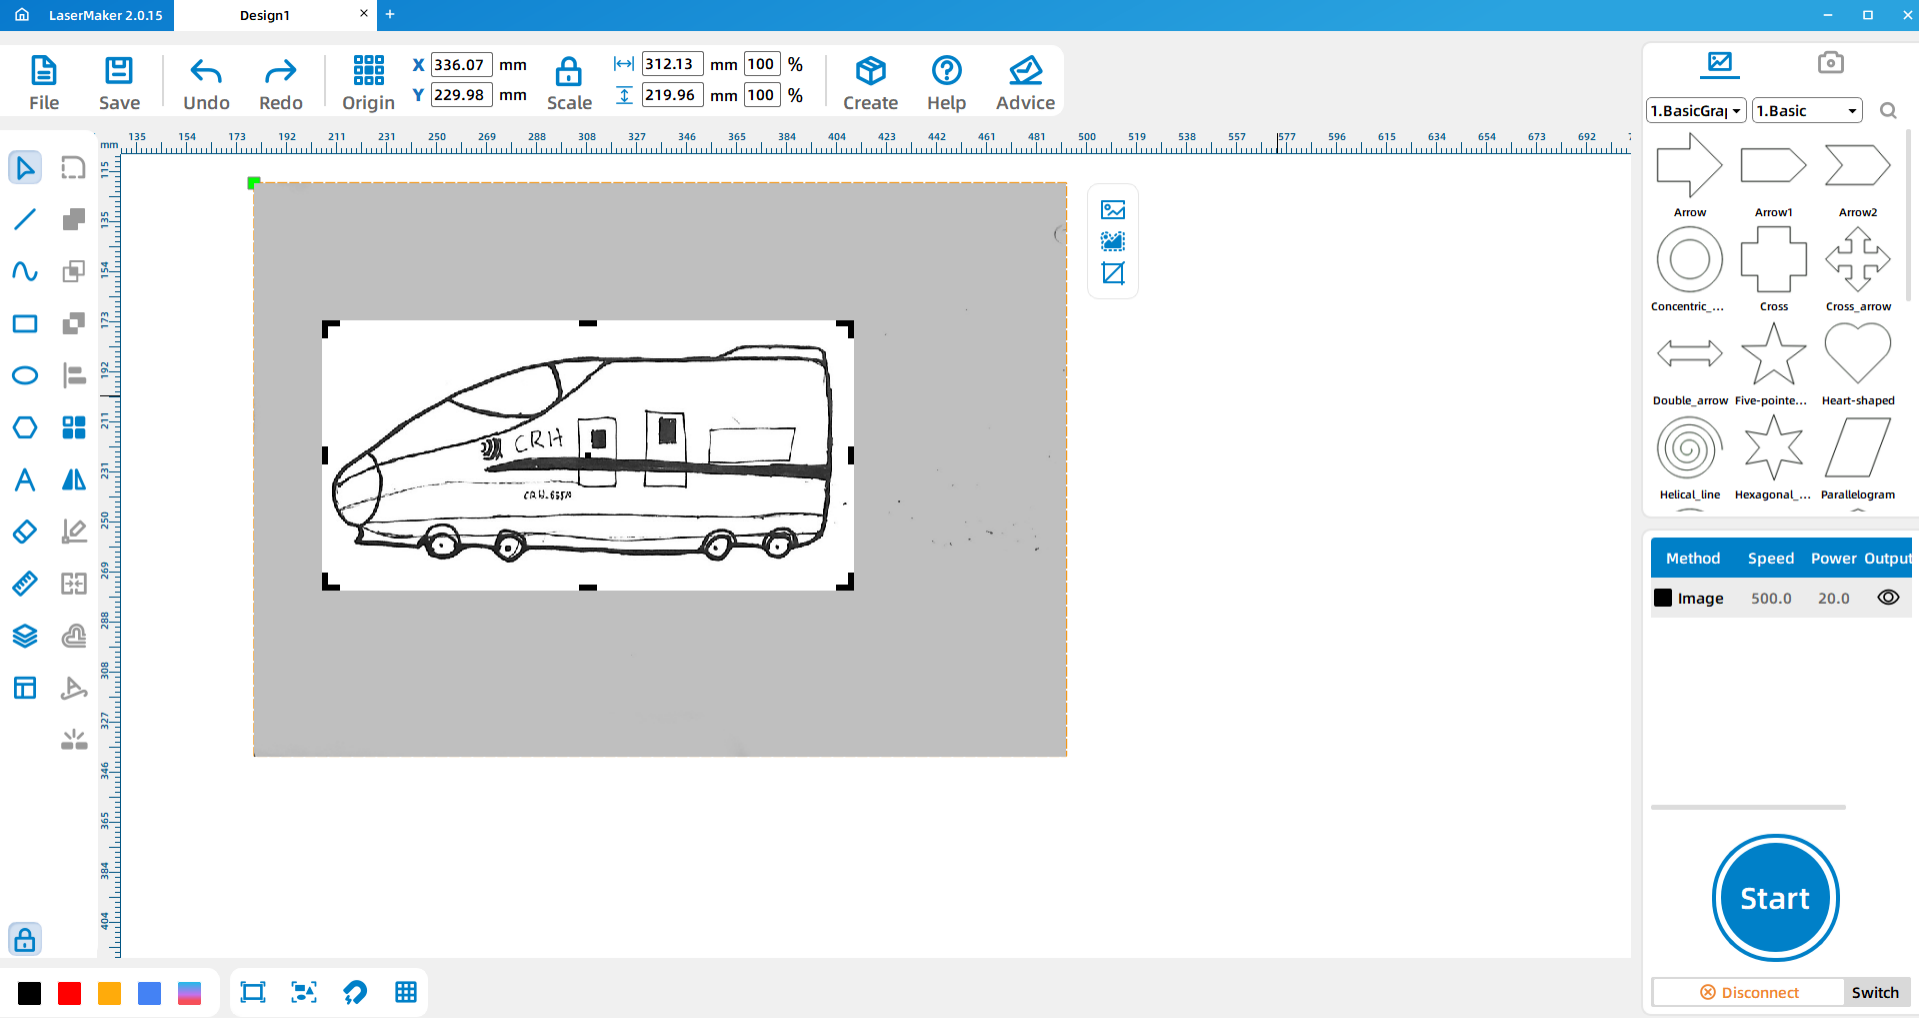
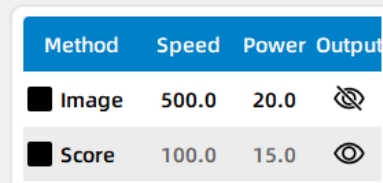
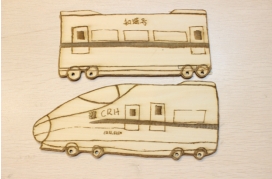
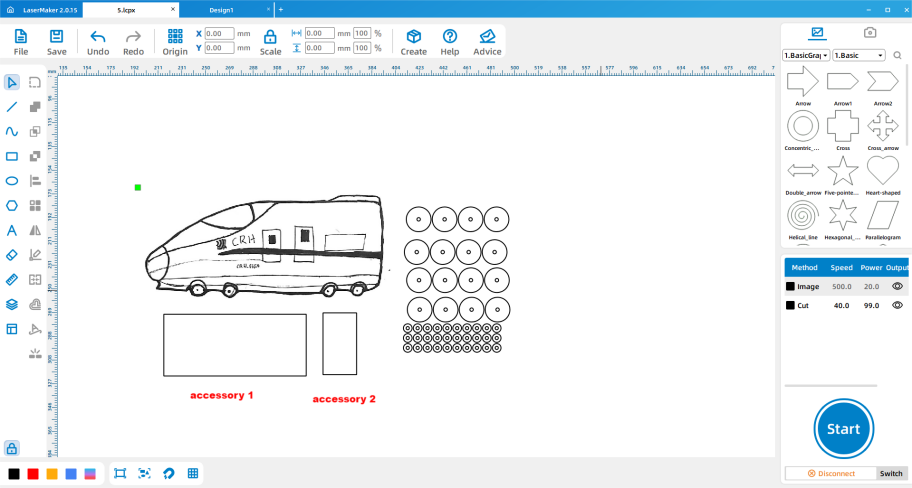
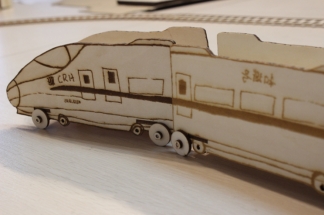
Next, use Picture > Outline to generate the train outline. Select and delete the inner outline, keeping only the outer contour for cutting. The original bitmap can remain for engraving so the student’s drawing is still visible on the finished train.
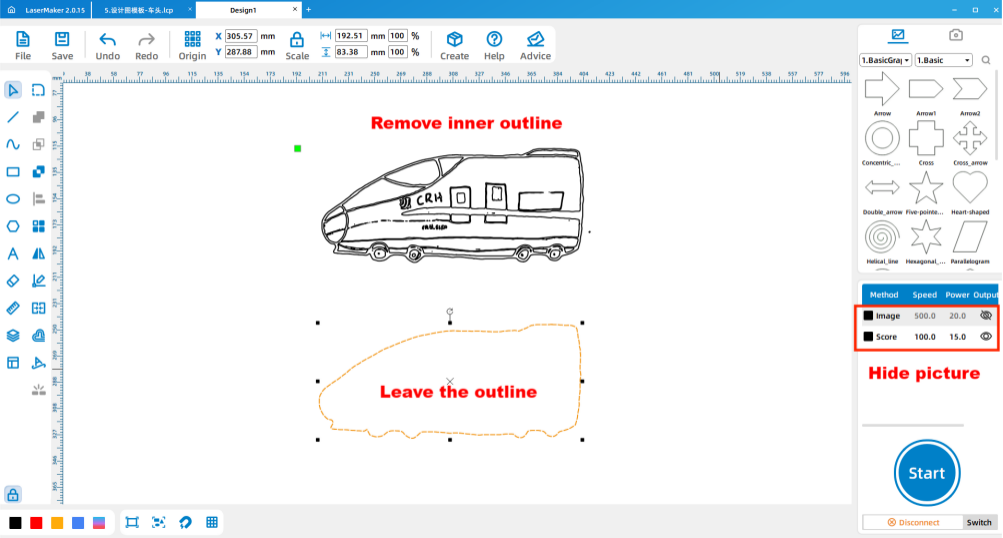
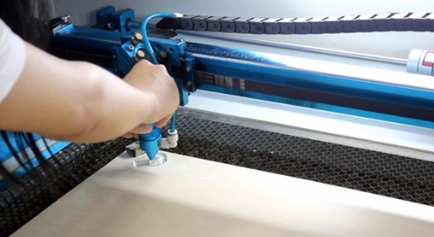
Double-click the layer parameter area in LaserMaker and set the engraving and cutting parameters for the plywood project. After checking the settings, send the file to the laser cutter for processing.
Next Design Question: A single silhouette train can show the drawing, but the locomotive and carriages are not yet connected. Students now need to design parts that let the train sections connect and move together.
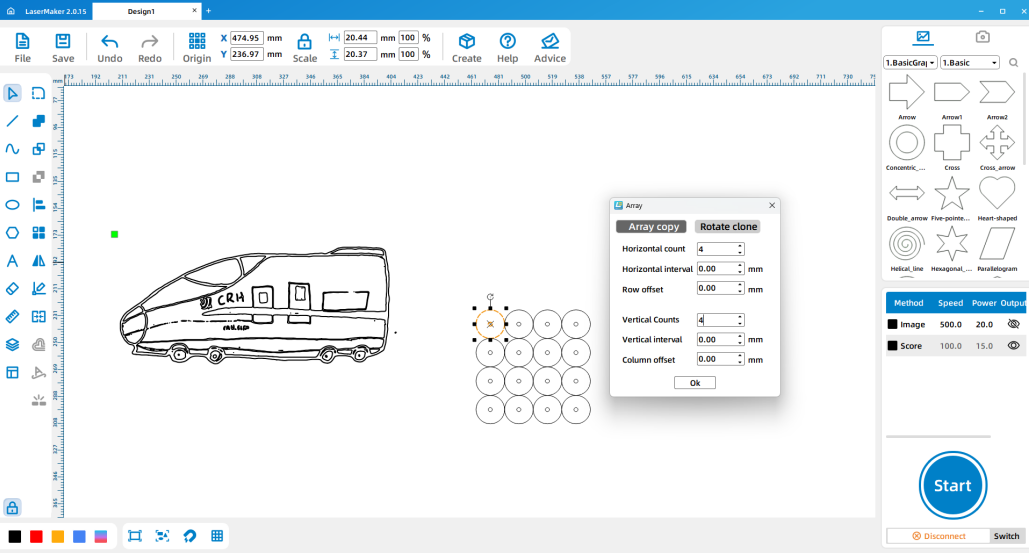
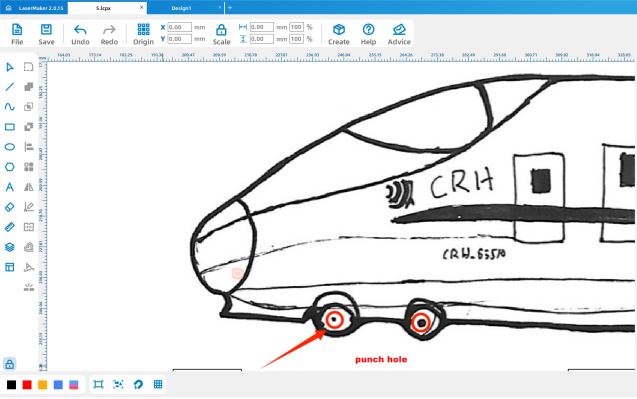
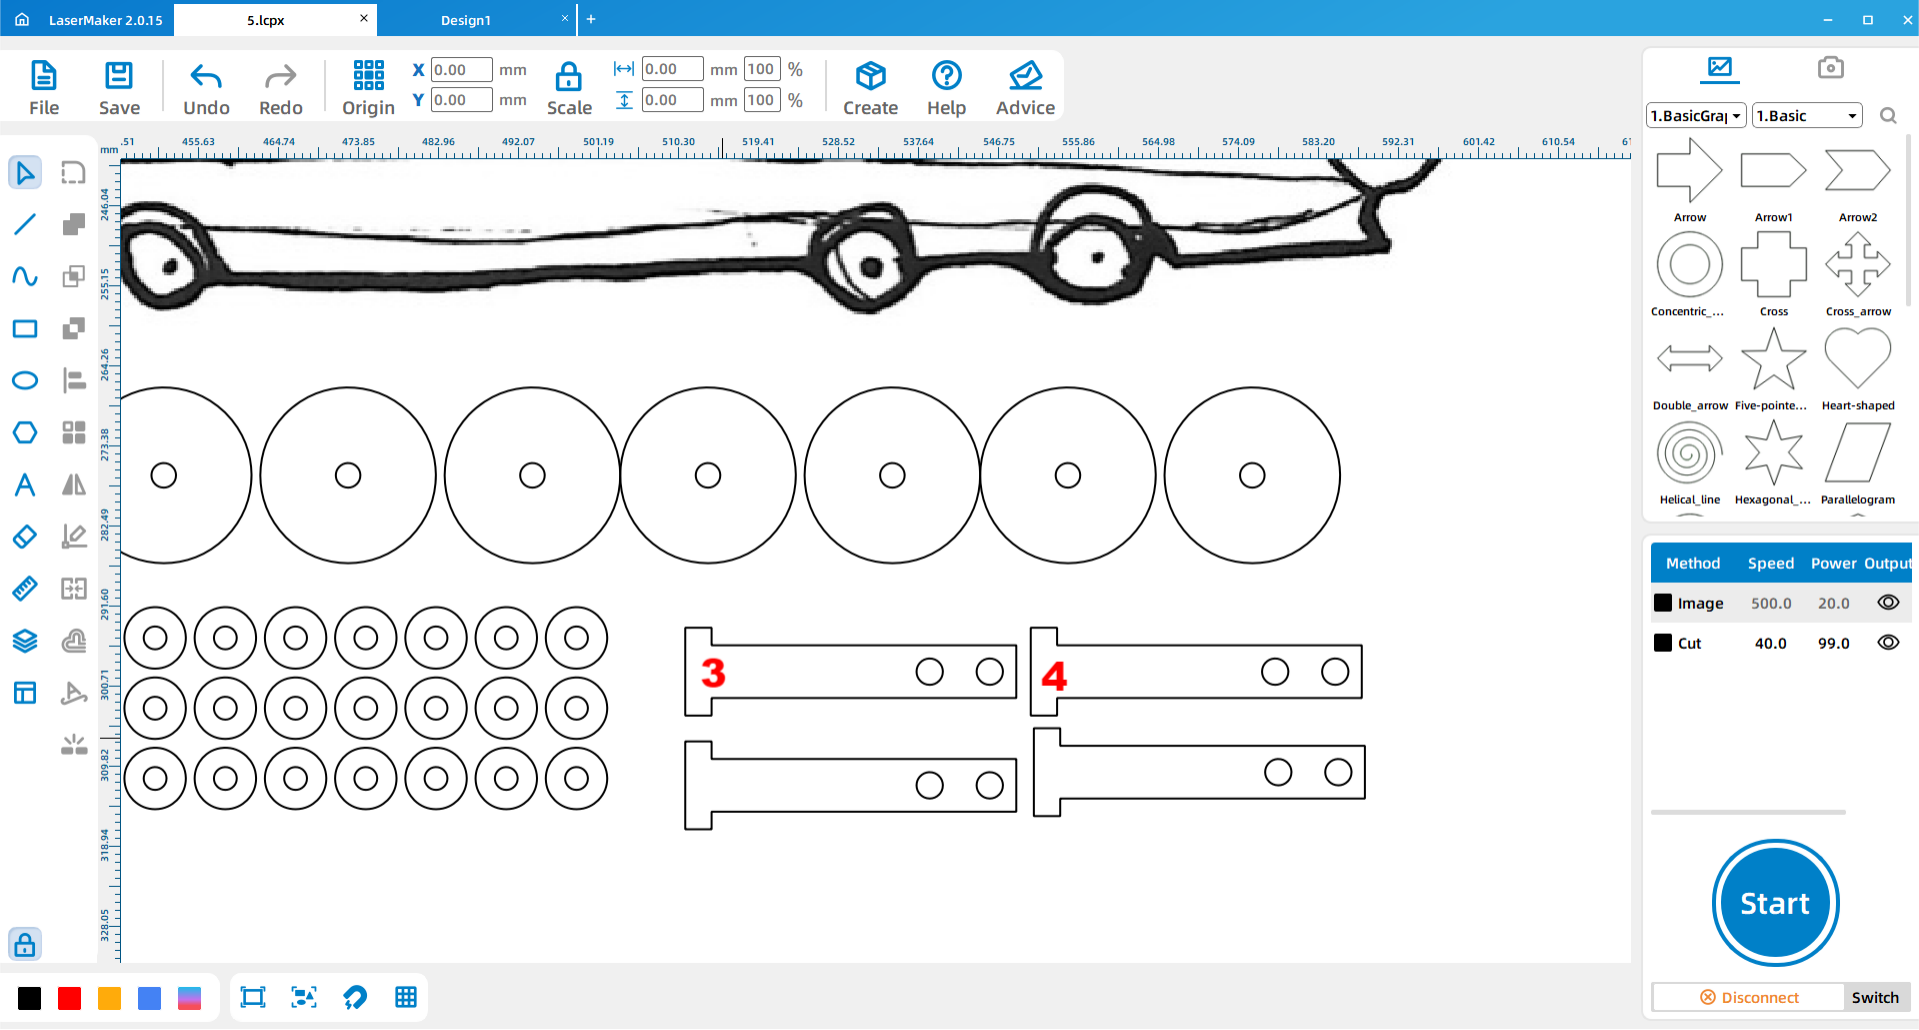
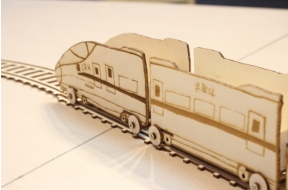
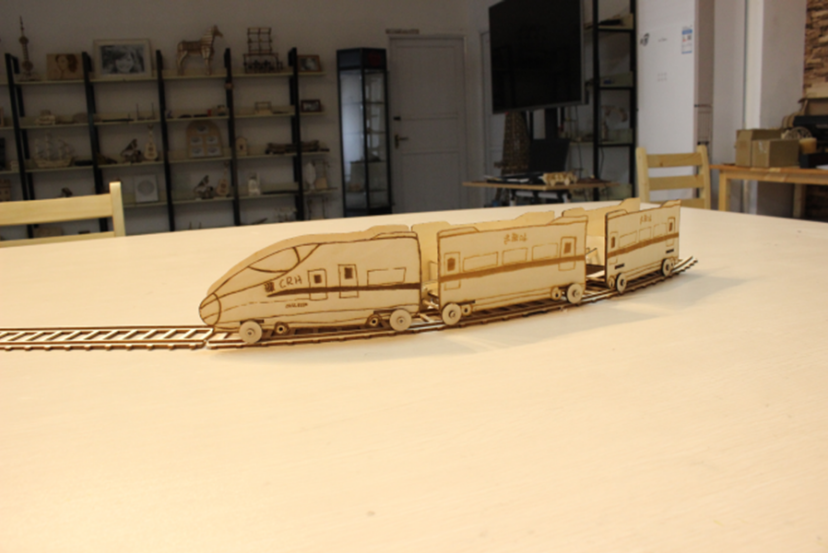
Start by designing the train wheels and small wooden fixing rings. In the source workflow, each wheel uses a 20 mm outer circle and a 3 mm inner circle. Use Array Copy to create multiple wheels and rings efficiently.
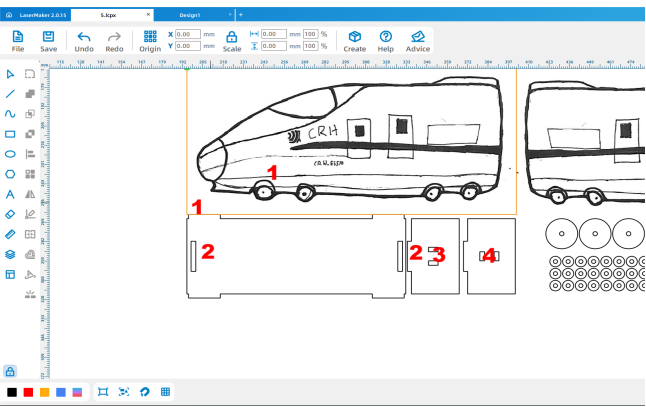
Next, design the train splicing plates with the welding function. These plates help connect the train body and support the three-dimensional structure.
| Part | Source Size Reference |
|---|---|
| Splicing plate 1 | 137.65 mm × 50 mm |
| Splicing plate 2 | 30 mm × 50 mm |
| Main bayonet sizes | 20 mm × 3 mm and 3 mm × 20 mm |
| Train-car connection bayonet sizes | 6 mm × 3 mm and 3 mm × 6 mm |
Place the bayonet features in the correct order. Draw a 3 mm circle at the center of each wheel position. In the source workflow, bayonets 3 and 4 are used to connect the train cars.
To connect the train cars, design coupler-style chain parts. Draw a 38 mm by 6 mm rectangle, add a 3 mm by 10 mm rectangle at the left center for welding, and add two 3 mm circles on the right side. Use Array Copy to make multiple coupler parts.
Mirror the locomotive and carriage graphics as needed so matching parts can be assembled on both sides. After the file is complete, process the parts with the laser cutter.
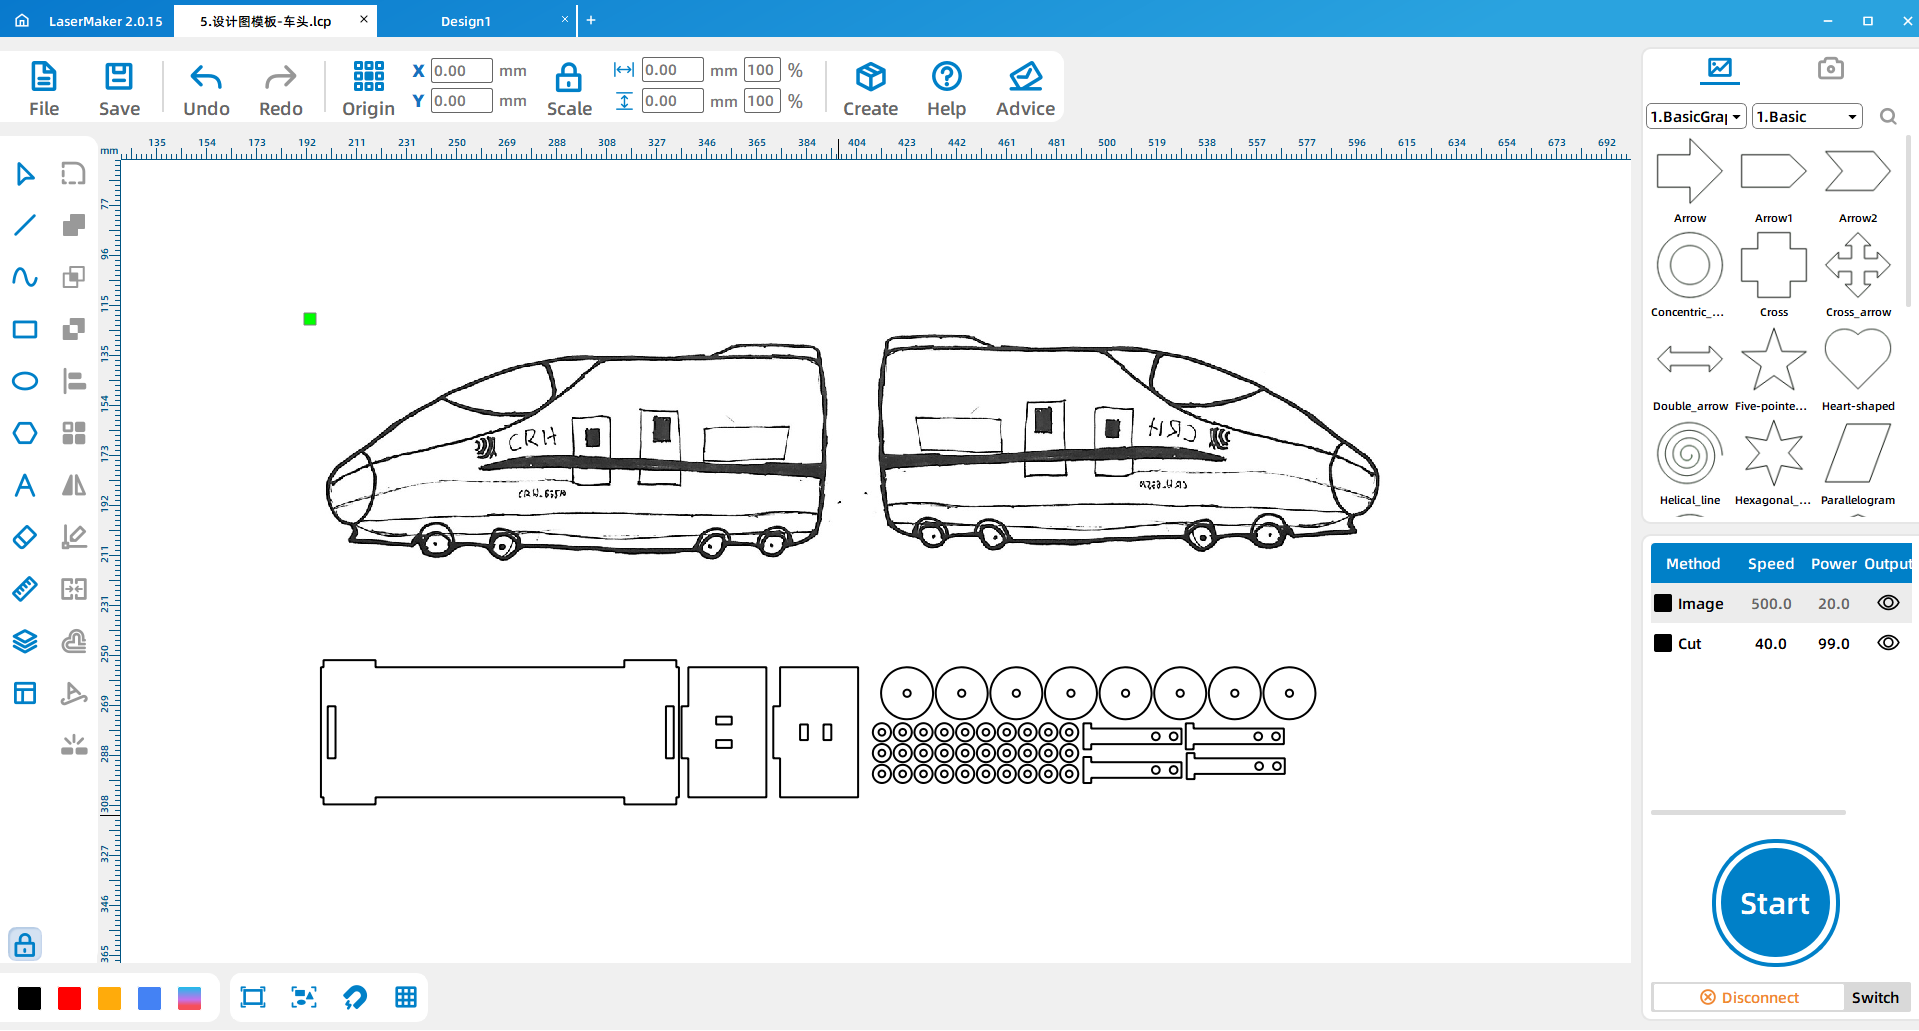
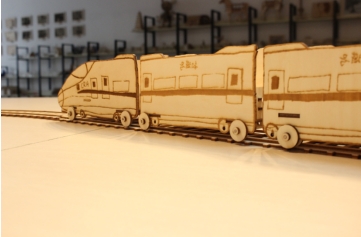
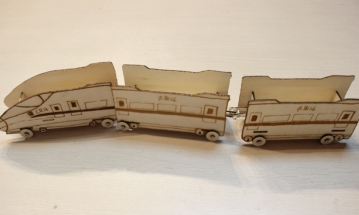
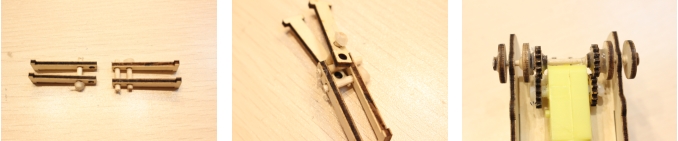
After cutting, install the wheels and splicing plates on the locomotive and train body. Connect two coupler parts to the tail of the locomotive, then connect another two coupler parts to the front of the next car. Use a small stick to connect the four coupler parts. Repeat the same method for the remaining cars.
Import the saved design files into the laser cutting machine for processing. Before processing, check the material placement, engraving and cutting layers, and focal length. The source lesson specifically reminds students to adjust the focus before cutting to reduce the risk of incomplete cuts.
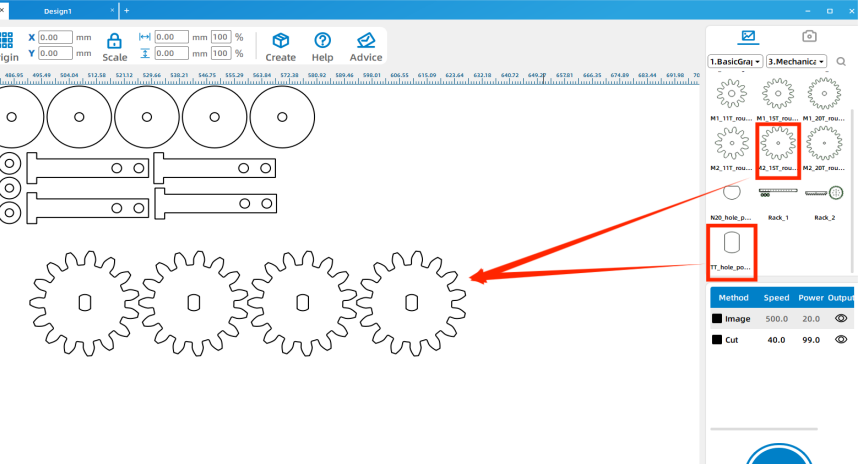
To make the train run by itself, students can add a small motor to the train. Use the gear design built into the LaserMaker Gallery, import it into the workspace, and use Array Copy to create four gears.
Install two gears on both sides of the motor. Glue the small motor under the front section near the front wheels. Install the remaining two gears on the wheel shaft and align them with the gears on the motor. If the wheel-shaft gears are not secure, glue can be used carefully to help fix them in place.
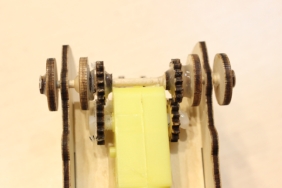
Connect the positive and negative wires from the battery box to the motor. Once the wiring is secure and the gears are aligned, the train can move by itself.
Since trains and high-speed trains usually run on rails, students can also design and build rails for the finished train. Rails make the model more realistic and give students another opportunity to explore alignment, spacing, and repeated structures.
Hand drawing: Give students paper and pens, then check that the locomotive and carriages have clear outlines before scanning.
Software design: Guide students through importing, cropping, outlining, deleting inner contours, setting layers, creating wheels, and designing couplers.
Machine processing: Process student files in a safe classroom order and confirm focus before cutting.
Assembly: Let students assemble wheels, splicing plates, train cars, and couplers with teacher support.
Review the car inventor workflow before introducing the train project so students understand what is being reused and what is new.
Remind students that trains have multiple connected bodies, so the connection parts are just as important as the drawing itself.
Prepare spare wheels, small rings, wooden sticks, and coupler parts when class time is limited.
Use batch processing when appropriate by arranging several student train parts into one laser processing file.
Use the rail-making extension as a reward task or advanced challenge for students who finish early.
What is the basic structure of a train?
What differences between trains and cars did you discover during this project?
How could you make your train run faster?
Students can evaluate their own work and give peer feedback based on creativity, structural firmness, appearance, and learning attitude.
| Evaluation Item | Self-Evaluation | Peer Evaluation |
|---|---|---|
| Creativity, 30 points | ||
| Firmness, 30 points | ||
| Appearance, 20 points | ||
| Learning Attitude, 20 points | ||
| Total, 100 points |
At the end of the lesson, students can display their trains, explain how they designed the locomotive, carriages, couplers, wheels, and optional upgrades, and discuss how they would improve the next version.
After finishing the basic train, students can improve the motorized version by changing the power unit, adjusting the gear connection, improving the wheel-shaft fit, or testing different carriage numbers. They can also design longer rails, stations, bridges, or scenery to create a complete train environment.
For a broader creative challenge, students can use the same draw-scan-process-cut-upgrade workflow to design other connected systems, such as buses, cable cars, amusement rides, or linked robot modules.
This project is suitable for classroom laser cutters that support engraving and cutting of thin plywood for student maker activities. For schools and beginner STEAM labs, projects like hand-drawn train models, connected vehicles, wheels, couplers, and beginner LaserMaker activities can be completed with a classroom laser cutter such as the Thunder Laser Bolt Series.
Teachers can choose the machine and material setup based on classroom space, student supervision needs, material thickness, project size, and ventilation setup. Students should always test settings, check focus, and follow the school’s laser safety rules before final cutting.
Talk To Our Experts Now!
Please leave your contact information so that we can serve you better.
TAKE THE NEXT STEP WITH THUNDER LASER

 Stable & Consistent MachinesUnlimited ApplicationRobust After-sales SupportFactory Direct Supply


