Custom Name Badge Laser Cutting Project with LaserMaker
 26-05-18
WHAT ARE YOU LOOKING FOR?
Search Across Products, Blog Posts, Support Content, And Resources.

Custom Name Badge Laser Cutting Project with LaserMaker
26-05-18

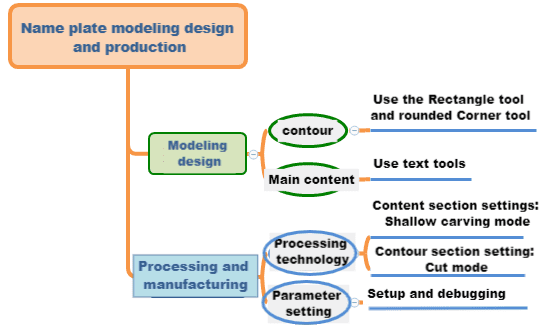
In this STEAM classroom project, students design and make a personalized name badge using LaserMaker. The lesson introduces basic digital drawing, text layout, material selection, engraving, cutting, and parameter testing through a practical object students can use in class events, maker camps, exhibitions, or school activities.
This beginner-friendly project works well as an introduction to laser cutting, digital fabrication, and project-based learning. Students move from research and sketching to software design, material processing, testing, and final presentation.
| Item | Details |
|---|---|
| Project | Custom laser-cut name badge |
| Software | LaserMaker |
| Main Skills | Measurement, rounded rectangle drawing, text editing, layer setup, engraving, cutting, and parameter testing |
| Suggested Materials | Basswood plywood or acrylic sheet |
| Classroom Fit | Maker education, STEAM projects, design and technology lessons, school activity preparation, and beginner laser cutting practice |
Students will create a name badge that communicates identity clearly and fits a real use scenario. Through the process, they will practice planning, drawing, arranging text, choosing materials, setting processing layers, and improving the result through testing.
Students should use respectful, school-appropriate language and imagery on their badges. They may study other designs for inspiration, but their final work should include their own improvements, choices, and creative decisions.
A name badge is a wearable or hanging sign used to show identity, role, group, or event information. It helps people introduce themselves and makes activities, workshops, exhibitions, and classroom events easier to organize.
Most name badges are rectangular, but they can also use rounded, circular, or customized shapes depending on the purpose and design style.
Before opening the software, students should analyze the badge as a real product. This helps them understand how the design will be used, what material is suitable, and which parts should be engraved or cut.
Start by observing real badges from school events, workshops, conferences, or activity groups. Pay attention to size, shape, readability, and how the badge is worn or attached.
| Measurement Data Recording / Unit: mm | |
|---|---|
| Length: | Width: |
After measuring, students should sketch their badge by hand. The sketch should show the badge outline, text placement, decorative elements, and any holes or attachment positions needed for wearing or hanging.
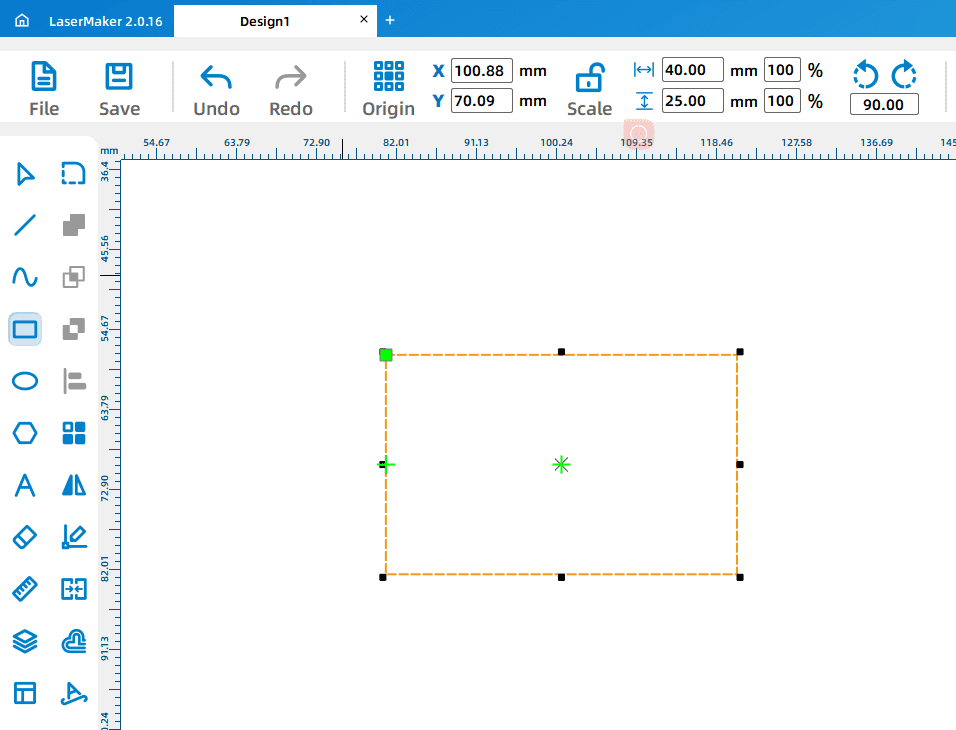
Open LaserMaker and use the Rectangle Tool to draw the basic badge shape. Students can drag to create the rectangle or enter the measured width and height directly in the size fields.
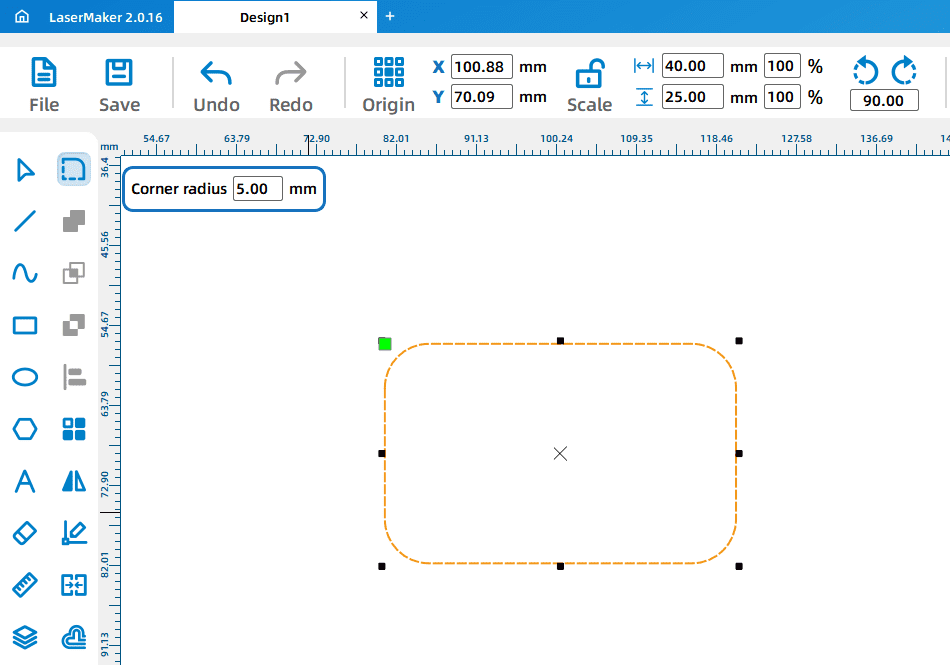
Next, use the Rounded Corner Tool to soften the sharp corners. In the sample project, a radius value of 5 is used. Move to each corner and click when the “+” symbol appears to round the corners one by one.
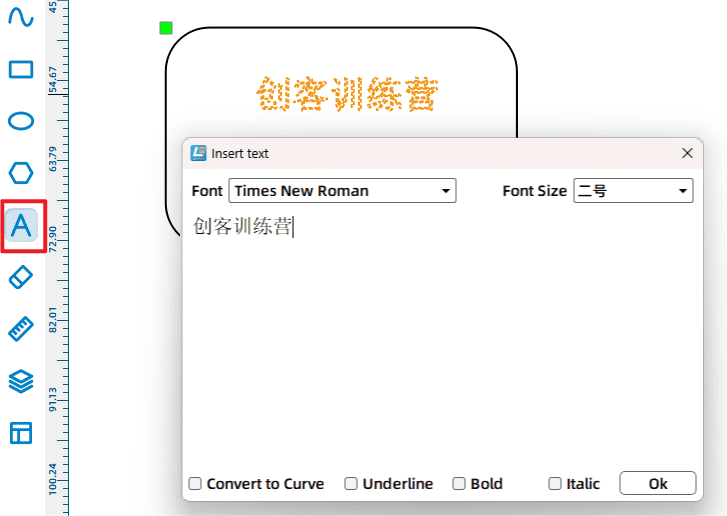
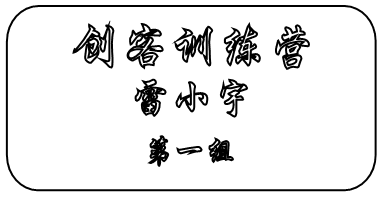
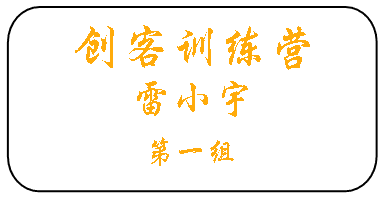
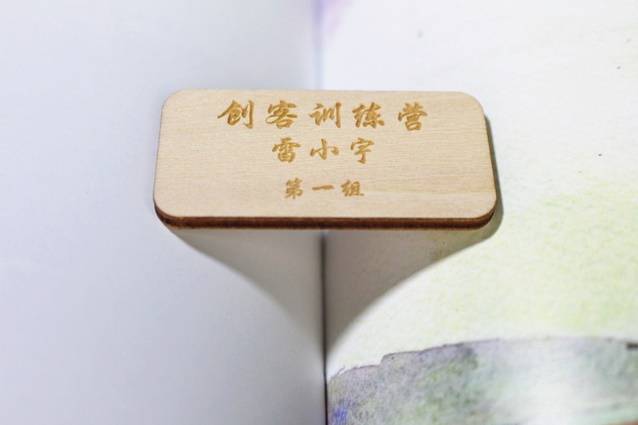
Use the Text Tool to add the badge content. In the sample project, the text includes “Maker Training Camp,” a student name, and a group label. Students can choose a suitable font and size, then move and resize the text so the layout is balanced and easy to read.
Select the text objects and assign them to the appropriate processing layer. In the sample workflow, the text is assigned to the yellow shallow engraving layer.
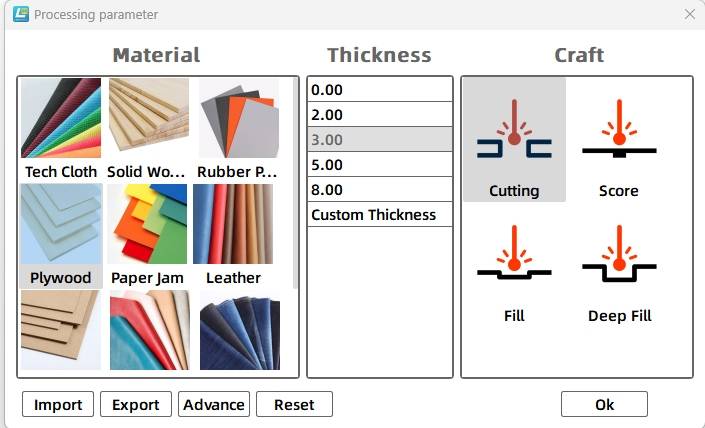
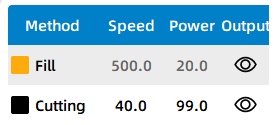
Double-click the processing layer to open the Processing Parameters dialog box. For the sample badge, set the material to basswood plywood, choose shallow engraving for the text, and use a processing thickness of 0.1 mm. For the badge outline, use the black cutting layer, set the material to basswood plywood, choose cutting, and use a processing thickness of 3 mm.
If a test result needs improvement, students can adjust the engraving or cutting parameters, including speed and power, in the relevant parameter dialog box. The sample debugging activity suggests testing a speed value of 400 and a power value of 20, then observing the result and refining the settings as needed.
Suggested process order: shallow engraving → tracing → cutting. This order helps keep the material stable before the final outline is cut.
Before making the final badge, students should test the design and processing settings on a small piece of the same material. Encourage them to compare the clarity of different fonts, observe the engraving depth, and check whether the cut edge is clean.
After the final settings are confirmed, students can complete the engraving and cutting process, then clean the badge and attach the pin, cord, or other wearing method selected during the design stage.
After completing the name badge, students can apply the same design process to a classroom sign or group display board. They should consider how the sign will be fixed securely to a wall, door, board, or classroom display area.
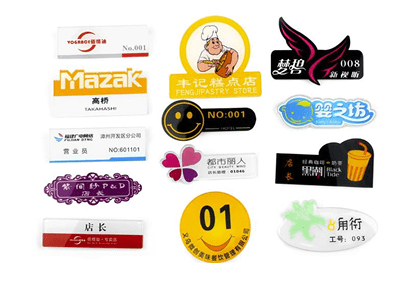
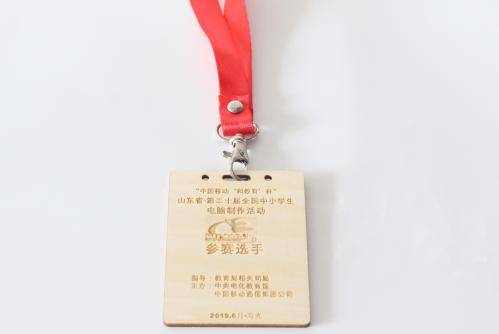
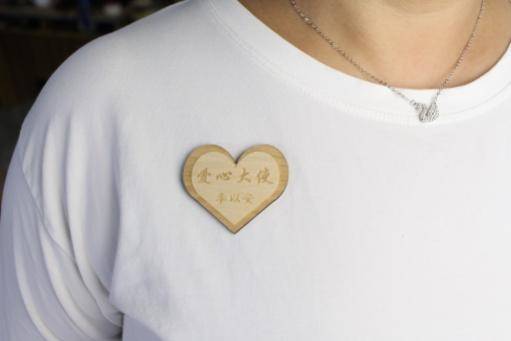
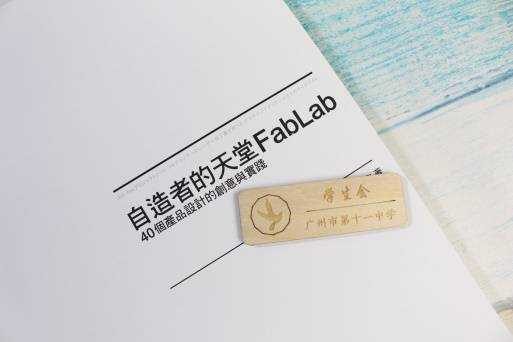
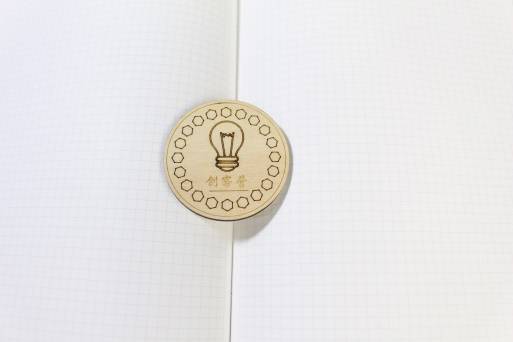
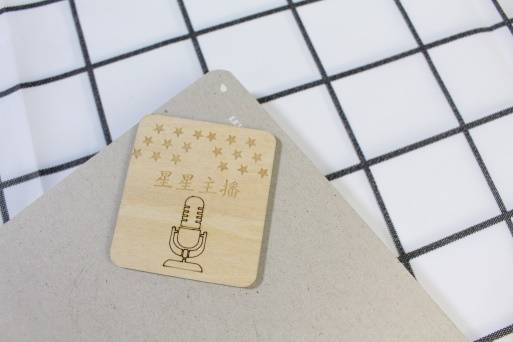
The following badge and sign examples can be used for classroom discussion, design inspiration, and student reflection. Encourage students to compare the shape, layout, text, material, and attachment method of each example.
This project is suitable for classroom laser cutters that support small-format engraving and cutting. For schools, makerspaces, and beginner STEAM labs, Thunder Laser Bolt can be used for hands-on projects such as name badges, signs, tags, labels, and student design activities.
Teachers can choose the machine and material setup based on classroom space, project size, material choice, and learning goals. The same workflow can also be adapted for other CO2 laser machines when students move on to larger signs, display boards, or more advanced maker projects.
Talk To Our Experts Now!
Please leave your contact information so that we can serve you better.
TAKE THE NEXT STEP WITH THUNDER LASER

 Stable & Consistent MachinesUnlimited ApplicationRobust After-sales SupportFactory Direct Supply