STEAM Design and Build a DIY Mid-Autumn Lantern Project
 24-08-26
WHAT ARE YOU LOOKING FOR?
Search Across Products, Blog Posts, Support Content, And Resources.

STEAM Design and Build a DIY Mid-Autumn Lantern Project
24-08-26

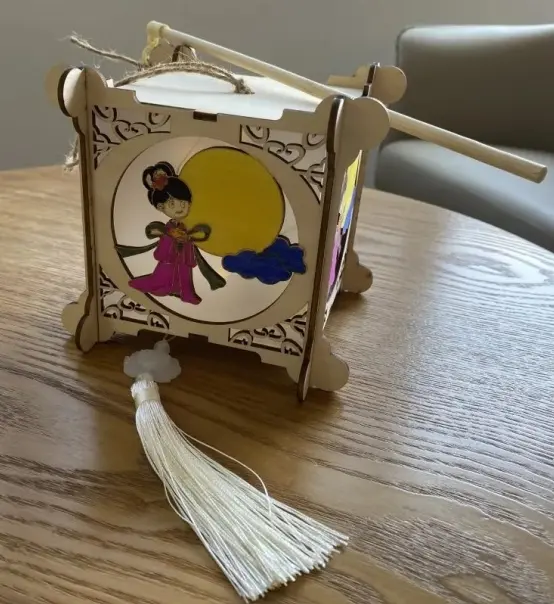
Lanterns are traditional lighting and decorative objects. They are often made with a frame and a translucent outer layer, and they can combine painting, paper cutting, folding, stitching, and structural design. In many Mid-Autumn Festival celebrations, lanterns help create a warm festive atmosphere and express wishes for reunion, peace, and good fortune.
In this laser STEAM course, students will design and make a DIY Mid-Autumn lantern. The project combines cultural craft, digital drawing, laser cutting, mortise-and-tenon assembly, frosted light-diffusing panels, and LED lighting. Students can complete the lantern as a classroom project and share it with friends or family during the Mid-Autumn Festival.
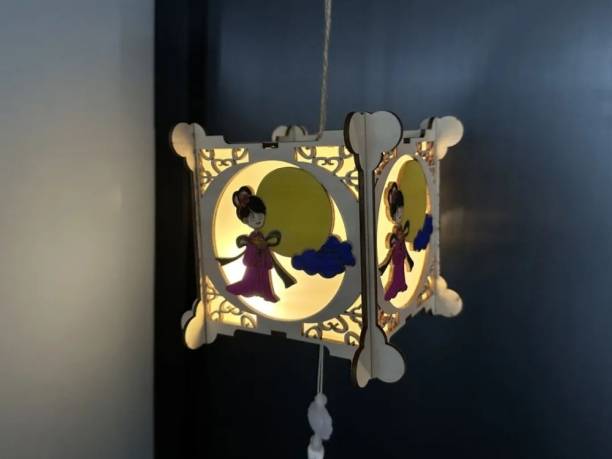
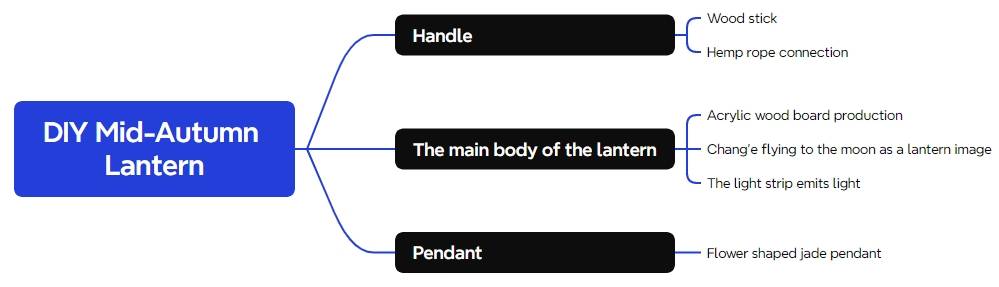
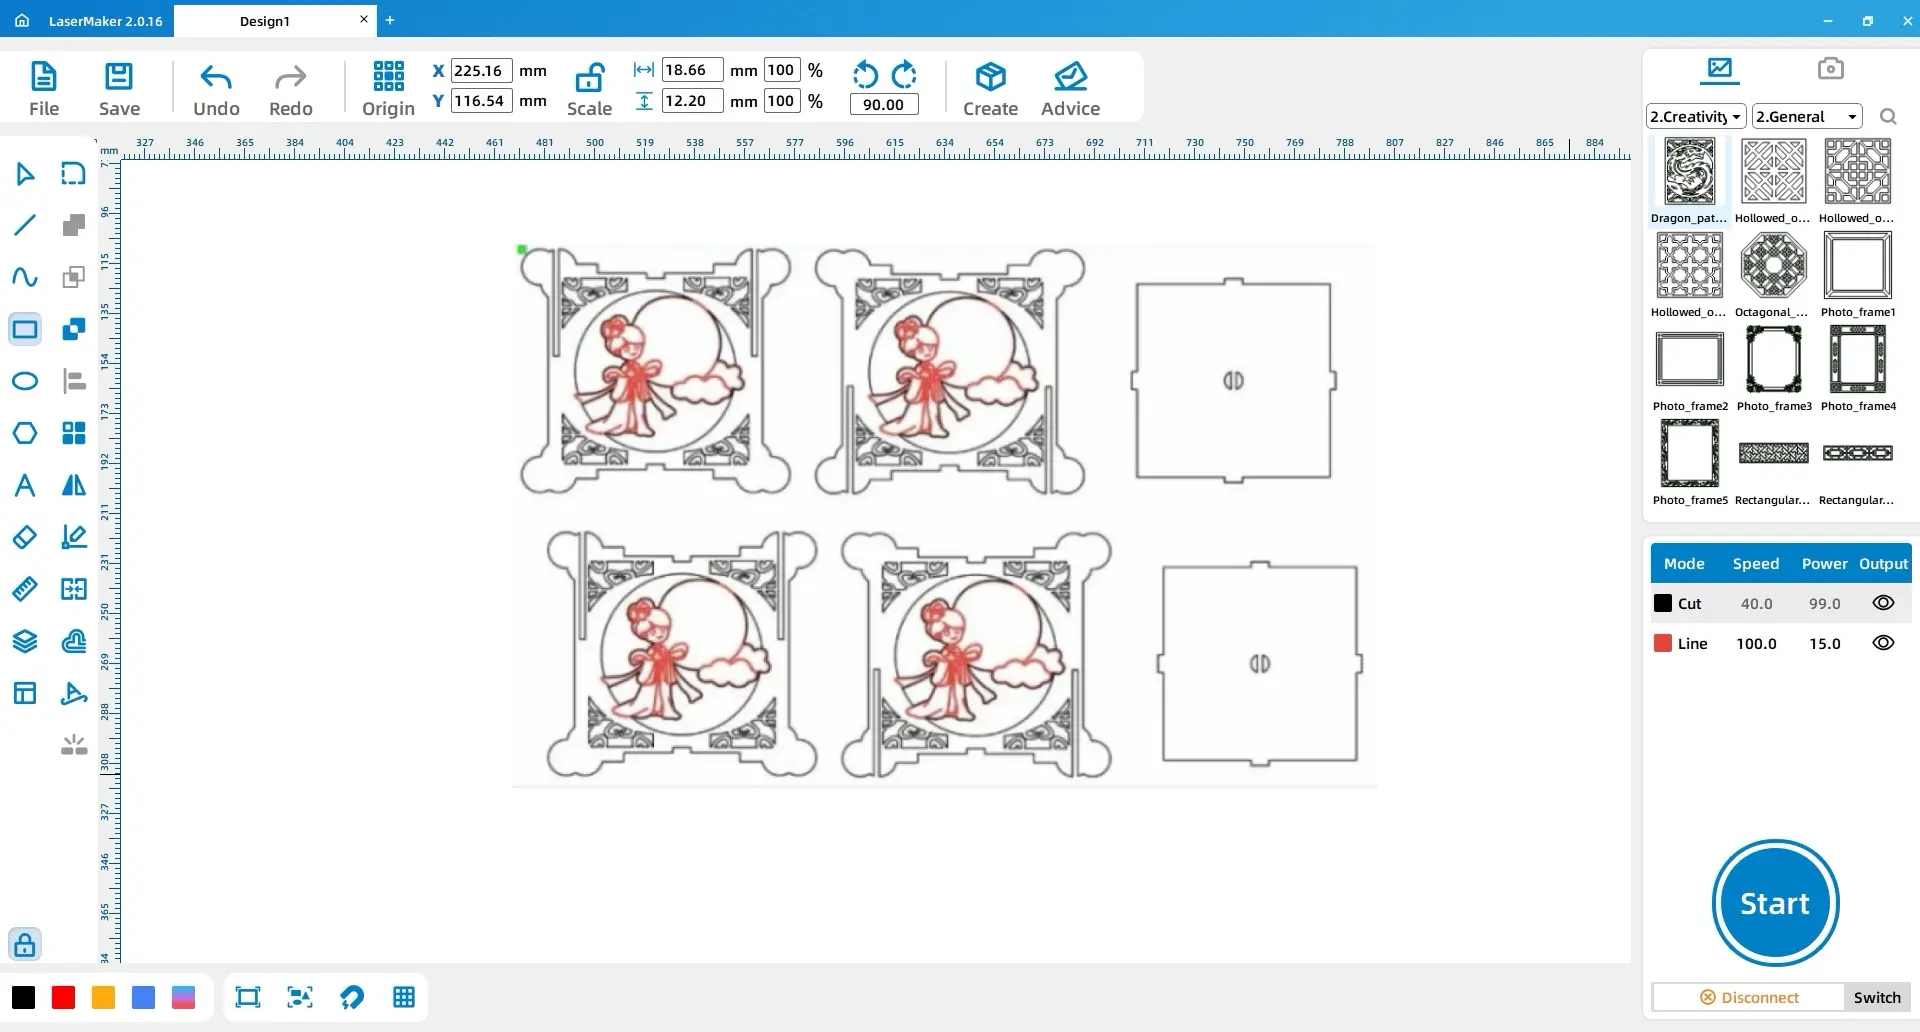
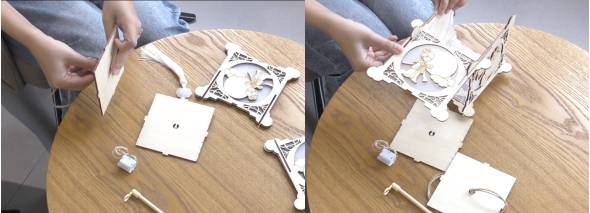
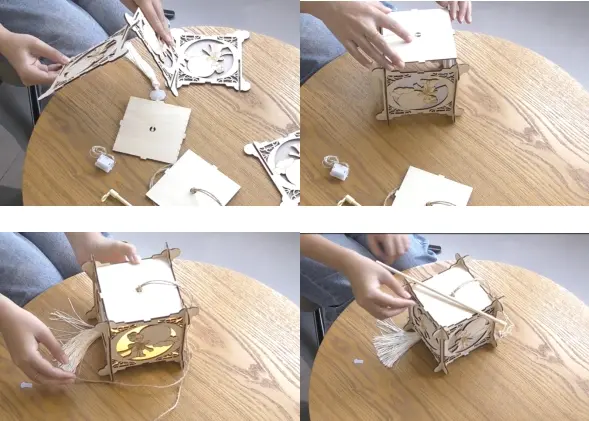
The lantern structure includes a handle, the main lantern body, and a pendant. Students will create decorative panels, prepare the cutting and tracing layers, assemble the six faces of the lantern, attach frosted plastic sheets, install the LED light strip, and complete the handle and pendant.
Lantern making is a strong example of how traditional craft can connect with modern digital fabrication. In this project, students redesign a festive object using laser cutting, then assemble and decorate it by hand. This makes the activity useful for cultural learning, seasonal classroom projects, maker education, and project-based STEAM lessons.
The project also encourages students to think about light diffusion, structure, and user experience. Frosted plastic sheets help soften the light, while the wooden frame and mortise-and-tenon structure help the lantern keep its shape.
| Number | Material or Component | Quantity |
|---|---|---|
| 1 | 3 mm basswood board | 1 |
| 2 | Hemp rope | 1 |
| 3 | Wooden stick | 1 |
| 4 | Pendant | 1 |
| 5 | LED light strip | 1 |
| 6 | Paint | 1 |
| 7 | Frosted plastic sheets | 4 |
Classroom note: This lesson uses an LED light strip. For classroom safety, do not use an open flame inside the wooden lantern. Teachers should review the laser file, confirm material suitability, and supervise laser processing and assembly.
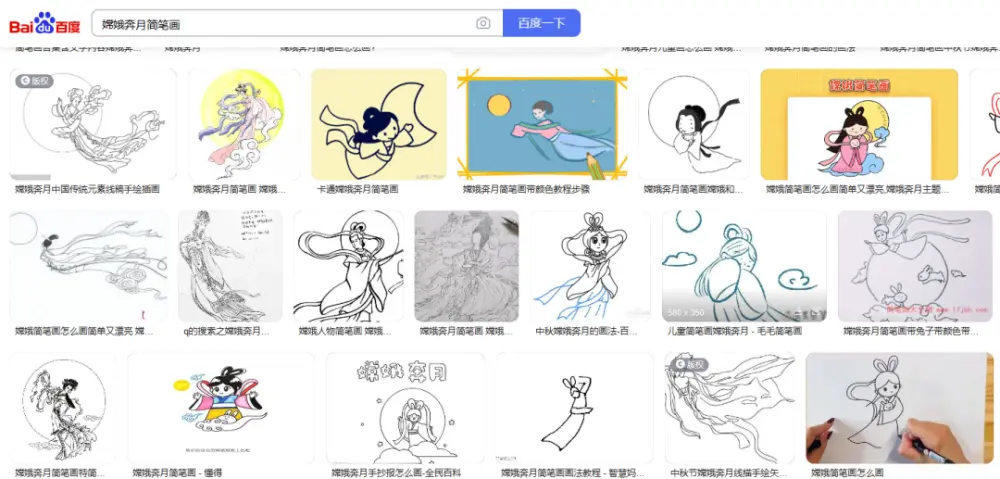
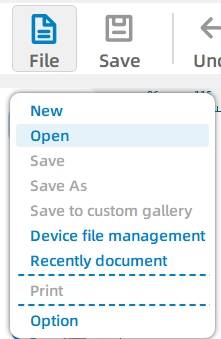
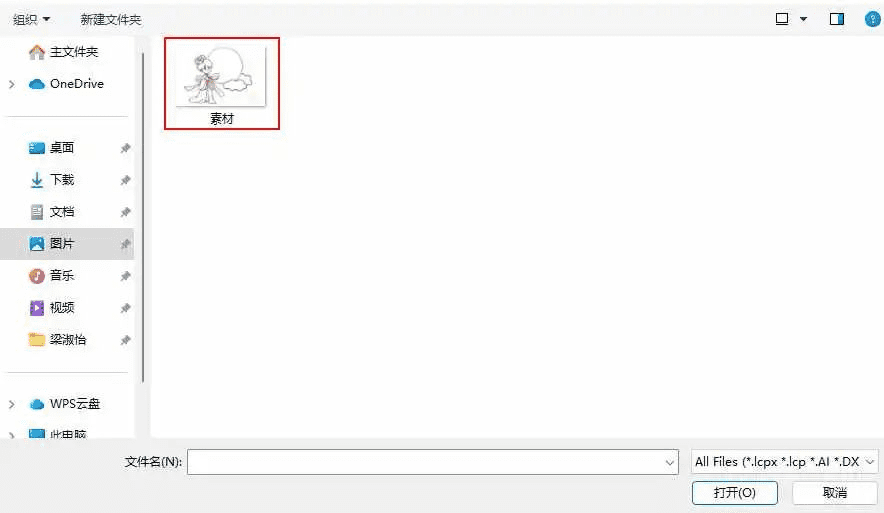
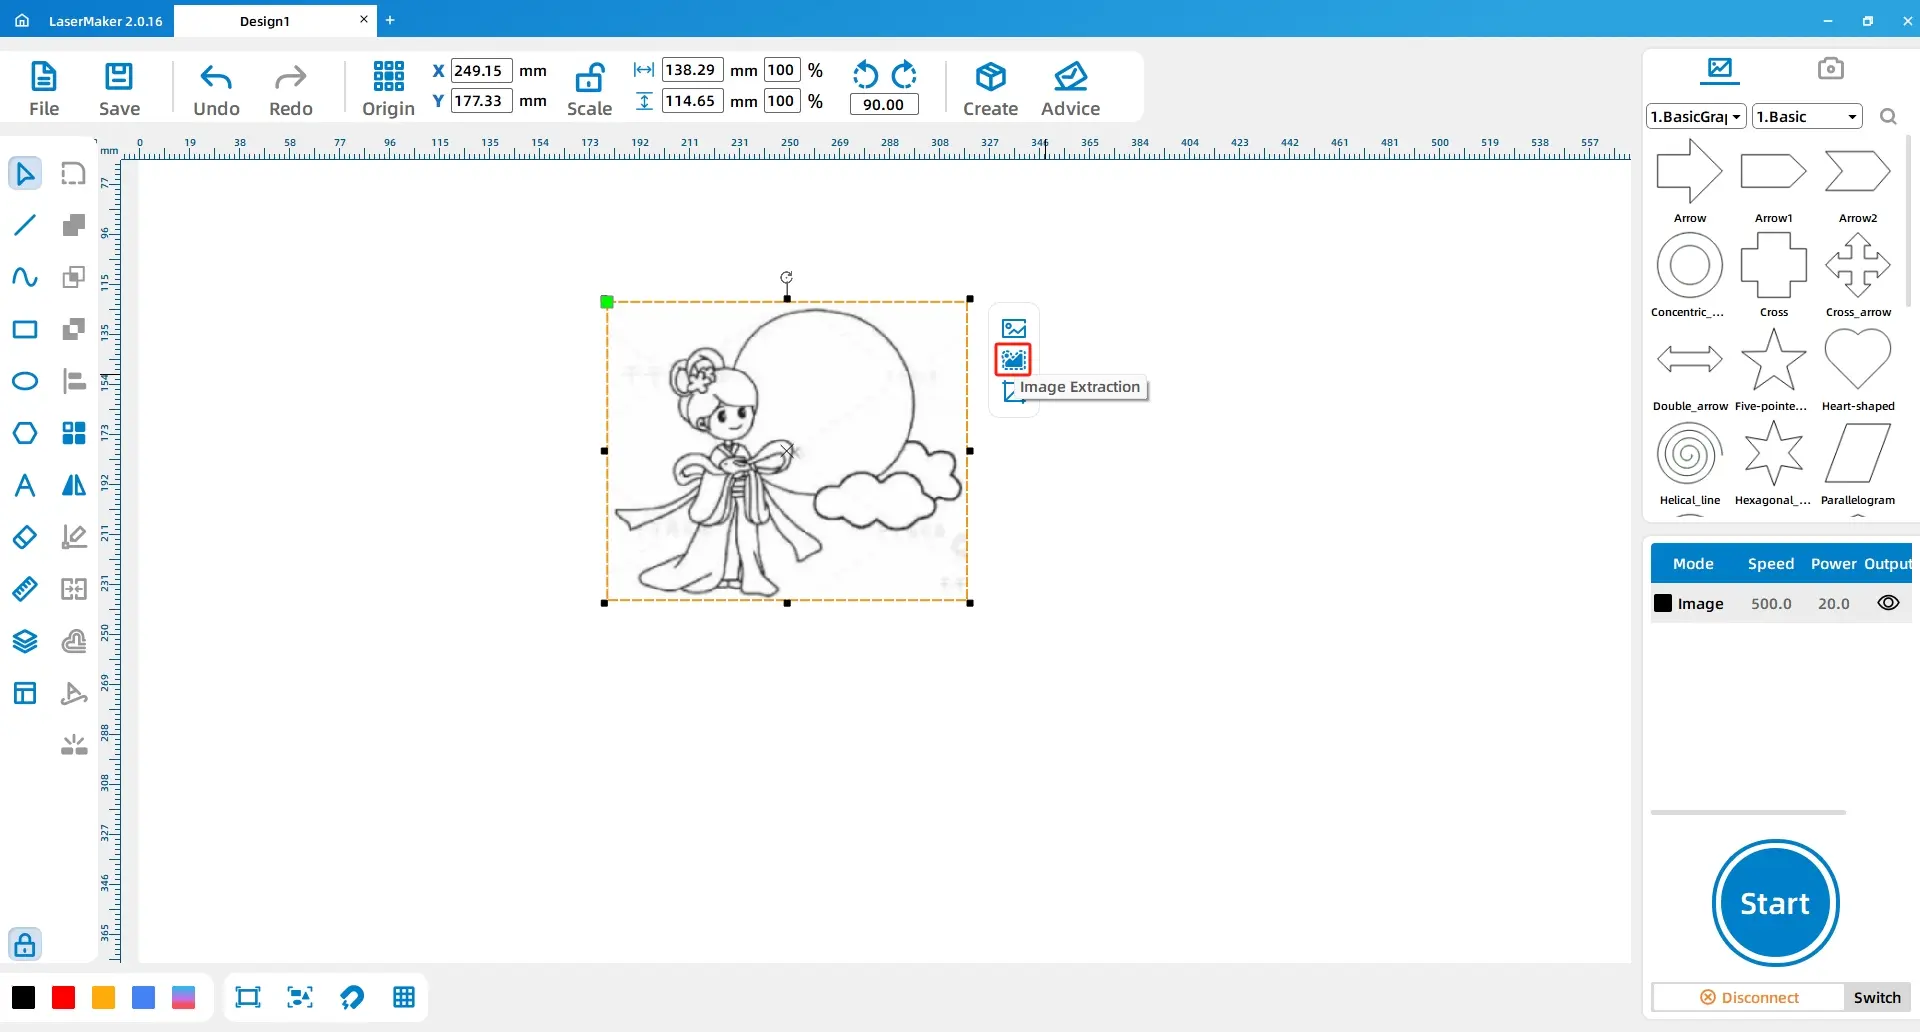
Prepare a simplified drawing of “Chang’e Flying to the Moon.” In the source workflow, students search for a suitable image, save it, then open it in the laser design software using File and Open. Teachers may also provide an approved classroom image so students can focus on tracing and design.
Select the Chang’e image, click Outline Tracing, and adjust the tracing parameters until a usable line drawing is created.
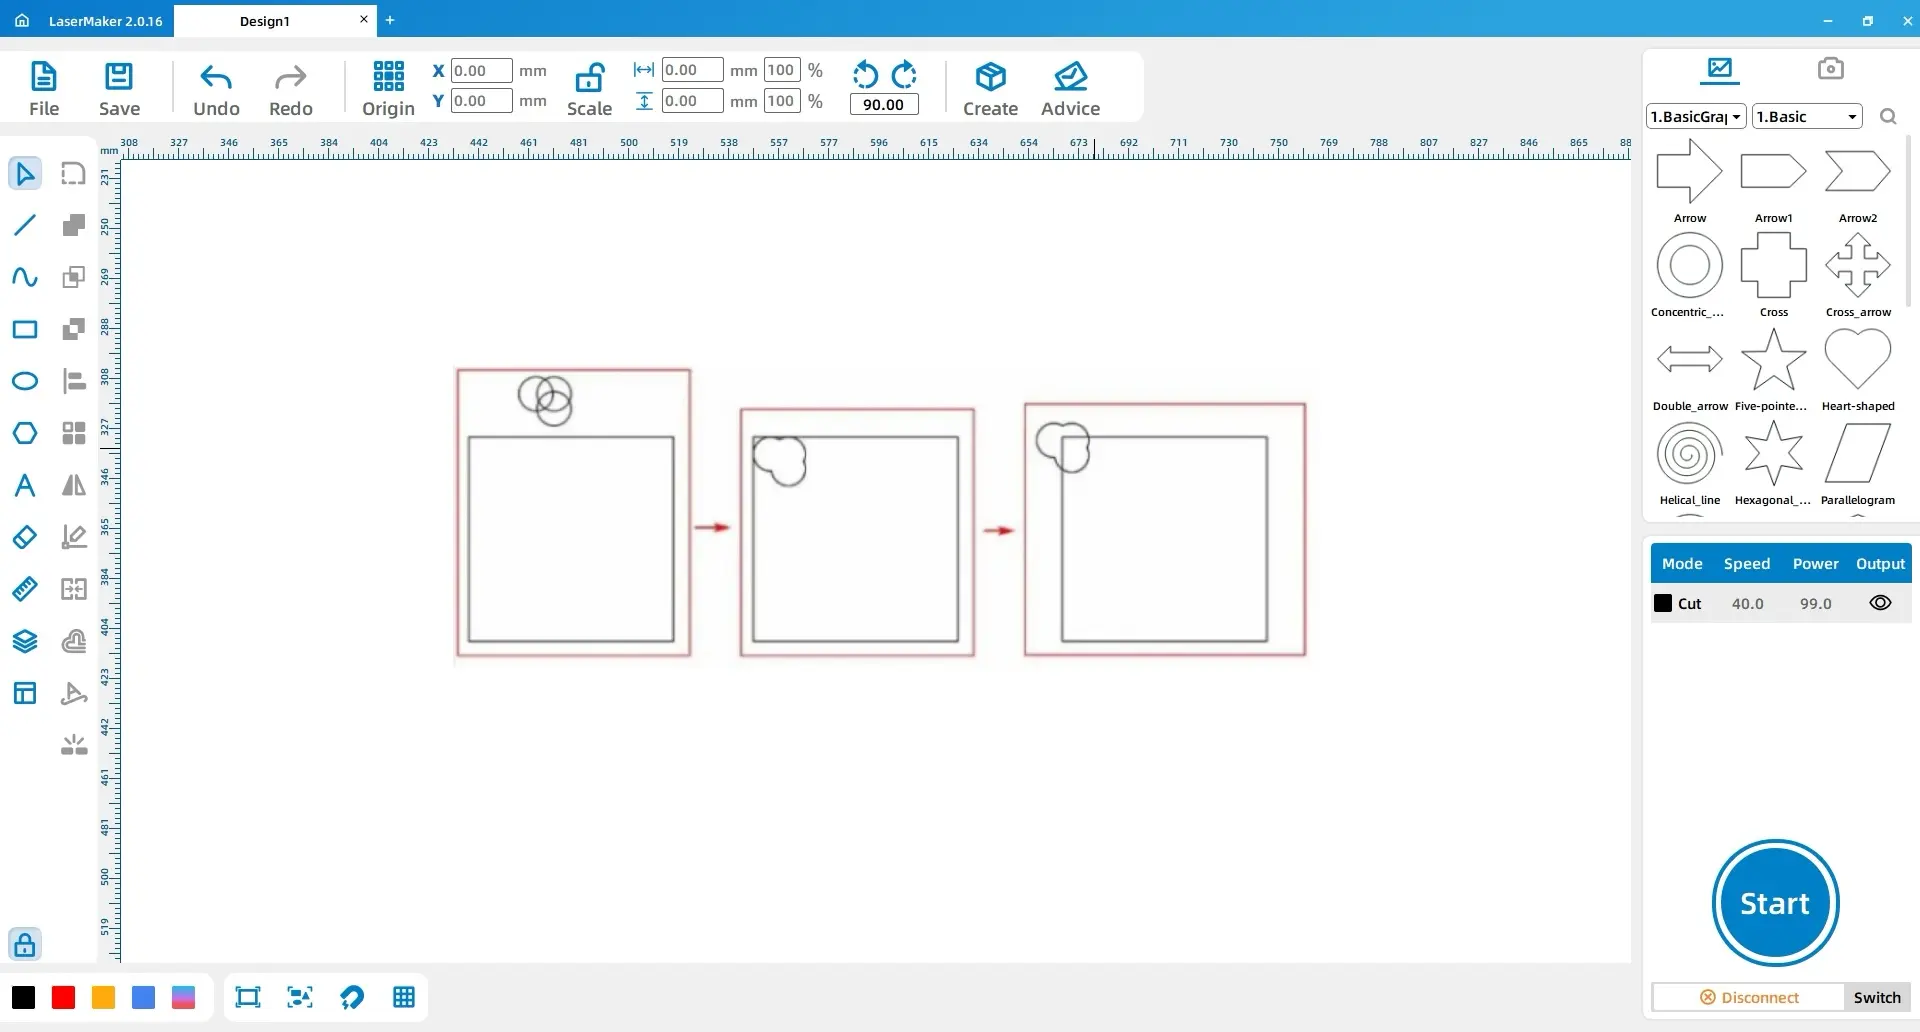
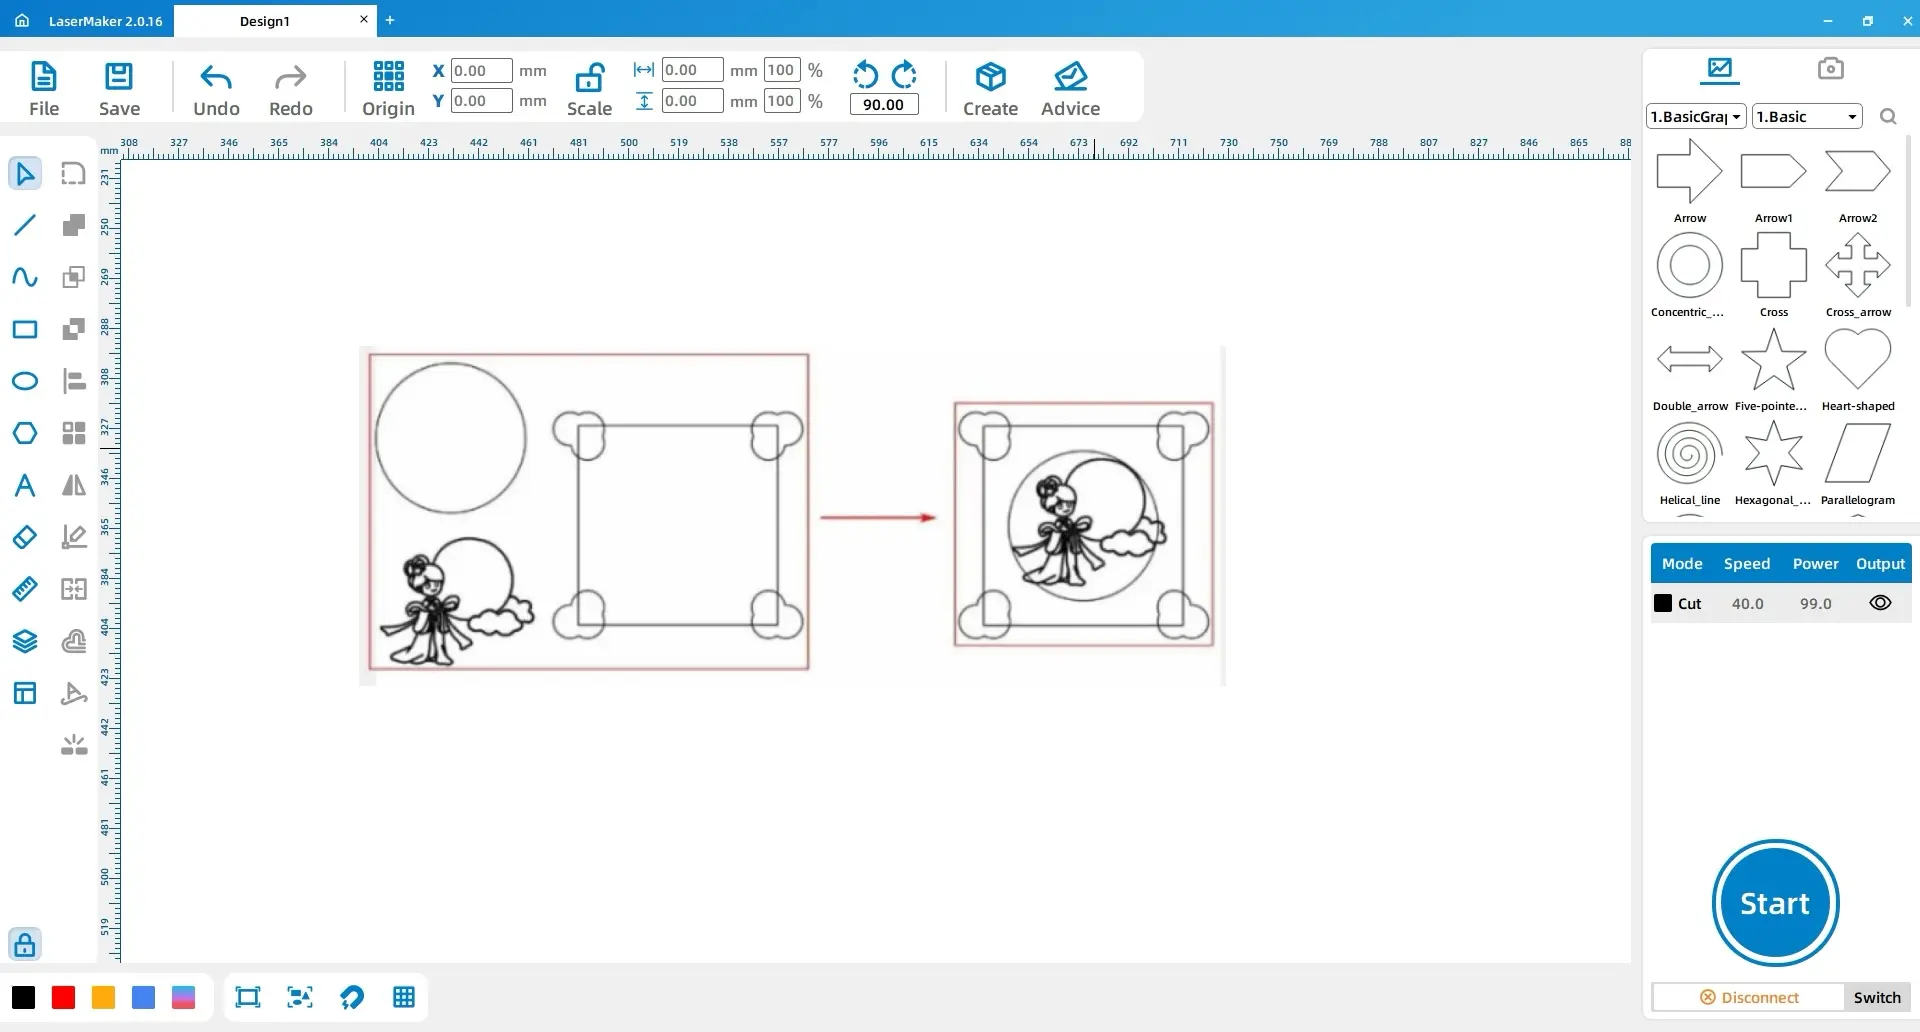
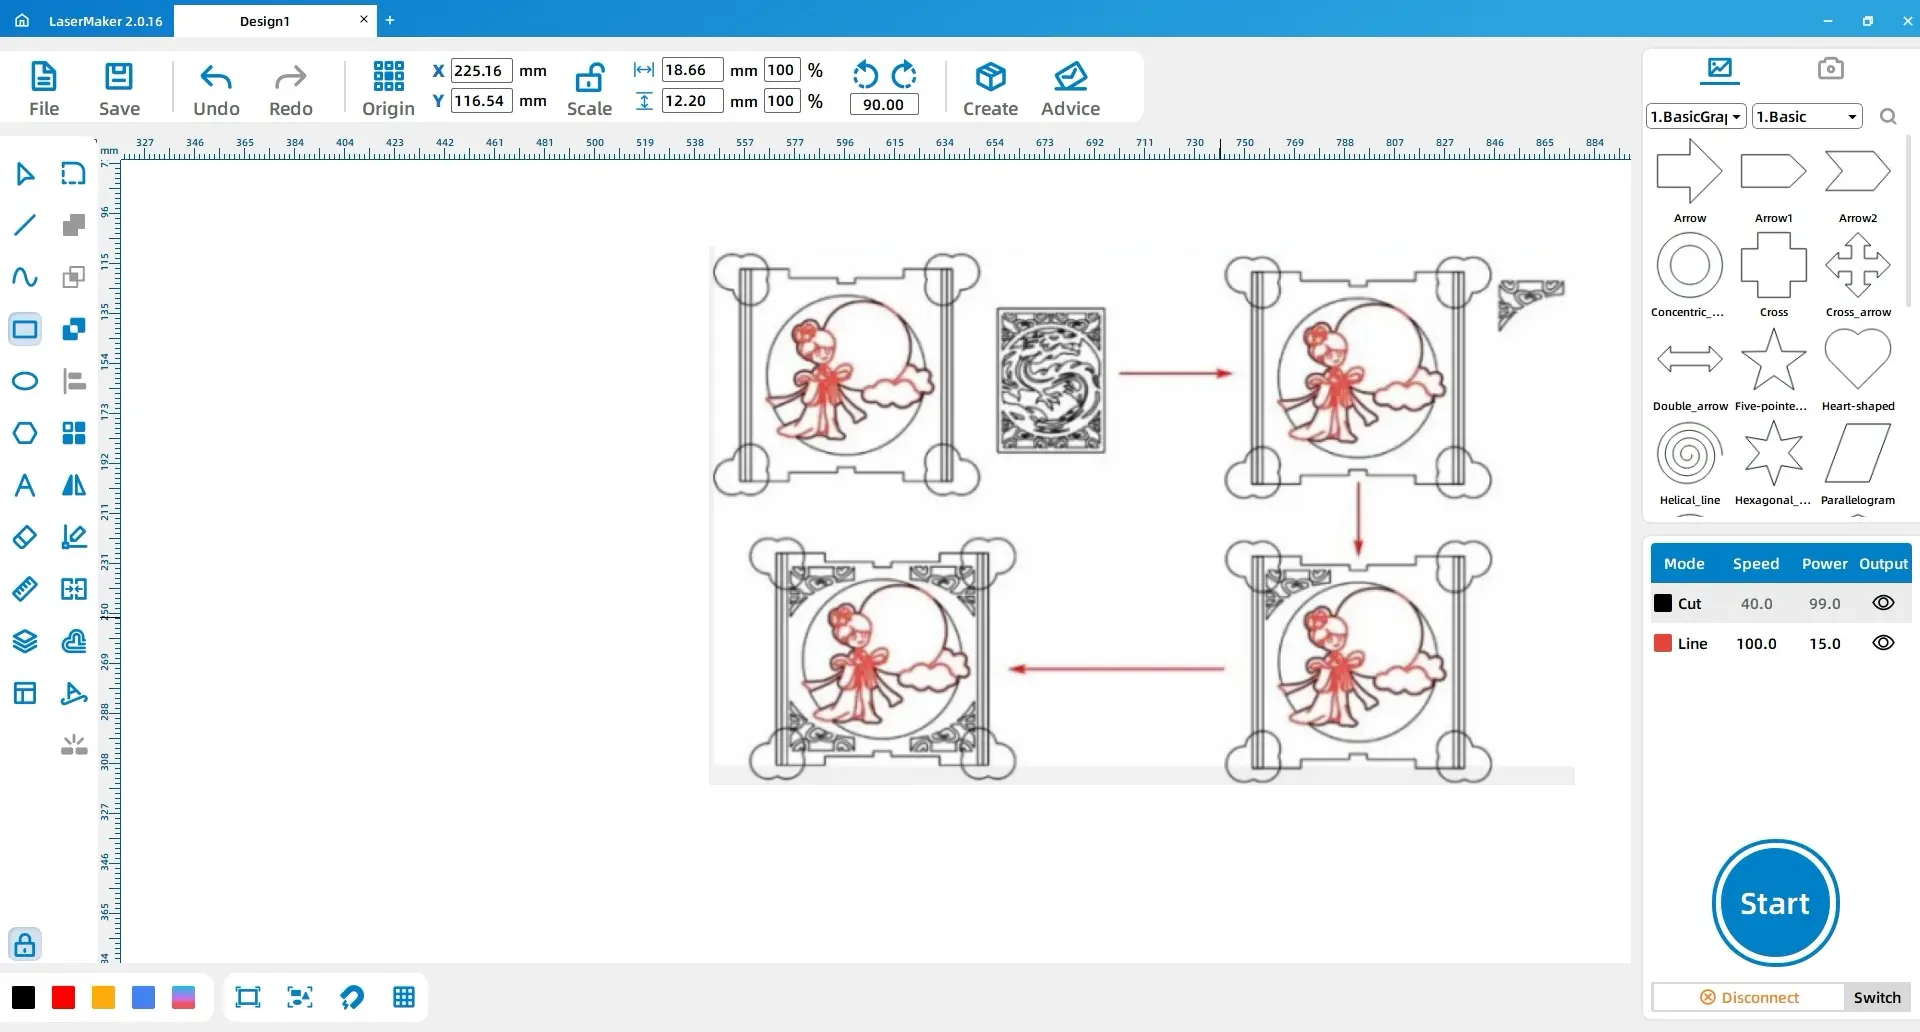
Use the Rectangle tool to draw a 120 mm × 120 mm rectangle. Then use the Ellipse tool to draw a 20 mm × 20 mm circle. Copy and paste the circle twice, arrange the three circles into a cloud shape, and use Union to combine them.
Move the cloud pattern to the top-left corner of the rectangle, then adjust its position using the source coordinate reference.
Copy the cloud pattern and move it to the top-right corner. Apply a horizontal mirror flip. Then copy the two upper cloud patterns, move them to the bottom of the rectangle, and apply vertical mirror flips to form the lower cloud decorations.
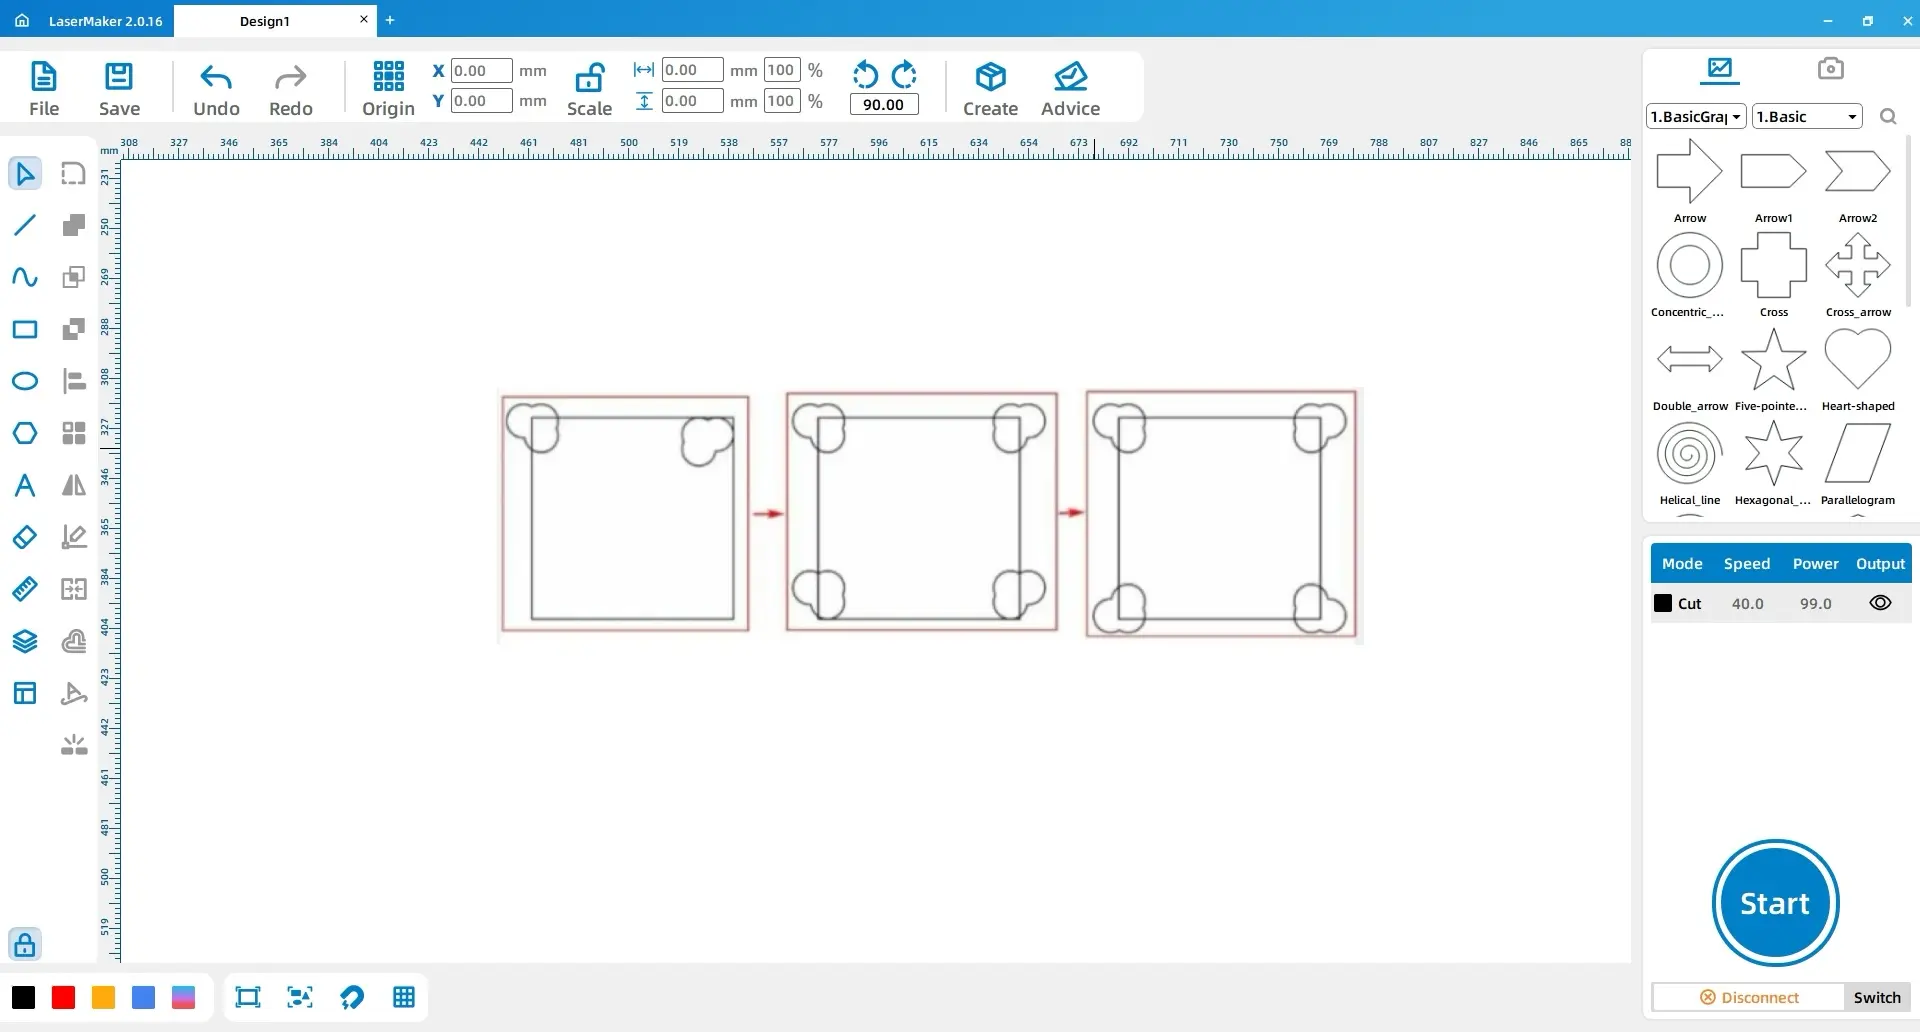
Draw a 90 mm × 90 mm circle and place it in the centre of the rectangle. Place the Chang’e line drawing in the centre of the circle.
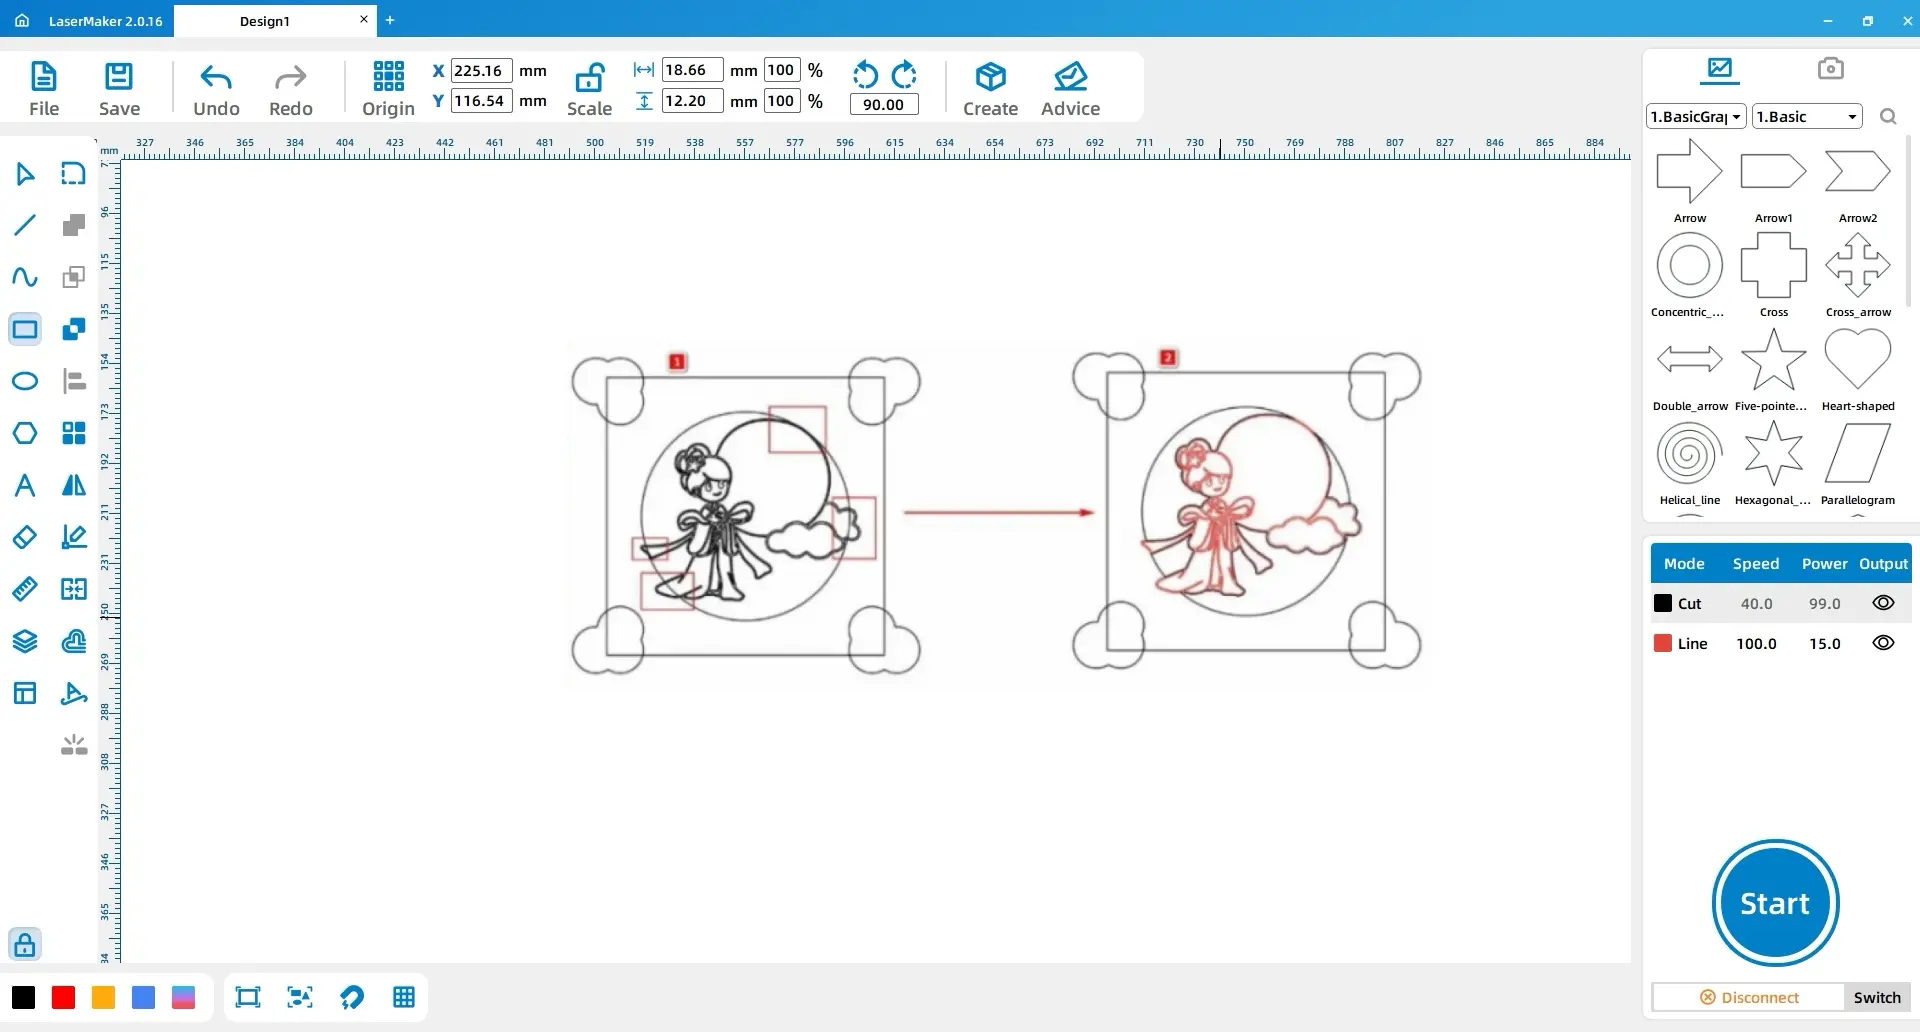
Use the Eraser tool and its Break Line Segment function to break the intersection points between the Chang’e pattern and the circle. Then use Combine Curve to connect the outer perimeter of the Chang’e pattern with the circle. Select the internal lines of the Chang’e pattern and assign them to the tracing layer.
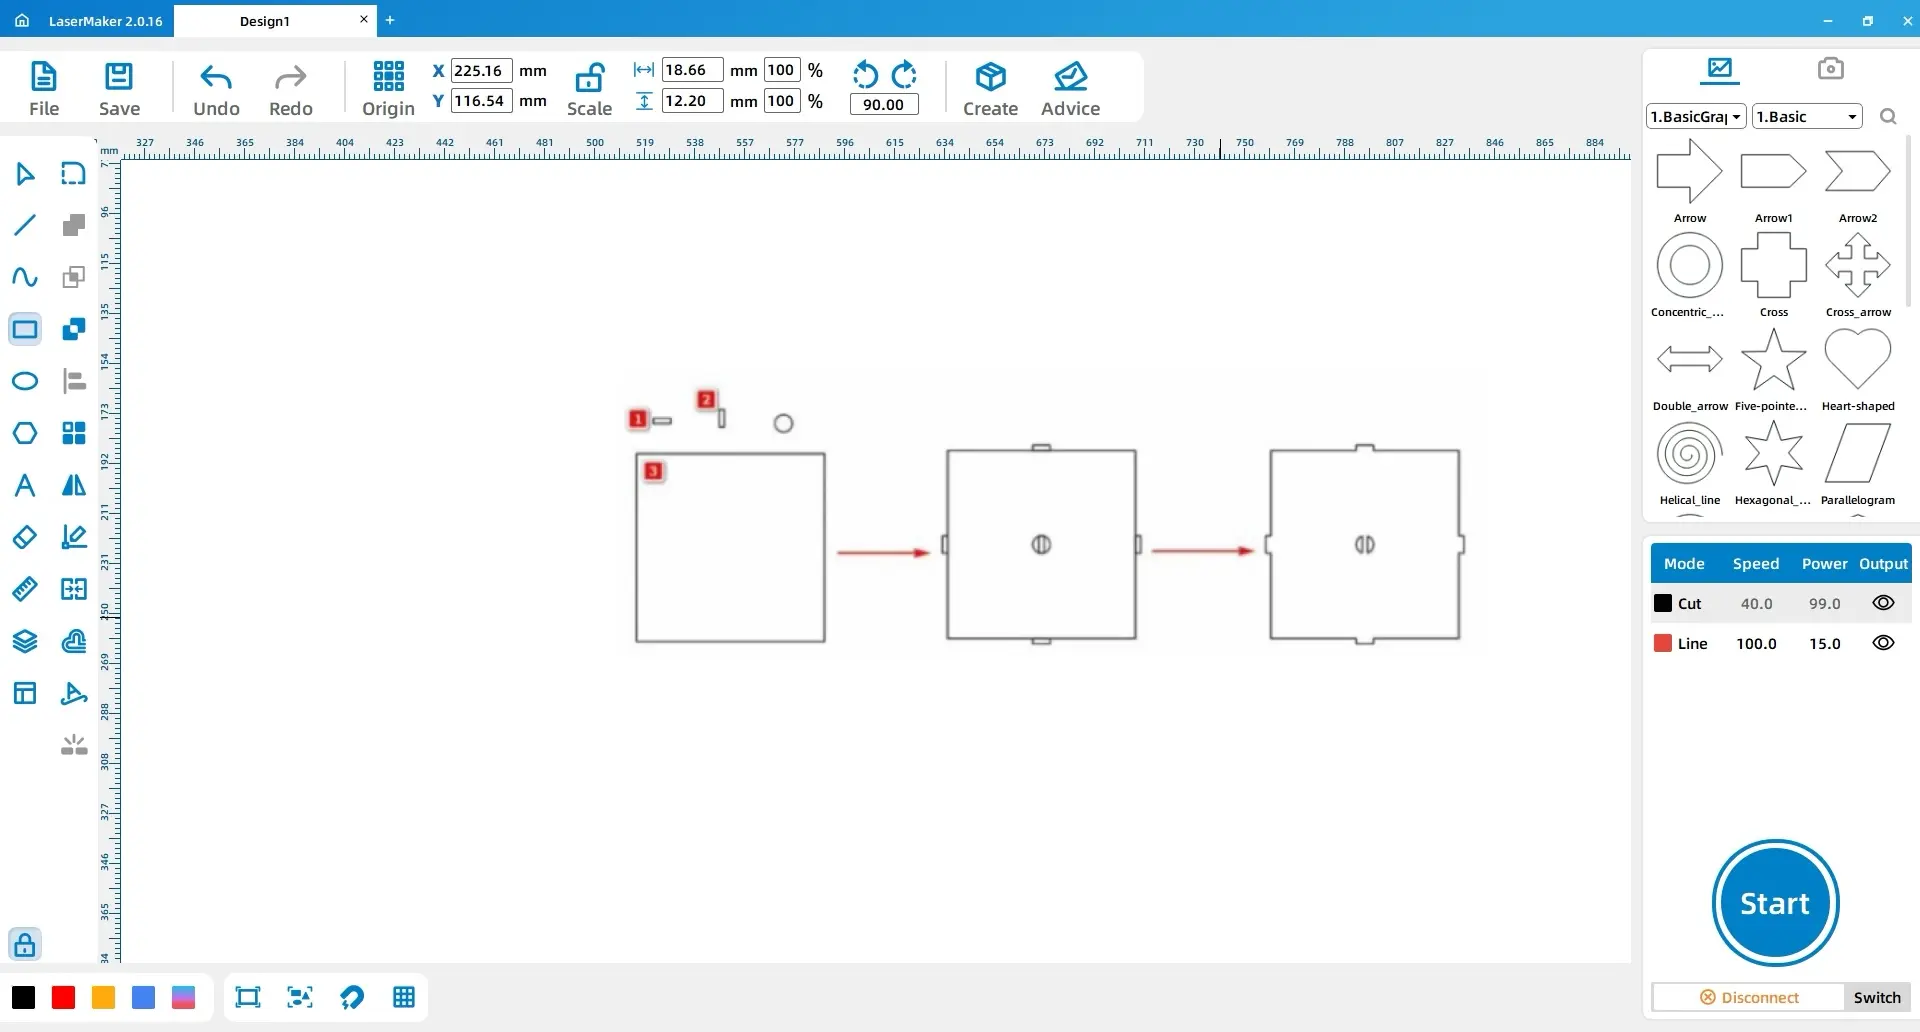
Draw two rectangles, each 65 mm × 5 mm, and place them at the centre of the upper and lower inner sides of the large rectangle. Draw two additional rectangles, each 10 mm × 3 mm, and align them above and below the first two rectangles. Use Union, then apply Difference with the large rectangle to create the slot structure.
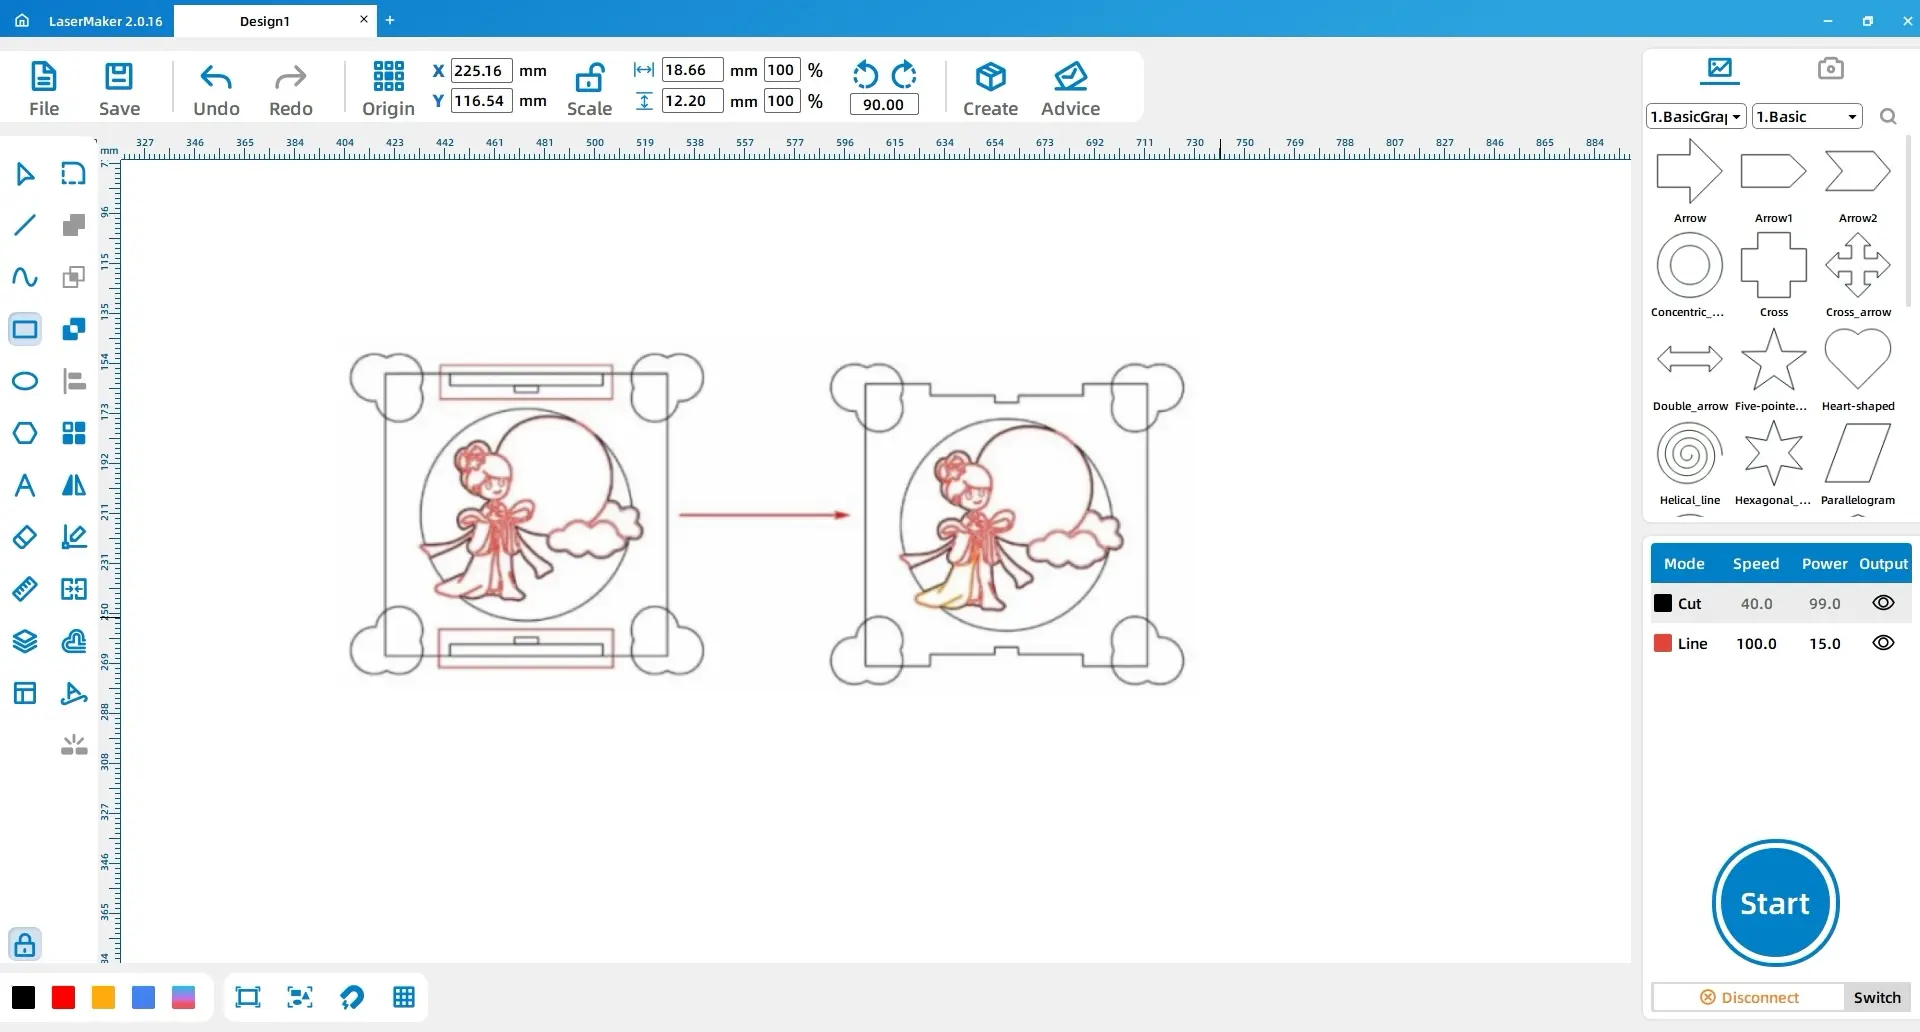
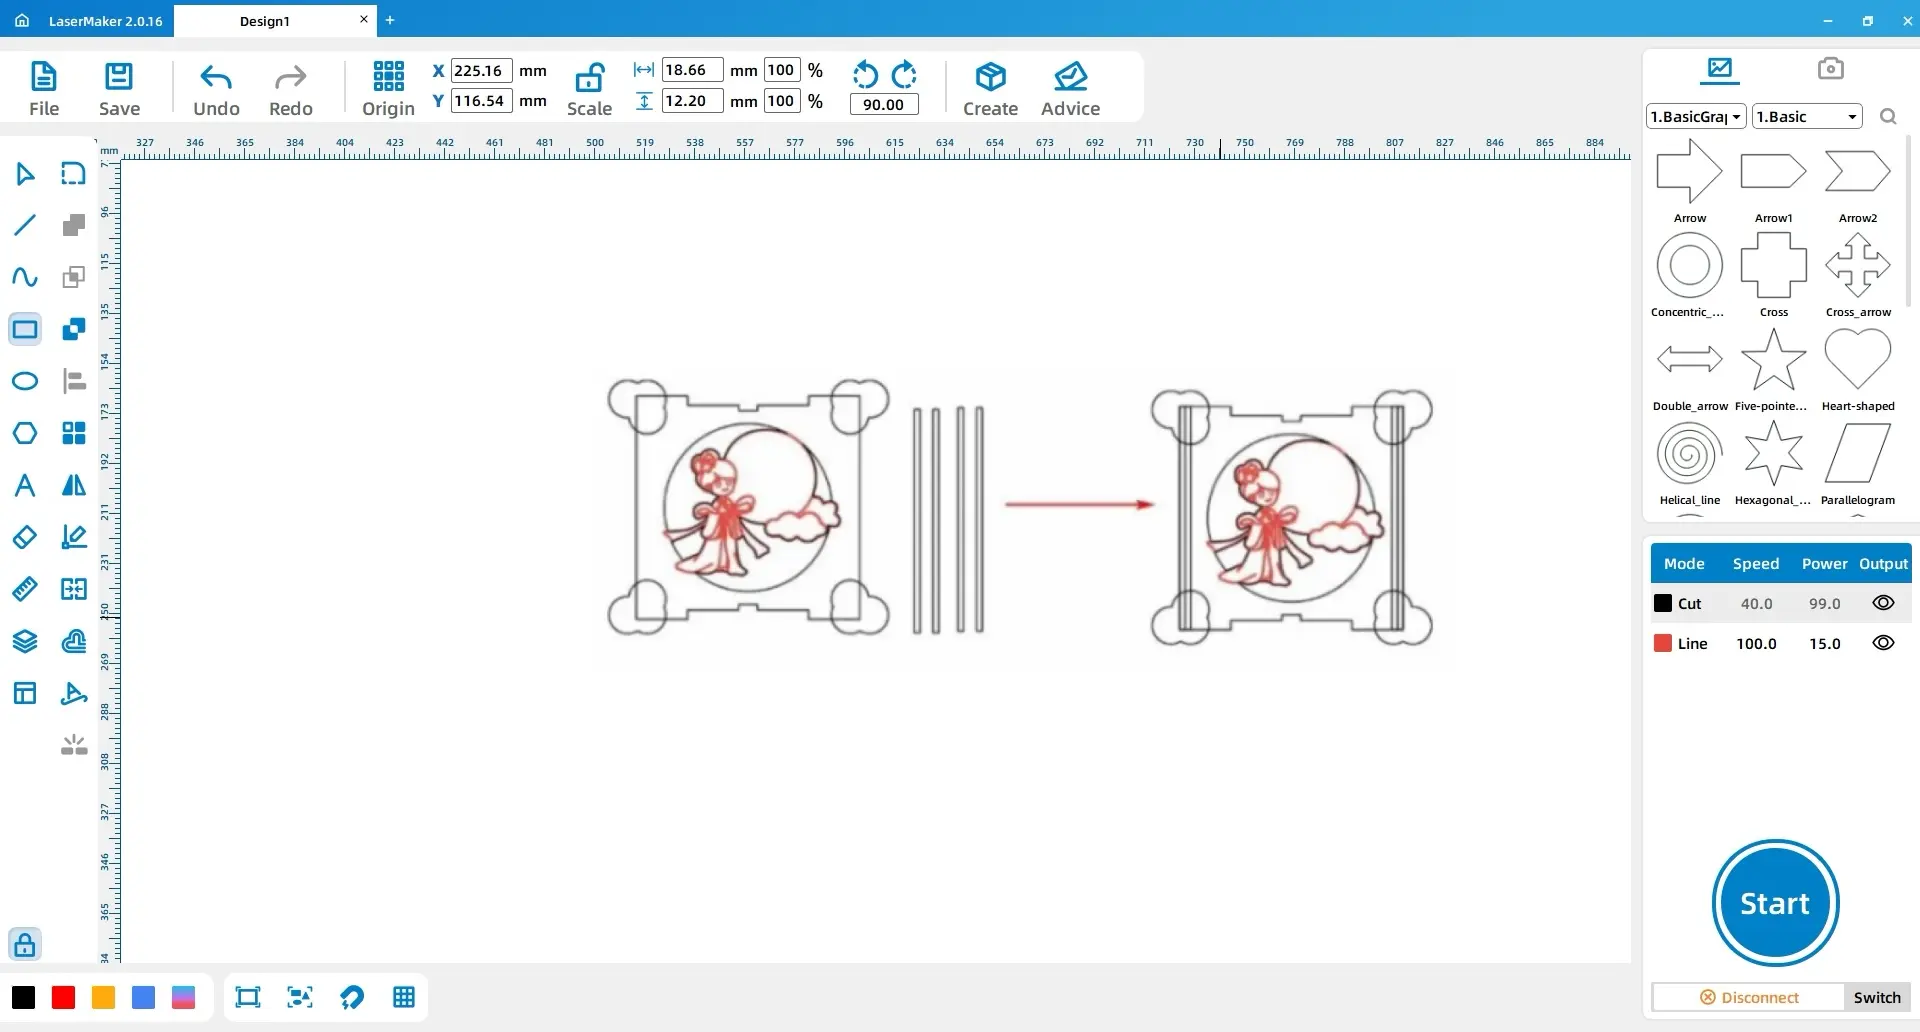
Draw four small rectangles, each 3 mm × 120 mm. Place two on each inner side of the large rectangle’s left and right edges.
Open the Gallery and choose Decorative Borders. Select Dragon Totem 1 and place the first border at the top-left corner of the large rectangle. Copy it to create the top-right border, then copy both borders and use vertical mirror flipping to place the lower borders.
Select the large rectangle and the four cloud patterns, then apply Union. Delete the small rectangles on the far left and far right inside the large rectangle. Adjust the height of the remaining two small rectangles to 60 mm. Copy and paste the full pattern, then reposition the small rectangles in the copied panels according to the source layout.
Draw three rectangles: Rectangle 1 is 10 mm × 3 mm, Rectangle 2 is 3 mm × 10 mm, and Rectangle 3 is 108 mm × 108 mm. Draw a 10 mm × 10 mm circle. Place Rectangle 1 above and below Rectangle 3, and place Rectangle 2 on the left and right sides. Copy another Rectangle 2 into the centre and place the circle in the centre as well.
Use Difference on the centre rectangle, then select Rectangle 3 and the four surrounding rectangles and apply Union to create the cover structure.
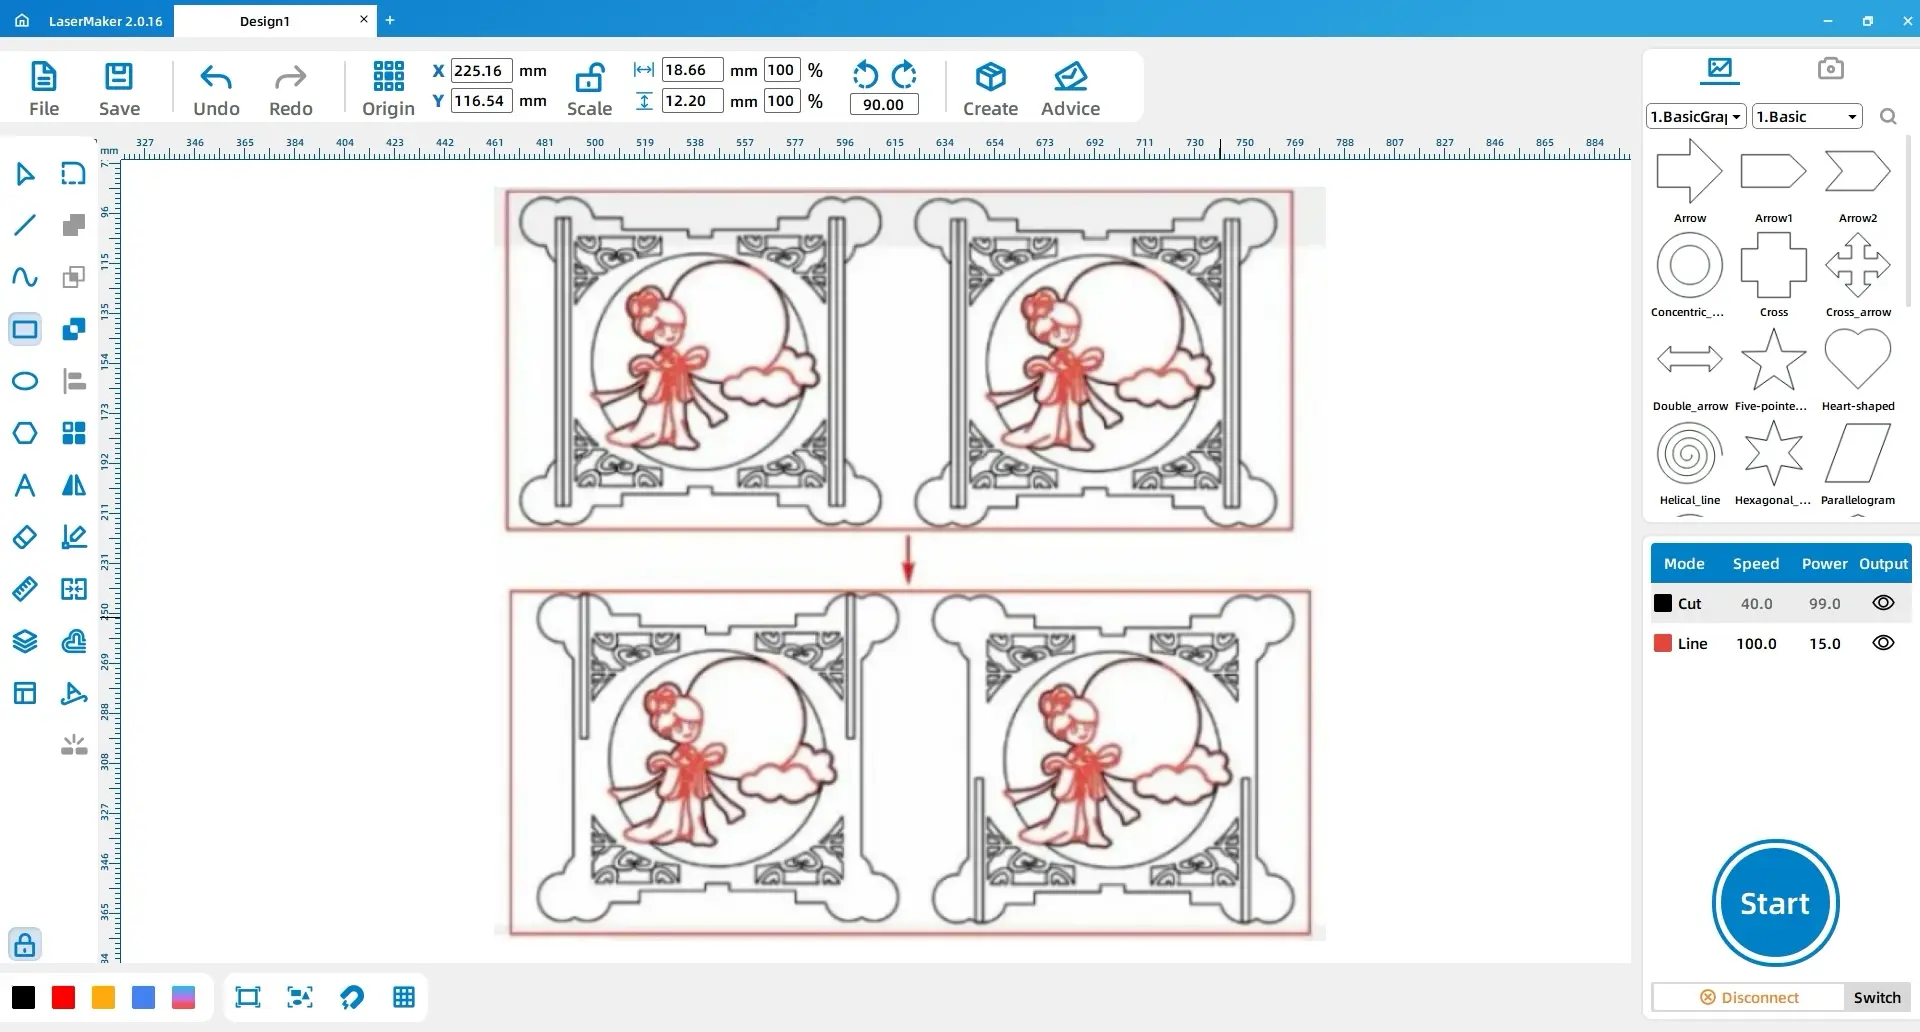
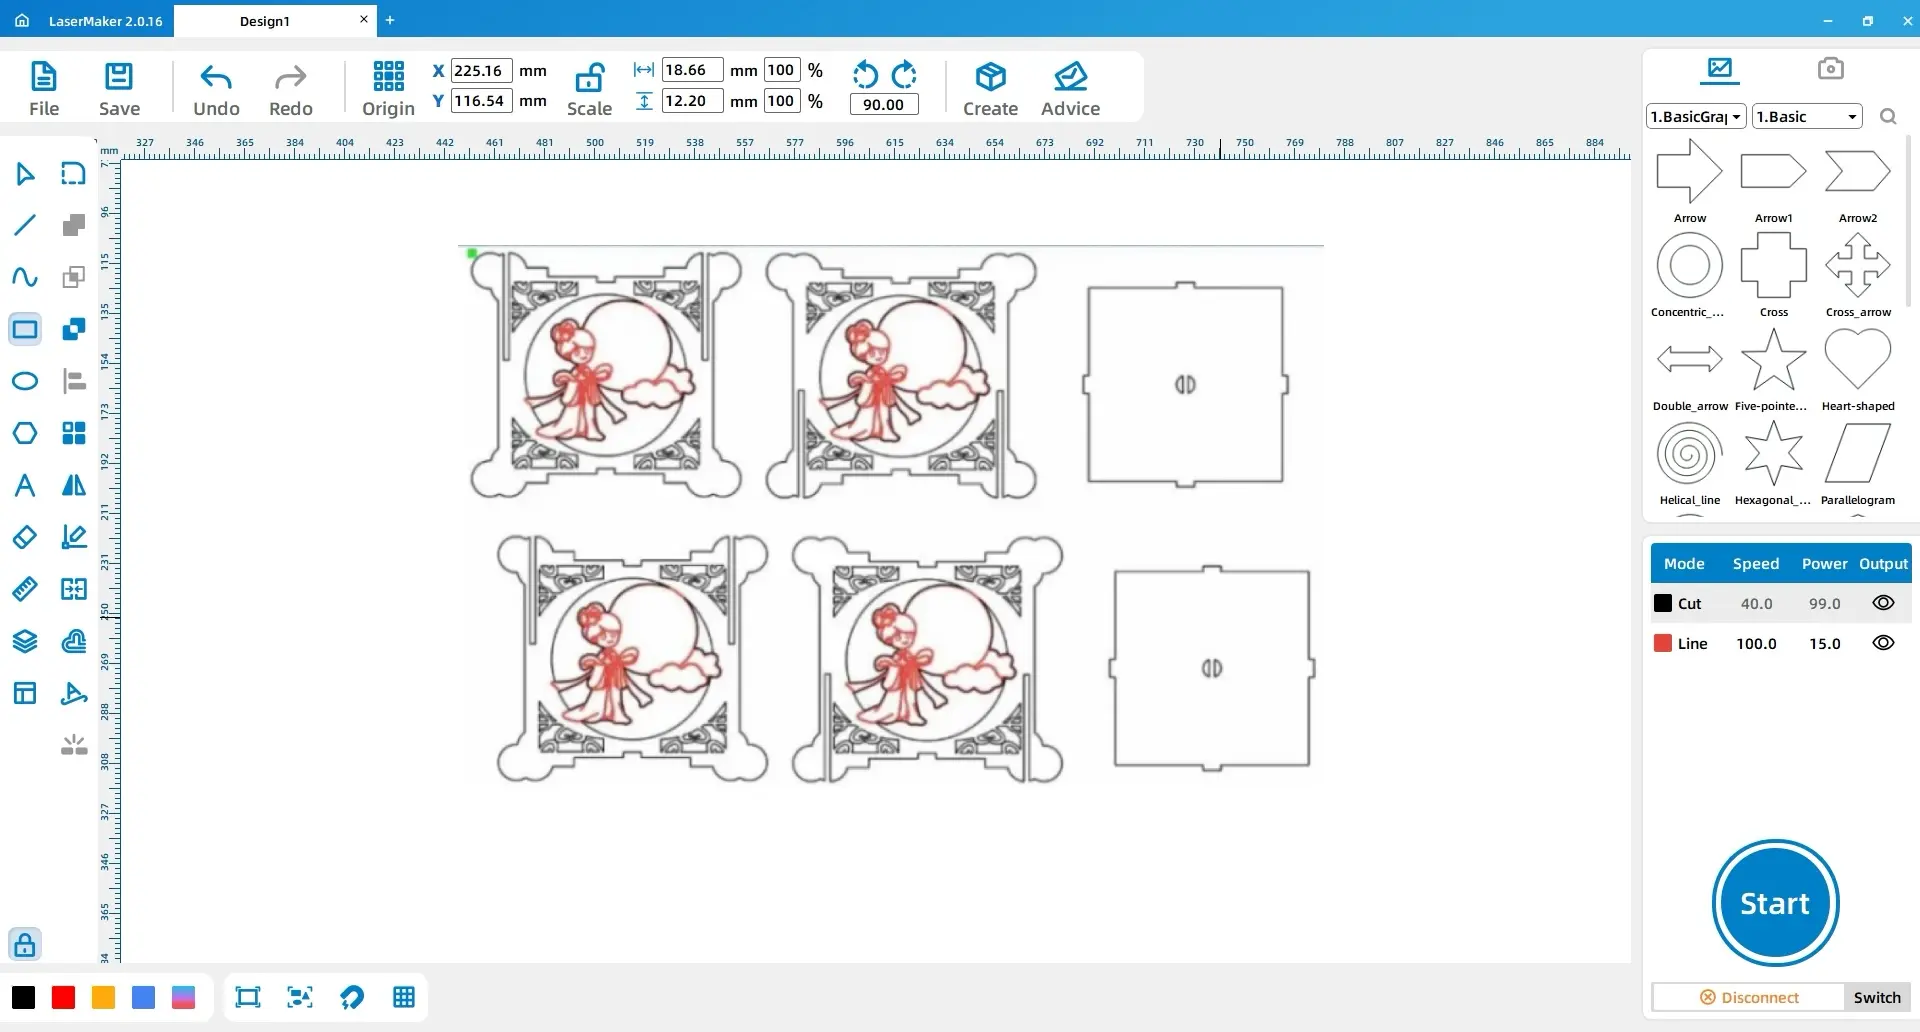
Select all patterns, copy them, and paste them once. Use all the small rectangles inside the lantern and the outer contour of the lantern to apply Difference and obtain the complete drawing for the Mid-Autumn lantern.
Select the internal lines of the Chang’e pattern and assign them to the tracing layer. Select the outer contour of Chang’e and all other patterns, then assign them to the cutting layer.
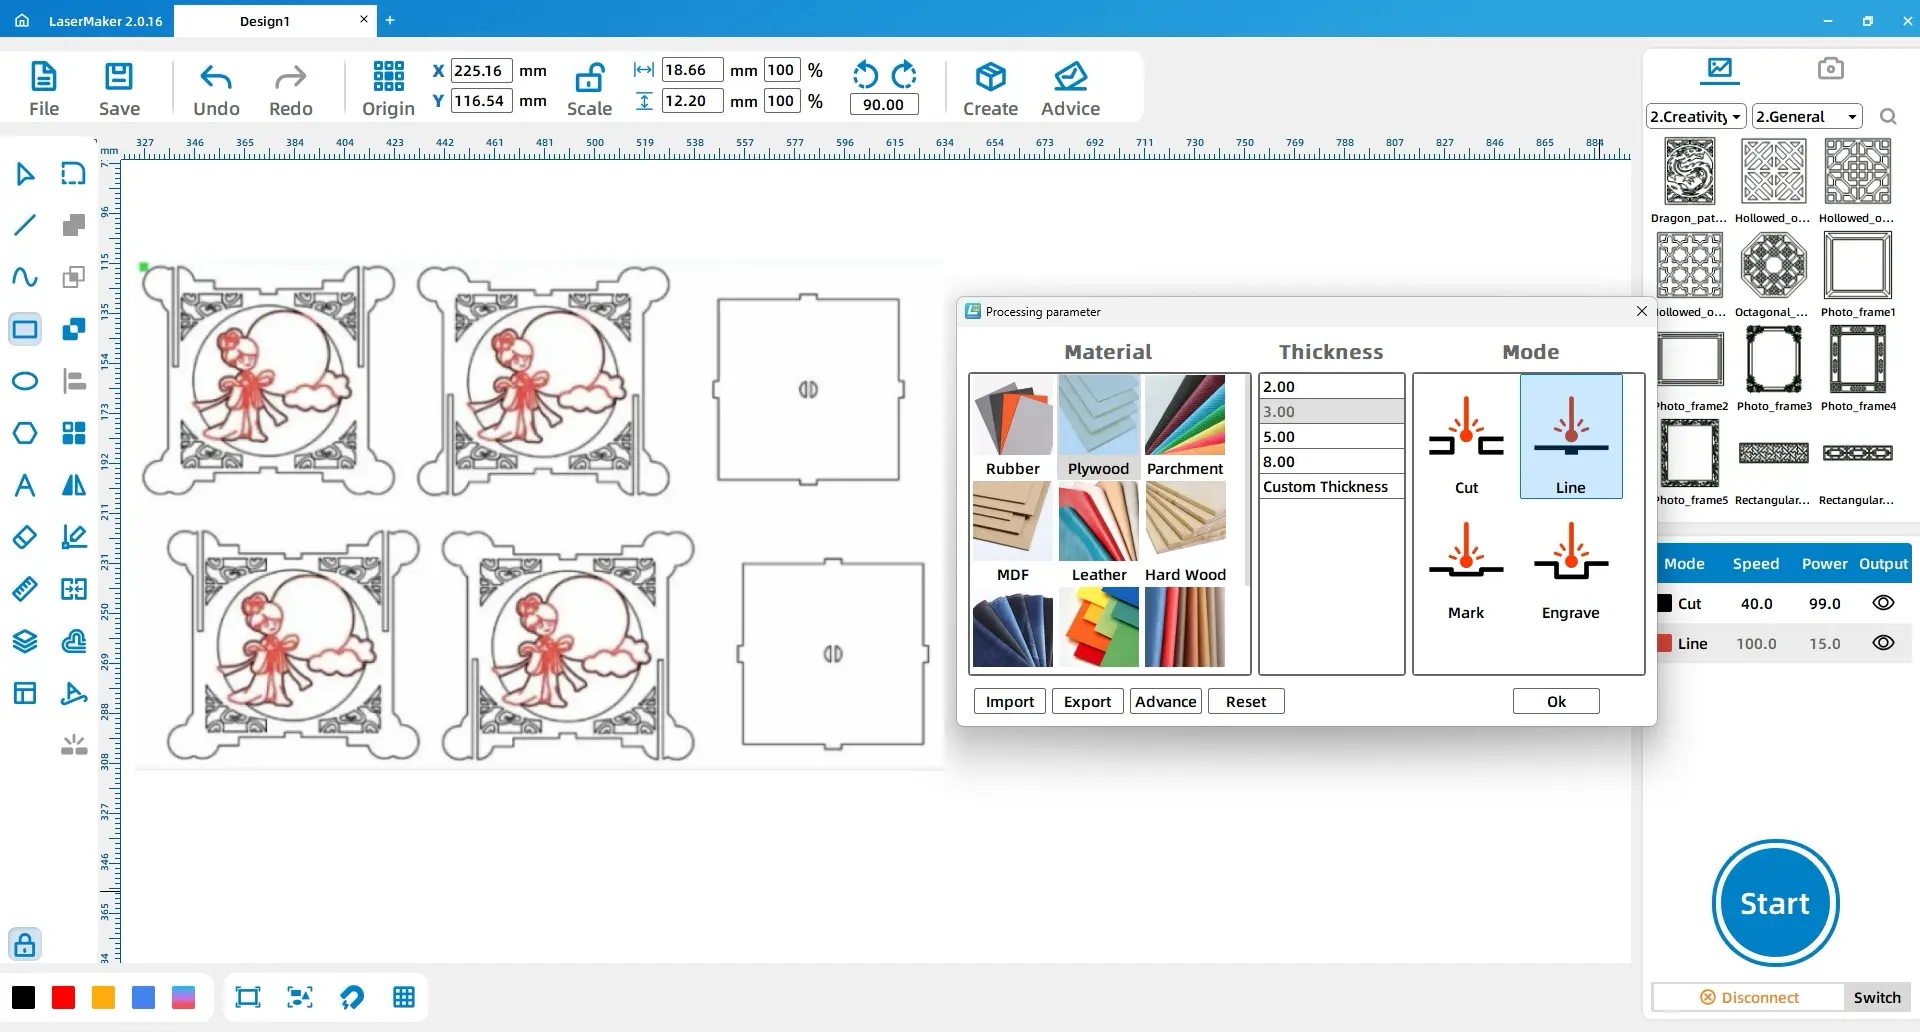
Set the tracing layer to basswood board, 3 mm, and tracing line. Set the cutting layer to basswood board, 3 mm, and cutting.
| Layer Purpose | Material | Thickness | Process |
|---|---|---|---|
| Internal Chang’e decorative lines | Basswood board | 3 mm | Tracing line |
| Outer contours and remaining patterns | Basswood board | 3 mm | Cutting |
The completed lantern shows how laser cutting can support seasonal craft projects. The main challenge is understanding how the six faces connect through the mortise-and-tenon structure. Once the structure is complete, the frosted sheets and LED light strip help create a warm festive effect.
Students can extend this project by changing the side panel artwork, redesigning the pendant, adjusting the handle style, or creating a different holiday-themed lantern. They can also test how different translucent materials affect the brightness and softness of the LED light.
For schools and beginner STEAM labs, this project can be completed on a classroom laser cutter such as the Thunder Laser Bolt Series.
Talk To Our Experts Now!
Please leave your contact information so that we can serve you better.
TAKE THE NEXT STEP WITH THUNDER LASER

 Stable & Consistent MachinesUnlimited ApplicationRobust After-sales SupportFactory Direct Supply