


STEAM Heart-Shaped Music Box Laser Cutting Project with LaserMaker
 24-08-17
WHAT ARE YOU LOOKING FOR?
Search Across Products, Blog Posts, Support Content, And Resources.

STEAM Heart-Shaped Music Box Laser Cutting Project with LaserMaker
24-08-17

In this STEAM maker project, students design and build a heart-shaped music box using LaserMaker and a laser cutting machine. The lesson connects creative product design, shape editing, flexible border construction, bayonet-style joints, hole placement, laser processing, music box movement installation, and hands-on assembly.
This project introduces students to both art and mechanism. Students begin with a heart shape, design a flexible side border that can wrap around the body, add installation holes for the music box movement, and assemble a working decorative music box.
| Item | Details |
|---|---|
| Project | Heart-shaped music box laser cutting project |
| Software | LaserMaker |
| Main Skills | Gallery shape import, proportional scaling, rectangle drawing, Array Copy, toothed bayonet design, Welding, Bessel line drawing, vertical flip, rotation, hole placement, layer parameter setup, laser cutting, and assembly |
| Suggested Materials and Parts | Laser-cut sheet material, music box movement, hot glue, and basic classroom assembly tools |
| Classroom Fit | Laser cutting and maker projects, music-themed STEAM activities, product design, beginner LaserMaker practice, creative gift projects, and mechanism observation lessons |
Students will design a heart-shaped music box body, create a flexible border strip with repeated cut lines, add bayonet-style connection features, place holes for the music box movement, laser cut the parts, and assemble the finished music box.
For teachers: Use this project to connect music, product design, digital fabrication, flexible structures, and mechanism observation.
For students: Use the activity to design a decorative music box and understand how flat laser-cut parts can become a three-dimensional object.
For makerspaces: Use it as a gift-style project that combines shape design, kerf-style bending, assembly, and mechanical sound.
Describe what a music box is and identify the main parts that create sound.
Use LaserMaker to import a heart shape, resize it proportionally, and prepare a matching body design.
Create a bendable border strip using repeated line patterns and welded connection features.
Design bayonet-style structures and installation holes for the music box movement.
Laser cut, assemble, test, and improve a heart-shaped music box model.
Design thinking: Choose the music box shape, plan the visual style, and consider how the finished object will look and feel.
Computational thinking: Use dimensions, repeated arrays, spacing, flipping, rotation, and layer order to create accurate production files.
Engineering thinking: Consider border flexibility, part fit, hole placement, music box movement clearance, glue strength, and final assembly stability.
Students should operate the laser cutter only under teacher or lab supervisor guidance. Before processing, check material placement, focal length, line order, cutting layers, and machine settings. During assembly, use hot glue carefully and test the music box movement only after it is securely installed.
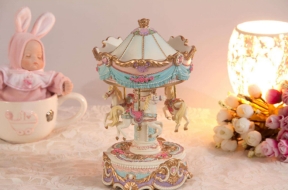
A music box is a small mechanical object that plays sound when its movement is activated by a spring, crank, or similar power source. The source lesson introduces the music box as a familiar object that combines sound, memory, craft, and design.
For this classroom project, students focus on the outer structure and the installation of the music box movement. They learn how the design of the body, border, holes, and assembly process affects whether the music box can be completed neatly and securely.
Teachers can begin the lesson with short questions about sound, design, and mechanical objects. These prompts help students connect the project with personal experience and product design.
What is a music box?
Where do music boxes come from, and why have people liked them for so long?
What shape would make a music box feel special or meaningful?
How might a flat sheet become a three-dimensional box?
What could make a music box look richer or more personal?
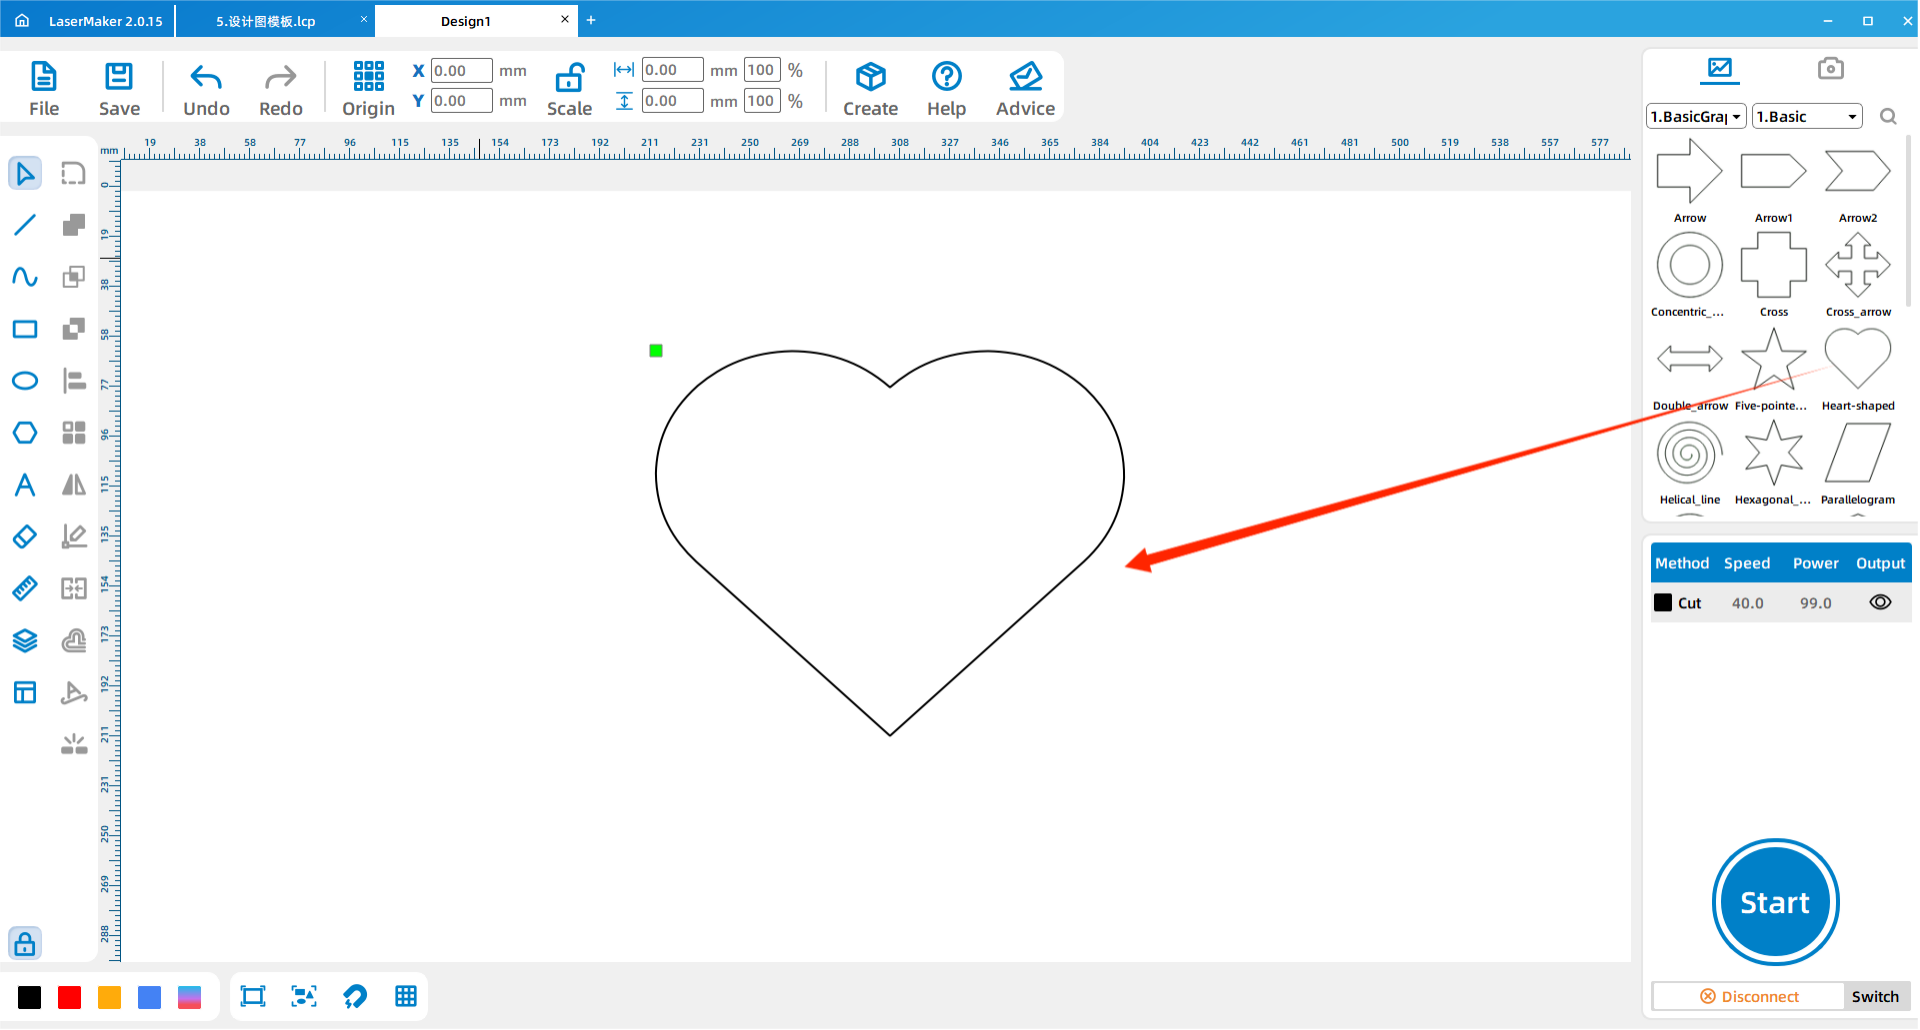
Open LaserMaker. Go to Gallery > Polygon, select the heart shape, and drag it onto the blank workspace. Turn on the proportional lock, then adjust the heart width to 180 mm. Teachers may allow students to change the size if it fits the project material and music box movement.
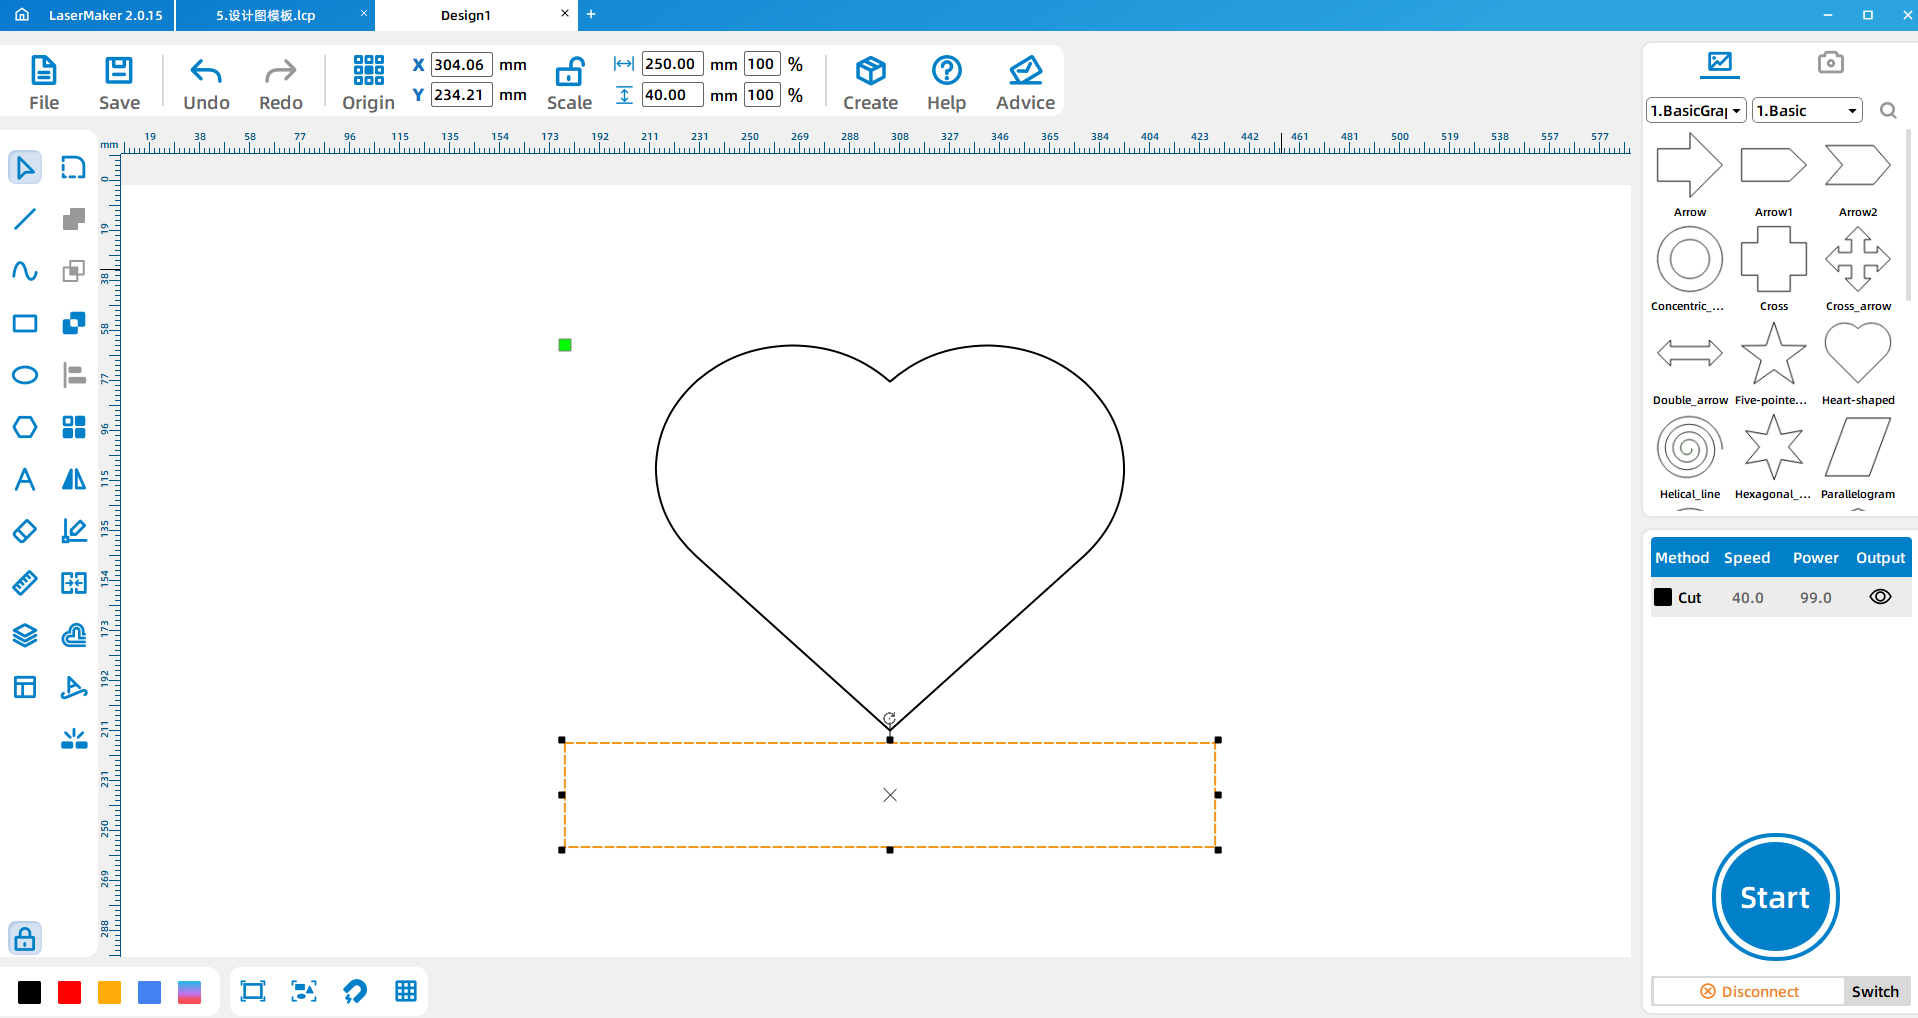
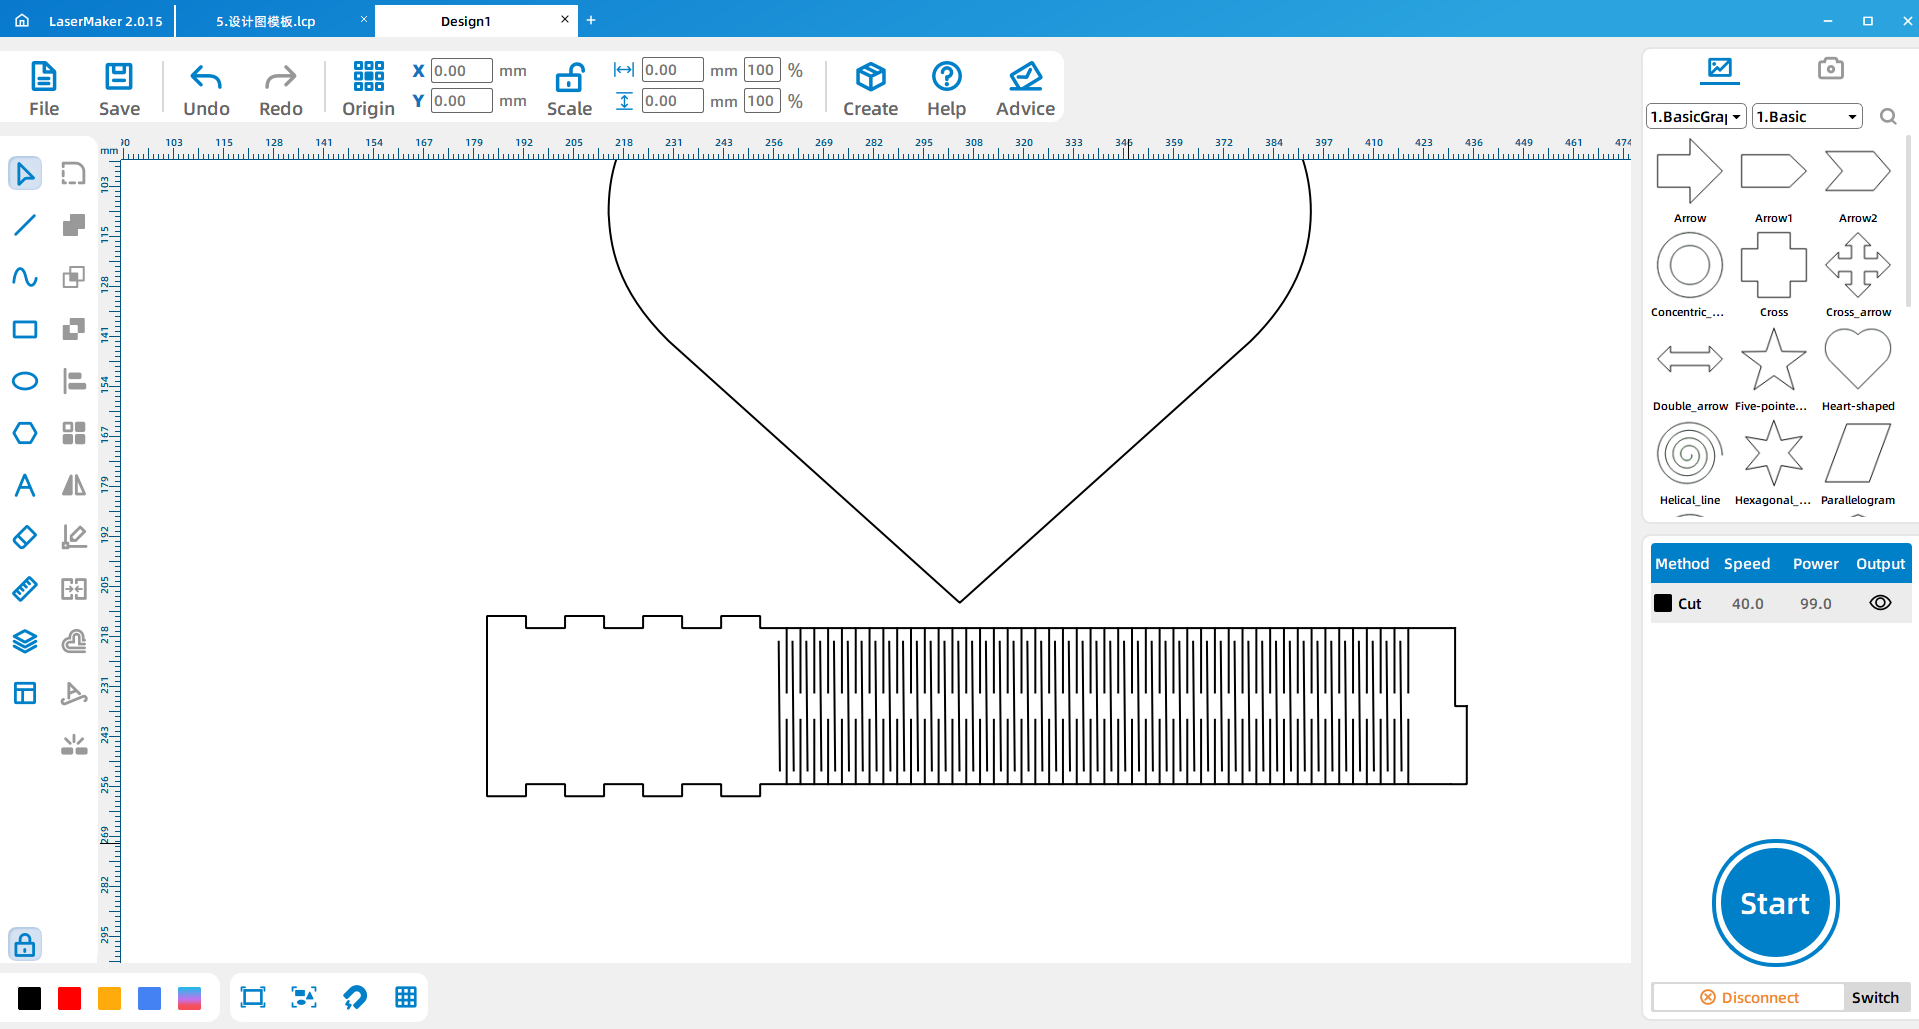
Draw a 250 mm by 40 mm rectangle as the side border of the heart-shaped music box. The border strip must be long enough to wrap around the heart, so students should adjust the length if they change the heart size.
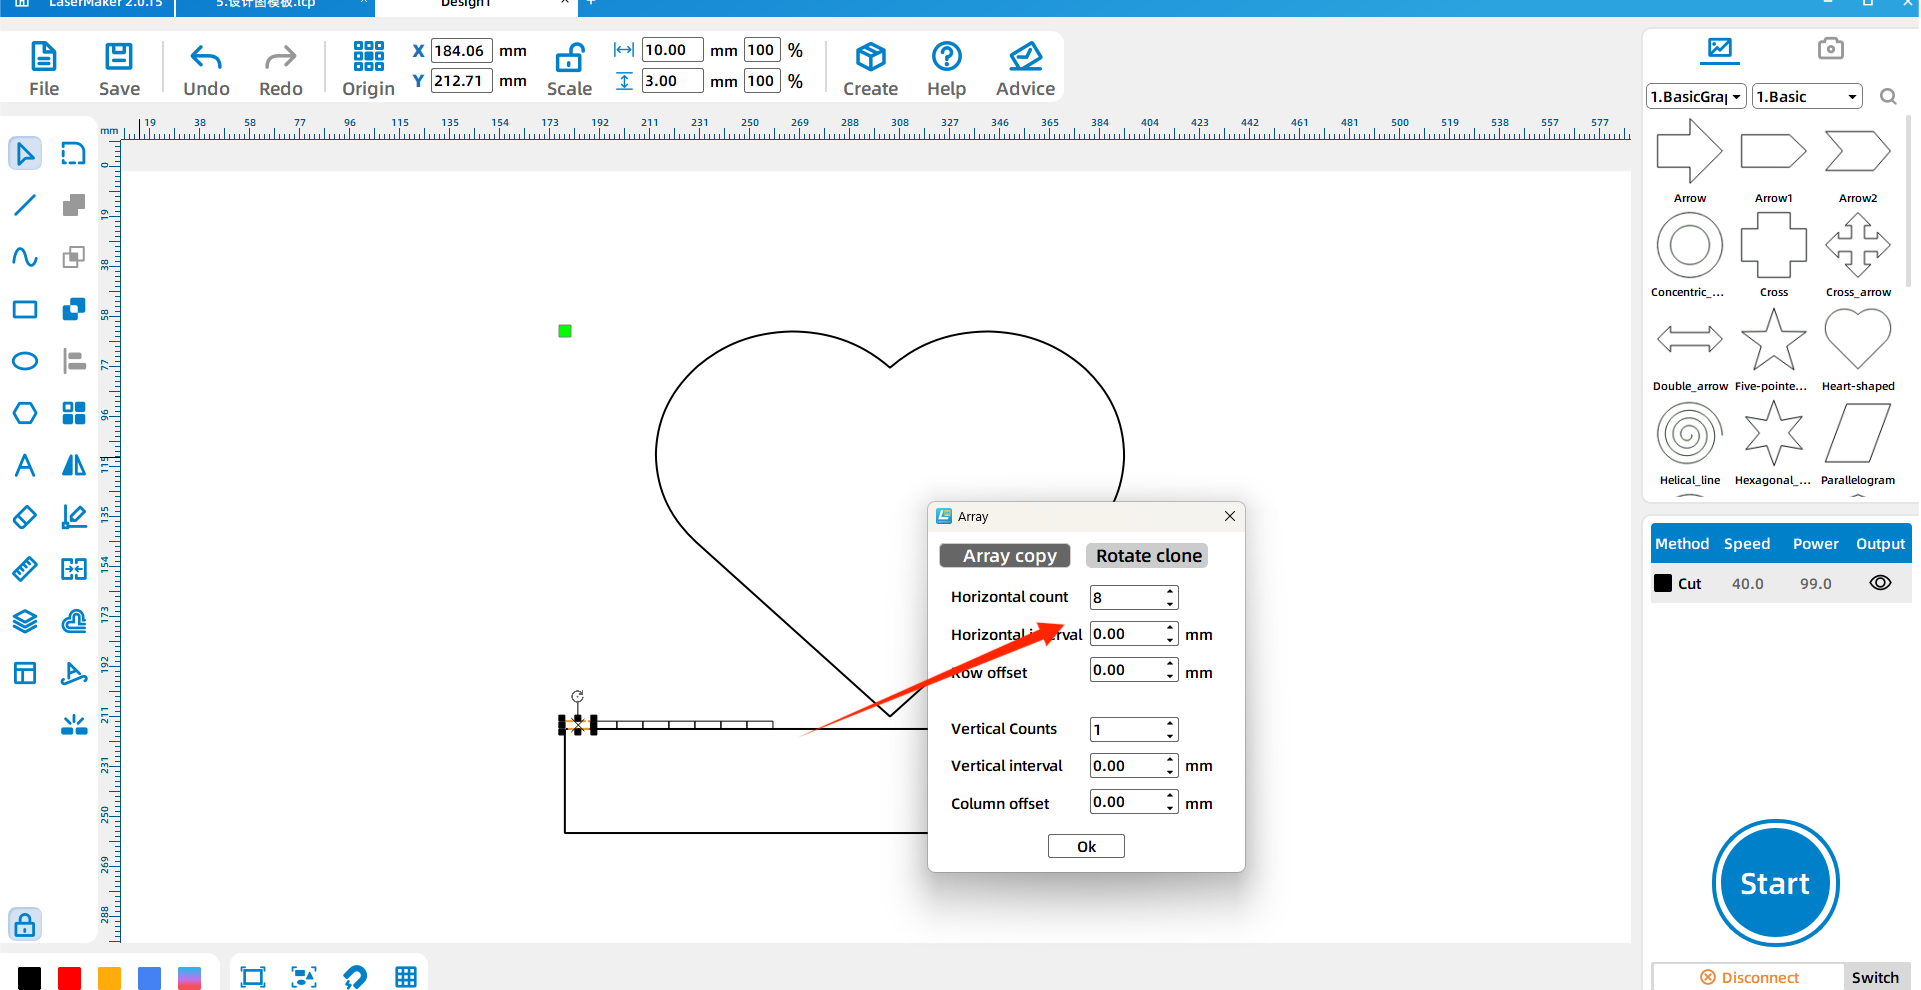
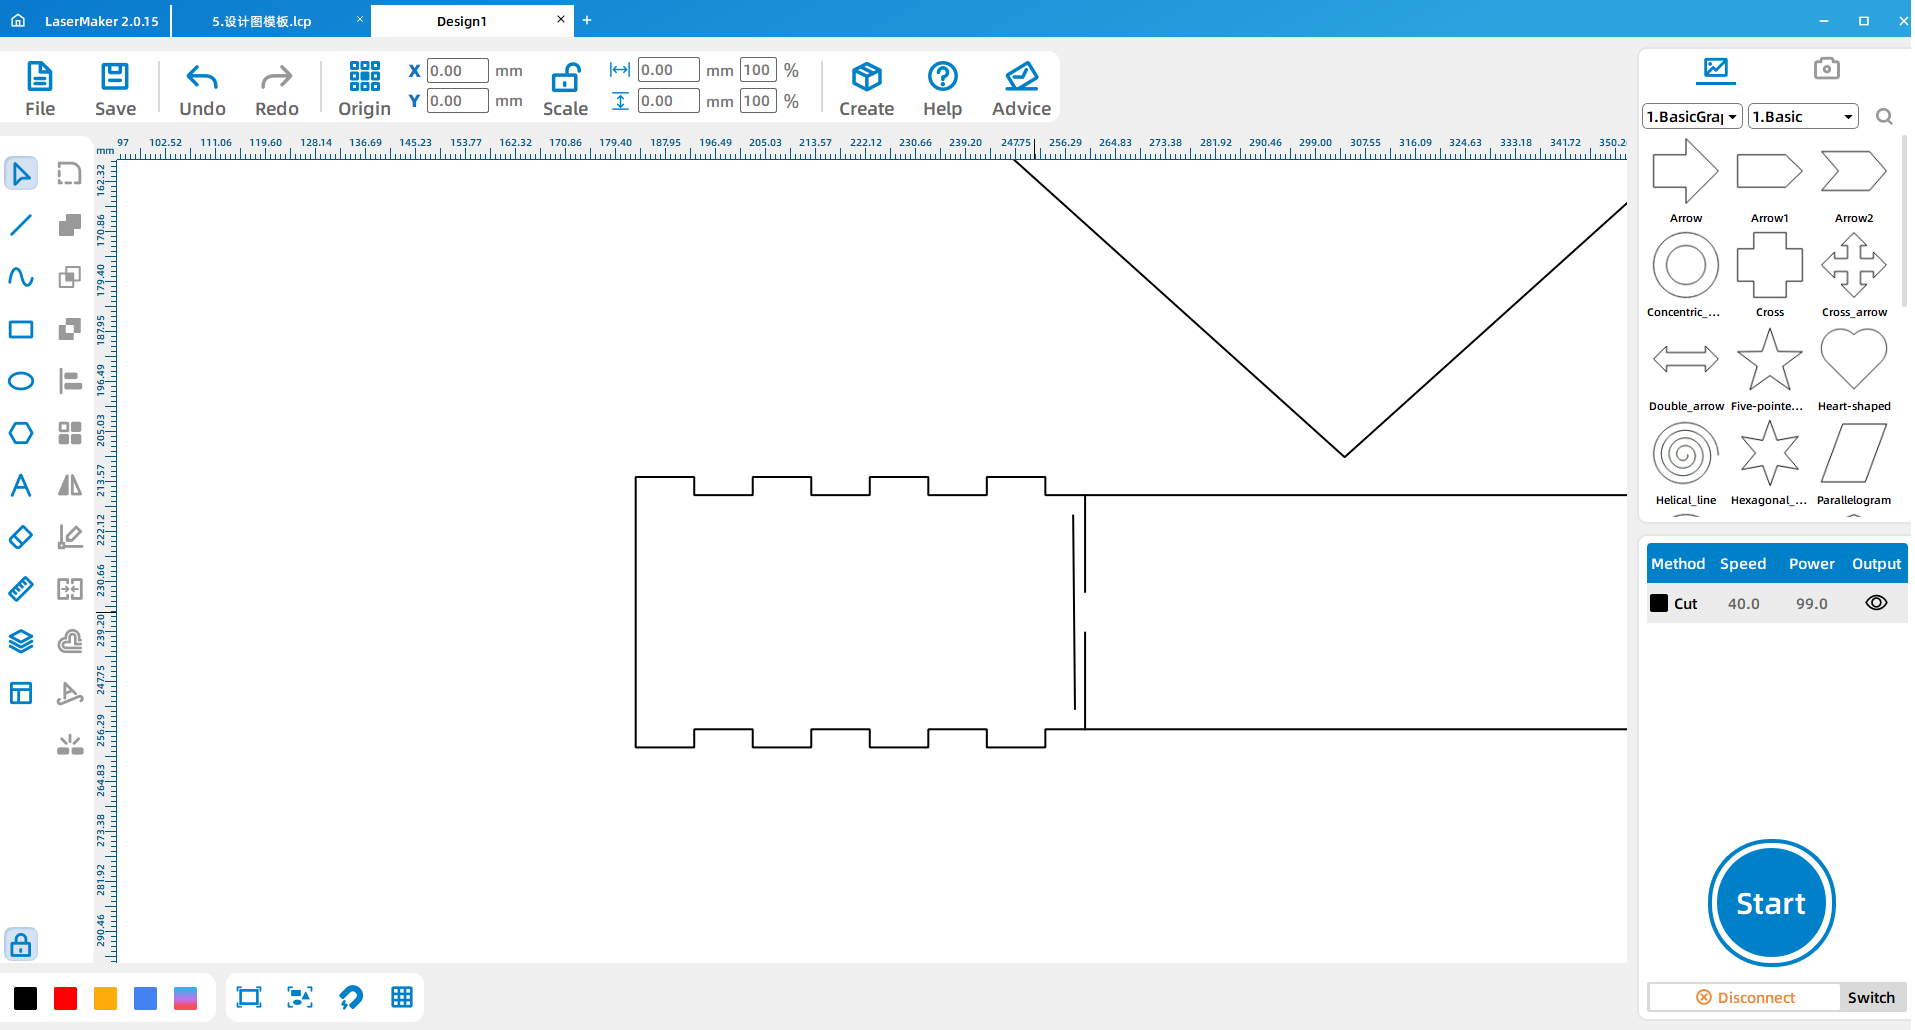
Draw a 10 mm by 3 mm small rectangle for the bayonet-style frame feature. Use Array Copy with 8 horizontal copies, 1 vertical copy, and 0 spacing. Zero spacing helps keep each position aligned and reduces layout error.
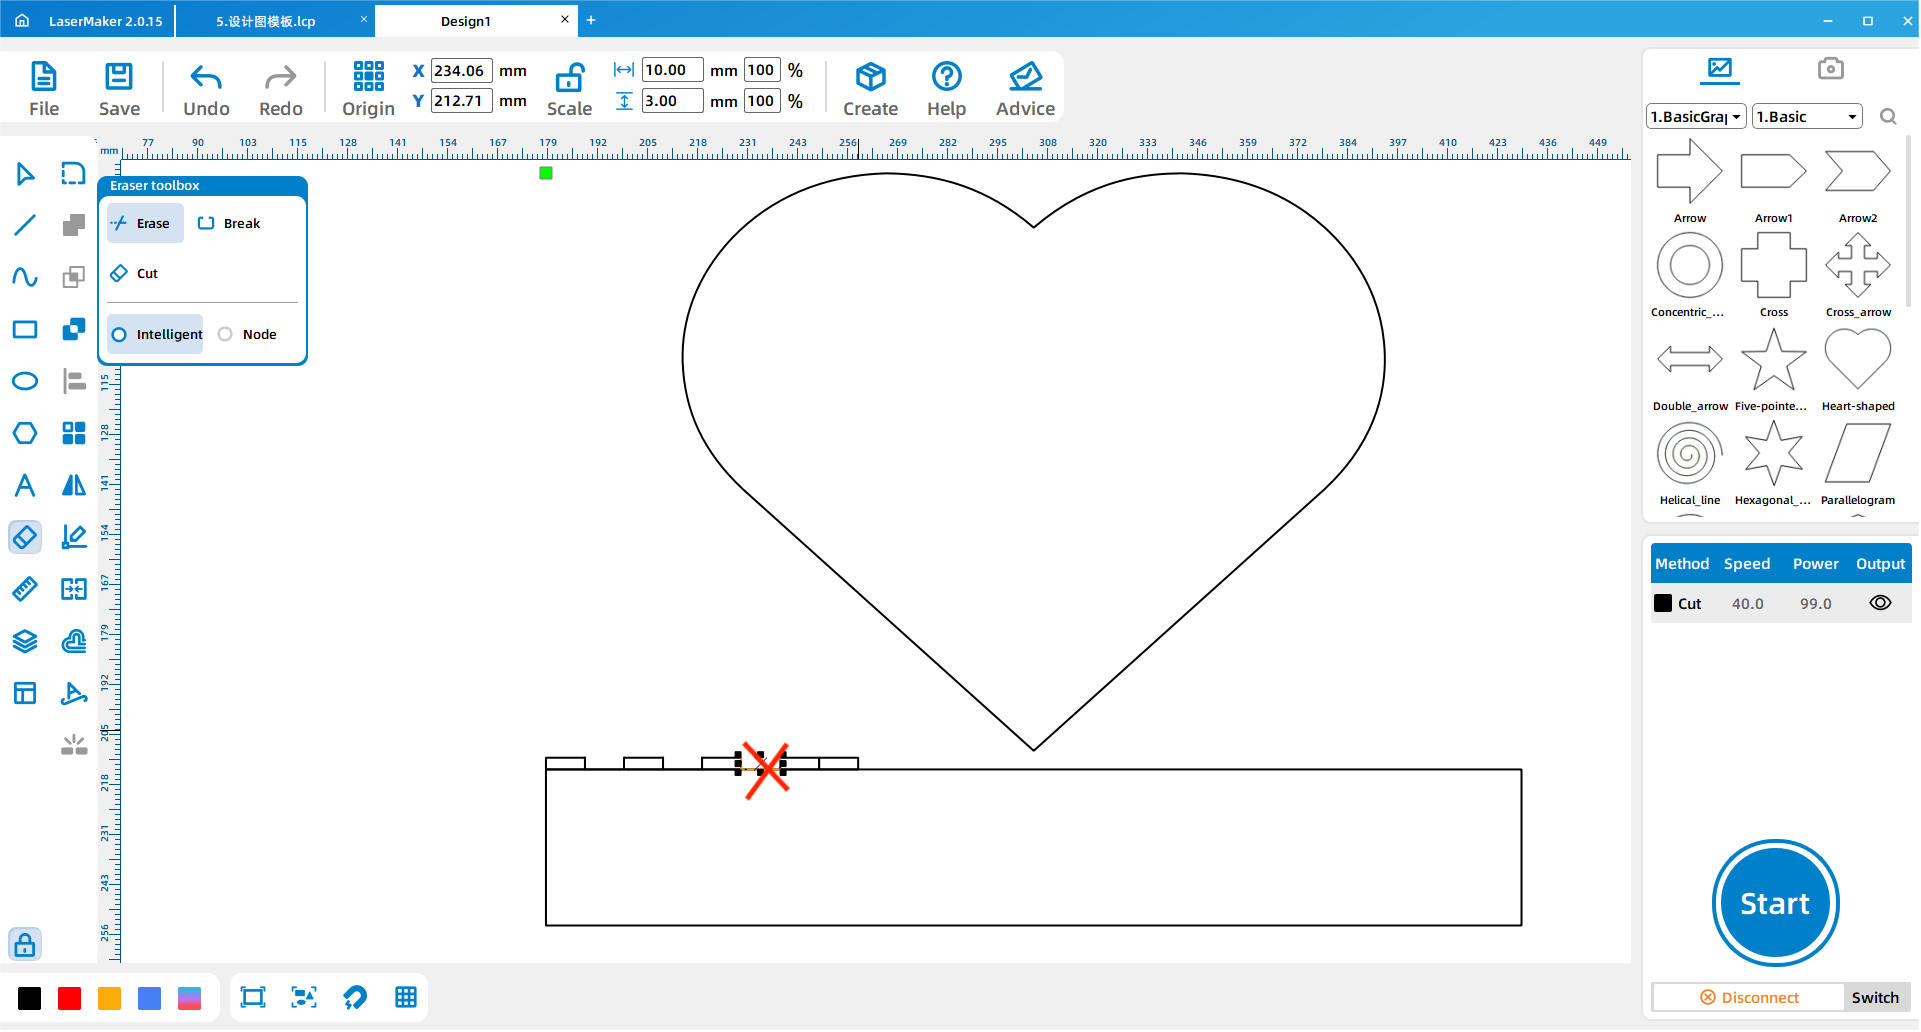
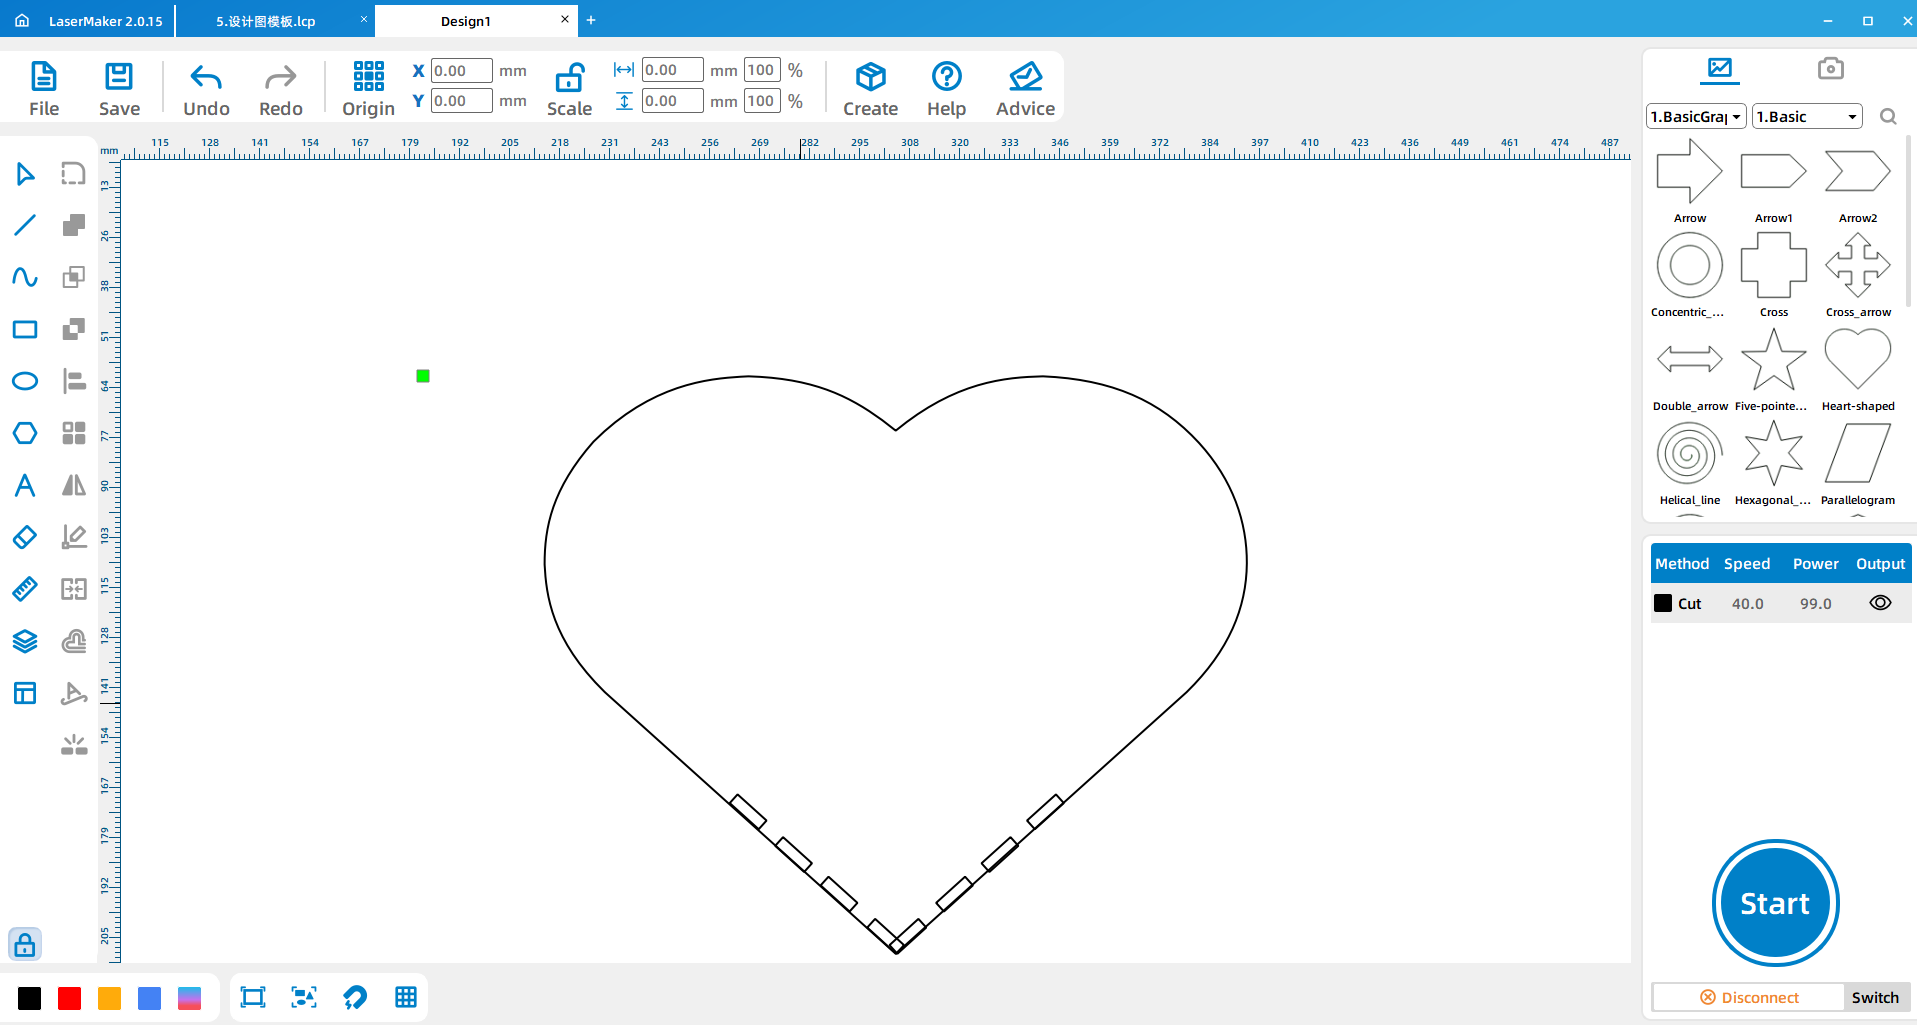
Place the eight small rectangles according to the design layout, then remove the extra small border areas to form the toothed bayonet shape. Select the complete border and use Shape > Welding to merge the structure.
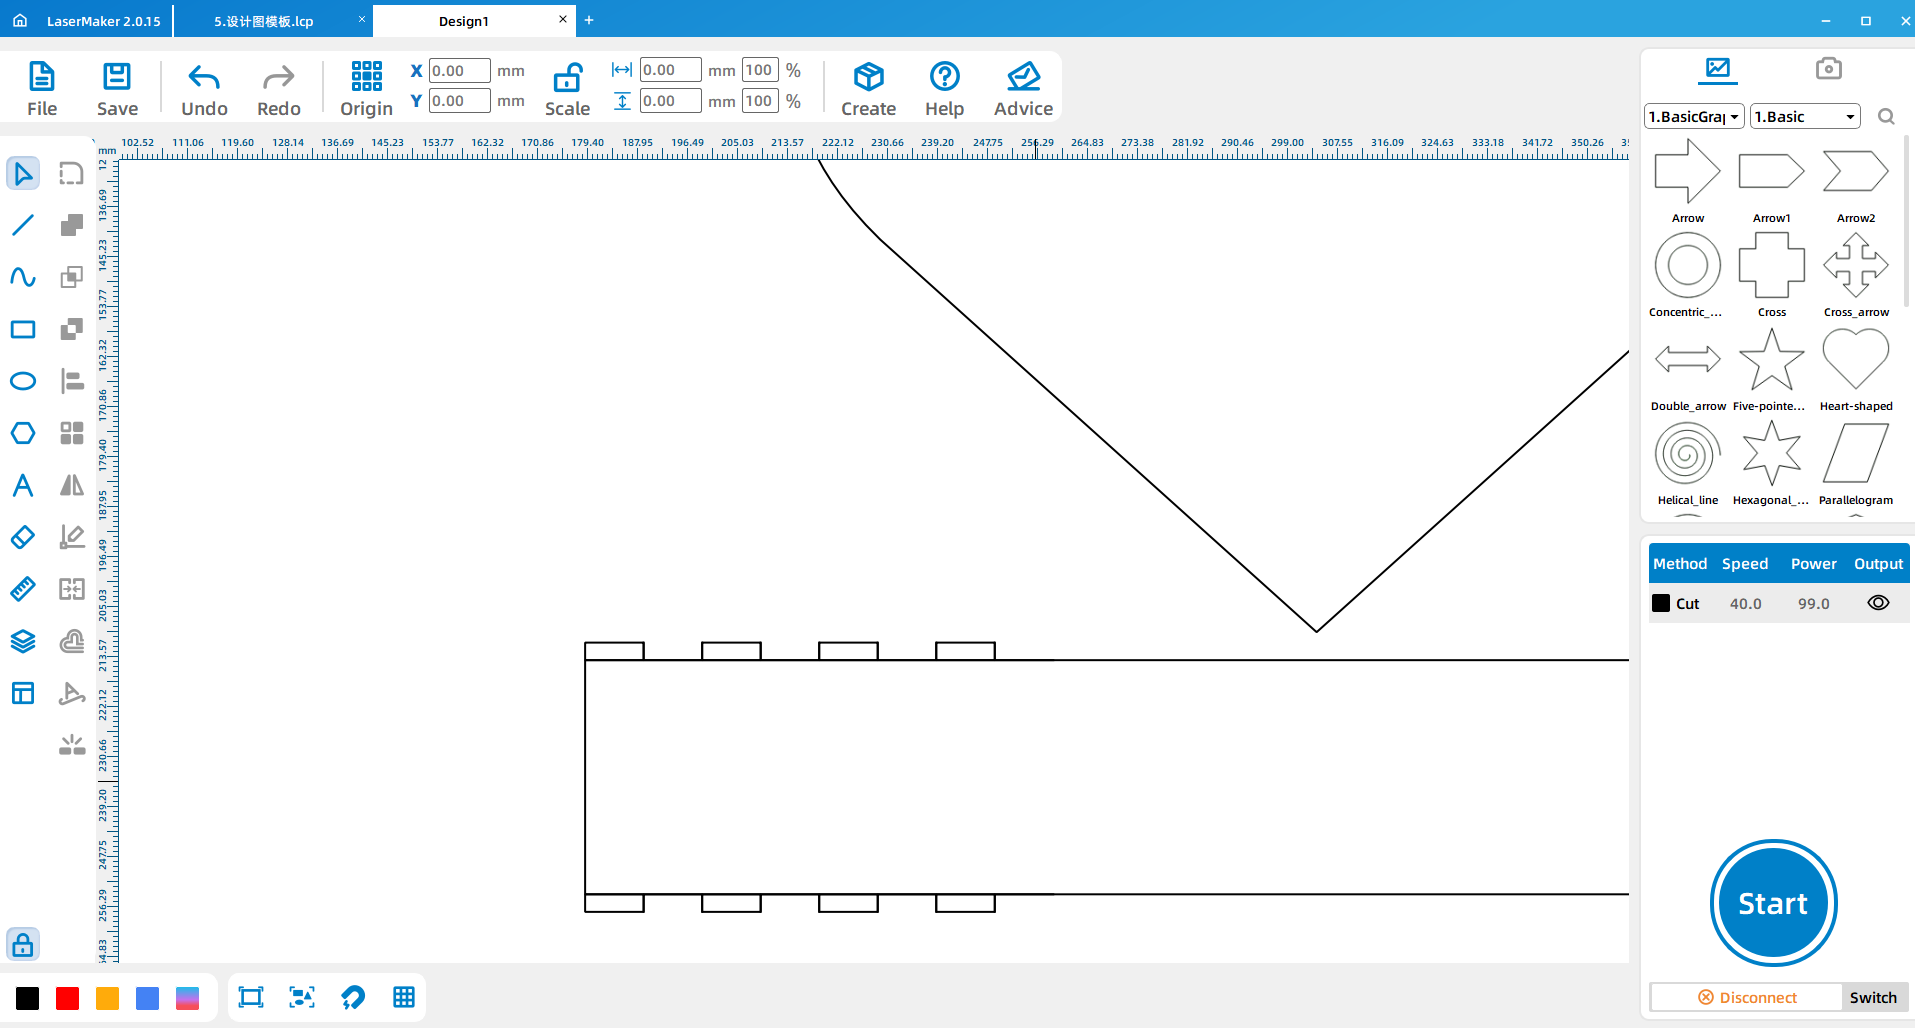
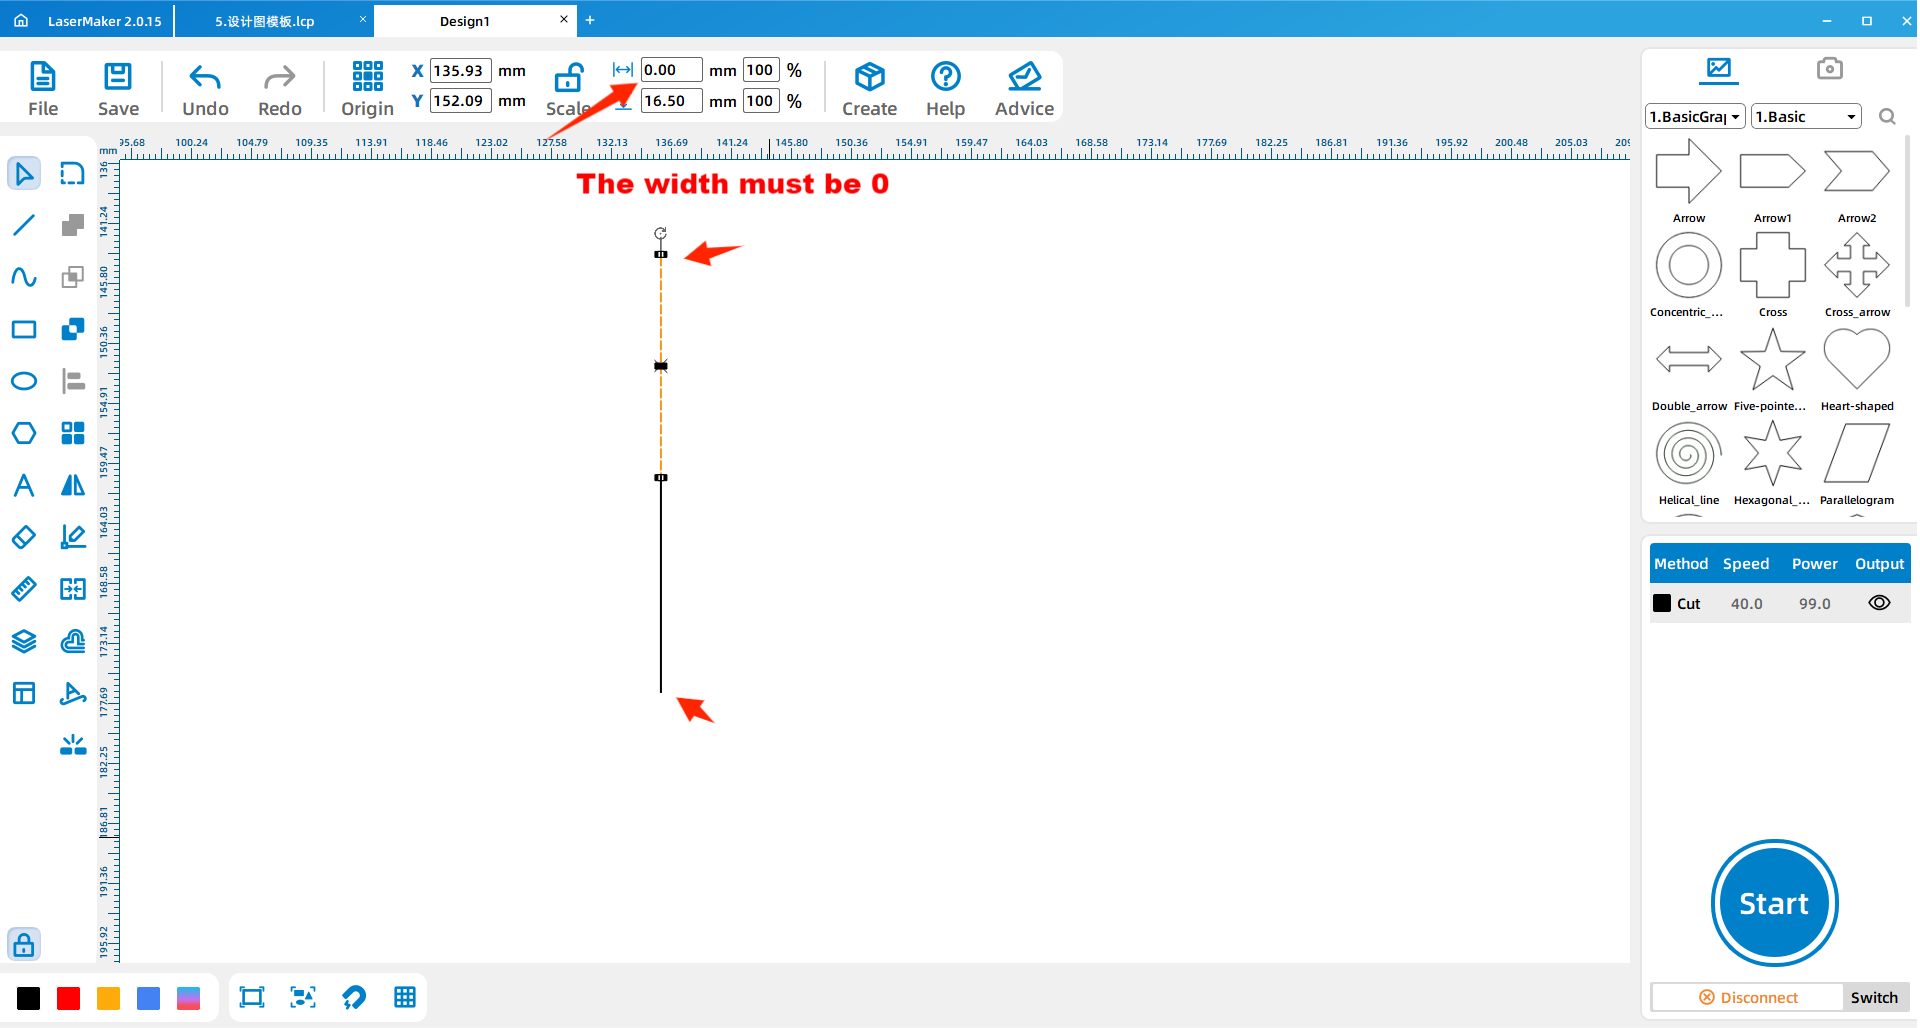
Use Draw Bessel Lines and Curves to draw one 33 mm straight line and two 16.5 mm straight lines. While drawing, check that each line is truly straight. If a drawn line shows an unwanted width value, it may not be straight enough and should be corrected before cutting.
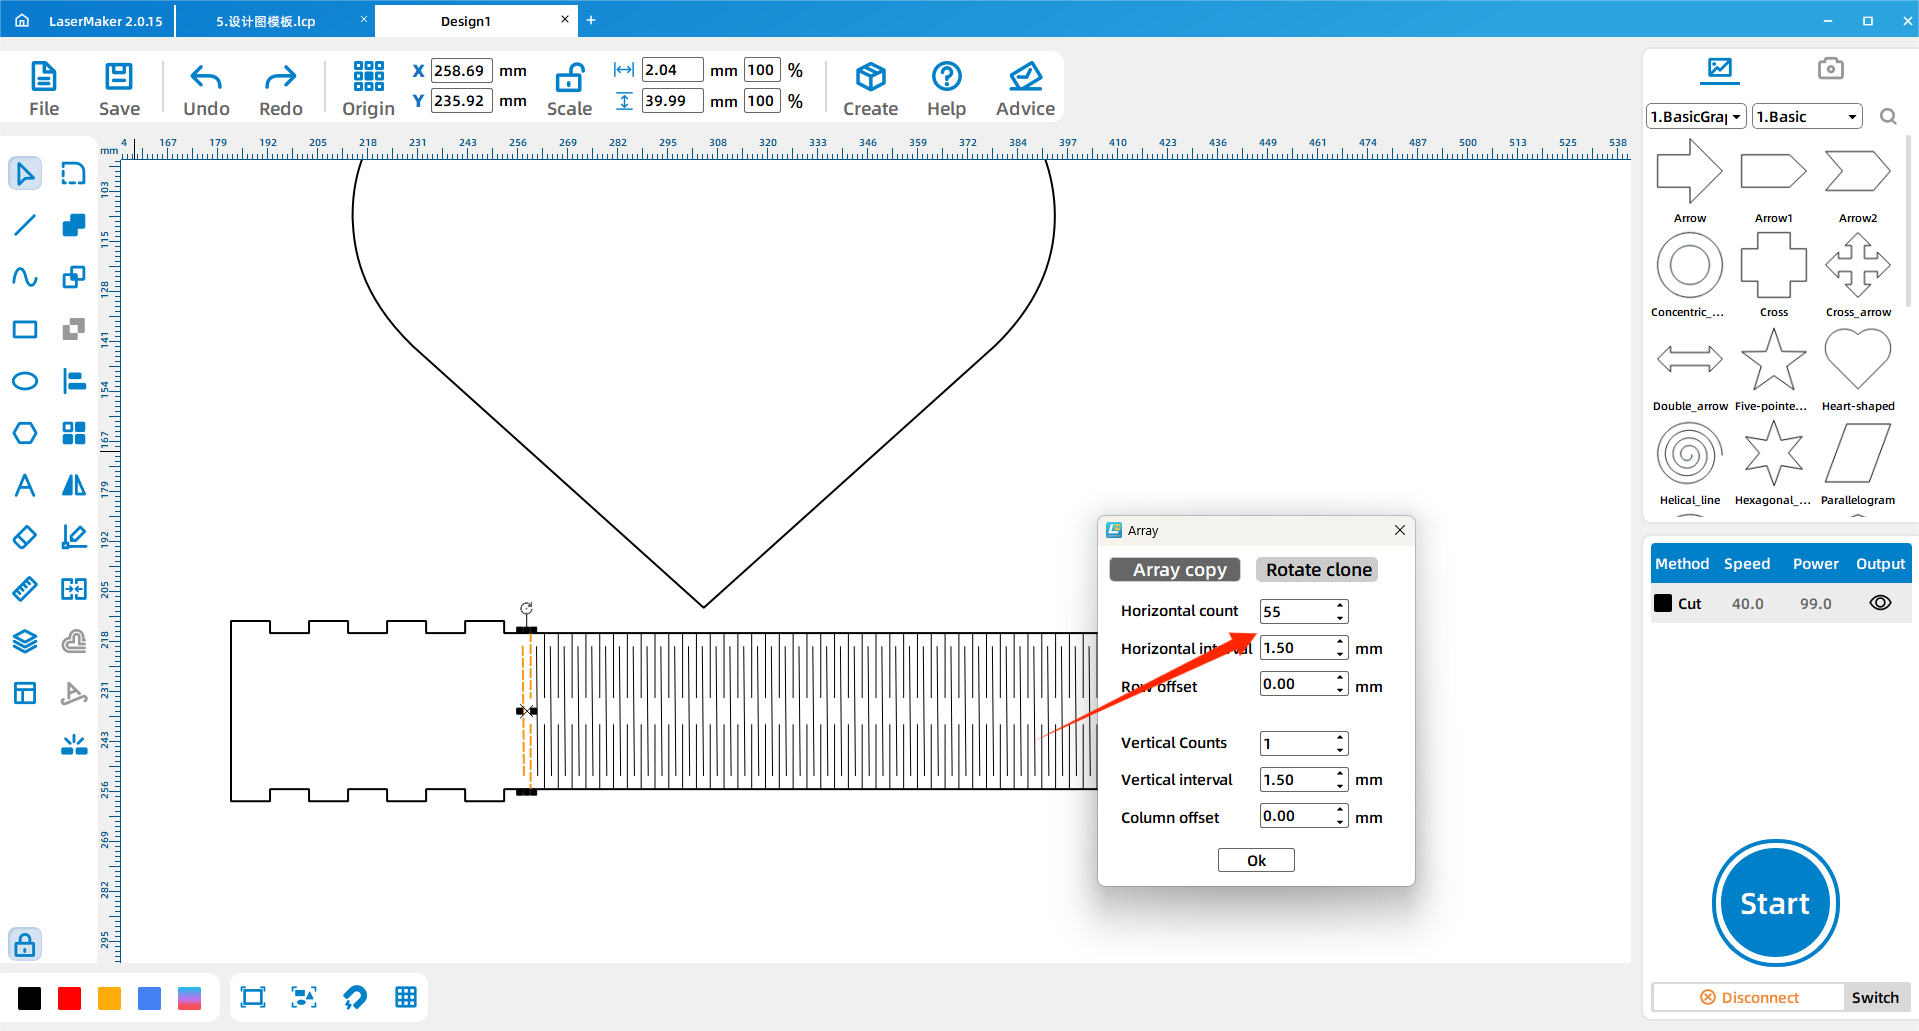
Place the three lines inside the border strip as shown in the source workflow. Then use Array Copy to repeat the line group across the border. The source example uses 55 horizontal copies, 1 vertical copy, and 1.5 spacing. Students can adjust these values if their border size changes.
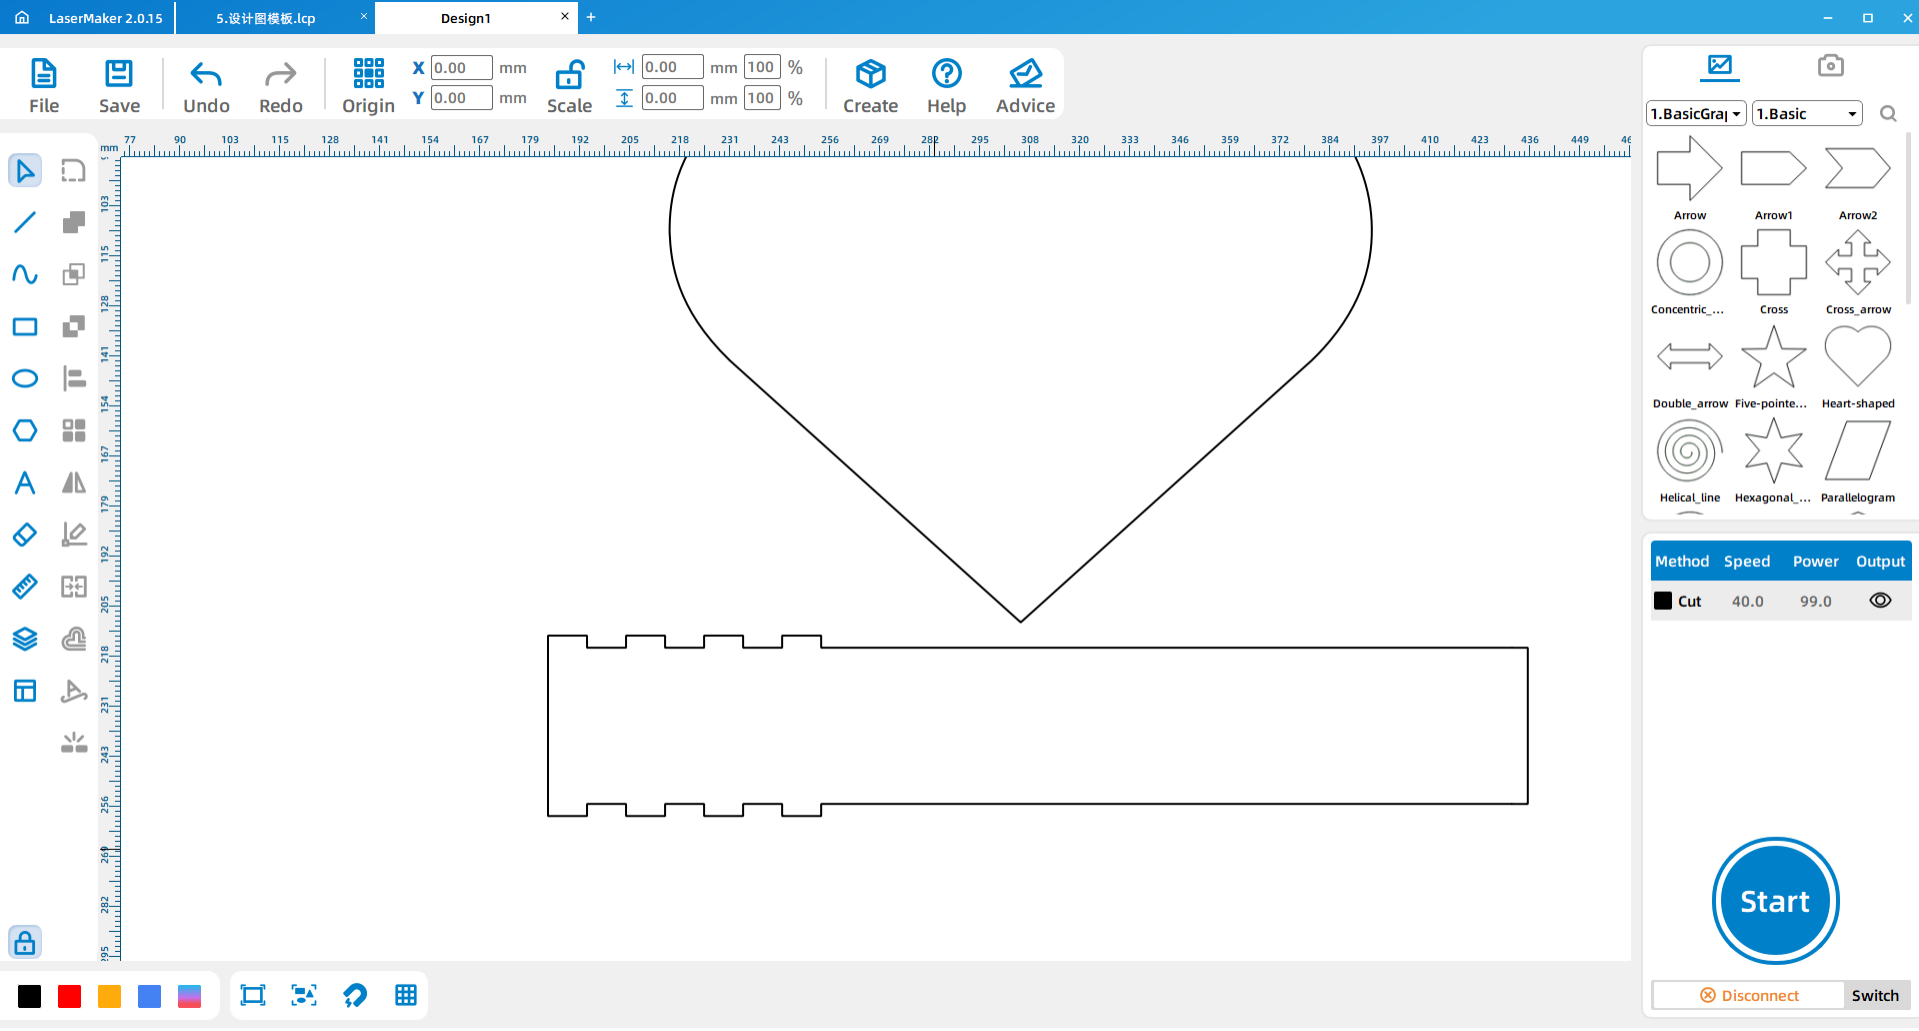
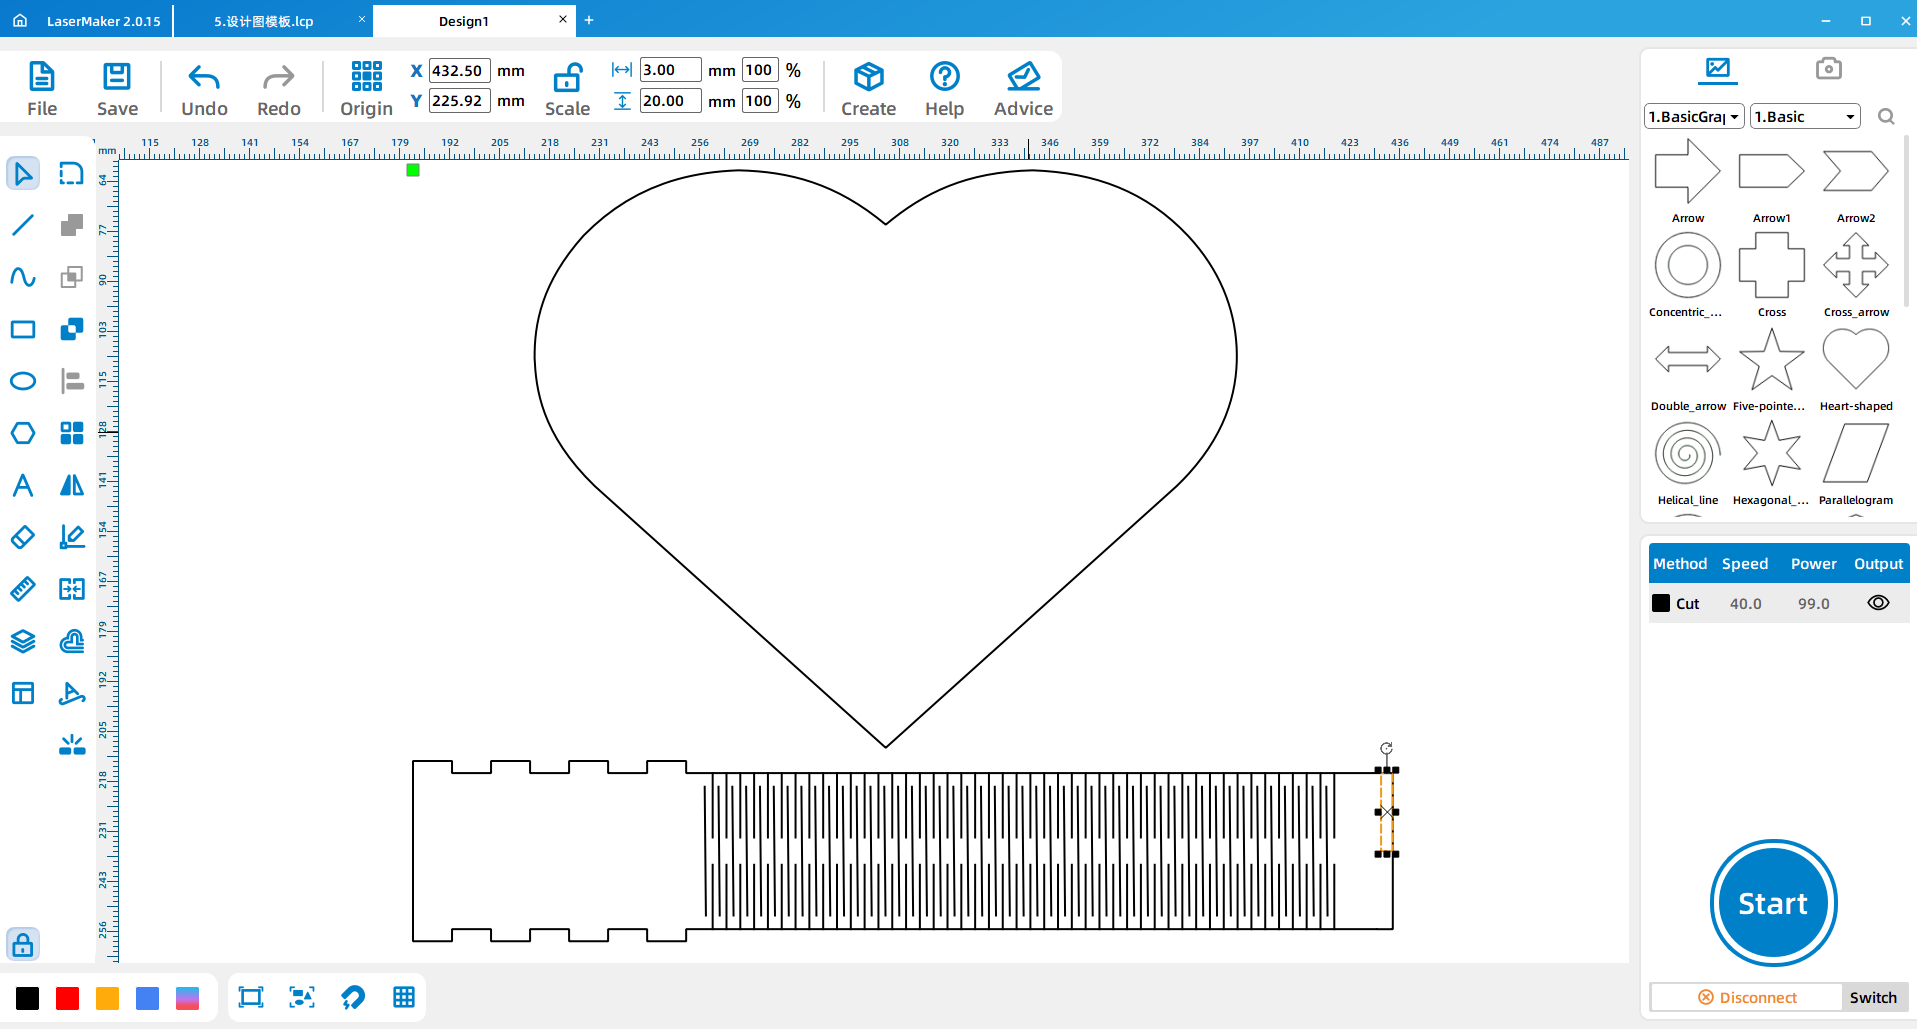
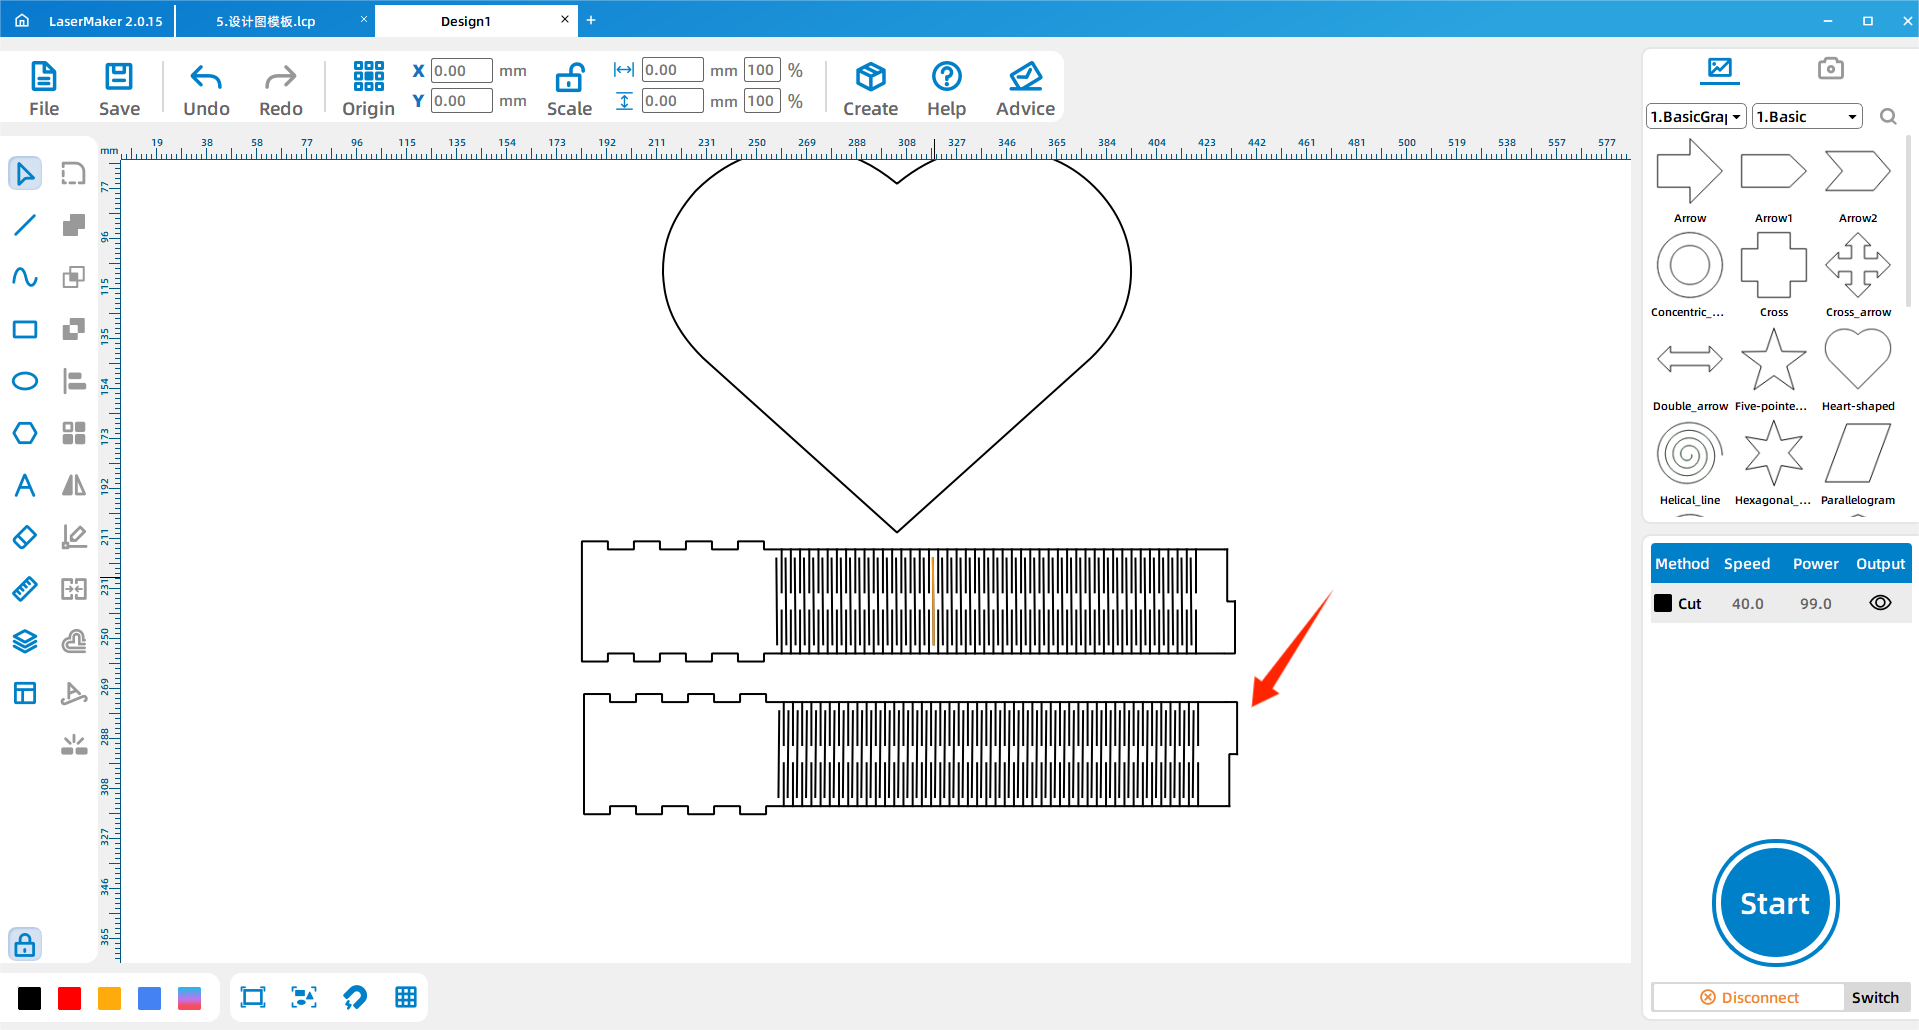
Draw a 3 mm by 20 mm rectangle at the end of the border strip and weld it into the design. Copy and paste the finished border strip, then use Rotate > Flip Vertically to create the matching border part.
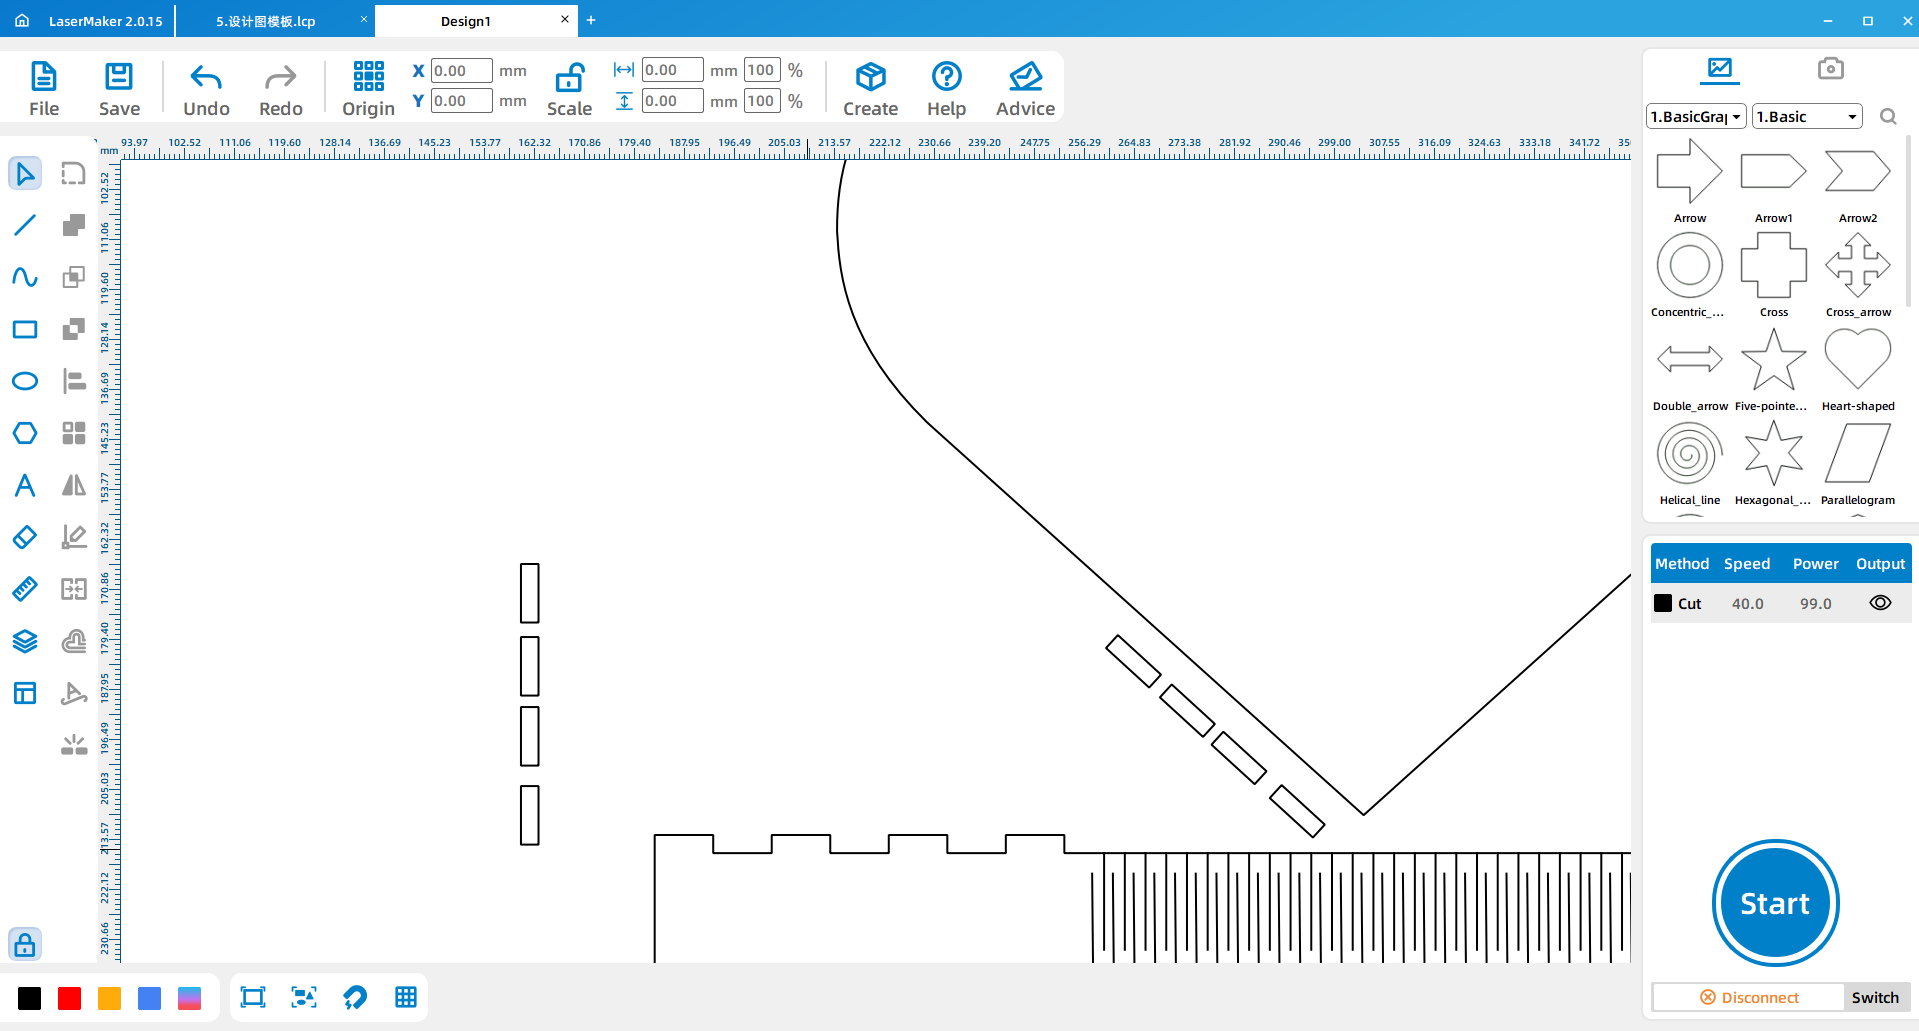
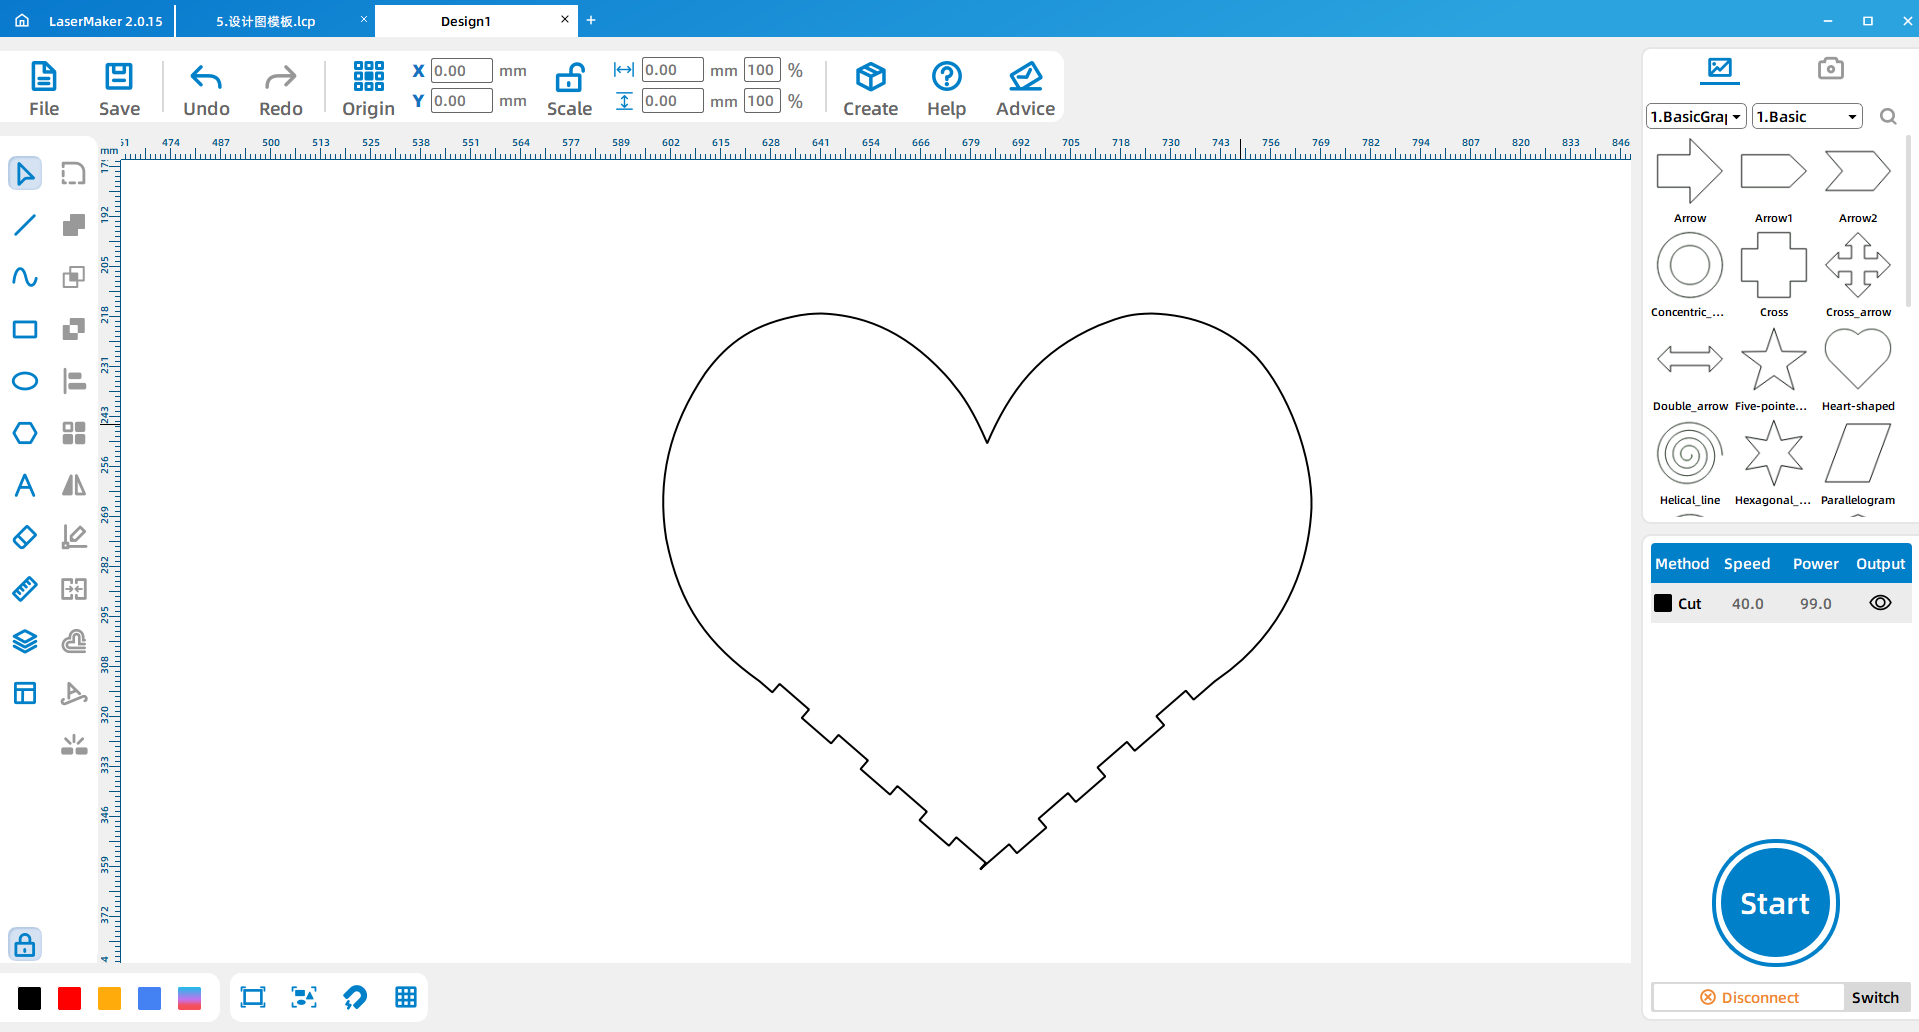
Use the same bayonet-drawing method to create another gear bayonet structure. Move it near the lower tip of the heart and rotate it until it is parallel to the lower point of the heart shape.
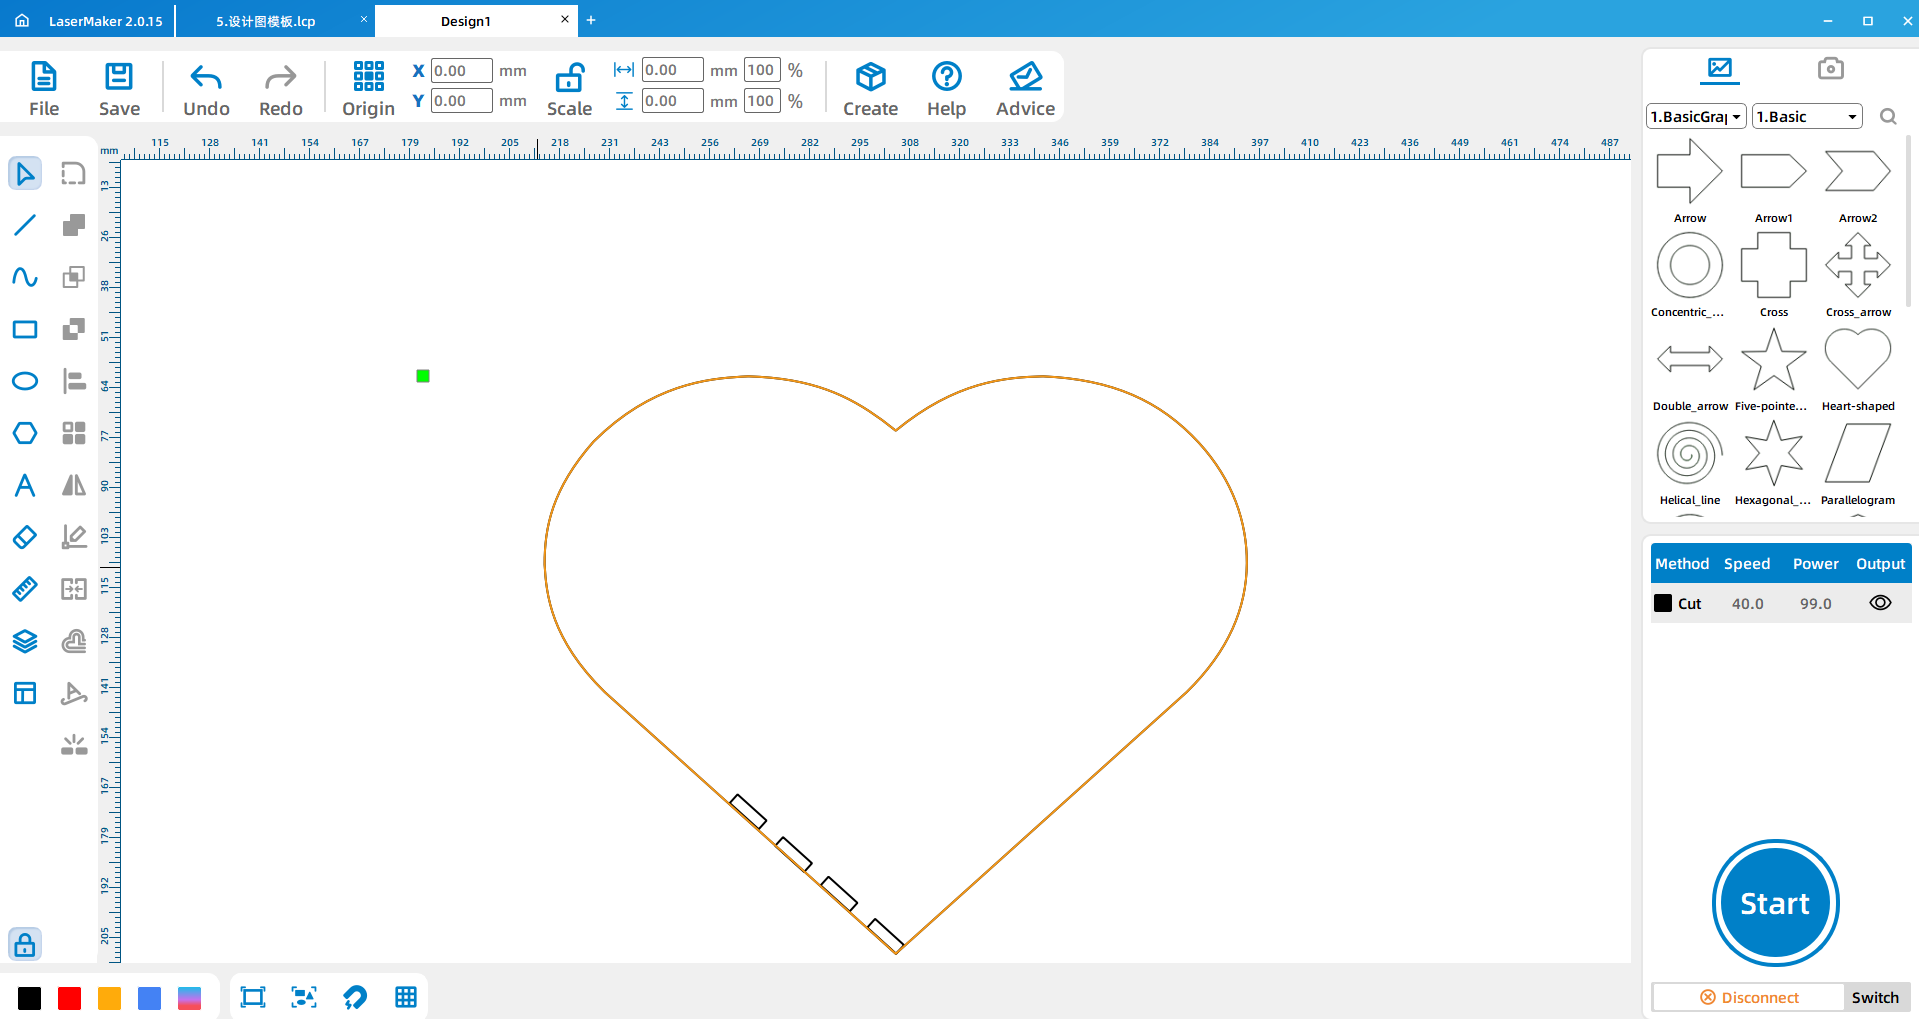
When the fit is correct, copy and paste the gear bayonet, rotate or flip it horizontally, and place it on the other side of the heart tip. Weld the bayonet features onto the heart design, then duplicate the completed heart-shaped plate.

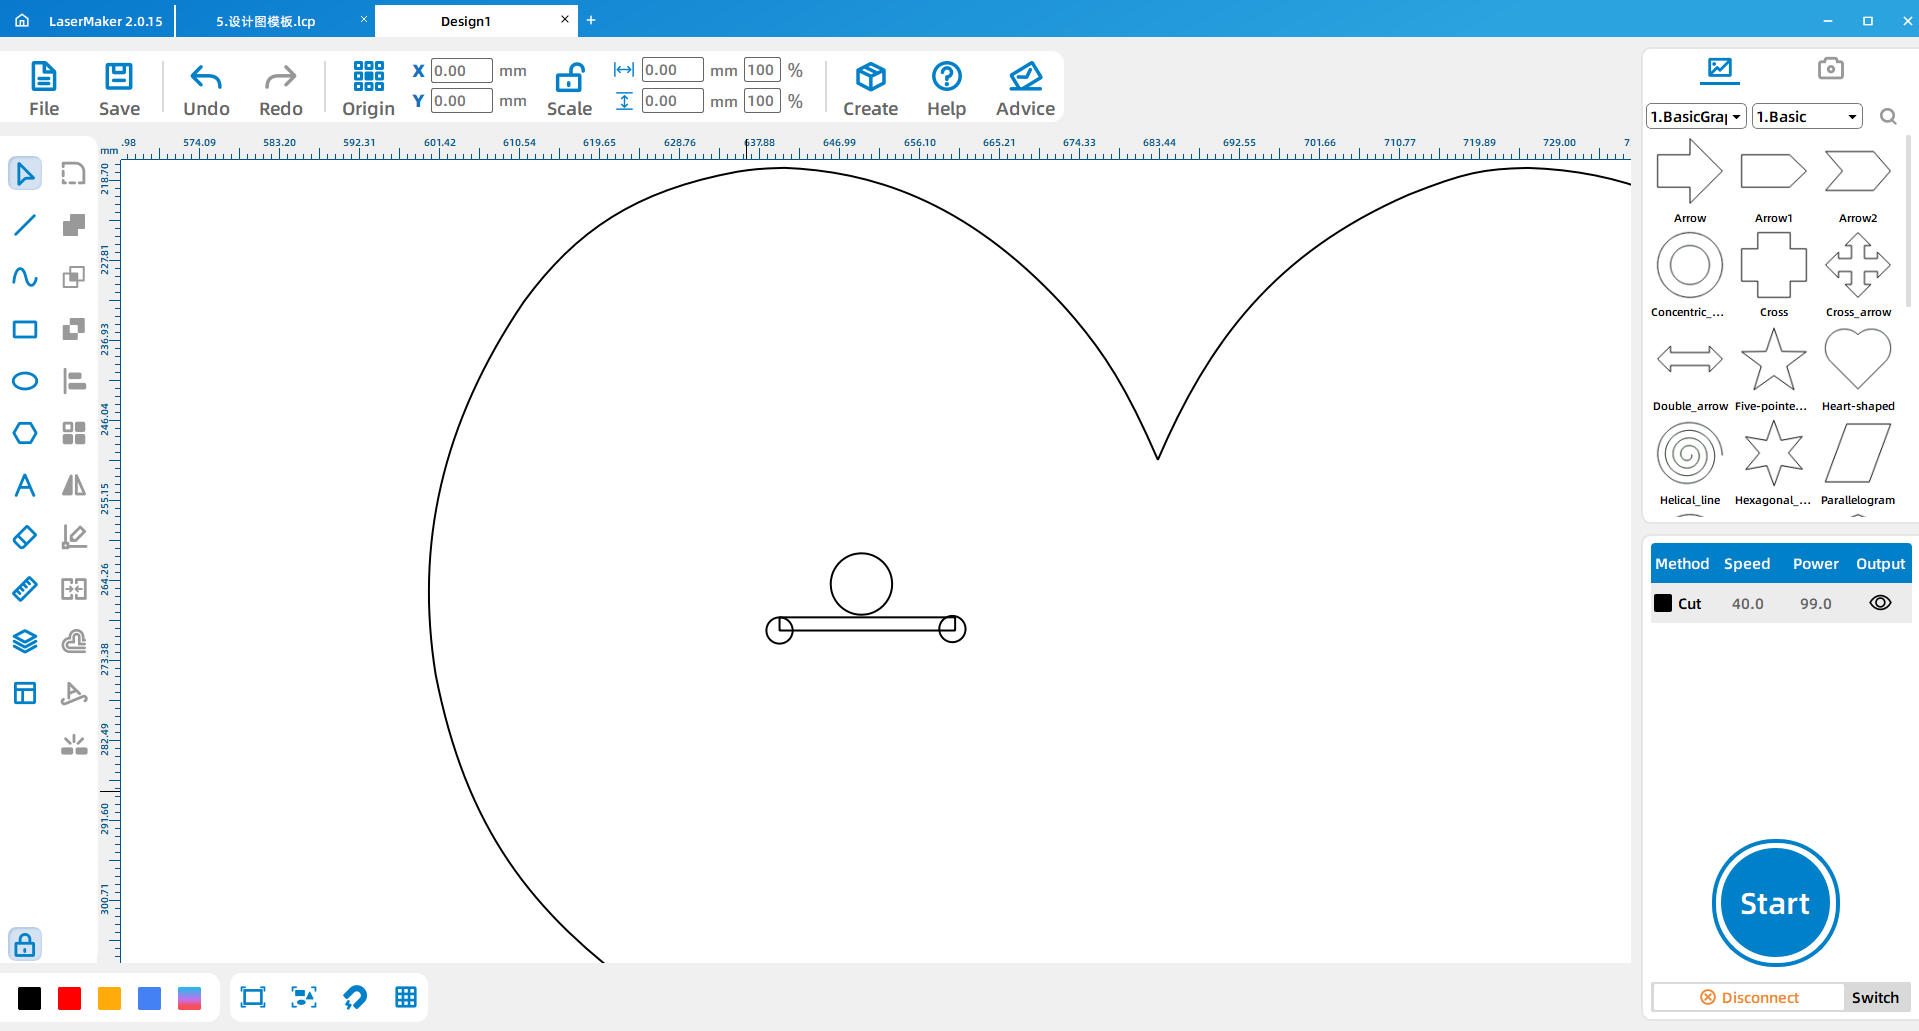
Draw three circles for installation: one 7 mm circle for the wind-up hole and two 3 mm circles for screw holes. Draw a 20 mm by 1.5 mm rectangle as a measuring reference for the distance between the two screw holes.
After the design is complete, set the layer parameters and arrange the processing order. The source workflow notes that line processing should come before cutting. Before sending the job to the laser cutter, check the layer order, cutting paths, and material setup.
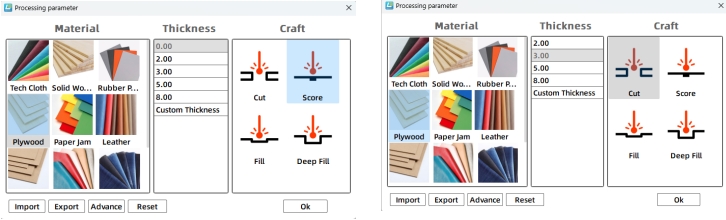
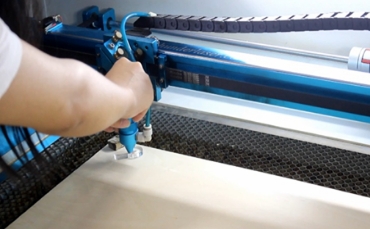
Import the saved design files into the laser cutting machine for processing. Before cutting, adjust the focal length carefully to reduce the risk of incomplete cuts.
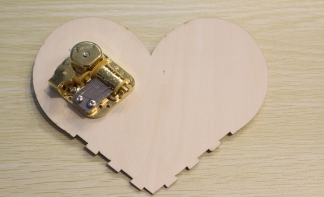
First, install the music box movement into the heart-shaped plate with holes. Check that the wind-up hole and screw holes align with the movement before securing the part.
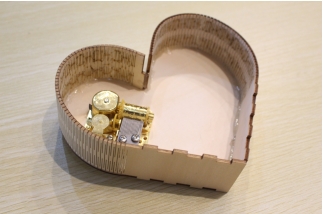
Use hot glue to wrap the flexible frame strip around the outside of the heart. Work slowly so the strip follows the curve neatly and the edge stays aligned with the heart-shaped plate.
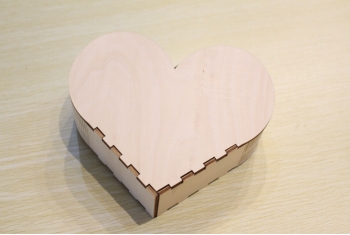
After the border strip is attached, glue the second heart-shaped plate to the other side of the structure. Check the edges and allow the glue to set before winding and testing the music box.
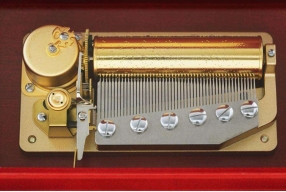
A music box movement usually includes a power source, a rotating cylinder, a comb-like sound plate, a base plate, and a transmission structure. When the spring or crank powers the cylinder, small pins on the cylinder pluck the thin metal teeth of the sound plate. The different tooth lengths produce different notes.
The cylinder can be understood as a stored musical pattern, while the sound plate works like a set of tuned keys. This gives students a simple way to connect mechanical motion with sound production.
Design planning: Students discuss the shape, style, and music box movement placement before drawing.
Software design: Students import the heart shape, draw the border strip, create flexible cut lines, add bayonets, and place the movement holes.
Machine processing: Students process files in a safe classroom order under teacher supervision.
Assembly: Students install the movement, glue the border strip, close the body, and test the music box.
Prepare a sample music box movement so students can observe the wind-up hole, screw holes, cylinder, and sound plate.
Remind students that the border strip length should match the size of the heart shape.
Check the flexible cut line pattern before cutting, because small spacing errors can affect how the border bends.
Ask students to test-fit the movement before final gluing.
Encourage students to add safe decorative details after the basic music box structure works.
How does a music box create sound?
Besides a heart shape, what other music box shapes could you design?
How did the flexible border help the flat material wrap around the curved body?
What decoration or structure could make the music box look richer?
Students can evaluate their own work and give peer feedback based on creativity, technical process, artistic effect, and collaboration.
| Evaluation Item | Self-Evaluation | Peer Evaluation |
|---|---|---|
| Creativity, 30 points | ||
| Technology, 30 points | ||
| Art, 20 points | ||
| Assist, 20 points | ||
| Total, 100 points |
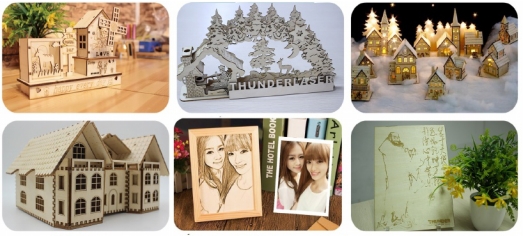
After finishing the heart-shaped music box, students can redesign the body into another shape, such as a star, circle, animal, book, house, or custom gift form. They can compare how different shapes affect the border length, bending pattern, hole placement, and assembly difficulty.
Students can also add engraved decoration, layered panels, name text, themed patterns, or a display stand to make the music box more personal and visually complete.
This project is suitable for classroom laser cutters that support cutting and line processing of sheet materials for small maker projects. For schools and beginner STEAM labs, projects like heart-shaped music boxes, decorative boxes, flexible border structures, and beginner LaserMaker activities can be completed with a classroom laser cutter such as the Thunder Laser Bolt Series.
Teachers can choose the machine and material setup based on classroom space, student supervision needs, material thickness, project size, music box movement dimensions, and ventilation setup. Students should always test settings, check focus, and follow the school’s laser safety rules before final cutting.
Talk To Our Experts Now!
Please leave your contact information so that we can serve you better.
TAKE THE NEXT STEP WITH THUNDER LASER

 Stable & Consistent MachinesUnlimited ApplicationRobust After-sales SupportFactory Direct Supply


