


STEAM Carousel Music Box Laser Cutting Project with LaserMaker
 24-08-20
WHAT ARE YOU LOOKING FOR?
Search Across Products, Blog Posts, Support Content, And Resources.

STEAM Carousel Music Box Laser Cutting Project with LaserMaker
24-08-20

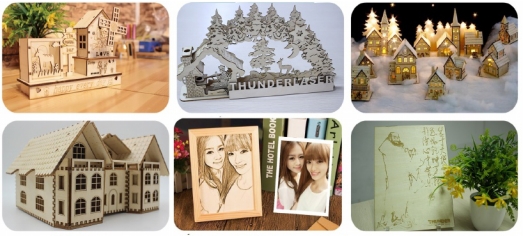
In this STEAM mechanism project, students design and build a carousel music box using LaserMaker, a laser cutting machine, and a music box movement. The lesson connects box-body layout, hole placement, rotating base design, small-hole positioning, clockwork slot design, horse figure selection, laser processing, and hands-on assembly.
This project extends previous music box activities by turning the music box movement into a carousel-style model. Students learn how the movement, box body, rotating disc, horse figures, sticks, and wind-up handle work together to create a finished decorative mechanism.
| Item | Details |
|---|---|
| Project | Carousel music box laser cutting project |
| Software | LaserMaker |
| Main Skills | Box file arrangement, circle drawing, hole placement, Rotation, disc design, oval slot design, horse file import, layer parameter setup, laser cutting, gluing, and carousel assembly |
| Suggested Materials and Parts | Laser-cut sheet material, music box movement, screws, small sticks, horse parts, hot glue or white latex, and basic classroom assembly tools |
| Classroom Fit | Robotics and mechanism projects, music-themed STEAM activities, rotating structures, laser cutting, product design, beginner LaserMaker practice, and creative classroom projects |
Students will prepare a laser-cut box structure, add holes for a music box movement, design a rotating carousel base, import and arrange horse graphics, set laser processing parameters, cut the parts, assemble the box, attach the horse figures to sticks, and complete a carousel music box.
For teachers: Use this project to connect music box mechanisms, rotating platforms, decorative object design, and laser-cut assembly.
For students: Use the activity to design a carousel model and understand how accurate holes, rotation, gluing, and assembly affect the final product.
For makerspaces: Use it as a compact mechanism project that combines digital design, cutting, craft assembly, and creative styling.
Review how a music box movement can be installed inside a laser-cut structure.
Use LaserMaker to arrange a box design file and place holes for a movement, screw positions, and a wind-up handle.
Create a rotating base using 100 mm discs, 2.7 mm small holes, 30 mm circles, and a 7 mm by 25 mm oval clockwork slot.
Import horse graphics, choose suitable horse parts, and organize the final cutting layout.
Assemble the box, attach horses to sticks, connect the rotating base, insert the wind-up handle, and test the finished carousel.
Design thinking: Turn a music box movement into a carousel-style object with a recognizable theme and personal decoration.
Computational thinking: Use circle sizes, hole spacing, rotation, layer order, and repeated parts to create an accurate laser cutting file.
Engineering thinking: Consider movement alignment, disc rotation, screw-hole placement, stick direction, horse orientation, glue strength, and final stability.
Students should operate the laser cutter only under teacher or lab supervisor guidance. Before processing, check material placement, focal length, layer order, line processing, and cutting paths. During assembly, use hot glue carefully, align the movement before tightening screws, and test the rotating structure slowly.
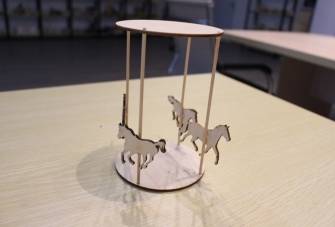
A carousel music box combines a familiar music box movement with a rotating, story-like display. In this project, students use a box body to hold the movement and a circular base to support the carousel horses.
The main design challenge is to make the movement holes, rotating base, horse sticks, and wind-up handle fit together. Students need to think about where the spring handle goes, how the base attaches, and how the horse direction affects the final appearance.

Before opening the software, teachers can guide students with short design and mechanism questions.
If you were asked to make a carousel music box, how would you make it?
What materials would you choose for the carousel body, base, and horse figures?
How can a music box movement be connected to a rotating display?
What details make a carousel easy to recognize?
How could you make your carousel look more personal or beautiful?
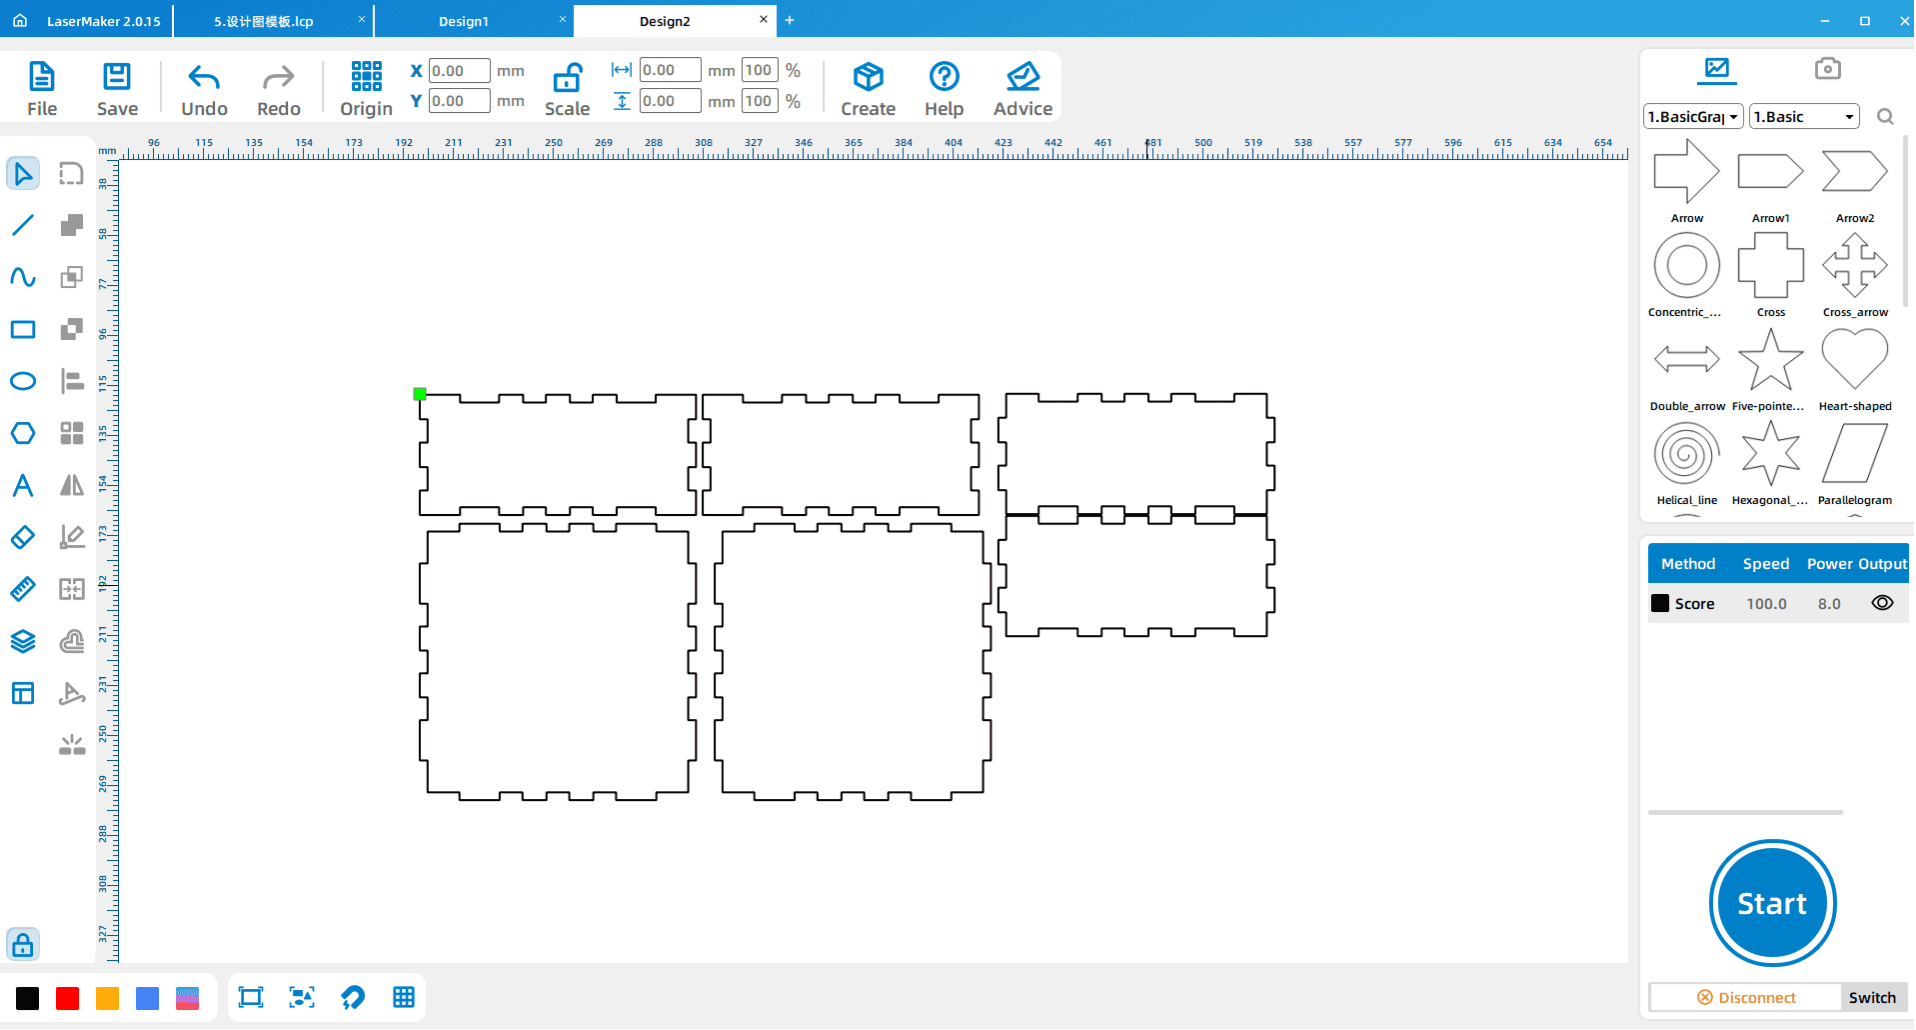
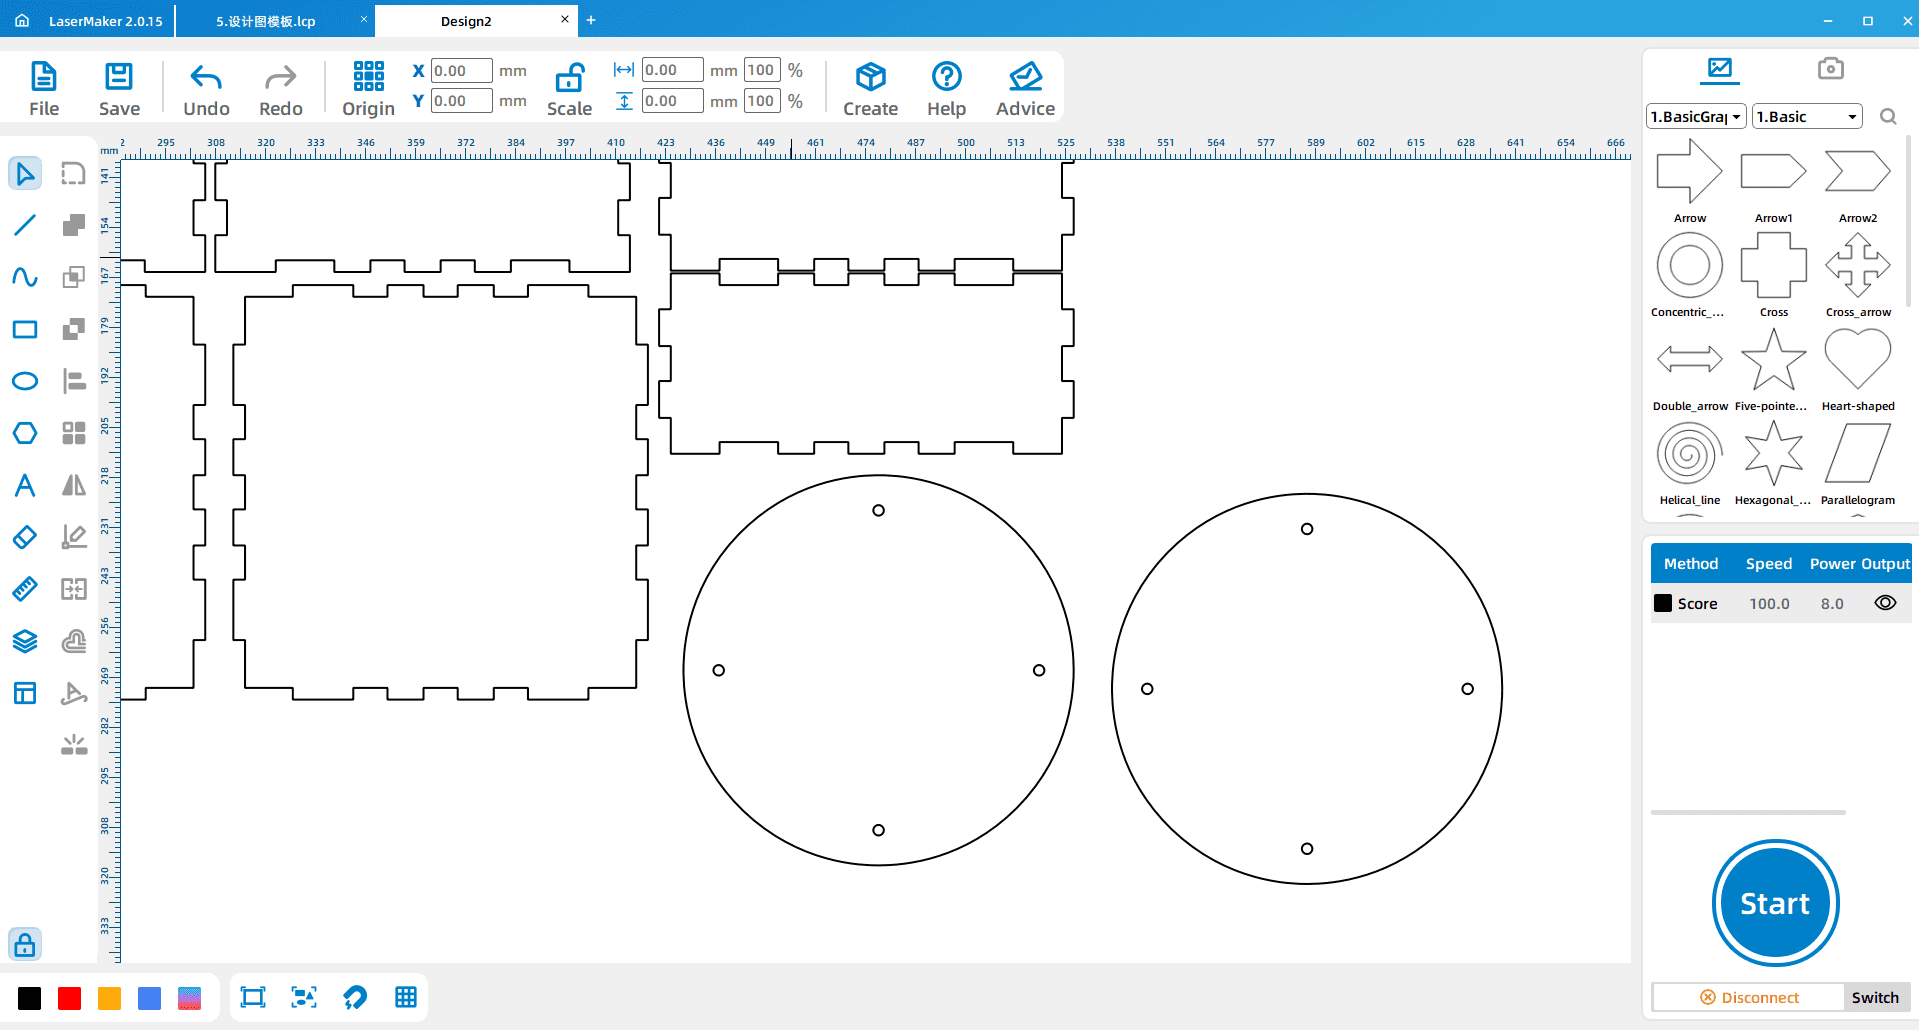
Open the design file for the box in LaserMaker and move each part into place. Students should identify which parts will form the body of the carousel music box before adding holes and rotating components.
Draw a 6.5 mm circle as the wind-up hole for the music box movement. Then draw two 3.15 mm circles as screw holes. During the design process, a 19 mm by 1.5 mm rectangle can be used as a measuring reference for the distance between the two screw holes.
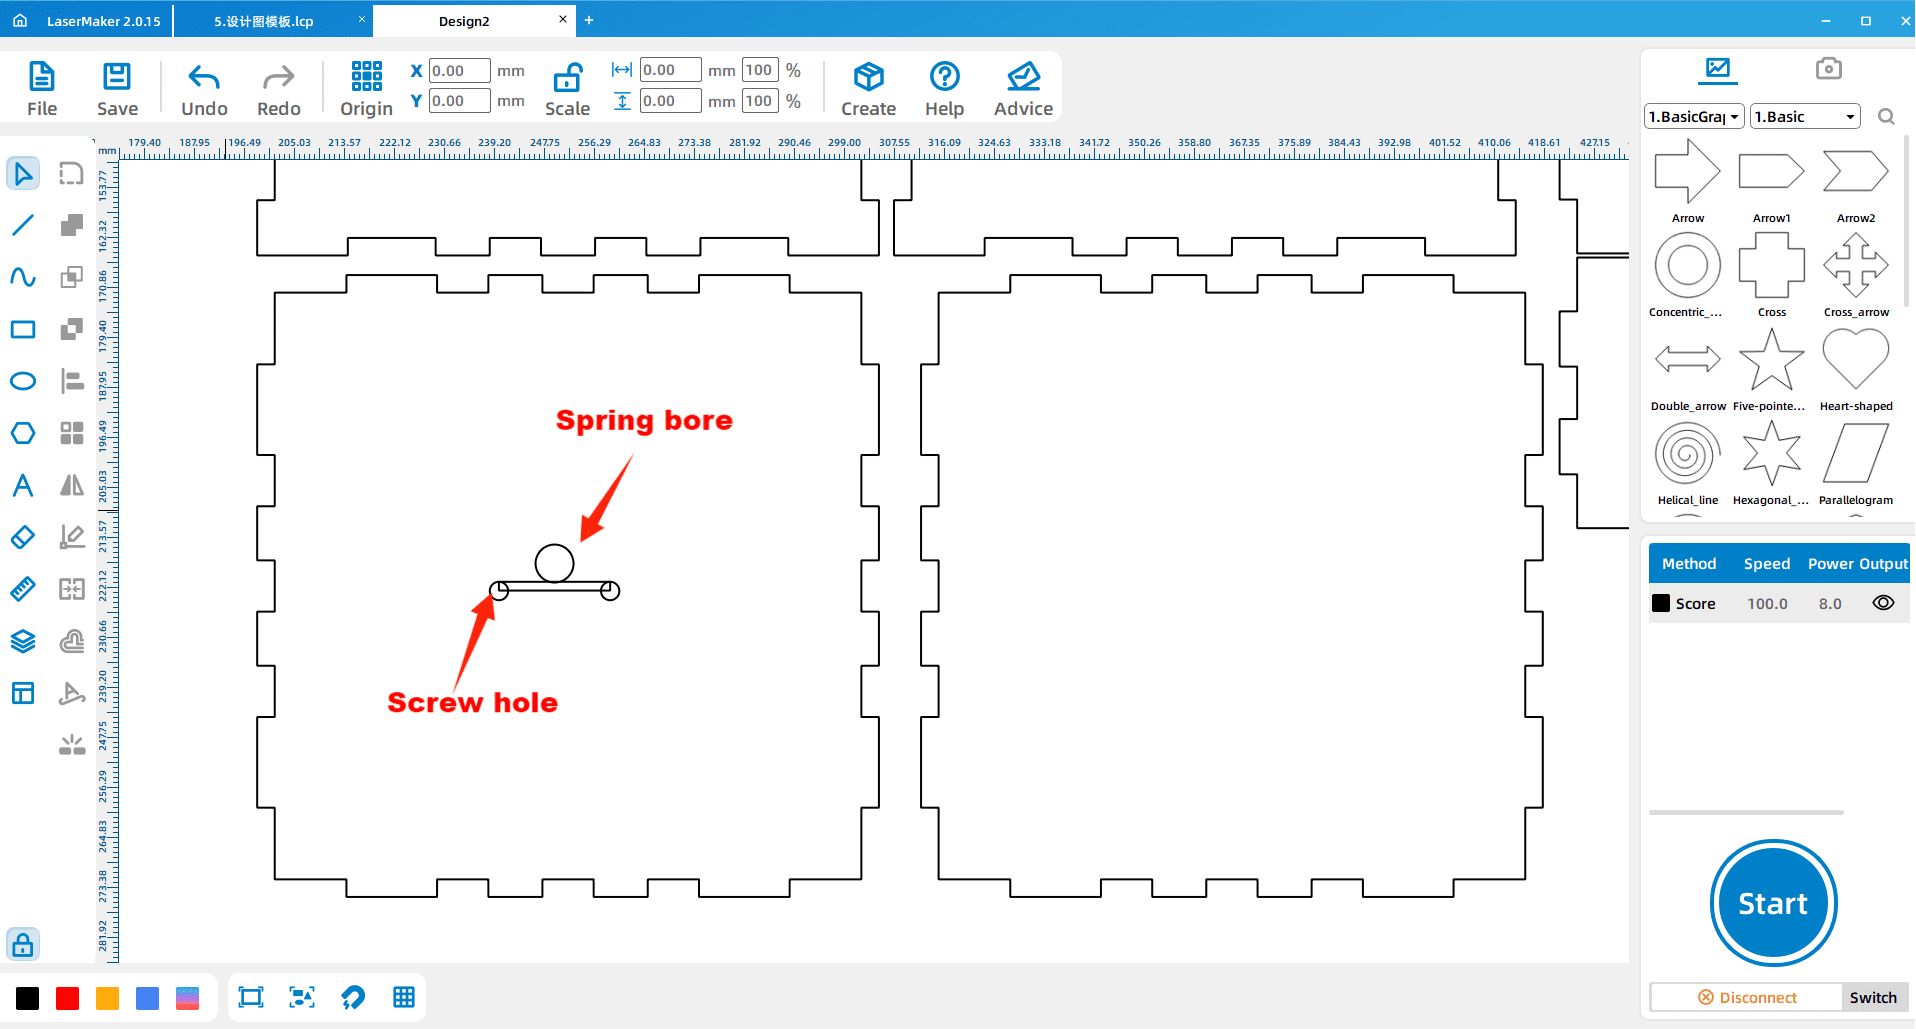
Adjust the hole position according to the actual size and layout of the music box movement. In the source workflow, Rotation is used to help position the holes. The middle spring hole should stay centered so the wind-up handle can work correctly.
Measurement Reminder: Music box movements may vary. Students should measure the actual wind-up and screw positions before final cutting instead of copying sample hole positions without checking.
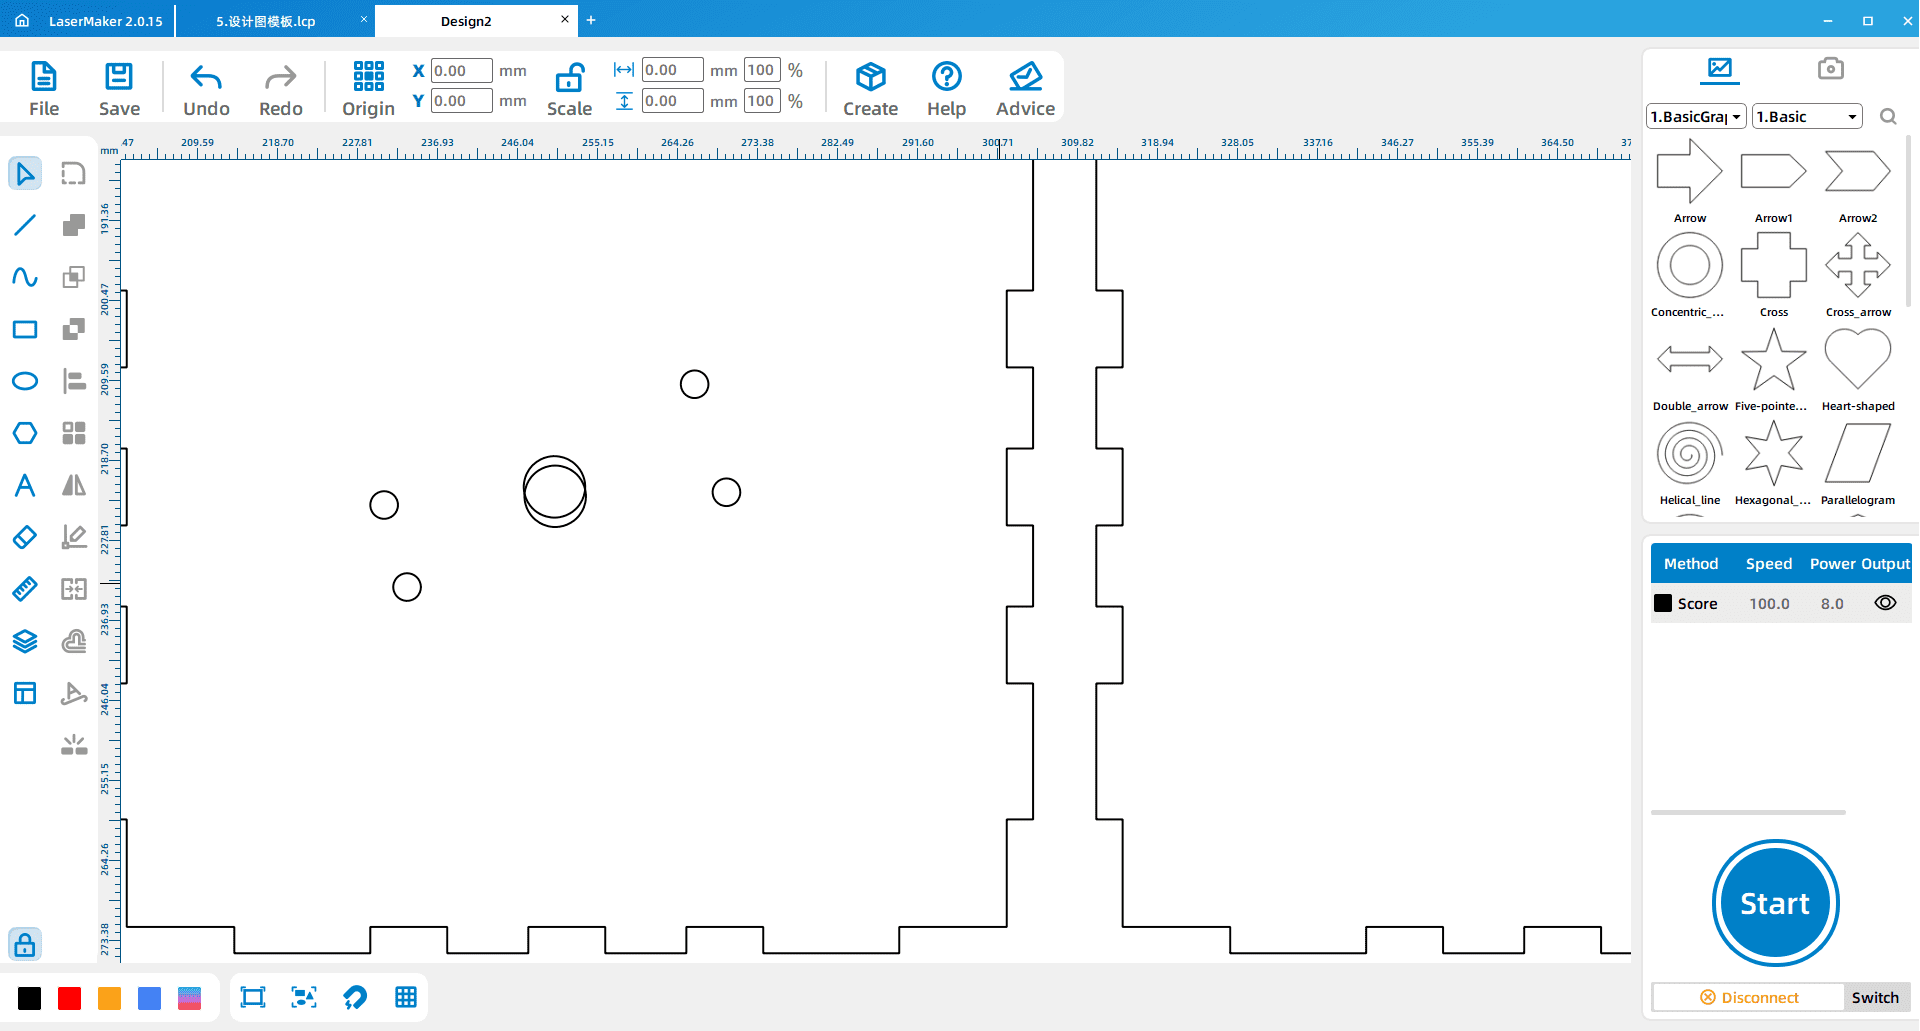
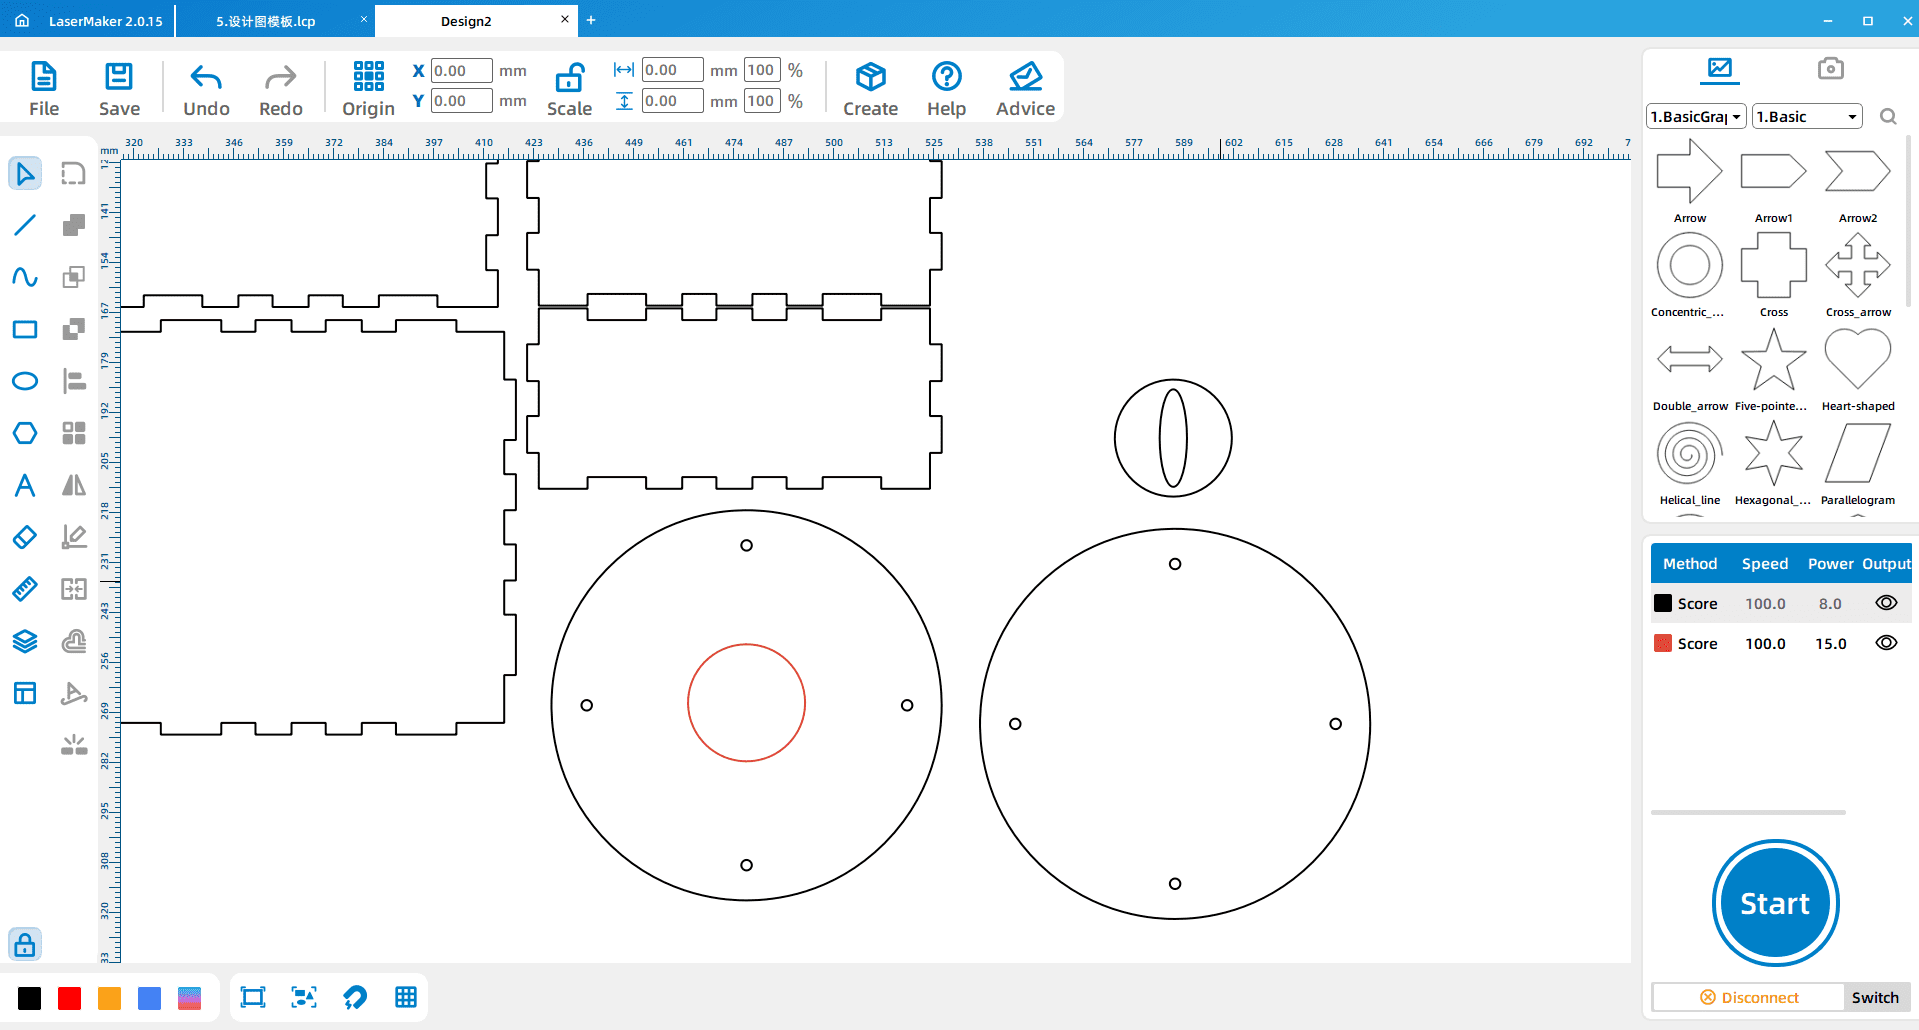
Draw two 100 mm circles for the carousel discs. These circular parts form the main rotating base structure for the carousel.
Next, draw four 2.7 mm circles as small holes on the disc and arrange them diagonally. These holes help position the small sticks and carousel horse supports.
Draw two 30 mm circles. Change the layer color of one circle and place it on the rotating base. On the other small circle, draw a 7 mm by 25 mm oval to create the clockwork slot for the wind-up handle.
Import the horse file into LaserMaker and choose suitable horse graphics for the carousel. After selecting the preferred horse parts, arrange all final parts neatly to complete the design layout.
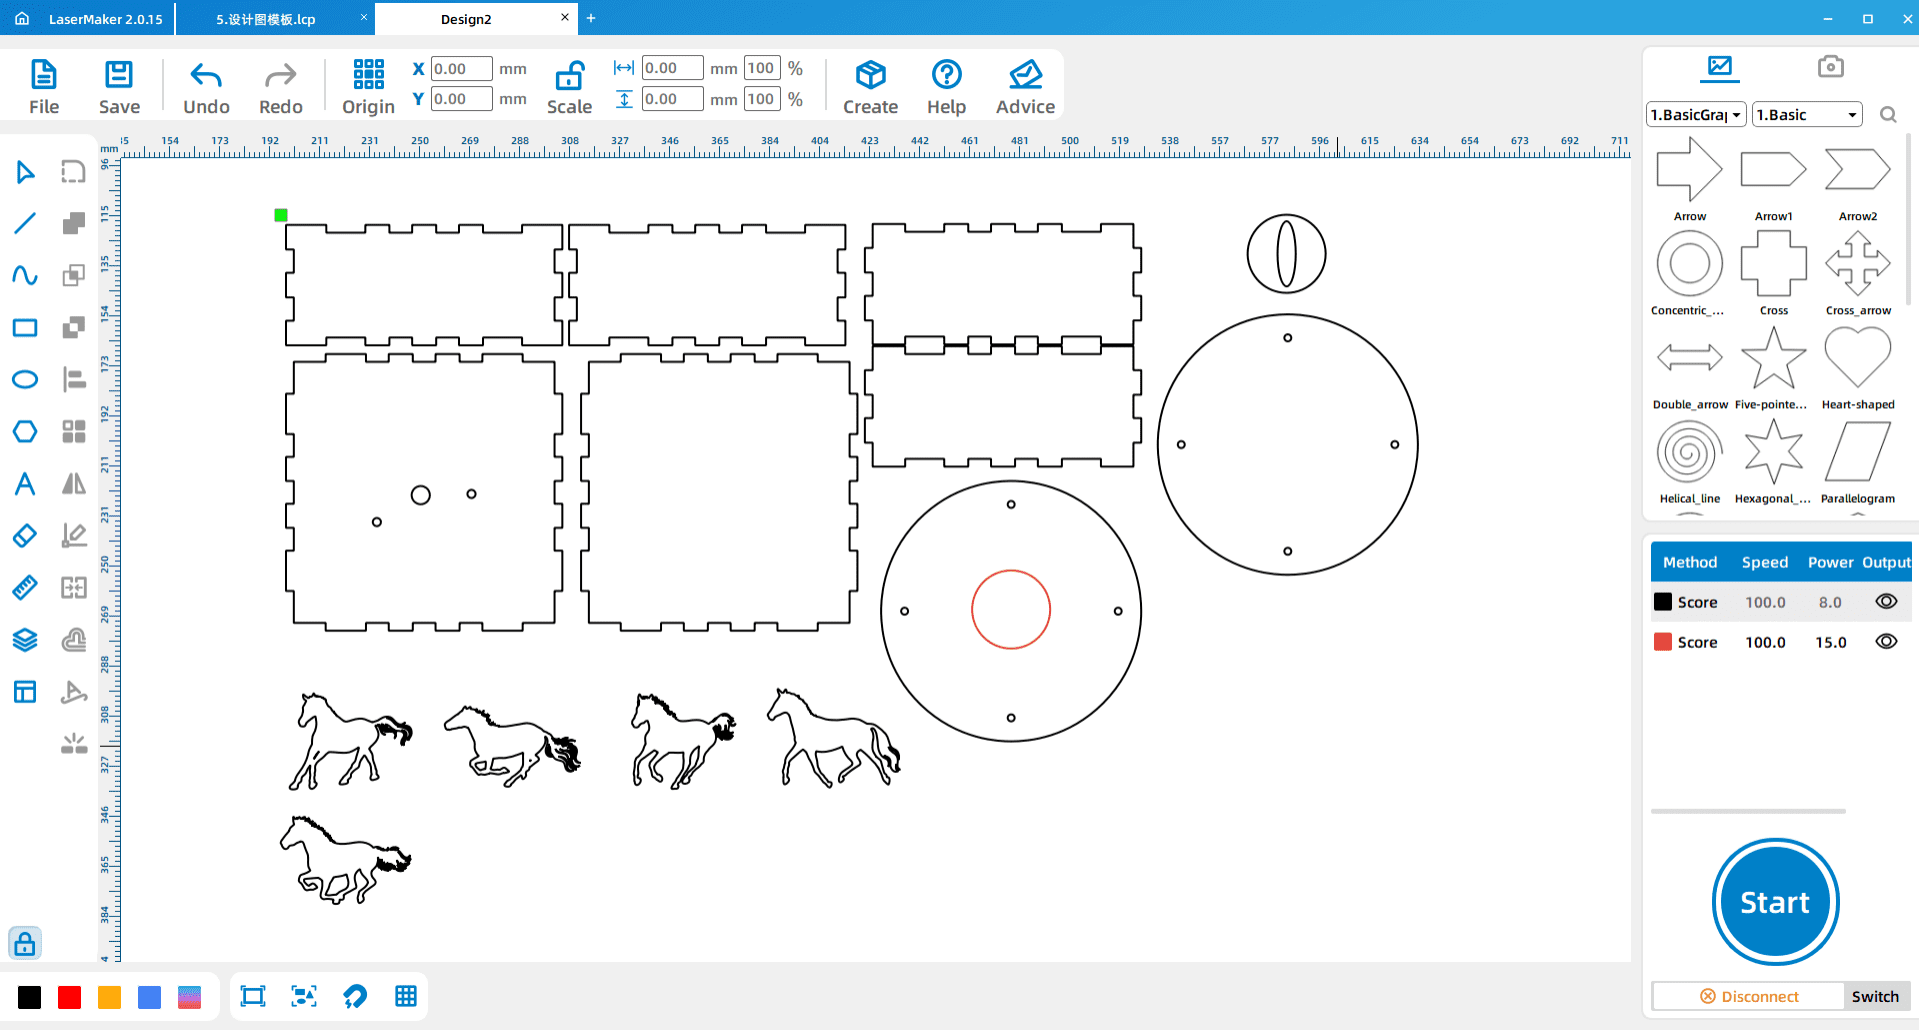
After the design is complete, set the layer parameters and adjust the processing order. The source workflow notes that line processing should come before final cutting.
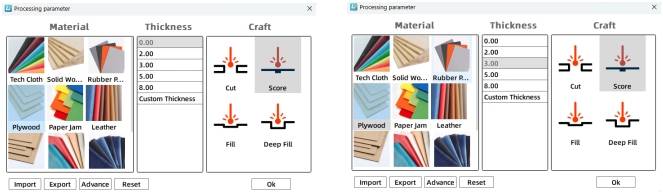
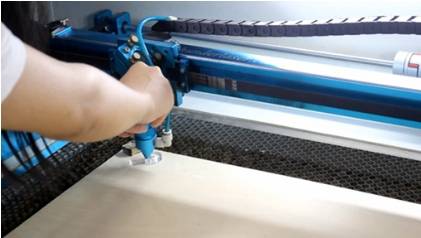
Import the completed design file into the laser cutting machine for processing. Before starting the job, adjust the focal length carefully to reduce the risk of incomplete cutting.
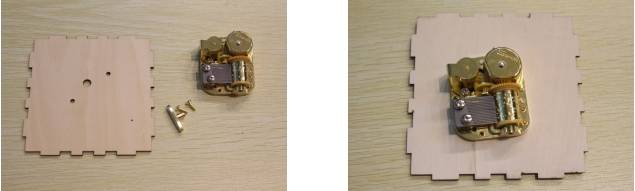
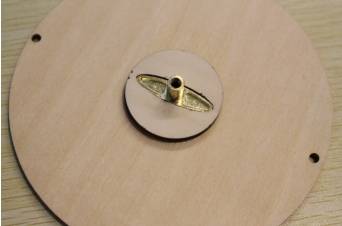
Remove the spring handle from the music box movement. Install the movement onto the laser-cut part shown in the source workflow and secure it with screws after the holes are aligned.
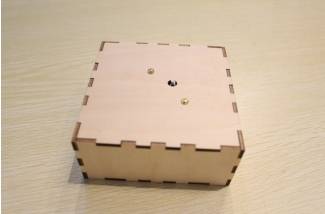
Assemble the box according to the matching structure. Check the fit of the body parts before applying glue or final pressure.
Use hot glue or white latex to attach each pony or horse figure to a small stick. The source workflow recommends hot glue for this step. Let the glue set before installing the horse supports on the base.
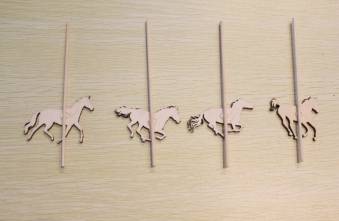
Attach the small sticks with the horse figures to the two original boards. Pay attention to the direction of each horse so the carousel looks consistent after assembly.
Insert the wind-up handle into the small circle. Then attach the assembled base to the larger circular part using hot glue or white latex.
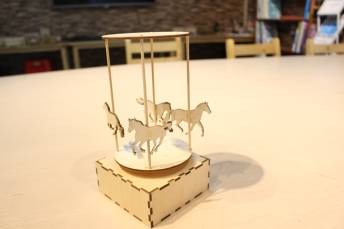
After assembly, spin or test the carousel and observe whether the structure is stable. Students should check whether the music box movement is secure, the rotating base is attached firmly, and the horse figures face the intended direction.
Check whether the music box movement is installed in the correct direction.
Check whether the wind-up and screw holes match the actual movement.
Check whether the rotating base is centered and firmly attached.
Check whether the horse sticks are vertical, secure, and evenly arranged.
Discuss how the carousel could be redesigned to look more personal or decorative.
Design planning: Students discuss the materials and parts needed for a carousel music box.
Software design: Students arrange the box file, place music box movement holes, design the rotating base, and import horse parts.
Machine processing: Students process files in a safe classroom order under teacher supervision.
Assembly: Students install the movement, build the box, glue horses to sticks, attach the rotating base, and insert the wind-up handle.
Testing: Students test the finished carousel and record what they would improve.
Show students the music box movement before design so they understand the wind-up hole and screw-hole positions.
Ask students to measure the actual movement before finalizing the hole positions.
Remind students that line processing should happen before final cutting.
Prepare spare horse pieces, sticks, and small circular parts for groups that need to retry assembly.
Use the finished carousel to discuss how rotating structures can become decorative, functional, or story-based designs.
How does the carousel combine with the music box movement?
Which parts help the carousel rotate or look like a carousel?
How could you make your carousel more beautiful and personal?
What problems did your group meet during design, cutting, or assembly?
Students can evaluate their own work and give peer feedback based on creativity, technical process, artistic effect, and collaboration.
| Evaluation Item | Self-Evaluation | Peer Evaluation |
|---|---|---|
| Creativity, 30 points | ||
| Technology, 30 points | ||
| Art, 20 points | ||
| Assist, 20 points | ||
| Total, 100 points |
At the end of the lesson, students can present their carousel music boxes, explain how they designed the box, rotating base, horse supports, and movement installation, and discuss what they would improve in the next version.
After finishing the basic carousel, students can redesign the horse figures, change the carousel theme, add engraved decoration, adjust the base shape, or create a more detailed story scene around the carousel.
For a mechanism challenge, students can compare how the music box movement is installed in the heart-shaped music box, music car, music windmill, and carousel, then explain how one movement can support different product designs.
This project is suitable for classroom laser cutters that support cutting and engraving of sheet materials for small maker and mechanism projects. For schools and beginner STEAM labs, projects like carousel music boxes, music box models, rotating bases, and beginner LaserMaker activities can be completed with a classroom laser cutter such as the Thunder Laser Bolt Series.
Teachers can choose the machine and material setup based on classroom space, student supervision needs, material thickness, project size, music box movement dimensions, and ventilation setup. Students should always test settings, check focus, and follow the school’s laser safety rules before final cutting.
Talk To Our Experts Now!
Please leave your contact information so that we can serve you better.
TAKE THE NEXT STEP WITH THUNDER LASER

 Stable & Consistent MachinesUnlimited ApplicationRobust After-sales SupportFactory Direct Supply


