


Laser Cutting Wood Basics for STEAM Classrooms
 2024-08-02
WHAT ARE YOU LOOKING FOR?
Search Across Products, Blog Posts, Support Content, And Resources.

Laser Cutting Wood Basics for STEAM Classrooms
2024-08-02

This STEAM lesson teaches students how wood type, thickness, speed, power, focus, and air assist affect laser-cutting results. Students complete a controlled test, compare edge quality and cut-through performance, and apply their findings to a classroom project.
Designed for middle school and high school classrooms, this beginner laser cutter lesson plan can be used by teachers, students, schools, makerspaces, and Fab Labs. It introduces wood laser cutting through observation, prediction, controlled testing, data recording, troubleshooting, and project-based learning.
The lesson focuses on classroom learning rather than general wood purchasing or commercial laser machine selection. It helps students understand why laser settings must be tested and how evidence can be used to improve a finished wooden part.
Lesson focus: Students investigate how processing variables affect wood cutting, record their observations, and use the results to produce a small classroom project.
This laser cutting wood lesson is a 60–90 minute beginner activity in which students compare teacher-approved cutting settings on 3 mm birch plywood and use their results to produce a finished classroom project.
| Lesson Information | Details |
|---|---|
| Grade Level | Middle School / High School |
| Lesson Duration | 60–90 Minutes |
| Skill Level | Beginner |
| Class Size | 8–20 Students |
| Machine | Enclosed CO₂ Laser Cutter |
| Main Material | 3 mm Birch Plywood |
| Software | LaserMaker / LightBurn |
| Learning Outcome | Compare cutting settings and produce a finished wooden part |
Overview of the recommended grade level, lesson duration, material, equipment, and learning outcome.
Students will investigate how wood responds to laser cutting. They will observe the material, predict how different settings may affect the result, complete a teacher-approved speed and power test, record their findings, and use the evidence to create a finished part.
The lesson can be delivered as a standalone classroom activity or included within a broader laser cutting curriculum covering digital design, material science, engineering, product development, and responsible manufacturing.
By the end of this STEAM laser cutting lesson, students should be able to explain the basic wood-cutting process, conduct a controlled settings test, record observable results, and select an appropriate setting for a finished project.
Students will learn to:
Responsible making requires students to use approved materials, reduce unnecessary waste, follow classroom safety procedures, and test settings before processing a final part.
Students should plan layouts carefully so that more useful parts can be produced from each sheet. Painted, stained, glued, laminated, or chemically treated wood should only be used after the teacher or lab supervisor confirms that it is suitable for laser processing.
Unknown materials should never be placed in the laser cutter.
A safe classroom laser cutting lesson requires the teacher to prepare the material, test the machine, confirm extraction, organize student roles, and establish clear supervision before the activity begins.
Before the lesson, the teacher should:
Students should only use an enclosed CO₂ laser cutter under the supervision of a trained teacher or lab supervisor.
Teacher safety rule: Students should never change machine settings, open the machine, remove material, or restart a failed cut without teacher approval.
CO₂ lasers can cut and engrave many suitable wood materials because the focused laser energy heats the material along a programmed path. Successful results depend on the wood, machine condition, focus, airflow, and processing settings.
Yes. CO₂ laser cutters are widely used for cutting and engraving suitable wood materials. They allow students to turn a digital drawing into a physical object with detailed shapes and repeatable dimensions.
Wood laser cutting for students can support projects such as model components, signs, nameplates, coasters, ornaments, slot-fit structures, classroom prototypes, decorative objects, and simple product-design projects.
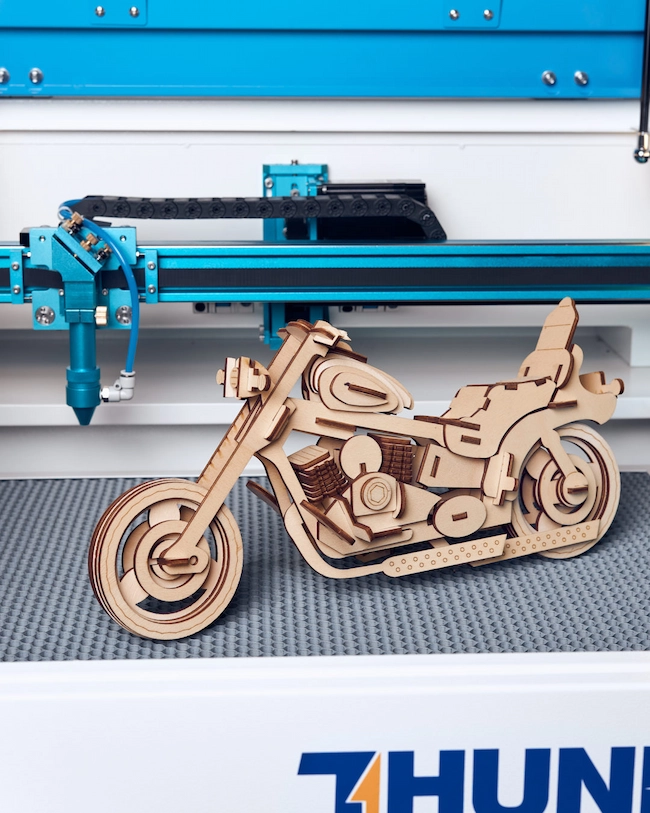
A classroom laser cutter project can transform a digital drawing into a detailed wooden model.
Wood cutting settings must be tested because two sheets that appear similar may produce different results.
Cutting performance can be affected by:
Students should therefore treat laser settings as testable variables rather than fixed answers. A controlled test helps identify which combination produces a complete cut with acceptable edge color and limited surface damage.
Thicker wood generally requires more laser energy than thinner wood. Depending on the teacher-approved process, this may involve slower movement, increased power, or additional passes.
For this beginner lesson, 3 mm birch plywood is recommended because it is suitable for short classroom tests and can be used for many small finished projects.
Students should understand that material thickness is only one factor. A flat 3 mm sheet with consistent internal layers may cut more reliably than a warped or inconsistent sheet of the same stated thickness.
Students only need to understand a small group of practical classroom materials for this lesson. Birch plywood, basswood, MDF, cherry, and walnut provide useful examples of how different wood structures and appearances can affect a project.
| Wood Material | Classroom Characteristics | Suitable Student Projects |
|---|---|---|
| Birch Plywood | Smooth, lightweight, relatively strong, and useful for cutting and engraving. Glue layers and internal voids may affect consistency. | Models, structures, signs, coasters, boxes, and prototypes |
| Basswood | Soft, light-colored, and fine-grained. It is generally easy to cut and useful for beginner work. | Ornaments, model parts, layered artwork, and detailed shapes |
| MDF | Flat and consistent, but may produce more residue and odor. Only approved laser-safe MDF should be used. | Signage, templates, simple structures, and painted projects |
| Cherry | A reddish-brown hardwood that can produce attractive contrast and a polished appearance. | Decorative parts, engraving samples, gifts, and presentation pieces |
| Walnut | A darker hardwood with a distinctive grain. It may require more careful testing than lighter or softer woods. | Decorative products, nameplates, gifts, and contrast-based designs |
A classroom-focused comparison of five common wood materials used in student laser cutting projects.
For a more detailed comparison of wood species, plywood types, cutting behavior, and material selection, review the best wood for laser engraving and cutting guide.
Before cutting, students should examine the material and record visible characteristics.
In this wood cutting experiment, students compare teacher-approved speed and power settings on 3 mm birch plywood while keeping material type, thickness, focus, air assist, test geometry, and machine setup consistent.
How do teacher-approved speed and power settings affect cut-through performance, edge color, surface residue, and overall cutting quality on 3 mm birch plywood?
Before using the machine, each group should predict which setting will produce the cleanest complete cut.
Students should support their prediction with ideas such as:
The prediction should be recorded before the test begins.
Examine the wood surface, grain, thickness, flatness, and visible defects.
Predict which teacher-approved speed and power combination will produce the best result.
Import the test design into LaserMaker or LightBurn.
The teacher should confirm:
Place the 3 mm birch plywood flat on the working table. Avoid warped areas, knots, gaps, or damaged sections.
Focus the laser according to the machine instructions. Use the framing function to confirm that the entire test grid fits on the material.
Activate extraction and air assist. Run Tests A–D under direct supervision. Each test should use the speed and power combination selected by the teacher before class.
Wait until the laser has stopped and the material has cooled before opening the machine or removing the test piece.
For each test, record whether the wood cut through, edge color, surface residue, visible charring, warping, flare-up, and other defects.
Identify which setting produced the cleanest complete cut and which settings caused incomplete cutting or excessive darkening.
Explain why the results changed when speed or power changed.
Choose the most suitable test result for the final classroom project. The teacher must approve the selection before the project begins.
Use the approved setting to produce a small finished part, such as a coaster, model component, nameplate, or geometric decoration.
Before class, the teacher should enter the approved speed and power values for Tests A–D. Students should not create their own machine settings during this beginner lesson.
After each test, students record whether the wood cut through, compare the edge color and surface residue, and note any visible problems. The completed table helps the group identify an appropriate setting for the final classroom project.
| Test | Teacher-Selected Speed | Teacher-Selected Power | Cut Through? | Edge Color | Surface Residue | Visible Problems |
|---|---|---|---|---|---|---|
| A | ______ | ______ | Yes / No | Light / Medium / Dark | Low / Medium / High | None / Charring / Warping / Flare-Up / Other |
| B | ______ | ______ | Yes / No | Light / Medium / Dark | Low / Medium / High | None / Charring / Warping / Flare-Up / Other |
| C | ______ | ______ | Yes / No | Light / Medium / Dark | Low / Medium / High | None / Charring / Warping / Flare-Up / Other |
| D | ______ | ______ | Yes / No | Light / Medium / Dark | Low / Medium / High | None / Charring / Warping / Flare-Up / Other |
Students use this table to compare teacher-selected speed and power tests and choose a setting for the final project.
After completing the table, students should answer:
A student conclusion may follow this pattern:
Test ___ produced a complete cut with __________ edge color and __________ surface residue. We selected this setting for the final project because ________________________________________________.
Students should change only the variables selected by the teacher.
The following factors should remain consistent:
Keeping these conditions consistent makes it easier to compare the results fairly.
A successful classroom laser cutter project follows a supervised sequence: prepare the material, check the design, confirm focus, frame the job, apply a tested setting, monitor the process, and inspect the finished part.
Confirm that the wood is approved, flat, and free from unknown coatings.
Place it securely on the working table. Make sure the planned cutting area does not overlap a damaged, warped, or inconsistent section of the material.
Import the project file into LaserMaker or LightBurn.
Before cutting, check:
Focus the laser according to the machine instructions.
Use the framing function to confirm that the design fits completely within the wood sample and does not extend outside the safe processing area.
Use the setting selected from the student wood cutting experiment.
The teacher should confirm the final speed, power, air assist, pass count, and processing order. Students should not enter or change final settings without teacher approval.
Start the job with extraction and air assist operating.
Students should observe from the designated safety area and look for normal smoke movement, cutting progress, edge darkening, incomplete cutting, excessive smoke, persistent flame, or material movement.
The teacher should stop the process if unsafe or unexpected conditions appear.
After the job is complete, allow the material to cool.
Remove the parts and check whether every section cut through, the dimensions are correct, the edge color is acceptable, small features remain intact, and the final part matches the original design.
Clean loose residue and lightly sand the edges when appropriate.
Students should use recorded evidence to explain which setting produced the strongest result and how the experiment influenced their final classroom project.
After completing the test, students can apply their results to a small classroom or makerspace wood project.

Birch plywood coasters are suitable for a short beginner classroom project.
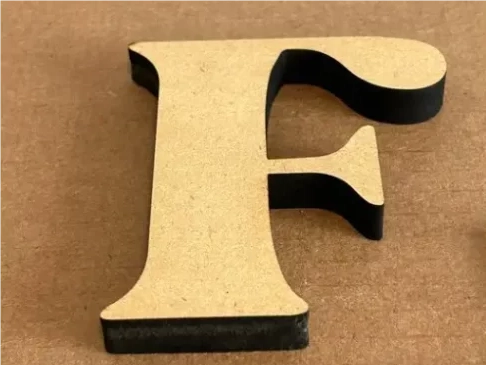
MDF can be used for classroom signs, templates, and simple structures when the material is approved for laser processing.
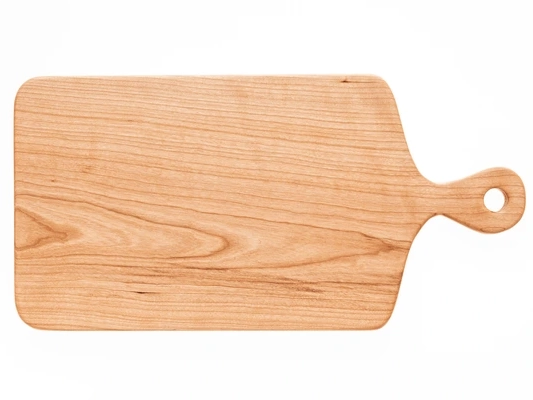
Cherry wood can produce decorative classroom projects with attractive color and contrast.

Walnut and basswood can be compared through decorative makerspace and Fab Lab projects.
Suitable project ideas include:
The project should be small enough to complete within the available lesson time and simple enough for students to evaluate the effect of the selected cutting setting.
Classroom troubleshooting should be evidence-based. Students should identify the visible problem, consider likely causes, and make only one teacher-approved change at a time.
If the wood does not cut through, first check focus, material flatness, material thickness, lens condition, air assist, whether the selected setting matches the test result, and whether internal plywood layers are inconsistent.
Within the teacher-approved test range, reducing speed, increasing power, or adding another pass may improve cut-through performance.
Students should not immediately repeat the same failed cut without checking the cause.
Excessive charring can result from too much laser energy, movement that is too slow, repeated processing, weak air assist, poor smoke removal, incorrect focus, or unsuitable material.
Students should compare the affected sample with cleaner test results before selecting a different setting.
Stop the laser immediately if a persistent flame appears.
Before restarting, the teacher should check air assist, extraction, material approval, focus, processing settings, debris beneath the material, and working table condition.
The machine should not be restarted until the cause has been identified.
Warped wood can move outside the correct focal position and produce inconsistent cuts.
Use a flatter sheet or secure the material with an approved method that does not interfere with the laser path. Students should not press or hold material inside an active machine.
Incorrect focus can cause a wider cutting line, incomplete cutting, increased charring, reduced detail, and inconsistent results.
Confirm the material thickness and repeat the machine’s approved focusing procedure before running another test.
More detailed machine or industrial troubleshooting should be handled through the relevant machine manual, wood-cutting guide, or Thunder Laser technical support.
The following Nova 130W values are reference settings for teacher preparation and comparison. They are not universal classroom settings, and teachers should test the actual material batch before using any value in a student lesson.
| Material | Thickness | Processing | Speed | Min Power | Max Power | Air Pressure | DPI |
|---|---|---|---|---|---|---|---|
| Birch Ply | — | Engraving | 500 mm/s | 10% | 90% | Low | 300 |
| Birch Ply | 3 mm | Cutting | 55 mm/s | 10% | 90% | High | — |
| Birch Ply | 6 mm | Cutting | 25 mm/s | 10% | 90% | High | — |
| Birch Ply | 10 mm | Cutting | 18 mm/s | 10% | 90% | High | — |
| Cherry Wood | — | Engraving | 500 mm/s | 10% | 20% | Low | 300 |
| Cherry Wood | 3 mm | Cutting | 85 mm/s | 10% | 90% | High | — |
| Cherry Wood | 8 mm | Cutting | 24 mm/s | 10% | 90% | High | — |
| Cherry Wood | 11 mm | Cutting | 16 mm/s | 10% | 90% | High | — |
Nova 130W reference settings for birch plywood and cherry wood cutting and engraving.
Teachers should use these values only as a starting reference. The classroom experiment should use a narrower, teacher-approved range suited to the actual material and machine.
For additional reference values, review the CO₂ laser parameter settings guide.
Schools should choose a laser cutter according to classroom space, project size, enclosure, extraction, supervision, material thickness, software workflow, and expected usage rather than selecting a machine based on power alone.
Important considerations include:
The Thunder Laser Bolt Series can support compact classroom and beginner STEAM lab workflows.
The Thunder Laser Nova Series can support larger wood projects and broader fabrication activities when the school needs a larger working area.
Schools planning a complete classroom setup can also review Thunder Laser’s laser STEAM education solutions.
Students should be assessed on their understanding of the material, quality of prediction, accuracy of observations, use of evidence, final project result, teamwork, and compliance with safety procedures.
| Assessment Area | Beginning | Developing | Proficient |
|---|---|---|---|
| Material Understanding | Identifies the material with support. | Describes some material characteristics. | Explains how thickness, flatness, density, or surface condition may affect cutting. |
| Prediction | Makes a prediction without an explanation. | Gives a partial explanation. | Uses speed, power, heat, or material evidence to justify the prediction. |
| Observation | Records limited results. | Records most visible results. | Accurately compares cut-through, edge color, residue, and defects. |
| Evidence-Based Decision | Selects a setting without evidence. | Refers to part of the test result. | Selects and explains a setting using recorded evidence. |
| Final Project | The part is incomplete or requires major support. | The part is complete with some quality issues. | The part is complete, appropriately finished, and reflects the selected test result. |
| Safety and Teamwork | Requires repeated reminders. | Follows most procedures with support. | Consistently follows procedures and contributes to the assigned group role. |
A three-level rubric for evaluating student knowledge, observations, decision-making, project quality, safety, and teamwork.
By the end of this laser cutting wood lesson, students should be able to explain that successful wood cutting depends on a combination of material choice, material thickness, surface condition, flatness, clean digital design, correct focus, speed, power, air assist, extraction, safe monitoring, and evidence-based testing.
Each student group should produce:
Teachers can use this lesson independently or include it within a broader laser cutting curriculum covering digital design, material testing, fabrication, engineering, art, and product development.
Explore more hands-on classroom activities in the Thunder Laser STEAM Courses library.
Course summary: This STEAM laser cutting lesson guides students from material observation and prediction to controlled testing, result comparison, troubleshooting, and the production of a finished classroom project.
Talk To Our Experts Now!
Please leave your contact information so that we can serve you better.
FIND THE RIGHT LASER FOR YOUR NEXT PROJECT
Explore Thunder Laser solutions designed for different materials, workflows, and production needs.


 Stable & Consistent MachinesUnlimited ApplicationsRobust After-sales SupportFactory Direct Supply


