Tangram Puzzle Laser Cutting Project with LaserMaker
 24-04-26
WHAT ARE YOU LOOKING FOR?
Search Across Products, Blog Posts, Support Content, And Resources.

Tangram Puzzle Laser Cutting Project with LaserMaker
24-04-26

In this STEAM classroom project, students design and make a laser-cut tangram puzzle using LaserMaker. The lesson connects geometry, measurement, line drawing, cutting path planning, and hands-on making through a classic puzzle activity.
This project helps students understand how simple geometric shapes can be arranged, cut, tested, and recombined into many different patterns. It is suitable for laser cutting lessons, math-integrated STEAM activities, and beginner maker projects.
| Item | Details |
|---|---|
| Project | Laser-cut tangram puzzle |
| Software | LaserMaker |
| Main Skills | Line Segment Tool, Grid Tool, Align Guides, geometric layout, cutting path planning, and processing parameter setup |
| Suggested Material | Basswood plywood board |
| Classroom Fit | STEAM projects, geometry lessons, maker education, puzzle design, classroom laser cutting, and beginner digital fabrication practice |
Students will design a tangram puzzle by analyzing its geometric structure, drawing accurate cutting lines, setting laser processing parameters, and producing a physical puzzle that can be rearranged into different shapes.
If students use online images as references for puzzle or jigsaw designs, they should respect image copyright and follow teacher-approved classroom guidelines.
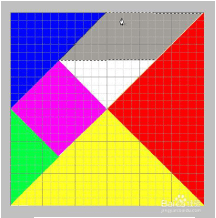
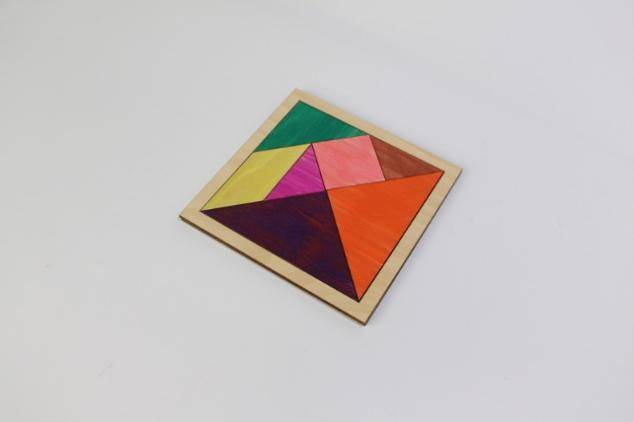
The tangram is an ancient Chinese puzzle made from seven geometric pieces cut from a square. These pieces include two large triangles, one medium triangle, two small triangles, one square, and one parallelogram.
The seven pieces can be rearranged into many shapes, including triangles, parallelograms, irregular polygons, people, animals, buildings, and letters. The source lesson notes that tangrams can form more than 1,600 kinds of shapes, making the project a strong connection between math, creativity, and making.
Before drawing the puzzle in LaserMaker, students should analyze the tangram as both a geometric pattern and a physical object. This helps them plan size, cutting order, material, and playability.
Start by looking at tangram examples or jigsaw puzzle toys. Students should observe the composition, layout, and size, then decide the dimensions of the puzzle and base they want to design.
| Measurement Data Recording / Unit: mm | |
|---|---|
| Length of puzzle blocks: | Width of puzzle blocks: |
| Length of bottom bracket: | Width of bottom bracket: |
After measuring, students should sketch the tangram pattern by hand. They can use colored pens to mark the planned cutting lines clearly before drawing the design in LaserMaker.
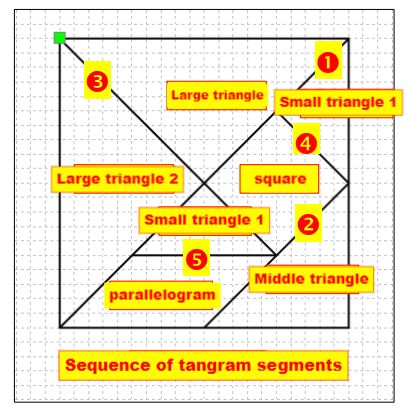
Students can import a tangram reference image into LaserMaker and use it as a guide. Turn on the Grid Tool to show a grid background, then draw the square and internal cutting lines step by step.
In the source workflow, the square is drawn at 130 mm by 130 mm. Students use the Line Segment Tool to draw the diagonal, divide the square into triangles, and complete the line segments that form the medium triangle, two large triangles, two small triangles, square, and parallelogram.
Use the Rectangle Tool to draw a 150 mm by 150 mm square as the outer frame of the tangram. Align it with the center of the tangram design so the puzzle pieces fit cleanly inside the frame.
Then copy the outer frame to use as the base plate of the tangram. This creates a simple puzzle tray or bottom board for organizing the pieces.
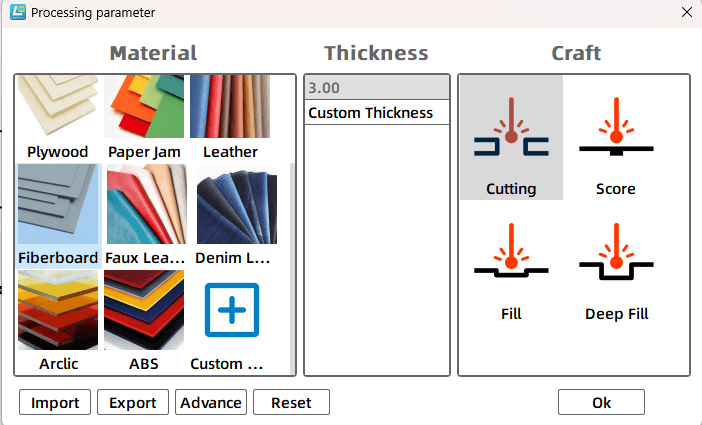
Select the tangram object and open the Processing Parameters dialog box from the corresponding black cutting layer. In the source workflow, the process is set to cutting with a processing thickness of 3 mm.
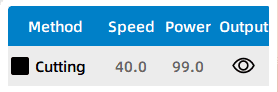
Before making the final tangram set, students should test the cutting result on the selected material. The source activity suggests adjusting cutting parameters, such as testing a speed value of 30 and a power value of 60, then observing the result and refining the settings as needed.
After the cutting settings are confirmed, students can complete the final tangram puzzle. The finished project should include the seven puzzle pieces and, if included in the design, a matching frame or base plate.
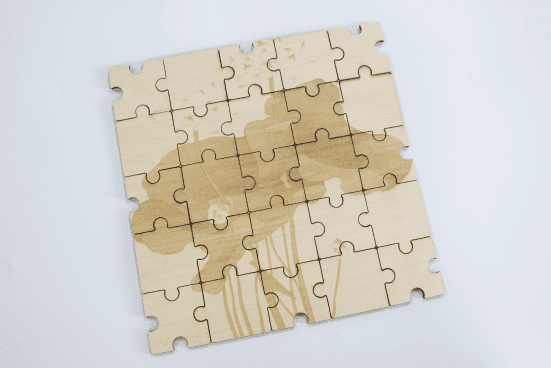
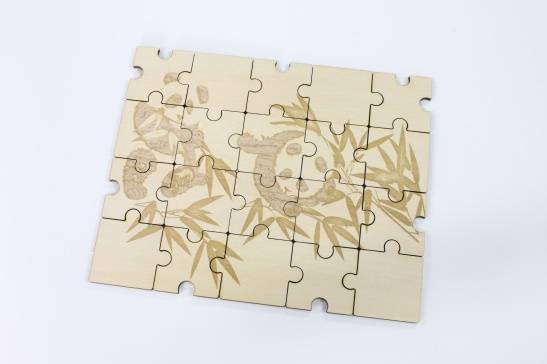
After completing the tangram, students can design their own puzzle based on an image they like. They can import the image into LaserMaker, plan the cutting lines, and create a new jigsaw-style puzzle.
For a more advanced challenge, students can study the rounded interlocking shapes used in jigsaw puzzles and think about how the round arch interfaces should be drawn.
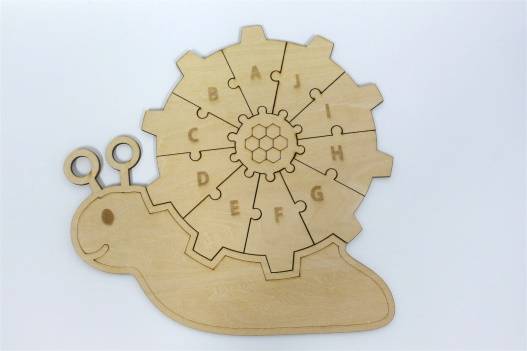
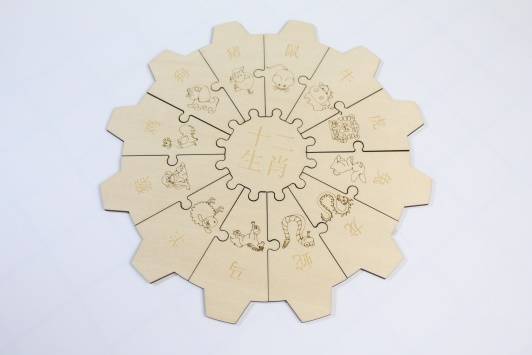
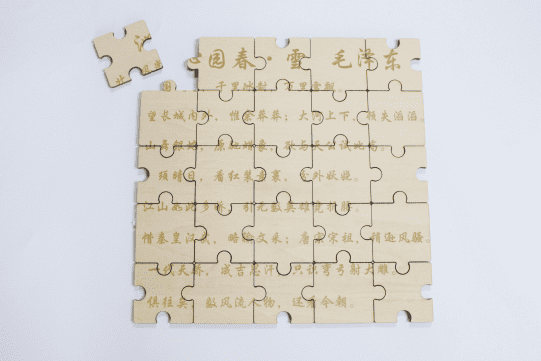
The following examples can be used for classroom discussion, design inspiration, and student reflection. Encourage students to compare the puzzle shapes, cutting paths, assembly methods, and finished visual effects.
This project is suitable for classroom laser cutters that support small-format cutting of sheet materials. For schools, makerspaces, and beginner STEAM labs, projects like tangram puzzles, learning toys, puzzle boards, tags, and small wooden models can be completed with a classroom laser cutter such as the Thunder Laser Bolt Series.
Teachers can choose the machine and material setup based on classroom space, project size, material choice, and learning goals. The same workflow can also be adapted for other CO2 laser machines when students move on to larger puzzles, display boards, or more advanced maker projects.
Talk To Our Experts Now!
Please leave your contact information so that we can serve you better.
TAKE THE NEXT STEP WITH THUNDER LASER

 Stable & Consistent MachinesUnlimited ApplicationRobust After-sales SupportFactory Direct Supply