Laser-Cut Postcard Stamp Collecting STEAM Course
 24-08-22
WHAT ARE YOU LOOKING FOR?
Search Across Products, Blog Posts, Support Content, And Resources.

Laser-Cut Postcard Stamp Collecting STEAM Course
24-08-22

Postcard stamp collecting is a travel and cultural activity in which people press a unique seal from a post office, scenic spot, museum, or local attraction onto a postcard. Each stamp records a place, a memory, and a story.
In this advanced laser STEAM lesson, students design and make a postcard stamp collecting tool with a base, handle, and rubber stamp. The activity combines cultural observation, digital drawing, material planning, laser engraving, laser cutting, and final assembly.
Teacher note: This is an advanced project. Students should be ready to follow multi-step modeling instructions, check dimensions carefully, and make small laser compensation adjustments so the parts assemble smoothly.
Stamp collecting on postcards is both a cultural experience and a form of personal collecting. During the stamping process, students can learn about local landmarks, public spaces, tourism culture, and the way small physical objects carry emotional memories across time and distance.
Teachers can connect this lesson with geography, visual design, cultural studies, local history, and product design. Students can adapt the stamp pattern for a city, school, club, museum activity, travel project, or classroom exhibition.
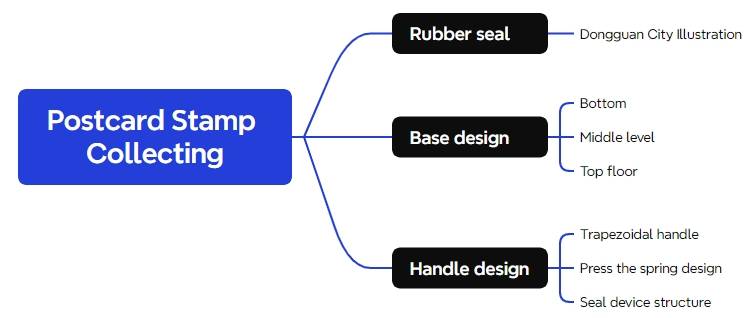
The project is divided into three main parts: the base, the handle, and the rubber stamp. Students should analyse how each part supports the finished function before drawing the final file.
Assembly tip: The source lesson reminds students to consider laser compensation. Depending on the material and machine result, hole and slot positions may need small adjustments of about 1–2 mm to make assembly easier.
| Number | Material or Tool | Quantity |
|---|---|---|
| 1 | 3 mm acrylic | 1 |
| 2 | 3 mm basswood panel | 1 |
| 3 | 2 mm rubber | 1 |
| 4 | Glue | 1 |
| 5 | Postcard | 1 |
| 6 | Springs | 2 |
| 7 | Ink pad | 7 |
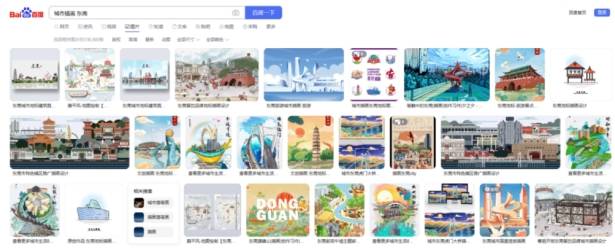
First, prepare a city illustration or place-based image for the stamp. The source lesson uses “City Illustration Dongguan” as the example. For classroom use, teachers may ask students to use a teacher-approved image, draw their own original city illustration, or create artwork based on a local landmark.
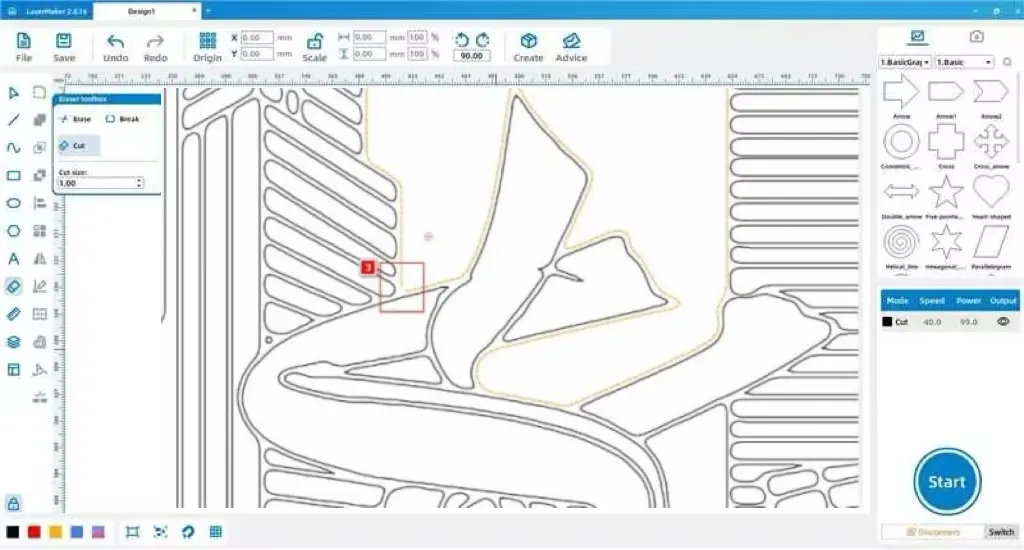
Select the image and use Contour Tracing to convert the illustration into a line drawing. This creates the basic line artwork for the rubber stamp.
Use the Eraser Tool to separate connected buildings and refine the illustration. Students should keep important architectural features while simplifying details that may be too fine for a clear stamp effect.
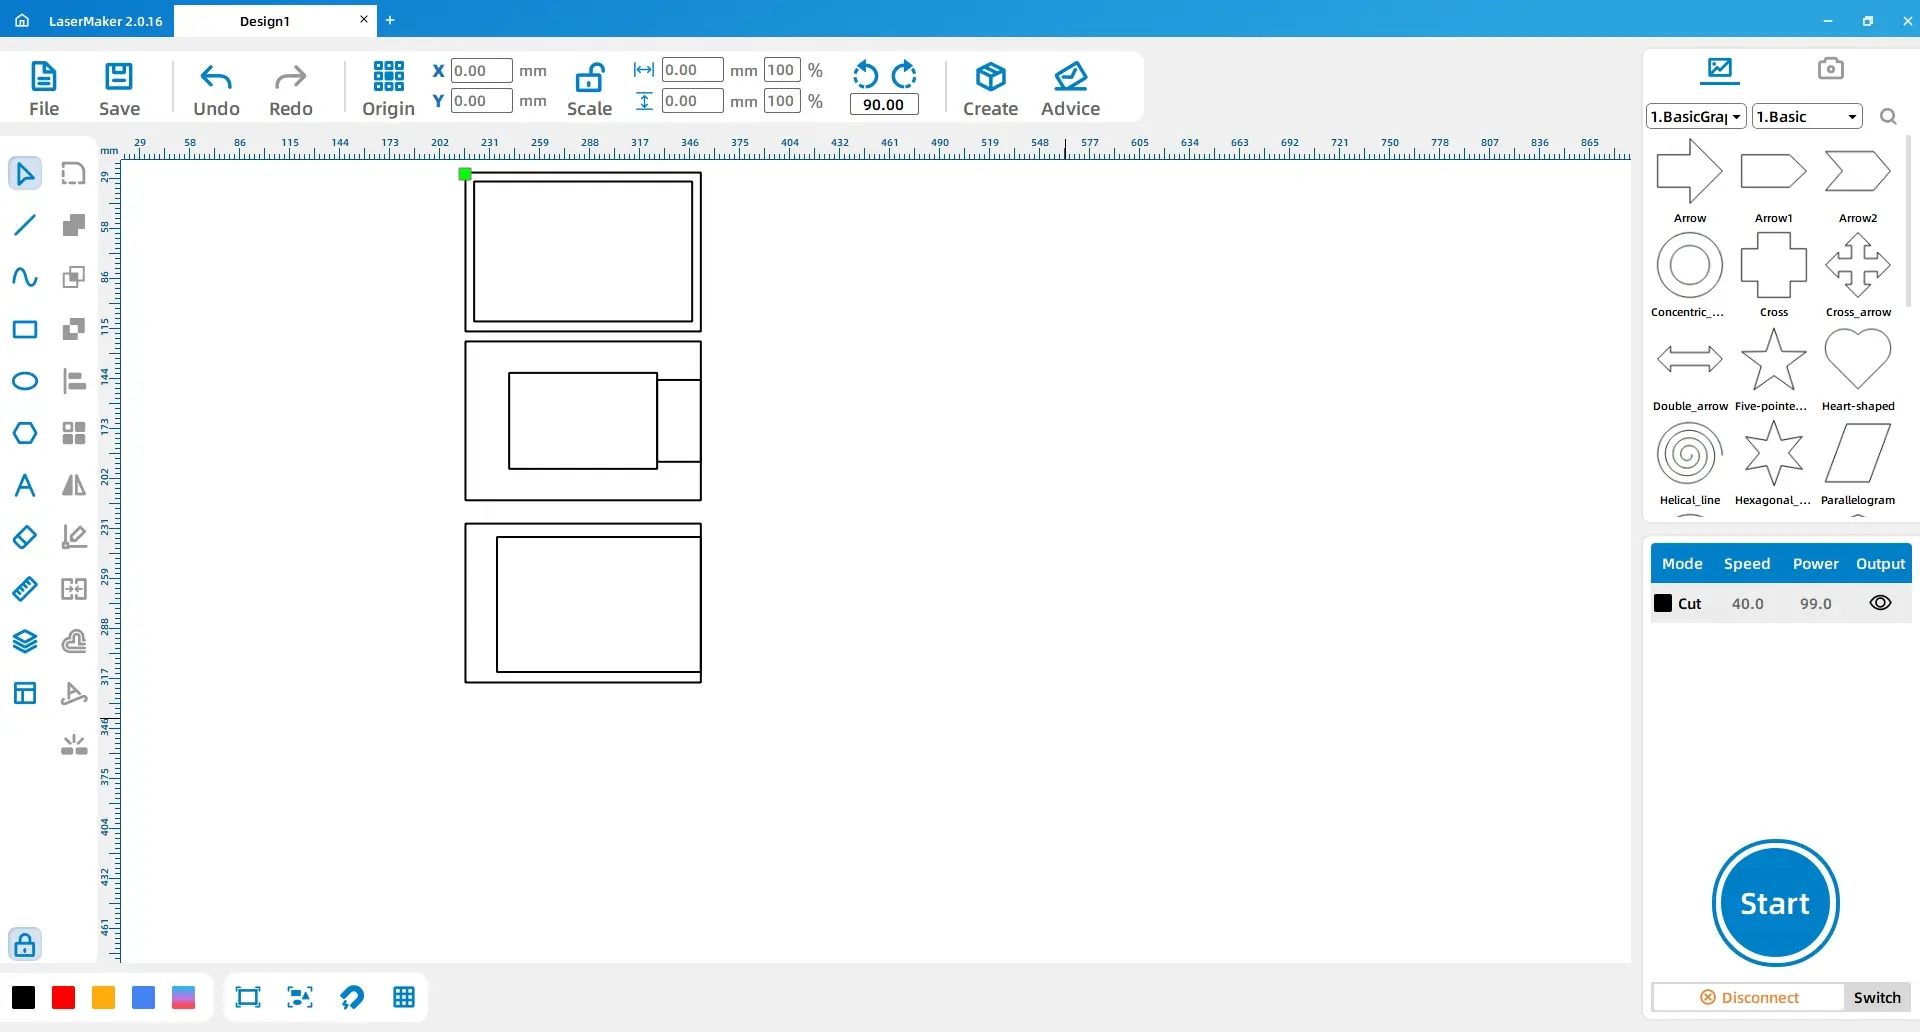
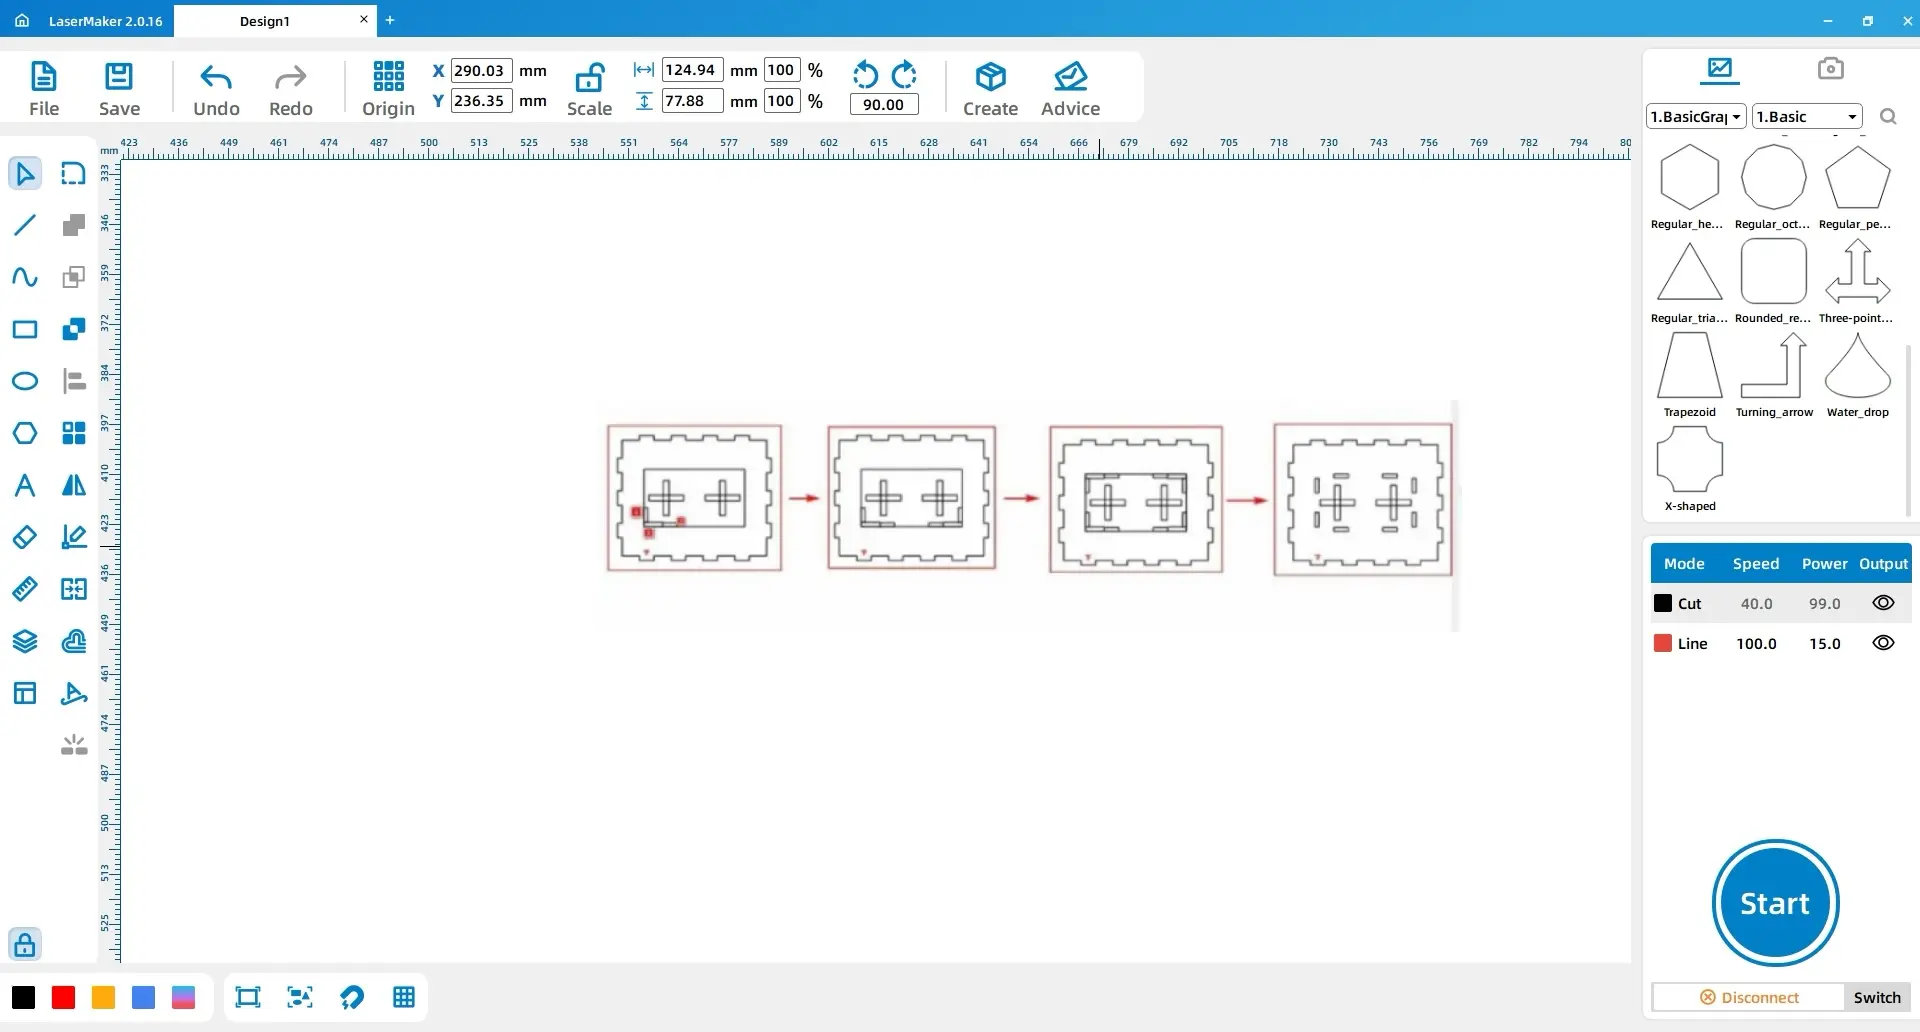
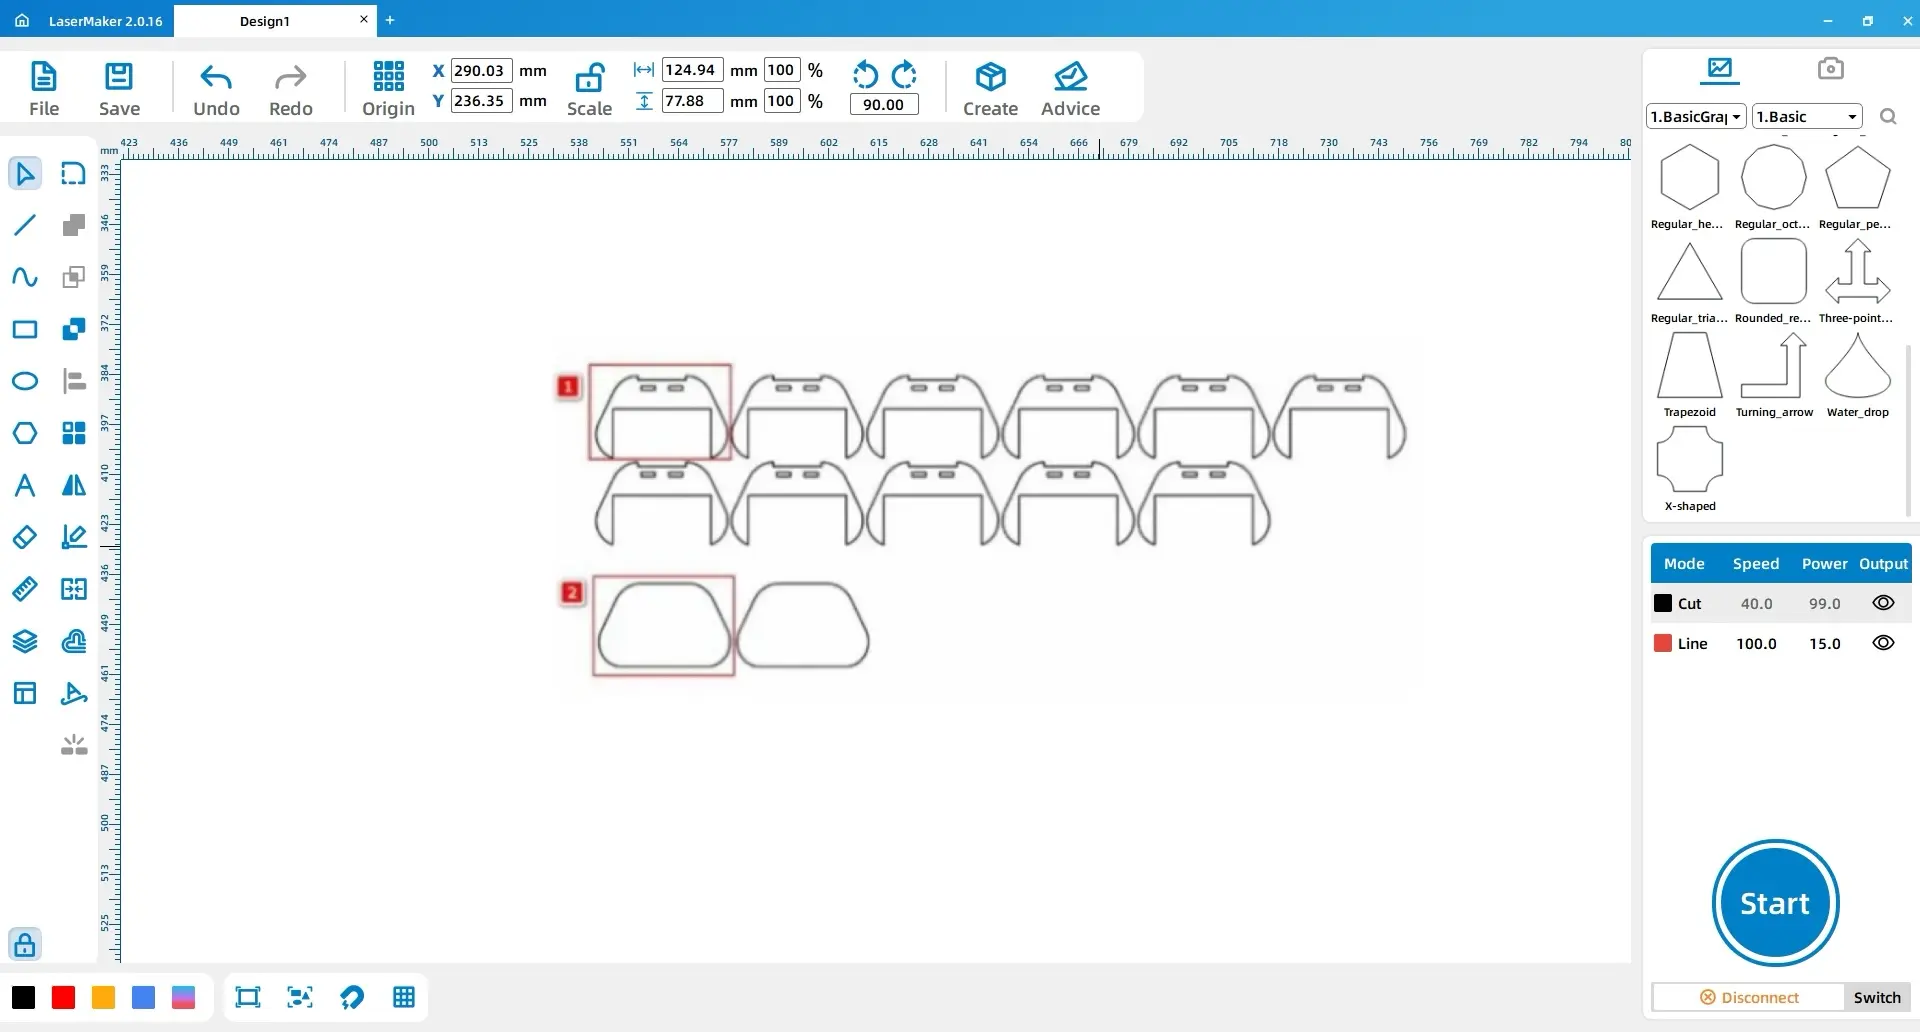
Use the Rectangle Tool to draw two rectangles. Set Rectangle 1 to Width 180, Height 130, and Rectangle 2 to Width 150, Height 100. Duplicate these rectangles twice to create Rectangles 3, 4, 5, and 6. Adjust Rectangle 4 to Width 107, Height 87, and Rectangle 6 to Width 102, Height 165. Insert Rectangle 7 between Rectangles 3 and 4 with dimensions Width 36.5, Height 70.
Base layer note: Rectangle 1 is the bottom layer of the base, Rectangle 3 is the middle layer, and Rectangle 5 is the top layer.
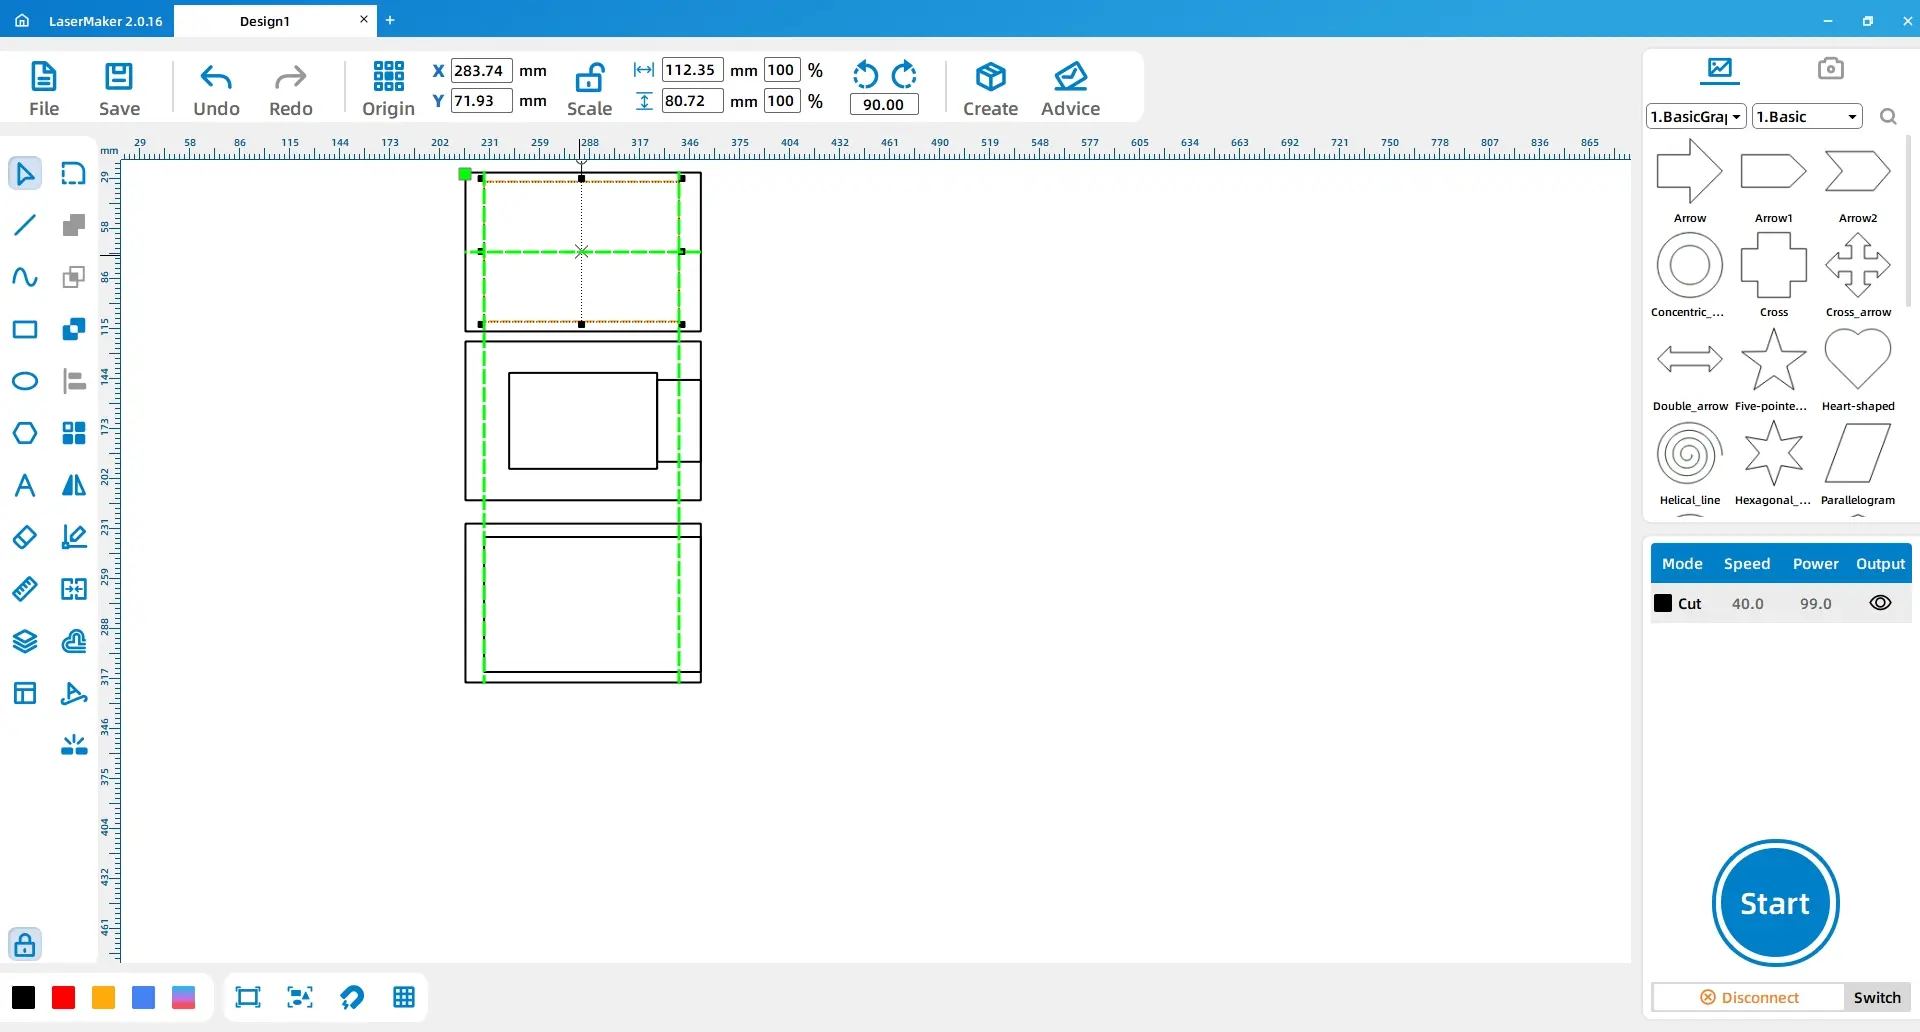
Draw Notch 1 with dimensions Width 2.6, Height 10. Copy and paste this notch three times to create Notch Group 1, then place the group in the correct position inside Rectangle 1. Duplicate the notch group twice and place Notch Group 2 in Rectangle 3 and Notch Group 3 in Rectangle 5.
Click Origin in the top toolbar and select Middle-Top as the origin point. Change the height of the top two notches in Notch Group 3 to 3. Then choose Middle-Bottom as the origin point and change the height of the bottom two notches in Notch Group 3 to 3.
Draw Card Slot 1 with dimensions Width 9, Height 10, and Card Slot 2 with dimensions Width 2.6, Height 7. Use the Align tool to apply horizontal alignment and bottom alignment. Duplicate the pair of card slots three times.
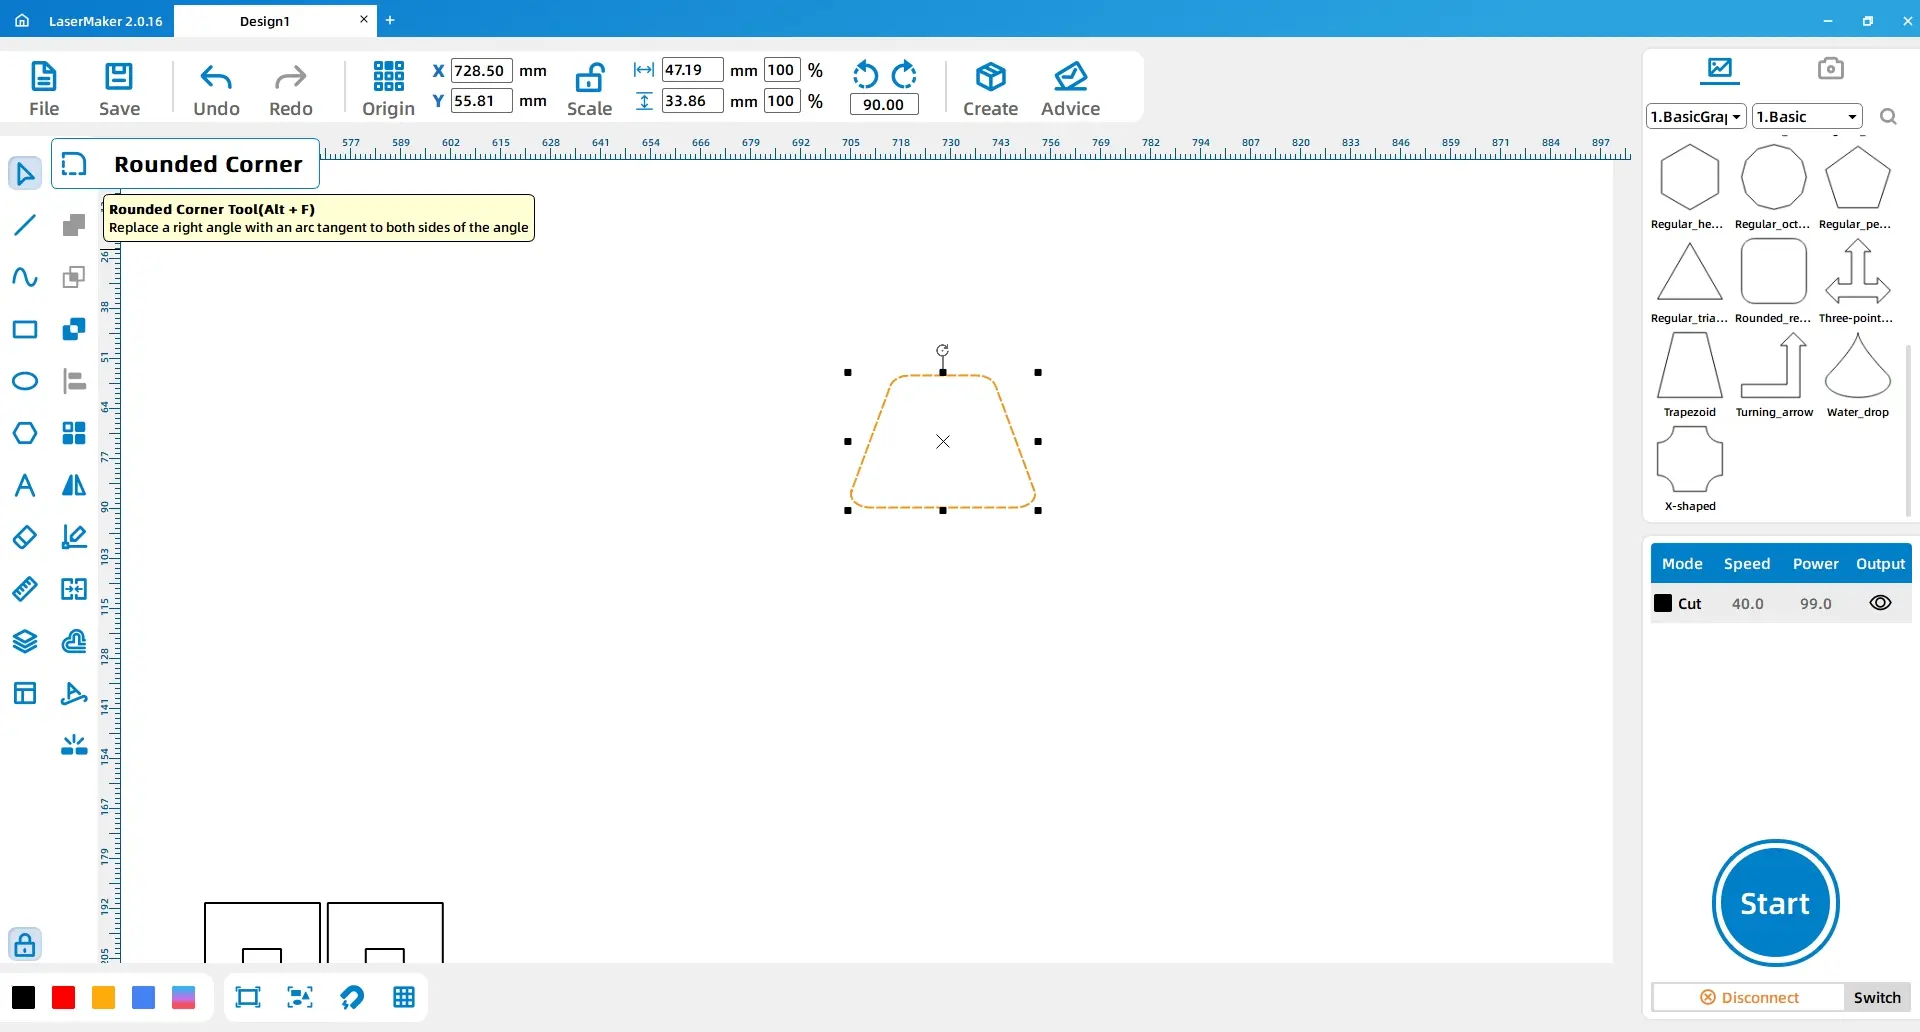
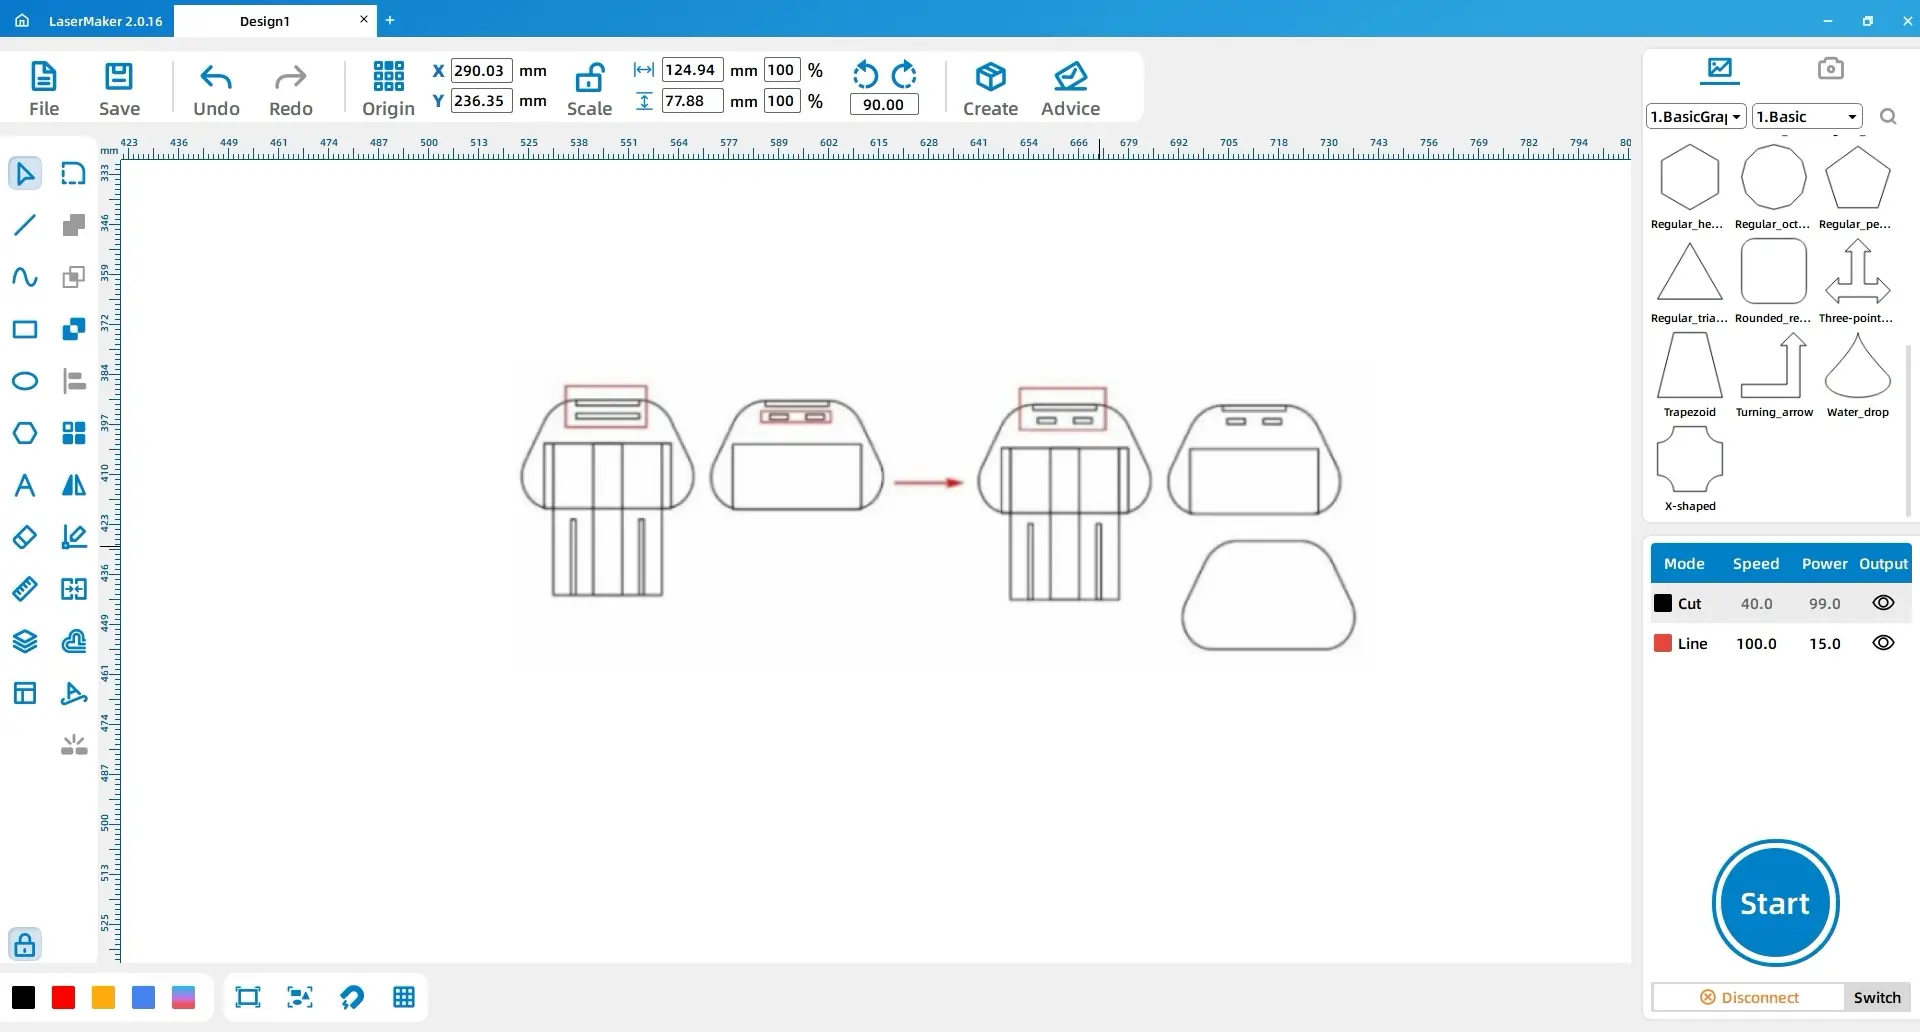
Select Trapezoid from the Basic Shapes section. Use the Rounding tool to round the four corners, then set the trapezoid to Width 95, Height 60.
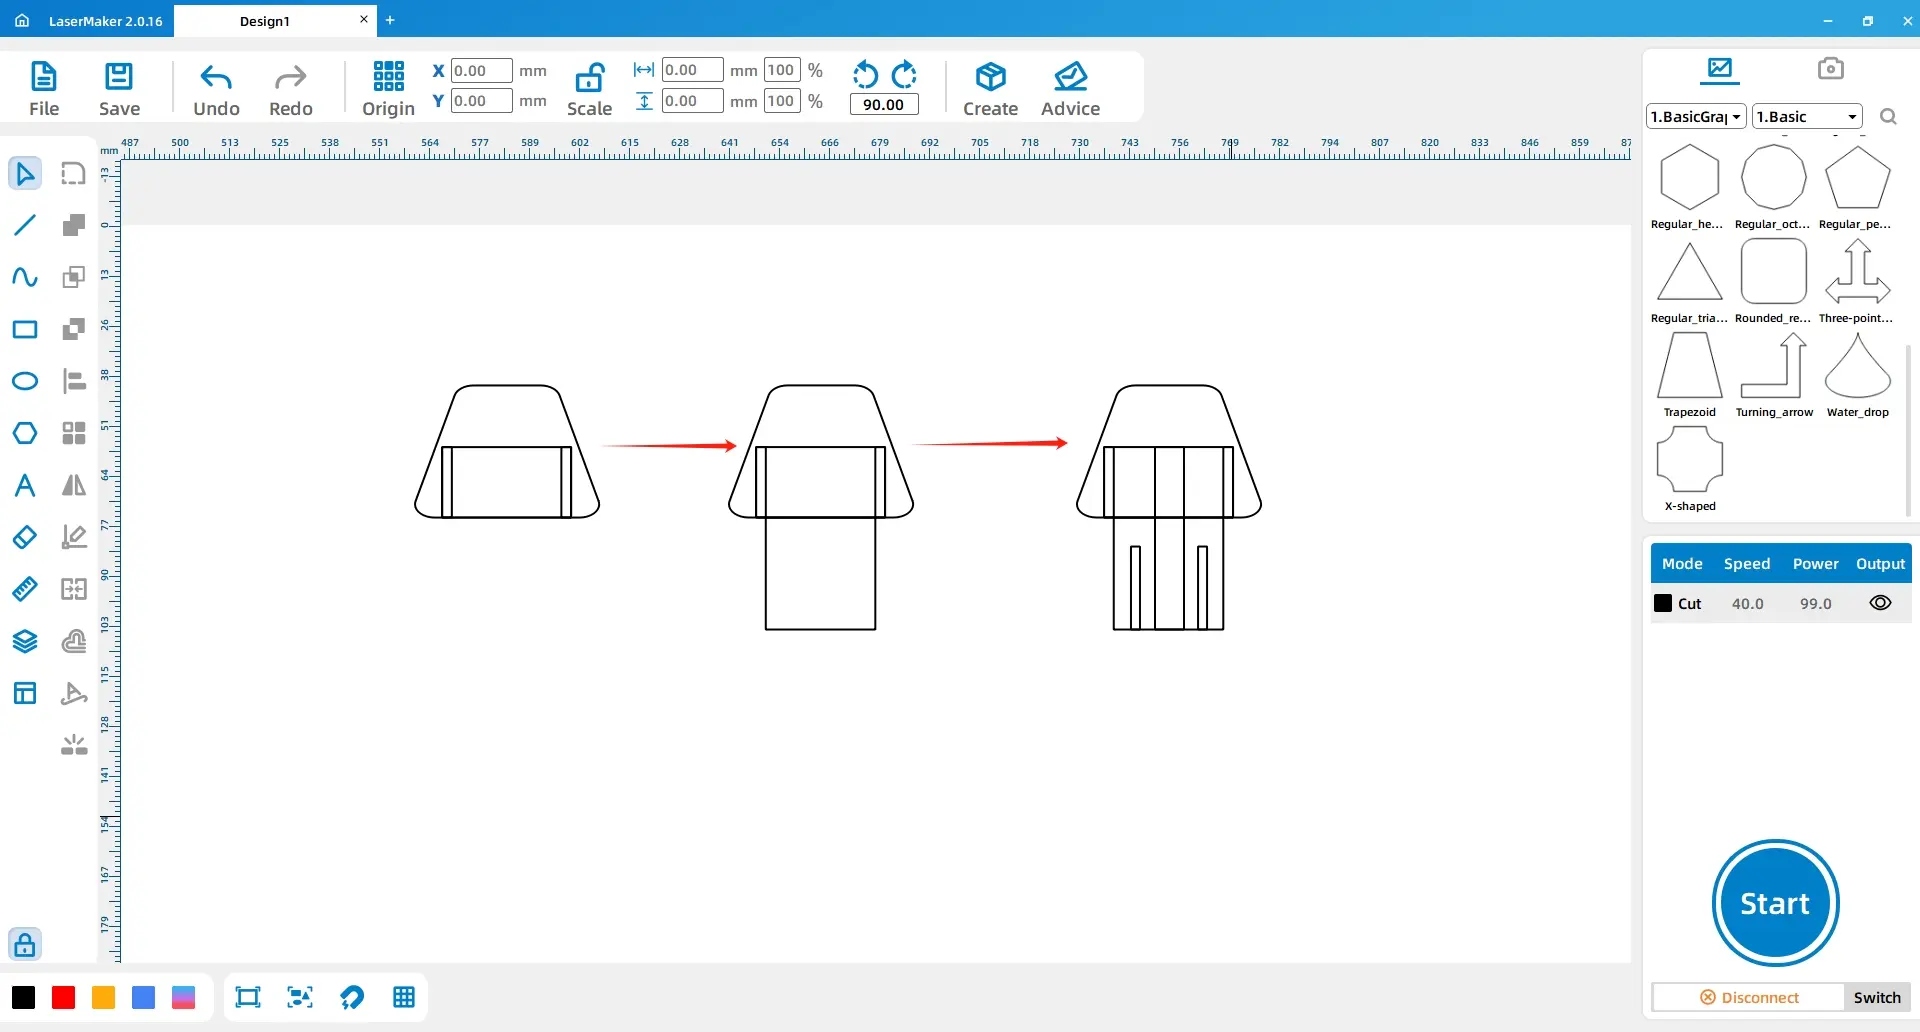
Draw Rectangle 1 with dimensions Width 60, Height 36, and Rectangle 2 with dimensions Width 5.1, Height 36. Duplicate Rectangle 2 once. Center-align Rectangle 1 with the trapezoid and align it to the bottom. Place the two narrow rectangles on the left and right sides of Rectangle 1.
Click Origin and select Middle-Top as Origin. Change Rectangle 1 to Height 84. Draw Rectangle 3 with dimensions Width 16, Height 84 and center-align it with Rectangle 1. Draw Rectangle 4 with dimensions Width 2.6, Height 42, duplicate it once, and place both rectangles as shown.
Draw Rectangle 1 with dimensions Width 35, Height 3. Duplicate it and apply a vertical array with a count of 2 and spacing of 4.35 to create Rectangle 2. Select the trapezoid, Rectangle 1, and Rectangle 2, then duplicate them to create Trapezoid 1 and Rectangles 1.1 and 2.2.
Draw Rectangle 3 with dimensions Width 71, Height 36 and align it horizontally and vertically with Trapezoid 1. Duplicate the combined pattern twice. Draw Rectangle 4 with dimensions Width 10, Height 3, apply a horizontal array with a count of 2 and spacing of 10, group the two rectangles, center-align them with Rectangle 2.2, and delete Rectangle 2.2.
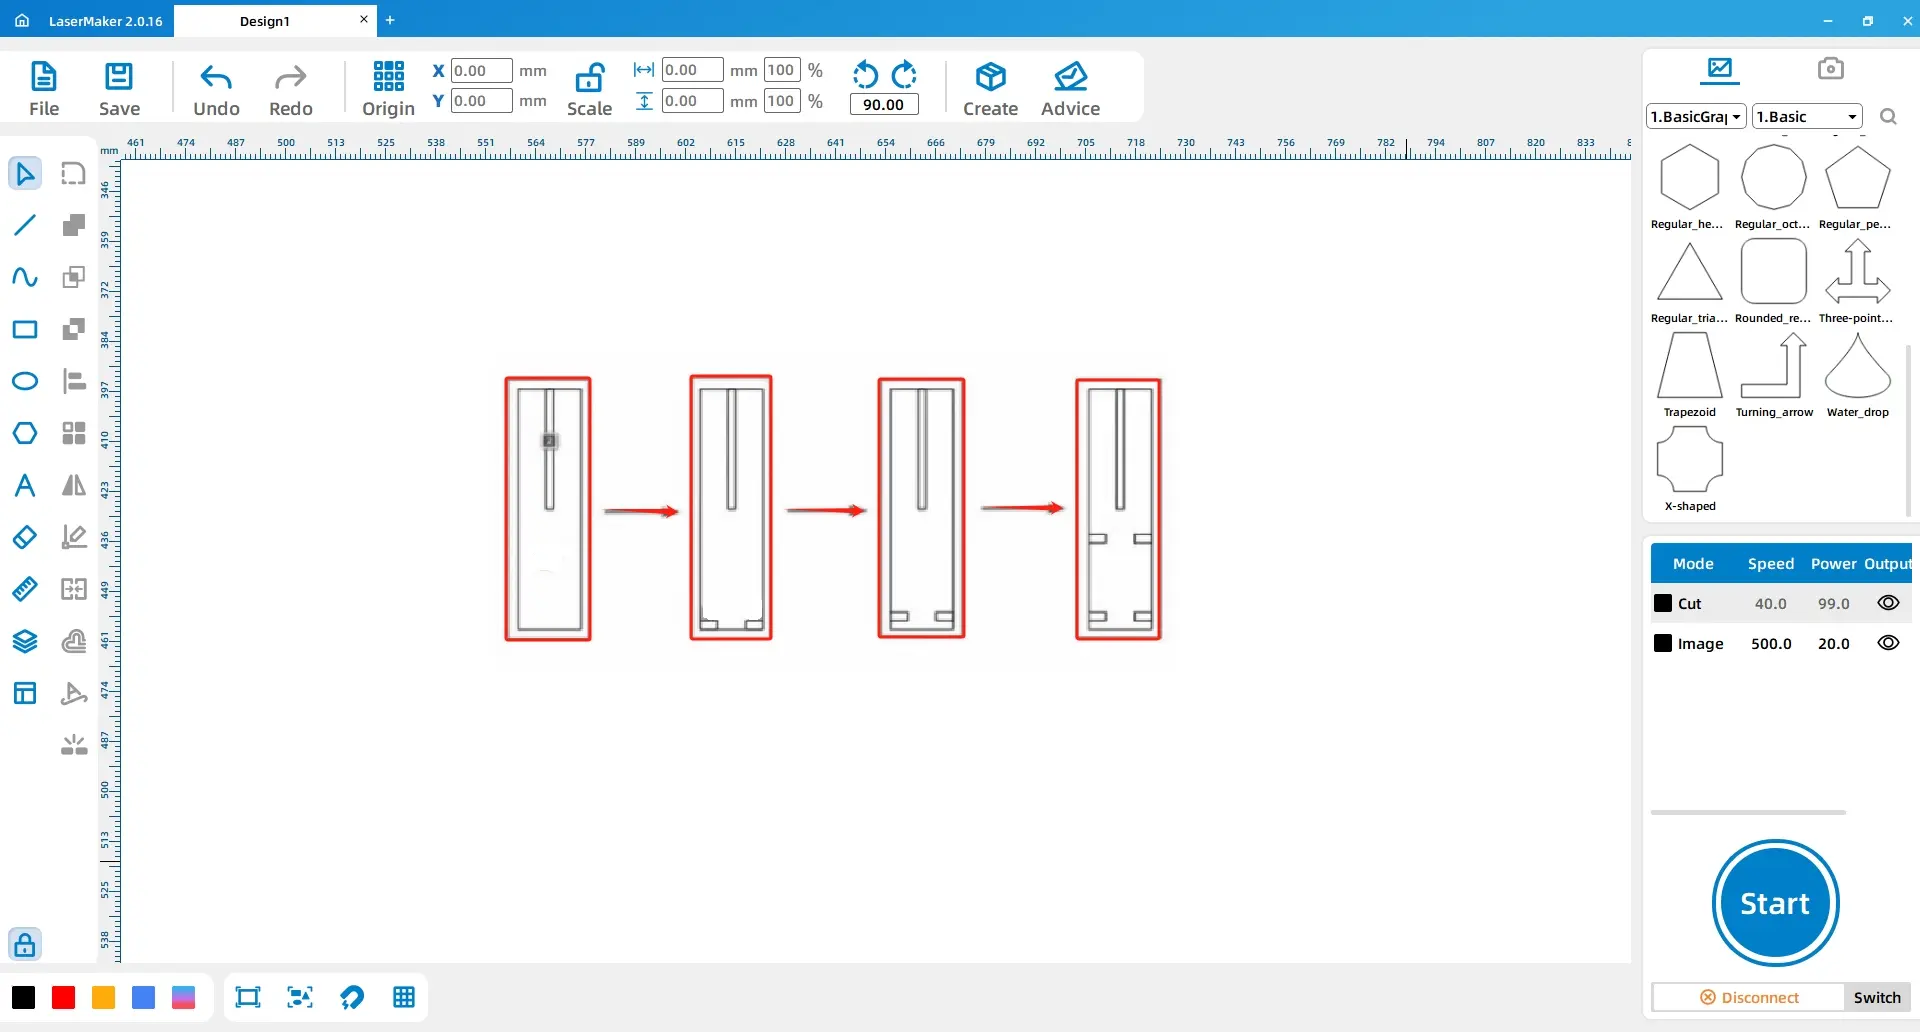
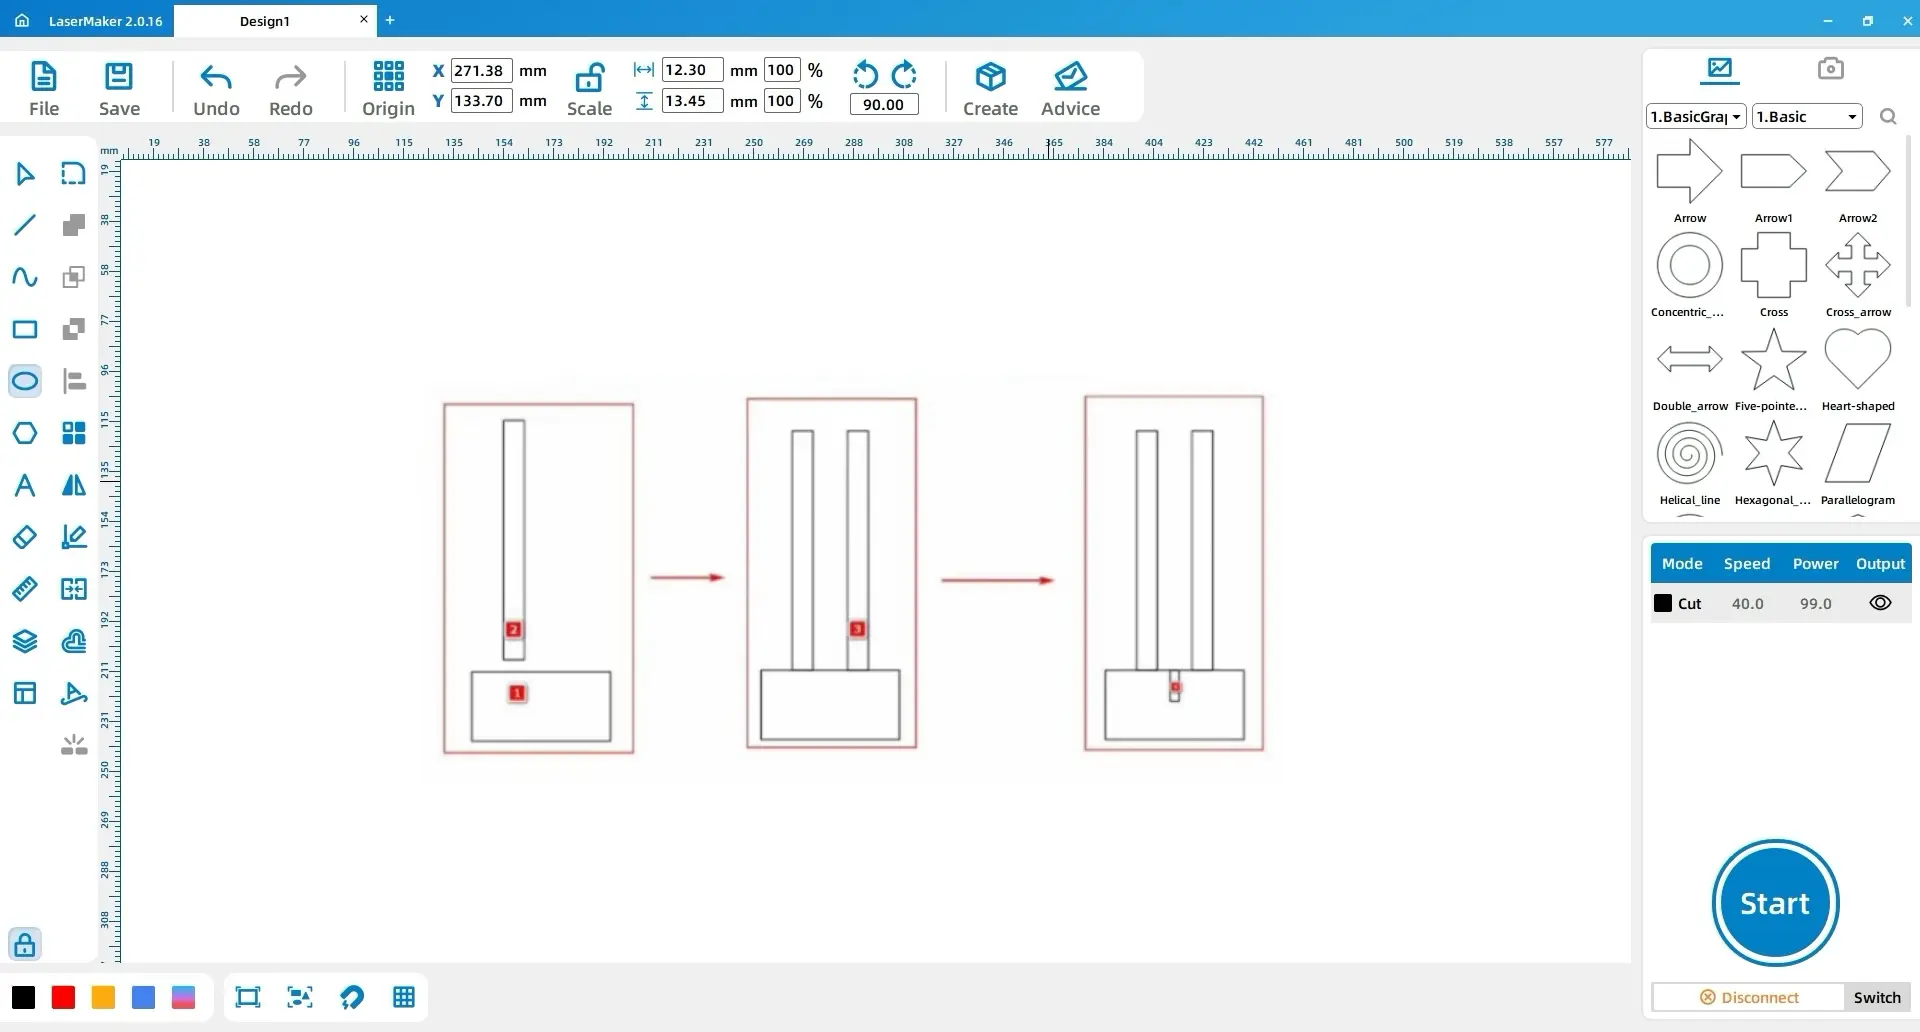
Draw Rectangle 1 with dimensions Width 22, Height 84, and Rectangle 2 with dimensions Width 2.6, Height 42. Center-align and top-align the two rectangles. Draw Rectangle 3 with dimensions Width 6, Height 3, duplicate it to create Rectangle 4, and place them at the lower-left and lower-right corners of Rectangle 1.
Move Rectangles 3 and 4 up by 3 mm. Apply a vertical array to Rectangles 3 and 4 with a count of 2 and spacing of -30.2 mm.
Draw Rectangle 1 with dimensions Width 40, Height 20, and Rectangle 2 with dimensions Width 6, Height 69. Apply a horizontal array to Rectangle 2 once with spacing of 10 to create Rectangle 3. Group Rectangles 2 and 3 as Group 1 and center-align Group 1 with Rectangle 1. Draw Rectangle 4 with dimensions Width 2.6, Height 9, then horizontally and top-align it with Rectangle 1.
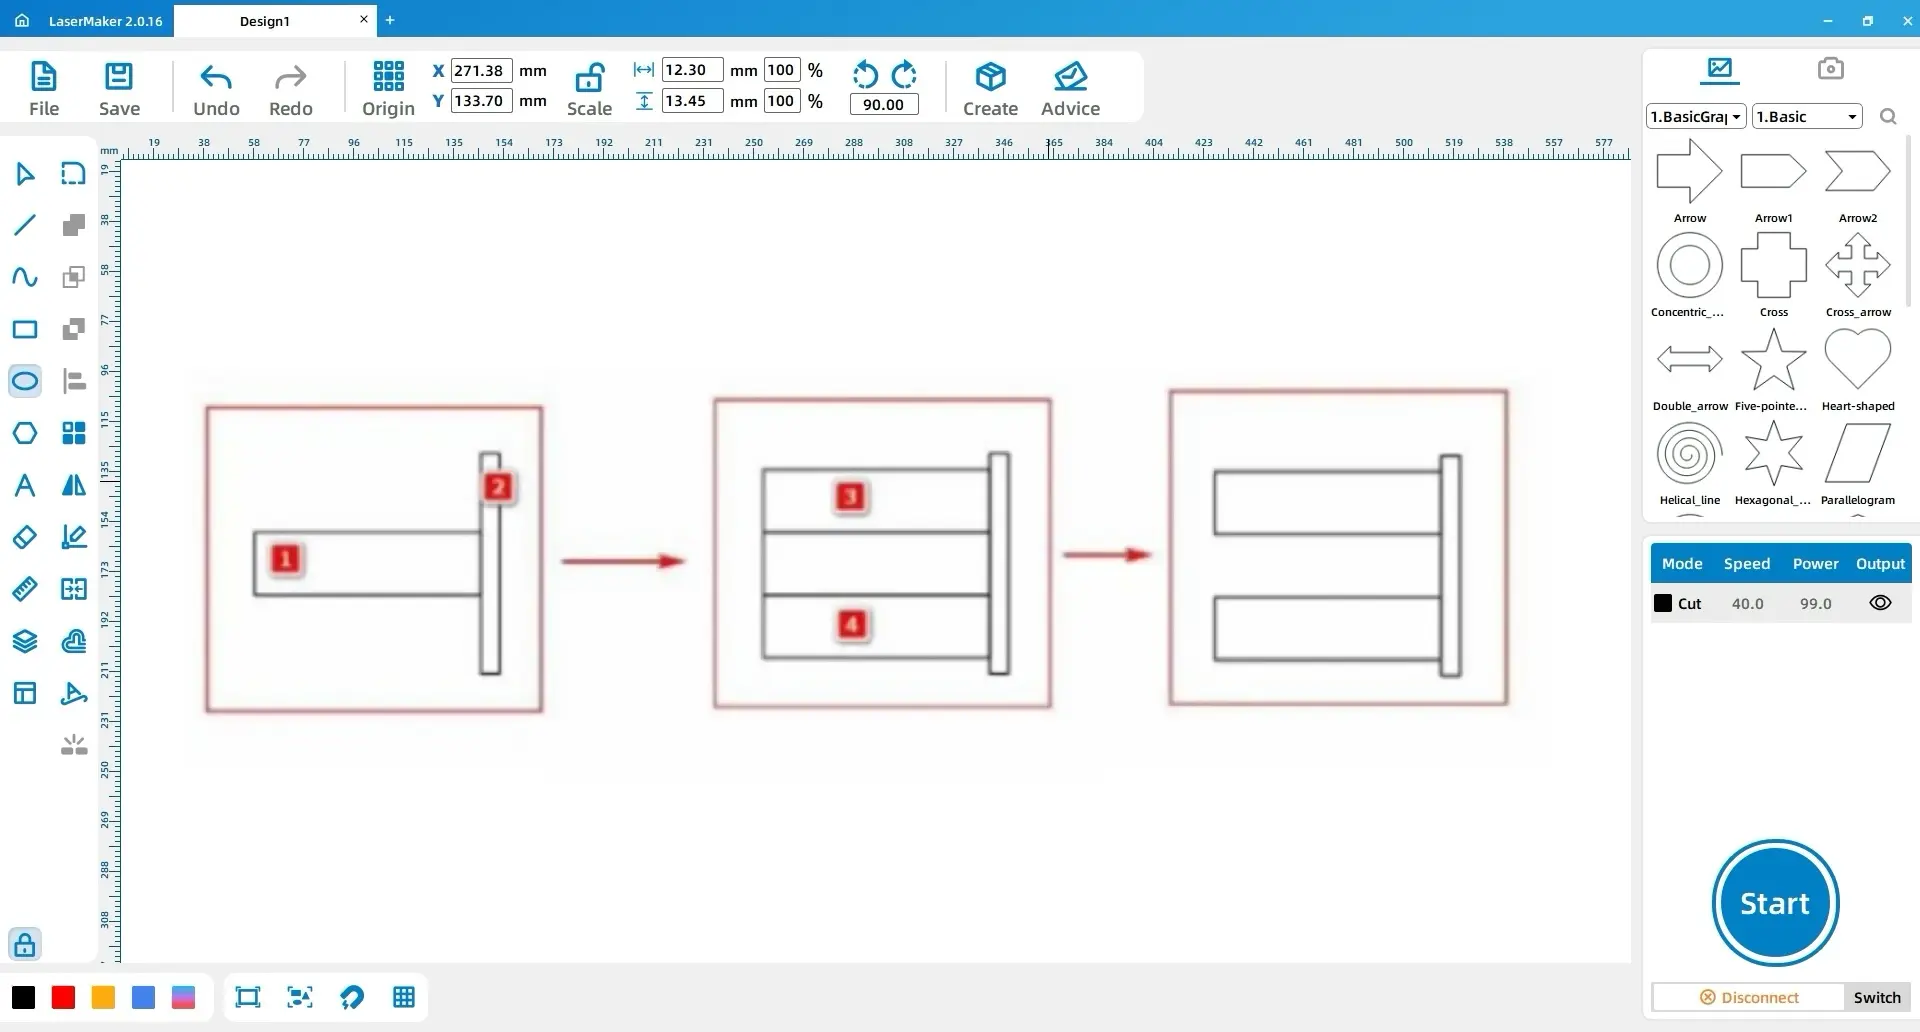
Draw Rectangle 1 with dimensions Width 36, Height 10, and Rectangle 2 with dimensions Width 3, Height 35. Horizontally align them so that the right side of Rectangle 1 connects with the left side of Rectangle 2. Duplicate Rectangle 1 twice to create Rectangles 3 and 4. Move Rectangle 3 above Rectangle 1 and Rectangle 4 below Rectangle 1 so that they connect, then delete Rectangle 1.
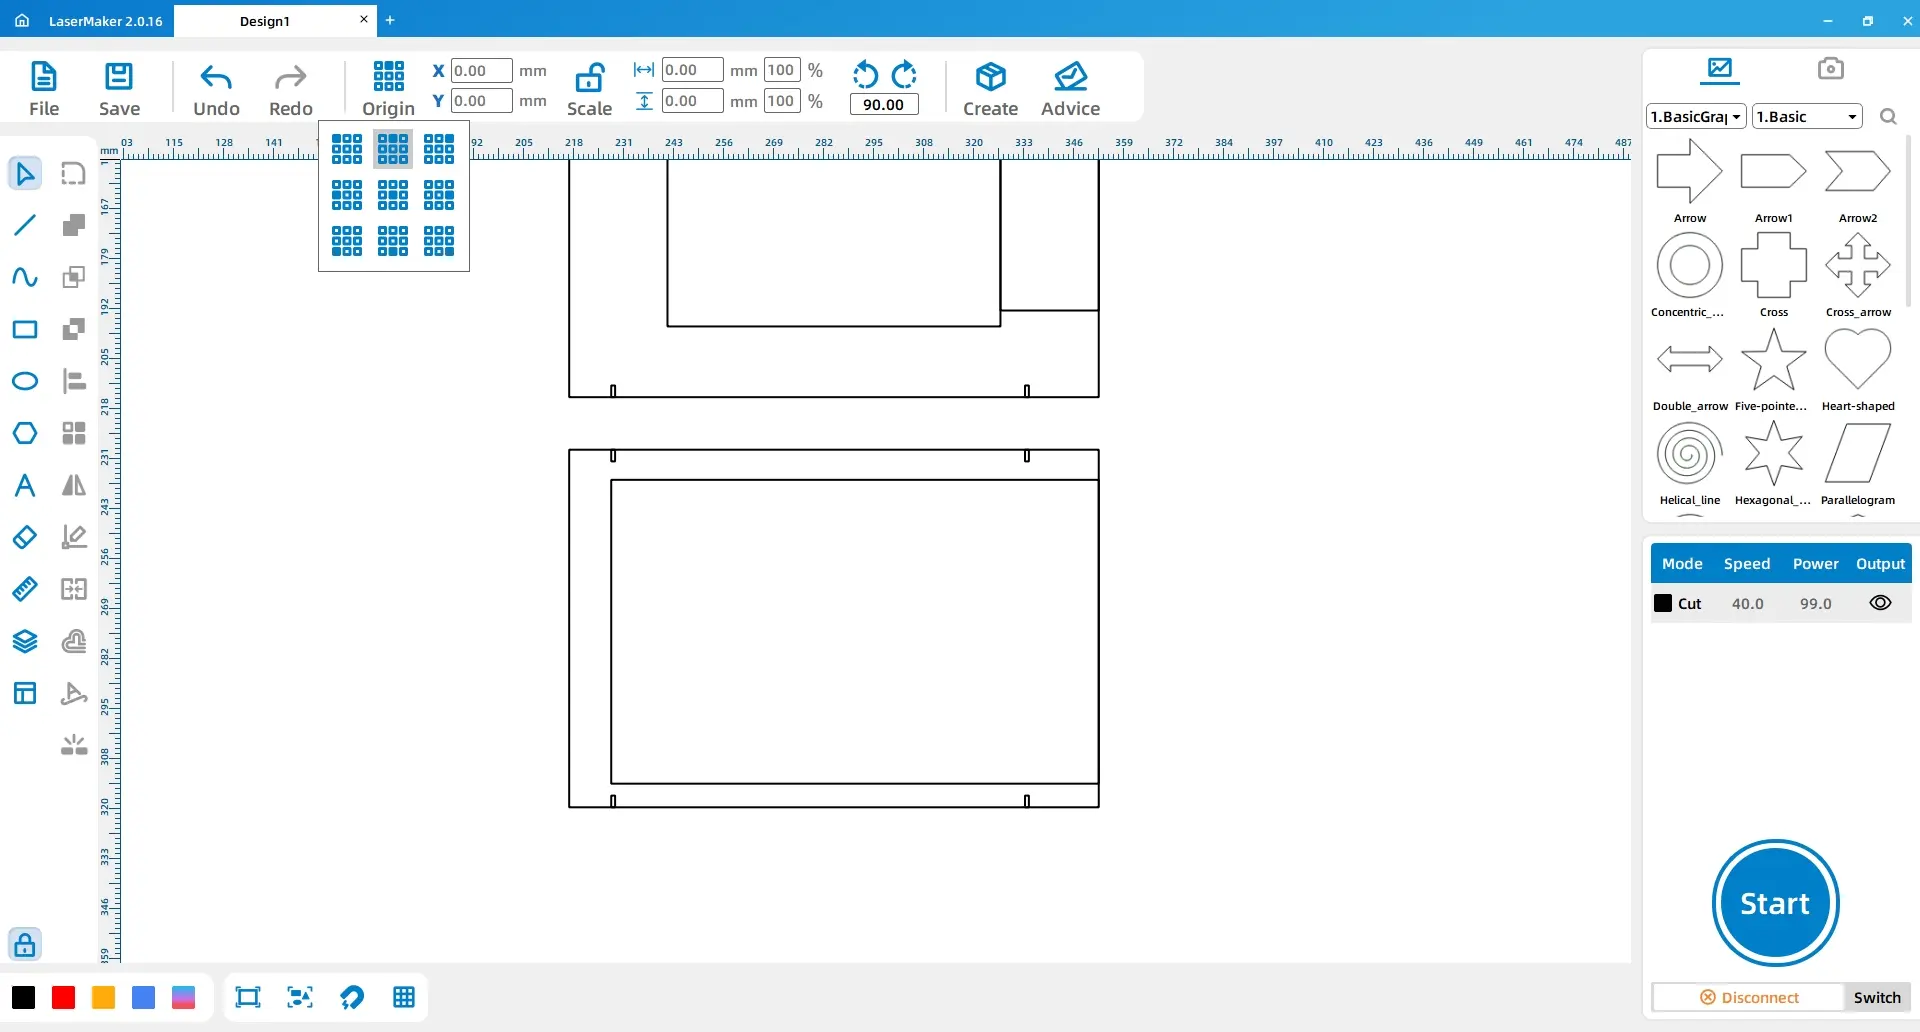
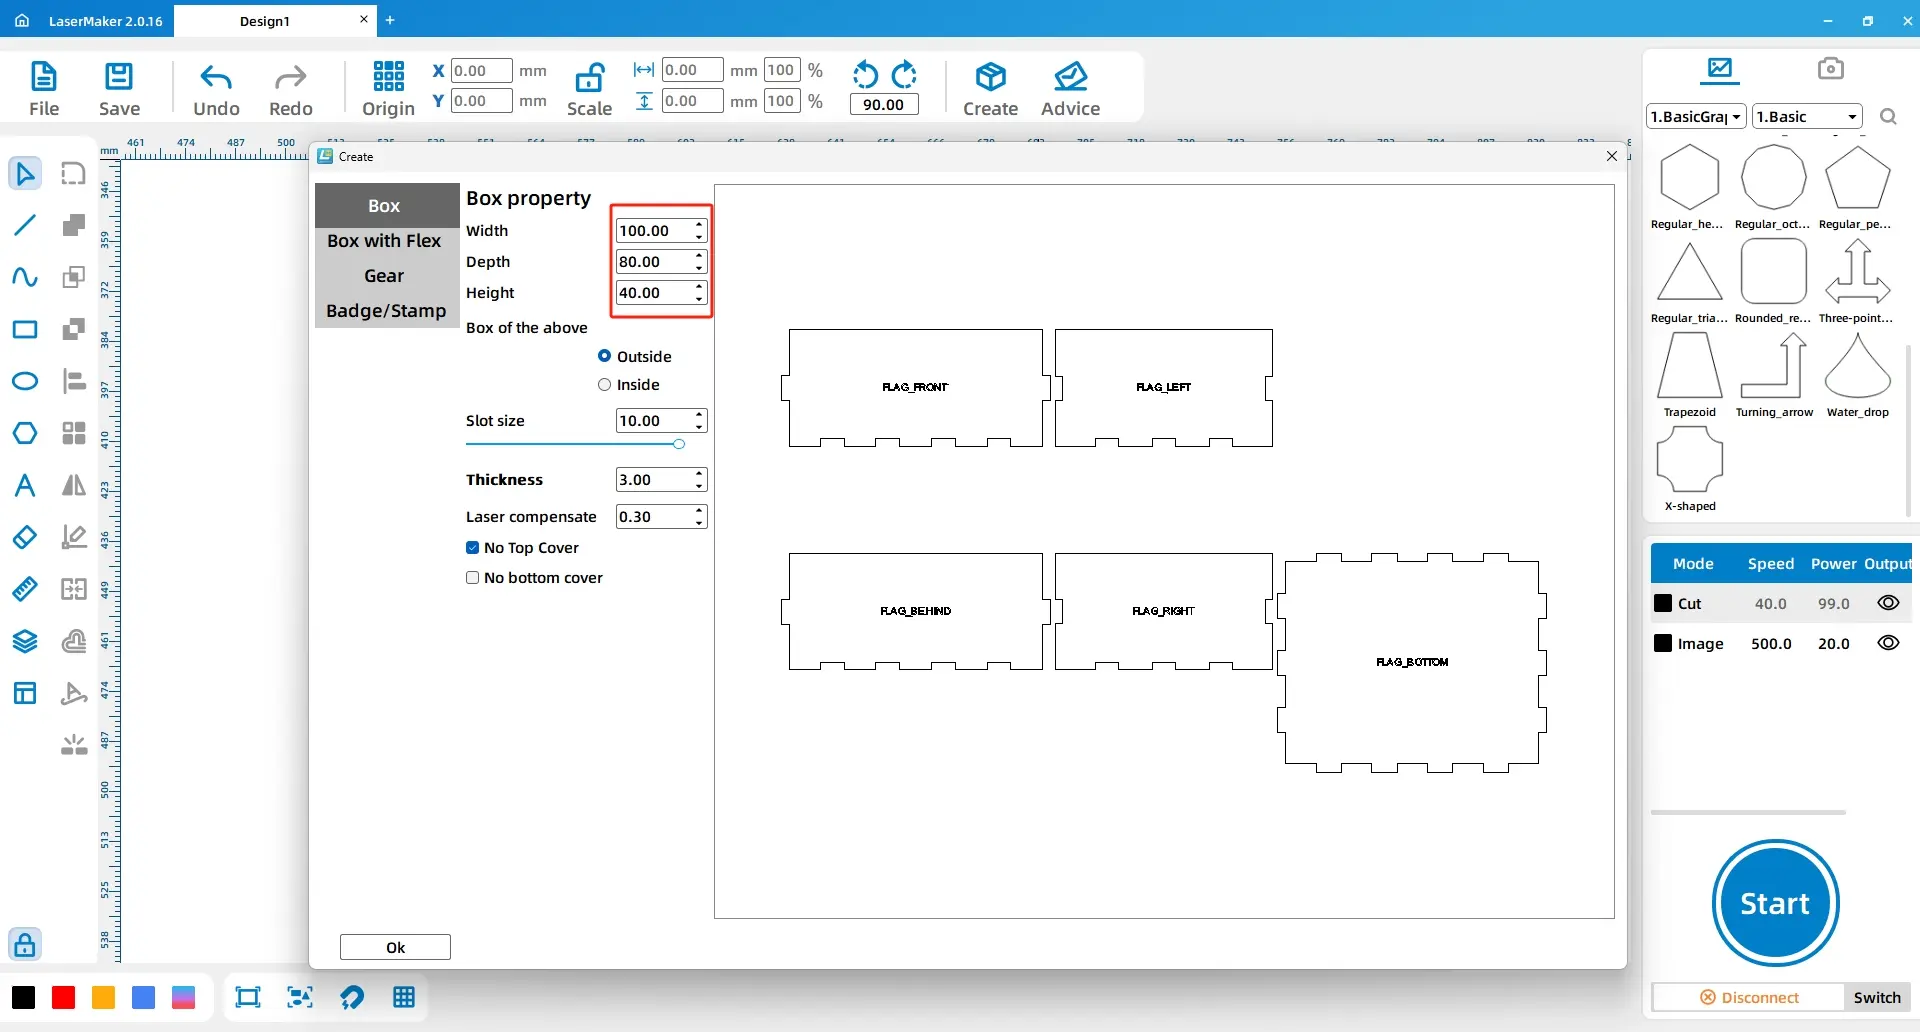
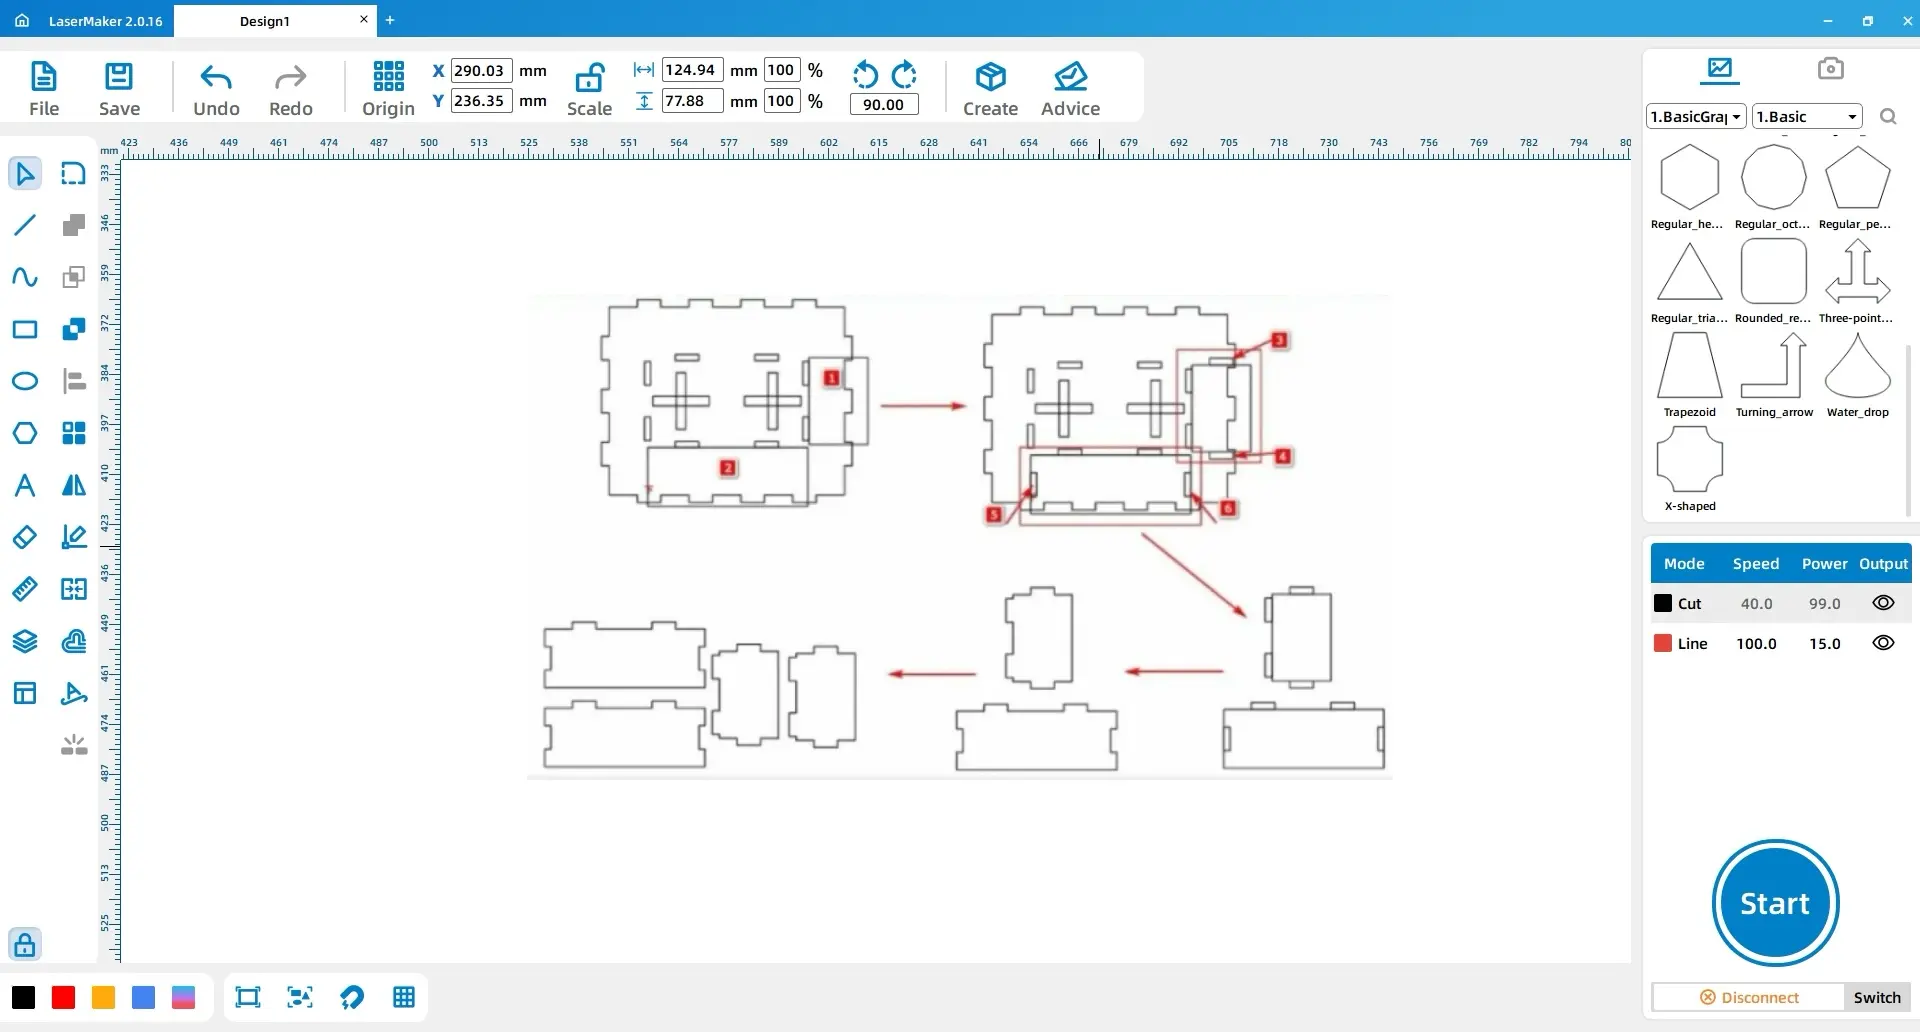
Use the Create feature in the top toolbar and choose Rectangular Box. Set the box parameters to Length 100, Width 80, Height 40, and choose No Top Cover.
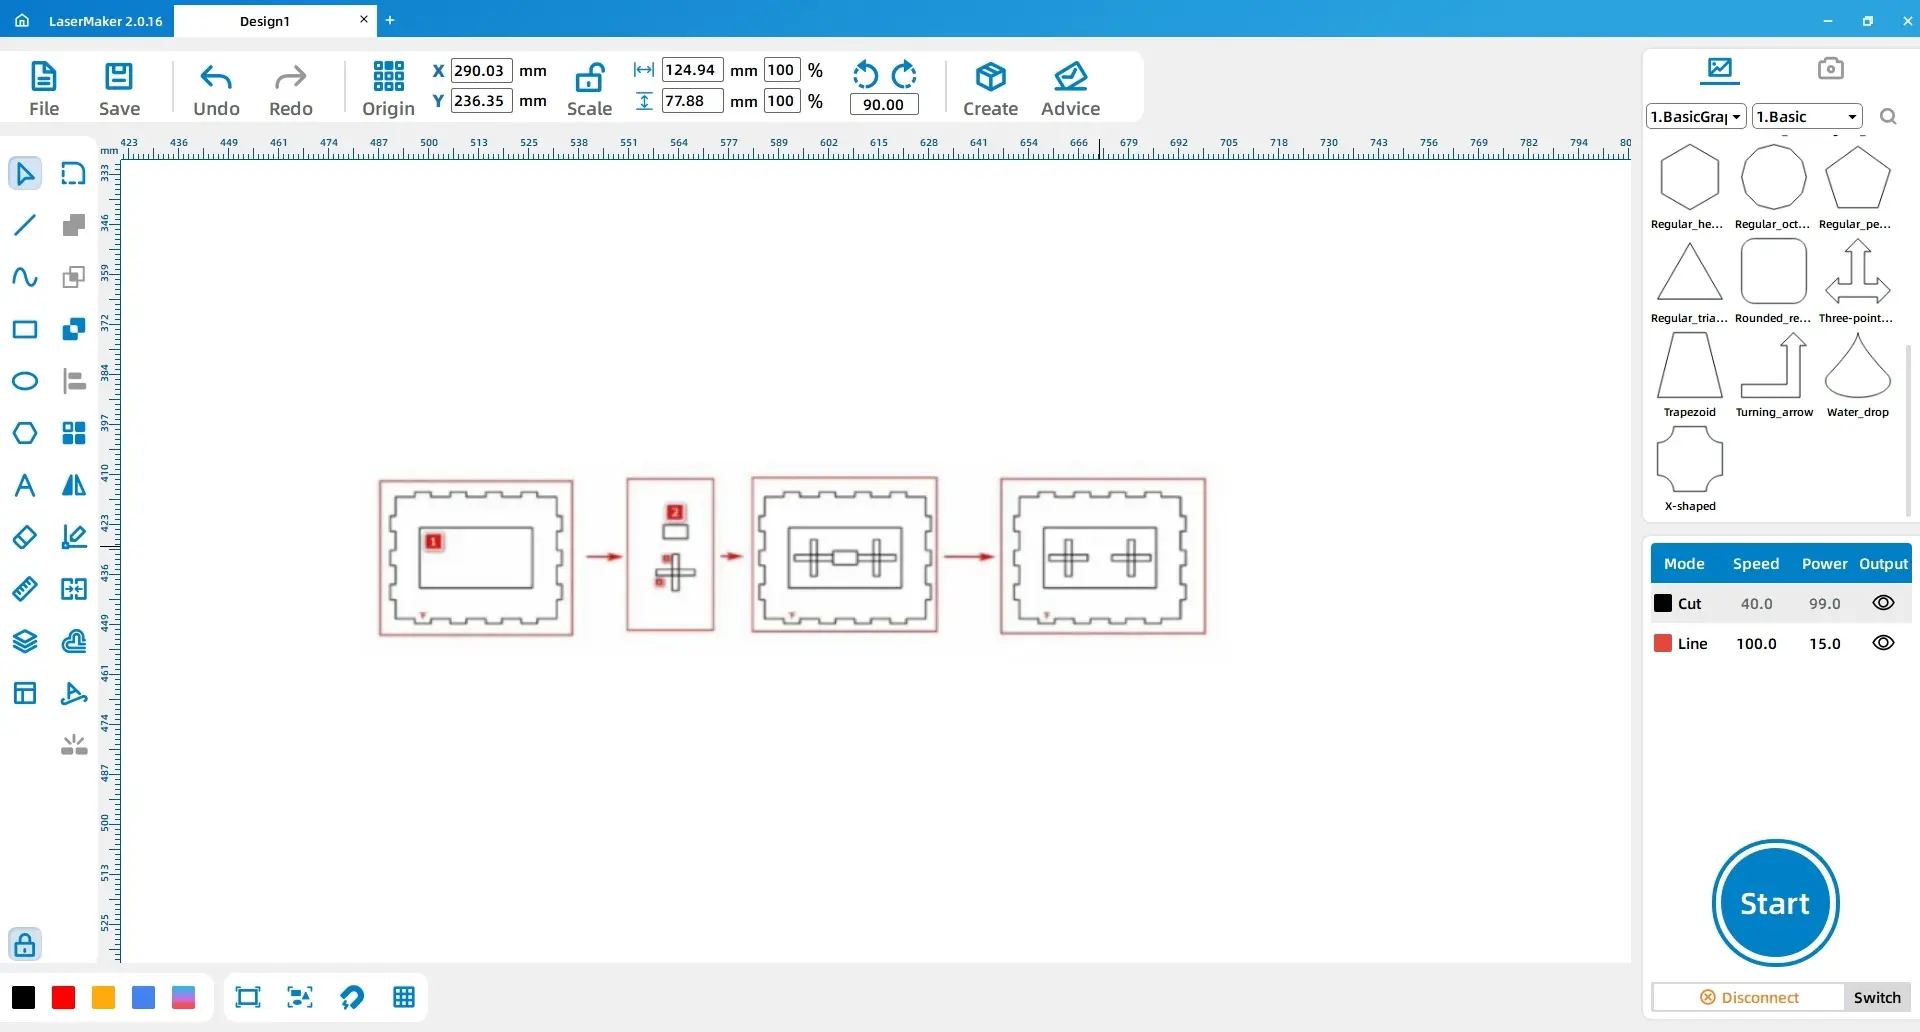
Draw Rectangle 1 with dimensions Width 69.8, Height 39.6 and align it horizontally and vertically with the bottom cover of the rectangular box. Draw Rectangle 2 with dimensions Width 14.9, Height 9, and Rectangle 3 with dimensions Width 4, Height 24. Duplicate Rectangle 3 as Rectangle 4, rotate Rectangle 4 by 90°, then center-align Rectangles 3 and 4 to create Group 1.
Align Rectangle 2 with Rectangle 1. Place Group 1 to the left of Rectangle 2 and connect it to Rectangle 2. Duplicate Group 1 as Group 2 and place Group 2 to the right of Rectangle 2. Delete Rectangle 2 after the side groups are positioned.
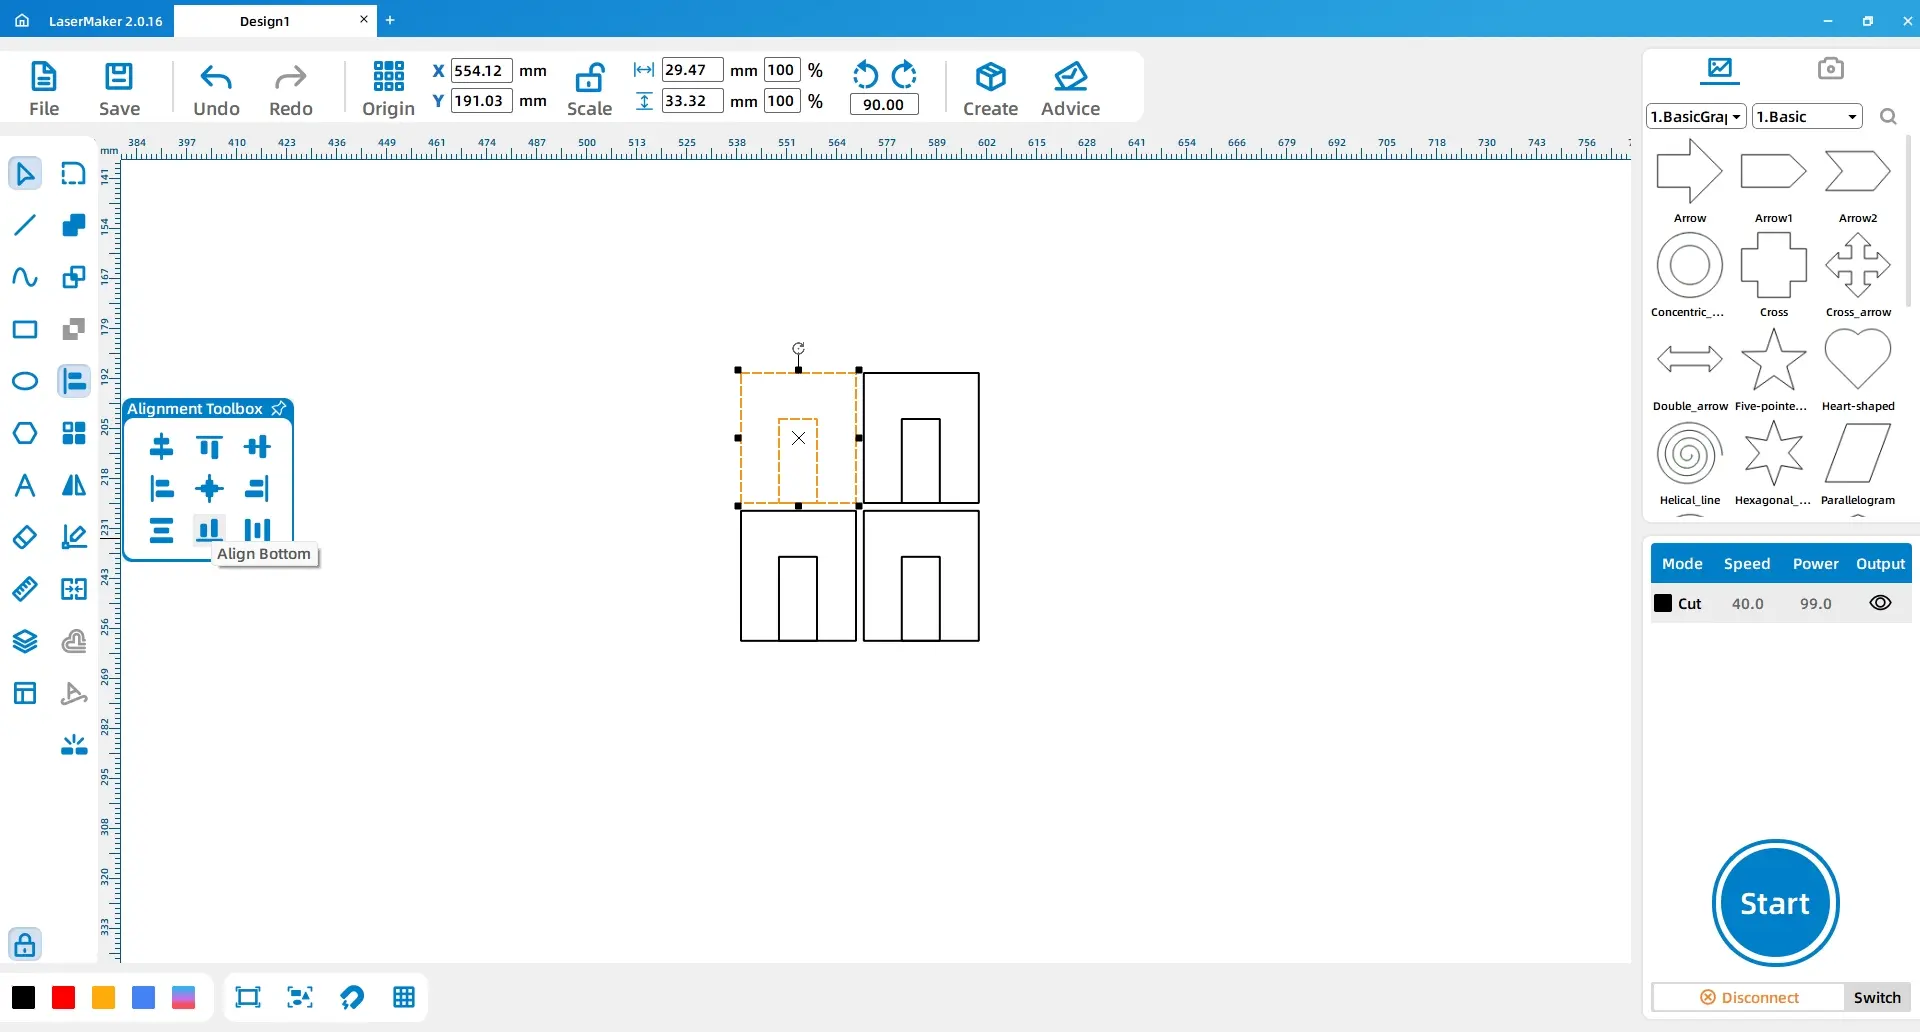
Draw Rectangle 1 with dimensions Width 2.6, Height 10, Rectangle 2 with dimensions Width 13, Height 3, and Rectangle 3 with dimensions Width 10, Height 2.6. Position them as shown and group them as Group 1. Duplicate Group 1 as Group 2 and mirror Group 2 horizontally. Duplicate Groups 1 and 2 together to create Group 3, mirror Group 3 vertically, and position it as shown. Keep the needed rectangle and cross-shaped details, then remove the extra rectangles.
Draw Rectangle 1 with dimensions Width 25, Height 37, and Rectangle 2 with dimensions Width 68, Height 25. Draw Rectangles 3 and 4 above and below Rectangle 1, both with dimensions Width 10, Height 3. Draw Rectangles 5 and 6 above and below Rectangle 2.
Move the indicated area outside the lower cover of the box. Change the width of the two rectangles on the left side of Rectangle 1 to 3, and change the height of the two rectangles above Rectangle 2 to 3. Merge Rectangle 1 with Rectangles 3, 4, and the left-side rectangles to create Pattern 1. Merge Rectangle 2 with Rectangles 5, 6, and the upper rectangles to create Pattern 2. Duplicate Pattern 1 and Pattern 2 and position them as shown.
Draw a rectangle with dimensions Width 36.4, Height 35.4. Use the Text Tool to add a short label. For an international classroom website sample, use English text such as Thunder Laser, a school name, or an event name. Adjust the text size to be slightly larger than the default and arrange it within or near the rectangle.
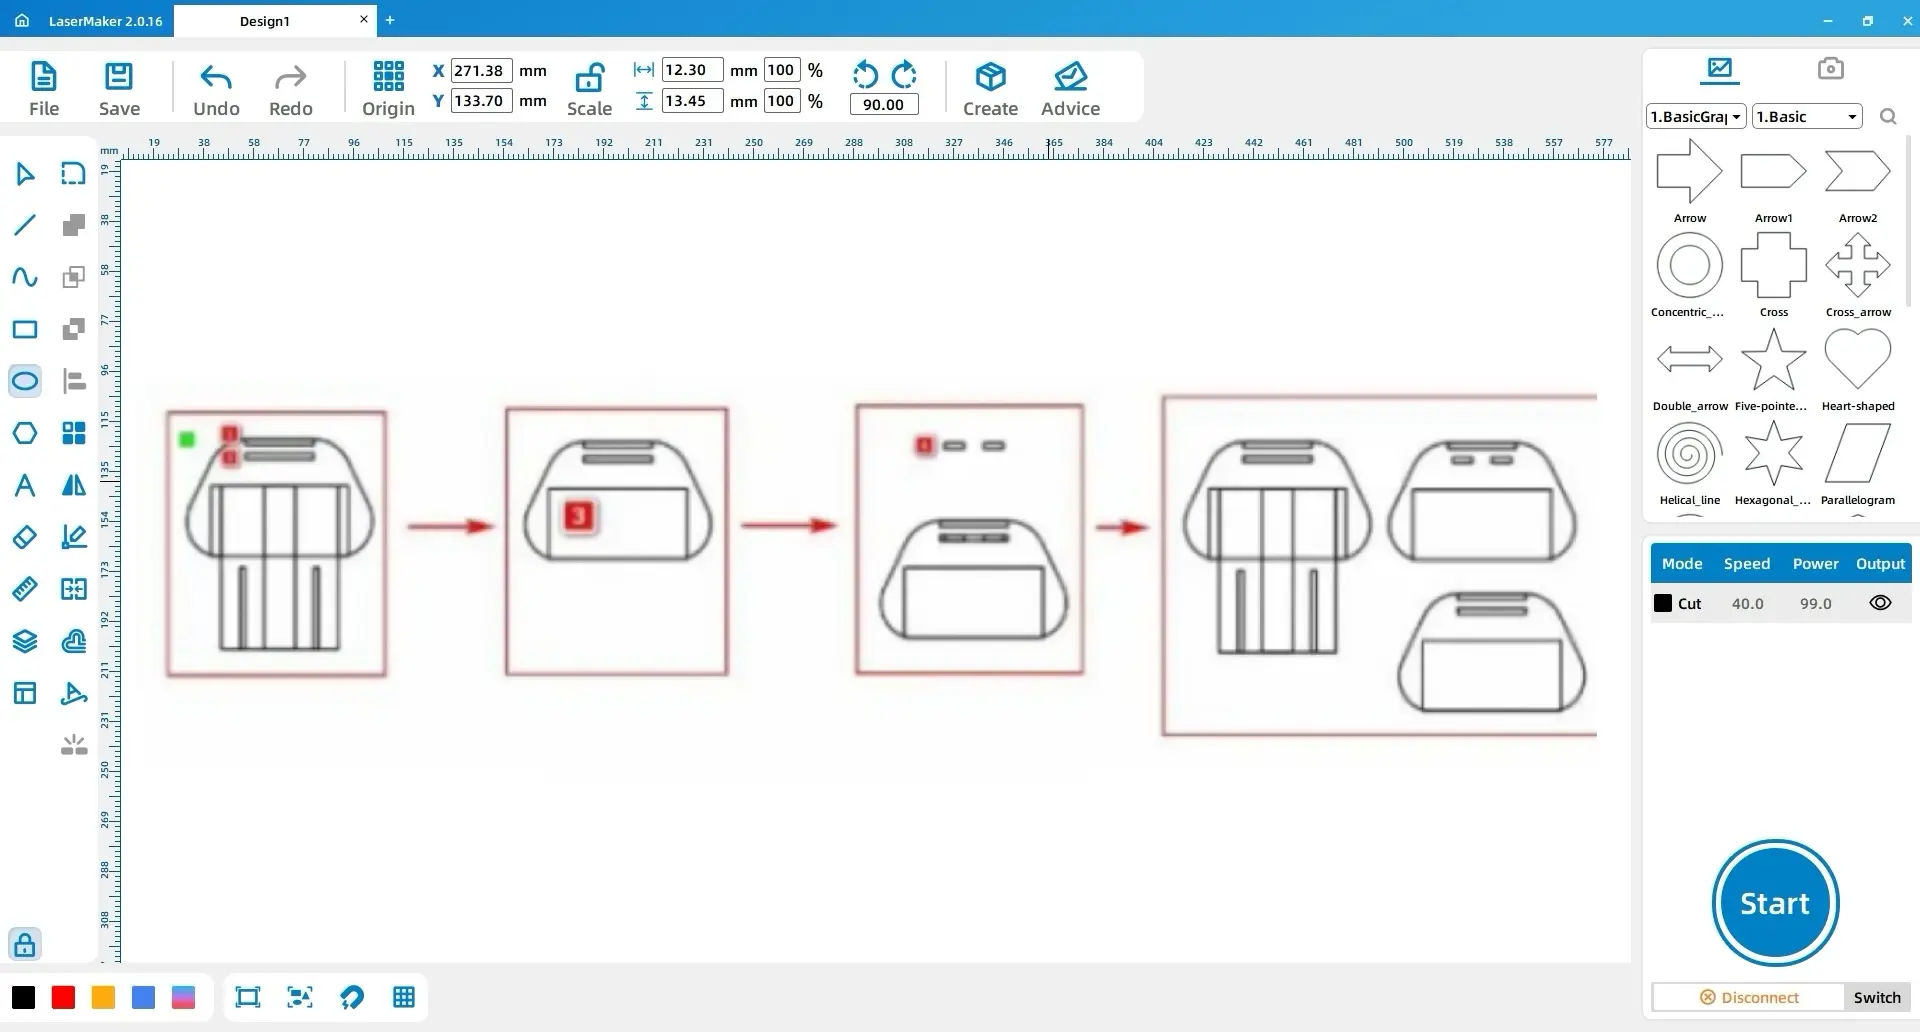
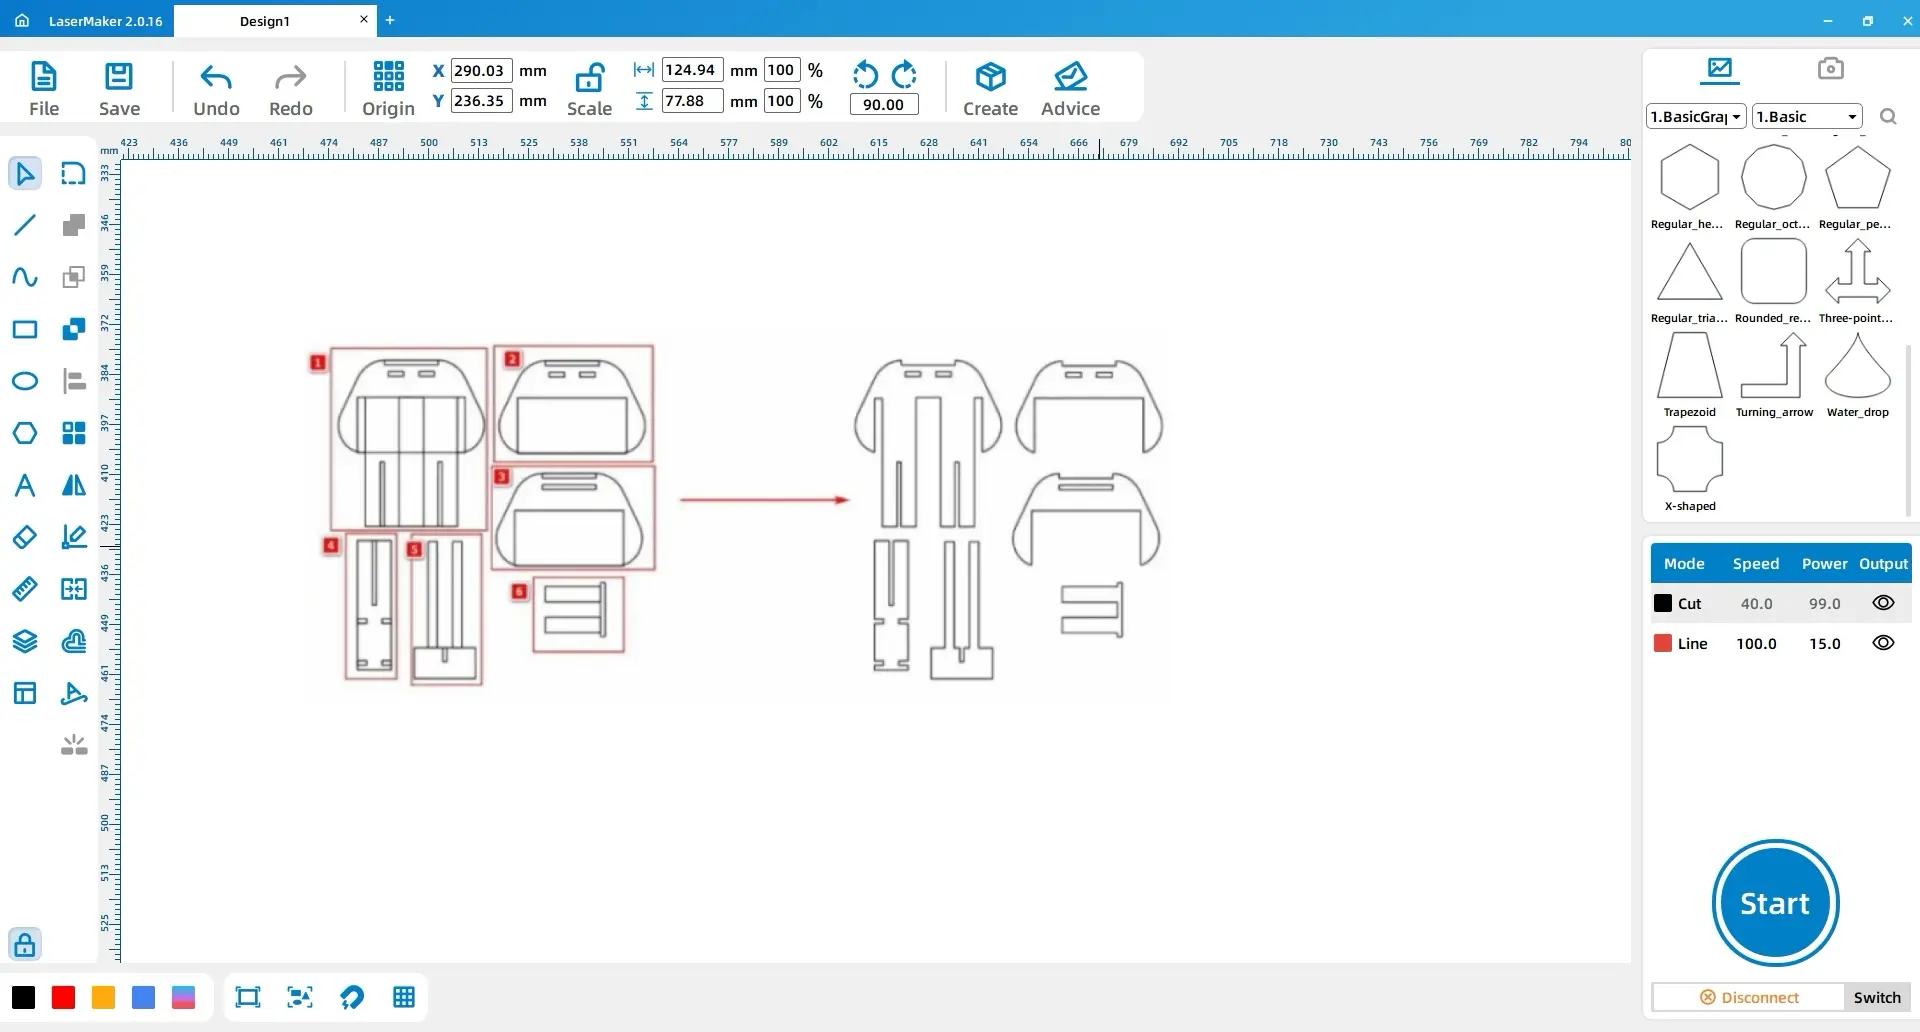
Locate the two rectangles in the highlighted area of the right-side pattern and duplicate them. Move the duplicated rectangles into the second rectangle in the highlighted area on the left side. After positioning the rectangles, delete the second rectangle from the left-side pattern. Then select and duplicate the outer contour of the right-side pattern and position it to match the design layout.
Repeat the rectangle duplication and placement operation for the next highlighted area. Move the copied rectangles into the matching position on the left-side pattern, delete the unnecessary rectangle, and duplicate the outer contour as needed to keep the design aligned.
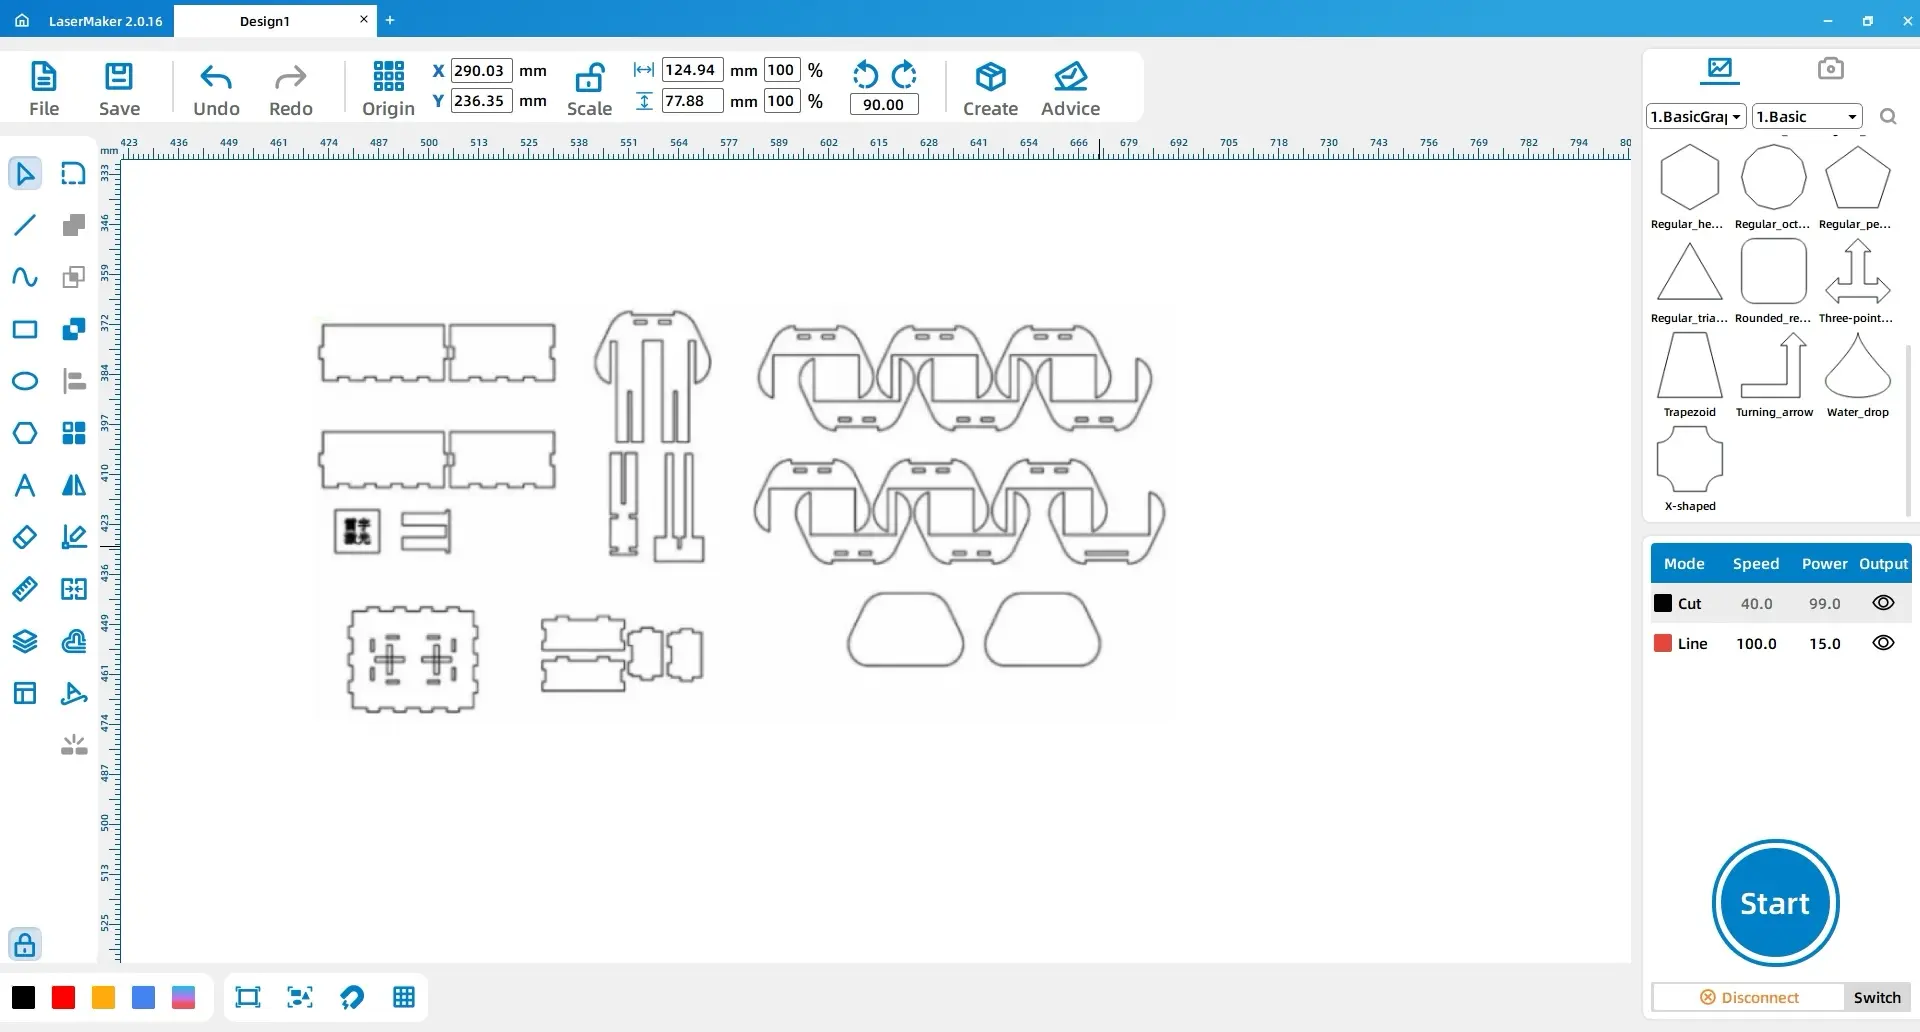
Use the array function to create multiple instances of the patterns. Arrange Pattern 1 into an array of 11 identical patterns, and arrange Pattern 2 into an array of 2 patterns.
After completing these steps, the design drawing for the handle is ready for laser processing.
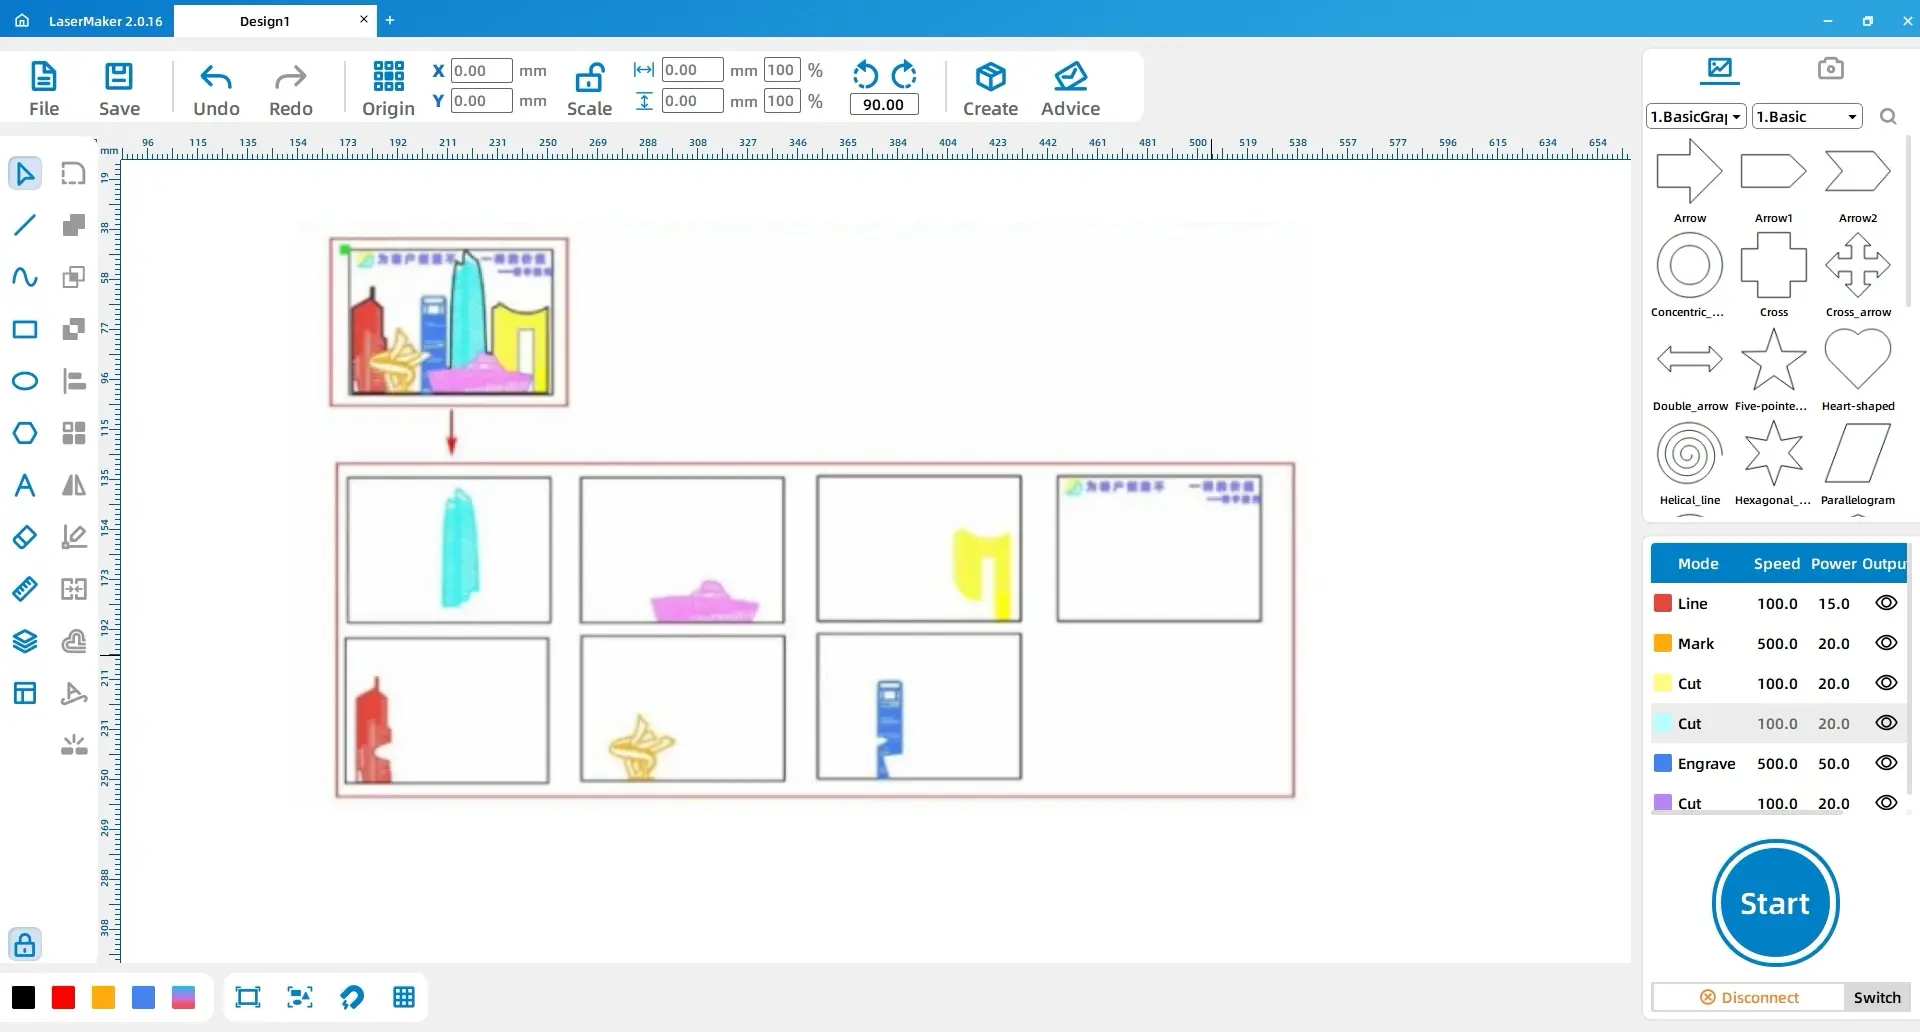
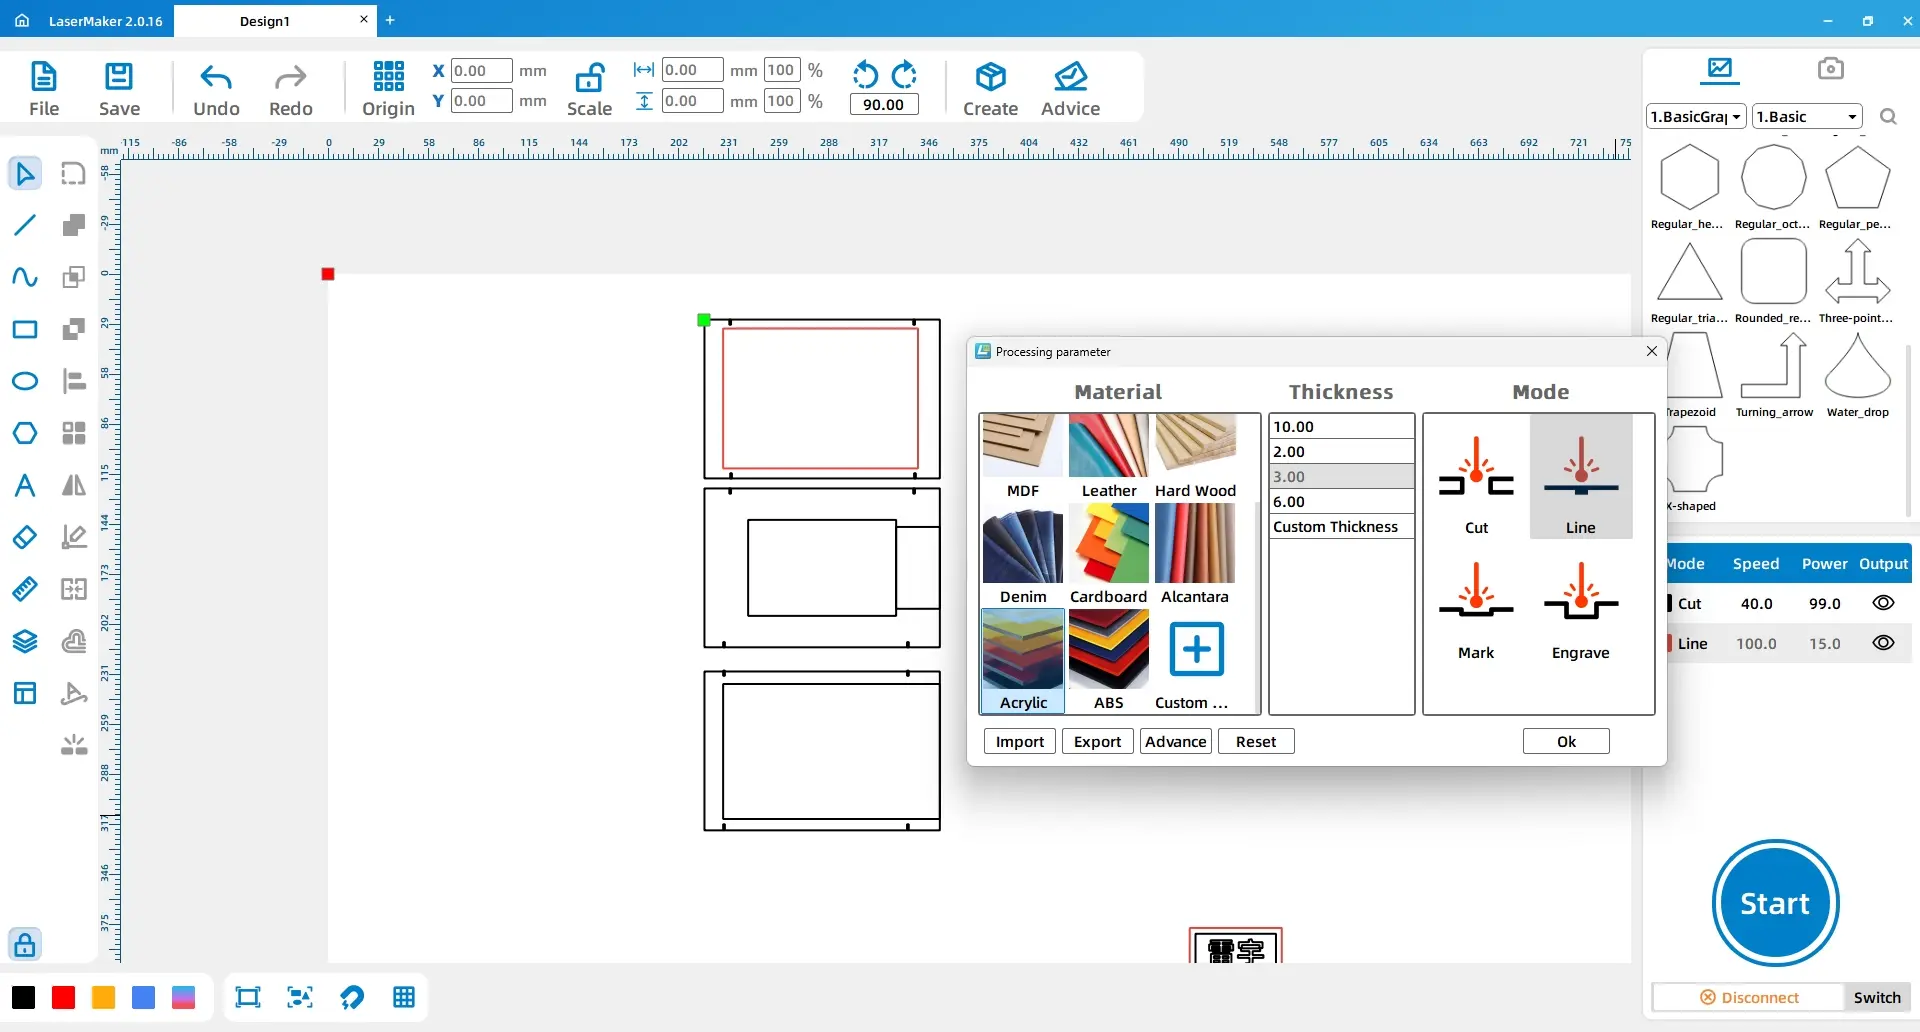
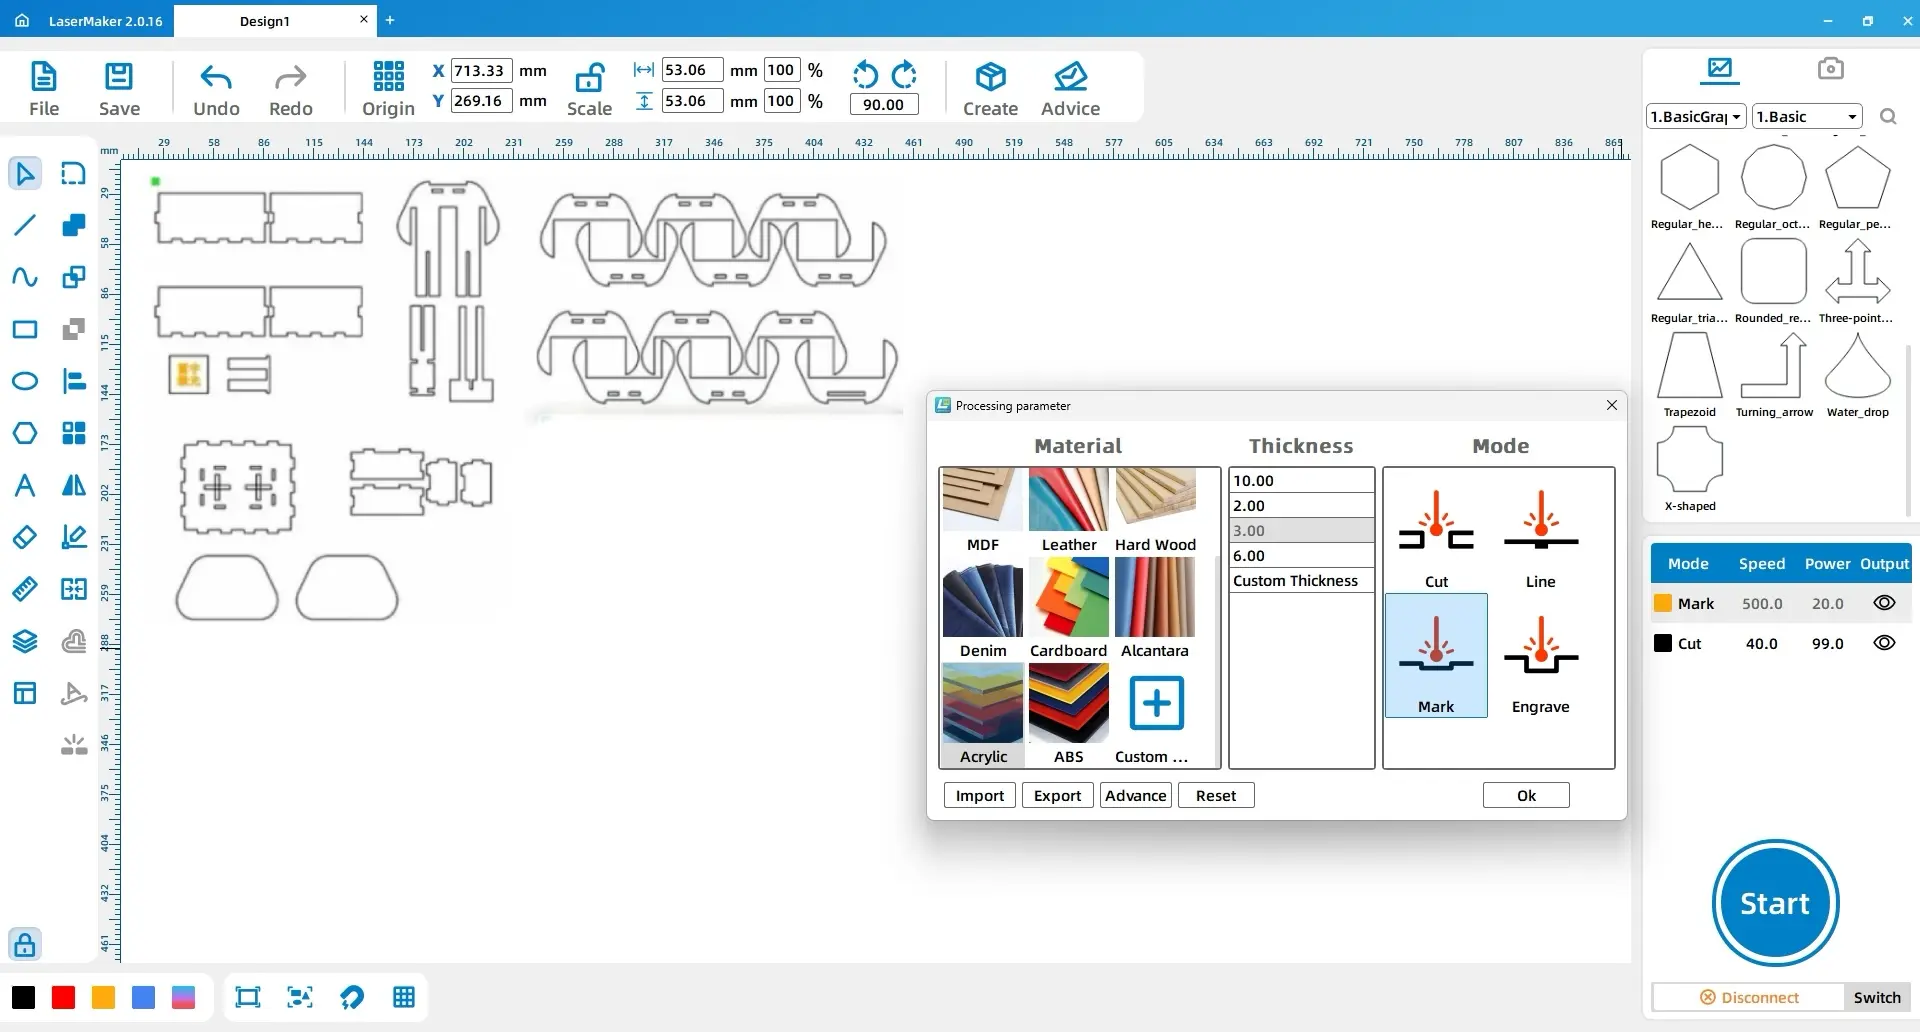
Set up the material and layer parameters before processing. Teachers should review material suitability, supervise machine operation, and follow the school’s laser safety procedures and the machine’s operating guidance.
| Part | Layer or Material | Thickness | Process |
|---|---|---|---|
| Rubber stamp | Rubber | 2 mm | Shallow engraving |
| Base, red layer | Acrylic | 3 mm | Outlining |
| Base, black layer | Acrylic | 3 mm | Cutting |
| Handle, yellow layer | Acrylic | 3 mm | Shallow engraving |
| Handle, black layer | Acrylic | 3 mm | Cutting |
For the rubber stamp, double-click the blue layer in the Processing Panel and add a custom material named Rubber. Set the material name in English, Simplified Chinese, and Traditional Chinese as required by the software, set the thickness to 2 mm, select the rubber material image, and choose Rubber, 2 mm, Shallow Engraving.
For the base, select Rectangle 1 and change its layer color to red. Set the red layer to Acrylic, 3 mm, Outlining. Set the black layer to Acrylic, 3 mm, Cutting.
For the handle, select the label text and change its layer color to yellow. Set the yellow layer to Acrylic, 3 mm, Shallow Engraving. Set the black layer to Acrylic, 3 mm, Cutting.
This project asks students to think carefully about structure before production. They need to break the work into functional parts, complete the design drawings, consider slot and hole compensation, and assemble the final object patiently.
After assembly, students can test the stamp on a postcard and compare the result with the original design. Encourage them to reflect on line thickness, engraving clarity, handle comfort, alignment, and whether the stamp tells a clear place-based story.
For schools and beginner STEAM labs, this project can be completed on a classroom laser cutter such as the Thunder Laser Bolt Series. Teachers should choose suitable materials, test parameters before class production, and supervise all cutting and engraving operations.
Talk To Our Experts Now!
Please leave your contact information so that we can serve you better.
TAKE THE NEXT STEP WITH THUNDER LASER

 Stable & Consistent MachinesUnlimited ApplicationRobust After-sales SupportFactory Direct Supply