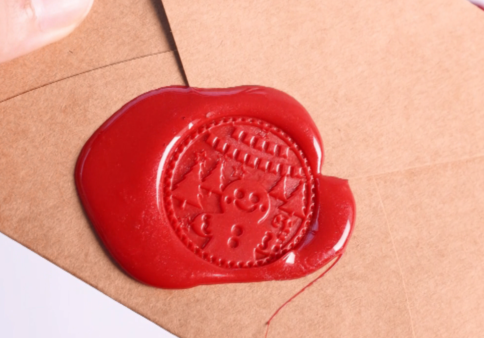
As Christmas approaches, it’s the small handmade details that make gifts and letters feel truly special. A brass wax stamp adds a timeless, ceremonial touch—whether you’re sealing holiday cards, gift boxes, or invitations.
In this tutorial, you’ll learn how to create a Christmas-themed brass wax stamp using a laser machine. This step-by-step guide focuses on precision, texture, and clean detail—exactly what a wax stamp needs.
Verify that the exhaust fan is functioning properly.
Make sure the lens isn't stained and the laser is running well.
Remember take the the lens' cover off!
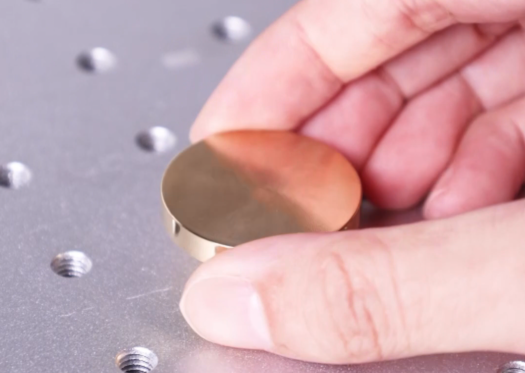
Step 1: Place the Brass Stamp
Lay the brass blank flat on the laser bed. Make sure the surface is clean, dry, and free of fingerprints or oil, as these can affect marking quality.
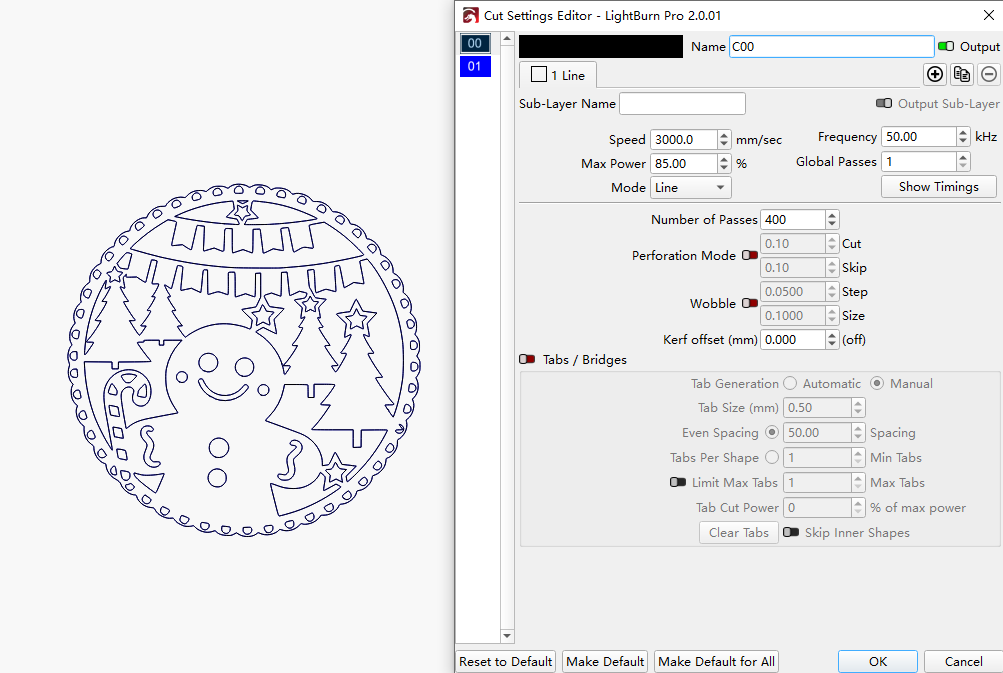
Step 2: Import Your File and Confirm the Laser Marking Settings
Open your preferred laser software and import your design file (SVG, DXF, or image). Adjust the size, rotation, and position of the design to match the exact area you want to engrave. Then make sure the laser marking parameters are set correctly.
Tip: Always double-check your design dimensions in the software to ensure they match the actual marking area. Use the “preview” or “frame” option to avoid accidental misplacement.
Step 3: Focus Your Machine
Focus is the key to success. Once focus is ignored, the results may not be satisfying. Before you start, make sure you have finished focusing.
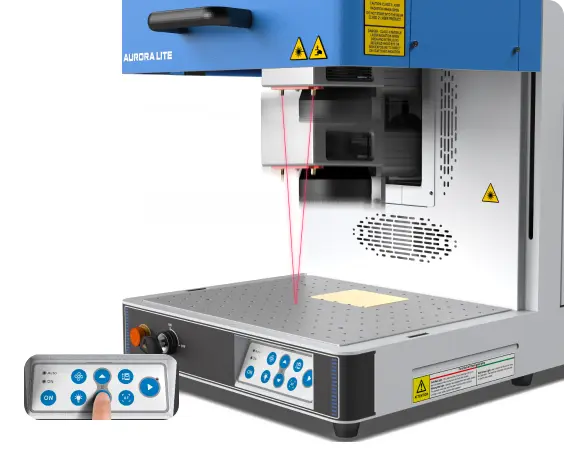
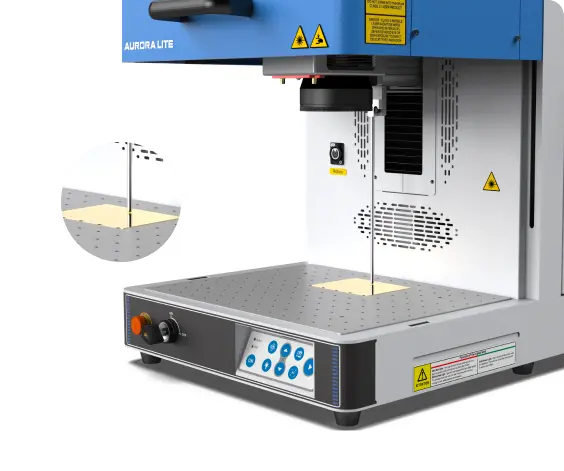
With the Aurora Lite, you have two ways to achieve perfect focus. The first method uses the red-dot pointer to assist—simply adjust the laser head until the two red dots overlap, and you’re good to go. The second method, which is often more precise, is manual focusing with a focus stick. Adjust the height of the laser head until the focus stick just touches the surface of the material in a perfectly vertical position. Whenever possible, use manual focus for better accuracy.
Auto focus
Manual focus
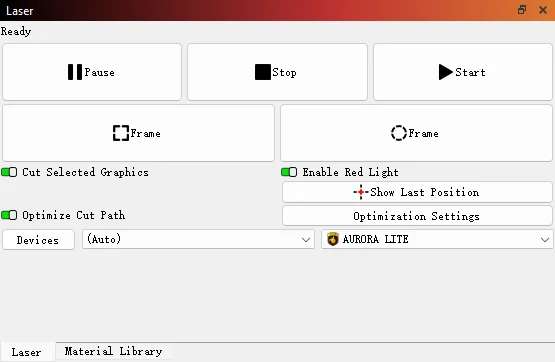
Step 4: Frame the Design and Start Laser Marking
When we click the “Frame” , we can see red light show the outline of marking area. It’s safe, and the frame will be on the surface of the blank stamp. Once it isn’t, move your brass stamp or design until they are at the same position. Once everything is adjusted, simply hit ‘Start’ to begin laser marking the brass stamp with the Aurora Lite.
Step 5: Monitor the Kaser Marking Process
Keeping an eye on the machine allows you to spot unusual conditions—such as error alarms, smoke build-up, or unexpected pauses—before they become problems.
While observing, remember that the laser beam is extremely powerful. Even with the protective lid closed, avoid staring directly at the marking spot for too long. A quick glance to check progress is fine, but prolonged gazing should be avoided for safety reasons.
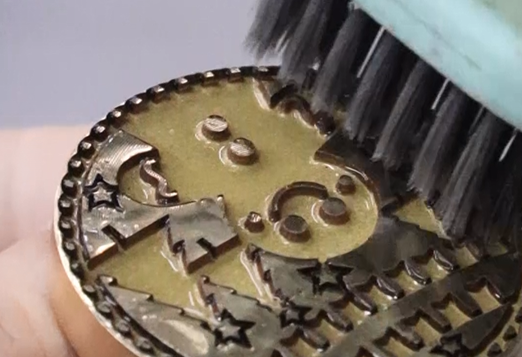
Step 6: Clean the Brass Stamp
When the marking is finished and the stamp has cooled, clean the surface with water and a toothbrush to remove metal residue. Or you can use a soft, dry cloth or a microfiber towel—avoid harsh chemicals that could damage the brass finish.
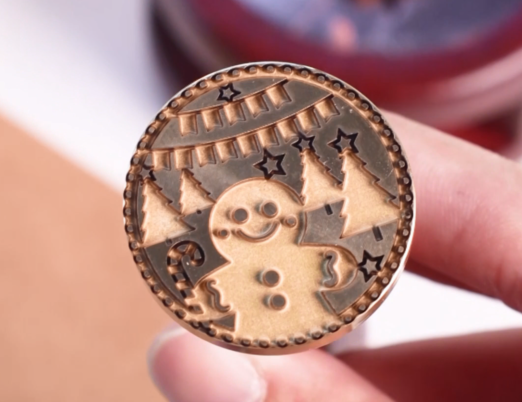
Step 7: Complete the Laser Marking
Your Christmas brass wax stamp is now ready to be mounted on a handle or used directly.
Come and Try!
There’s something deeply satisfying about sealing a letter with a stamp you made yourself. If your holiday season includes handwritten cards, wrapped gifts, or small personal rituals, this brass wax stamp is a project worth trying. Load the brass, start the laser, and create a Christmas detail that feels slow, thoughtful, and truly handmade.

.png "laser cutter Globle") International
International
 United States
 Brasil
 Canada
 Costa Rica
 Mexico
 Česká
Česká
 Romania
 Polska
 Ireland
 Italia
 Lietuva
 Россия
 Deutschland
 Britain
 Україна
 France
 Sverige
 Norway
 Denmark
 Ελλάδα
 Portugal
 한국
한국
 中国
中国
 中国香港
中国香港
 Israel
 中國臺灣
中國臺灣
 ジャパン
ジャパン India
India
 پاکستان
 پශ්රී ලංකා
 ประเทศไทย
 Australia
 New Zealand
 South Africa