Introduction
Laser engraving on marble is a meaningful way to preserve a memory forever. A well-prepared photo, combined with the right machine settings, can turn a plain stone into a lasting tribute. In this step-by-step guide, we’ll walk through the process of engraving a photo onto marble, from choosing the right image to finishing the piece.
Machine Used
- Thunder Titan Pro 63 100W
Material Needed
- Marble
Settings
Engraving
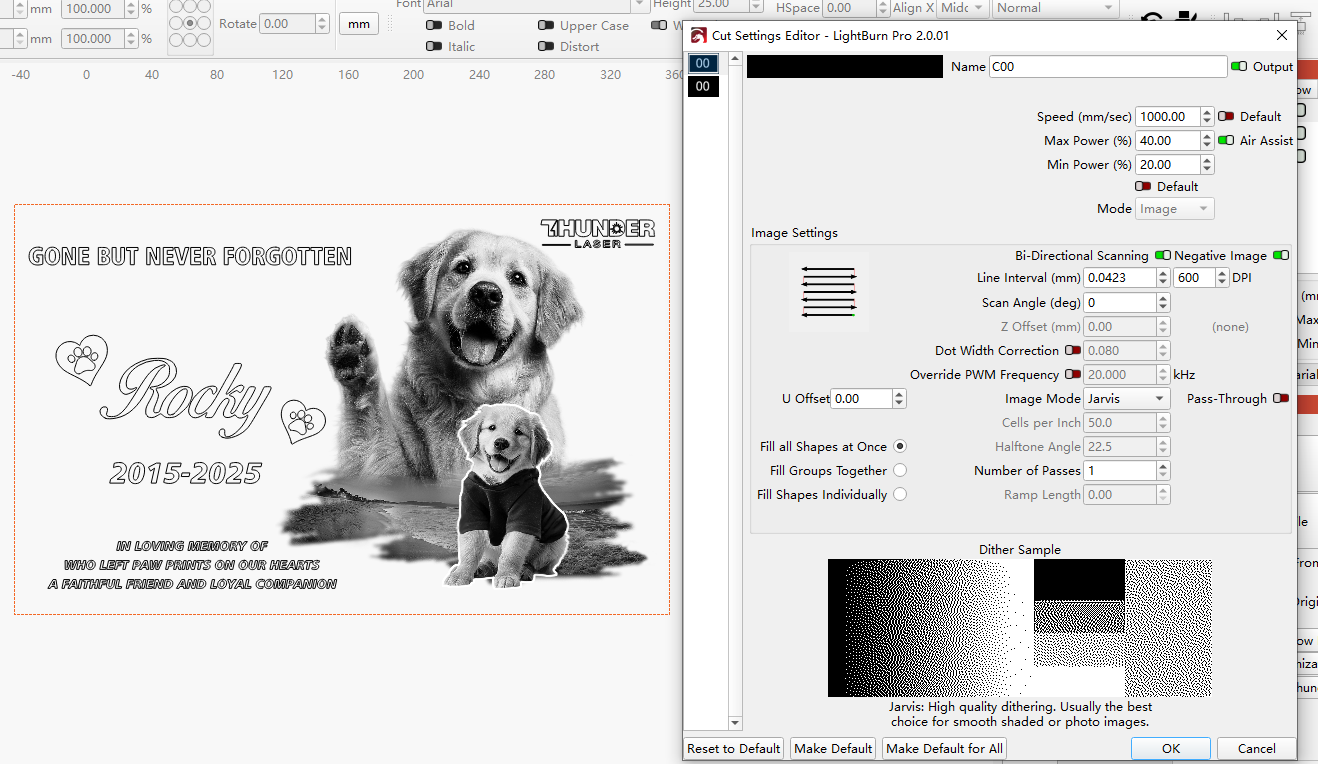
- Speed:1000mm/s
- Max Power:40%
- Min Power:20%
- DPI:600
Before your work begins
- Verify the lens is clean or there's no problem in the laser.
- Make sure the exhaust fan is working well.
- Ensure the air assist is on.
Step 1: Prepare the Marble
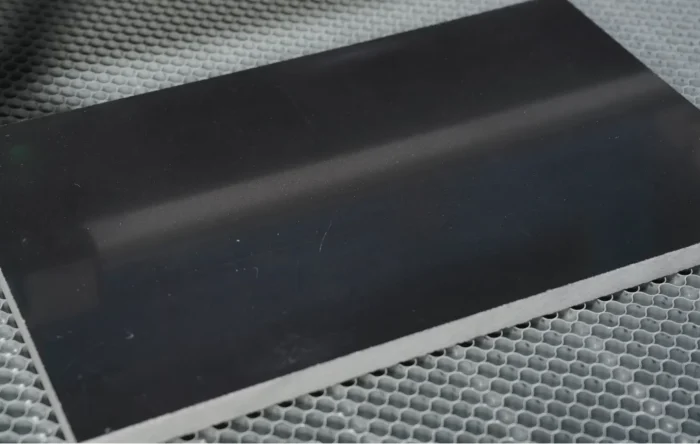
Start by selecting a piece of dark marble with a smooth, polished surface—black marble works best because it offers the strongest contrast. Clean the stone thoroughly to remove any dust, fingerprints, or oils that might interfere with engraving to have a perfectly clean, reflective surface so the engraving can be sharp and consistent. A lint-free cloth and a bit of rubbing alcohol are usually enough. Put it on the work area after it is clean and dry.
Step 2: Select and Process the Photo
Not every photo is suitable for laser engraving. The most successful engravings come from images with a wide range of tones, clear details, and natural contrast. Look for a photo that shows soft gradations between light and dark areas rather than large flat regions of solid color.
Sharp focus is essential—details like eyes, hair, or hands should be clearly defined and separated from the background. Avoid images that are blurry, too dark, or lacking in texture. Portraits with varied shading often work best, because the engraving can capture those subtle differences and create a realistic, lifelike result on marble.
Once you’ve chosen the photo, process it in image-editing software. Convert it to grayscale, adjust brightness and contrast, and then export as a high-resolution image (PNG/JPG) at the final physical size you plan to engrave, or slightly larger.

Step 3: Set Up the File in Your Laser Software
Import the processed photo into your preferred laser software. Invert the image to get a better result. Then apply dithering (Jarvis, Stucki, or similar) so the laser renders tones as dots. If you use LightBurn, set Image Mode to a dithering option (Jarvis/Stucki) and adjust Gamma/Enhance if needed.
● Quick starting points (software side):
- Dither = Jarvis or Stucki: consider Gamma ~0.8 and a small Enhance Radius to pop edges on dark stone.
- DPI / line interval: 300–600 DPI is good for photo engraving on stone; keep the image DPI and the engrave DPI consistent.
Step 4: Focus the Laser
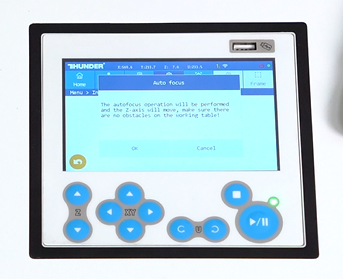
Accurate focusing is critical for engraving fine details on marble. Depending on your machine, you may have auto-focus or manual focus options. With auto-focus, the laser head automatically adjusts to the correct distance—ideal for flat marble slabs. If you’re using manual focus, adjust the laser head until the focal tool or stick just touches the surface of the stone at a perfect vertical angle. Double-check that the marble is sitting level to avoid blurry or uneven engraving.
Resize it to match the area of the marble you want to engrave, and make sure it’s positioned correctly. It’s a good idea to use the “frame” or “preview” function to check alignment before engraving, so you know exactly where the image will be placed.
Step 5: Start the Engraving
Once everything is set, run a low-power test pass on a corner or scrap piece of marble to confirm your settings. When satisfied, begin engraving the photo. Keep an eye on the process to ensure the laser is working smoothly, but avoid staring directly at the beam. Depending on the image size and level of detail, the engraving may take some time—patience is key for the best results.
Step 6: Clean and Finish
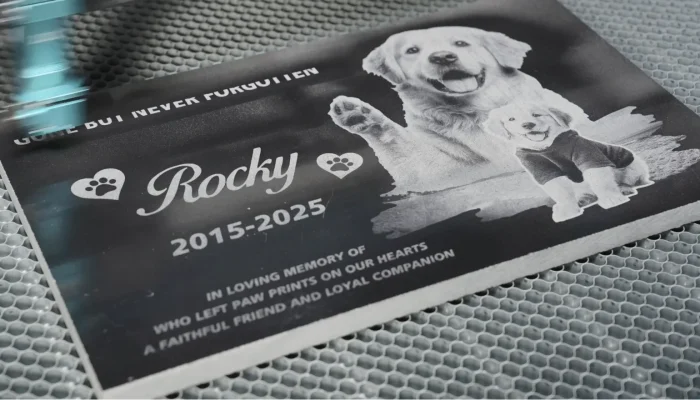
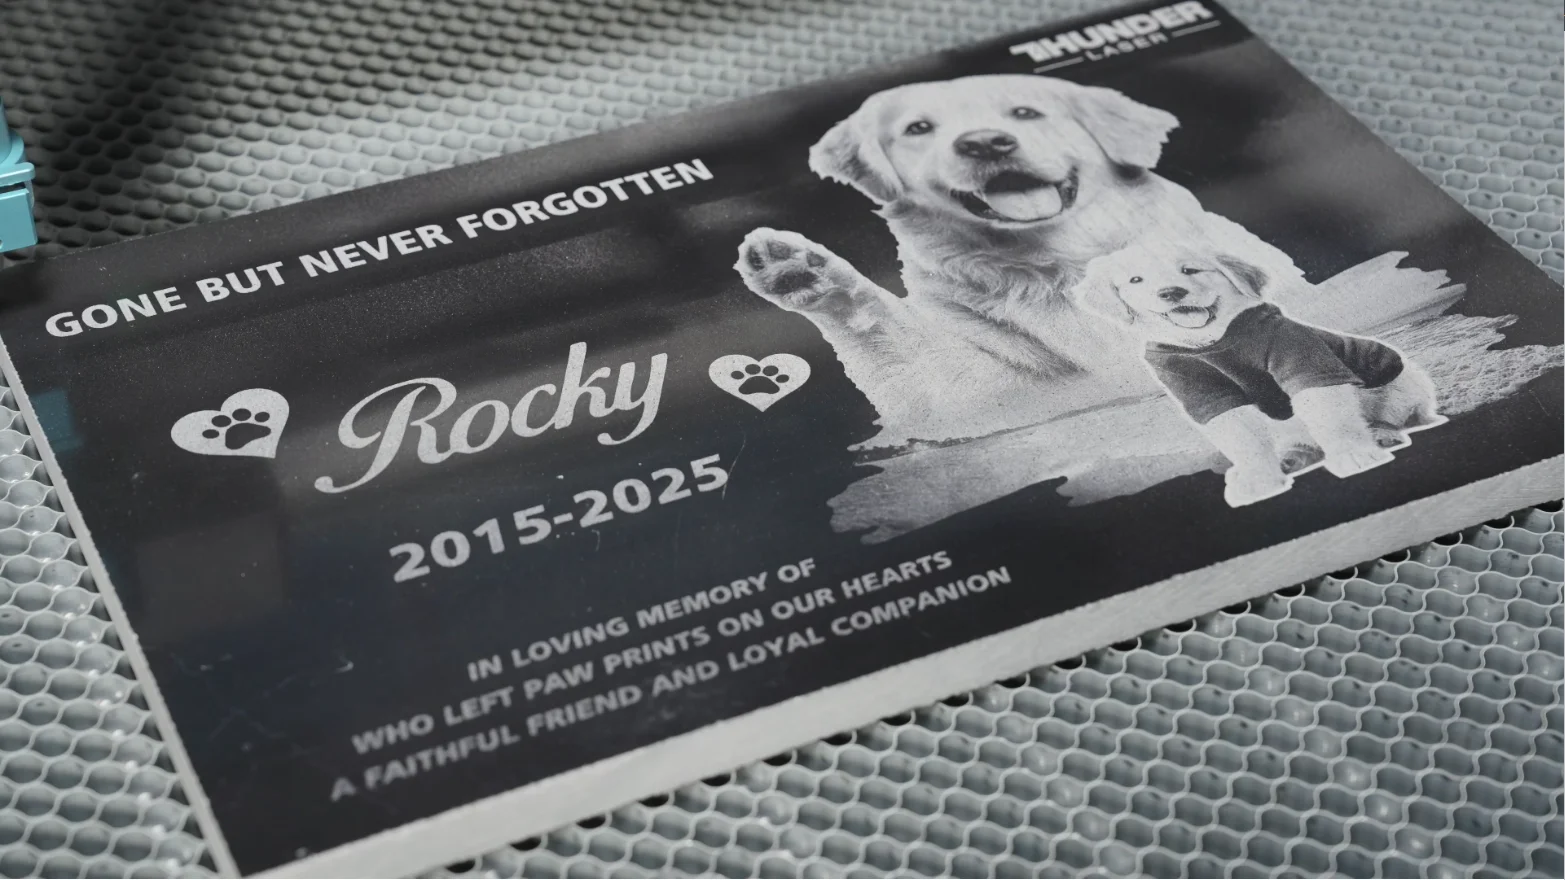
After engraving, allow the marble to cool for a moment. Wipe the surface gently with a damp cloth to remove any dust or residue. The engraved areas will appear lighter, standing out beautifully against the dark polished background.
Step 7: Complete the Laser Task
Take a close look at the engraved photo to check clarity and detail. If needed, you can apply a light coat of stone polish or mineral oil to deepen the contrast and make the image stand out more vividly. This finishing touch enhances both the look and durability of the engraving.

Come and Try!
Creating a photo engraving on marble is both an art and a craft. With the right preparation and attention to detail, your laser machine can turn a simple image into a permanent memorial that honors a loved one. Take your time choosing the right photo, fine-tune your settings, and let the stone carry the story forward.

.png) International
International
 United States
 Brasil
 Canada
 Costa Rica
 Mexico
 Česká
Česká
 Romania
 Polska
 Ireland
 Portugal
 Lietuva
 Россия
 Deutschland
 Britain
 Україна
 France
 Sverige
 Italia
 Norway
 Denmark
 Ελλάδα
 한국
한국
 中国
中国
 ประเทศไทย
 中国香港
中国香港
 Israel
 中國臺灣
中國臺灣
 India
India
 پاکستان
 پශ්රී ලංකා
 ジャパン
ジャパン
 Australia
 New Zealand
 South Africa