Laser Engraving Ceramic Tile: Methods, Settings, and Machine Guide
 2026-05-27
WHAT ARE YOU LOOKING FOR?
Search Across Products, Blog Posts, Support Content, And Resources.

Laser Engraving Ceramic Tile: Methods, Settings, and Machine Guide
2026-05-27

Ceramic is a durable and versatile material known for its hardness, non-porous surface, and resistance to heat and chemicals. These properties make ceramic tiles useful for flooring, wall decoration, home decor, personalized gifts, signage, and artistic projects.
Laser engraving ceramic tile is an efficient way to create detailed patterns, photos, text, logos, and decorative designs on ceramic surfaces. The process is non-contact, highly customizable, and suitable for both one-off personalization and small-batch production.
In this guide, we will explain whether ceramic can be laser engraved or laser cut, how ceramic laser engraving works, which laser types are suitable, recommended laser settings, and practical tips for safer and cleaner ceramic engraving results.
Yes, ceramic can be laser engraved. Among common ceramic engraving tools, laser machines are one of the most efficient options for engraving ceramic tiles, mugs, plates, plaques, and decorative items.
Ceramic’s smooth surface and heat resistance make it suitable for laser engraving. Depending on the ceramic surface and laser type, the laser may remove a thin surface layer, ablate a coating, or create visible contrast on the material. This allows users to produce detailed, long-lasting designs without physically touching the tile surface.
Laser engraving ceramic tiles uses a focused laser beam to etch patterns, text, images, or logos onto the surface. Because the process is digitally controlled, it is ideal for personalized gifts, decorative art, custom signage, photo engraving, and creative home decor.
Laser engraving ceramic tiles usually works in two main ways: removing the surface glaze layer or creating contrast on the ceramic surface. The best method depends on the tile surface, coating, laser type, and desired visual effect.
In this method, the laser directly etches the ceramic tile by removing part of the outer glaze layer. This creates a textured effect with a natural matte finish. The result is a tactile design that reveals or changes the surface layer of the ceramic material.
This method is suitable for rustic, artistic, or decorative styles where a physical etched texture is desired. However, because ceramic is hard and brittle, laser power, speed, focus, and airflow should be tested carefully to avoid cracking, chipping, or excessive surface damage.
Another common method is to create color or tone contrast on the ceramic surface. Instead of deeply removing material, the laser modifies the surface, coating, or glaze to create a visible mark. This method is often used for photos, text, logos, decorative patterns, and high-contrast designs.
For coated or painted ceramic surfaces, the laser may remove the coating to reveal the base color underneath. For uncoated ceramic, a CO2 laser is usually more practical for creating a frosted or etched effect.
Laser cutting ceramic tiles is much more difficult than laser engraving them. Ceramic is hard, brittle, and highly resistant to heat, which makes it challenging for standard laser machines to cut through effectively.
Unlike wood or acrylic, ceramic does not easily vaporize or burn away under a laser beam. Instead, intense localized heat can cause cracking, chipping, uneven edges, or thermal stress damage.
Some high-powered industrial laser systems with specialized setups may cut certain ceramic materials, but the process is usually slow and requires careful calibration. Glazed ceramic tiles are especially difficult because their surface and base material may react differently to heat.
In most practical cases, laser machines are better suited for ceramic engraving rather than ceramic cutting. If you need to cut ceramic tiles, water jet cutting or mechanical tile-cutting tools are usually more reliable.
Laser engraving opens many creative possibilities for ceramic projects. From detailed photo tiles to custom mugs and memorial plaques, ceramic engraving can turn ordinary objects into personalized and meaningful products.
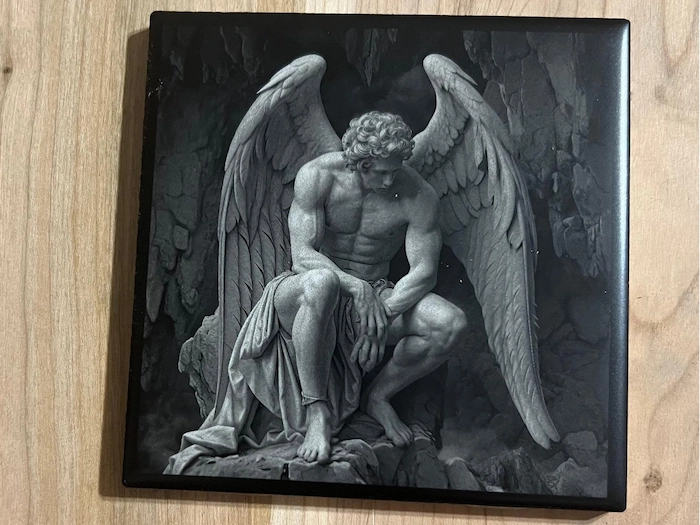
Laser machines can create detailed photo engravings on ceramic surfaces, especially when the image is prepared with proper contrast and the tile surface responds well to the laser. This makes ceramic photo engraving suitable for wall art, commemorative gifts, family portraits, and decorative displays.
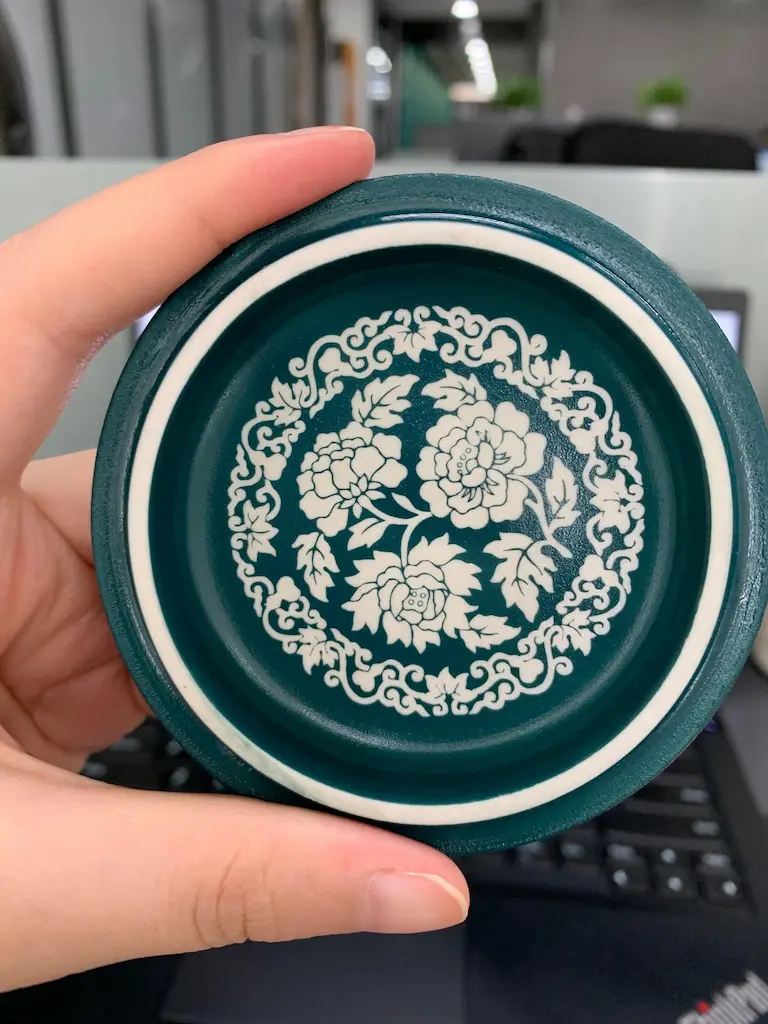
Custom ceramic mugs are popular for personalized gifts, branded merchandise, cafes, events, and home items. Laser engraving can add names, logos, patterns, illustrations, or short messages to ceramic mugs and similar curved products.
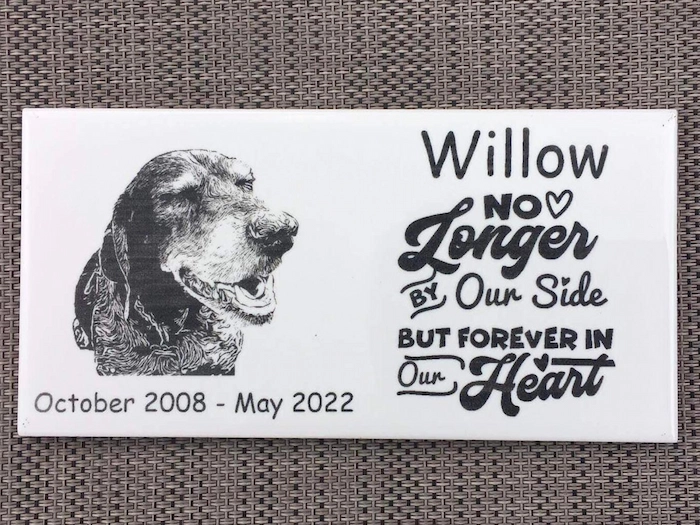
Ceramic tiles and plates can also be engraved into memorial plaques, commemorative gifts, decorative wall pieces, and keepsakes. The hard ceramic surface helps preserve the design for long-term display.
For more creative project examples, visit the Thunder Laser sample library.
Engraving ceramics requires a laser that can handle hard, brittle surfaces with controlled energy delivery. The two most common options are CO2 lasers and fiber lasers, but they are suitable for different ceramic applications.
CO2 lasers are commonly used for engraving ceramics because they work well with many non-metal materials. For uncoated ceramic tiles, mugs, and plates, a CO2 laser can create frosted, etched, or high-contrast surface effects.
CO2 lasers are especially useful for photo engraving, decorative patterns, custom text, and detailed ceramic designs. If your main work includes ceramics, wood, acrylic, leather, paper, and other non-metal materials, a CO2 laser is usually the more versatile choice.
Fiber lasers are less commonly used for bare ceramics, but they can work well on coated, painted, or treated ceramic surfaces. In these cases, the laser may ablate the coating to reveal the base layer underneath, creating crisp and precise marks.
If your work also involves metal marking, stainless steel, aluminum, tools, jewelry, or industrial tags, a fiber laser machine may be useful. For ceramic-only or non-metal-focused work, however, a CO2 laser is usually more practical.
The best ceramic engraving machine depends on your material type, workpiece size, production volume, and whether you also process other materials.
If you focus on non-metal materials and need a compact machine for detailed ceramic engraving, the Bolt Series is a practical CO2 laser option. It is suitable for small studios, personalized gifts, ceramic mugs, and detailed tile engraving.
If you need a larger working area for bigger ceramic tiles or batch production, the Nova Plus Series can be a better choice for workshops and growing businesses that process ceramics along with wood, acrylic, leather, and other non-metal materials.
If your work includes metal marking or coated ceramic surfaces, the Aurora Series can support fiber or UV laser marking applications, depending on the configuration and material requirements.
Accurate ceramic engraving requires careful parameter control. The right settings depend on the ceramic surface, coating, design detail, machine power, lens, focus, and desired contrast.
The following settings are based on a Thunder Bolt 30W RF CO2 laser and should be used as a starting point only. Always test on a sample tile before processing the final piece.
| Thickness | Process | Speed | Min Power | Max Power | Blow Type | DPI |
|---|---|---|---|---|---|---|
| / | Engraving | 1000 mm/s | 60% | 60% | Low | 350 |
Reference laser engraving settings for ceramic tile using a Thunder Bolt 30W RF CO2 laser.
For more tested material parameters, start with the CO2 laser settings library, then fine-tune laser power, processing speed, focus, air assist, and DPI based on your actual ceramic material.
Clean the surface: Use alcohol to clean the ceramic tile surface and allow it to dry completely. Wear gloves when handling the tile to avoid leaving oil, fingerprints, or grease marks.
Secure the ceramic tile: To prevent movement during engraving, place the ceramic tile flat and secure it firmly. Use clamps, fixtures, or other suitable holding methods to keep the tile stable throughout the job.
Check the focus: Ceramic surfaces are hard and unforgiving, so stable focus is important. Make sure the tile surface is level and the laser focus is set correctly before engraving.
Ceramic is a hard and brittle material that can crack or sustain surface damage from heat shock during engraving. To improve safety and engraving quality, follow these precautions:
Ceramic tiles should be stored in a dry, well-ventilated area to prevent moisture-related issues and surface contamination. Avoid stacking tiles directly against each other because this can increase the risk of chipping or scratching.
Use spacers, protective sheets, or upright storage racks when possible. Keep ceramic tiles in a stable location away from heavy or sharp objects to reduce the risk of breakage. For better processing consistency, clean and inspect each tile before engraving.
For more material preparation guidance, see how to store and pre-process materials for better laser cut results.
Laser engraving ceramic tile is a practical way to create durable, detailed, and personalized designs on ceramic surfaces. While ceramic tiles are difficult to laser cut, they can be engraved effectively when the right laser type, settings, focus, airflow, and preparation steps are used.
For most uncoated ceramic engraving projects, a CO2 laser is a strong choice. For coated ceramic surfaces or users who also need metal marking, fiber or UV laser systems may be worth considering. Always test your material first, adjust the settings carefully, and use proper ventilation and safety protection.
Need Help with Ceramic Laser Engraving?
Contact Thunder Laser to discuss your ceramic materials, engraving goals, machine options, parameter settings, and production workflow.
Contact UsTalk To Our Experts Now!
Please leave your contact information so that we can serve you better.
FAQS
NEED HELP FINDING THE RIGHT SOLUTION?
Talk to our team for machine recommendations, application advice, and support based on your needs.

 Stable & Consistent MachinesUnlimited ApplicationRobust After-sales SupportFactory Direct Supply