A lantern is a cage-shaped lighting fixture. Its outer layer is often made of fine bamboo strips or iron wires as the framework, covered with transparent materials like paper or gauze, and a candle is placed inside for illumination, decoration, or appreciation. The lantern integrates techniques such as painting, paper cutting, paper folding, and stitching, which is closely connected to Chinese people’s daily lives. You can find lanterns everywhere, from temples to living rooms. Mid-Autumn lanterns not only create a festive atmosphere for the holiday but also inspire people to pray for good fortune, embodying their beautiful aspirations for reunion and peace.
In this session, we will teach you how to design a Mid-Autumn lantern. Through this course, you can create your own Mid-Autumn lantern and give it to your friends and family during the reunion of the Mid-Autumn Festival! Laser Little Expert brings you the creation “DIY Mid-Autumn Lantern”!
II. Work Analysis
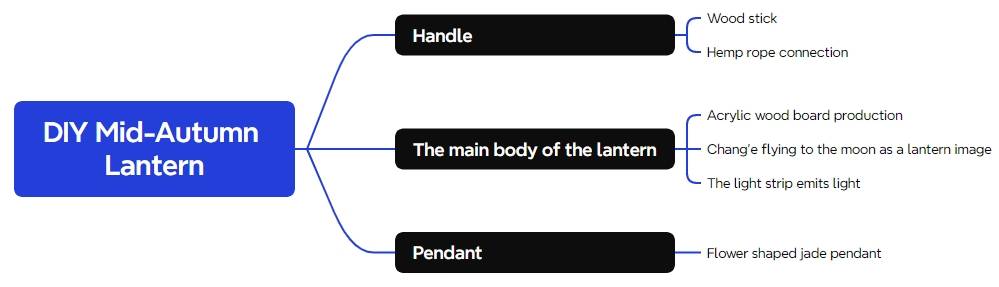
The structure of the Mid-Autumn lantern consists of a handle, the main body of the lantern, and a pendant. Here is a breakdown of the materials and their quantities:
III. Materials List
Number
Name
Quantity
1
3mm Basswood Board
1
2
Hemp Rope
1
3
Wooden Stick
1
4
Pendant
1
5
LED Light Strip
1
6
Paint
1
7
Frosted Plastic Sheets
4
IV. Laser Modeling
1. Lantern Design
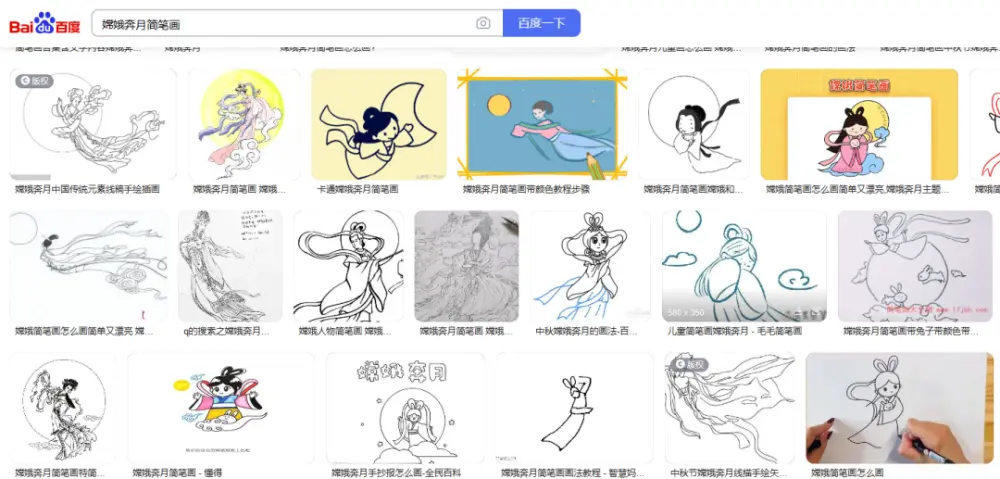
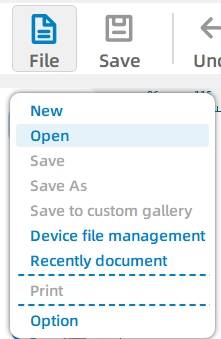
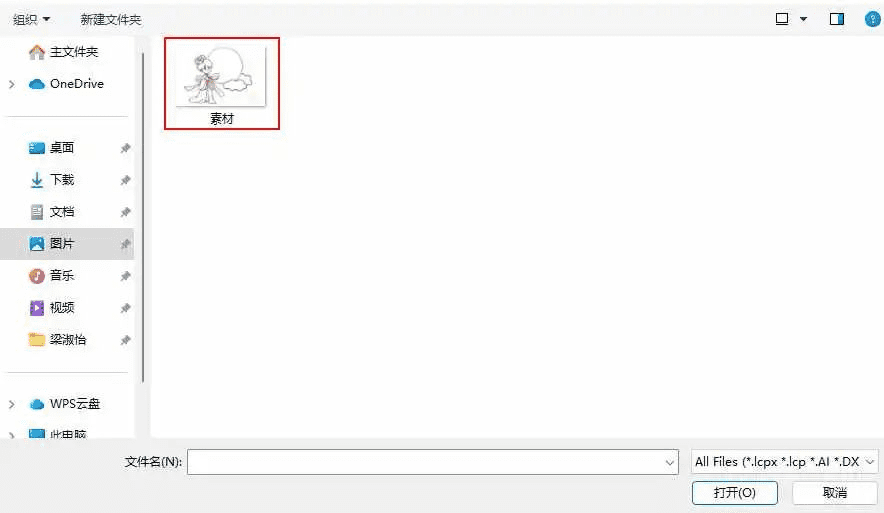
(1) Enter the keyword “Simplified Drawing of Chang’e Flying to the Moon” in Baidu Images, select and save your favorite picture. Click on “File” in the toolbar above, then click “Open” and double-click to open the saved simplified drawing of Chang’e Flying to the Moon. As shown in the following figure:
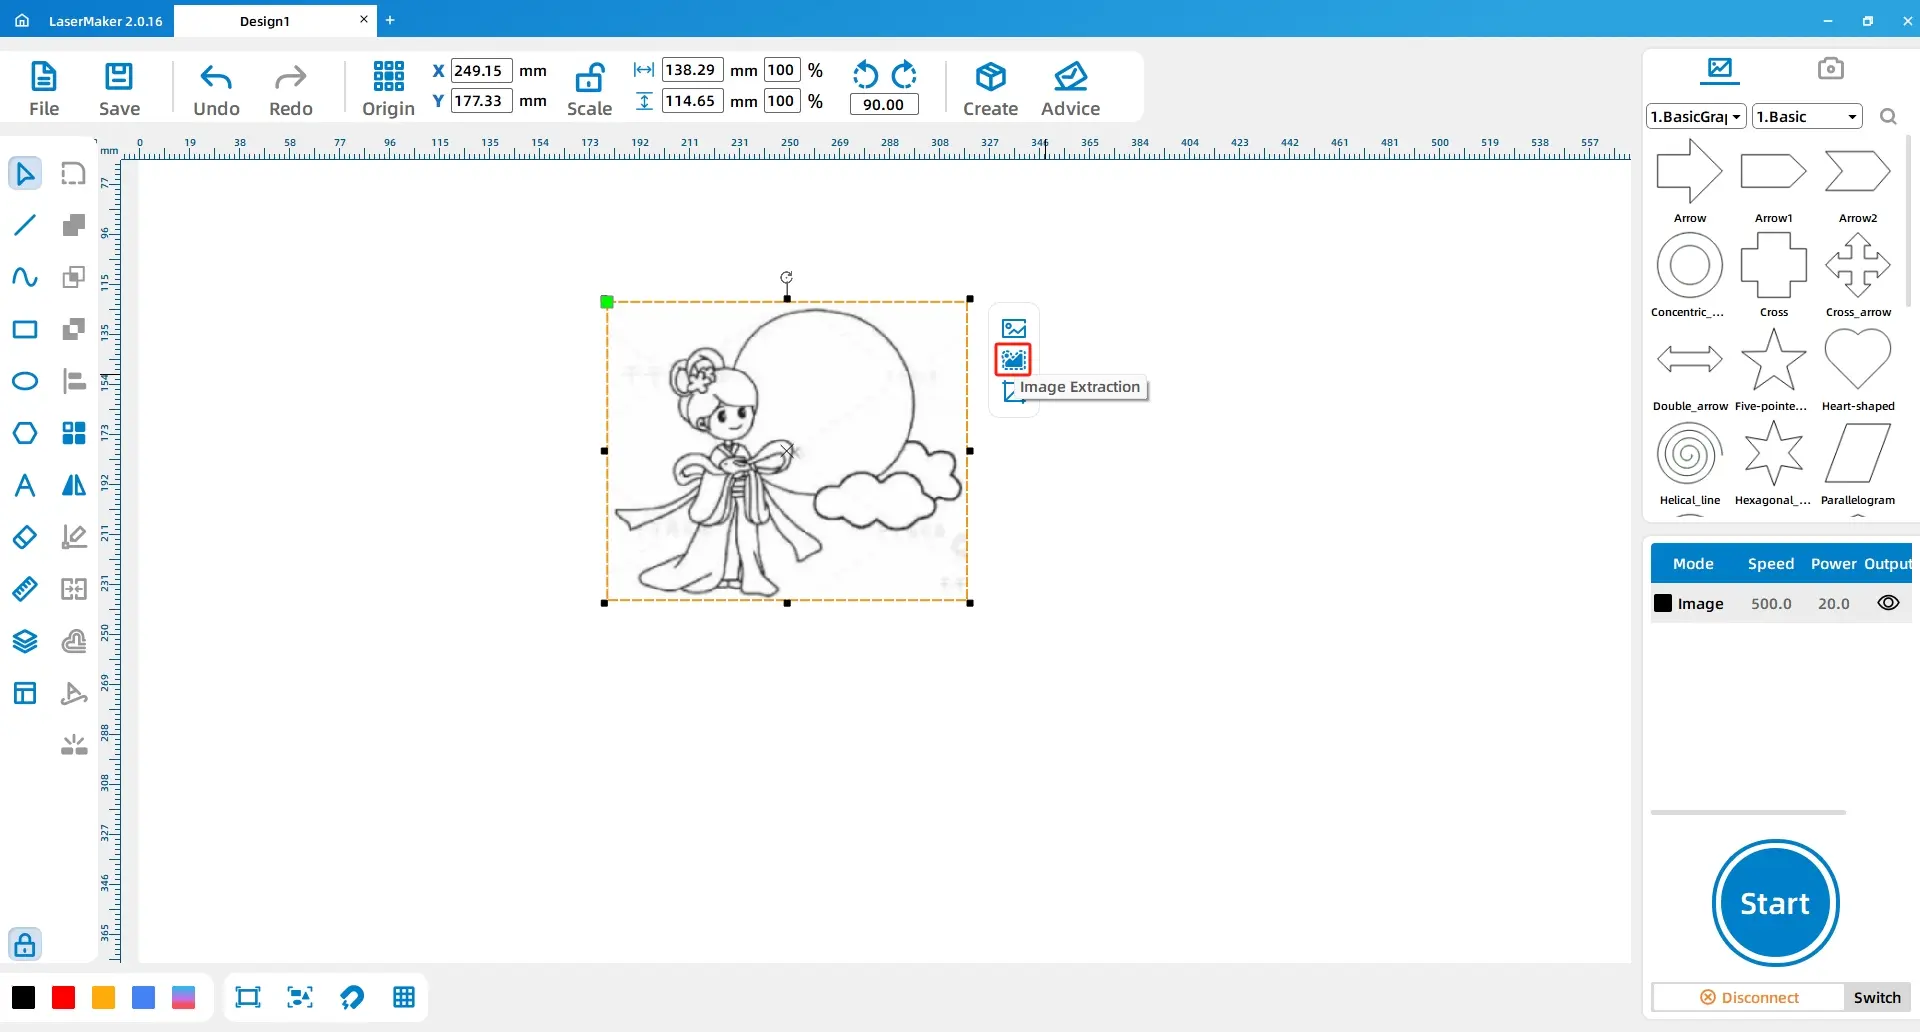
(2) Click on the image of Chang’e Flying to the Moon with the left mouse button, then click on “Outline Tracing” and adjust the parameters to obtain a line drawing of Chang’e Flying to the Moon. As shown in the following figure:
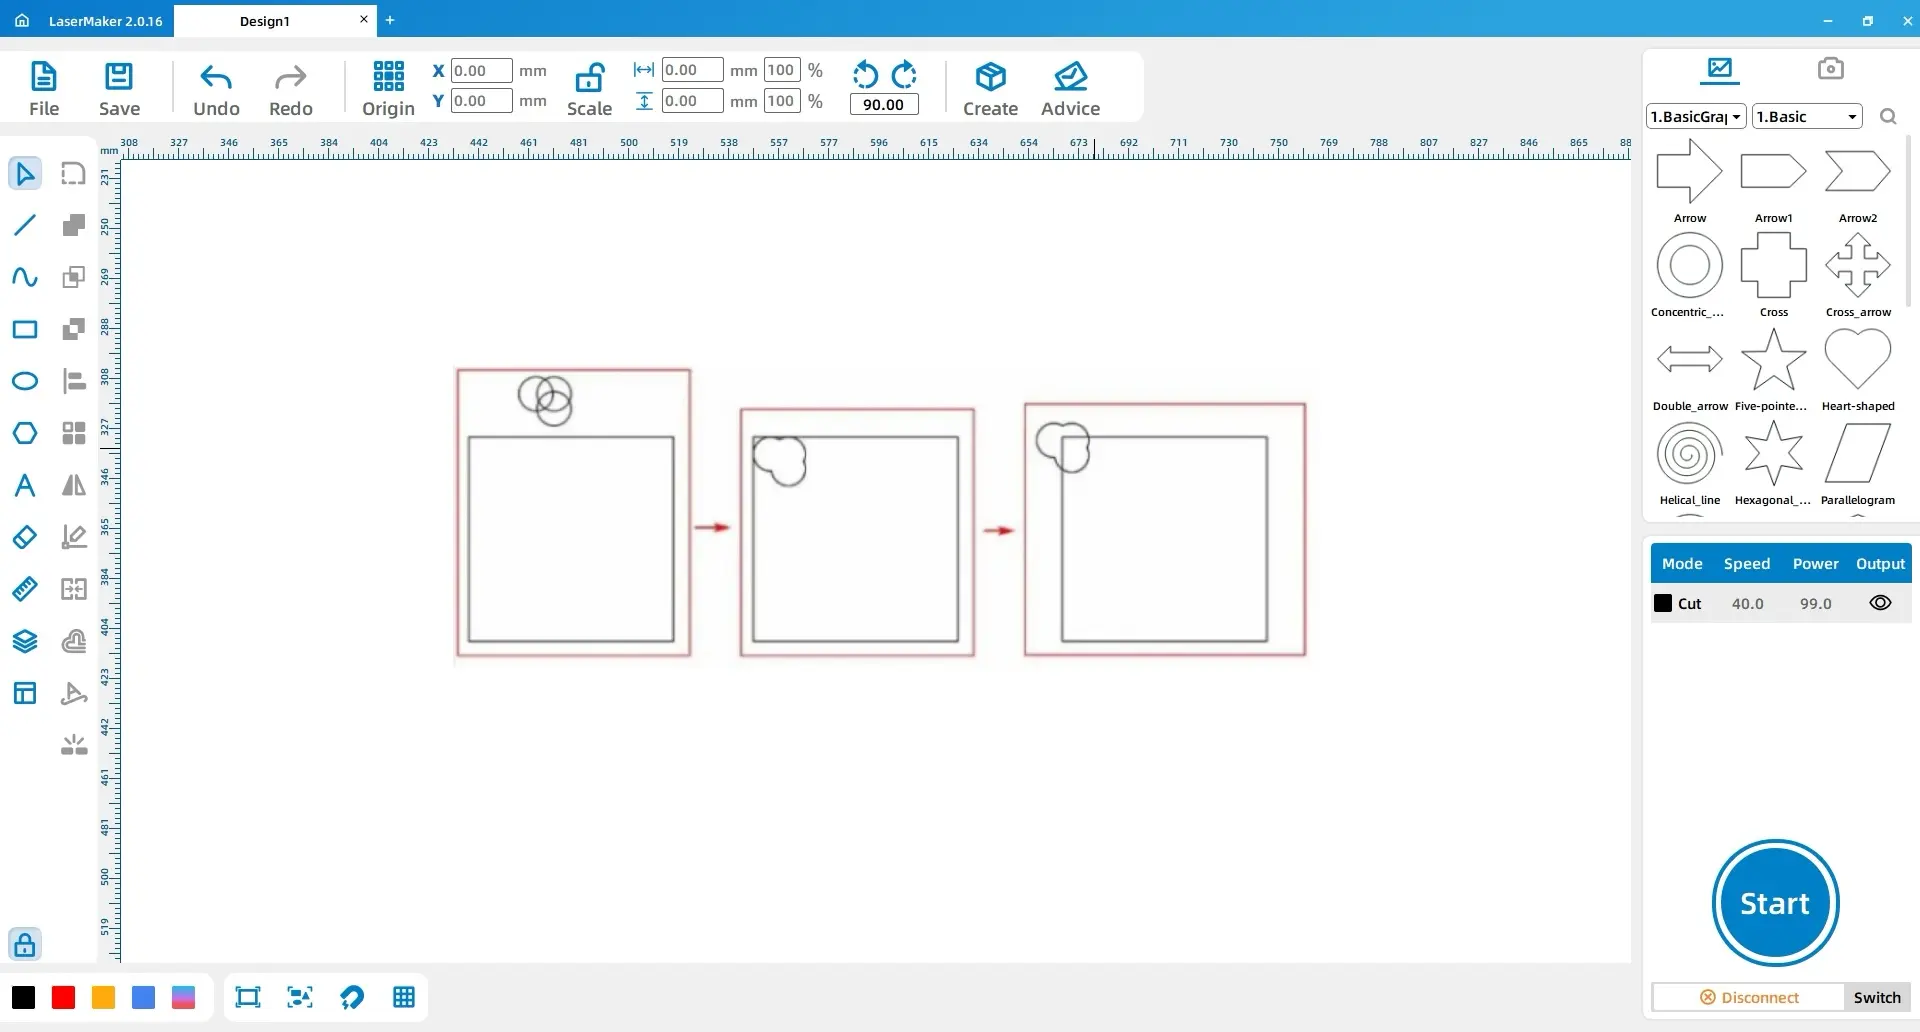
(3) Using the left mouse button, click on the “Rectangle” tool in the left toolbar to draw a rectangle with a length and width of “120, 120”.
Then, click on the “Ellipse” tool in the left toolbar to draw a perfect circle with a length and width of “20, 20”.
Copy and paste the perfect circle twice, arrange the three circles in a suitable position, and union them to create a cloud-shaped pattern.
Move the cloud pattern to align with the top left corner of the rectangle, then adjust the x-coordinate to -15 and the y-coordinate to -8, as shown in the following figure:
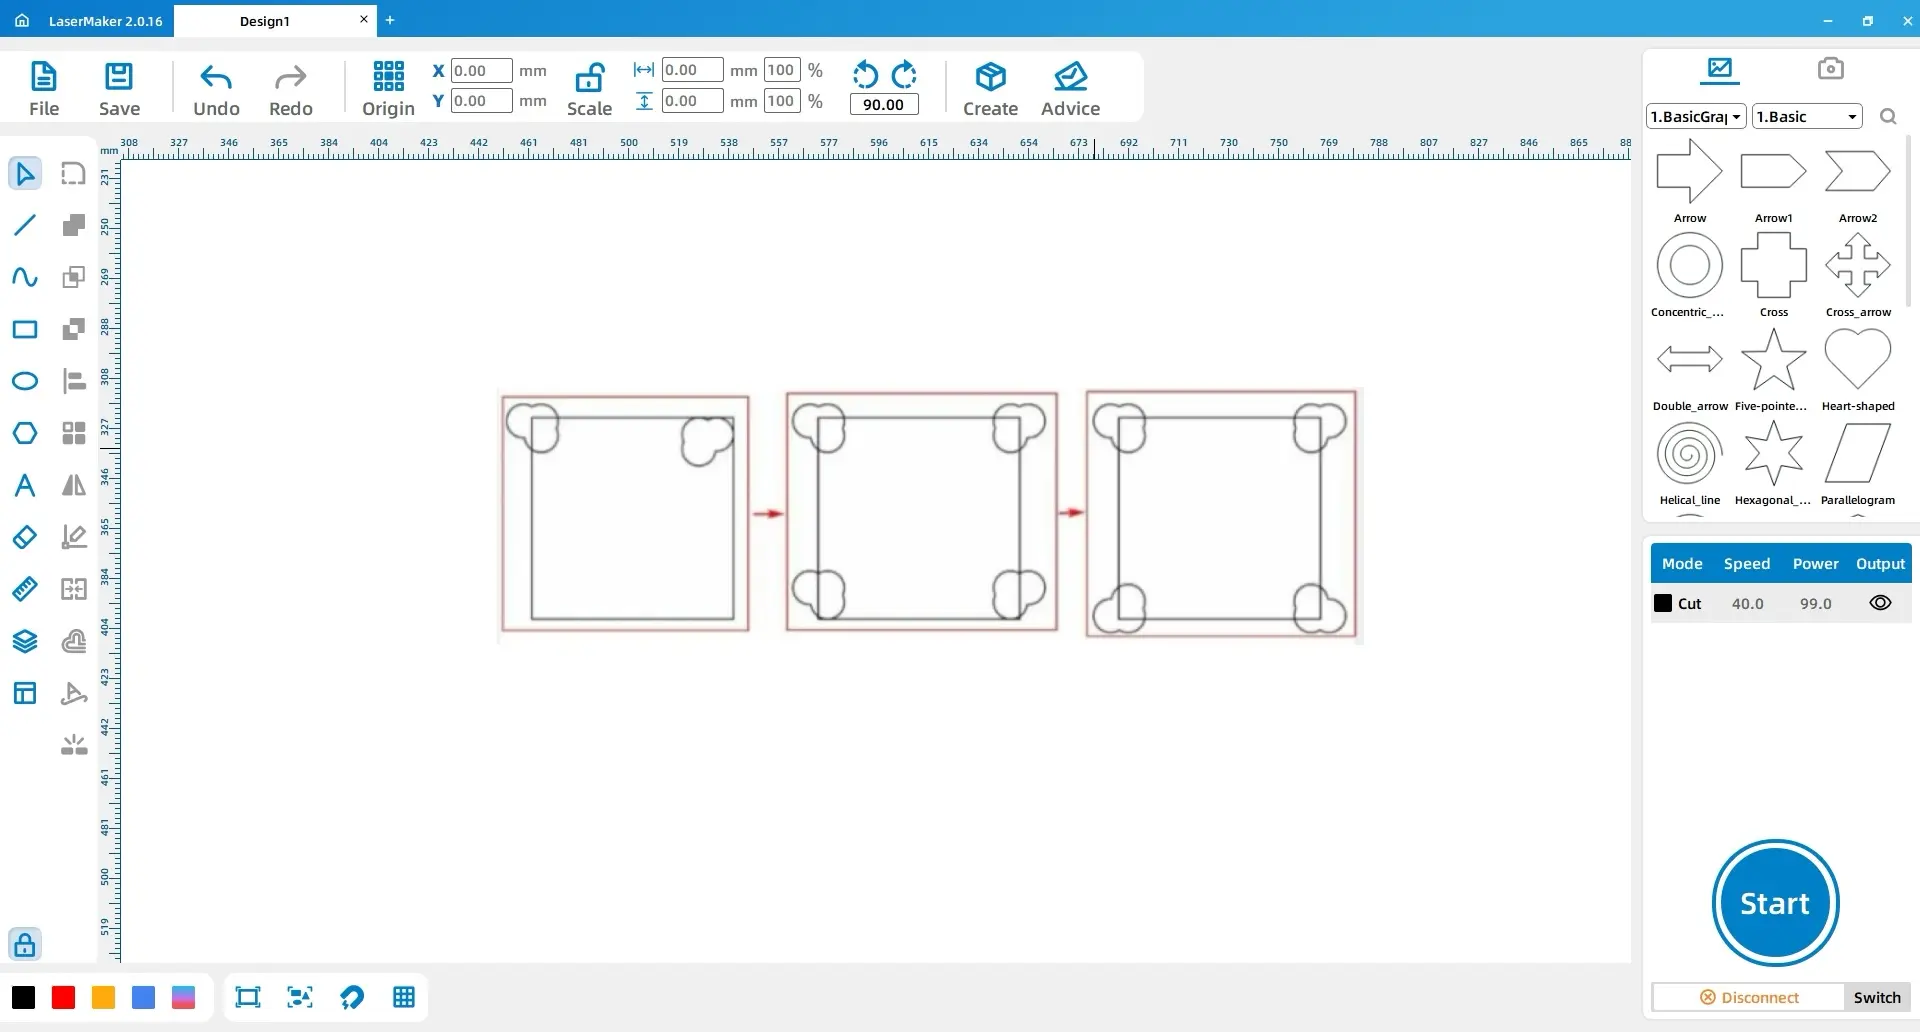
(4) Select the cloud pattern with the left mouse button, copy and paste it once, and move it to the top right corner of the rectangle. Perform a horizontal mirror flip on it. Finally, adjust the x-coordinate of the cloud pattern to -15 and the y-coordinate to +8.
Select the two cloud patterns above the rectangle, copy and paste them once, move them directly below the original cloud pattern, and align them with the bottom of the rectangle. Perform a vertical mirror flip on each of the final two cloud patterns. Finally, adjust the y-coordinate of the cloud pattern in the lower left corner to +8, and the y-coordinate of the cloud pattern in the lower right corner to +8, as shown in the following figure:
(5) Using the left mouse button, click on the “Ellipse” tool in the left toolbar to draw a perfect circle with a length and width of “90, 90”.
Place the perfect circle in the middle of the rectangle, and then place the pattern of Chang’e Flying to the Moon in the center of the circle, as shown in the following figure:
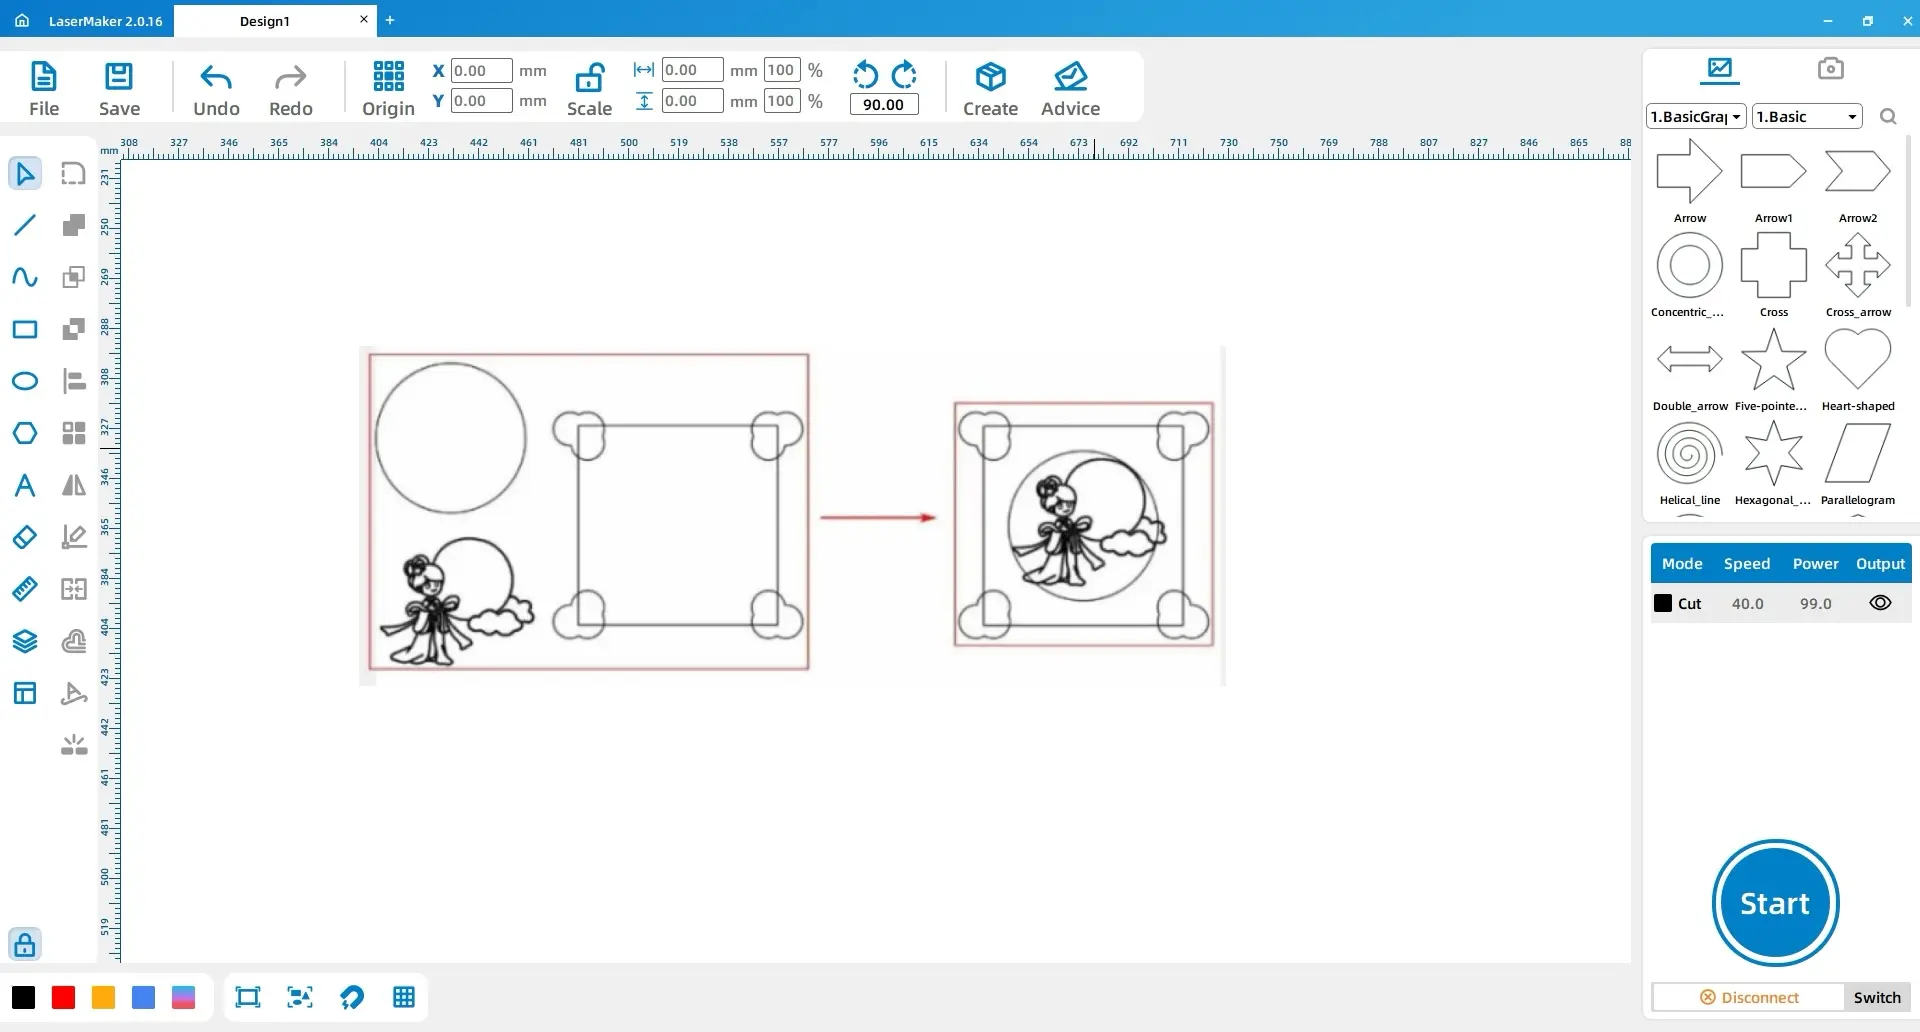
(6) Using the left mouse button, select the “Eraser” tool in the left toolbar and utilize its “Break Line Segment” function to break the intersection points between “Chang’e Flying to the Moon” and the “Perfect Circle” within the four small rectangles on the left side. Then, use the “Combine Curve” function to connect the outer perimeter of “Chang’e Flying to the Moon” with the “Perfect Circle”.
Select all the internal lines of “Chang’e Flying to the Moon” and, with the left mouse button, click on the layer panel at the bottom left to change the layer color to red, as shown in the following figure:
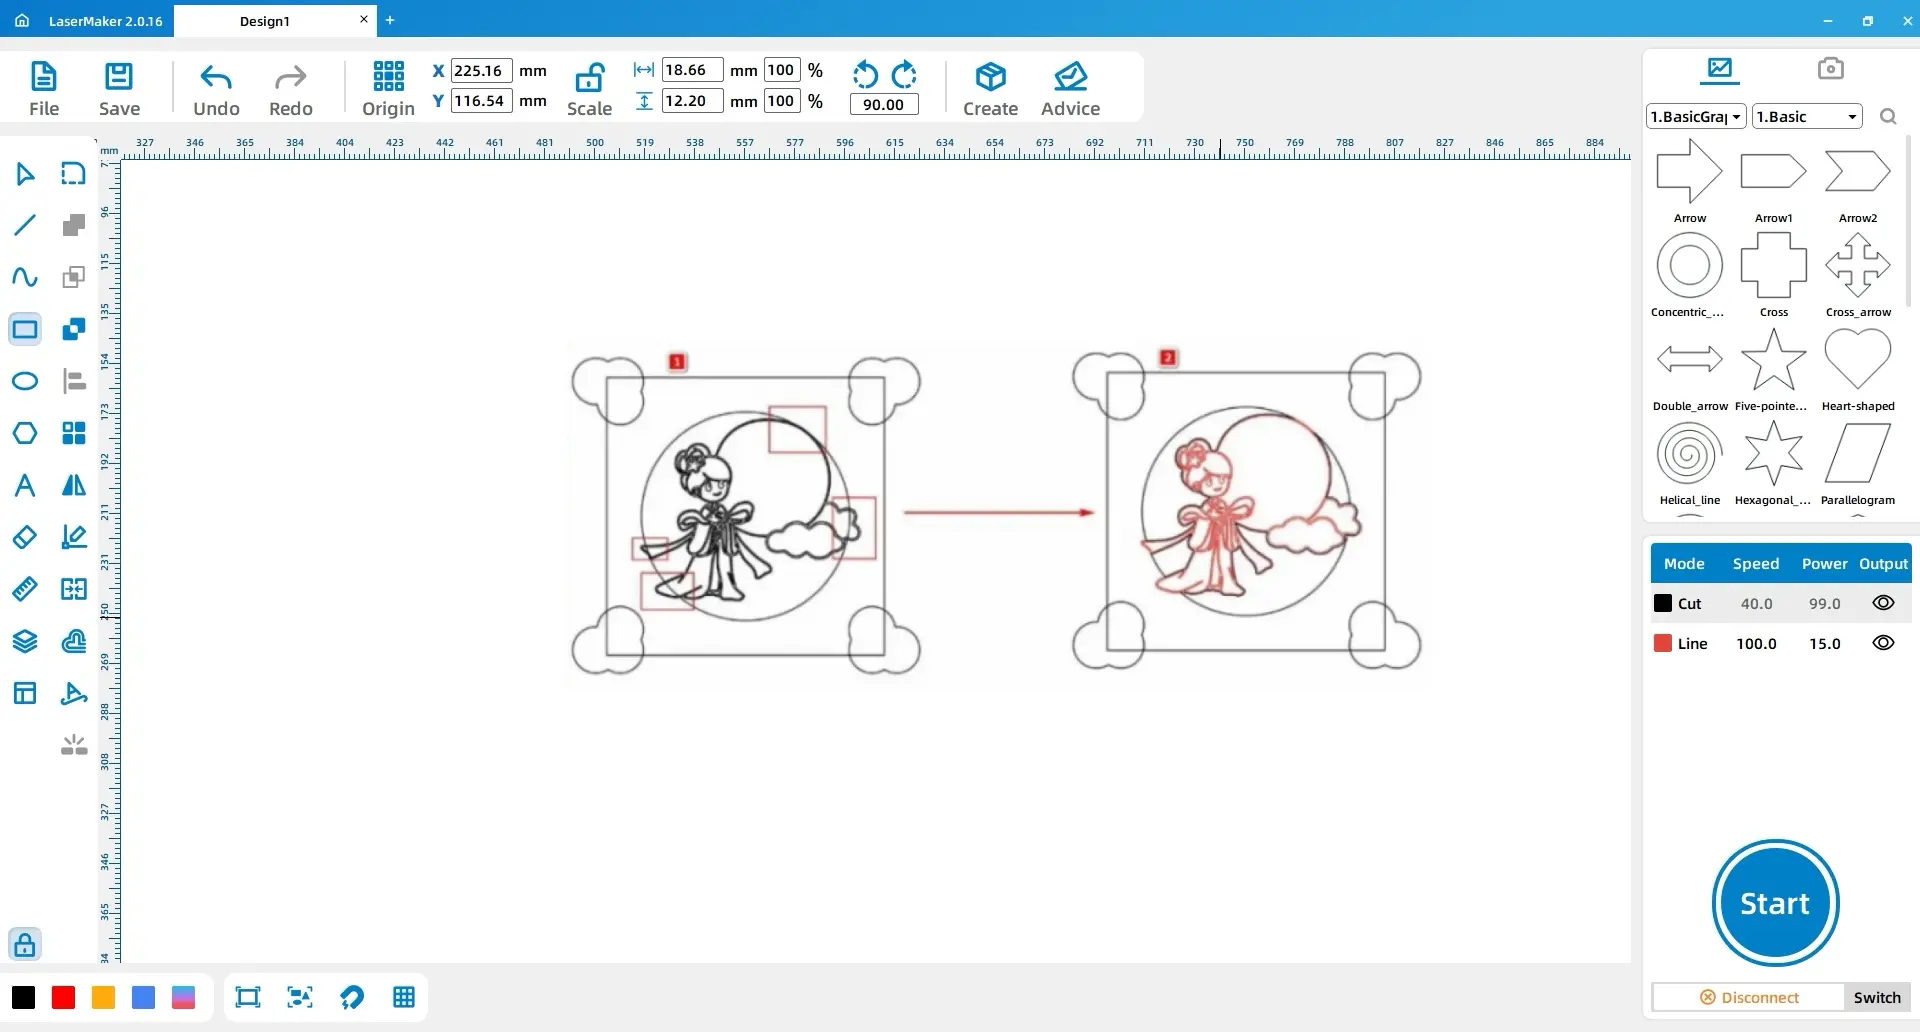
(7) Using the left mouse button, select the “Rectangle” tool in the left toolbar to draw rectangles 1 and 2, both with a width and height of “65, 5”. Place them respectively in the center and aligned to the upper and lower inner sides of the large rectangle.
Next, using the “Rectangle” tool again, draw rectangles 3 and 4, both with a width and height of “10, 3”. Align rectangle 3 to the center below rectangle 1 and rectangle 4 to the center above rectangle 2.
Perform a union operation on rectangles 1 and 3, and rectangles 2 and 4, respectively. Then, perform a difference set operation between the resulting union patterns and the large rectangle, as shown in the following figure:
(8) Using the left mouse button, select the “Rectangle” tool in the left toolbar to draw four small rectangles, each with a width and height of “3, 120”. Place two rectangles on each inner side of the large rectangle’s left and right edges, as shown in the following figure:
(9) Using the left mouse button, click on “2. Decorative Borders” in the “Gallery” in the top right corner. Select “Dragon Totem 1” and choose border 1 from the top left corner. Place it aligned to the top left corner of the large rectangle, and adjust the x-coordinate to +8 and the y-coordinate to +8.
Copy and paste border 1 to create border 2, and move it to the top right corner of the large rectangle. Adjust its x-coordinate to -8 and y-coordinate to +8.
Select borders 1 and 2, copy and paste them, and perform a “vertical mirror flip” on the resulting borders 3 and 4. Move them directly below borders 1 and 2 and align them with the inner lower side of the large rectangle. Finally, adjust the y-coordinate of borders 3 and 4 to -8, as shown in the following figure:
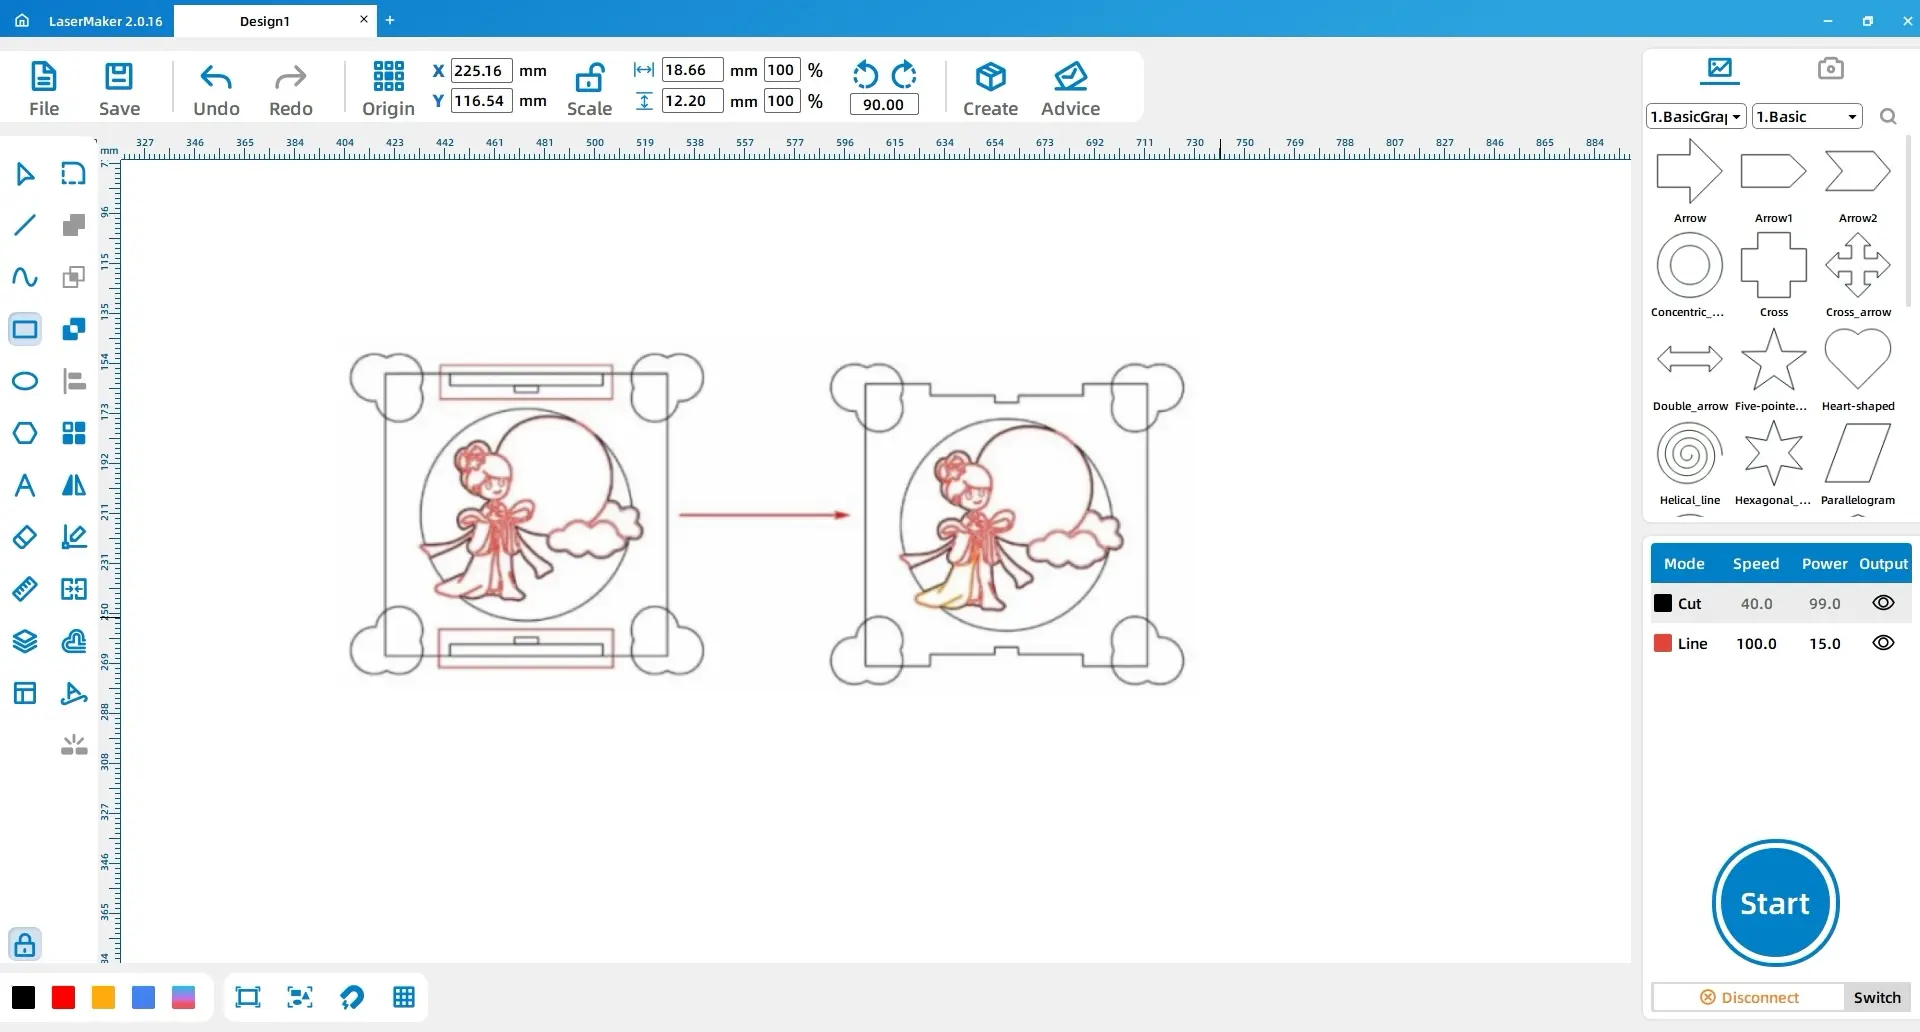
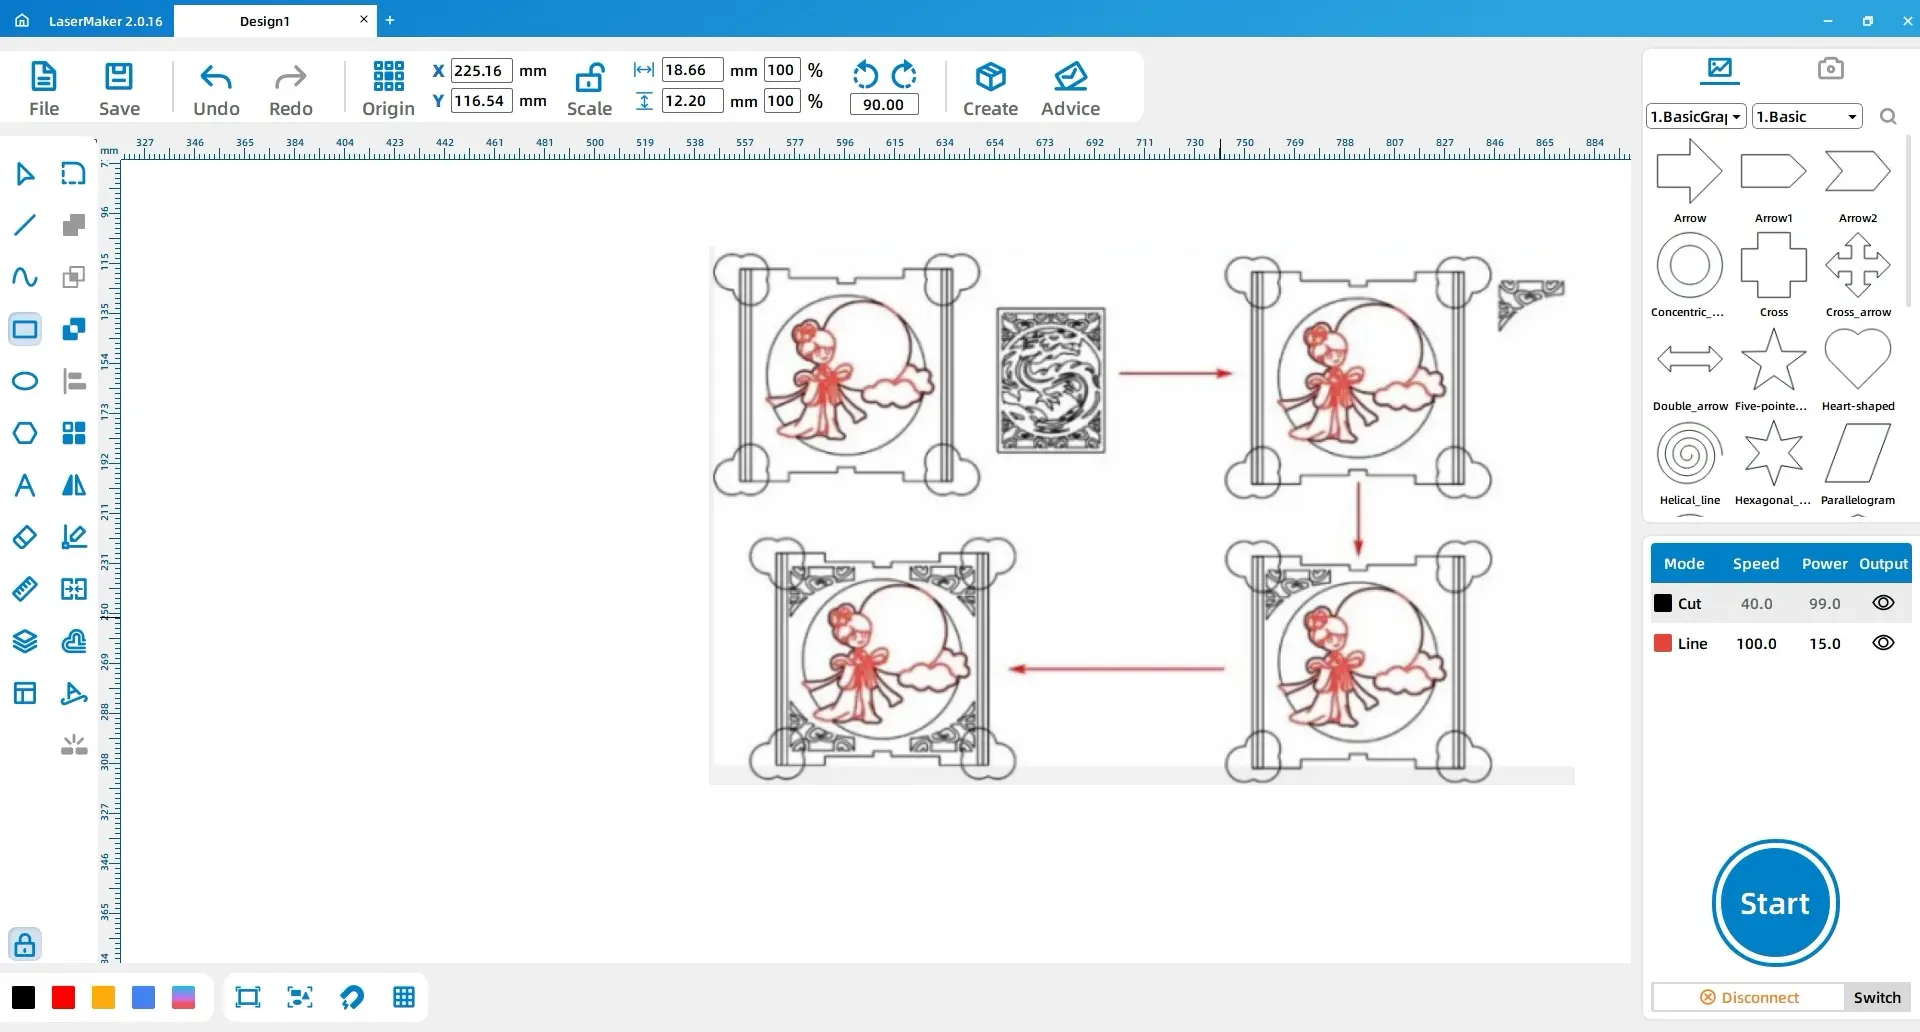
(10) Using the right mouse button, select the large rectangle and the cloud patterns in its four corners. Perform a union operation on them, and then delete the small rectangles on the rightmost and leftmost sides inside the large rectangle. Adjust the height of the remaining two small rectangles to 60.
With the right mouse button, select all the patterns and copy and paste them once. Move the two small rectangles within the left pattern to align with the top of the cloud patterns, and move the two small rectangles within the right pattern to align with the bottom of the cloud patterns, as shown in the following figure:
(11) Right-click to select the large rectangle and the cloud patterns at its four corners, perform a union operation, then delete the small rectangles on the rightmost and leftmost sides within the large rectangle. Adjust the height of the remaining two small rectangles to 60. Right-click to select all patterns, copy and paste them once. Move the two small rectangles in the left pattern to align with the top of the cloud patterns, and the two in the right pattern to align with the bottom, as shown in the figure below.
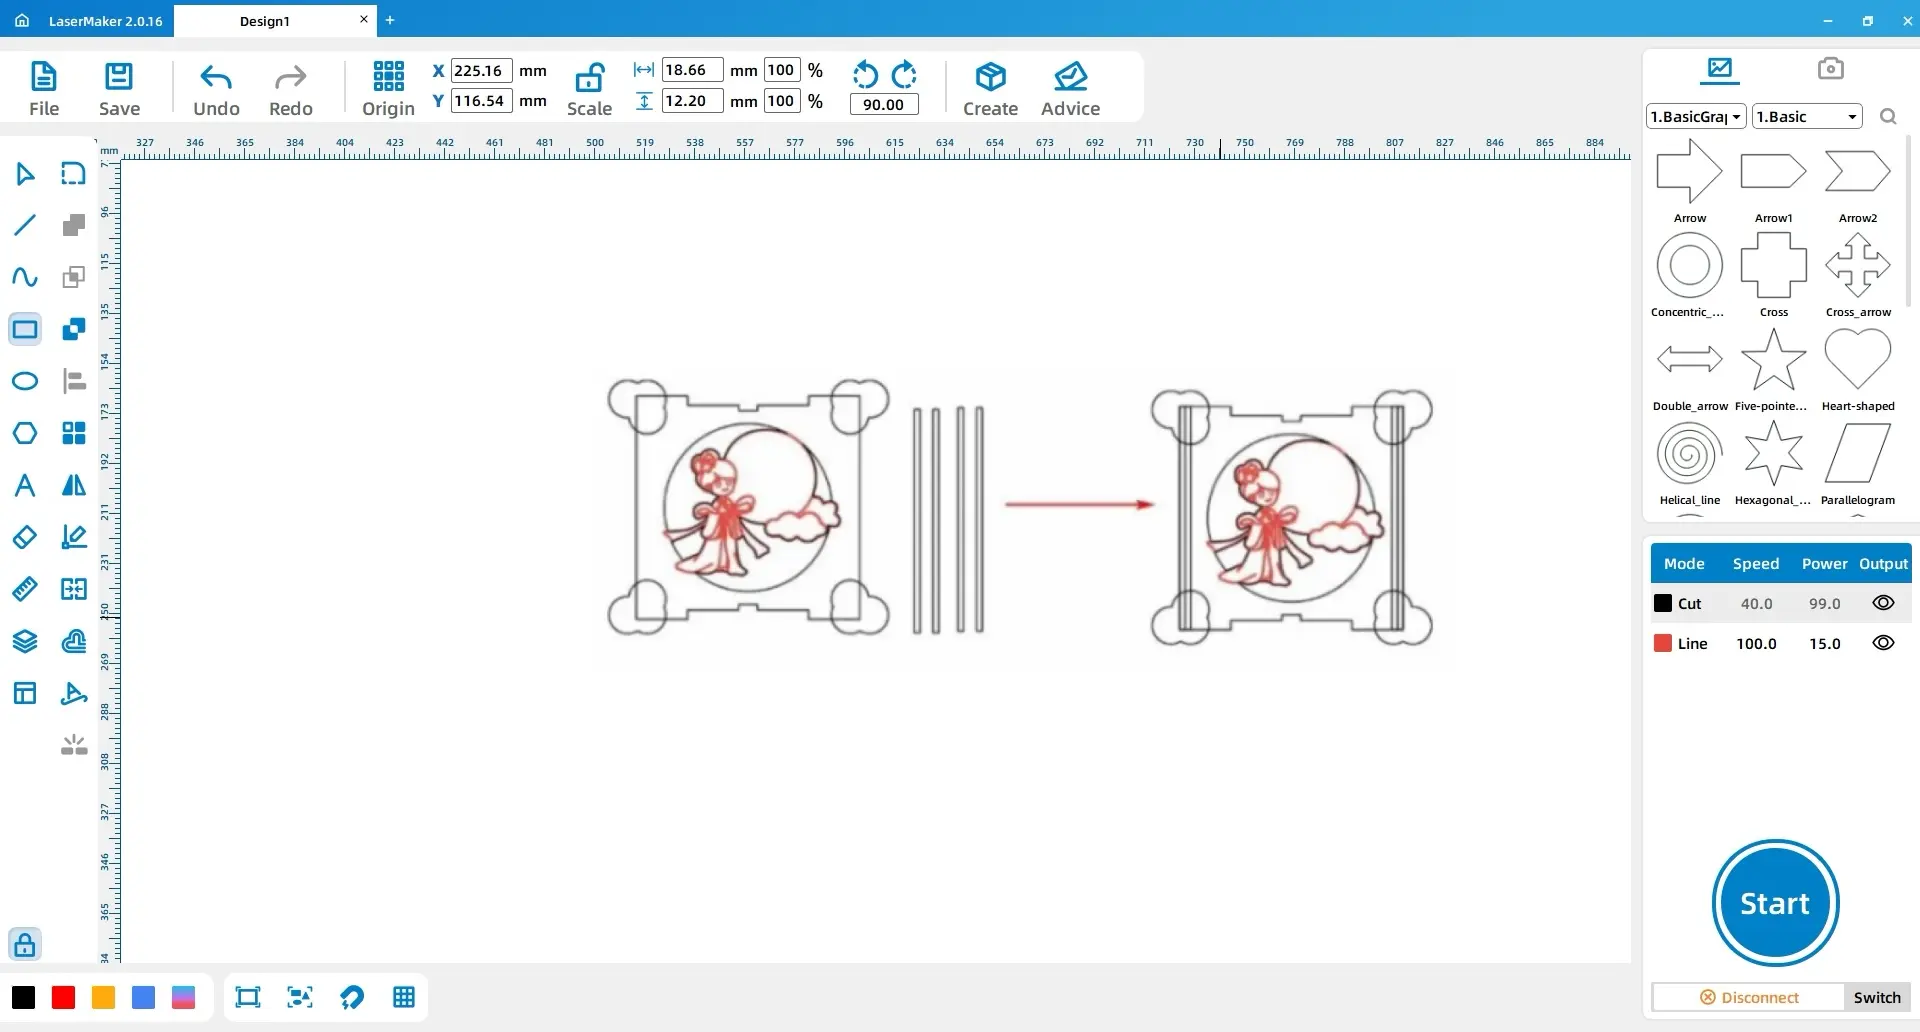
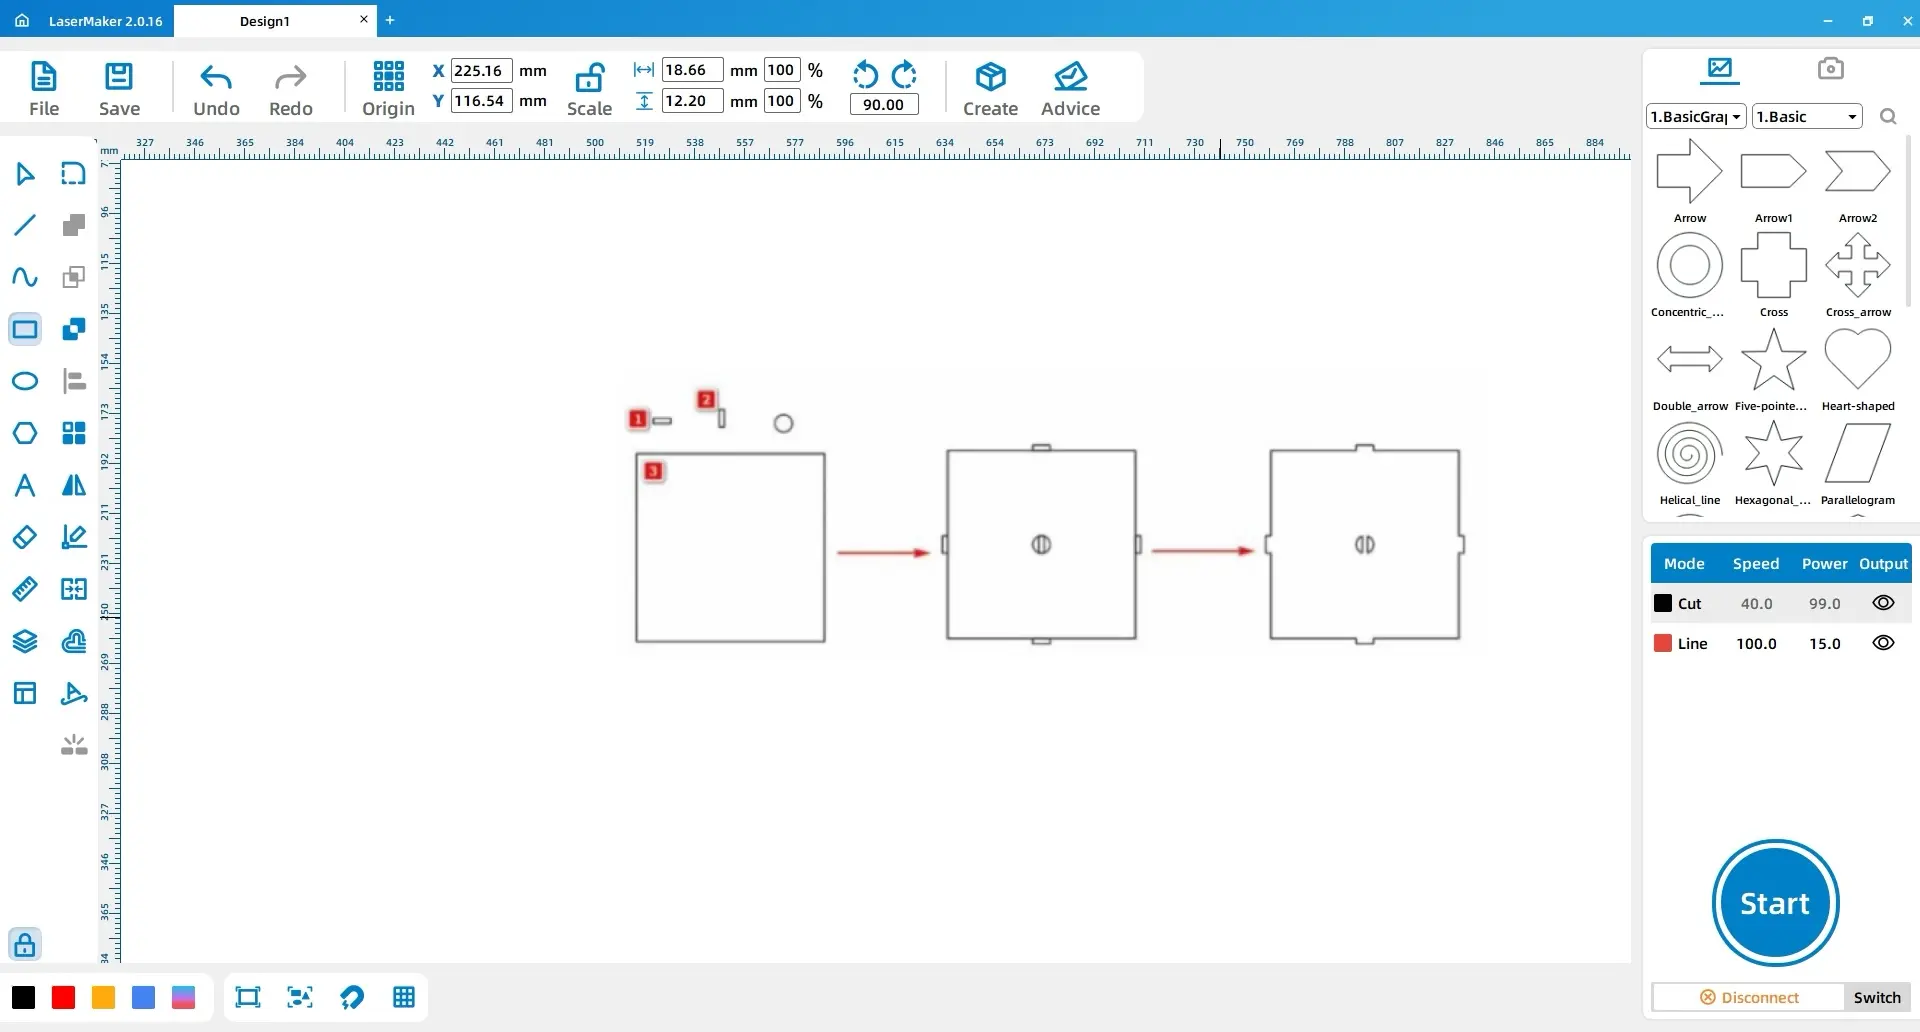
(12) Using the left mouse button, select the “Rectangle” tool in the left toolbar to draw three rectangles. Rectangle 1 should have a width and height of “10, 3”, Rectangle 2 should have a width and height of “3, 10”, and Rectangle 3 should have a width and height of “108, 108”.
Next, using the left mouse button, select the “Ellipse” tool to draw a perfect circle and set its width and height to “10, 10”.
Move Rectangle 1 to the center and align it directly above Rectangle 3. Then, copy and paste Rectangle 1, and move the resulting rectangle to the center and align it directly below Rectangle 3.
Move Rectangle 2 to the left side of Rectangle 3 and align it centrally. Then, copy and paste Rectangle 2, and move the resulting rectangle to the right side of Rectangle 3 and align it centrally.
Copy and paste Rectangle 2 again, and move the resulting rectangle to the center of Rectangle 3. Simultaneously, move the perfect circle to the center of Rectangle 3. Click on the rectangle in the center of Rectangle 3 with the left mouse button and perform a difference operation. Then, select Rectangle 3 and the four surrounding rectangles, and perform a union operation, as shown in the following figure.
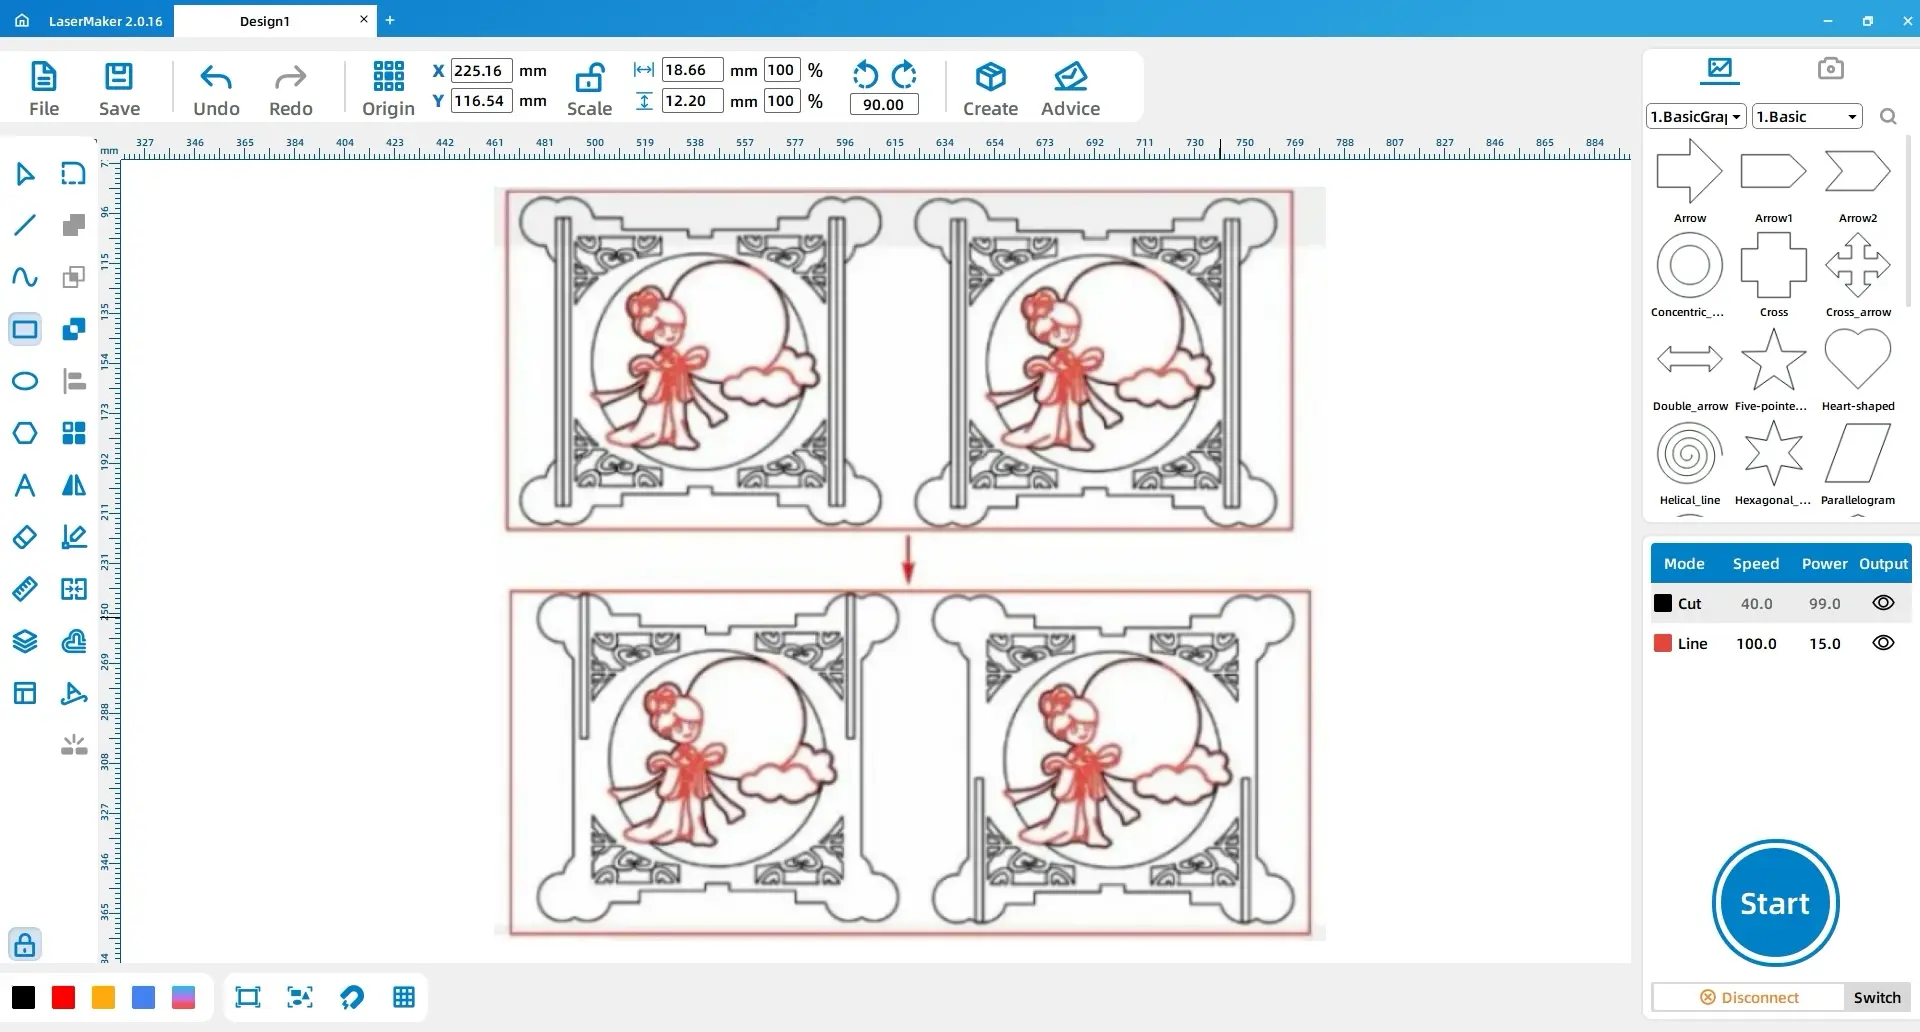
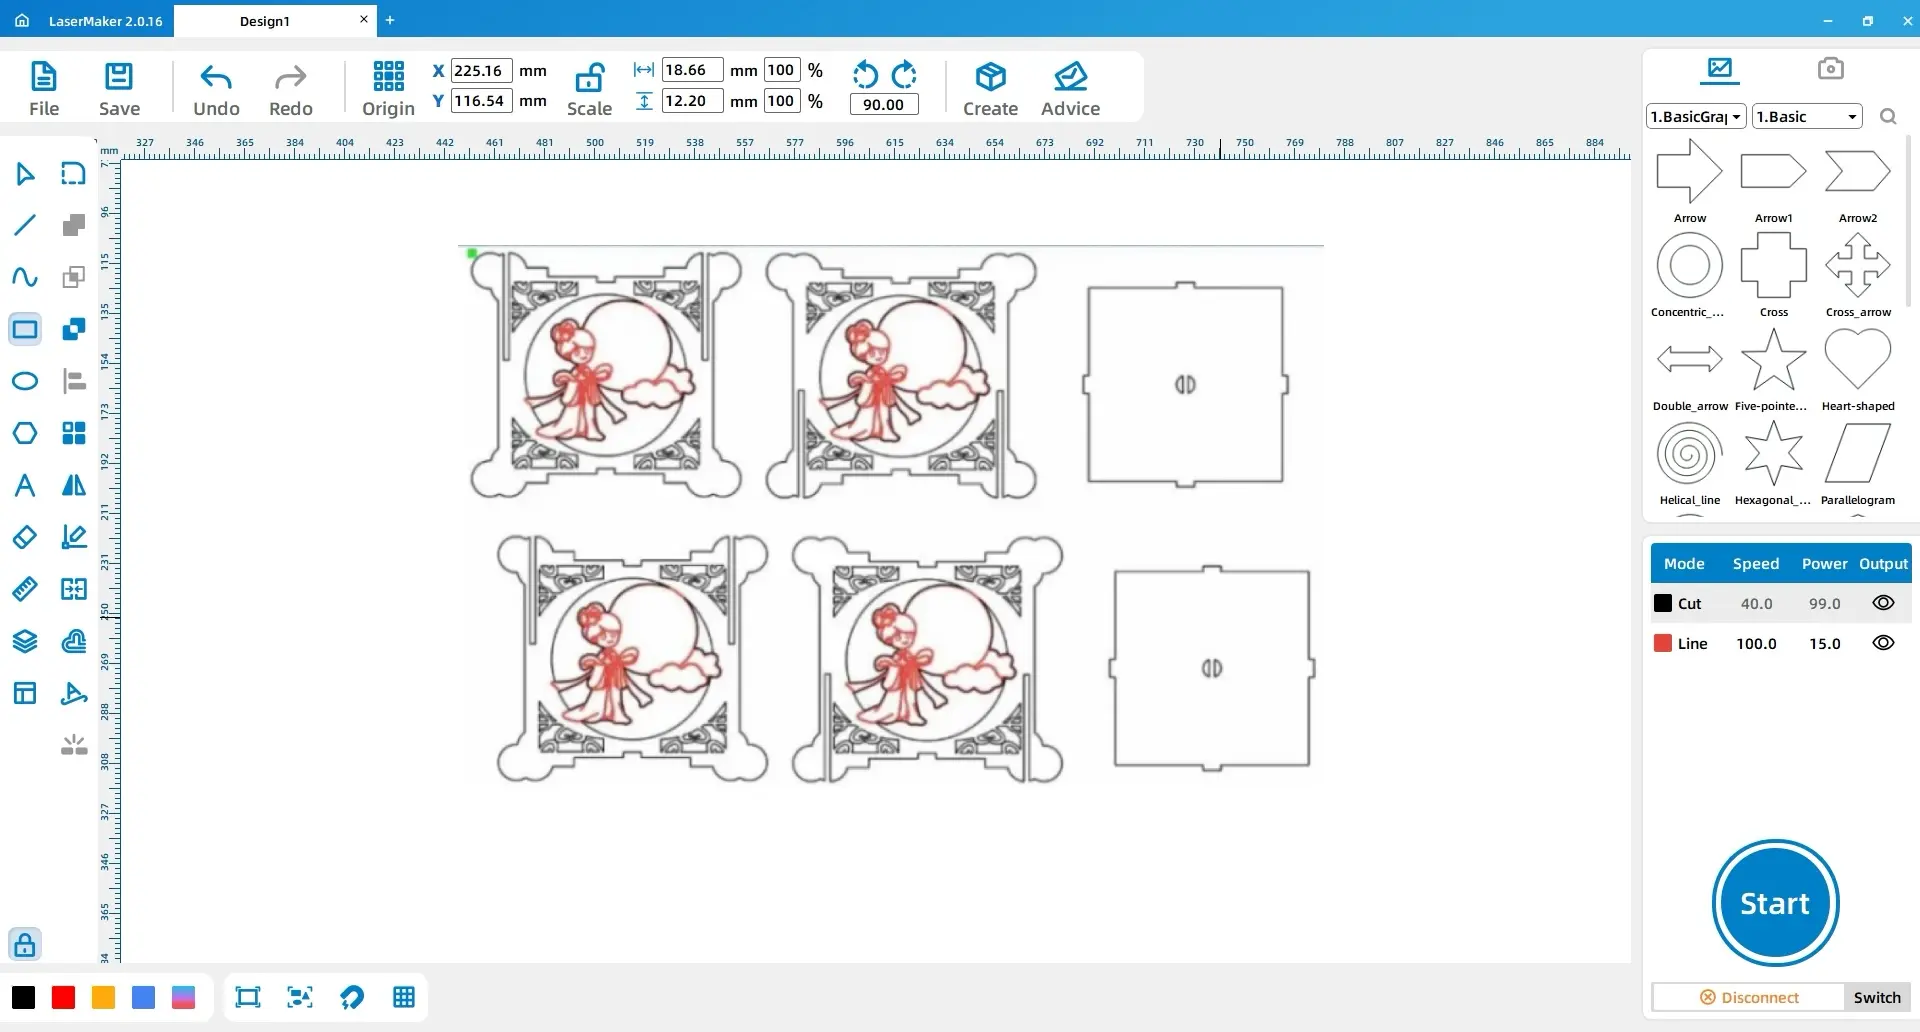
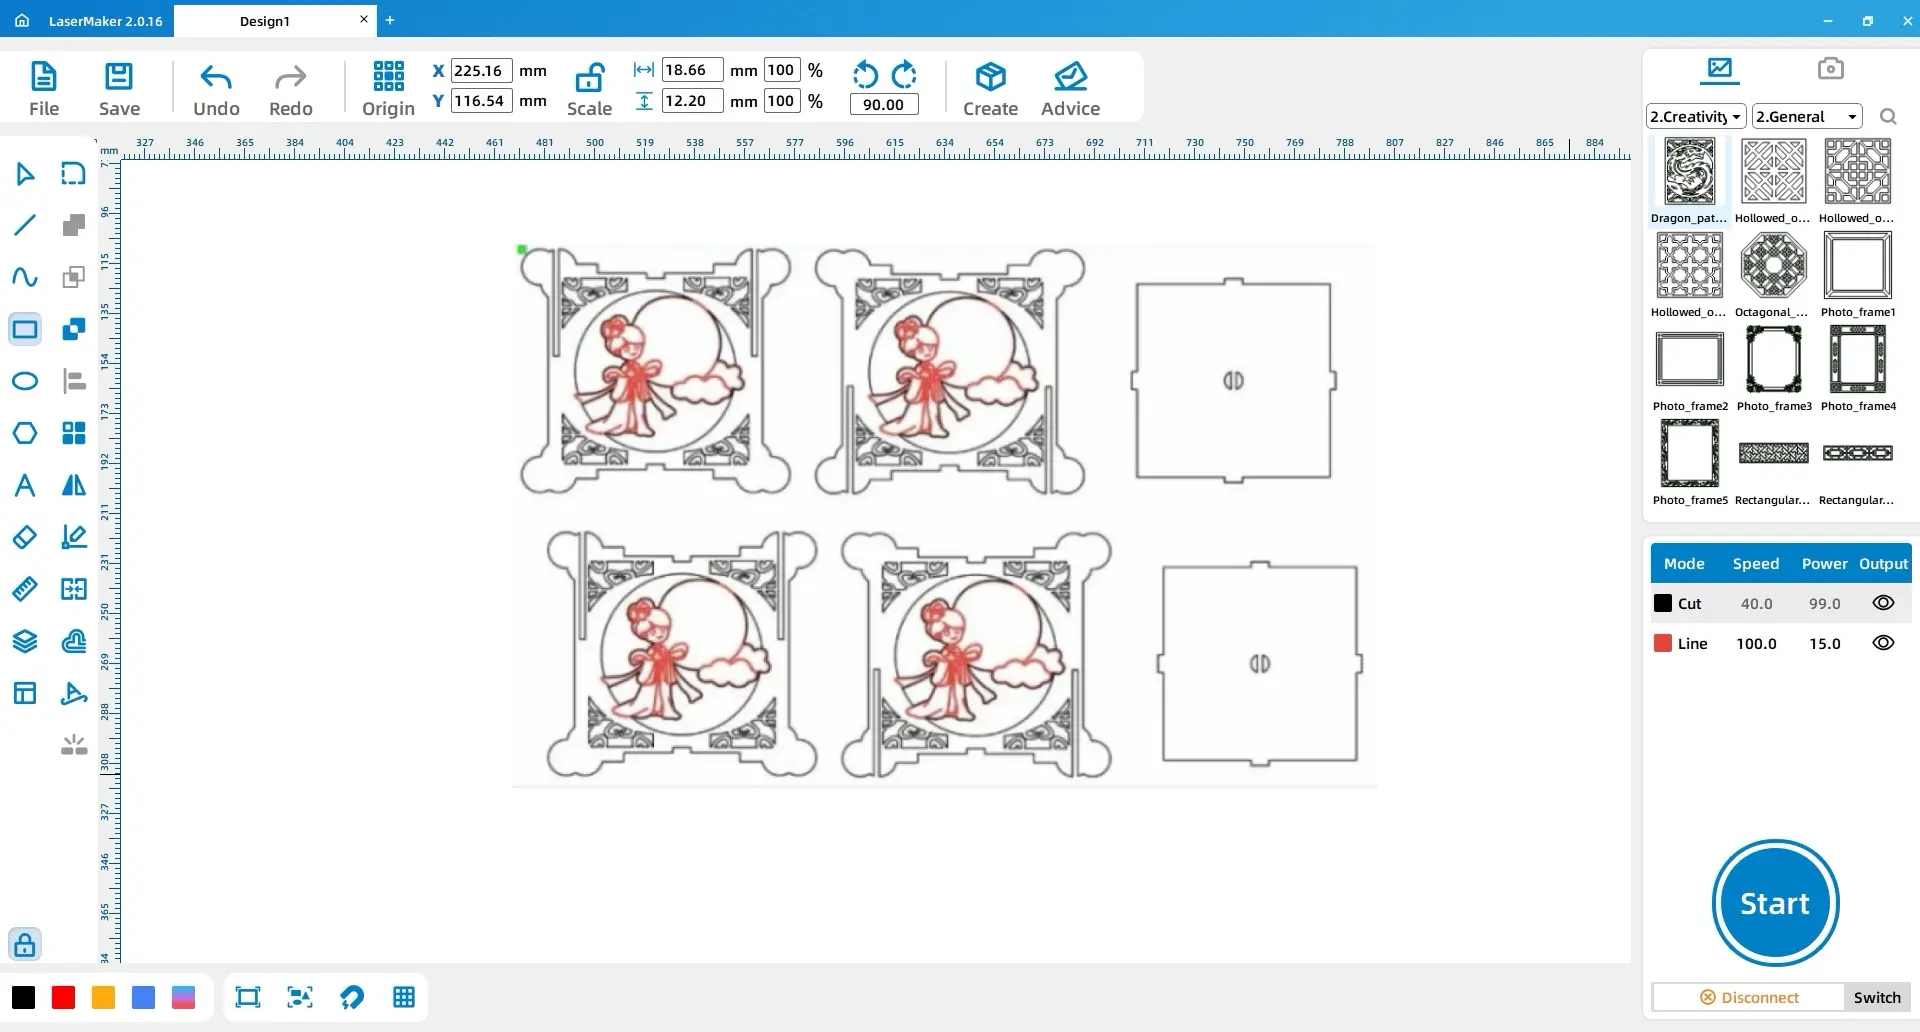
(13) Using the left mouse button, select all the patterns, copy them, and then paste them once. Next, perform a difference operation using all the small rectangles inside the lantern and the outer contour of the lantern to obtain the complete drawing for making the Mid-Autumn Festival lantern, as shown in the following figure.
2. Process Settings
(1) Select the internal lines of the “Chang’e Flying to the Moon” pattern. Using the left mouse button, click on the layer panel on the lower left side and change the layer color to yellow. Next, select the outer contour of “Chang’e Flying to the Moon” and all other patterns. Again, using the left mouse button, click on the layer panel on the lower left side and change the layer color to black. The resulting setup should look like the following figure:
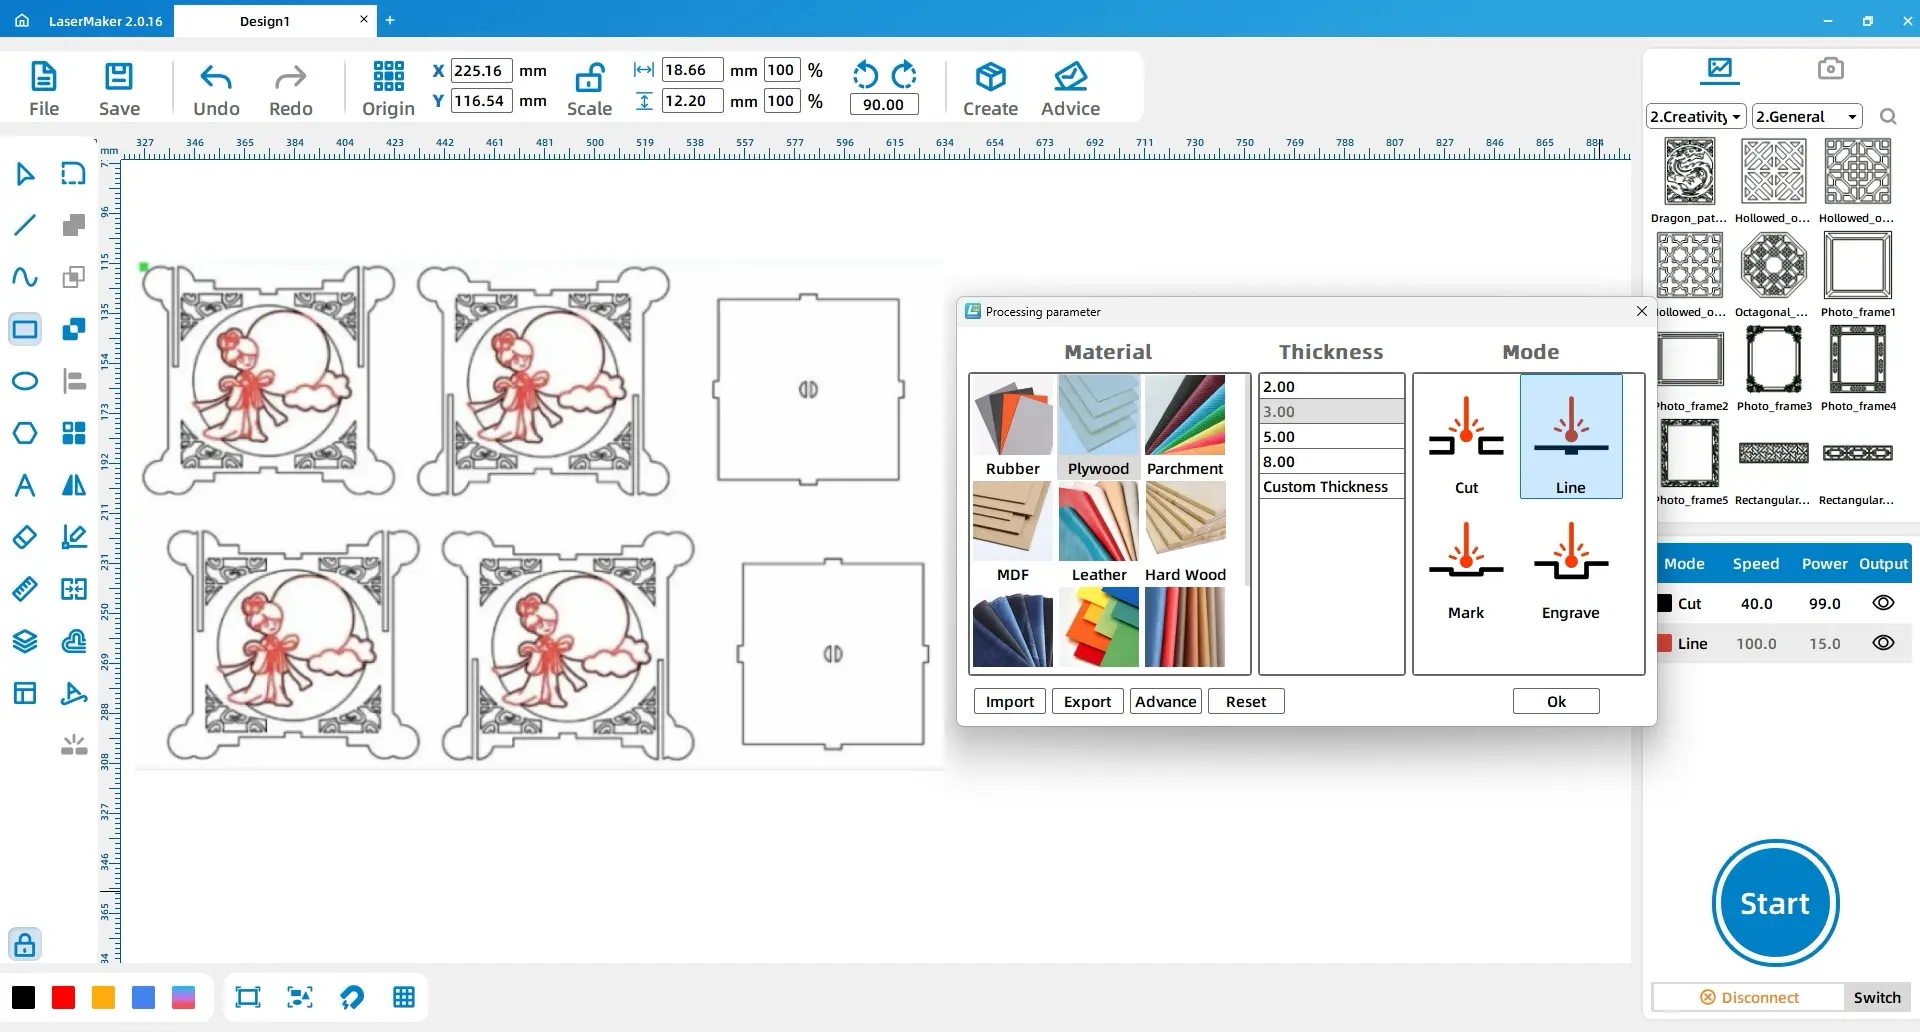
(2) Double-click on the red layer with the left mouse button and set the material, thickness, and process to basswood board, 3mm, and tracing line, respectively. Then, double-click on the black layer with the left mouse button and set the material, thickness, and process to basswood board, 3mm, and cutting, respectively. The settings should look like the following figure:
V. Assembly Tutorial
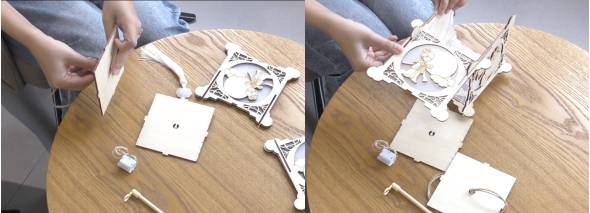
Step 1: Adhere the frosted plastic sheets to the inner sides of the four wooden panels (front, back, left, and right) of the lantern. Pass the hemp rope and pendant through the middle holes of the lantern’s top and bottom covers to connect them.
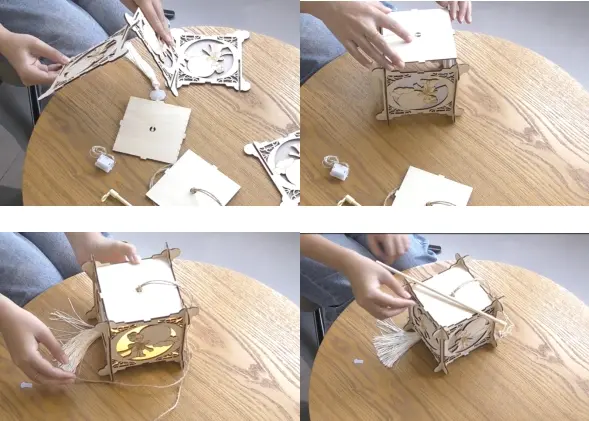
Step 2: Connect the four sides of the lantern (front, back, left, and right) using the mortise and tenon structure.
Step 3: Install the bottom cover into the lantern according to the hole positions.
Step 4: Turn on the light strip switch and place it inside the lantern. Then, secure the top cover onto the lantern, aligning it with the hole positions.
Step 5: Finally, connect the wooden stick to the hemp rope.
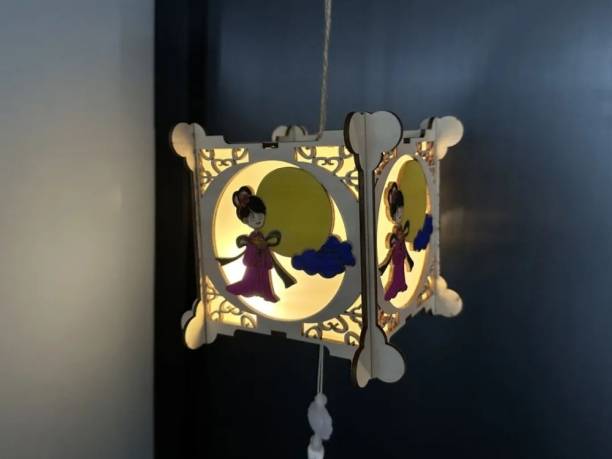
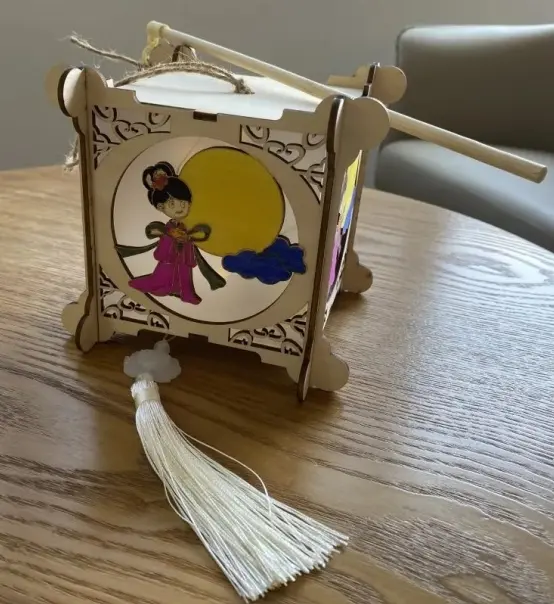
VI. Work Display
VII. Summary
This issue brings you a tutorial on how to design and make a Mid-Autumn Festival lantern.
The process of making the lantern is not difficult, but the main challenge lies in figuring out how to connect the six faces of the lantern using a mortise and tenon structure. With the Mid-Autumn Festival approaching, follow the steps of the Laser Master to learn how to make a lantern and present a handmade Mid-Autumn lantern to your friends and family!
The Laser Master wishes all designers a happy Mid-Autumn Festival!


.png "laser cutter Globle") International
International
 United States
 Brasil
 Canada
 Costa Rica
 Mexico
 Česká
Česká
 Romania
 Polska
 Ireland
 Italia
 Lietuva
 Россия
 Deutschland
 Britain
 Україна
 France
 Sverige
 Norway
 Denmark
 Ελλάδα
 Portugal
 한국
한국
 中国
中国
 中国香港
中国香港
 Israel
 中國臺灣
中國臺灣
 ジャパン
ジャパン India
India
 پاکستان
 پශ්රී ලංකා
 ประเทศไทย
 Australia
 New Zealand
 South Africa