How to Use a Laser Engraver?
 24-11-11
WHAT ARE YOU LOOKING FOR?
Search Across Products, Blog Posts, Support Content, And Resources.

How to Use a Laser Engraver?
24-11-11

Learning how to use a laser engraver may seem difficult at first, but the process becomes much easier once you understand the basic workflow. Most modern laser engravers come with user-friendly software, practical presets, and clear machine interfaces that help beginners get started quickly.
This guide explains what you need before operating a laser engraver, how to set up the machine, how to connect it to a computer, and how to complete a simple engraving or cutting project safely and efficiently.
It is not as hard as many beginners imagine. While machine complexity and design software experience can affect the learning curve, most laser engravers today are built to be accessible, even for complete beginners.
With proper setup, safe operation, and a few test runs, users can quickly move from simple engraving tasks to more detailed creative projects. Before diving into the workflow, take a look at what inspiring effects a laser engraver can create.
Before using a laser engraver, prepare the machine, software, workspace, safety equipment, and materials. Having the right setup helps improve engraving quality and reduces safety risks.
A toolbox overview can also help you understand the accessories you may need when operating your laser machine.
After receiving a laser machine, the first step is to place, connect, and configure it correctly. Exact procedures may vary by model, so always follow the user manual provided by the manufacturer.
Place the laser engraver on a stable, flat surface in a well-ventilated area. Keep it away from flammable materials and make sure there is enough space around the machine for operation and maintenance.
Connect the laser engraver to a suitable power source and connect it to your computer with the required cable or network connection. Install the machine software, drivers, or control program needed for communication.
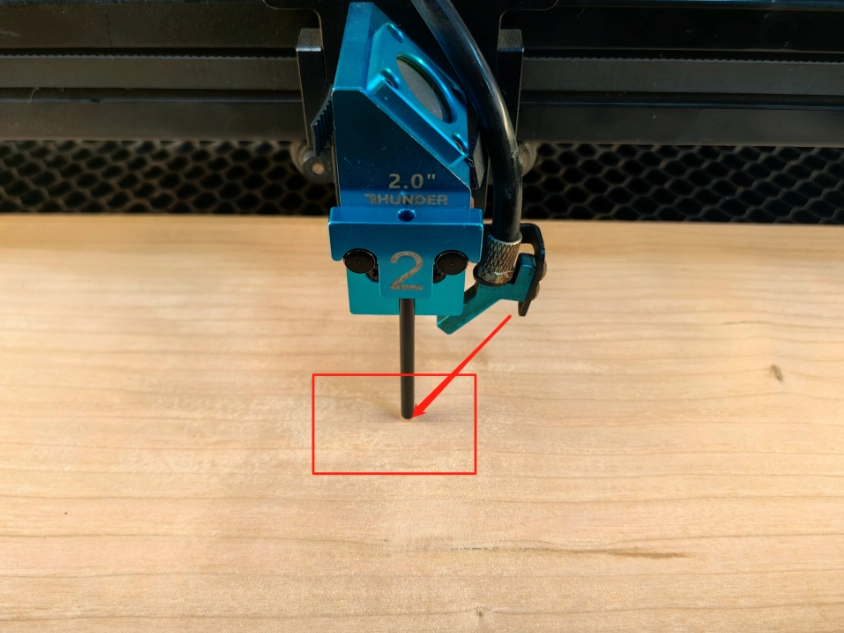
Power on the machine and set the correct distance between the laser head and the material. Depending on the model, you may use a manual focus tool or an automatic focusing feature.
Open your design or control software, set up the machine profile, choose the correct measurement units, import your design, and adjust basic parameters according to the material.
Confirm that the exhaust system or air filter is connected and working properly. If your machine or material requires additional protective eyewear, put it on before starting the job.
Load the design, confirm the material settings, and start the engraving or cutting process. Monitor the machine while it runs so you can respond quickly if smoke, flame, misalignment, or other issues appear.
Each machine may have slightly different setup requirements, especially for assembly, focusing, and software configuration. For product-specific guidance, refer to the user manual or watch the setup video provided for your laser model.
To connect a laser engraver to a computer, first check which connection methods your machine supports. Common options include USB, Ethernet, and Wi-Fi.
After connecting the machine, install the laser software provided by the manufacturer. This usually includes drivers and a design interface so the computer can send design files and machine instructions correctly.
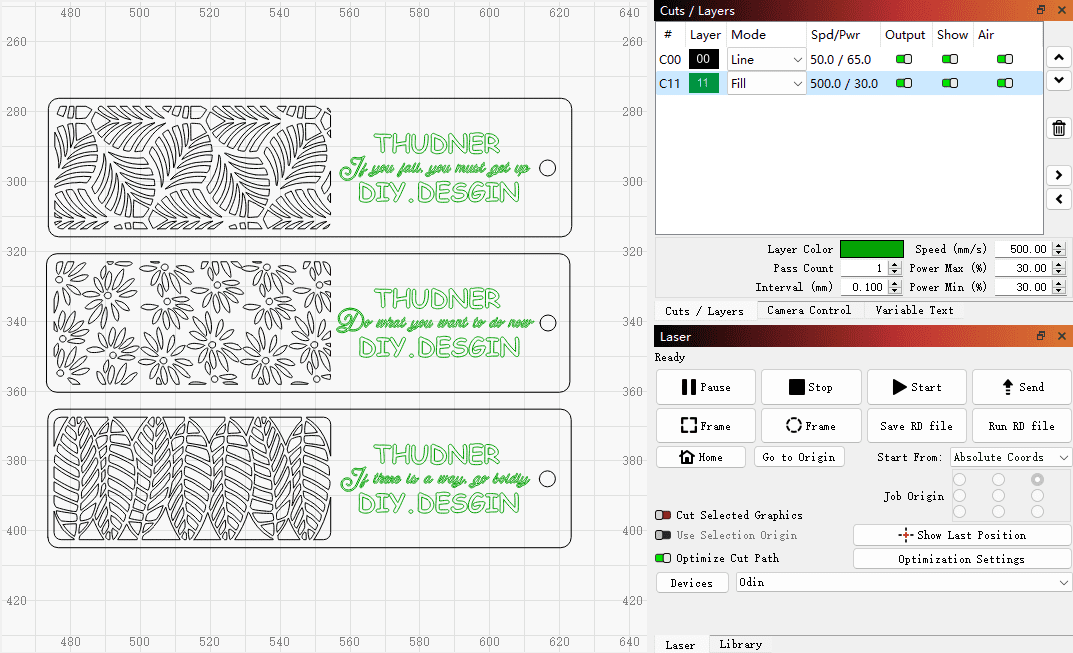
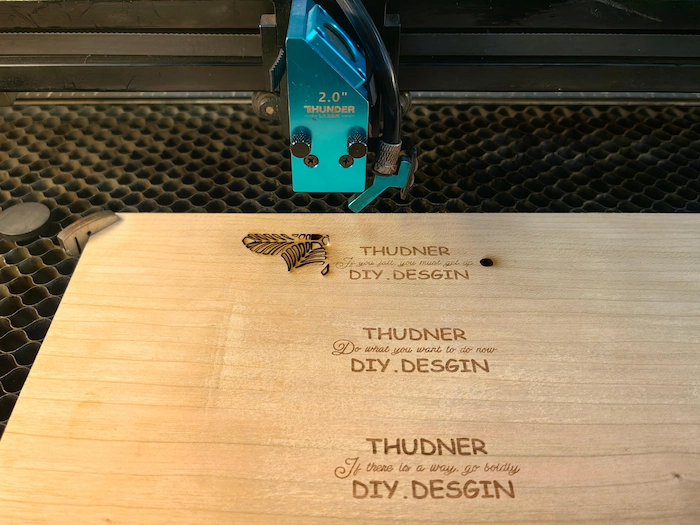
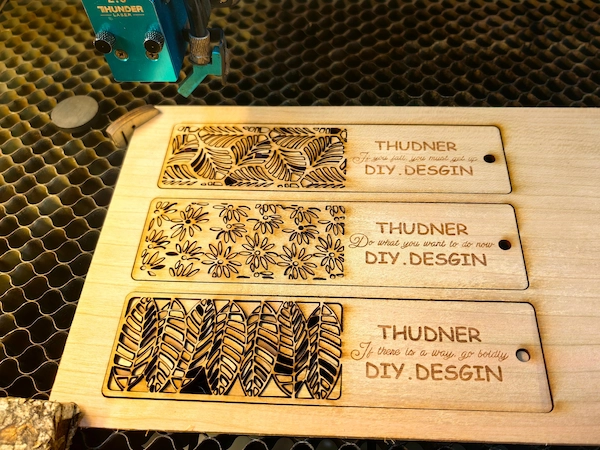
With easy-to-use controls on the computer, software, and machine panel, operating a laser engraving machine can be quick and convenient. In this example, we will use the process of working with a CO2 machine to create wooden bookmarks, showing how to perform simple laser cutting and engraving.
Confirm whether you will use single-direction or double-direction filling, as each setting creates a different effect. Single-direction filling usually provides cleaner results, but it takes more time. A common starting point for engraving is around 300 DPI. Higher DPI can create deeper and more detailed engraving, but it may also increase processing time.
For cutting, use strong air assist to help reduce fire risk, clear smoke, and protect the lens.
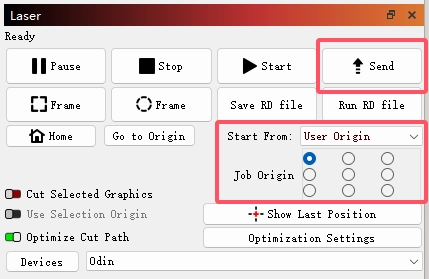
Set the starting point, commonly at the top left, for easier alignment. After positioning, run the border or frame function to check whether the alignment is accurate. Then click the send button to transfer the file to the machine. Keep the file name simple so it is easy to identify on the machine panel.
Place the material flat on the honeycomb board or work table. Use the correct focus tool to set the laser head at the proper distance from the material surface. Some machines may also offer automatic focusing options.
On the machine panel, open the file menu and locate the file you just sent. Confirm that the design is complete and displays correctly before moving on to final positioning.
After selecting the position, click the alignment button and confirm the starting point. Run the frame again to make sure the entire design fits within the sample surface. Once focus and alignment are confirmed, you can press the start button.
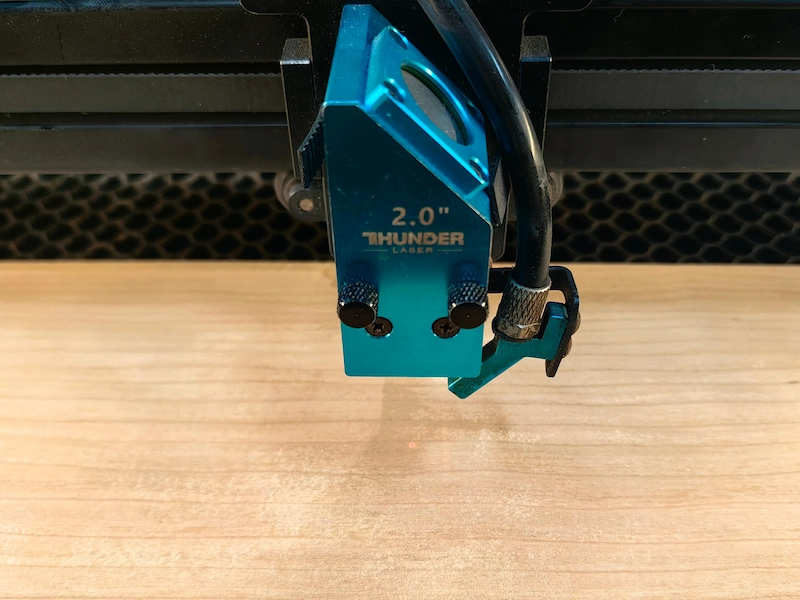
If the red dot is difficult to see, reduce the speed so it is easier to trace the boundary with the naked eye.
Monitor the engraving process closely to prevent unexpected incidents. Try to stay near the machine while it is running so you can respond quickly if flame, smoke buildup, misalignment, or material movement occurs.
After the engraving and cutting process is finished, wait until the machine stops completely before opening the cover or removing the material.
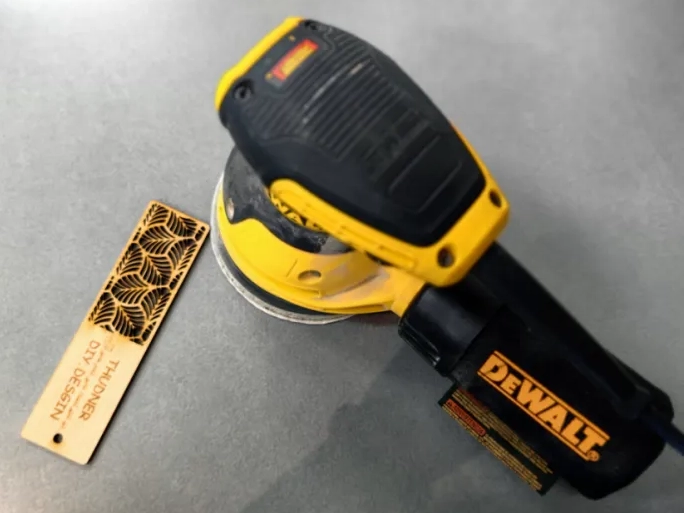
Since solid wood can release resin during cutting, you can use a sander or suitable finishing tool to clean and smooth the surface. This helps give the final piece a more polished appearance.
LightBurn is a versatile and user-friendly laser engraving software option. It is compatible with many laser machines and allows users to create simple designs, adjust laser settings, perform precise positioning, and execute engraving or cutting tasks.
Its easy-to-use interface makes it practical for beginners, while its advanced controls also support more experienced users. Learn more about LightBurn and explore software tips to improve your laser engraving workflow.
Yes, you can use a laser engraver without a computer in some cases. Many modern laser engravers have built-in screens or control panels that allow you to operate the machine directly. Some models also support USB drives or SD cards, so users can save design files onto external storage, insert the device into the engraver, and select the file to start engraving.
However, using a computer generally provides more precise control over design editing, parameter adjustment, file management, and accurate positioning. For most users, computer-based operation is still the more flexible workflow.
For faster engraving without compromising quality, use vector engraving instead of raster engraving for simple line designs when appropriate. Adjusting power settings and choosing the right material profile in your software can also improve efficiency.
Regularly check the machine's X and Y axes and confirm that the laser head is parallel to the work surface. Use the frame or outline function before starting the job to verify design placement and avoid misalignment.
Proper focus is essential for clean, sharp engraving. Use a focus gauge to set the correct distance between the laser lens and the material. If your machine has autofocus, make sure it is calibrated correctly.
Excessive vibration can affect engraving accuracy. Place the machine on a stable, flat surface, use anti-vibration pads if needed, tighten belts when appropriate, and keep moving parts properly maintained.
Smoke buildup can affect engraving quality, especially on wood or acrylic. Make sure your exhaust system is fully functional, use air assist to blow smoke away from the laser path, and clean the lens and mirrors regularly to maintain engraving performance.
Using a laser engraver may seem complex at first, but with the right setup, software, safety precautions, and practice, it quickly becomes a powerful tool for creative and professional projects. Whether you are engraving wood, metal, leather, or acrylic, understanding your machine and following proper alignment and focusing techniques will help you achieve consistent, high-quality results.
User-friendly software, practical accessories, and beginner-friendly machines make it easier for new users to bring ideas to life. If you are unsure where to start, explore setup videos, expert tutorials, and machine-specific support resources.
Ready to start laser engraving? Explore beginner-friendly Thunder Laser machines and use setup guides or video tutorials for hands-on learning.
Talk To Our Experts Now!
Please leave your contact information so that we can serve you better.
FAQS
You need a laser engraver, compatible design software, a computer or supported control method, proper ventilation, protective gear when required, and laser-safe materials.
TAKE THE NEXT STEP WITH THUNDER LASER

 Stable & Consistent MachinesUnlimited ApplicationRobust After-sales SupportFactory Direct Supply