Thunder Laser Nova Installation Guide
 24-05-17
WHAT ARE YOU LOOKING FOR?
Search Across Products, Blog Posts, Support Content, And Resources.

Thunder Laser Nova Installation Guide
24-05-17

After the Thunder Laser Nova has been unloaded and positioned, the next step is proper installation. A careful setup helps prepare the machine for safe startup, stable movement, water cooling, air assist, exhaust, and PC connection.
This guide walks through the main installation steps, including stabilizing the machine, leveling it, setting up the water chiller, connecting accessories, powering on the machine, checking laser tube bubbles, verifying laser pulse, and connecting the machine to a computer.
Before starting, make sure the machine is placed in its intended position and that the surrounding area is clear for installation, inspection, and safe operation.
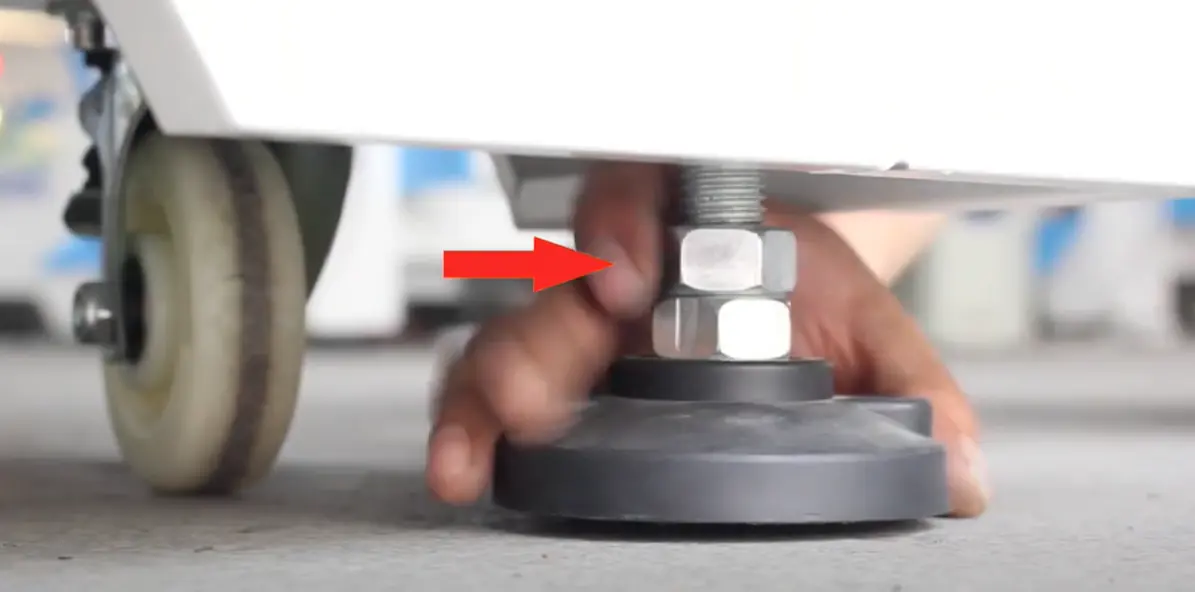
Adjust the foot stands or relocate the machine if necessary to keep the machine stable.
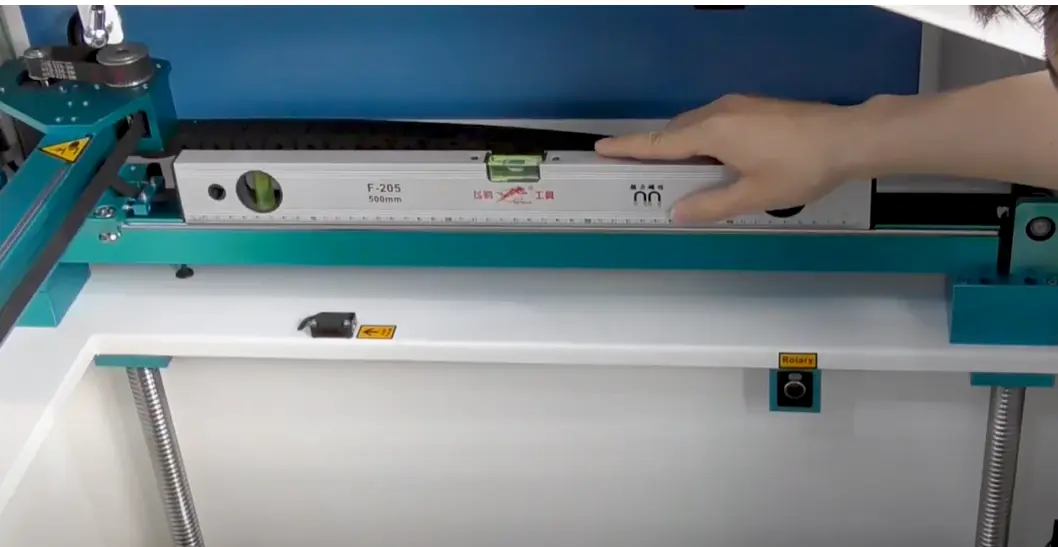
Check whether the machine is level. If it is not horizontal, adjust the foot stands or relocate the machine as needed.
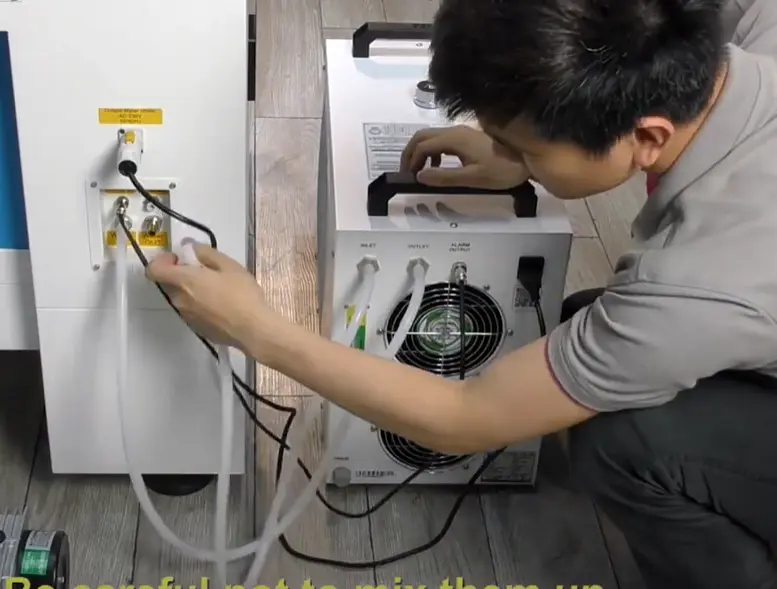
Fill the water chiller with about 6L of purified water until the water level reaches the normal range.
Connect the chiller correctly: OUTLET to WATER IN, and INLET to WATER OUT.
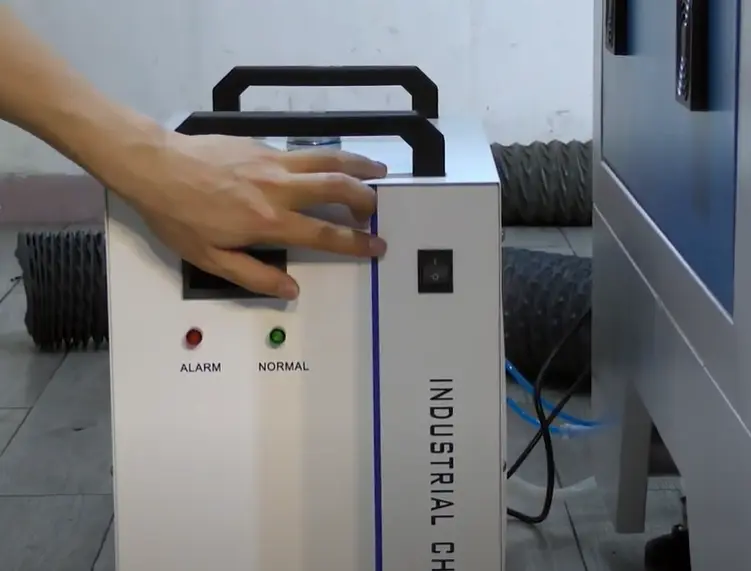
Turn on the chiller. It will receive power from the machine when the laser switch is turned on.
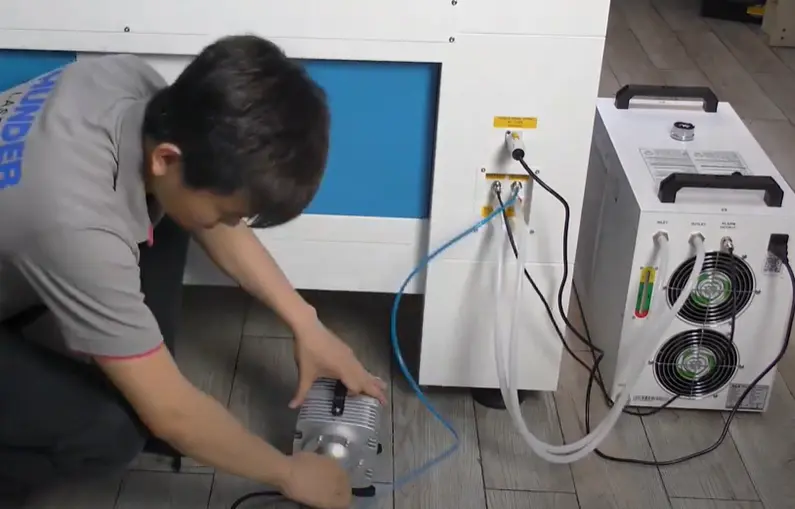
Connect the air compressor before operating the machine so the air assist system is ready for laser processing.
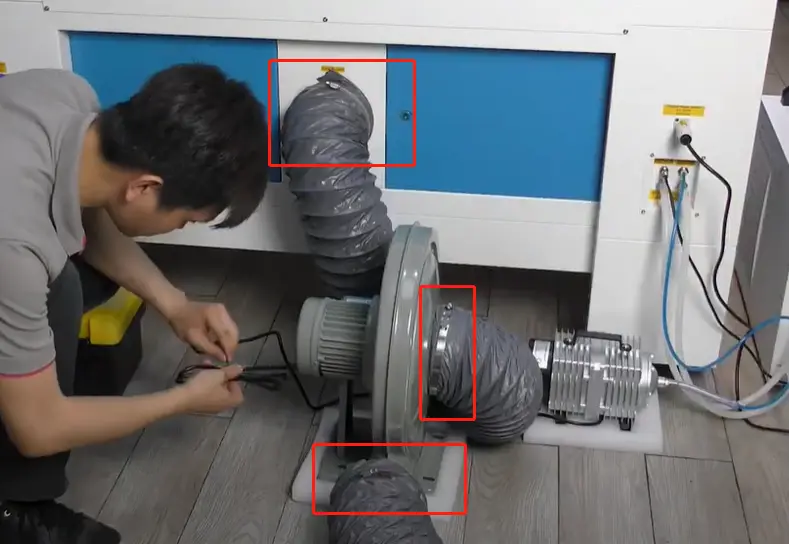
Connect the exhaust fan so smoke and fumes can be removed during laser cutting and engraving.
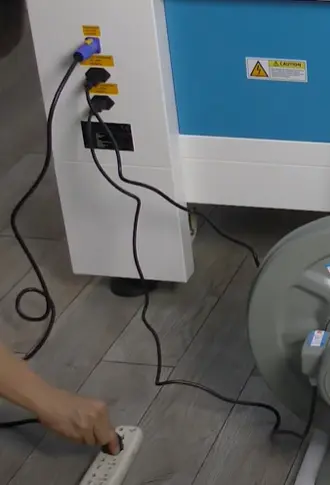
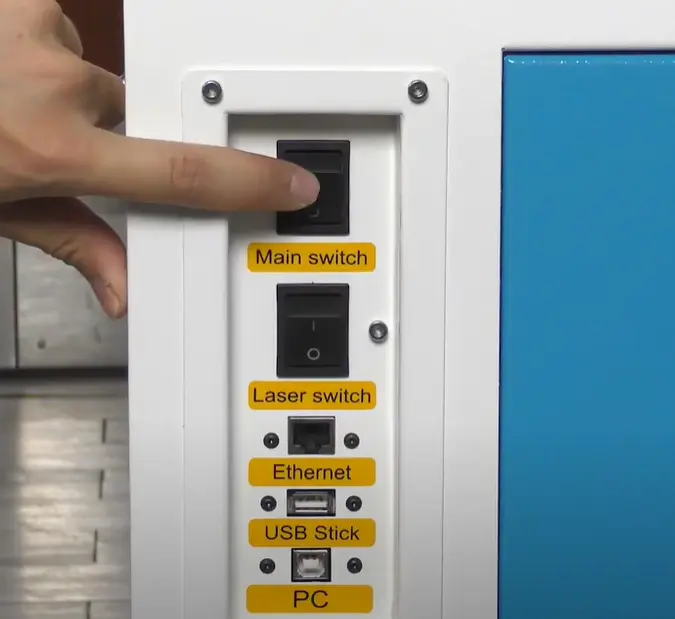
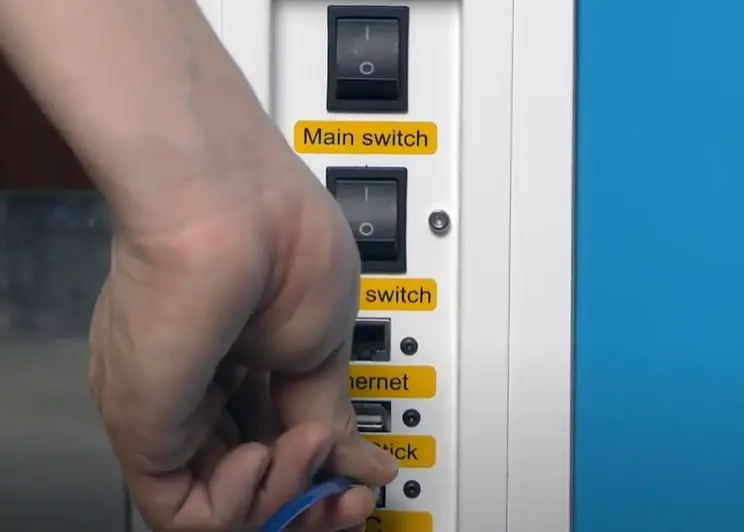
Connect the power cable before powering on the machine.
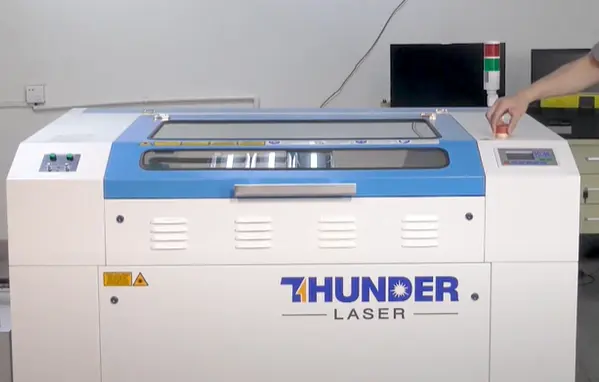
Release the emergency stop button before starting the machine.
Turn on the main switch to power up the machine.
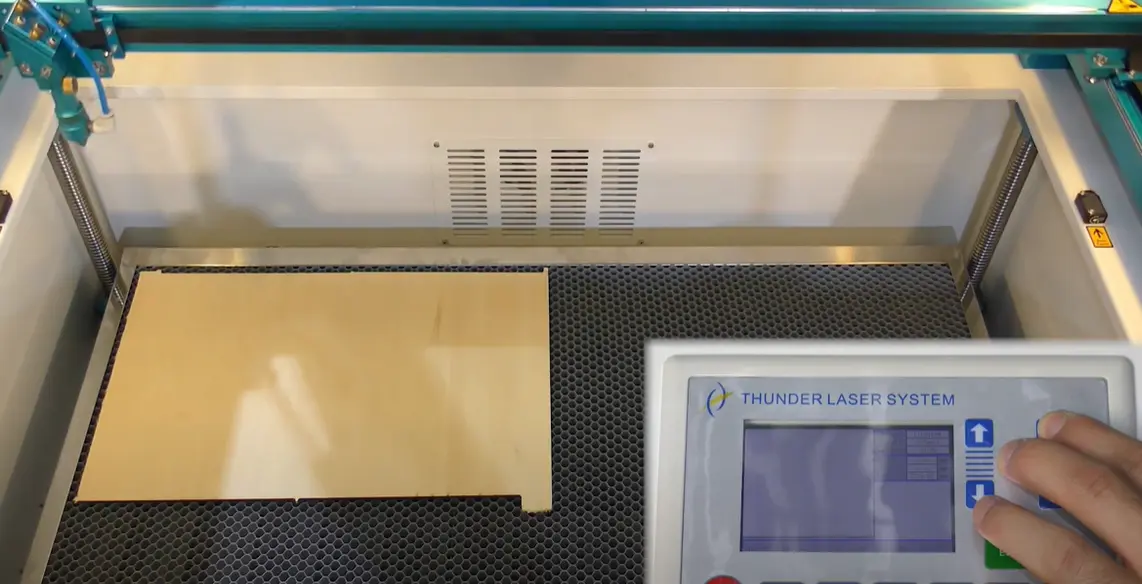
Verify movement of all X, Y, and Z axes. Move the laser head and honeycomb board accordingly to confirm normal motion.
Activate the laser switch. The chiller will turn on automatically.
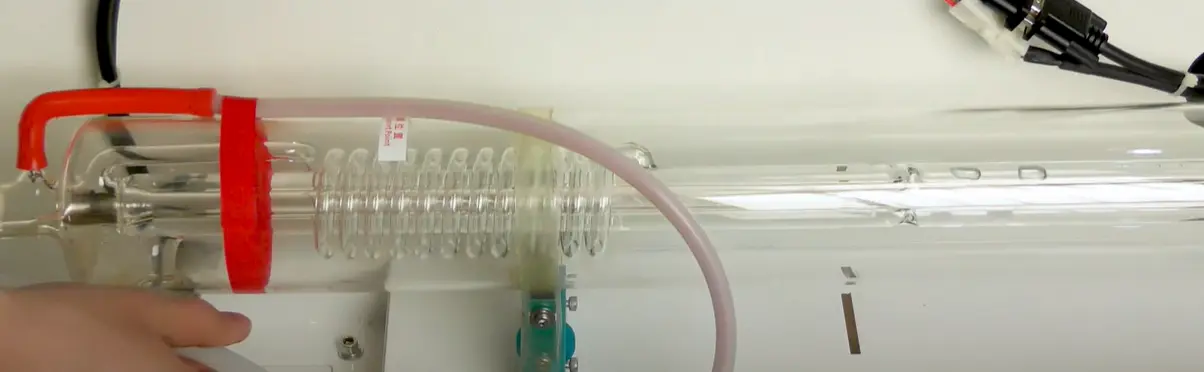
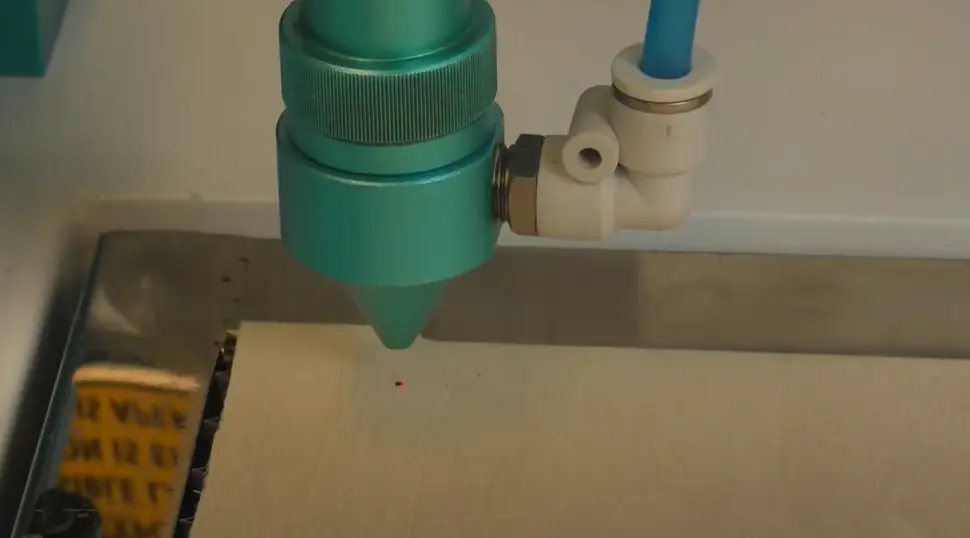
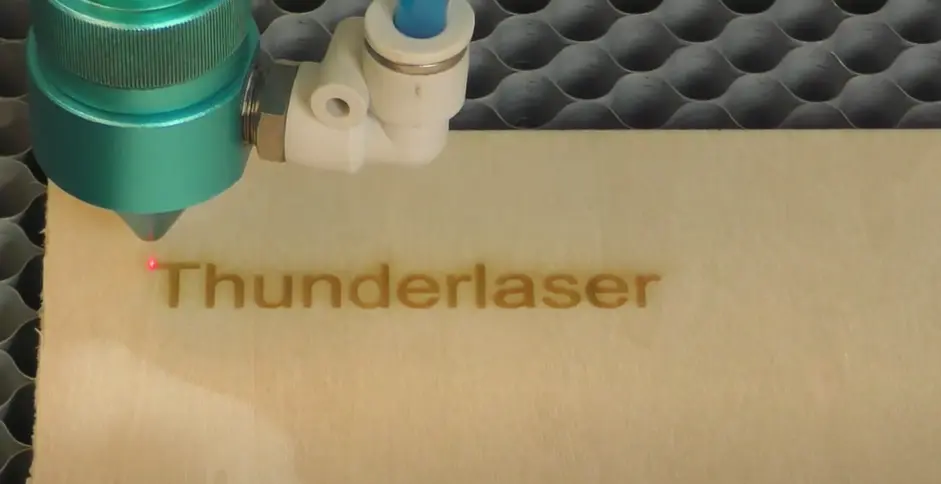
Check the laser tube for air bubbles. If air bubbles are present, remove them before continuing.
Verify the laser pulse before starting regular work.
Establish the connection with a PC using a USB or Ethernet cable. Once the connection is complete and the previous checks are finished, the machine is ready to start working.
For a visual walkthrough of the installation process, refer to the installation video below.
Thunder Laser Nova installation guide video
Installing a Thunder Laser Nova involves several important checks and connections. Stabilize and level the machine, set up the water chiller, connect the air compressor and exhaust fan, connect power, release the E-stop, and verify movement before laser operation.
After activating the laser switch, check the laser tube for air bubbles, verify laser pulse, and connect the machine to a PC through USB or Ethernet. Completing these steps carefully helps prepare the machine for normal laser cutting and engraving work.
A complete Nova installation starts with machine stability and ends with connection testing. Check each step carefully before beginning regular production.
Talk To Our Experts Now!
Please leave your contact information so that we can serve you better.
THUNDER LASER NOVA INSTALLATION FAQS
Connect the machine to a PC using a USB or Ethernet cable. After the connection is established and all setup checks are complete, the machine is ready to start working.
TAKE THE NEXT STEP WITH THUNDER LASER

 Stable & Consistent MachinesUnlimited ApplicationRobust After-sales SupportFactory Direct Supply