Thunder Laser Bolt Unboxing Guide
 24-05-30
WHAT ARE YOU LOOKING FOR?
Search Across Products, Blog Posts, Support Content, And Resources.

Thunder Laser Bolt Unboxing Guide
24-05-30

After receiving your Thunder Laser Bolt, the first step is to unbox the machine carefully and prepare it for setup. Proper unboxing helps protect the machine, keeps accessories organized, and makes the installation process smoother.
This guide walks through the main Bolt unboxing steps, including preparing a workstation, opening the packaging, removing foam and stretch film, moving the machine onto the desk, checking shipping cable ties, and confirming that the tools are present.
Before starting, prepare enough space around the package and make sure two people are available to lift the Bolt safely onto the workstation or desk.
Before opening the package, prepare a stable workstation or desk for the machine. Make sure the desk is ready before lifting the Bolt out of the packaging.
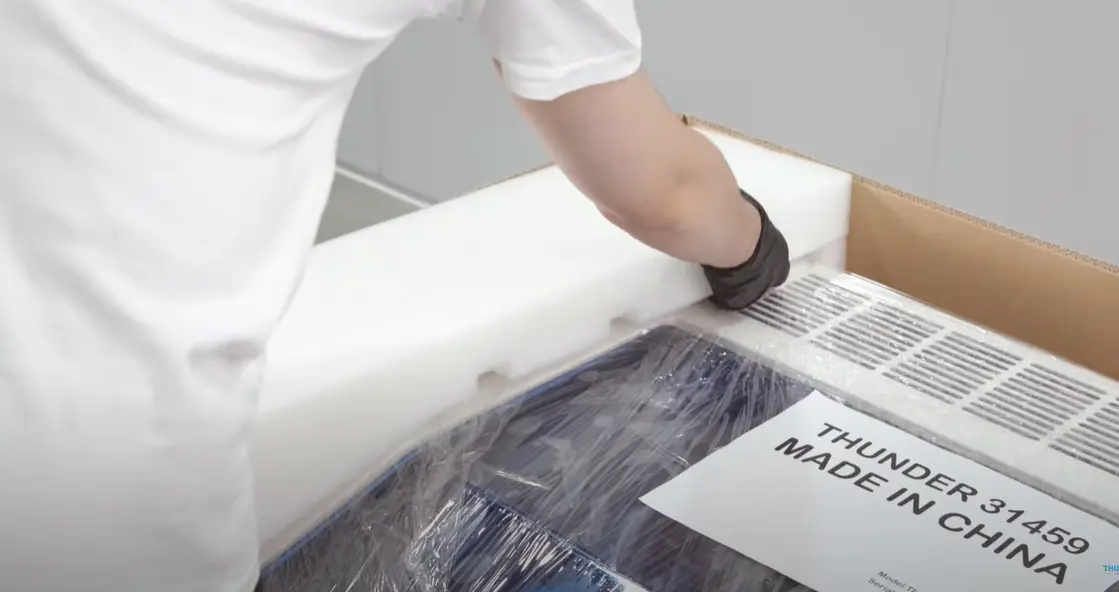
Cut off the nylon straps holding the Bolt cardboard box. Then remove the cover from the box. You should find a toolkit on the machine; take it out and put it aside for later use.
Carefully remove the foam and cardboard shell from around the machine. These protective materials help keep the machine safe during shipping, so remove them gently and avoid scratching the machine surface.
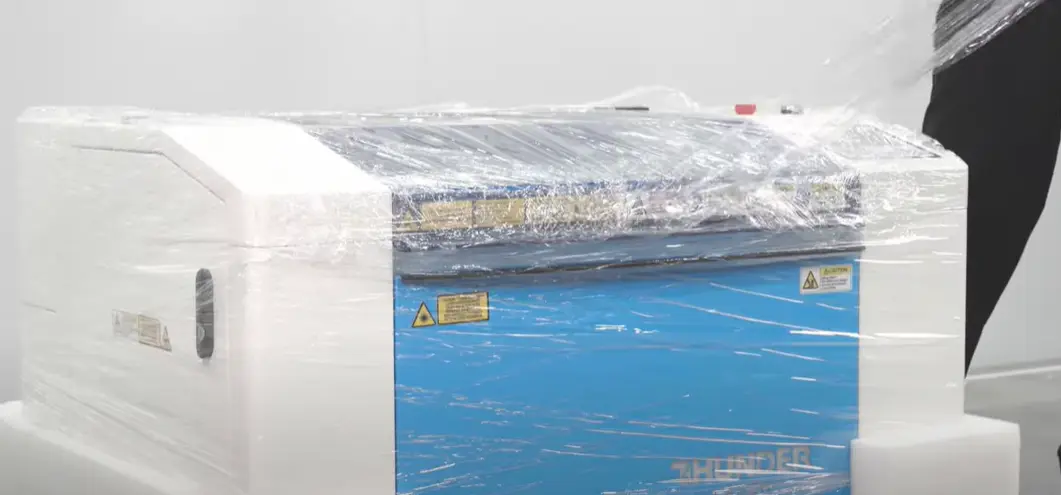
Find a safe place to begin removing the stretch film. Pull the film away from the machine carefully and cut it off as needed.
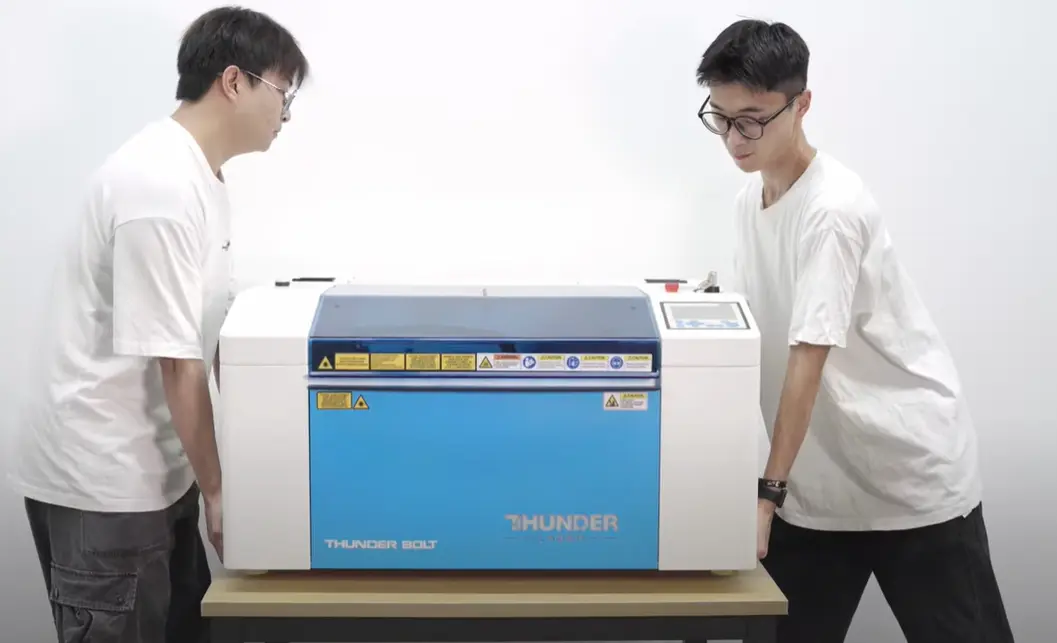
The Bolt is not very heavy, but it is still recommended to have another person help lift it. Carefully lift the machine and place it onto the prepared workstation or desk.
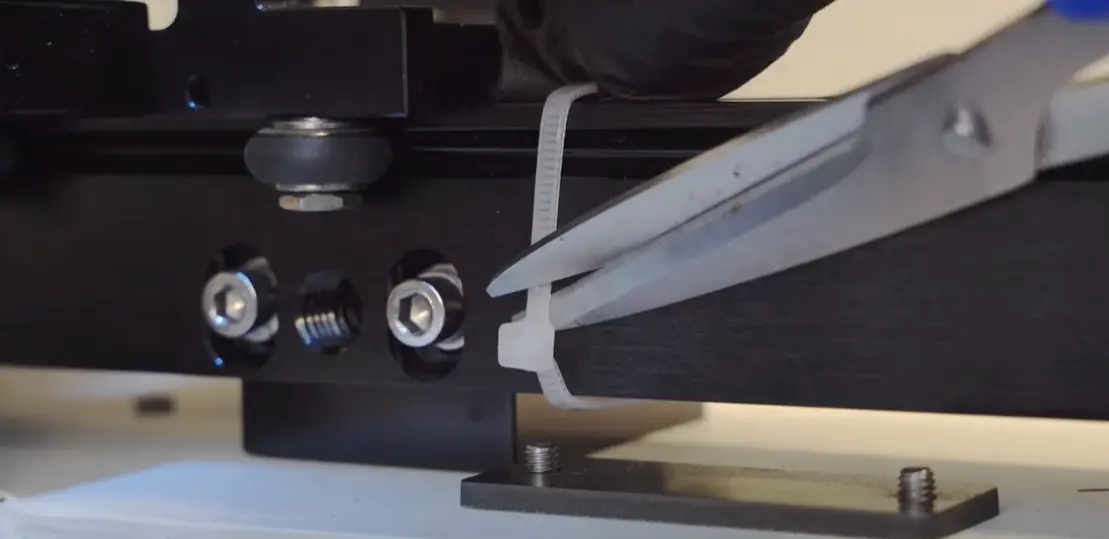
Open the machine and check the inside carefully. Use wire cutters to find and cut the shipping zip ties that were used to keep parts secure during transportation.
Be careful during this step. Cut only the shipping cable ties that need to be removed, not every tie inside the machine.
After the machine has been placed on the desk and the shipping ties have been checked, confirm that the included tools are present. Keep the tools and accessories organized for the next setup steps.
You can also watch the unboxing video below for a visual walkthrough of the Bolt unboxing process.
Thunder Laser Bolt unboxing guide video
Unboxing the Thunder Laser Bolt is a straightforward process when each step is completed in order. Prepare the desk first, open the packaging carefully, remove the protective materials, lift the machine with help, and check the inside for shipping cable ties.
After confirming that the tools are present, the unboxing process is complete and the machine is ready for the next setup stage.
A smooth Bolt setup starts with careful unboxing: prepare the workstation, remove packaging safely, lift with help, and only cut the required shipping cable ties.
Talk To Our Experts Now!
Please leave your contact information so that we can serve you better.
THUNDER LASER BOLT UNBOXING FAQS
TAKE THE NEXT STEP WITH THUNDER LASER

 Stable & Consistent MachinesUnlimited ApplicationRobust After-sales SupportFactory Direct Supply