Thunder Laser Bolt Installation Guide
 24-05-30
WHAT ARE YOU LOOKING FOR?
Search Across Products, Blog Posts, Support Content, And Resources.

Thunder Laser Bolt Installation Guide
24-05-30

After unboxing the Thunder Laser Bolt, the next step is to complete the basic installation and setup. A proper installation helps prepare the machine for ventilation, power connection, computer communication, parameter import, and scanning offset checking.
This guide walks through the main Thunder Laser Bolt installation steps, including installing the ventilation ducts, connecting the cable, powering on and resetting the machine, connecting the computer, importing machine parameters, and checking scanning offset.
Before starting, make sure the Bolt has been placed on a stable workstation and that the required tools, cables, and ventilation accessories are ready for installation.
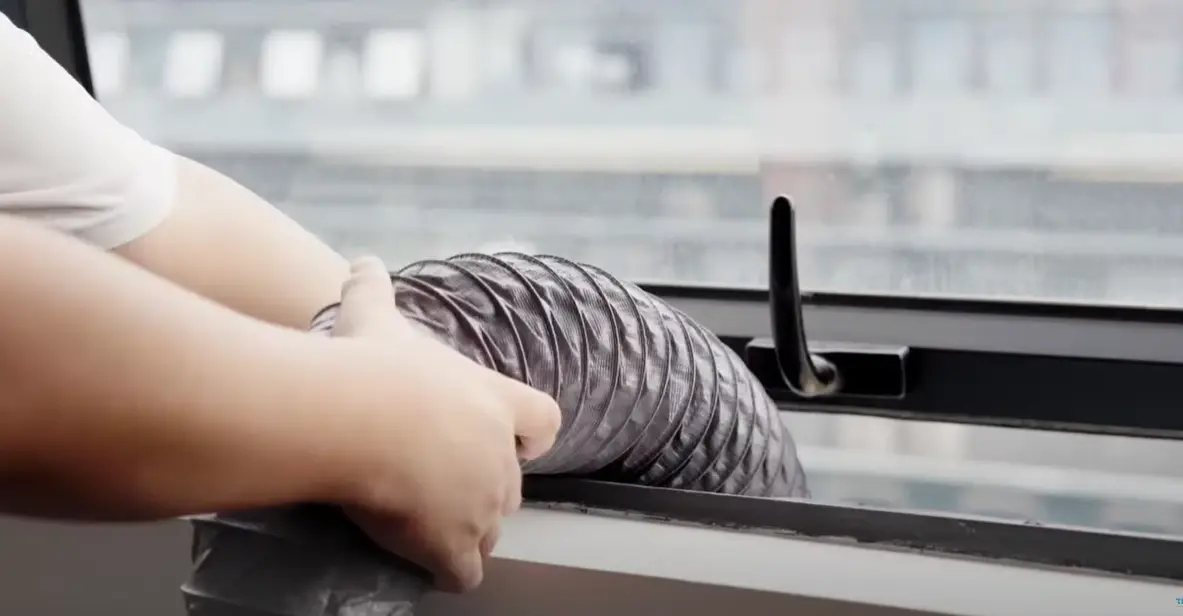
Start by installing the ventilation ducts. Proper ventilation helps remove smoke and fumes during laser cutting and engraving, so this step should be completed before regular machine operation.
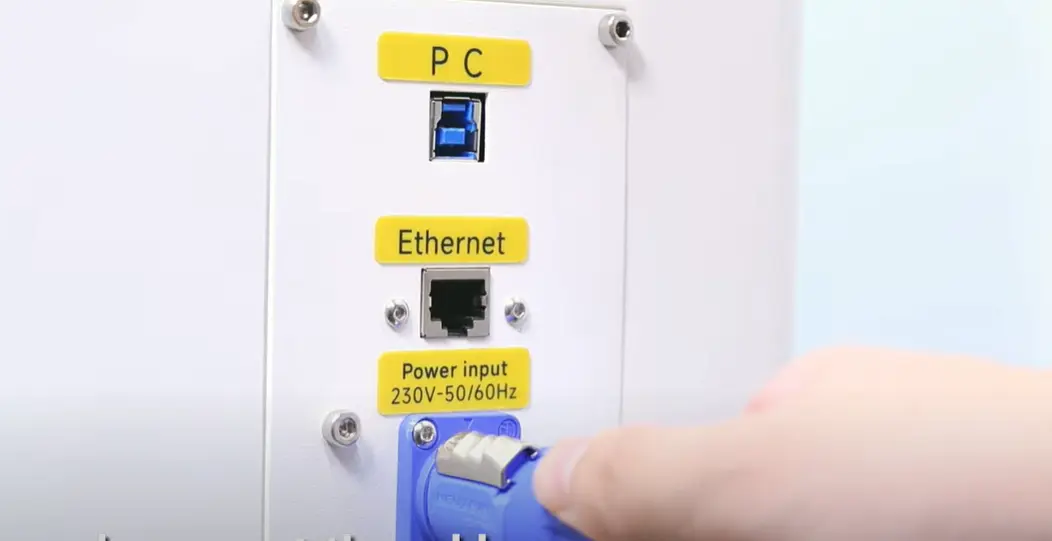
Next, properly connect the cable according to the machine setup requirements. Make sure the connection is secure before moving on to the power-on step.
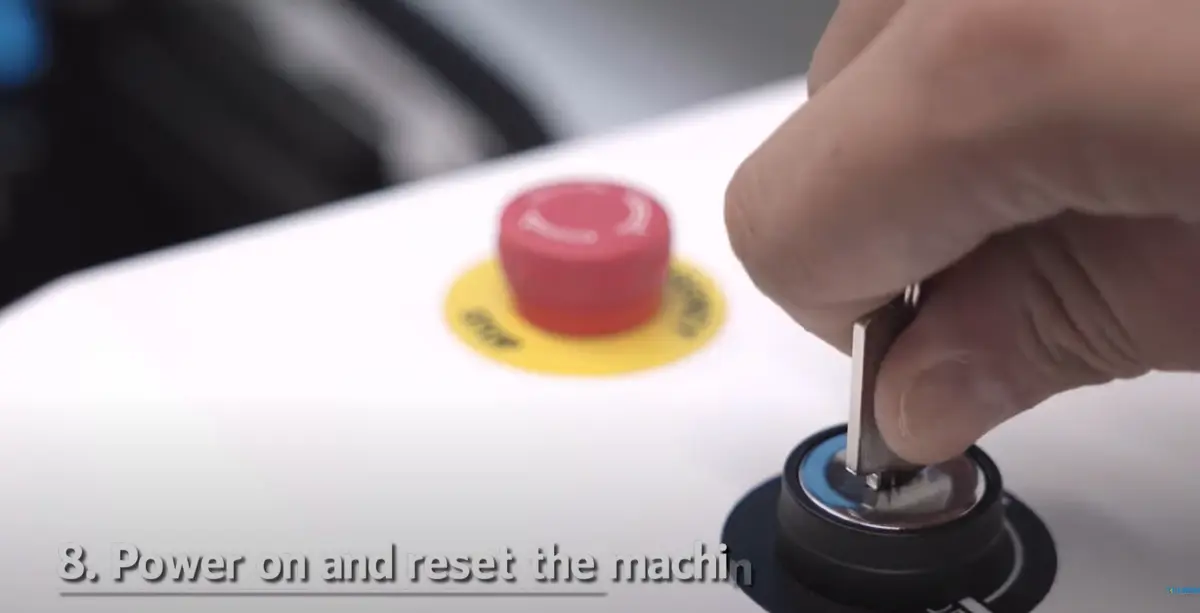
After the cable is connected, power on the machine and reset it. This prepares the Bolt for the next setup steps and helps confirm that the machine can start correctly.
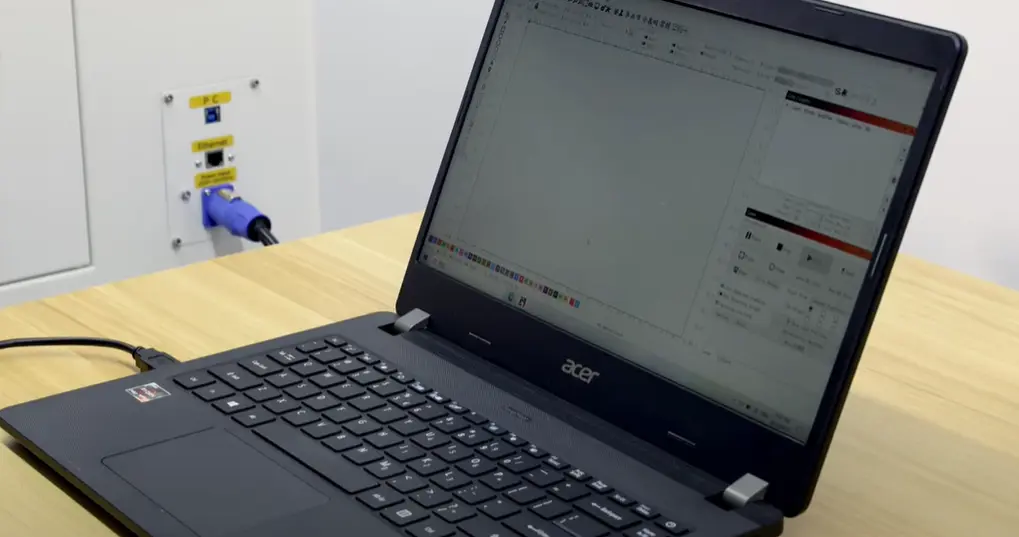
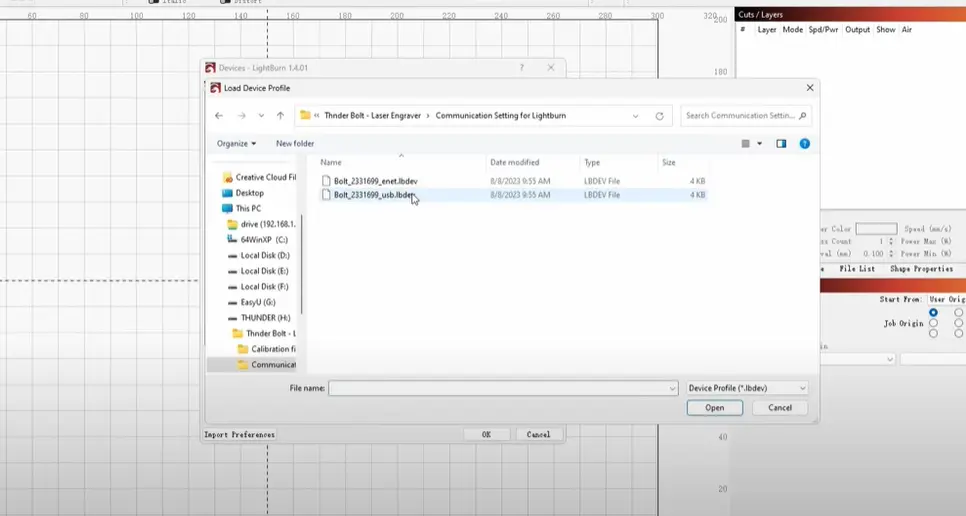
Connect your computer to the Bolt so the machine can communicate with the software. Confirm that the connection is ready before importing machine parameters.
Accurately import the machine parameters according to the setup process. Correct machine parameters are important for normal machine communication and operation.
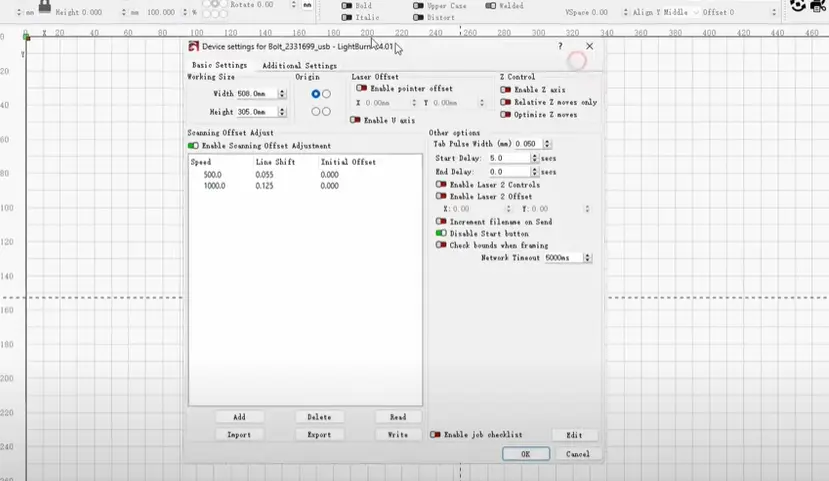
Check the scanning offset as part of the final setup process. This helps prepare the machine for more accurate engraving results.
You can also watch the installation video below for a visual walkthrough of the Thunder Laser Bolt setup process.
Thunder Laser Bolt installation guide video
Installing the Thunder Laser Bolt mainly includes setting up ventilation, connecting the cable, powering on and resetting the machine, connecting the computer, importing machine parameters, and checking scanning offset.
After these steps are complete, the Bolt is ready for the next stage of your laser creativity journey.
A complete Bolt installation should confirm three key points: ventilation is installed, the machine is connected correctly, and the software parameters are imported accurately.
Talk To Our Experts Now!
Please leave your contact information so that we can serve you better.
THUNDER LASER BOLT INSTALLATION FAQS
TAKE THE NEXT STEP WITH THUNDER LASER

 Stable & Consistent MachinesUnlimited ApplicationRobust After-sales SupportFactory Direct Supply