How to Remove, Clean, and Reinstall a Laser Honeycomb Table
 24-10-30
WHAT ARE YOU LOOKING FOR?
Search Across Products, Blog Posts, Support Content, And Resources.

How to Remove, Clean, and Reinstall a Laser Honeycomb Table
24-10-30

Laser honeycomb table maintenance is an important part of keeping your Thunder Laser machine clean, stable, and reliable. Over time, smoke residue, debris, and cutting buildup can collect on the honeycomb laser bed, affecting airflow, material support, and cutting quality.
In this guide, you’ll learn how to safely remove, clean, and reinstall the honeycomb table on a Thunder Laser Nova Series laser cutter. Regular maintenance helps support consistent cutting and engraving results while extending the service life of your machine.
Step-by-step guide to disassembling and reinstalling the honeycomb table on a Thunder Laser Nova machine.
The honeycomb table supports materials during laser cutting and engraving. Because it sits directly below the workpiece, it can collect residue, small scraps, dust, and smoke deposits after repeated use.
Keeping the honeycomb laser bed clean helps maintain better material support, smoother airflow, and more consistent laser results. It also helps reduce unwanted marks on the back of materials during cutting.
Before removing the laser honeycomb bed, make sure the laser cutter is turned off and unplugged. This helps prevent accidental operation, electrical hazards, or unexpected machine movement during maintenance.
Safety should always come first. Never disassemble or clean the honeycomb table while the laser machine is powered on.
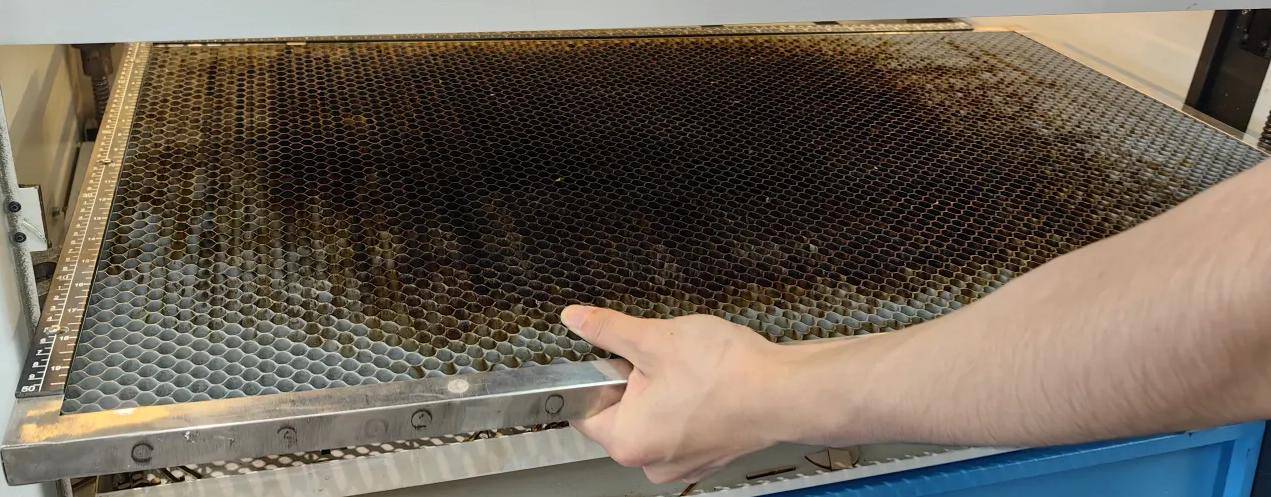
To remove the honeycomb laser table, open the front door of the Nova Series machine and remove the drawer so you can access the honeycomb bed. The table is secured with screws, so unscrew them carefully before lifting the honeycomb table out of the machine.
Since the honeycomb table can be large and awkward to handle, it is best to get assistance during this step. Lift the table gently to avoid damaging the bed, the frame, or the machine interior.
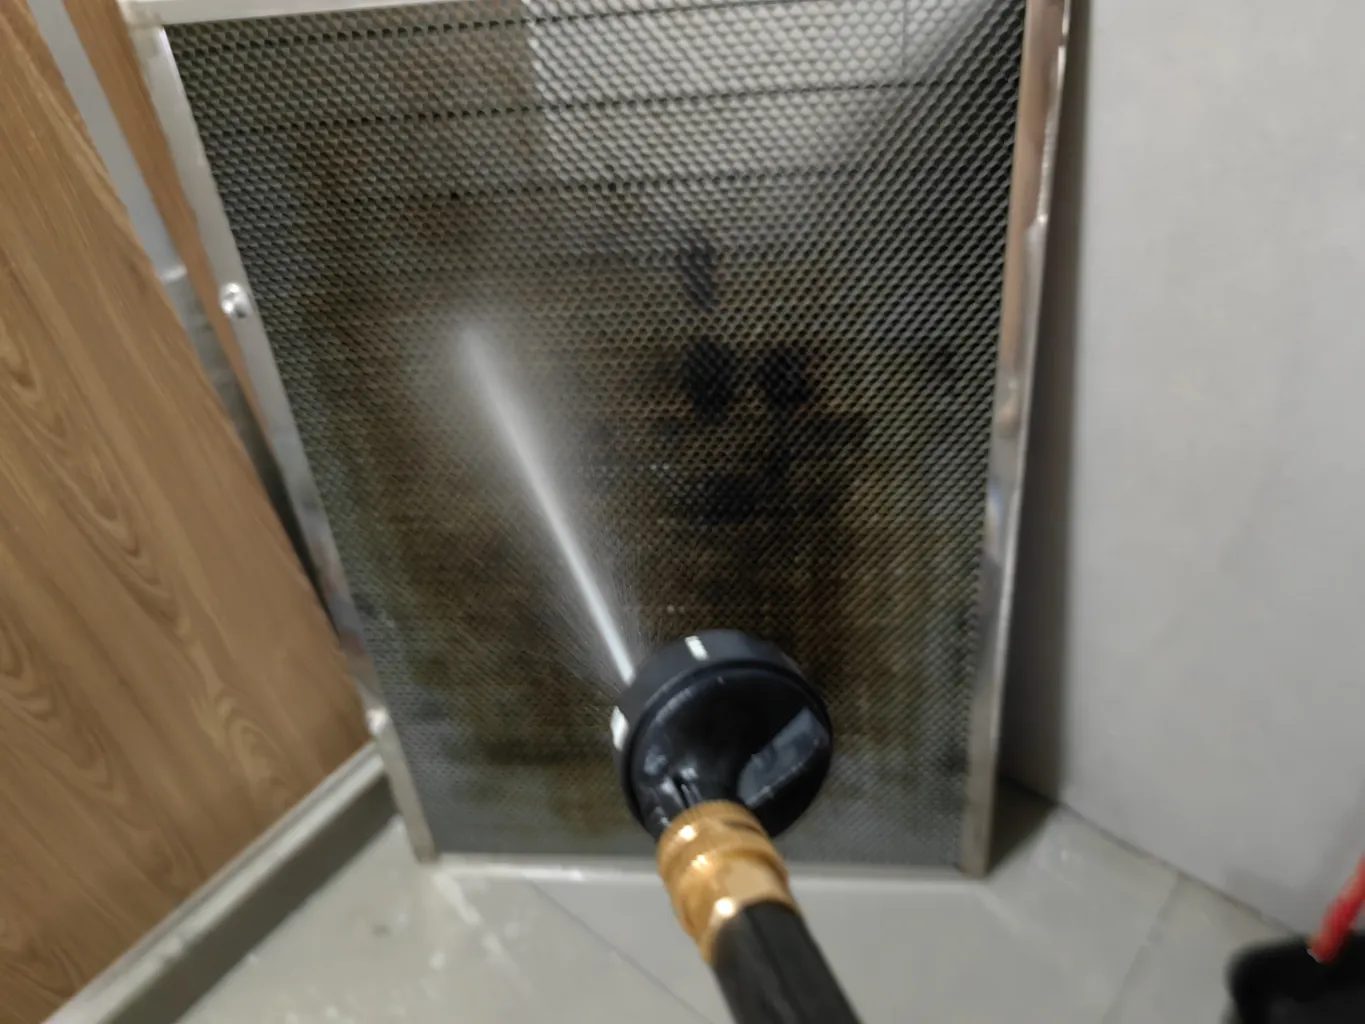
Once the laser honeycomb table is removed, you can begin cleaning it. A high-pressure water gun and a suitable cleaning agent can help remove smoke residue, cutting buildup, and debris from the honeycomb structure.
After cleaning, make sure the honeycomb bed is fully dried before reinstalling it. Moisture left on the table can affect machine performance and may cause unnecessary issues inside the laser cutter.
To reinstall the table, carefully place the cleaned and dried honeycomb laser bed back into its original position. Check that it is properly aligned before tightening the screws.
Once the screws are secured, confirm that the table is level and stable. A correctly installed honeycomb table helps support accurate focus, stable material placement, and consistent laser cutting results.
Regular maintenance of the laser honeycomb bed is essential for keeping your Thunder Laser Nova machine running smoothly. By safely removing the table, cleaning away buildup, drying it completely, and reinstalling it correctly, you can maintain better cutting quality and support long-term machine reliability.
For the clearest step-by-step process, follow the official video tutorial and include honeycomb table cleaning as part of your regular laser machine maintenance routine.
Need Help Maintaining Your Laser Machine?
Contact Thunder Laser for support, machine recommendations, and laser maintenance guidance.
Contact UsTalk To Our Experts Now!
Please leave your contact information so that we can serve you better.
LASER HONEYCOMB TABLE MAINTENANCE FAQS
TAKE THE NEXT STEP WITH THUNDER LASER

 Stable & Consistent MachinesUnlimited ApplicationRobust After-sales SupportFactory Direct Supply