Laser Engraving Brass and Copper: A Practical Guide for Precise Results
 24-09-18
WHAT ARE YOU LOOKING FOR?
Search Across Products, Blog Posts, Support Content, And Resources.

Laser Engraving Brass and Copper: A Practical Guide for Precise Results
24-09-18

Brass and copper are beautiful materials, but they can be challenging to engrave because of their reflective surfaces and heat sensitivity. Whether you are personalizing jewelry, producing industrial nameplates, or creating decorative metal pieces, the right laser type, preparation method, and settings are essential for clean and durable results.
This guide explains practical methods for laser engraving brass and copper, including fiber laser engraving, UV laser engraving, CO2 laser marking with spray, surface preparation, blackening steps, and reference settings for brass marking.
The best way to engrave brass and copper is usually with a fiber laser, because fiber lasers are designed for metal processing and can produce precise marks with minimal surface damage. They are well suited for fine details, small text, logos, serial numbers, and decorative patterns.
A UV laser can also be used for brass and copper engraving. Compared with fiber lasers, UV lasers are typically slower and more expensive, but they generate less heat, which helps reduce the risk of heat-related damage on sensitive materials.
Traditional hand engraving with tools such as burins or gravers is another option. It can create a personal handmade look, but it requires more skill, more time, and usually cannot match the speed and repeatability of laser engraving.
A CO2 laser cannot directly etch bare copper or brass in the same way a fiber laser can, mainly because these metals have reflective surfaces. However, a CO2 laser can be used with a laser marking spray to create visible marks on brass and copper.
This spray-assisted method is useful when you need visible marking, but it may not provide the same depth, durability, or permanence as direct fiber laser engraving. For professional metal marking on brass and copper, a fiber laser is usually the better choice.
Laser engraving can produce highly detailed and accurate designs, making it suitable for intricate patterns, small characters, fine lines, and decorative details on brass and copper.
Because the laser does not physically touch the metal, there is no tool pressure on the workpiece. This helps reduce the risk of mechanical wear, distortion, or surface scratches during processing.
Fiber and UV lasers can help control heat buildup during marking. With proper settings, they reduce the chance of warping, tarnishing, or heat discoloration on brass and copper surfaces.
Laser engraving creates permanent marks that are resistant to wear, making the process useful for durable labels, identification codes, decorative graphics, and industrial parts.
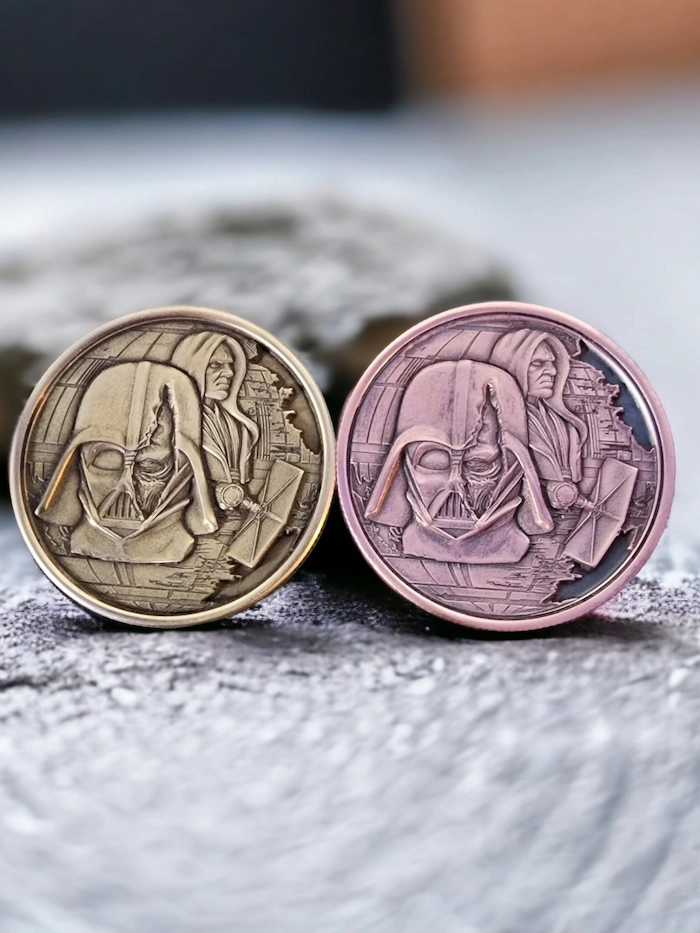
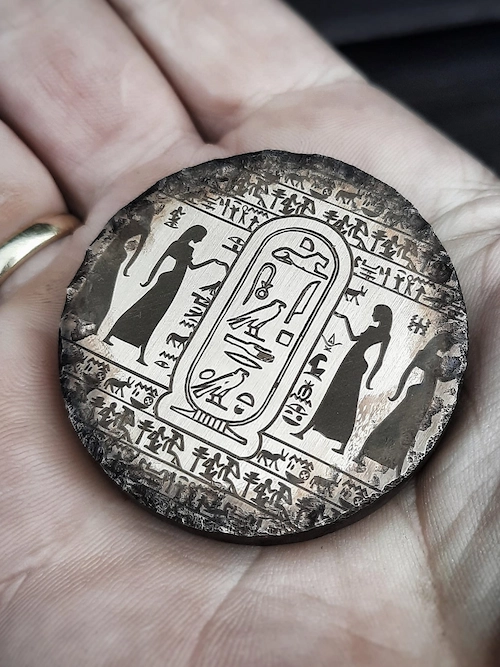
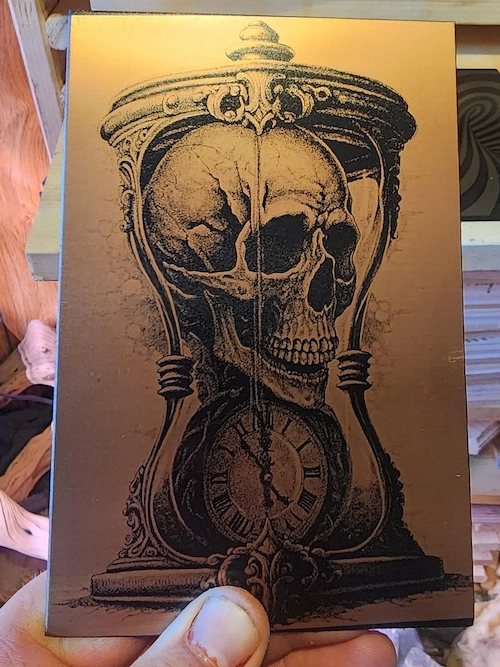
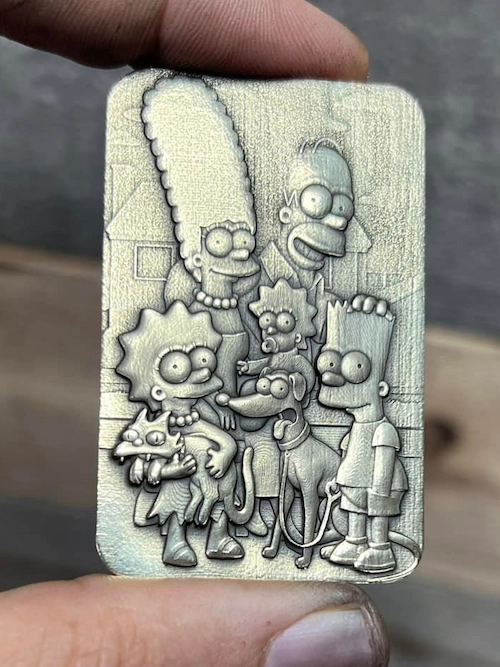
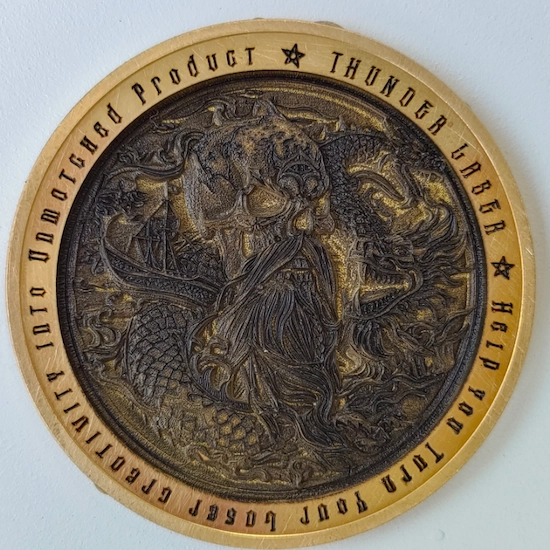
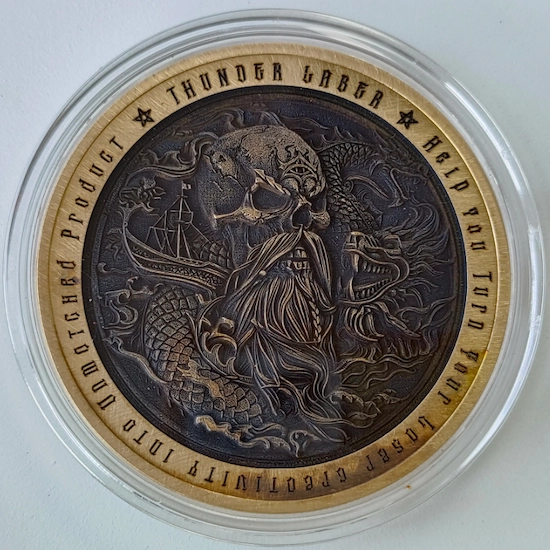
Brass and copper are widely used in metal laser engraving because they offer attractive finishes and broad application potential. Many users enjoy engraving small brass and copper coins, tags, and decorative pieces, while businesses use these metals for practical identification and branding needs.
Use a degreaser or mild cleaner to remove dirt, oil, fingerprints, and oxidation from the metal surface. A clean surface helps the laser interact with the metal more consistently and also helps marking spray adhere evenly when spray is required.
If you are using a CO2 laser, apply a laser marking spray to the brass or copper surface first. The spray reacts with laser heat to create a dark visible mark. Let the spray dry fully before processing so the final mark is clearer and more even.
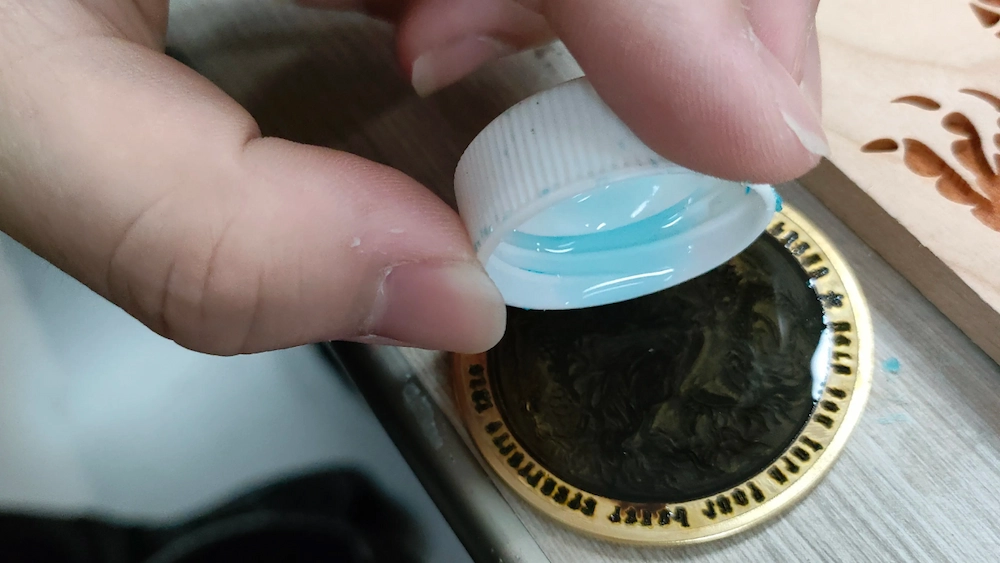
After engraving, brass or copper can be treated with a copper blackening agent to make the engraved details darker and more textured. This process can improve contrast and make fine details easier to see.
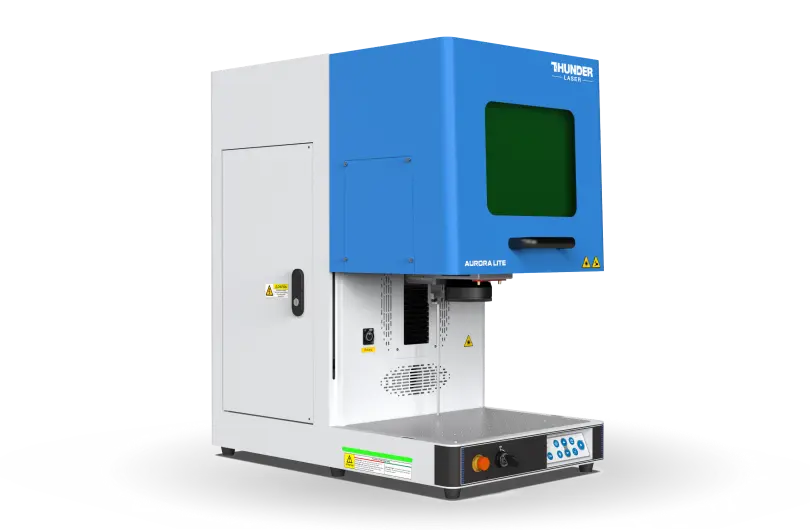
For better brass and copper engraving, a professional metal laser marker is recommended. The Thunder Aurora is designed for metal engraving, and its standard fiber laser can create detailed marks on brass and copper. With speeds of up to 8000 mm/s, Aurora supports fast and precise marking as well as more textured 3D relief effects.
Aurora’s all-in-one desktop design makes it convenient for daily laser projects. Users can select a design on the computer, adjust it through the control panel, and start processing. It supports most bare and coated metals. For users who need broader non-metal material compatibility, a UV laser option can also provide more versatility.
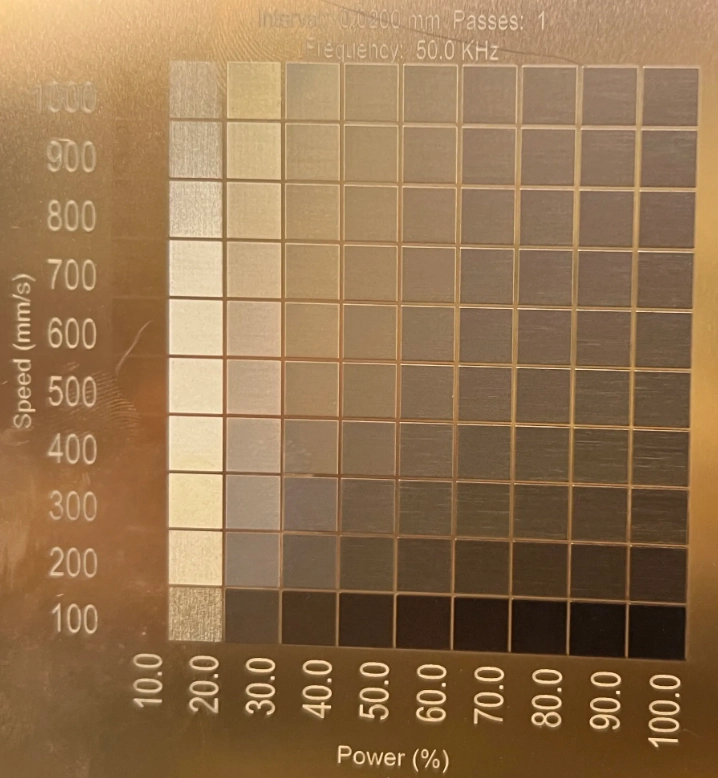
The following parameters were obtained during fiber laser engraving tests on brass with the Aurora Lite-50W. They can be used as a reference for brass processing. During testing, the most suitable frequency was 50 kHz.
| Marking Results | Speed (mm/s) | Power (%) | Frequency (kHz) | Fill Mode | Line Interval (mm) | No. of Passes |
|---|---|---|---|---|---|---|
| Black | 100 | 10 | 50 | Bi-directional | 0.02 | 1 |
| White | 400 | 30 | 50 | Bi-directional | 0.02 | 1 |
Different settings can create different color and contrast results. Use these values as a starting point, then adjust speed, power, frequency, fill mode, and line interval based on your material, surface condition, and desired effect.
Learn more laser settings on our website >>
Laser engraving brass and copper opens up both functional and decorative applications across many industries. With the right laser machine, proper material preparation, and suitable processing settings, you can achieve clean, precise, and durable results.
Need help getting started? Explore the Thunder Aurora metal marker or contact the Thunder Laser team for guidance on brass and copper laser engraving projects.
Talk To Our Experts Now!
Please leave your contact information so that we can serve you better.
LASER ENGRAVING BRASS AND COPPER FAQS
TAKE THE NEXT STEP WITH THUNDER LASER

 Stable & Consistent MachinesUnlimited ApplicationRobust After-sales SupportFactory Direct Supply