How to Use a Laser Cutter Pass-Through Door for Long Materials
 24-12-10
WHAT ARE YOU LOOKING FOR?
Search Across Products, Blog Posts, Support Content, And Resources.

How to Use a Laser Cutter Pass-Through Door for Long Materials
24-12-10

Imagine that one day you need to cut or engrave a very long piece of material, but the table of your laser cutter is not long enough. Should you cut the material into smaller pieces with a saw first? That would waste time, add extra work, and may even damage the material.
This is where a pass-through door design becomes useful. Thunder Laser cutters are designed with a pass-through door to help users process longer materials more easily and keep the project more complete during engraving or cutting.
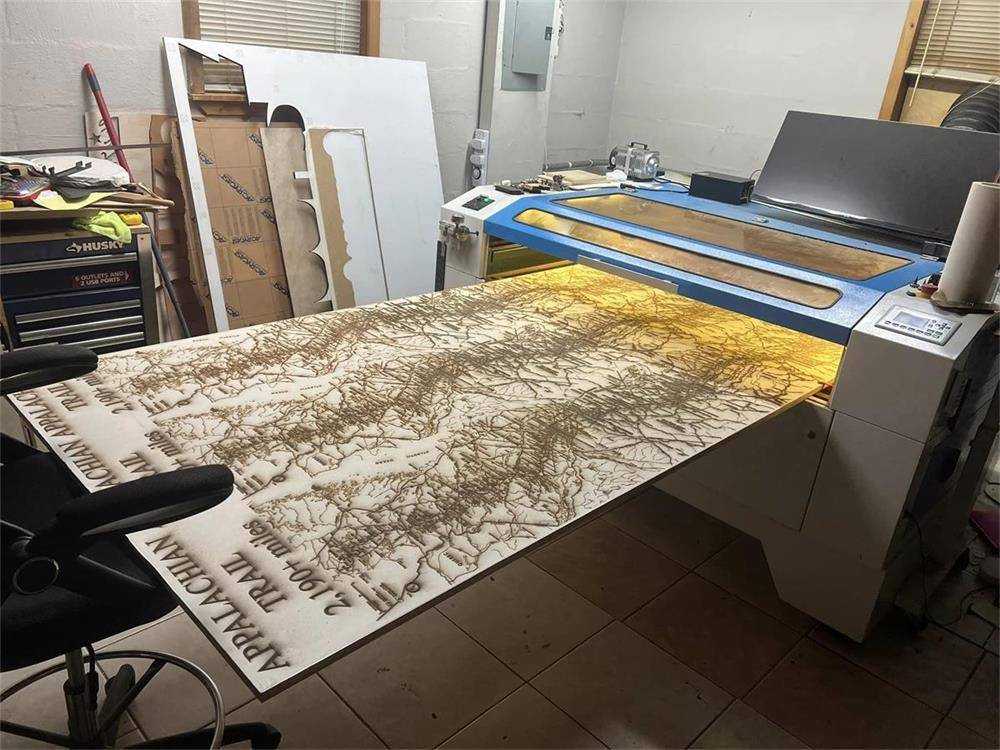
Pass-through door design for processing long materials with a Thunder Laser cutter.
The pass-through door is a structural design feature of a laser cutting machine. It allows the machine to engrave or cut materials that are larger than the machine’s standard working area.
This design is especially helpful when handling large or long workpieces. By opening the front and rear pass-through areas, users can feed longer materials through the machine and process them in sections instead of cutting them into smaller pieces first.
A laser cutter with a pass-through door gives users more flexibility when working with oversized materials. It helps reduce unnecessary material preparation and supports more complete engraving or cutting results.
To use the pass-through function, open the front bezel with a key, remove the front bezel, and place the material flat on the Thunder Laser machine. Next, disassemble the rear bezel, which is fixed with screws.
Remove the screwdriver from the machine kit, unscrew the rear bezel, and take it off. After the bezel is removed, a straight groove of about 3 cm is exposed, allowing longer materials to pass through the machine.
The limited height of the straight groove helps support safer machine use while still allowing longer materials to pass through for extended engraving or cutting work.
When cutting a project larger than your laser’s work area, the design needs to be divided into manageable sections. In LightBurn, you can use the “Cut Shapes” function to split the design strategically.
For accurate alignment between sections, add crosshair markers to each section. These markers serve as target positions, helping you align the next section after the material is moved through the pass-through door.
It is important to plan the division so that both the current section and its corresponding crosshairs from the previous cut fit entirely within the laser’s working area. This helps maintain continuous and accurate alignment as you move from one section to the next.
Once the crosshairs of a section are engraved, assign them to a Tool layer so they are not output again during later cuts. Do not delete or reposition these crosshairs, because they are essential for keeping the entire project aligned.
Similarly, after a section is fully engraved or cut, move the remaining graphics for that section to a Tool layer or delete them to avoid duplicate output.
Cutting a project larger than your laser workspace using the pass-through method.
A pass-through door design can make long-material laser cutting and engraving much more practical. Instead of damaging oversized materials by cutting them down first, users can feed the material through the machine and complete the project in carefully aligned sections.
With proper planning in LightBurn, crosshair alignment, and careful use of Tool layers, a Thunder Laser cutter with a pass-through door can help you complete larger projects more efficiently and accurately.
Need Help Choosing a Laser Cutter with Pass-Through Capability?
Contact Thunder Laser to learn which machine best fits your material size, workflow, and production needs.
Contact UsTalk To Our Experts Now!
Please leave your contact information so that we can serve you better.
LASER CUTTER PASS-THROUGH DOOR FAQS
TAKE THE NEXT STEP WITH THUNDER LASER

 Stable & Consistent MachinesUnlimited ApplicationRobust After-sales SupportFactory Direct Supply