How to Use the Right Laser Lens for Thunder Bolt
 25-01-09
WHAT ARE YOU LOOKING FOR?
Search Across Products, Blog Posts, Support Content, And Resources.

How to Use the Right Laser Lens for Thunder Bolt
25-01-09

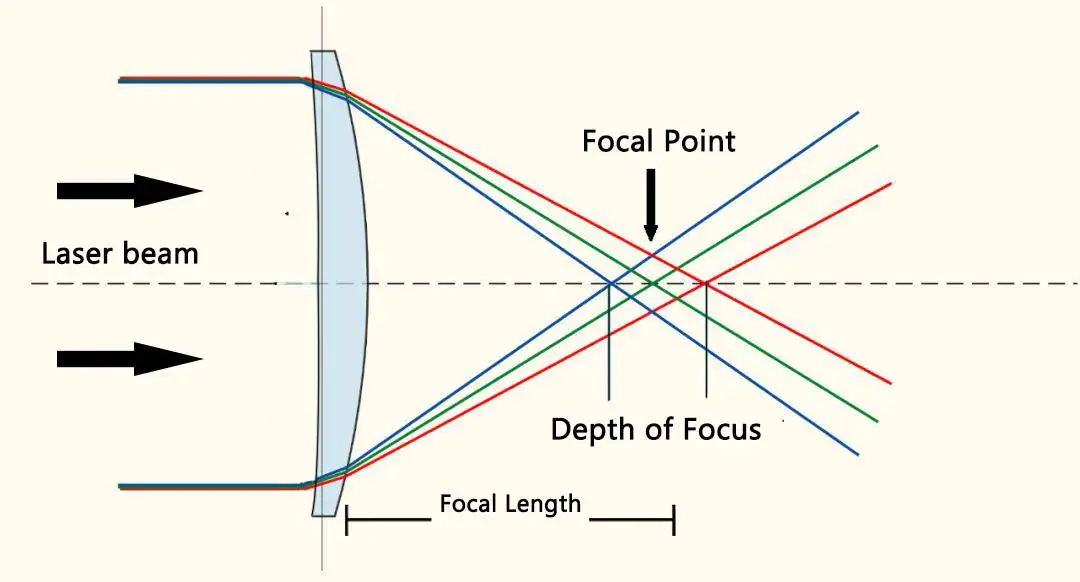
Choosing the right laser lens is essential for getting the best performance from your Thunder Bolt. Different focal lengths create different beam characteristics, which directly affect engraving detail, cutting depth, heat concentration, and edge quality.
Thunder Bolt laser lenses are classified by focal length, ranging from 1.5 inches to 4 inches. A shorter focal length concentrates laser energy into a smaller area, making it suitable for fine engraving. A longer focal length provides a deeper depth of focus, making it more suitable for cutting thicker materials.
The focal length of a laser lens is the distance from the center of the lens to the focal point of the laser beam. This focal point is where the laser energy is most concentrated.
In general, a smaller focal length means the laser energy is concentrated in a smaller area. This helps create sharper engraving details, but it also creates a shallower depth of focus, making the lens less suitable for cutting thicker materials.
Smaller focal length lenses are better suited for engraving extremely fine details, while larger focal length lenses have a deeper depth of focus and are mainly used for cutting thicker materials. The best choice depends on whether your project focuses on fine engraving, general engraving, heat-sensitive materials, or thicker cutting jobs.
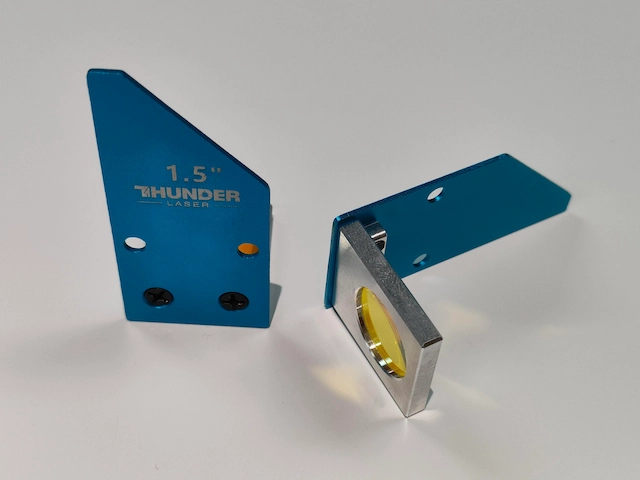
The very short focal length of the 1.5-inch laser lens creates a small laser spot at the point of focus. This allows for very fine engraving detail and high power density, making it suitable for small text, detailed images, and delicate patterns.
Because the laser spot is small, engraving lines may appear thinner and less uniform on some designs. This can often be improved by adjusting the DPI. However, high power density may cause heat-sensitive materials to curl or distort when engraving large areas. Increasing the Z-axis offset or switching to a larger focal length lens can help reduce this effect by enlarging the laser spot.
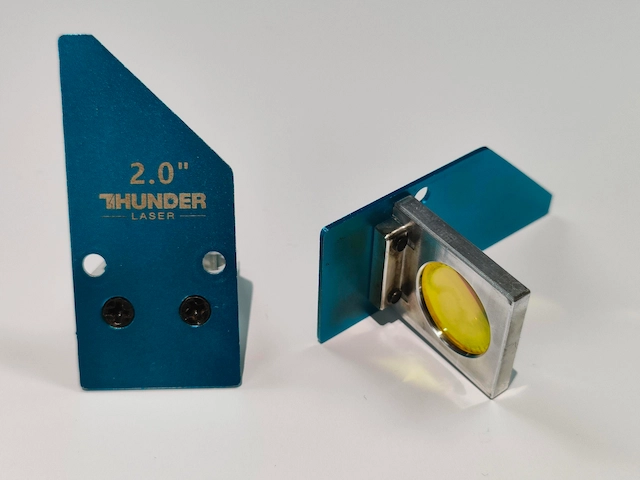
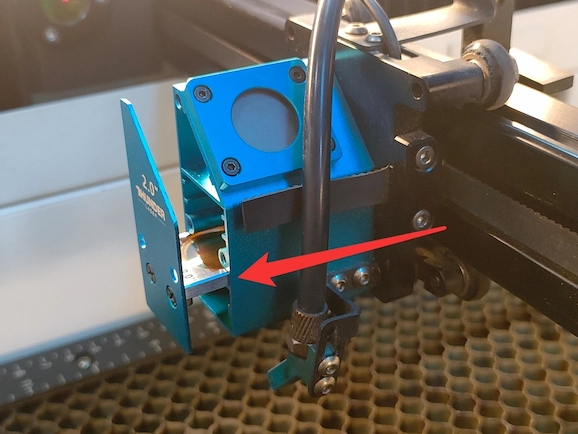
For engraving tasks, the 2.0-inch laser lens is a practical balanced option. It provides good engraving detail while remaining easier to use than a shorter focal length lens with a very narrow focus tolerance.
If you are not sure which lens to use for common engraving work, the 2.0-inch lens is often a reliable starting point because it balances detail, usability, and processing stability.
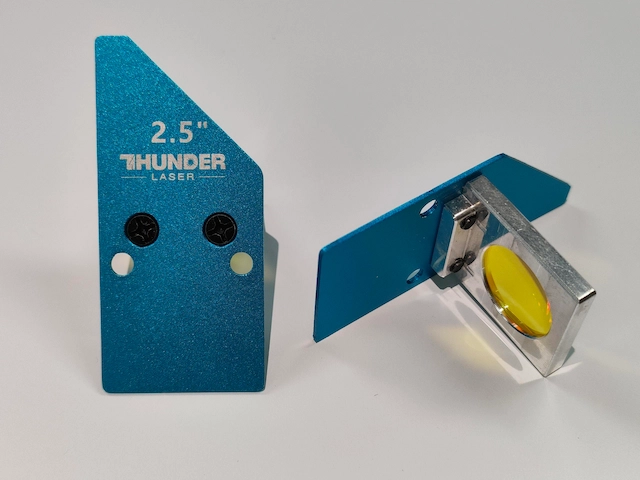
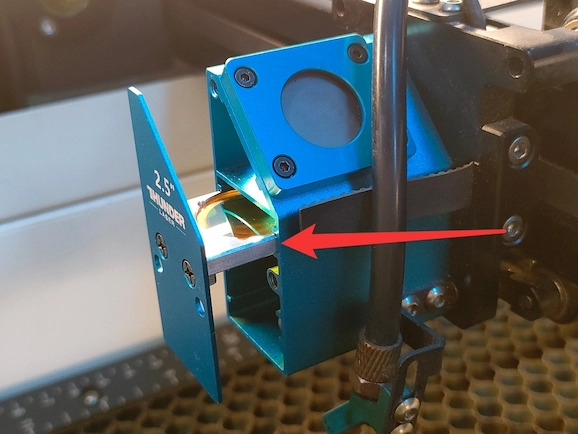
When working with temperature-sensitive materials, choosing a 2.5-inch laser lens with a larger focal length can help reduce thermal distortion during larger-area engraving.
By spreading the energy over a slightly larger spot and providing a deeper depth of focus, the 2.5-inch lens can improve processing stability for larger engraving areas and mixed engraving-and-cutting jobs.
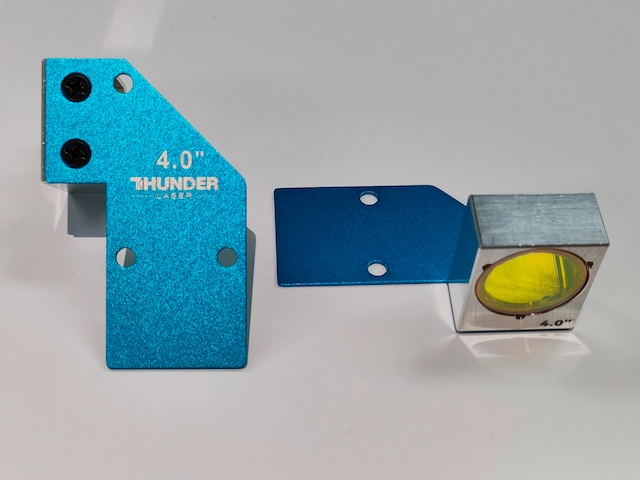
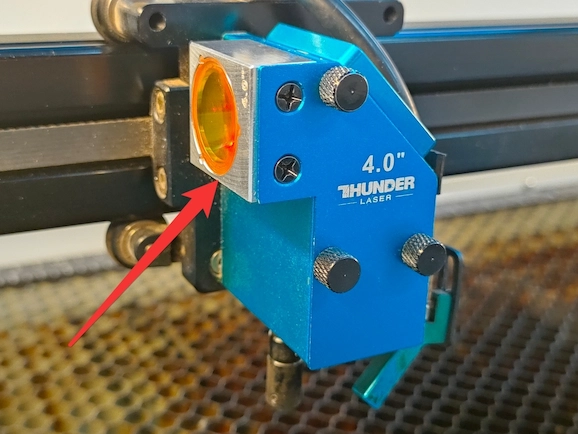
For cutting materials thicker than one inch, the 4.0-inch laser lens is recommended because it helps create more vertical cutting edges and improves cut quality on thicker materials.
The 4.0-inch lens is not the best option for extremely fine engraving detail, but it is valuable when deeper focus and straighter cutting edges are more important.
The table below provides a simple reference for choosing the right lens according to your main processing goal.
| Lens | Best For | Main Advantage | Key Note |
|---|---|---|---|
| 1.5-inch lens | Fine engraving, small text, detailed images | Small laser spot and high engraving detail | Not ideal for thick cutting or large heat-sensitive engravings |
| 2.0-inch lens | General engraving tasks | Balanced detail and usability | Good starting option for standard engraving |
| 2.5-inch lens | Heat-sensitive materials and mixed engraving/cutting | Better heat control and deeper depth of focus | Useful when large-area engraving causes distortion |
| 4.0-inch lens | Thicker material cutting | Straighter cutting edges and deeper cutting focus | Not recommended for the finest engraving detail |
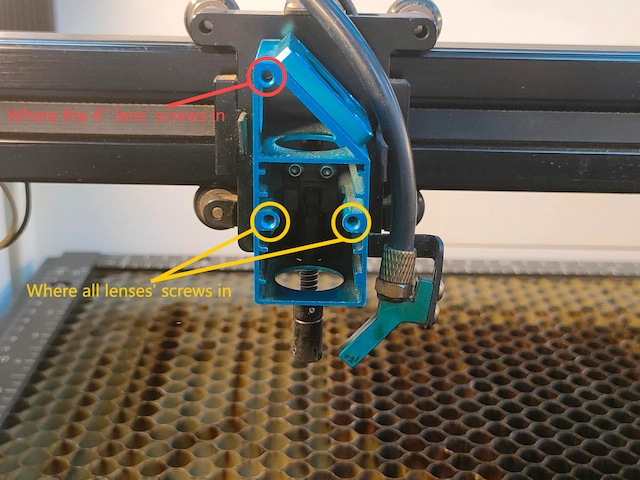
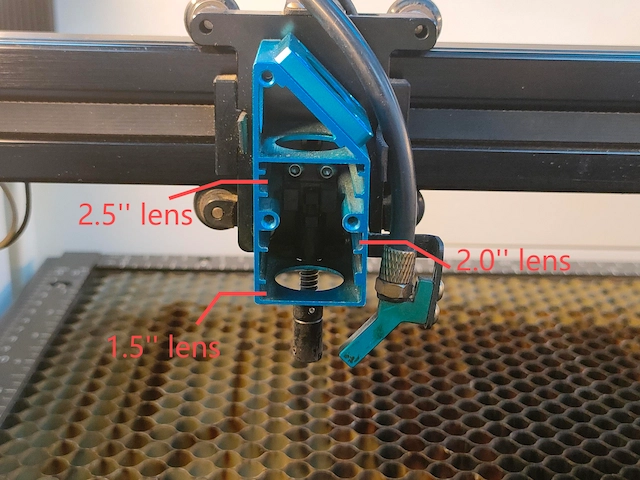
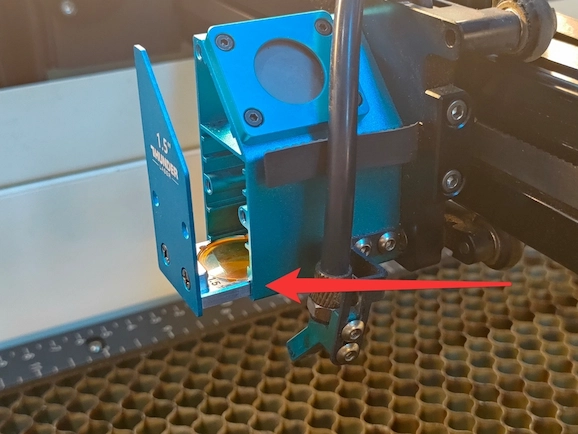
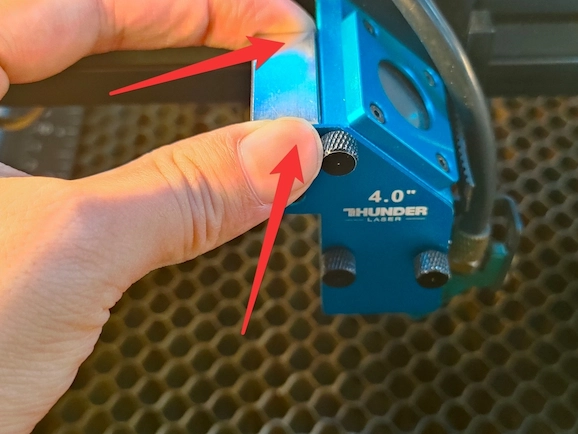
Thunder Bolt uses a uniform laser head appearance, so any supported focusing lens can be focused in a similar way. However, different lens types are installed in different positions inside or near the laser head.
The laser head leaves room for three thumb screws. The position marked in yellow is used for all focusing lens models, while the red position is only needed when using the 4.0-inch laser lens.
The installation position depends on the focal length. Use the reference below to match each lens with the correct position.
Laser lenses are precision optical components. Proper handling and maintenance help preserve laser power, engraving quality, and cutting performance.
For more visual guidance, watch the related Thunder Bolt laser head assembly video.
The right Thunder Bolt laser lens depends on your project goal. For the finest engraving detail, the 1.5-inch lens is the strongest choice. For general engraving, the 2.0-inch lens provides a balanced option. For heat-sensitive materials and broader processing tolerance, the 2.5-inch lens is practical. For thicker cutting, the 4.0-inch lens is the better solution.
By understanding focal length, installation position, and proper lens handling, you can get cleaner engraving, better cutting results, and more consistent Thunder Bolt performance.
Need a compact CO2 laser engraver for detailed work and everyday production? Explore Thunder Bolt and choose the lens setup that matches your engraving and cutting needs.
Talk To Our Experts Now!
Please leave your contact information so that we can serve you better.
THUNDER BOLT LASER LENS FAQS
Hold lenses by the edges and avoid touching the optical surface. Fingerprints, dust, and smoke residue can affect power output and engraving quality, so keep lenses clean and protected.
TAKE THE NEXT STEP WITH THUNDER LASER

 Stable & Consistent MachinesUnlimited ApplicationRobust After-sales SupportFactory Direct Supply