How to Clean a Laser Engraver Exhaust Fan
 24-10-07
WHAT ARE YOU LOOKING FOR?
Search Across Products, Blog Posts, Support Content, And Resources.

How to Clean a Laser Engraver Exhaust Fan
24-10-07

If you use your laser engraver regularly but have not cleaned the exhaust fan in a couple of months, it is time to check it. A clean laser engraver exhaust fan helps maintain airflow, supports better machine performance, and can help extend the service life of the fan and exhaust system.
This guide walks you through the basic cleaning process, including safety preparation, loosening the band clamp, cleaning the fan core, wiping the surrounding parts, and reassembling the exhaust fan in the correct direction.
During laser cutting and engraving, smoke, dust, and residue can pass through the exhaust system. Over time, buildup around the fan blades, diffuser, and housing may reduce airflow and make the exhaust system less efficient.
Regular cleaning helps the fan move air more smoothly, keeps dust from accumulating around the fan core, and supports a cleaner working environment for your laser machine.
Always start by turning off your laser engraver and unplugging the exhaust fan. Never clean the fan while it is still connected to power.
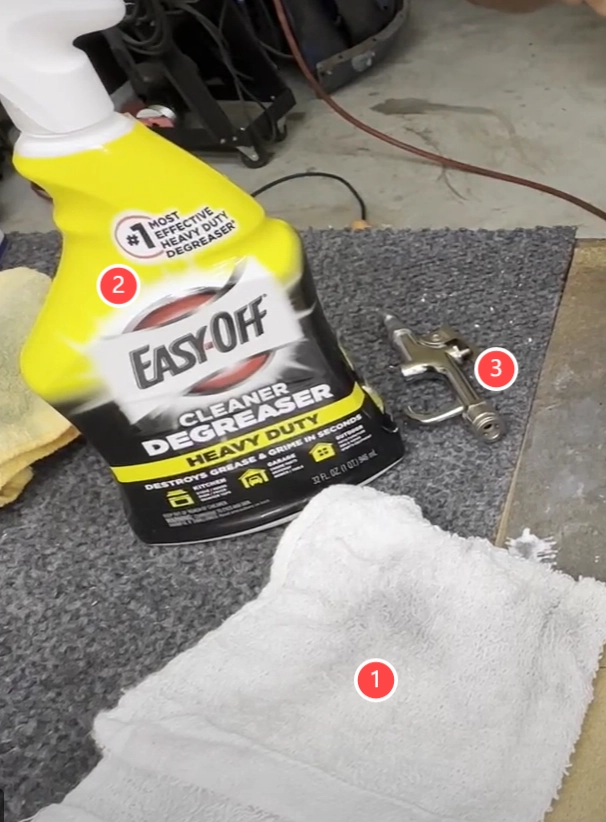
Prepare the basic cleaning tools before you begin:
Warning: Never submerge the exhaust fan in water or any other solution.
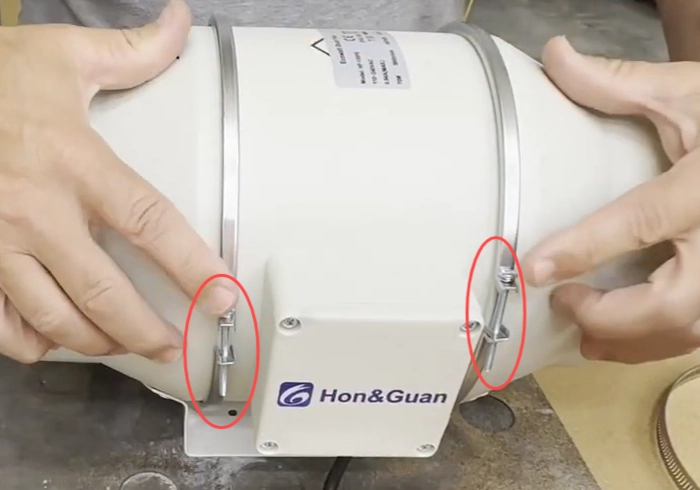
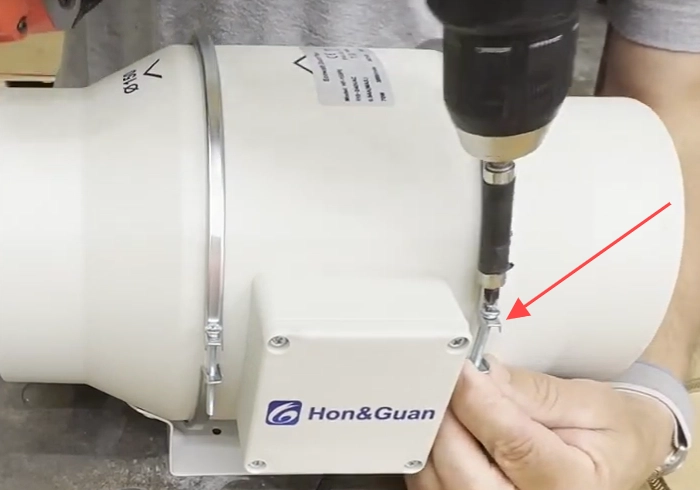
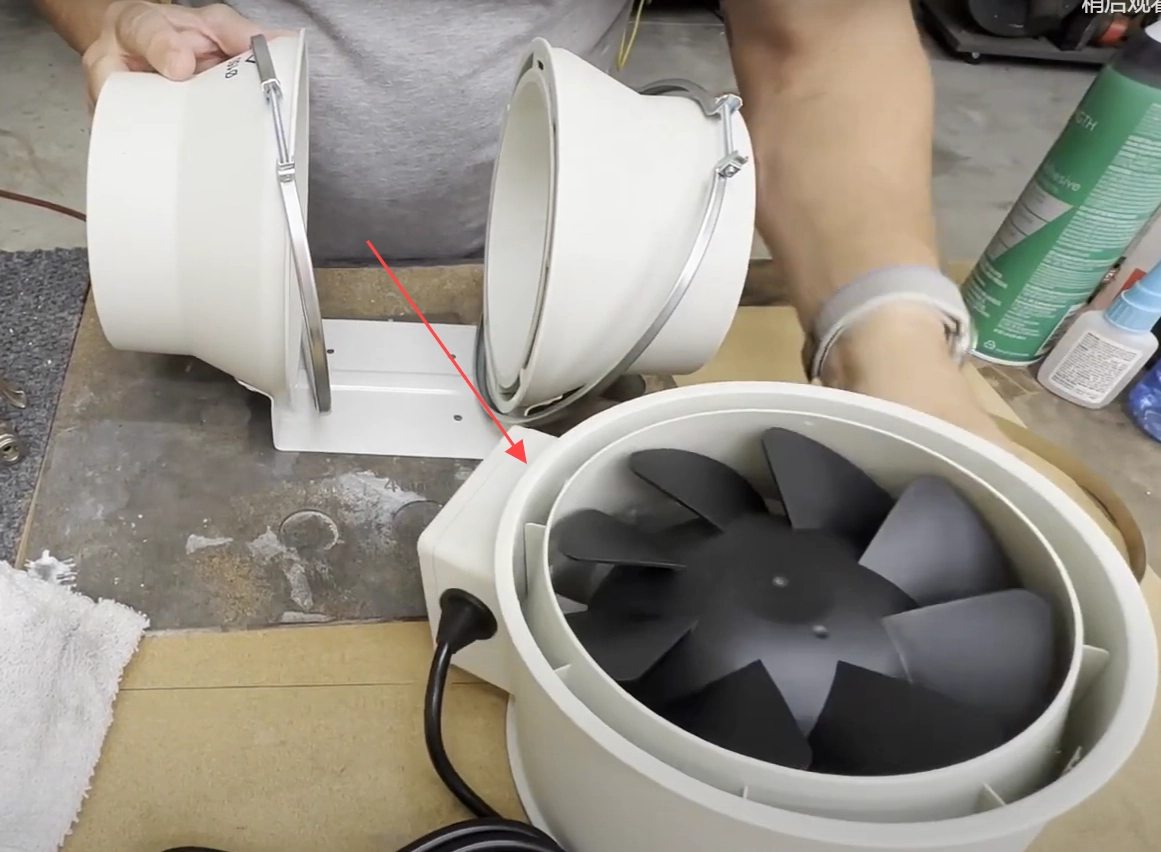
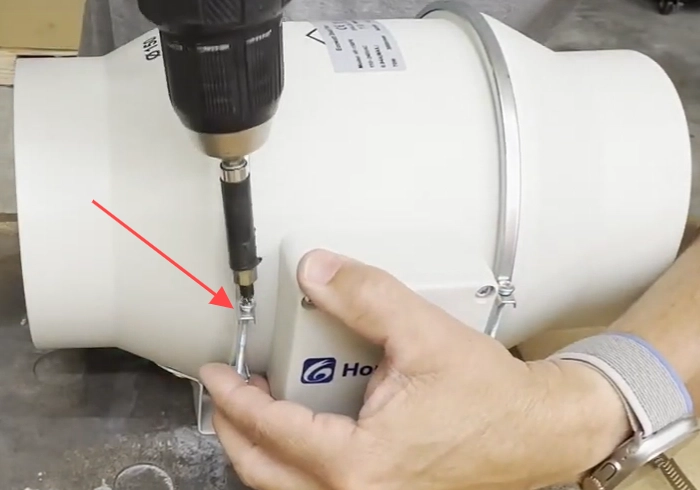
Find the screws on the band clamps. You do not need to remove them completely. Loosen them slightly so you can take the laser engraver exhaust fan apart more easily.
Attention: The band clamps are not the metal hoop ties that hold the hoses.
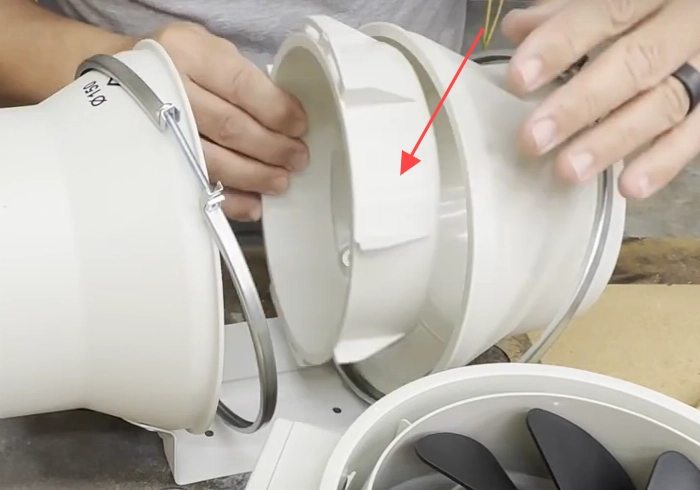
With the band clamps loosened, gently remove the core of the laser engraver exhaust fan. Hold one side with one hand and gently push the center part out with the other hand. Leave the fan frame and attached hoses in place, and remove only the center part of the fan.
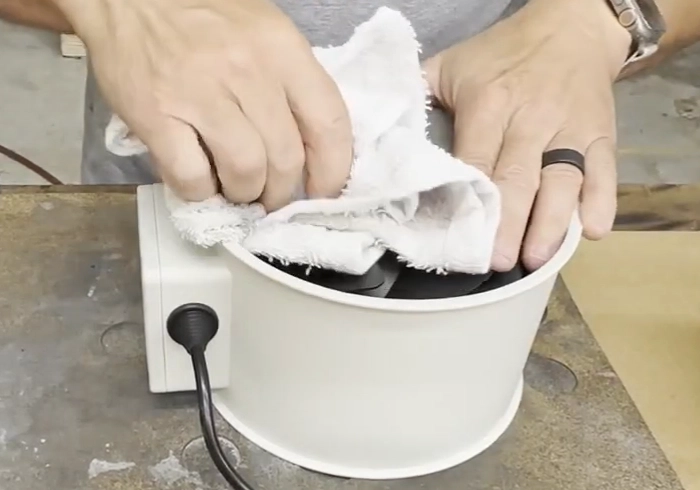
Apply cleaning solution to a towel and wipe the fan carefully. Spray the cleaning solution on the towel instead of directly onto the fan. If you see debris stuck in the fan, remove it while you clean.
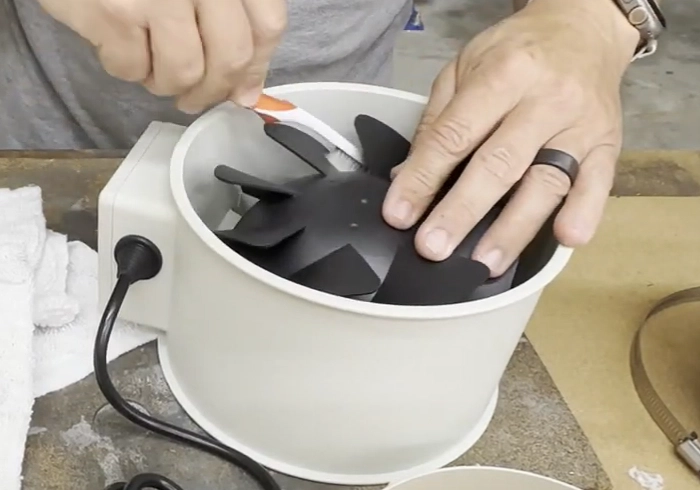
Use a brush to reach between the laser engraver exhaust fan blades. This helps remove dust from tight spaces where residue can easily gather.
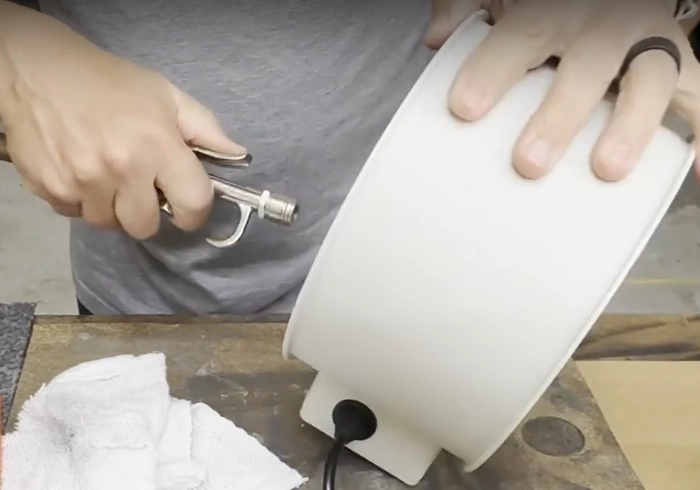
Use an air gun to blow away any remaining dust. Turn the fan over and repeat the process so the fan is cleaned from all angles.
The parts around the fan core can also collect dust. Use a towel to wipe down the diffuser and the housing so the surrounding area stays clean and dust-free.
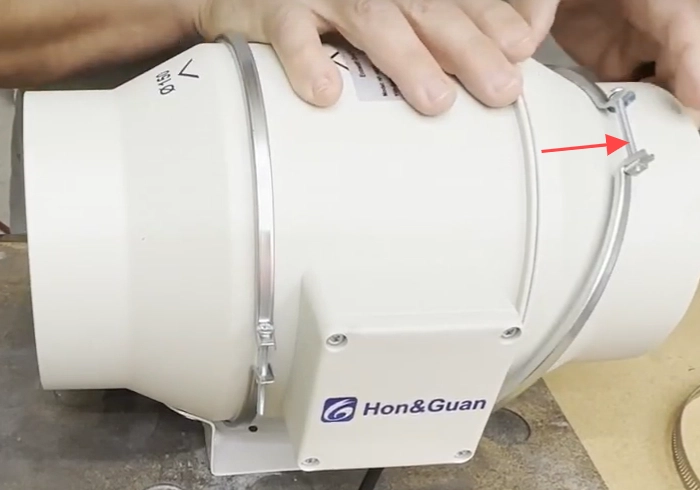
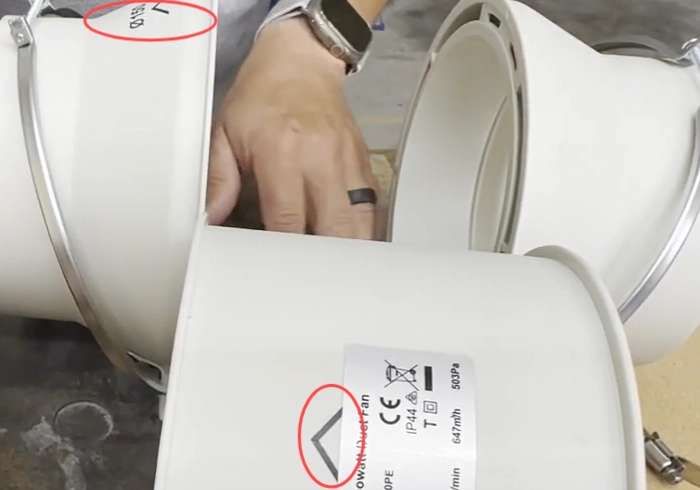
Put the fan core back in place. Make sure the arrows on the center section line up with the arrows on the sides. This direction is important for correct fan operation. Once everything is aligned, tighten the screws on the band clamps.
If your exhaust system uses an old centrifugal fan, refer to the dedicated cleaning guide for that fan type: Cleaning Your Stock Exhaust Fan.
You can also review the reassembly process in the reference video below.
Reference video for laser exhaust fan reassembly.
By following these simple steps, you can keep your laser engraver exhaust fan in better condition. Regular cleaning supports better airflow, helps the machine run more smoothly, and can save time and maintenance effort in the long run.
Need Help with Laser Machine Maintenance?
Contact Thunder Laser for machine support, product guidance, and practical maintenance advice.
Contact UsTalk To Our Experts Now!
Please leave your contact information so that we can serve you better.
LASER ENGRAVER EXHAUST FAN CLEANING FAQS
TAKE THE NEXT STEP WITH THUNDER LASER

 Stable & Consistent MachinesUnlimited ApplicationRobust After-sales SupportFactory Direct Supply