Chuck Rotary Setup in LightBurn and RDWorks
 24-06-04
WHAT ARE YOU LOOKING FOR?
Search Across Products, Blog Posts, Support Content, And Resources.

Chuck Rotary Setup in LightBurn and RDWorks
24-06-04

Thunder Laser offers different styles of chuck rotary attachments. Before setting up your rotary, first confirm which rotary attachment and connector type your machine uses. If your rotary style or connector is different, the setup steps may also vary.
This guide explains common reasons why rotary engraving size may be incorrect, how to check circle pulse and object diameter, how different rotary connectors affect setup, and how to configure a chuck rotary in LightBurn and RDWorks.
If the final engraving size does not match your design, the issue is usually related to rotary pulse settings, object diameter, connector type, software workflow, or rotary attachment settings. Start by checking the following common causes.
First, check the gear ratio on your rotary attachment. The circle pulse, also called steps per rotation in LightBurn, must match the rotary structure.
The diameter value entered in the software must be the outer diameter of the object you want to engrave or cut. If the diameter is wrong, the output size will also be wrong.
Solution: Enter the correct circle pulse or steps per rotation, then enter the correct outer diameter of the object.
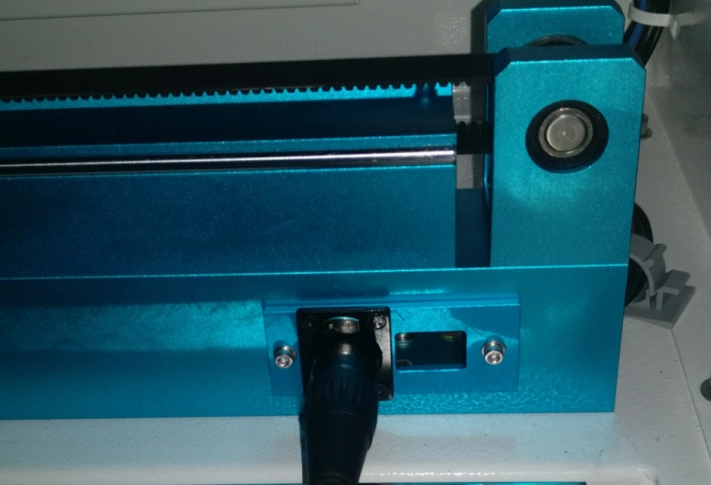
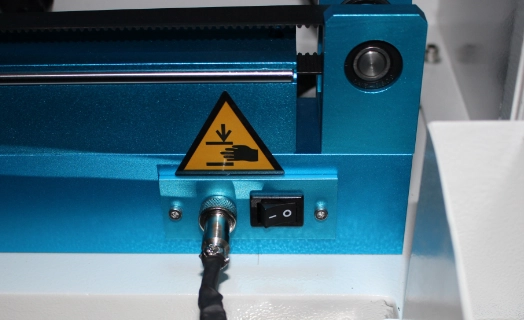
Next, check the rotary connector on your machine. The rotary connector is located inside the right front of the machine. Different connector types require different software setup methods.
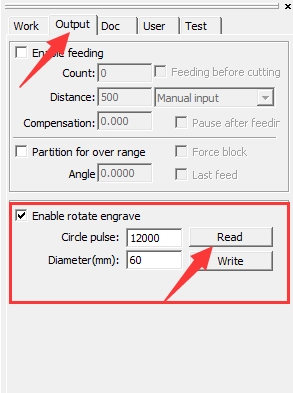
For this connector type, the rotary axis is controlled by the U axis. In RDWorks, the “Enable rotate engrave” setting needs the Read and Write buttons so the setting can be saved into the U axis.
In RDWorks, follow this workflow: Read, tick “Enable rotate engrave,” set “Circle pulse” and “Diameter,” then click Write.
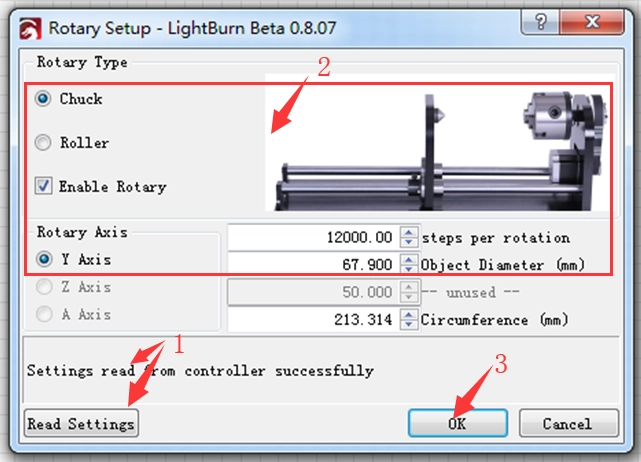
In LightBurn, read settings successfully, tick “Chuck” and “Enable Rotary,” set “Steps per rotation” and “Object Diameter,” then click OK. The setting needs to be saved into the controller, so make sure your computer and laser machine are connected.
For this connector type, the rotary axis is controlled by the Y axis after the rotary switch is turned on. In RDWorks, there should be no Read and Write buttons on the “Enable rotate engrave” setting.
In RDWorks, tick “Enable rotate engrave,” then set “Circle pulse” and “Diameter.”
The machine with a 5-pin rotary connector does not work correctly with LightBurn.
Solution: Check your rotary connector type and operate the rotary attachment with the correct software method.
To enable or disable the Read and Write buttons on “Enable rotate engrave” in RDWorks, go to the RDWorks root directory, open the text file named “soft,” change the “ShowRWRotate” setting, and save the text file.
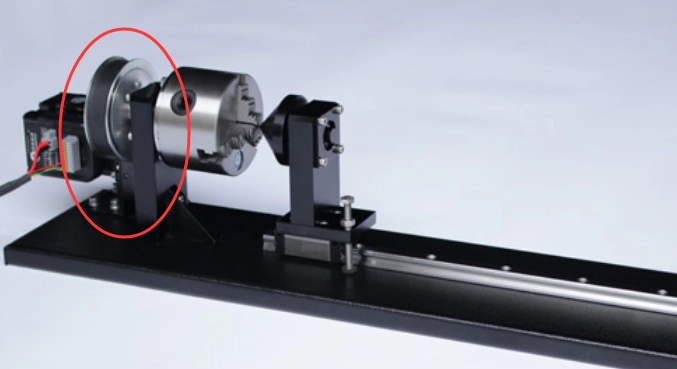
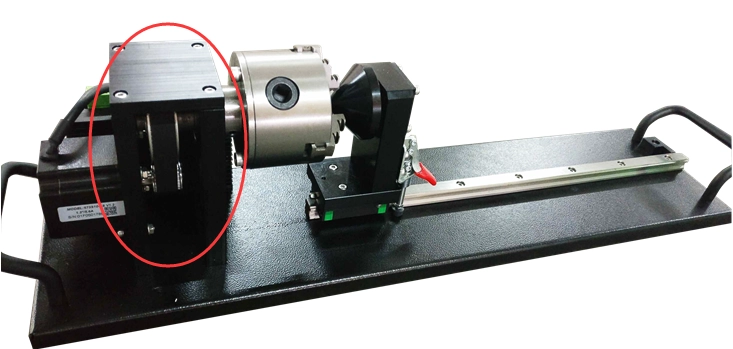
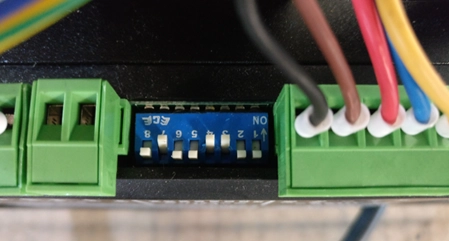
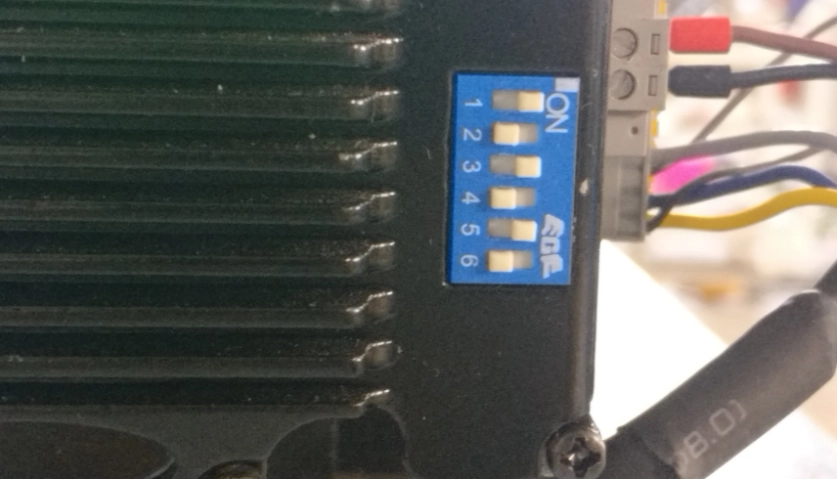
If the rotary attachment itself is not set correctly, engraving size can also be inaccurate. Check whether your rotary uses a separated motor and driver or an integrated motor, then confirm the DIP switch settings.
Solution: Change the DIP switches according to the correct setting for your rotary attachment type.
In LightBurn’s top menu, click Laser Tools. In the drop-down menu, select Rotary Setup to open the Rotary Setup window. Then follow the steps below to set up your chuck rotary.
Chuck Rotary Setup and Alignment Reference Video
When using a chuck rotary attachment, incorrect engraving size is usually caused by wrong steps per rotation, incorrect object diameter, the wrong connector workflow, or incorrect rotary attachment settings. Checking these items first can save time and reduce failed jobs.
Before running final production, confirm your rotary gear ratio, connector type, LightBurn or RDWorks settings, object diameter, alignment, and focus. Always test your graphic and measurements before engraving the final object.
Need Help with Rotary Setup?
Contact Thunder Laser for guidance on chuck rotary setup, LightBurn settings, RDWorks settings, rotary alignment, and laser engraving troubleshooting.
Contact UsTalk To Our Experts Now!
Please leave your contact information so that we can serve you better.
CHUCK ROTARY SETUP FAQS
TAKE THE NEXT STEP WITH THUNDER LASER

 Stable & Consistent MachinesUnlimited ApplicationRobust After-sales SupportFactory Direct Supply