How to Use Manual Focus with the Bolt Series
 2025-01-09
WHAT ARE YOU LOOKING FOR?
Search Across Products, Blog Posts, Support Content, And Resources.

How to Use Manual Focus with the Bolt Series
2025-01-09

Manual focus gives you greater flexibility when using the Bolt Series, especially in non-standard engraving or cutting scenarios. With the included manual focus tool, you can quickly set the correct focus height and improve accuracy on uneven, warped, or pressure-sensitive materials.
This guide explains what the Bolt Series manual focus tool looks like, how to use it step by step, and when manual focus is a better choice than automatic focusing.
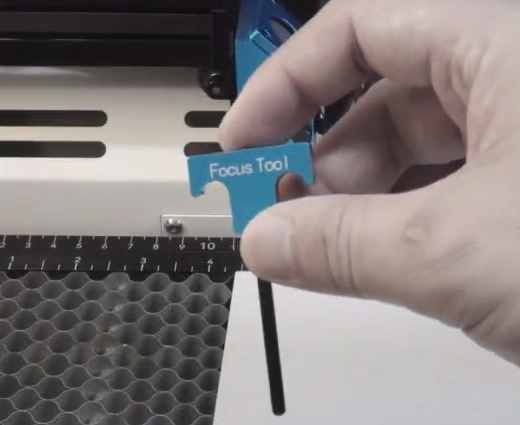
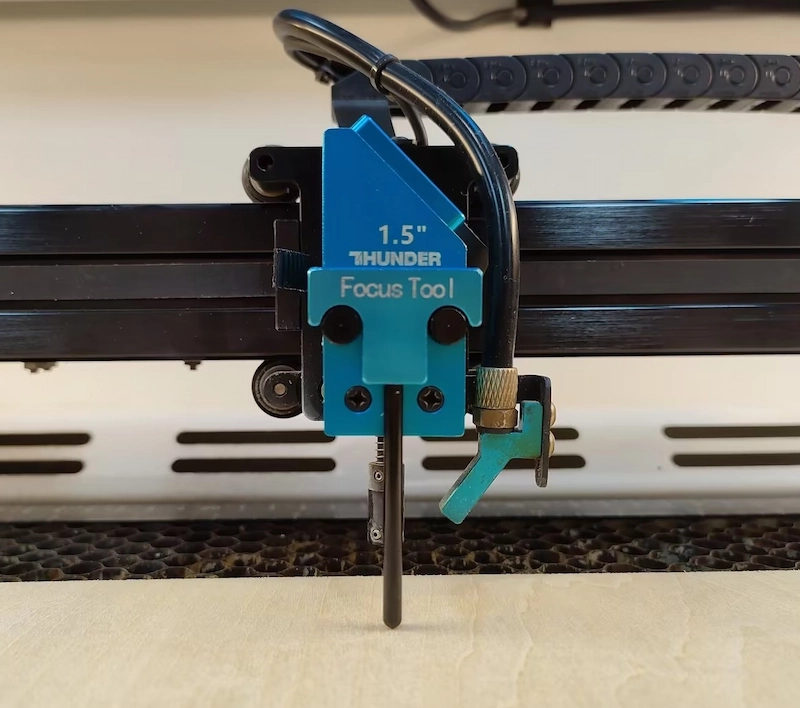
The manual focus tool used with the Bolt Series has a simple T-shaped design. It comes with the Bolt Series and is designed to hook onto the laser head so you can check the correct focus distance quickly and accurately.
Using the manual focus tool is quick and straightforward. Follow the steps below to place the tool correctly and adjust the Z-axis height.
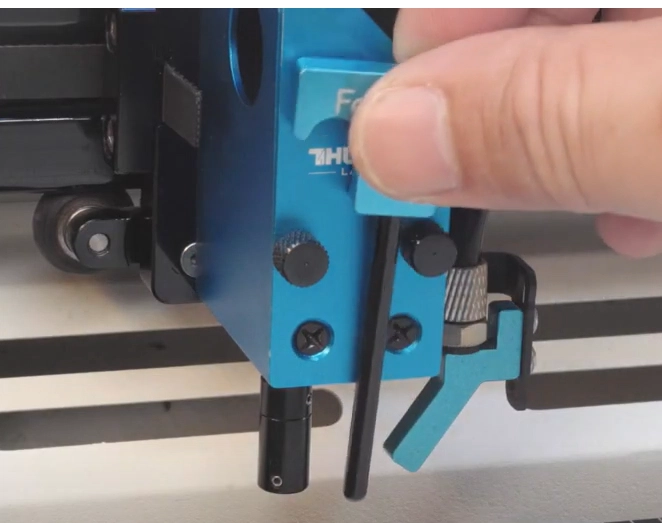
Take the manual focus tool and hook it onto the two set screws on the laser head. These two set screws are in the same position for all Bolt Series lenses, so you do not need to adjust the focus tool when switching between different lenses.
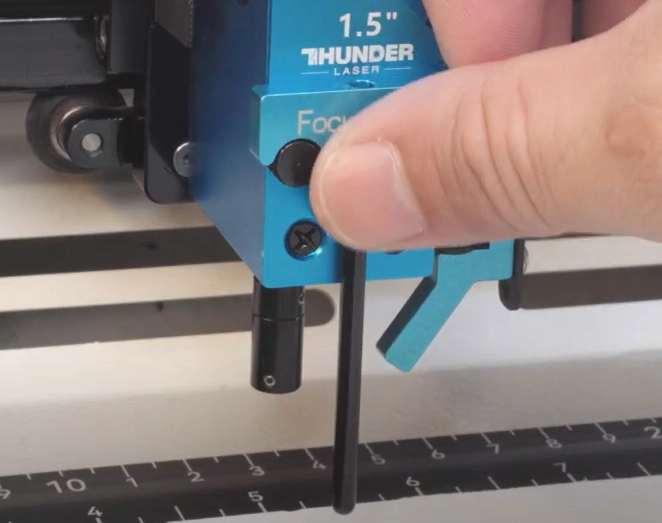
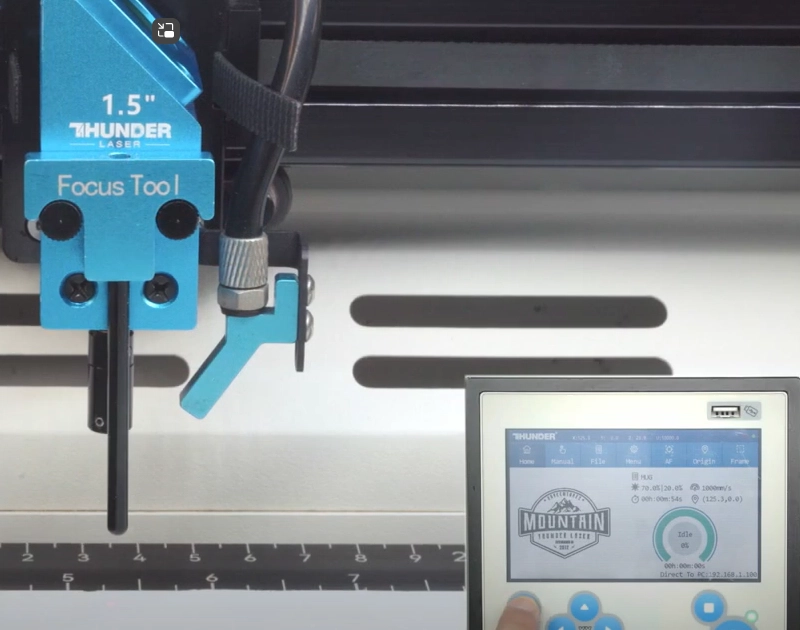
Adjust the Z-axis height while watching the manual focus tool. Focusing is complete when the bottom end of the focus tool just touches the surface of the material.
When using a rotary attachment, use a spirit level to confirm that the upper surface of the workpiece is level before focusing. This helps maintain consistent engraving results on cylindrical items.
Tip: Do not raise the laser bed too high. If the bed is raised too far, the manual focus tool may tilt and affect the focus accuracy. Take a little extra time here to help achieve better engraving and cutting results.
Manual focus is especially useful when automatic focusing may not give the best result. It gives you direct control over the focus position and can be a reliable backup in several situations.
Watch the reference video below to see how manual focus is used on the Bolt Series.
Manual focus is a practical and reliable focusing method for the Bolt Series. By placing the focus tool correctly, adjusting the Z-axis carefully, and checking the material surface before processing, you can set the correct focus height for a wide range of engraving and cutting tasks.
It is especially helpful for uneven materials, elastic materials, rotary work, or situations where the sensor needs a backup method. With a little patience during setup, manual focus can help you achieve cleaner and more consistent laser results.
Talk To Our Experts Now!
Please leave your contact information so that we can serve you better.
WOOD LASER ENGRAVING
& CUTTING FAQS
The new Bolt Series has been upgraded with faster engraving speeds (up to 2000 mm/s), higher RF power options (up to 80W), larger working areas, improved Z-axis height, and Standard dual-air assist. We also added a recessed tray design for larger rotary objects and included new accessories such as a conical nozzle.
The new Bolt Series has been upgraded with faster engraving speeds (up to 2000 mm/s), higher RF power options (up to 80W), larger working areas, improved Z-axis height, and Standard dual-air assist. We also added a recessed tray design for larger rotary objects and included new accessories such as a conical nozzle.
The new Bolt Series has been upgraded with faster engraving speeds (up to 2000 mm/s), higher RF power options (up to 80W), larger working areas, improved Z-axis height, and Standard dual-air assist. We also added a recessed tray design for larger rotary objects and included new accessories such as a conical nozzle.
The new Bolt Series has been upgraded with faster engraving speeds (up to 2000 mm/s), higher RF power options (up to 80W), larger working areas, improved Z-axis height, and Standard dual-air assist. We also added a recessed tray design for larger rotary objects and included new accessories such as a conical nozzle.
The new Bolt Series has been upgraded with faster engraving speeds (up to 2000 mm/s), higher RF power options (up to 80W), larger working areas, improved Z-axis height, and Standard dual-air assist. We also added a recessed tray design for larger rotary objects and included new accessories such as a conical nozzle.
TAKE THE NEXT STEP WITH THUNDER LASER

 Stable & Consistent MachinesUnlimited ApplicationRobust After-sales SupportFactory Direct Supply